
It’s time for the APPT Blog Hop! This is my first time hopping with this talented group of stampers, and I’m thrilled to get to share, not only my alternative projects with you, but theirs as well. This month’s Paper Pumpkin kit is called Wildflower Wishes, and it makes some really lovely cards. I’ve used some of the pieces to make a different card and a coordinating treat bag gift card holder. I hope you like them. And I hope you follow the hop to see all the great projects created by these amazing demonstrators.
The Wildflower Wishes kit appears to be sold out, but the refills are still available, in case you need more pieces. It’s listed in the supply list near the bottom of this post. Remember, only Paper Pumpkin subscribers can purchase extra kits & refills.
Here’s what I made:
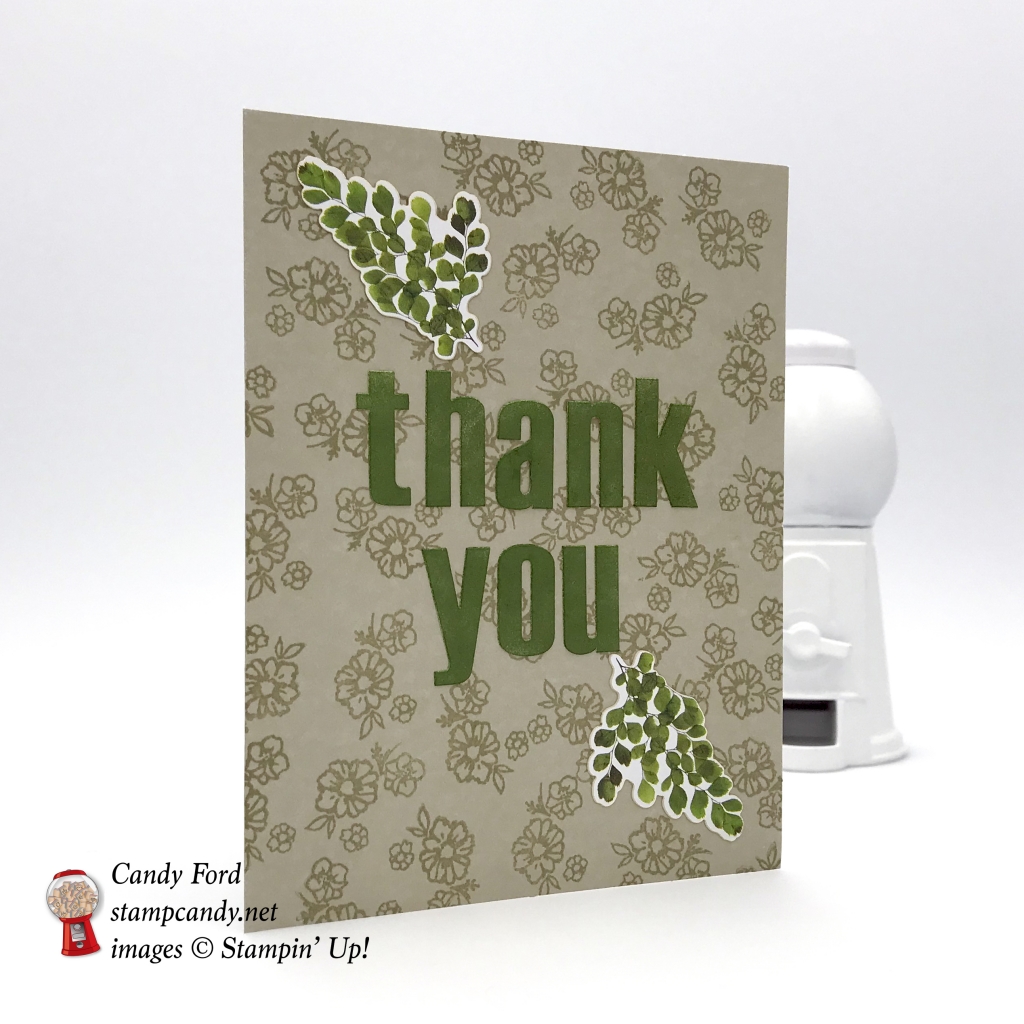
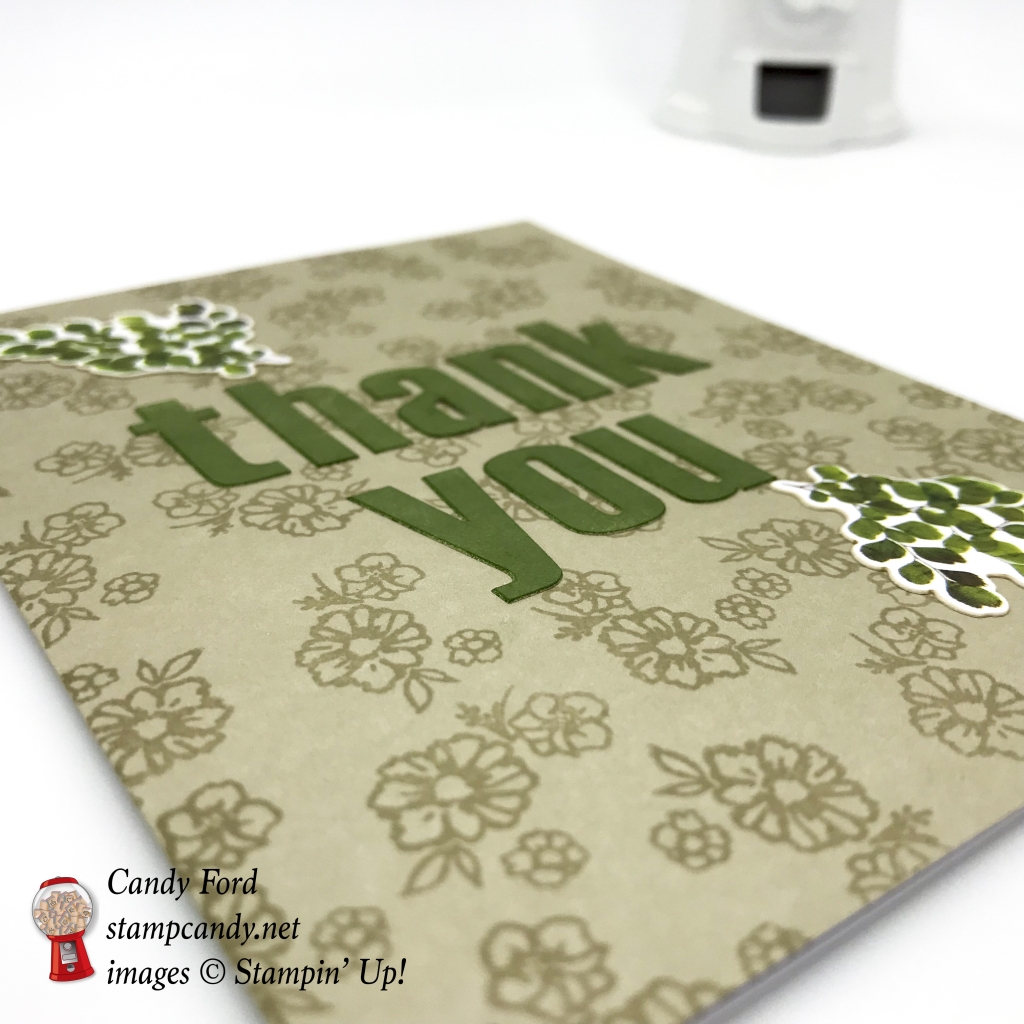
First the card…
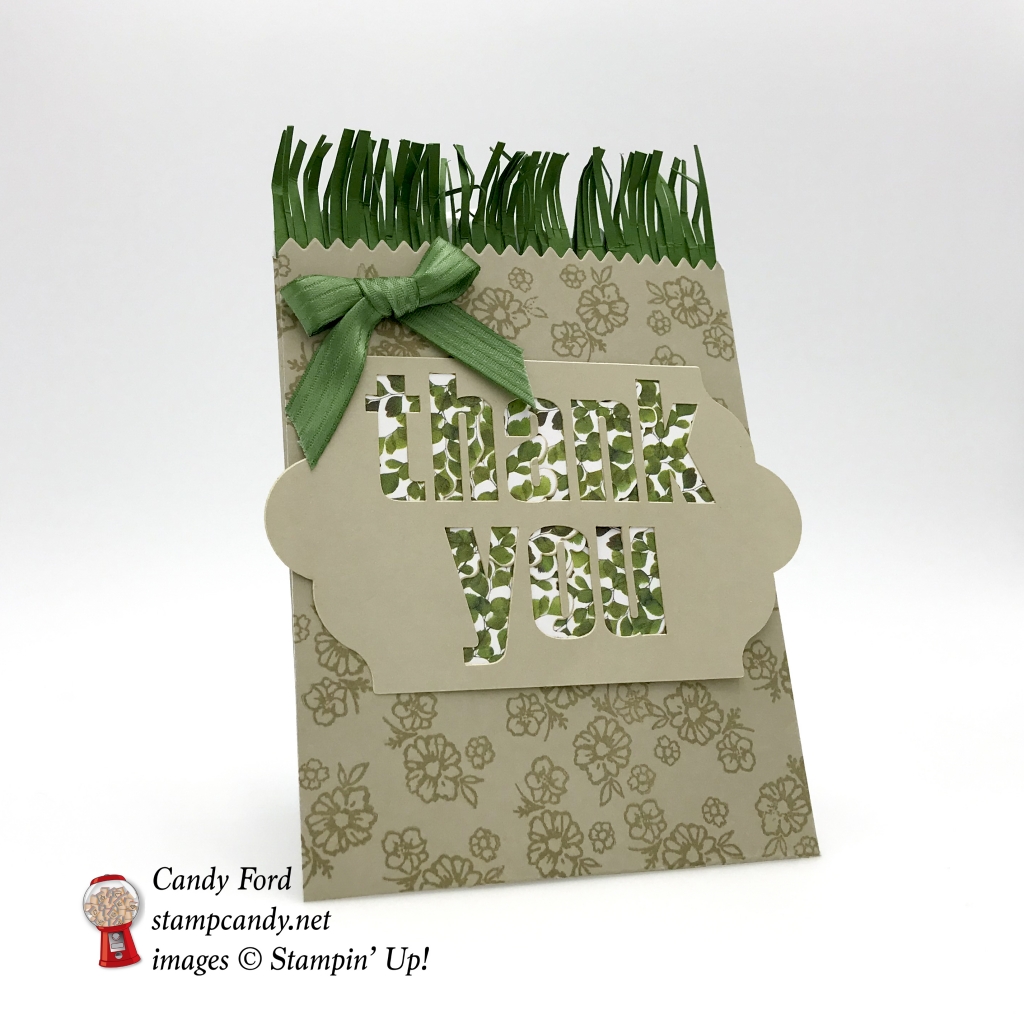
…then the treat bag…

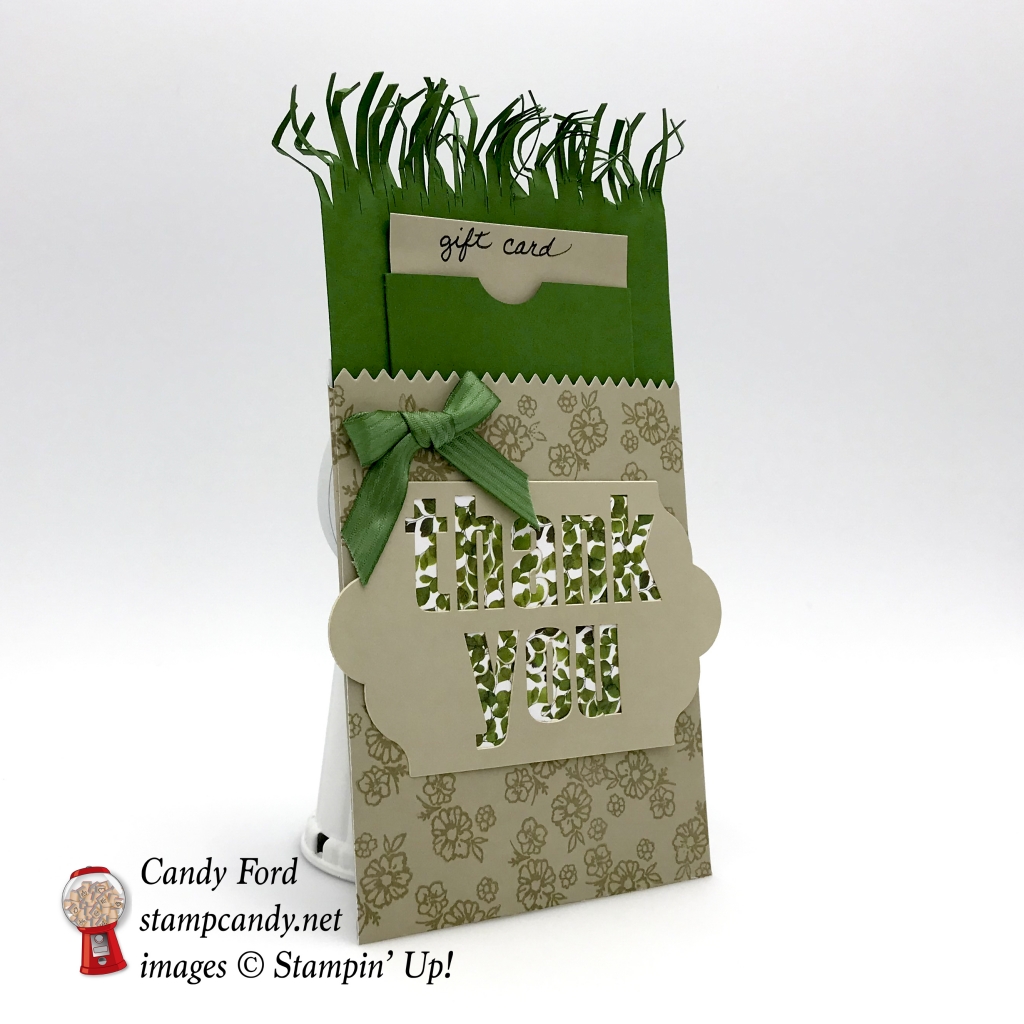
…with a gift card holder inside.

Here’s what I did:
Cut and scored with my Stampin’ Trimmer:
- Garden Green card stock (CS) cut to 3-5/8″ x 5-1/4″
- Garden Green CS cut to 3″ x 3-1/2″, then scored 1/4″ from both long sides and from one short side, for the gift card pocket
Cut using a 1″ Circle Punch:
- a semicircular notch from the one non-scored side of the small Garden Green CS
Stamped with the Wildflower Wishes stamp set from the kit:
- small flower image in Sahara Sand ink onto the front of one of the cards bases, and the front of the assembled treat bag (see below)
Die cut using the Mini Treat Bag Thinlits:
- larger bag piece from one of the card bases, lining up the score line of the card base with the score line of the die
- NOTE: Since the card base height is shorter than the treat bag die, I ran it through twice with this die – the first time so the bottom flap of the bag got cut, and the second time so the zigzag top of the bag got cut.
- smaller bag piece from yet another card base, then used Paper Snips to trim the bottom edge so it would fit with the larger die cut piece
Assembled the card:
- folded and burnished the score line in the card base with a Bone Folder
- peeled a thank you tag away from its sheet, leaving the letters on the sheet
- used a Sponge Dauber to ink the letters with Garden Green ink
- applied letters to the card front
- applied two green leafy stickers to the card front
Assembled the bag:
- assembled the bag using Multipurpose Liquid Glue along the seams, first the side, then the back, then the bottom flap
- stamped the small flowers in Sahara Sand inl onto the front of the bag (see above)
- applied 8 of the same green leafy stickers to the back of the thank you tag, so the designs showed through the letters
- NOTE: I was careful to save the inside pieces of the “a” and the “o”, and placed them over the leafy stickers
- applied the tag to the front of the bag
- used an Embossing Buddy on the back of the tag areas that stick out past the edge of the bag, so they wouldn’t be sticky
- tied a bow with Garden Green ribbon and adhered it to the bag using Mini Glue Dots
Assembled the bag insert:
- cut one of the short sides (the top) of the larger Garden Green CS with Paper Snips to resemble grass, then crinkled it with my fingers
- folded and burnished the score lines in the small Garden Green CS with a Bone Folder
- glued the three flaps to the front of the larger Garden Green CS, to create the pocket for the gift card
Here’s how to get to the next stop on the hop:

Here are today’s colors:
You can click on each one to see all the products that come in that color!
Here’s what I used:
Click on these images for more details and to purchase.
Here’s some awesome info about Paper Pumpkin:

When you buy a 3, 6, or 12 month prepaid Paper Pumpkin subscription, you qualify for FREE Sale-A-Bration items! After purchasing, you will receive a code in your email. Simply go to the Paper Pumpkin web site and enter the code to subscribe.

Paper Pumpkin is celebrating their 5th Anniversary! Subscribe by March 10 to receive the special FREE gift and special box with the March kit! You can watch a video about it here.
Here’s some other stuff you should know:
- This is a fabulous time to join my team! Sale-A-Bration is the biggest event of the Stampin’ Up! year and you can save big on the ultimate bundle, the Starter Kit. CLICK HERE for more information. Contact me with any questions: email candy@stampcandy.net or call/text 404-661-5222
- Newsletter: subscribe for exclusive deals, projects, and more! Enter your email address and click SUBSCRIBE at the top right of this page, just under the picture of my smiling face. You can also choose to receive an email every day that I have a blog post.
- Check out My Events Calendar HERE
- Host Code for the month of March (34CJGPSJ) Find out more about HOW, WHEN and WHY to use the code HERE.
- My Thank You Gift to You in March: Mini Embroidery Hoops – Find out more HERE.
- Gift Certificates are available in any U.S. dollar amount from me. Contact me – email: candy@stampcandy.net OR call/text: 404-661-5222
- Gumball Rewards for all orders over $50. Find out more HERE.
Thanks for stopping by today, and Sweet Stamping!


Love this color combination. The treat bag is amazing. Thanks for sharing. 🙂
Thanks so much, Tricia!
Hi Candy – welcome to the group. Great little gift holder idea for an Easter Basket with all that “grass”.
Thanks, Monika!!
Love your gift card/treat bag! I was thinking St. Patrick’s Day until you pulled out the slider gift card holder — great idea.
It can certainly be used for St. Patrick’s Day! Maybe include a gift card to the local pub!
Great alternative projects, Candy! Thanks for sharing.
Thank you, Jenny!
Very green, Spring-y, and vibrant! My brain also went to St. Patrick’s Day 😉 Great projects, thanks for sharing 😀
Thank you, Kimberley!