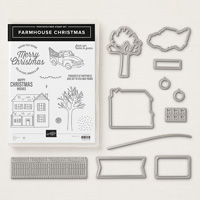
I made today’s card using the Farmhouse Christmas bundle (Farmhouse Christmas stamp set and Farmhouse Framelits Dies). I used several layers of Shimmery White card stock (CS) to create the snowy scene, and used an Aqua Painter to color the die cut pieces. I got the idea from a card on page 12 of the 2018 Holiday Catalog. They used the truck and the fence, and some Embossing Paste for snow.
Here’s the card I CASEd:
CASE = copy and share everything, or copy and selectively edit

Here’s what I made:
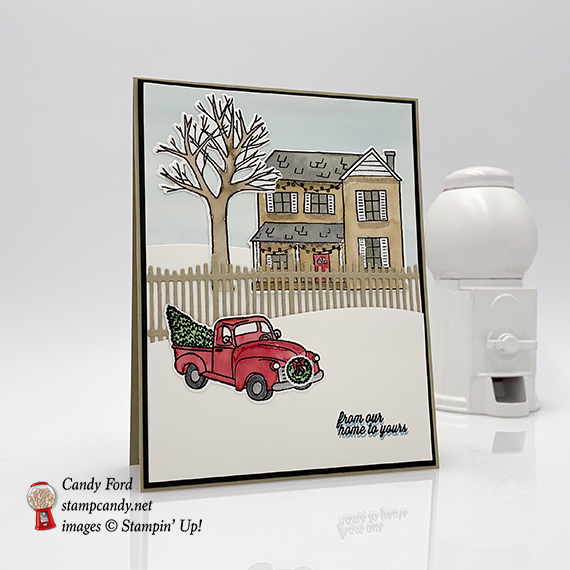


Here’s what I did:
Cut and scored with my Stampin’ Trimmer:
- Crumb Cake card stock (CS) cut to 4-1/4″ x 11″, then scored in half at 5-1/2″
- Basic Gray CS cut to 4-1/8″ x 5-3/8″
- Shimmery White CS cut to 4″ x 5-1/4″ (4 pieces: 3 for the snow layers and 1 for the inside of the card base)
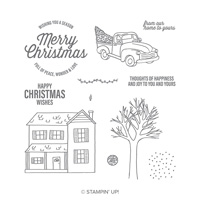
Stamped with the Farmhouse Christmas stamp set:
- house with string lights, tree, truck, and wreath in black Stazon ink onto scraps of Shimmery White CS
- sentiment in black Stazon ink onto the bottom right corner of the top layer
- sentiment in Balmy Blue ink just offset from black sentiment
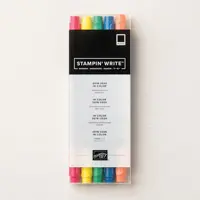
Colored using Stampin’ Write Markers:
- shadows on house in Crumb Cake
- string lights in Real Red, Call Me Clover, and Pacific Point
- tires in Basic Gray
Colored using an Aqua Painter :
- house in Crumb Cake; front door in Real Red; roof and windows in Basic Gray
- tree in Soft Suede
- truck in Real Red; tires and metal pieces in Basic Gray; tree in Garden Green
- wreath in Garden Green; bow in Real Red
- background (bottom Shimmery White CS layer) in Balmy Blue
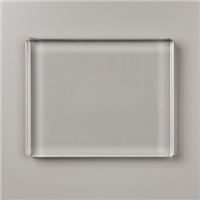
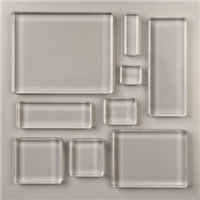
- NOTE: There are several ways you can get the ink onto the Aqua Painter: 1) squeeze an ink pad to get some ink onto the inside of the lid, and use that at your palette; 2) drop some ink from a refill onto a clear block or into a small bowl; 3) use a Stampin’ Write Marker to apply some ink onto a clear block. I used option 3, the markers, for this card.
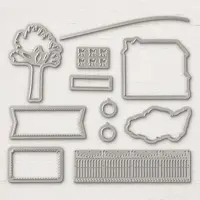
Die cut using the Farmhouse Framelits:
- house, tree, truck, and wreath
- fence from a scrap of Crumb Cake CS
- curve across the top of the top and middle Shimmery White CS layers (I flipped over the top one so the curves didn’t match up.)
Assembled the card:
- burnished the fold in the card base with a Bone Folder
- middle Shimmery White CS (snow) layer glued onto the bottom (painted, full size) snow layer, lining up the two bottom corners
- house and tree glued onto the middle/bottom snow layers
- fence glued over the middle snow layer, house, and tree, and the excell trimmed off the sides using Paper Snips
- top (shortest) snow layer glued over all, lining up the two bottom corners
- truck glued onto the top snow layer
- wreath glued onto the front of the truck
- bottom (full size) snow layer glued onto the Basic Gray CS layer
- Basic Gray CS layer glued onto the front of the card base
- Shimmery White CS glued onto the inside of the card base
Here are today’s colors:
You can click on each one to see all the products that come in that color!
Here’s what I used:
Click on these images for more details and to purchase.


Here’s how to shop 2019 Occasions/Sale-a-bration items now!


- Become a Candy Heart!
- Join my team and you can order the new products right now, instead of having to wait another month!
- No selling required! I welcome Hobby Demos! (Hobby Demos join to get the discount for themselves.)
- CLICK HERE for the details!
Here’s more stuff to check out:
- Shop my online store
- Clearance Rack
- Click here for your free catalog.
- Join my team to get a discount on your stamping supplies!
- SUBSCRIBE to my weekly newsletter and daily blog updates.
- December Host Code 3CXZMQ2Q – receive free product!
- Earn Gumball Rewards – receive free products!
- Gift Certificates are available in any U.S. dollar amount from me. Contact me for details.
Thanks for stopping by today, and Sweet Stamping!