May 15, 2020 | Cards, Gallery |
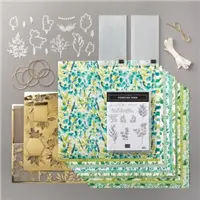
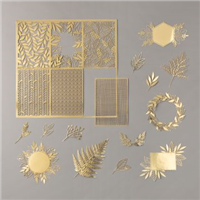
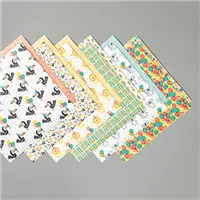
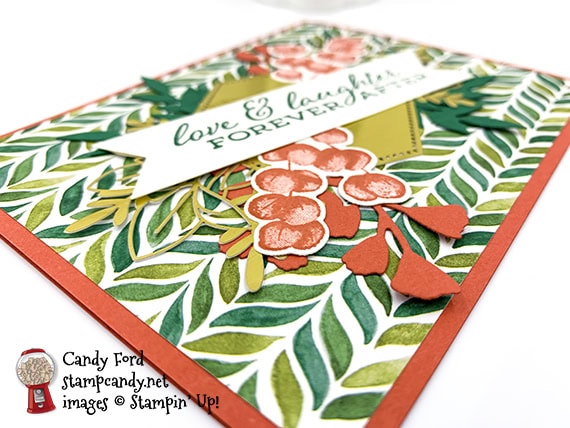
Today’s card is another sneak peek from the 2020-2021 Annual Catalog. I used the Forever Fern Bundle (Forever Fern stamp set and Forever Flourishing Dies,) Forever Gold Laser-cut Specialty Paper, and Forever Greenery Designer Series Paper, along with the Banner Triple Punch. I CASEd this card from a photo I saw in a Stampin’ Up! demonstrator Facebook group, but of course, I forgot to write down the demo’s name, and now I can’t find it. If you know who made the card (almost exactly like this) first, please let me know so I can give them credit for the design. Thanks!
If you are reading this in email, some photos may appear blurry, or may not appear at all. Please click here to see the post on my blog.
S forever flourishing forever flourishing forever flourishing forever flourishing
Last Chance Products!
Get these retiring products while you can. See them in my online store here.
Want a new 2020-2021 Annual Catalog?
The new catalog goes live June 3! If you have ordered from me in the past year, or have requested a catalog from me, I will send you one for free as soon as I get them in. Otherwise, if you would like a catalog, click here to request one. If you already have a Stampin’ Up! Demonstrator, please ask them for your catalog. Thank you.
Want a little bit of everything from the new catalog?
Click here to reserve your Swatch Books and Product Shares! Designer Series Paper Swatch Books are a wonderful tool! Paper Shares, Ribbon Shares, and Embellishment Shares give you a taste of all the new items so you can decide which ones you want to order more of.
S
Here’s what I made:

S
Here’s what I did:
Cut and scored with my paper trimmer:
- Terracotta Tile card stock (CS) cut to 5-1/2″ x 8-1/2″, then scored in half at 4-1/4″
- Forever Greenery Designer Series Paper (DSP) layer cut to 5-1/4″ x 4″
- Whisper White Thick CS cut to 5-1/4″ x 1″
- Whisper White CS cut to 5-1/4″ x 4″ for the inside of the card base
Stamped with the Forever Fern stamp set:
- sentiment in Shaded Spruce ink onto the 1″ strip
- two of the rounded leaf sprigs in Terracotta Tile ink onto a scrap of Whisper White Thick CS
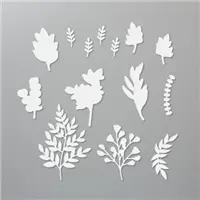
Cut using the Forever Flourishing Dies:
- Terracotta Tile stamped sprigs
- 2 laurel sprigs from a scrap of Shaded Spruce CS
- a larger sprig (gingko?) from a scrap of Terracotta Tile CS
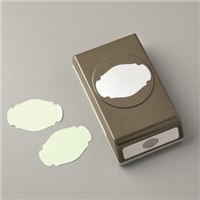
Cut using the Banner Triple Punch:
- both ends of the sentiment strip
Cut using Paper Snips:
- Shaded Spruce CS die cut sprigs in half
- Terracotta Tile CS die cut sprig cut into two pieces
Assembled the card:
- burnished the fold in the card base with a Bone Folder
- DSP layer glued onto the front of the card base
- back of a gold foil laser-cut embellishment covered in Tear & Tape, then the Shaded Spruce and Terracotta Tile CS die cut sprig pieces stuck to the back, so they show sticking out from the back
- gold foil piece adhered onto the DSP layer using Tear & Tape
- 2 stamped sprigs adhered over the gold foil piece
- sentiment adhered over the top of everything using Tear & Tape
- Whisper White CS glued onto the inside of the card base
S
Here are today’s main colors:
You can click on each one to see all the products that come in that color!
S
Here’s what I used:
Click on these images for more details and to purchase. If you are reading this post in email, the product images may not show up. Please click here to see the post on my blog.
Supply List <— Click for a clickable and printable list of the products!
S
Here are some helpful links:
S
Thanks for stopping by today, and Sweet Stamping!
May 14, 2020 | Cards, Gallery |

Welcome to the Manly May OSAT Blog Hop! My card features a sneak peek at some of the new products from the 2020-2021 Annual Catalog: the Forever Fern Bundle (Forever Fern stamp set and Forever Flourishing Dies,) Forever Greenery Designer Series Paper, and Lovely Labels Pick a Punch. While it’s really a unisex card, the colors are manly, and leaves are generally more manly than flowers.
If you are reading this in email, some photos may appear blurry, or may not appear at all. Please click here to see the post on my blog.
S manly may manly may manly may manly may
Here’s what I made:


S
Here’s what I did:
Cut and scored with my paper trimmer:
- Pretty Peacock card stock (CS) cut to 4-1/4″ x 11″, then scored in half at 5-1/2″
- Just Jade CS layer cut to 3-1/4″ x 4-1/2″
- Garden Green CS layer cut to 3-1/8″ x 4-3/8″
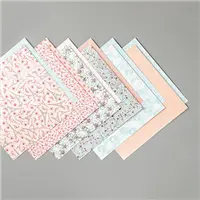
- Forever Greenery Designer Series Paper (DSP) layer cut to 3″ x 4-1/4″
- Whisper White Thick CS cut to 2-1/2″ x 1/2″
- Whisper White CS cut to 4″ x 5-1/4″ for the inside of the card base
Stamped with the Forever Fern stamp set:
- sentiment in Pretty Peacock ink onto the Whisper White Thick CS strip
- sprig in Garden Green ink onto a scrap of Whisper White Thick CS
Cut using the Forever Flourishing Dies:
Cut using the Lovely Labels Pick a Punch:
- both ends of the sentiment strip
Assembled the card:
- burnished the fold in the card base with a Bone Folder
- Just Jade CS layer glued onto the front of the card base
- Garden Green CS layer glued onto the Just Jade CS layer
- DSP layer glued onto the Garden Green CS layer
- die cut sprig glued onto the DSP layer
- sentiment adhered onto the DSP layer using Stampin’ Dimensionals
- Whisper White CS glued onto the inside of the card base
S
Here’s the Manly May OSAT Blog Hop:
S
Last Chance Products
Get the retiring products while you can! See all the remaining products in my online store here.
Want a new 2020-2021 Annual Catalog?
The new catalog goes live June 3! If you have ordered from me in the past year, or have requested a catalog from me, I will send you one for free as soon as I get them in. Otherwise, if you would like a catalog, click here to request one. If you already have a Stampin’ Up! Demonstrator, please ask them for your catalog. Thank you.
Want a little bit of everything from the new catalog?
Click here to reserve your Swatch Books and Product Shares! Designer Series Paper Swatch Books are a wonderful tool! Paper Shares, Ribbon Shares, and Embellishment Shares give you a taste of all the new items so you can decide which ones you want to order more of.
S
Here are today’s main colors:
You can click on each one to see all the products that come in that color!
S
Here’s what I used:
Click on these images for more details and to purchase. If you are reading this post in email, the product images may not show up. Click here to see the post on my blog.
Supply List. <— Click for a clickable and printable list of the products!
S
Here are some helpful links:
S
Thanks for stopping by today, and Sweet Stamping!
May 12, 2020 | Cards, Gallery, Swaps |
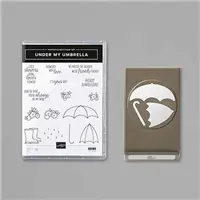
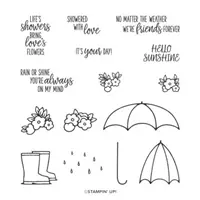
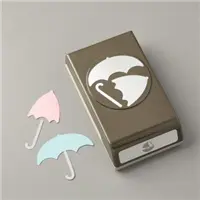
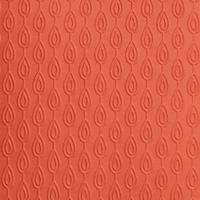
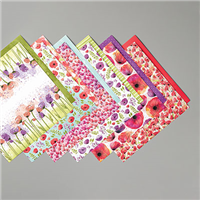
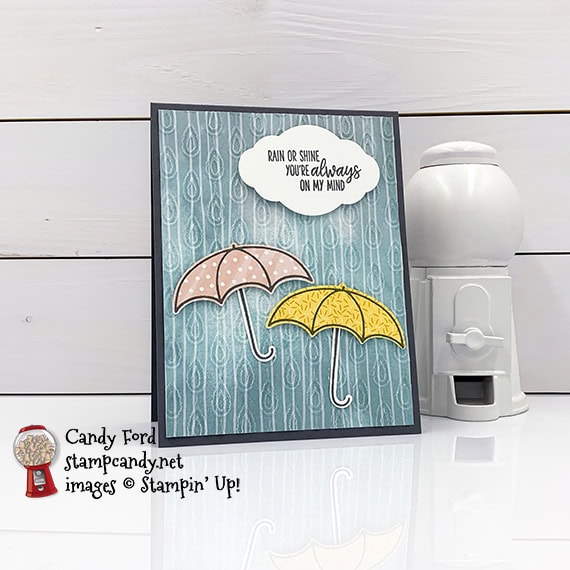
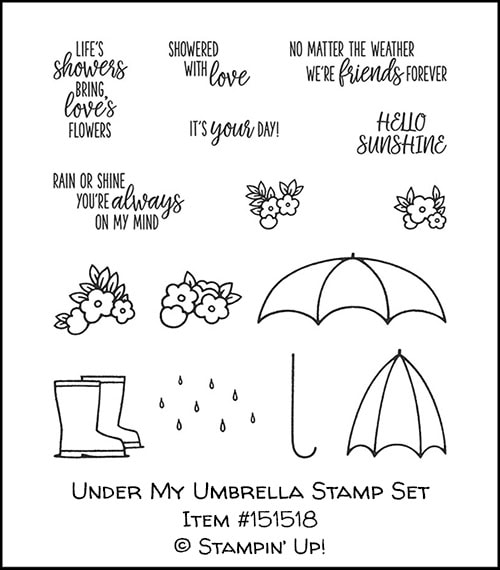
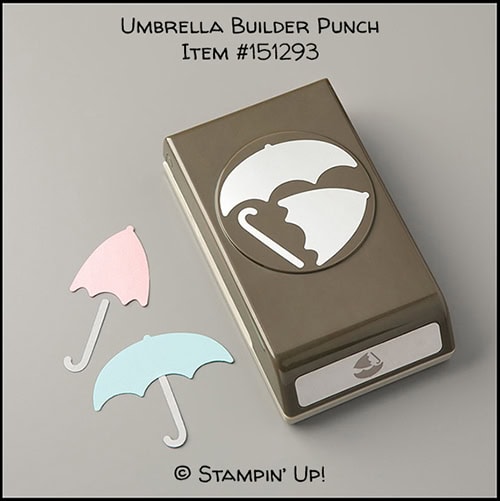
Today I’m sharing my swap card for the Candy Hearts April team meeting. The theme was weather. I used the Under My Umbrella bundle (Under My Umbrella stamp set and Umbrella Builder Punch – available at 10% off only for another month!) the Beads & Baubles Embossing Folder, and the Pretty Label Punch along with three different Designer Series Papers: Peaceful Poppies, Bird Ballad, and Birthday Bonanza. I think the Beads & Baubles Embossing Folder looks like big rain drops. And the Pretty Label Punch looks very much like a cloud. The splotchy Pool Party background with vertical lines also adds to the gloomy, rainy feel – it’s from the Peaceful Poppies DSP.
If you are reading this in email, some photos may appear blurry, or may not appear at all. Please click here to see the post on my blog.

These products will be retiring soon. Get them while you can, because they will start to sell out quickly.
See all the products in my online store here.
S beads beads beads
Here’s what I made:

S
Here’s what I did:
Cut and scored with my paper trimmer:
- Basic Gray card stock (CS) cut to 4-1/4″ x 11″, then scored in half at 5-1/2″
- Peaceful Poppies Designer Series Paper (DSP) layer cut to 4″ x 5-1/4″ (blue)
- Whisper White CS cut to 4″ x 5-1/4″ for the inside of the card base
Stamped with the Under My Umbrella stamp set:
- sentiment in Basic Gray ink onto a scrap of Whisper White Thick CS
- 2 umbrella handles in Basic Gray ink onto a scrap of Whisper White Thick CS
- one umbrella in Basic Gray ink onto a scrap of Bird Ballad DSP (pink)
- one umbrella in Basic Gray ink onto a scrap of Birthday Bonanza DSP (yellow)
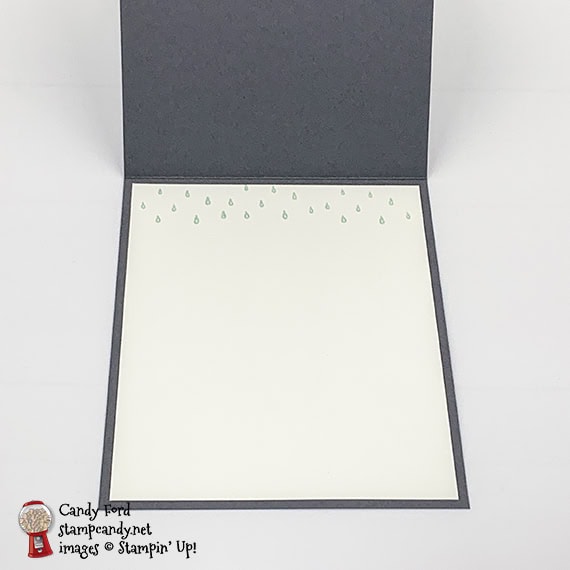
- rain drops in Pool Party ink along the top edge of the 4″ x 5-1/4″ Whisper White CS
Cut using the Umbrella Builder Punch:
- the 2 umbrellas and the 2 umbrella handles
Cut using the Pretty Label Punch:
Embossed using the Beads & Baubles Embossing Folder:
Assembled the card:
- burnished the fold in the card base with a Bone Folder
- DSP layer glued onto the front of the card base
- sentiment and 2 umbrellas adhered onto the DSP layer using Stampin’ Dimensionals
- 2 umbrella handles glued onto the DSP layer
- Whisper White CS glued onto the inside of the card base
S
Here are today’s colors:
You can click on each one to see all the products that come in that color!
S
Here’s what I used:
Click on these images for more details and to purchase. If you are reading this post in email, the product images may not show up. Click here to see the post on my blog.
Supply ListClick “Supply List” for a clickable and printable list of the products!
S
Here are some helpful links:
Thanks for stopping by today, and Sweet Stamping!
May 11, 2020 | Blog Hop, Cards, Gallery, Wedding |

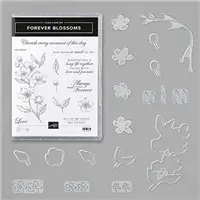
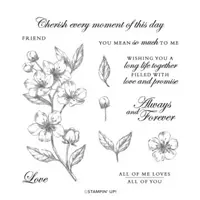
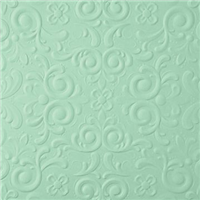
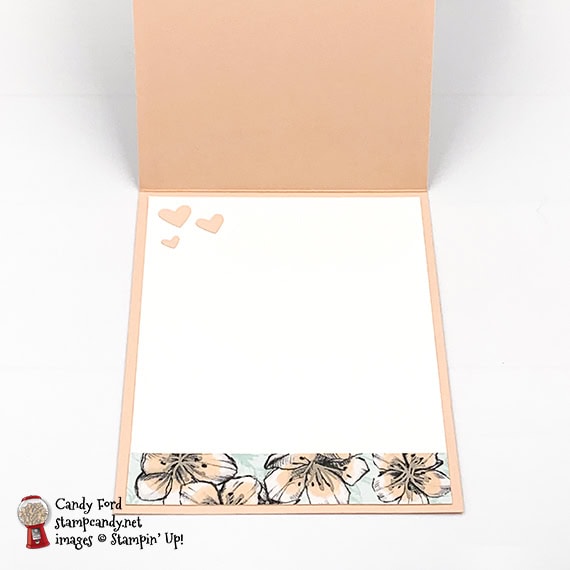
It’s time for the May 2020 CHBH! This month’s theme is Wedding and Anniversary. I used the Forever Blossoms stamp set, Detailed Hearts Die, Parisian Flourish 3D Embossing Folder, and Story Label Punch to create my wedding card.
If you are reading this in email, some photos may appear blurry, or may not appear at all. Please click here to see the post on my blog.
S May 2020 CHBH May 2020 CHBH May 2020 CHBH
Here’s what I made:

S
Here’s what I did:
Cut and scored with my paper trimmer:
- Petal Pink card stock (CS) cut to 4-1/4″ x 11″, then scored in half at 5-1/2″
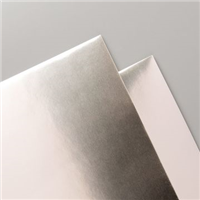
- Champagne Foil Sheet layer cut to 4″ x 5-1/4″
- Pool Party CS layer cut to 3-3/4″ x 5″
- Whisper White CS cut to 4″ x 5-1/4″ for the inside of the card base
- Parisian Blossoms Specialty Designer Series Paper (DSP) strip cut to 4″ x 3/4″
Stamped with the Forever Blossoms stamp set:
- sentiment in Pool Party ink onto a scrap of Whisper White Thick CS
Cut using the Detailed Hearts Die:
- a scrap of Petal Pink CS
- then cut into two pieces using Paper Snips

Cut using the Story Label Punch:
Embossed using the Parisian Flourish 3D Embossing Folder:
Assembled the card:
- burnished the fold in the card base with a Bone Folder
- foil layer adhered onto the front of the card base using Tear & Tape
- Pool Party layer adhered onto the foil layer using Tear & Tape
- Petal Pink CS hearts die cut glued onto the Pool Party CS layer
- Petal Pink ribbon adhered onto the bak of the sentiment using Tear & Tape, with a loop on each side
- sentiment adhered onto the Pool Party layer using Stampin’ Dimensionals
- 2 Champagne Rhinestones applied onto the sentiment and Pool Party CS layer
- DSP strip glued onto the bottom edge of the Whisper White CS for the inside
- Whisper White CS glued onto the inside of the card base
S
Here’s the May 2020 CHBH:
Thank you for hopping with the Hearts today! Be sure to hop around to all the stops. You do not want to miss any of the creativity in this talented group of stampers!
Here are today’s colors:
You can click on each one to see all the products that come in that color!
S
Here’s what I used:
Click on these images for more details and to purchase. If you are reading this post in email, the product images may not show up. Click here to see the post on my blog.
Sale: $11.60
Price: $14.50
Supply List <— Click for a clickable and printable list of the products!
S
Here are some helpful links:
Thanks for stopping by today, and Sweet Stamping!
May 8, 2020 | Cards, Gallery |
Today I’m sharing a card I made for my May Stamp Club. I used the Under My Umbrella Bundle (Under My Umbrella stamp set and Umbrella Builder Punch) along with the Dinoroar Designer Series Paper and several Stampin’ Blends Markers. The Under My Umbrella stamp set and Umbrella Builder Punch will be in the new annual catalog, but you only have a month to get the bundle price.
If you are reading this in email, some photos may appear blurry, or may not appear at all. Please click here to see the post on my blog.
Last Chance Products:
These products will be retiring soon. Some will sell out quickly. Stamp sets will definitely be available until May 15, but only while supplies last after that. Everything else is available only while supplies last. See all the products in my online store here.
S umbrella builder punch umbrella builder punch umbrella builder punch umbrella builder punch umbrella builder punch umbrella builder punch
Here’s what I made:

S
Here are the Under My Umbrella stamp set and Umbrella Builder Punch:
Here’s what I did:
Cut and scored with my paper trimmer:
- Pineapple Punch card stock (CS) cut to 4-1/4″ x 11″, then scored in half at 5-1/2″
- Basic Black CS layer cut to 4-1/16″ x 5-5/16″
- Whisper White CS layer cut to 4″ x 5-1/4″
- optional: CS cut to 4″ x 5-1/4″ for the inside of the card base
Stamped with the Under My Umbrella stamp set:
- sentiment, umbrella, umbrella handle, boots, and flowers in Tuxedo Black Memento ink onto the Whisper White CS layer
- umbrella in Tuxedo Black Memento ink onto a scrap of Dinoroar Designer Series Paper
- boots in Tuxedo Black Memento ink onto a scrap of Whisper White CS
Colored using Stampin’ Blends Markers:
- flowers in Lovely Lipstick, Pineapple Punch, and Old Olive
- boots (on scrap of CS) in Lovely Lipstick
- bottom of Whisper White CS layer in Pool Party
Cut using the Umbrella Builder Punch:
- Designer Series Paper umbrella
Cut using the Paper Snips:
Assembled the card:
- burnished the fold in the card base with a Bone Folder
- punched umbrella glued over the stamped umbrella on the Whisper White CS layer
- fussy cut boots glued over the stamped boots on the Whisper White CS layer
- Whisper White CS layer glued onto the Basic Black layer
- Basic Black layer glued onto the front of the card base
- optional: Whisper White CS glued onto the inside of the card base
S
Here are today’s main colors:
You can click on each one to see all the products that come in that color!
S
Here’s what I used:
Click on these images for more details and to purchase. If you are reading this post in email, the product images may not show up. Click here to see the post on my blog.
Supply List <— Click for a clickable and printable list of the products!
Ss
Here are some helpful links:
Thanks for stopping by today, and Sweet Stamping!
May 6, 2020 | Blog Hop, Cards, Gallery |

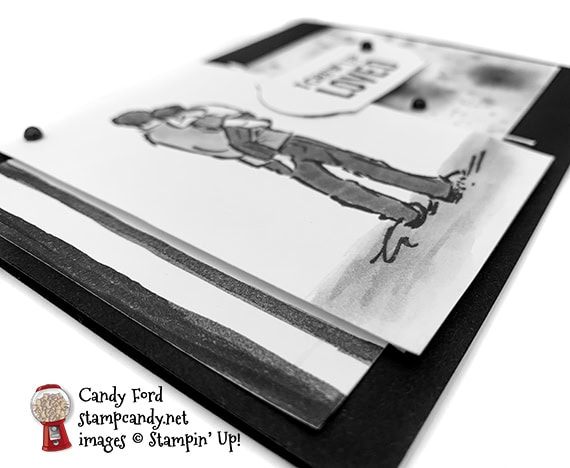
It’s time for the May ICS Blog Hop! This month’s theme is “It’s A Guy Thing In Black & White.” We are featuring masculine projects using only black and white products. I used the A Good Man stamp set and the Timeless Label Punch, and watercolored with an Aqua Painter and Memento ink refill on Shimmery White cardstock.
If you are reading this in email, some photos may appear blurry, or may not appear at all. Please click here to see the post on my blog.
S It’s A Guy Thing In Black & White It’s A Guy Thing In Black & White It’s A Guy Thing In Black & White https://bit.ly/2VSPkpK
Last Chance Products:
These products will be retiring soon. Get them while you can, because they will sell out quickly. See all the products in my online store here.
S
Here’s what I made:

S
Here’s what I did:
Cut and scored with my paper trimmer:
- Basic Black card stock (CS) cut to 5-1/2″ x 8-1/2″, then scored in half at 4-1/4″
- Shimmery White CS layer cut to 3-3/8″ x 3-1/2″
- Shimmery White CS layer cut to 3″ x 3″
- Shimmery White CS layer cut to 2-1/2″ x 4″
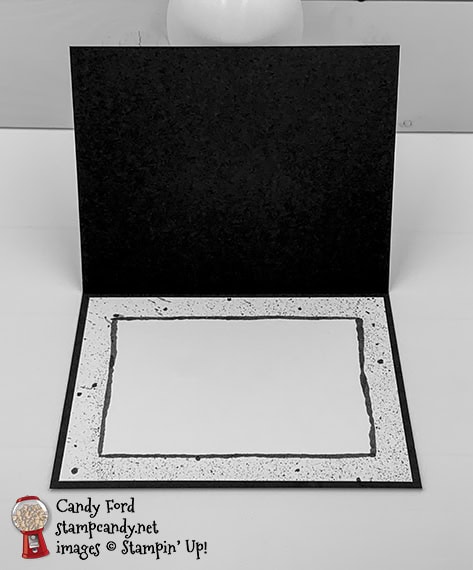
- Shimmery White CS cut to 5-1/4″ x 4″ for the inside of the card base
- any scrap paper cut to 4-1/4″ x 3″
Stamped with the A Good Man stamp set:
- image in Tuxedo Black Memento ink onto the 2-1/2″ x 4″
- sentiment in Tuxedo Black Memento ink onto a scrap of Shimmery White CS
Cut using the Timeless Label Punch:
Colored using an Aqua Painter and Tuxedo Black Memento ink:
- stripes onto the 3-3/8″ x 3-1/2″ piece of Shimmery White CS
- splotches onto the 3″ x 3″ piece of Shimmery White CS
- stamped image
- edges of the punched sentiment
- 4-1/4″ x 3″ scrap paper laid on the 5-1/4″ x 4″ Shimmery White CS, then used the Aqua Painter to splatter all around the edges
- removed scrap paper and painted a frame on the inner edge of the splattered area
- Note: I used a large clear block as a palette for the Memento ink refill.
Colored using a Stampin’ Blends Marker:
- 3 small frosted epoxy droplets in Dark Basic Black
Assembled the card:
- burnished the fold in the card base with a Bone Folder
- striped layer glued onto the front of the card base
- splotchy layer glued onto the front of the card base, over the striped layer
- image layer adhered over the first two layers using Stampin’ Dimensionals
- sentiment glued to the image layer on the left and adhered onto the splotchy layer with Stampin’ Dimensionals on the right
- 3 droplets applied onto the layers
- 5-1/4″ x 4″ piece of Shimmery White CS glued onto the inside of the card base
S
Here’s the “It’s a Guy Thing in Black & White” Blog Hop:
Click the Next button to hop to the next stop: Joni Metras of Joni in the Spotlight Stamping

S
Here are today’s colors:
You can click on each one to see all the products that come in that color!
S
Here’s what I used:
Click on these images for more details and to purchase. If you are reading this post in email, the product images may not show up. Click here to see the post on my blog.
Supply List <— Click for a clickable and printable list of the products!
S
Here are some helpful links:
Thanks for stopping by today, and Sweet Stamping!