Jun 30, 2020 | Cards, Gallery |
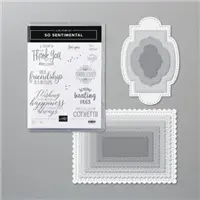
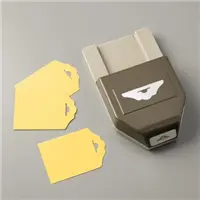
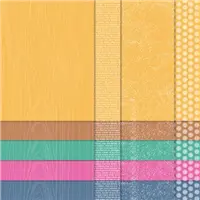
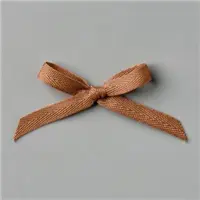
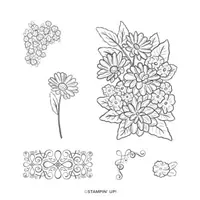
Today’s card features the new 2020-2022 In Color Bumblebee. I used the So Sentimental stamp set, Tasteful Labels Dies, 2020-2022 In Color Designer Series Paper, Fancy Tag Topper Punch, Flowers for Every Season Ribbon Combo Pack, and Bumblebee 1/4″ Ribbon.
If you are reading this in email, some photos may appear blurry, or may not appear at all. Please click here to see the post on my blog.
S So Sentimental So Sentimental So Sentimental So Sentimental So Sentimental
Here’s what I made:

S
Here’s what I did:
Cut and scored with my paper trimmer:
- Bumblebee card stock (CS) cut to 5-1/2″ x 8-1/2″, then scored in half at 4-1/4″
- 2020-2022 Designer Series Paper (DSP) layer cut to 5-1/4″ x 4″
- Whisper White CS layer cut to 5″ x 2-1/8″
- Whisper White CS cut to 5-1/4″ x 4″ for the inside of the card base
Stamped with the So Sentimental stamp set:
- sentiment in Versamark ink onto a scrap of Bumblebee CS, then heat embossed in white
Cut using the Tasteful Labels Dies:
Cut using the Fancy Tag Topper Punch:
- both ends of the Whisper White CS layer
Assembled the card:
- burnished the fold in the card base with a Bone Folder
- DSP layer glued onto the front of the card base
- white ribbon wrapped around the front of the card base, and through each end of the Whisper White CS layer, with both ends meeting on the front, and adhered using Stampin’ Seal (or Tear & Tape)
- Bumblebee 1/4″ ribbon adhered over the white ribbon and adhered with Stampin’ Seal (or Tear & Tape)
- sentiment adhered onto the Whisper White CS layer using Stampin’ Dimensionals
- Whisper White CS glued onto the inside of the card base
S
Tomorrow is the last day for these 2 great promotions!

It’s a bundle bash! When you purchase your Starter Kit in June, you can select one stamp and punch bundle (p. 168–169) OR one stamp and die bundle (p. 173-179) from the 2020–2021 Annual Catalog, in addition to your regular Starter Kit. Click here for more information.
Order Deadlines
- Phone: June 30, 2020; 6:50 PM (MT)
- Online: June 30, 2020; 11:50 PM (MT)
S

- Any order $250 or more will earn $25 EXTRA Stampin’ Rewards.
- All order types qualify for this promotion.
- Starter Kit orders do not qualify for this promotion.
- Paper Pumpkin prepaid subscriptions count toward a qualifying purchase. Month-to-month subscriptions do not qualify for this promotion.
- The qualifying amount must be reached prior to shipping and tax.
- Additional Stampin’ Rewards for this promotion will only be awarded once per order.
- Click here to shop now
Order Deadlines
- Phone: 30 June 2020; 6:50 PM (MT)
- Online: 30 June 2020; 11:50 PM (MT)
S
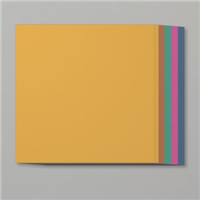
Here are today’s colors:
You can click on each one to see all the products that come in that color!
S
Here’s what I used:
Click on these images for more details and to purchase. If you are reading this post in email, the product images may not show up. Please click here to see the post on my blog.
Supply List <— Click for a clickable and printable list of the products!
S
Here are some helpful links:
S
Thanks for stopping by today, and Sweet Stamping!
Jun 29, 2020 | Cards, Gallery |
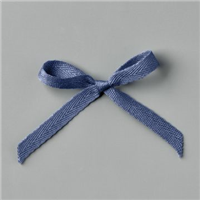
Today’s card features the new 2020-2022 In Color Misty Moonlight. I used the So Sentimental stamp set, Tasteful Labels Dies, 2020-2022 In Color Designer Series Paper, and the twine from the Flowers for Every Season Ribbon Combo Pack.
If you are reading this in email, some photos may appear blurry, or may not appear at all. Please click here to see the post on my blog.
S So Sentimental So Sentimental So Sentimental So Sentimental So Sentimental
Here’s what I made:
S
Here’s what I did:
Cut and scored with my paper trimmer:
- Misty Moonlight card stock (CS) cut to 5-1/2″ x 8-1/2″, then scored in half at 4-1/4″
- 2020-2022 Designer Series Paper (DSP) layer cut to 5-1/4″ x 4″
- Whisper White CS cut to 5-1/4″ x 4″ for the inside of the card base
Stamped with the So Sentimental stamp set:
- sentiment in Misty Moonlight ink onto a scrap of Whisper White Thick CS
Cut using the Tasteful Labels Dies:
Assembled the card:
- burnished the fold in the card base with a Bone Folder
- DSP layer glued onto the front of the card base
- Stampin’ Seal (or Tear & Tape) applied onto the DSP layer where it will be covered with the sentiment
- twine looped around and stuck to the Stampin’ Seal (or Tear & Tape)
- sentiment adhered over the twine using Stampin’ Dimensionals
- Whisper White CS glued onto the inside of the card base
S
Here are today’s colors:
You can click on each one to see all the products that come in that color!
S
Here’s what I used:
Click on these images for more details and to purchase. If you are reading this post in email, the product images may not show up. Please click here to see the post on my blog.
Supply List. <— Click for a clickable and printable list of the products!
S
Tomorrow is the last day for these 2 great promotions!
It’s a bundle bash! When you purchase your Starter Kit in June, you can select one stamp and punch bundle (p. 168–169) OR one stamp and die bundle (p. 173-179) from the 2020–2021 Annual Catalog, in addition to your regular Starter Kit. Click here for more information.
Order Deadlines
- Phone: June 30, 2020; 6:50 PM (MT)
- Online: June 30, 2020; 11:50 PM (MT)
S
- Any order $250 or more will earn $25 EXTRA Stampin’ Rewards.
- All order types qualify for this promotion.
- Starter Kit orders do not qualify for this promotion.
- Paper Pumpkin prepaid subscriptions count toward a qualifying purchase. Month-to-month subscriptions do not qualify for this promotion.
- The qualifying amount must be reached prior to shipping and tax.
- Additional Stampin’ Rewards for this promotion will only be awarded once per order.
- Click here to shop now
Order Deadlines
- Phone: 30 June 2020; 6:50 PM (MT)
- Online: 30 June 2020; 11:50 PM (MT)
S
Here are some helpful links:
S
Thanks for stopping by today, and Sweet Stamping!

Jun 26, 2020 | Cards, Gallery |
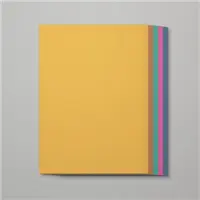
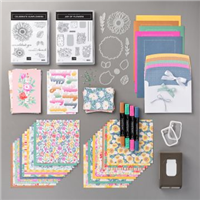
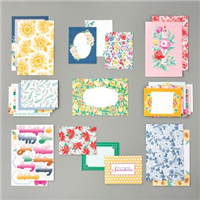
I’m in love with the new 2020-2022 In Colors, aren’t you? They all go so well together, there’s a suite that features them all – the Flowers for Every Season Suite on pages 10-13 in the 2020-2021 Annual Catalog. Below you can see five cards I made using these colors, one card for each color. Be sure to check back next week for detailed instructions on each one. x
If you are reading this in email, some photos may appear blurry, or may not appear at all. Please click here to see the post on my blog.
S 2020-2022 In Colors 2020-2022 In Colors 2020-2022 In Colors 2020-2022 In Colors 2020-2022 In Colors
Here’s what I made:

S
S
Here are the 2020-2022 In Colors:
You can click on each one to see all the products that come in that color!
S
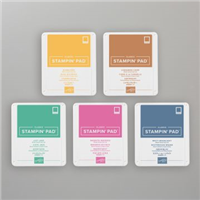
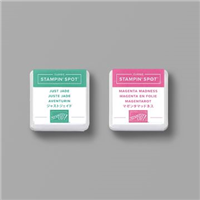
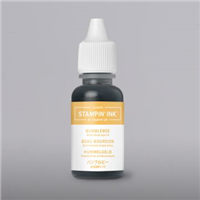
Here are the 2020-2022 In Color Products:
Click on these images for more details and to purchase. If you are reading this post in email, the product images may not show up. Please click here to see the post on my blog.
Supply List <— Click for a clickable and printable list of the products!
S
Time is running out for these 2 great promotions!
It’s a bundle bash! When you purchase your Starter Kit in June, you can select one stamp and punch bundle (p. 168–169) OR one stamp and die bundle (p. 173-179) from the 2020–2021 Annual Catalog, in addition to your regular Starter Kit. Click here for more information.
Order Deadlines
- Phone: June 30, 2020; 6:50 PM (MT)
- Online: June 30, 2020; 11:50 PM (MT)
S
- Any order $250 or more will earn $25 EXTRA Stampin’ Rewards.
- All order types qualify for this promotion.
- Starter Kit orders do not qualify for this promotion.
- Paper Pumpkin prepaid subscriptions count toward a qualifying purchase. Month-to-month subscriptions do not qualify for this promotion.
- The qualifying amount must be reached prior to shipping and tax.
- Additional Stampin’ Rewards for this promotion will only be awarded once per order.
- Click here to shop now
Order Deadlines
- Phone: 30 June 2020; 6:50 PM (MT)
- Online: 30 June 2020; 11:50 PM (MT)
S
Here are some helpful links:
S
Thanks for stopping by today, and Sweet Stamping!
Jun 25, 2020 | Blog Hop, Cards, Gallery, Paper Pumpkin |

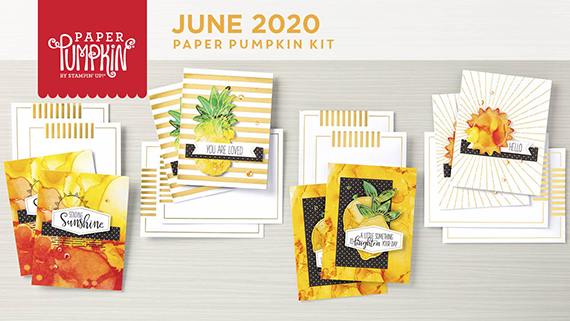
It’s time for the 06-2020 APPT Blog Hop! This month’s kit is called Box of Sunshine, and it’s all about sending some sunshine to those who need it. Even the box is yellow, and there’s a label in the kit that covers the Paper Pumpkin logo, so you can mail some sunshiney goodies in it. For my alternate projects today, I used the kit to make a Scrappy Strip card and a treat box.
If you are reading this in email, some photos may appear blurry, or may not appear at all. Please click here to see the post on my blog.
S 06-2020 APPT 06-2020 APPT 06-2020 APPT 06-2020 APPT 06-2020 APPT
Here’s the kit:
CLICK HERE to download the printable stamp case insert for this kit.

 S
S
Here’s what I made:


S
Here’s what I did:
Cut and scored with my paper trimmer:
- Poppy Parade card stock (CS) cut to 5-1/2″ x 8-1/2″, then scored in half at 4-1/4″
- Basic Black CS layer cut to 5-1/8″ x 3-7/8″
- Basic Black CS layer cut to 5″ x 3-3/4″
- front of two card bases from the kit cut to 4-5/8″ x 3-3/4″, then cut into random strips (I cut them together so the strips would be the same on both)
- Whisper White CS cut to 5-1/4″ x 4″ for the inside of the card base
- Basic Black CS cut to 7-1/2″ x 7-1/2″ and scored at 2-1/2″ and 5″ in both directions
- Basic Black CS cut to 4-1/16″ x 4-1/16″ and scored 3/4″ from all four sides
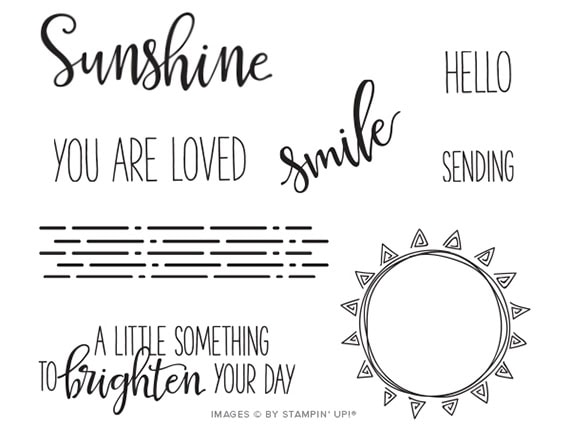
Stamped with the Box of Sunshine stamp set:
- sentiment in Poppy Parade ink onto two of the provided die cut labels
Cut using the Layering Circles Dies:
- 2 scalloped circles from a scrap of Gold Foil Sheet
- 1 larger scalloped circle from a scrap of Basic Black CS
Assembled the card:
- burnished the fold in the Poppy Parade card base with a Bone Folder
- card front strips glued onto the 5″ x 3-3/4″ Basic Black CS layer, about 1/16″ apart, alternating strips from the two different card fronts
- strip layer glued onto the 5-1/8″ x 3-7/8″ Basic Black CS layer
- 5-1/8″ x 3-7/8″ Basic Black CS layer glued onto the front of the card base
- a sun die cut adhered onto a gold foil scalloped circle using Stampin’ Seal
- gold foil scalloped circle adhered onto the Basic Black scalloped circle
- Basic Black scalloped circle glued onto the strips
- one of the sentiments glued onto a scrap of Basic Black CS, then trimmed the mat using Paper Snips
- matted sentiment adhered over strips and sun using Black Stampin’ Dimensionals
- Whisper White CS glued onto the inside of the card base
Assembled the box:
- burnished the folds in the two Basic Black CS box pieces with a Bone Folder
- using Paper Snips, cut the two pieces as shown below
- flaps of the smaller piece glued onto the inside of the adjacent sides to form the lid
- a sun die cut adhered onto a gold foil scalloped circle using Stampin’ Seal
- gold foil scalloped circle adhered onto the Basic Black lid using Stampin’ Seal
- sentiment glued onto a scrap of Basic Black CS, then trimmed the mat using Paper Snips
- matted sentiment glued onto the sun die cut on the lid
- folded up the sides of the box and put the lid on top
- NOTE: You can glue the sides of the box, but I like the way they fall open when the lid is removed.


S
Here’s the 06-2020 APPT Blog Hop:
S
Here are today’s main colors:
You can click on each one to see all the products that come in that color!
S
Here’s what I used other that what came in the kit:
Click on these images for more details and to purchase. If you are reading this post in email, the product images may not show up. Please click here to see the post on my blog.
Supply List. <— Click for a clickable and printable list of the products!
S
Here’s how to get Paper Pumpkin:
- Order one of the items below.
- You will receive an email with a redemption code.
- CLICK HERE to redeem your code.
Supply List <— Click for a clickable and printable list of the products!
S
Here are some helpful links:
S
Thanks for stopping by today, and Sweet Stamping!
Jun 24, 2020 | Cards, Gallery, Techniques |
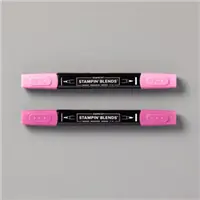
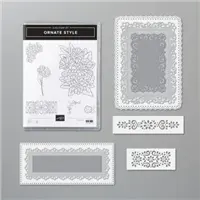
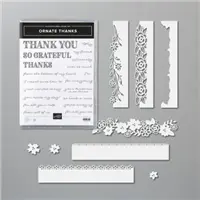
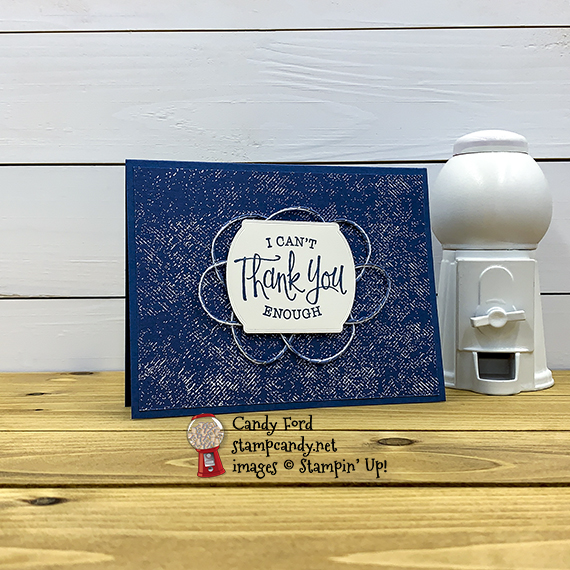
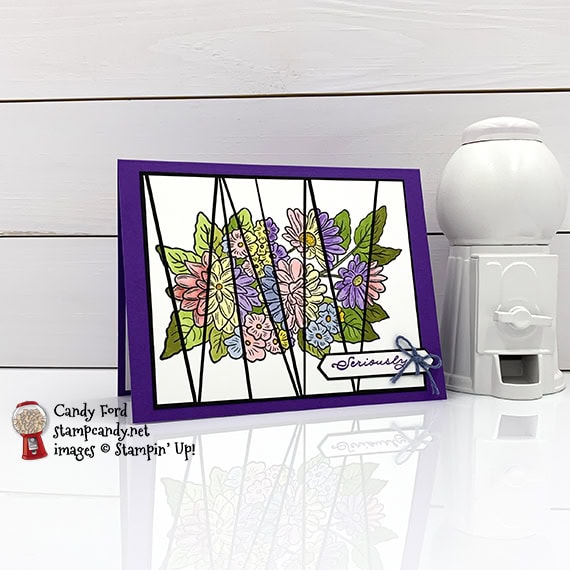
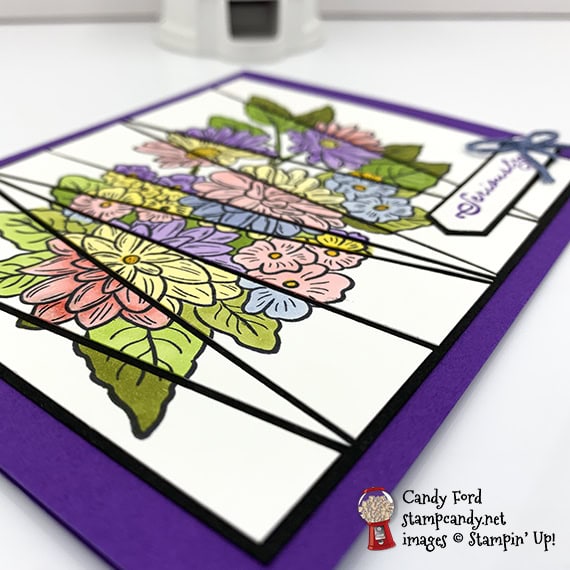
Today’s card doesn’t use the PPPST! Can you believe it? Instead I’m using another popular technique. This is my first try at the Scrappy Strip Technique. I used the Ornate Thanks and Ornate Style stamp sets. I colored in the image using Stampin’ Blends Markers, then cut it into strips. And I cut the sentiment using the Classic Label Punch.
PPPST = Paper Piecing Press n Seal Technique
If you are reading this in email, some photos may appear blurry, or may not appear at all. Please click here to see the post on my blog.
S scrappy scrappy scrappy scrappy scrappy
Here’s what I made:
S
Here’s what I did:
Cut and scored with my paper trimmer:
- Gorgeous Grape card stock (CS) cut to 5-1/2″ x 8-1/2″, then scored in half at 4-1/4″
- Basic Black CS layer cut to 4-3/4″ x 3-7/8″
- Whisper White CS layer cut to 4-1/4″ x 3-3/4″ (*after floral image was stamped, I cut the layer into strips as shown)
- Basic Black CS cut to 2-1/2″ x 7/16″
- Whisper White CS cut to 5-1/4″ x 4″ for the inside of the card base
Stamped with the Ornate Style stamp set:
- floral image in tuxedo Black Memento ink onto the Whisper White CS layer*
Stamped with the Ornate Thanks stamp set:
- front sentiment in Gorgeous Grape ink onto a scrap of Whisper White CS
- inner sentiment in Seaside Spray ink onto the Whisper White CS for the inside of the card base
Cut using the Classic Label Punch:
Cut using Paper Snips:
- both ends of the Basic Black CS strip, to mat the front sentiment
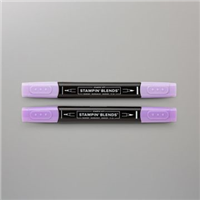
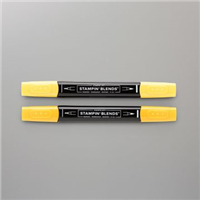
Colored using Stampin’ Blends Markers:
- floral image in Flirty Flamingo, Granny Apple Green, Highland Heather, Mango Melody, Old Olive, Seaside Spray, and So Saffron
- Note: I used different colors in each strip.
Assembled the card:
- burnished the fold in the card base with a Bone Folder
- colored strips glued onto the Basic Black CS layer, about 1/16″ apart
- Basic Black CS layer glued onto the front of the card base
- front sentiment glued onto the Basic Black CS strip
- blue twine pulled out of a piece of blue/white/silver twine, then tied around the sentiment and tied in a bow
- front sentiment glued onto the strips
- Whisper White CS glued onto the inside of the card base
S
Here’s what I would do differently:
I’m not sure why I thought I needed to cut all the strips into triangles with sharp points. When I look at other Scrappy Strip cards I’ve seen lately, I realize their strips have four edges instead of 3. I think that would make it much easier to line up the pieces.
S
Here are today’s colors:
You can click on each one to see all the products that come in that color!
S
Here’s what I used:
Click on these images for more details and to purchase. If you are reading this post in email, the product images may not show up. Please click here to see the post on my blog.
Supply List <— Click for a clickable and printable list of the products!
SS
Here are some helpful links:
S
Thanks for stopping by today, and Sweet Stamping!
Jun 23, 2020 | Cards, Gallery, Techniques |
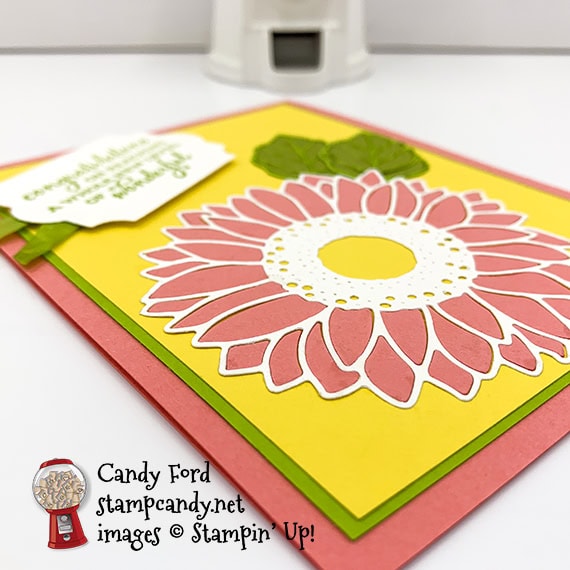
Today I’m sharing a card I used with some of the leftovers from yesterdays card, which you can see here. It’s another PPPST card made with the Celebrate Sunflowers Bundle (Celebrate Sunflowers stamp set and Sunflowers Dies.) I cut today’s sentiment using the Everyday Label Punch, and colored some Whisper White Crinkled Seam Binding Ribbon with a Stampin’ Blends Marker.
If you are reading this in email, some photos may appear blurry, or may not appear at all. Please click here to see the post on my blog.
S PPPST PPPST PPPST PPPST PPPST PPPST
Here’s what I made: 
S
Here’s what I did:
Cut and scored with my paper trimmer:
- Flirty Flamingo card stock (CS) cut to 4-1/4″ x 11″, then scored in half at 5-1/2″
- Granny Apple Green CS layer cut to 3-7/8″ x 5-1/8″
- Daffodil Delight CS layer cut to 3-3/4″ x 5″
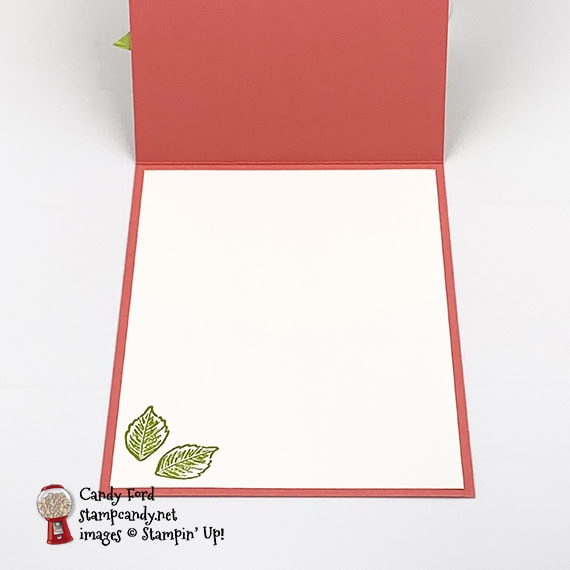
- Whisper White CS cut to 4″ x 5-1/4″ for the inside of the card base
Stamped with the Celebrate Sunflowers stamp set:
- sentiment in Granny Apple Green ink onto a scrap of Whisper White Thick CS
- 2 small leaves in Granny Apple Green ink onto the Whisper White CS for the inside of the card base
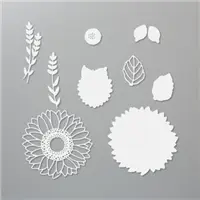
Cut using the Sunflowers Dies:
- large detailed sunflower cut from a scrap of Flirty Flamingo CS
- large detailed sunflower cut from a scrap of Whisper White Thick CS
- 2 detailed leaves cut from an scrap of Granny Apple Green CS
- 2 detailed leaves cut from an scrap of Old Olive CS
- NOTE: I pressed a piece of Press n Seal plastic wrap onto the tops of all the die cuts to keep the pieces in place
Cut using the Everyday Label Punch:
Colored with a Stampin’ Blends Marker:
- a piece of Whisper White Crinkled Seam Binding Ribbon in Granny Apple Green
Assembled the card:
- burnished the fold in the card base with a Bone Folder
- Granny Apple Green CS layer glued onto the front of the card base
- Daffodil Delight CS layer glued onto the Granny Apple Green CS layer
- outline piece of the Whisper White Thick CS die cut sunflower removed from Press n Seal and glued onto the Daffodil Delight CS layer
- outline piece of the 2 Granny Apple Green CS leaf die cuts removed from Press n Seal and glued onto the Daffodil Delight CS layer
- outline piece of the Flirty Flamingo die cut sunflower removed from Press n Seal and set aside
- using the Press n Seal to help with placement, glued the inner petals of the Flirty Flamingo sunflower inside the Whisper White outline
- outline piece of the Old Olive leaves removed from the Press n Seal and set aside
- using the Press n Seal to help with placement, glued the inner pieces of the Old Olive leaves inside the Grany Apple Green outlines
- ribbon folded in half and adhered onto the back of the sentiment using Tear & Tape or Stampin’ Seal
- sentiment adhered onto the Daffodil Delight CS layer using Stampin’ Dimensionals
- Whisper White CS glued onto the inside of the card base
S
Here are today’s colors:
You can click on each one to see all the products that come in that color!
S
Here’s what I used:
Click on these images for more details and to purchase. If you are reading this post in email, the product images may not show up. Please click here to see the post on my blog.
Supply List <— Click for a clickable and printable list of the products!
S
S
Here are some helpful links:
S
Thanks for stopping by today, and Sweet Stamping!