Mar 19, 2019 | Cards, Gallery, Occasions |
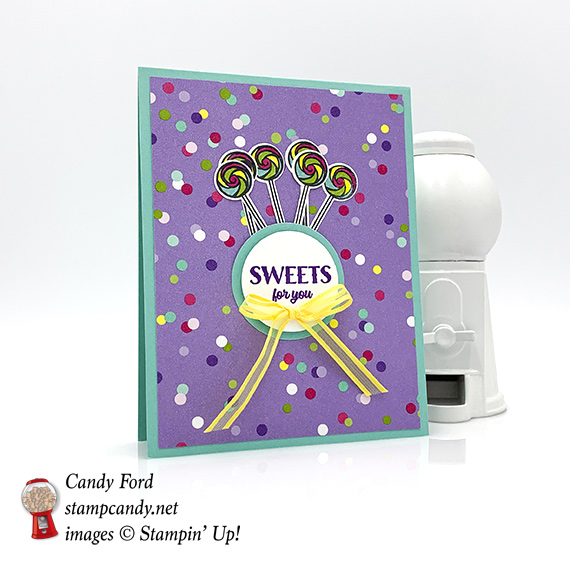
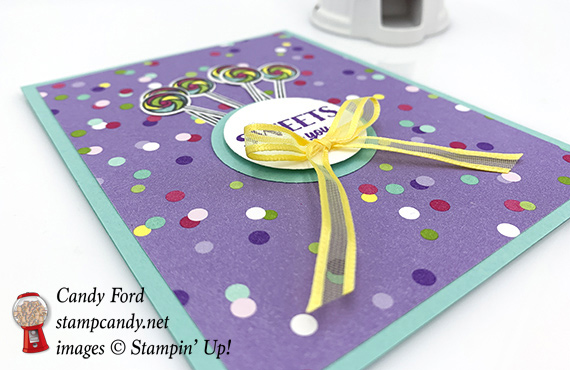
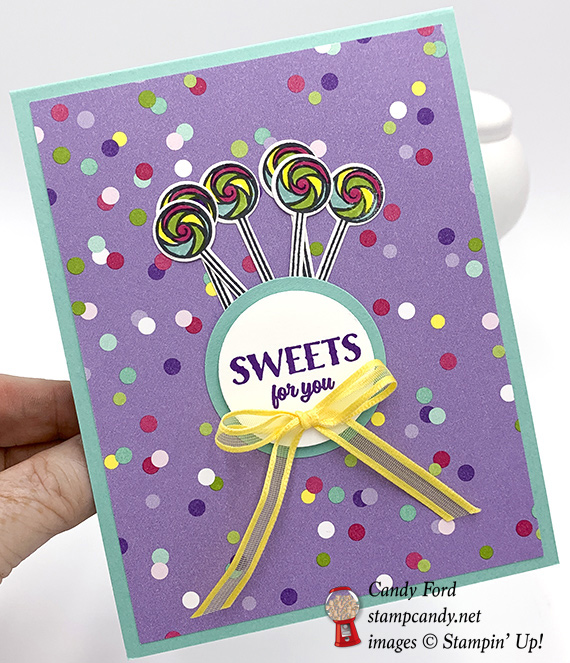
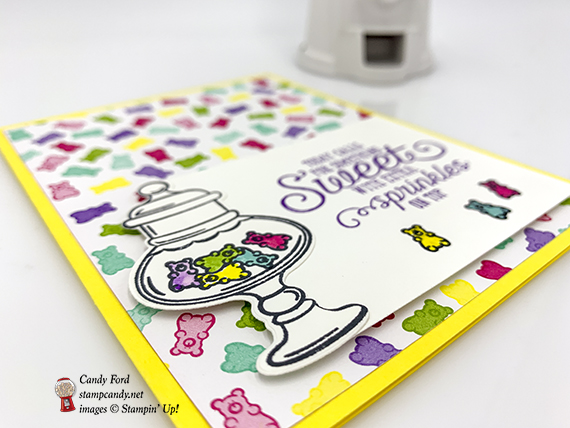
I have been playing with the How Sweet It Is suite of products a lot lately, and why not? It’s adorable and fun. The colors are bright and cheerful. I used it to made today’s card with confetti dots and lollipops that says Sweets for You. I used a piece of the Organdy Ribbon Combo pack that has now sold out. If you didn’t get it in time, you can easily replace it with one of the many other ribbons we have. I would suggest the Pineapple Punch 1/4″ Grosgrain Ribbon.
S
Here’s what I made:
 S
S
Here’s what I did:
Cut and scored with my Stampin’ Trimmer:
- Coastal Cabana card stock (CS) cut to 4-1/4″ x 11″, then scored in half at 5-1/2″
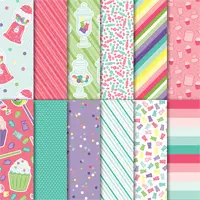
- How Sweet It Is Designer Series Paper (DSP) cut to 4″ x 5-1/4″
- Whisper White CS cut to 4″ x 5-1/4″ for the inside of the card
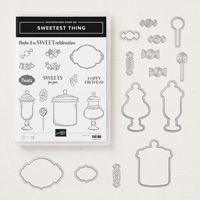
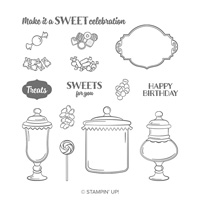
Stamped with the Sweetest Thing stamp set:
- sentiment in Gorgeous Grape ink onto a scrap of Whisper White CS
- 7 lollipops in Stazon black ink onto a scrap of Whisper White CS
Colored using Stampin’ Write Markers:
- lollipops in Coastal Cabana, Granny Apple Green, Melon Mambo, and Pineapple Punch
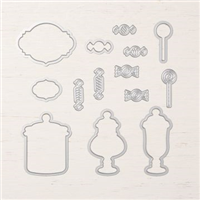
Die cut using the Jar of Sweets Framelits:
Die cut using the Layering Circle Framelits:
- sentiment
- a slightly larger circle from a scrap of Coastal Cabana CS
Assembled the card:
- burnished the fold in the card base with a Bone Folder
- DSP layer glued onto the front of the card base
- sentiment adhered onto the Coastal Cabana CS circle using Stampin’ Dimensionals
- lollipops glued onto the back of the Coastal Cabana CS circle
- sentiment/lollipops glued onto the DSP layer
- ribbon tien in a bow, then adhered onto the sentiment circle using a Mini Glue Dot
- Whisper White CS glued onto the inside of the card base
S
Here are today’s colors:
You can click on each one to see all the products that come in that color!
S
Here’s what I used:
Click on these images for more details and to purchase.
Preorder the Geared Up Garage Manly Card Online Class by March 20!
- Make 6 masculine cards at home in your PJs!
- 2 each of 3 designs
- manly designs for birthday, Father’s Day, or just to say I love you
- Limited spots available
Click on the image below for details:

S
Here are some helpful links:
S
Thanks for stopping by today, and Sweet Stamping!

Mar 18, 2019 | Cards, Gallery, Occasions |
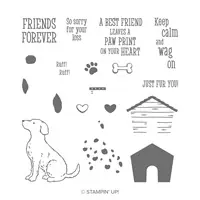
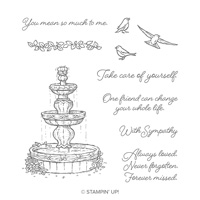
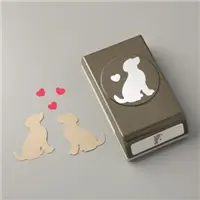
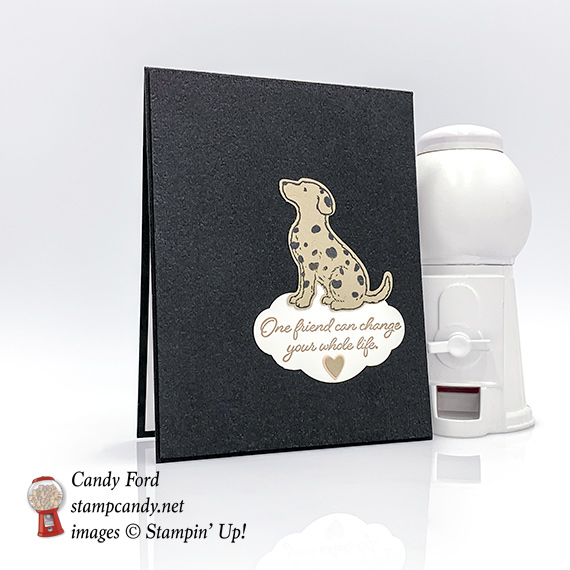
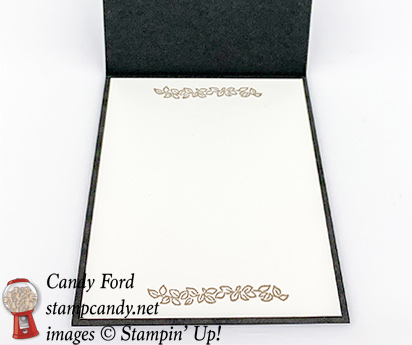
Today’s card is easy and simple. It features the Happy Tails bundle, Flowing Fountain stamp set, Pretty Label Punch, Be Mine Framelits Dies, and Subtle Dynamic Textured Impressions Embossing Folder. The tiny hearts were leftover from other projects. I like to keep cute little pieces that fall out of die cuts. These came from the multi-heart die in the Be Mine Framelits.
S
Here’s what I made:

S
Here’s what I did:
Cut and scored with my Stampin’ Trimmer:
- Basic Black card stock (CS) cut to 4-1/4″ x 11″, then scored in half at 5-1/2″
- Basic Black CS cut to 4-1/8″ x 5-3/8″
- Whisper White CS cut to 4″ x 5-1/4″
Stamped with the Happy Tails stamp set:
- dog outline and spots in black ink onto a scrap of Crumb Cake CS
Stamped with the Flowing Fountain stamp set:
- sentiment in Crumb Cake ink onto a scrap of Whisper White CS
- garland in Crumb Cake ink onto the Whisper White CS for the inside of the card
Cut using the Dog Builder Punch:
Cut using the Pretty Label Punch:
Cut using the Be Mine Framelits:
- a scrap of Petal Pink CS and a scrap of Crumb Cake CS cut with the multi-heart die
- NOTE: I used leftover hearts saved from previous projects
Embossed using the Subtle Dynamic embossing folder:
Assembled the card:
- burnished the fold in the card base with a Bone Folder
- embossed layer adhered onto the front of the card base using Stampin’ Dimensionals
- sentiment glued onto the embossed layer
- dog glued onto the embossed layer over the sentiment
- Crumb Cake heart glued onto a slightly larger Petal Pink heart, then glued onto the sentiment label
- Whisper White CS glued onto the inside of the card base
S
Here are today’s colors:
You can click on each one to see all the products that come in that color!
S
Here’s what I used:
Click on these images for more details and to purchase.
Preorder the Geared Up Garage Manly Card Online Class by March 20!
- Make 6 masculine cards at home in your PJs!
- 2 each of 3 designs
- manly designs for birthday, Father’s Day, or just to say I love you
- Limited spots available
Click on the image below for details:
S
Here are some helpful links:
S
Thanks for stopping by today, and Sweet Stamping!
Mar 16, 2019 | Cards, Gallery, Occasions, Sale-A-Bration |
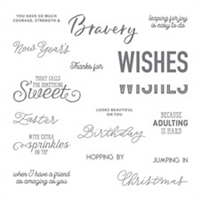
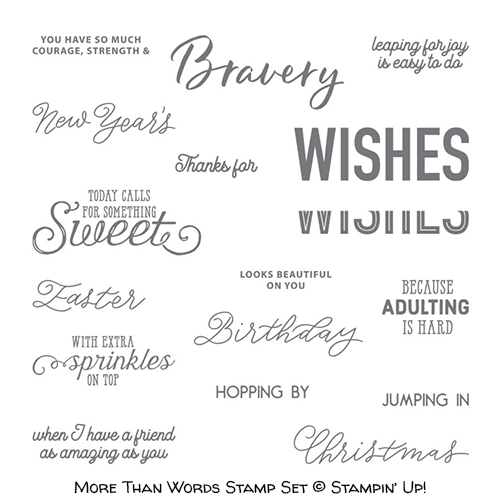
The new More Than Words stamp set is only available through March 31, or while supplies last. It has some great sentiments for different occasions, in different fonts, that can be used with many other Stampin’ Up! products.
S
Here’s what I made:

S
Here’s what I did:
Cut and scored with my Stampin’ Trimmer:
- Pineapple Punch card stock (CS) cut to 8-1/2″ x 5-1/2″, then scored in half at 4-1/4″
- How Sweet It Is Designer Series Paper (DSP) cut to 4″ x 5-1/4″
- Whisper White CS layer cut to ___
- Whisper White CS cut to 4″ x 5-1/4″ for the inside of the card
Stamped with the Sweetest Thing stamp set:
- candy jar in black ink onto a scrap of Whisper White CS
- gummy bears in black ink inside the jar
- three single gummy bears in black ink onto the Whisper White CS layer
Stamped using the More Than Words stamp set:
- sentiment in Gorgeous Grape ink onto the Whisper White CS layer
Die cut using the Jar of Sweets Framelits:
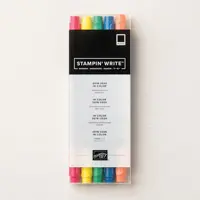
Colored using Stampin’ Write Markers and a Blender Pen:
- Gummy Bears in Gorgeous Grape, Granny Apple Green, Coastal Cabana, Melon Mambo, and Pineapple Punch
Assembled the card:
- burnished the fold in the card base with a Bone Folder
- DSP layer glued onto the front of the card base
- die cut candy jar glued onto the left edge of the Whisper White CS layer
- candy jar/Whisper White CS layer adhered onto the DSP layer using Stampin’ Dimensionals
- Whisper White CS glued onto the inside of the card base
S
Here are today’s colors:
You can click on each one to see all the products that come in that color!
S
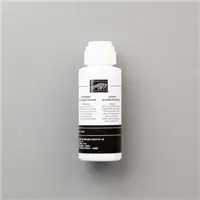
Here’s what I used:
Click on these images for more details and to purchase.
S
Preorder the Geared Up Garage Manly Card Online Class by March 20!
- Make 6 masculine cards at home in your PJs!
- 2 each of 3 designs
- manly designs for birthday, Father’s Day, or just to say I love you
- Limited spots available
Click on the image below for details:
S
Here are some helpful links:

S
Thanks for stopping by today, and Sweet Stamping!
Mar 13, 2019 | Cards, Gallery, Guest Stamper, Occasions |
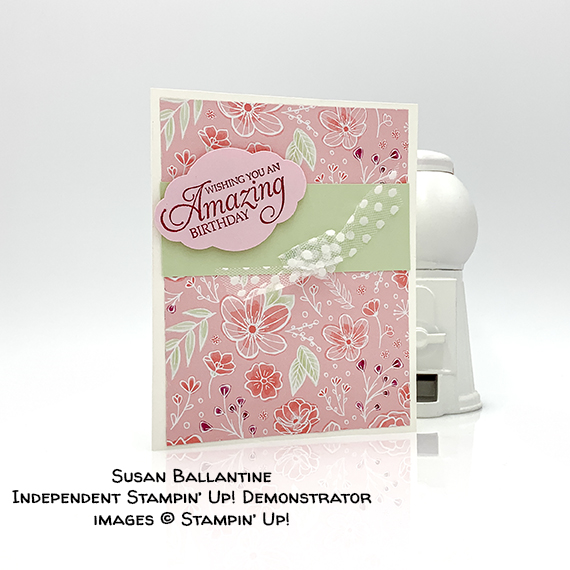
Today I get to share a card made by one of my wonderful Candy Hearts team members, Susan Ballantine, of Decatur, GA. Susan used the Humming Along stamp set and the Pretty Label punch along with the All My Love Designer Series Paper to create a beautiful pink birthday card.
S
Here’s what Susan made:

Here’s what Susan did:
Cut and scored with her Stampin’ Trimmer:
- Whisper White Thick card stock (CS) cut to 8-1/2″ x 5-1/2″, then scored in half at 4-1/4″
- All My Love Designer Series Paper (DSP) layer cut to 4″ x 5-1/4″
- Soft Sea Foam CS cut to 4″ x 1-1/4″
Stamped with the Humming Along stamp set:
- sentiment in Lovely Lipstick ink onto a scrap of Powder Pink CS
Cut using the Pretty Label Punch:
Assembled the card:
- burnished the fold in the card base with a Bone Folder
- DSP layer glued onto the front of the card base
- Soft Sea Foam CS layer glued onto the DSP layer
- sentiment adhered onto the Soft Sea Foam CS layer using Stampin’ Dimensionals
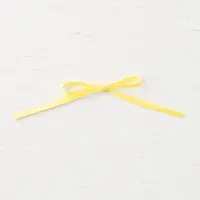
- Polka Dot Tulle Ribbon tied in a knot and adhered onto the Soft Sea Foam CS layer using Mini Glue Dots
S
Here are today’s colors:
You can click on each one to see all the products that come in that color!
S
Here’s what she used:
Click on these images for more details and to purchase.
S
Today is the last day to preorder the Climbing Roses Online Class!
- Make 6 beautiful cards at home in your PJs!
- 2 each of 3 designs
- perfect for anyone, including for Mom on Mother’s Day!
- Limited spots available!
Click on the image below for details:
S
Here are some helpful links:
S
Thanks for stopping by today, and Sweet Stamping!
Mar 12, 2019 | Cards, Gallery, Occasions |
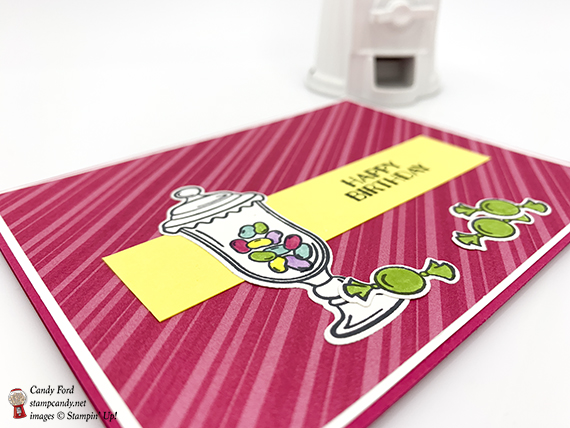
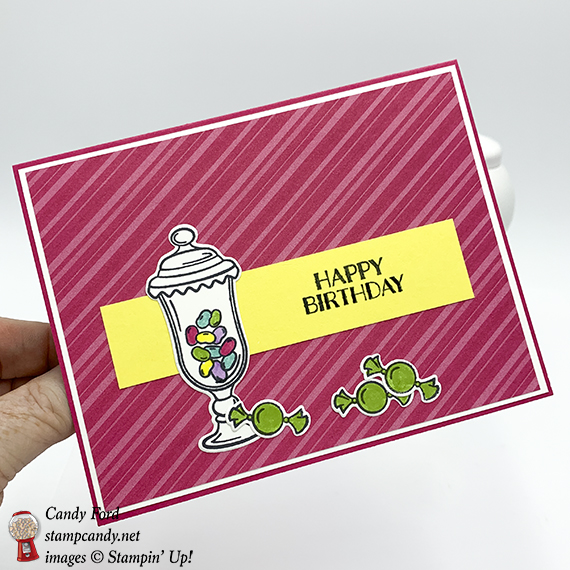
Today I’m sharing another fun card I made with the Sweetest Thing stamp set, Jar of Sweets Framelits Dies, and How Sweet It Is Designer Series Paper. I just love the colors in this set. They’re all so fun and happy. I used a scrap of Pineapple Punch cardstock – right out of the scrap drawer – for the sentiment, continuing my quest to use up a bunch of my scraps. I used Stampin’ Write Markers to color in the candies. While Gorgeous Grape is the purple used in the paper, I used a Highland Heather marker instead, because I thought the Gorgeous Grape would be too dark in this instance. You could use Gorgeous Grape with a Blender Pen to lighten it up.
S
Here’s what I made:

 S
S
Here’s what I did:
Cut and scored with my Stampin’ Trimmer:
- Melon Mambo card stock (CS) cut to 5-1/2″ x 8-1/2″, then scored in half at 4-1/4″
- Whisper White CS layer cut to 5-3/8″ x 4-1/8″
- How Sweet It Is Designer Series Paper (DSP) layer cut to 5-1/4″ x 4″
- Pineapple Punch CS cut to 4-1/4″ x 1″ (Why this size? Because that’s the size it was when I pulled it out of the scrap drawer.)
- Whisper White CS cut to 5-1/4″ x 4″ for the inside of the card base
Stamped with the Sweetest Thing stamp set:
- sentiment in black ink onto the Pineapple Punch CS strip
- candy jar in black ink onto a scrap of Whisper White CS
- jelly beans in black ink inside the candy jar
- 3 wrapped candies in black ink onto a scrap of Whisper White CS
Colored using Stampin’ Write Markers:
- jelly beans in Coastal Cabana, Granny Apple Green, Melon Mambo, Pineapple Punch, and Highland Heather
- 3 candies in Granny Apple Green
- NOTE: You can use Gorgeous Grape with a Blender Pen instead of the Highland Heather.
Die cut using the Jar of Sweets Framelits:
Assembled the card:
- burnished the fold in the card base with a Bone Folder
- Whisper White CS layer glued onto the front of the card base
- DSP layer glued onto the Whisper White CS layer
- Pineapple Punch CS strip glued onto the DSP layer
- candy jar glued onto the DSP layer and sentiment strip
- 3 candies glued onto DSP layer
- Whisper White CS glued onto the inside of the card base
S
Here are today’s colors:
You can click on each one to see all the products that come in that color!
S
Here’s what I used:
Click on these images for more details and to purchase.
S
Preorder the Climbing Roses Online Class by March 13!
- Make 6 beautiful cards at home in your PJs!
- 2 each of 3 designs
- perfect for anyone, including for Mom on Mother’s Day!
- Limited spots available!
Click on the image below for details:
S
Here are some helpful links:
S
Thanks for stopping by today, and Sweet Stamping!
Mar 10, 2019 | Cards, Gallery, Occasions |
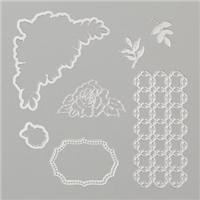
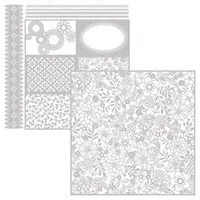
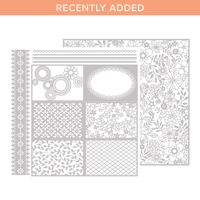
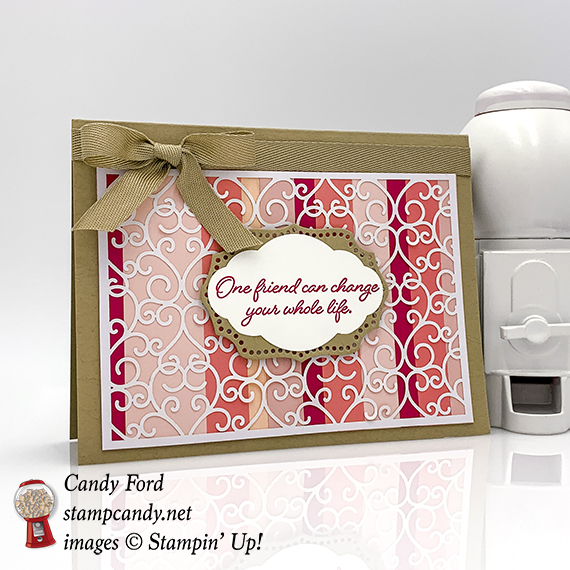
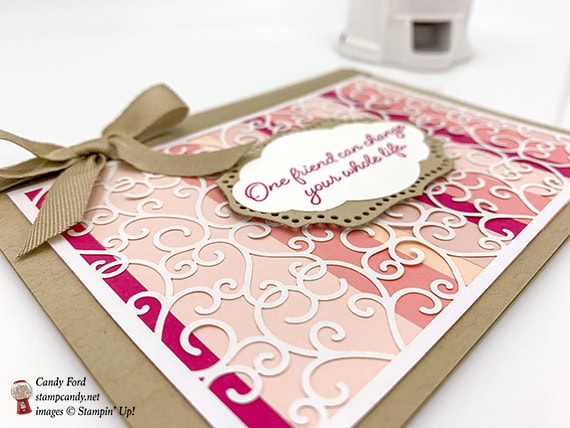
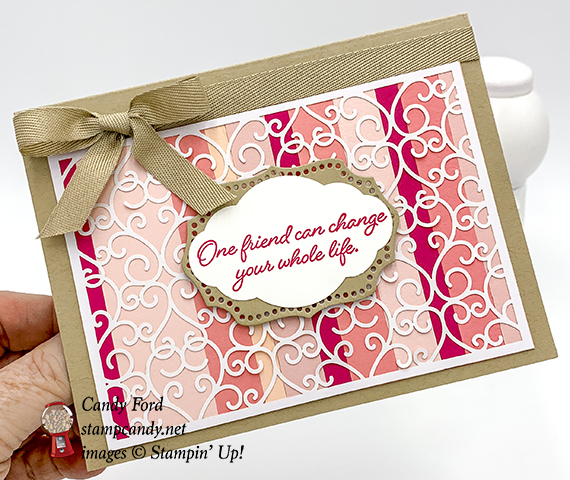
I save paper scraps, as most of us thrifty paper crafters do. I have a lot of paper scraps. I mean a LOT. I have a drawer for each color, and almost all of them are full. I also save extra pieces that I don’t end up using on projects. So I decided to use up some of them. You’ll see them on several of my cards in the near future, including today. See all those pink strips in the background? Those are card stock strips that had been cut off of other projects. The Delightfully Detailed Laser-Cut Designer Series Paper allows the pinks to show through while also tying them all together. The sentiment, from the Flowing Fountain stamp set, was cut using the Pretty Label Punch. And that’s on a piece of cardstock cut using the gorgeous label die from the Rose Trellis Thinlits Dies.
S
Here’s what I made:
S
Here’s what I did:
Cut and scored with my Stampin’ Trimmer:
- Crumb Cake card stock (CS) cut to 5-1/2″ x 8-1/2″, then scored in half at 4-1/4″
- Crumb Cake CS cut to 5″ x 3-1/2″
- Delightfully Detailed Laser-Cut Designer Series Paper (DSP) cut to 5″ x 3-1/2″
- scraps of Petal Pink, Powder Pink, Blushing Bride, Flirty Flamingo, and Melon Mambo CS cut to 3-1/2″ strips of various widths
- Whisper White CS cut to 5-1/4″ x 4″
Stamped with the Flowing Fountain stamp set:
- sentiment in Melon Mambo ink onto a scrap of Whisper White CS
Cut using the Pretty Label Punch:
Die cut using the Rose Trellis Thinlits:
- a scrap of Crumb Cake CS with the label die
Assembled the card:
- burnished the fold in the card base with a Bone Folder
- Crumb Cake ribbon wrapped around the front of the card base close to the top, securing with Tear & Tape, and tied in a bow
- CS strips glued onto the Crumb Cake CS layer
- DSP glued onto the CS strips
- sentiment glued onto the die cut piece
- die cut piece adhered over the DSP layer using Stampin’ Dimensionals
- Whisper White CS glued onto the inside of the card base
S
Here are today’s colors:
You can click on each one to see all the products that come in that color:
S
Here’s what I used:
Click on these images for more details and to purchase.
S
Preorder the Climbing Roses Online Class by March 13!
- Make 6 beautiful cards at home in your PJs!
- 2 each of 3 designs
- perfect for anyone, including for Mom on Mother’s Day!
- Limited spots available!
Click on the image below for details:
S
Here are some helpful links to check out:
S
Thanks for stopping by today, and Sweet Stamping!