Geodesic, adjective, of, relating to, or denoting the shortest possible line between two points on a sphere or other curved surface.
I’m still in an ornament making mood. It’s been years since I made any of the Geodesics, so I thought I’d give it a go. After a couple of practice runs, to remember how, I now feel I could crank these out pretty quickly and neatly.
You can tell the one on the right was my first one – the points don’t all come together as neatly as on the other one. Neither is perfect, but hey, they’re hand made. The imperfections in our crafts are what make them ours.

The template is simple – it’s just a circle with an equilateral triangle inside.
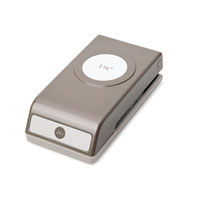
Cut 20 circles of the same size: 5 for the top, 5 for the bottom, and 10 for the middle. Fold in the three sides of each circle. I used the 1-3/8″ Circle Punch to cut mine. This made ornaments approximately 2-1/2″ wide. Obviously, larger circles would yield a larger ornament. I laid the template on top of each circle and used that as a guide to fold.

By the way, you know all those little paper scraps you’ve been holding onto just in case they would come in handy someday? Well, today’s the day! This is a great way to use them.
Multipurpose Liquid Glue is perfect for gluing the pieces together. Line up the sides, then pinch together while pressing on the table to keep everything straight. The glue sets quickly, so this just takes a few seconds per circle. (Yes, I know I need a manicure.)

First glue 5 circles together so that all 5 share a point. Then glue together another 5 the same way. These will be the top and bottom of the ornament.

TIP: Make a loop with your ribbon/twine and tie a knot at the end. Just before you glue together the last two circles of the ornament top, put the knot end inside the point with the loop end hanging out. Then add a dab of glue to the inside of the point to make sure the hanger doesn’t pull out. You can do this to the bottom as well, if you want something dangling from the bottom of the ornament.

Glue together the remaining ten circles in a line. The glued sides should make a zig zag.
Glue together the two ends to create the “belly band” of the ornament.
 Now glue the top onto the belly band. Repeat with the bottom.
 Et voila! You have a beautiful ornament that looks like it took much more time and effort than it really did.
I know my instructions are probably as clear as mud. I hope the photos help. Please let me know if you have any questions at all.
Here’s what I used:


Thank you for taking the time to walk us through the process of making those cute ornaments! Your pictures are really helpful!!! 🙂
Crafty hugs,
Jennifer
partridgelu at yahoo dot com