
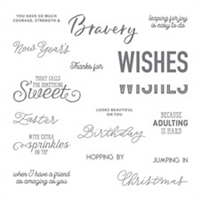
Welcome to InKing Royalty’s February Blog Hop! This year’s Blog Hop themes are inspired by a single word, and this month our projects are centered around BIRTHDAY. I used the upcoming More Than Words stamp set along with the Layering Squares Framelits Dies and Broadway Bound Designer Series Paper. The Stamparatus makes the two tone stamping super easy!
It’s always special to celebrate the birthday of someone you love, so handmade birthday cards are always fun to share. We are excited to share our creations with you today! After you read my post, I hope you’ll hop over to the next person on the list at the base of this post, the wonderful Jackie Beers of Blue Line Stamping.
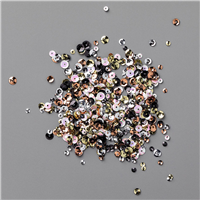
When I use small embellishments like sequins or pearls, I always try to use odd numbers, usually 3. Today I used 7, which I would normally feel is too many. But I think they kind of blend in on this card, so they don’t seem like too much. What do you think?
S
Here’s what I made:
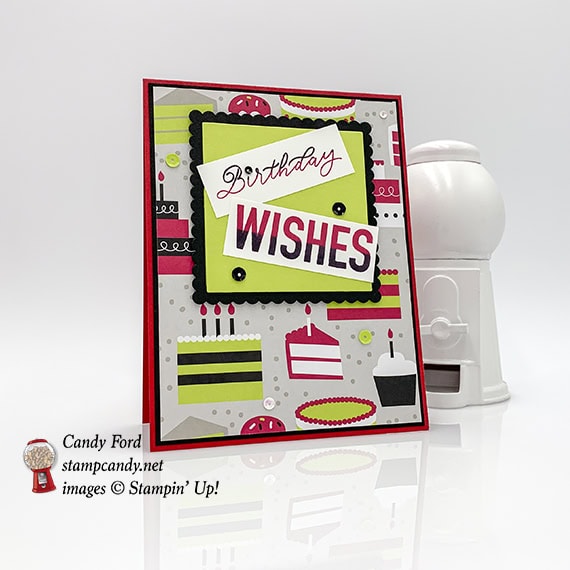
I originally cut the sentiment using one of the square dies, so it fit perfectly on the other die cut squares. But that just didn’t seem very fun. So I opted to cut the words apart and glue them onto the squares in a more whimsical fashion.
 S
S
Here’s what I did:
Cut and scored with my Stampin’ Trimmer:
- Lovely Lipstick card stock (CS) cut to 4-1/4″ x 11″, then scored in half at 5-1/2″
- Basic Black CS cut to 4-1/8″ x 5-3/8″
- Broadway Bound Designer Series Paper (DSP) cut to 4″ x 5-1/4″
- Whisper White CS cut to 4″ x 5-1/4″ for the inside of the card
- trimmed around sentiments after stamping
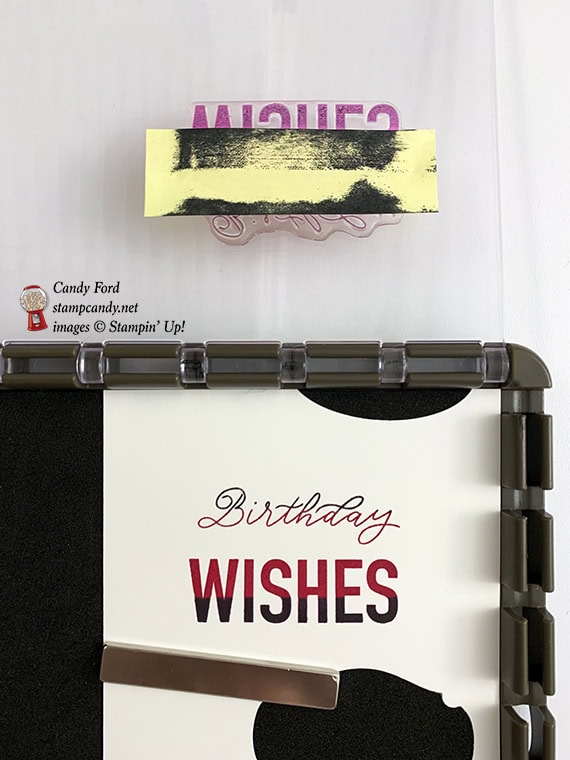
Stamped with the More Than Words stamp set:
- sentiment in Lovely Lipstick ink onto a scrap of Whisper White CS
- part of sentiment in black Memento ink over the Lovely Lipstick ink
- To accomplish this two tone effect, I used the Stamparatus: 1) stamped the sentiment first in Lovely Lipstick ink 2) used a Shammy to clean the stamps. 3) cut a sticky note to about 7/8″ wide and placed it over the part of the sentiment I wanted to remain Lovely Lipstick. 4) inked up the stamps in black ink, then removed the sticky note strip before stamping over the original image.
- You can see in the photo that I really do use “scraps” of card stock.
Die cut using the Layering Squares Framelits:
- a square from a scrap of Lemon Lime Twist CS
- a scalloped square from a scrap of Basic Black CS
Assembled the card:
- burnished the fold in the card base with a Bone Folder
- Basic Black CS layer glued onto the front of the card base
- DSP layer glued onto the Basic Black CS layer
- Lemon Lime Twist CS square glued onto the Basic Black CS scalloped square
- Basic Black CS scalloped square adhered onto the DSP layer using Stampin’ Dimensionals
- sentiment pieces glued onto the Lemon Lime Twist CS square
- 2 black sequins glued onto the Lemon Lime Twist square
- 1 small black sequin glued onto the sentiment, dotting the “i”
- 2 Lemon Lime Twist adhesive backed sequins applied onto the DSP layer
- 2 iridescent sequins glued onto the DSP layer
- Whisper White CS glued onto the inside of the card base
S
Here’s the Birthday hop:
Thank you for hopping along with us. After you read my post, I hope you’ll hop on over to the next stop, Jackie Beers at Blue Line Stamping. If you get stuck during the Blog Hop, please use this line-up as a guide:
- Brian King at Stamp with Brian
- Lynn Kolcun at Avery’s Owlery
- Nina King at InkPaperSequins
- Julie DiMatteo at The Paper Pixie
- Sue Jackson at Just Peachy Stamping
- Candy Ford at Stamp Candy <– YOU ARE HERE
- Jackie Beers at Blue Line Stamping
- Mary Fish at Stampin’ Pretty
- Jennifer Spiller at Westside Paper Creations
- Deb Cozzone at Grand Central Stamping
- Robbye Hamilton at Miss Hammie’s Crafts
- Robin Myren at Songbird Designs by Robin
- Katie Ferguson at Cottage Paper
- Shawn de Oliveira at Shawn Stamps
Here are today’s colors:
You can click on each one to see all the products that come in that color!
S
Here’s what I used:
Click on these images for more details and to purchase.


S
Today is the LAST DAY to preorder the Happiness Blooms Online Class!
- make 26 colorful cards at home in your PJs!
- 2 each of 10 designs, plus 6 individual card designs
- full detailed instructions
- Preorder February 14-20
- limited spots available
Click on the image below for details:

S
Here are some helpful links to check out:
- Sale-a-bration!!!– earn free items!
- Shop my online store
- Clearance Rack
- SUBSCRIBE to my weekly newsletter and daily blog updates.
- February Host Code X2T6W47T – receive free product!
- Earn Gumball Rewards – receive free products!
- Gift Certificates are available in any U.S. dollar amount from me. Contact me for details.
- Have you shopped from me within the past year? Join my private VIP Facebook group for exclusive project tutorials and more!
- Join my team! Sale-a-bration is a super time to join! You get so much extra!!!

S
Thanks for stopping by today, and Sweet Stamping!


A perfect card! I love how you arranged the sentiment. It really draws your eye to it. So pretty!
Thanks, Jackie!
I love this two-tone technique, Candy! I’ve got to try it! What a fun birthday card!!
Thanks, Julie!
Such a great, new set and a super-fun technique you’ve shared. Perfectly paired with this cheery paper. So happy you joined us for this hop, Candy! ♥
Thanks, B!
Candy, I love it! It reminds me of you because it makes me smile.
Awww, thanks, Robbye!
I love the two tone greeting! Super card!
Thanks, Deb!
Cute! Cute! Cute! Great bday card for just about everyone. I love the masking for the sentiment.
Thanks, Sue!
I love those dual colored sentiments!
Thanks, Robin!
what a great bday card. perfect for anyone of any age. love it.
Thanks, Lynn!