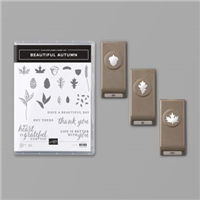
Autumn is almost here, and today’s project is a thank you card that’s all about the season. I used the Beautiful Autumn stamp set and Stitched So Sweetly Dies to create this simple fun fold card. I also made a coordinating little lip balm gift box, which I’ll share with you in a few days (you can see a sneak peek of it below.)
If you are reading this in email, some photos may appear blurry, or may not appear at all. Please click here to see the post on my blog.
S Autumn Autumn Autumn Autumn
Here’s what I made:


S
Here’s what I did:
Cut and scored with my paper trimmer:
- Early Espresso card stock (CS) cut to 5-1/2″ x 8-1/2″, then scored in half at 4-1/4″ and at 7-1/2″
- Gilded Autumn Designer Series Paper (DSP) layer cut to 3″ x 5-1/4″ (speckled)
- speckled DSP layer cut to 1″ x 5-1/4″
- herringbone pattern DSP layer cut to 5-1/4″ tall by 4 pattern stripes wide (just over 3/4″)
- acorn/leaf pattern DSP layer cut to 2-1/2″ x 4-1/4″
- Very Vanilla CS cut to 4″ x 5-1/4″ for the inside of the card base
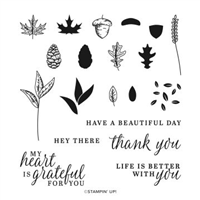
Stamped with the Beautiful Autumn stamp set:
- sentiment in Versamark ink onto a scrap of Early Espresso CS, then heat embossed in gold
- acorn in Early Espresso ink onto the bottom left corner of the Very Vanilla CS
Cut using the Stitched So Sweetly Dies:
- sentiment
Assembled the card:
- burnished the folds in the card base with a Bone Folder, folding the 1″ section back onto the card front
- larger speckled DSP layer glued onto the front of the card base (left side and under the folded over flap)
- acorn/leaf DSP layer glued onto the speckled DSP layer
- herringbone DSP layer glued onto the flap of the card base
- flap glued down onto the DSP layers
- sentiment glued onto the flap and DSP layers, but not the small part hanging off the right side
- 1″ speckled DSP strip glued onto the right side of the Very Vanilla CS
- Very Vanilla CS glued onto the inside of the card base
- If you prefer, you can skip gluing down the flap, and then only glue the sentiment to the flap, leaving the rest loose. I just felt the card would be easier to photograph if I glued them down.
S
Here are today’s main colors:
You can click on each one to see all the products that come in that color!
S
Here’s what I used:
Click on these images for more details and to purchase. If you are reading this post in email, the product images may not show up. Please click here to see the post on my blog.


Supply List. <— Click for a clickable and printable list of the products!
S
Two ways to save in September!
Buy the Starter Kit and receive even more! It’s already the best deal: $99 for $125 in product of your choice plus Free shipping! In September you will also receive the Queen Anne’s Lace stamp set, the So Much Love stamp set, Rhinestone Basic Jewels, and 16 precut card kits! Wow! This is the perfect time to work on your wish list of Stampin’ Up! products! CLICK HERE for more details.

Buy the new Stampin’ Cut & Emboss Machine (standard size) from me by September 30 and I will give you a Magnetic Cutting Plate FREE! You’ll save almost $30! CLICK HERE for more details and to order.

S
Here are some helpful links:
- September Host Code YPXPD4Q2 – receive free product!
- Shop my online store
- Request a free catalog
- SUBSCRIBE to my weekly newsletter and/or daily blog updates.
- Paper Pumpkin: buy a Prepaid Subscription or subscribe month-to-month
- Earn Gumball Rewards – receive free products!
- Gift Certificates are available in any U.S. dollar amount from me. Contact me for details.
- Have you shopped from me within the past year? Join my private VIP Facebook group for exclusive project tutorials and more!
- Join my team and enjoy a 20% discount (or more) on all your purchases! You choose $125 in products and pay only $99, and get free shipping! No obligation! No selling required!
S
Thanks for stopping by today, and Sweet Stamping!


I love the rich neutrals.
Thanks, Linda! So do I.
Thank YOU for this beautiful card and for the lip balm sneak peek – how fun!
Thanks, B!