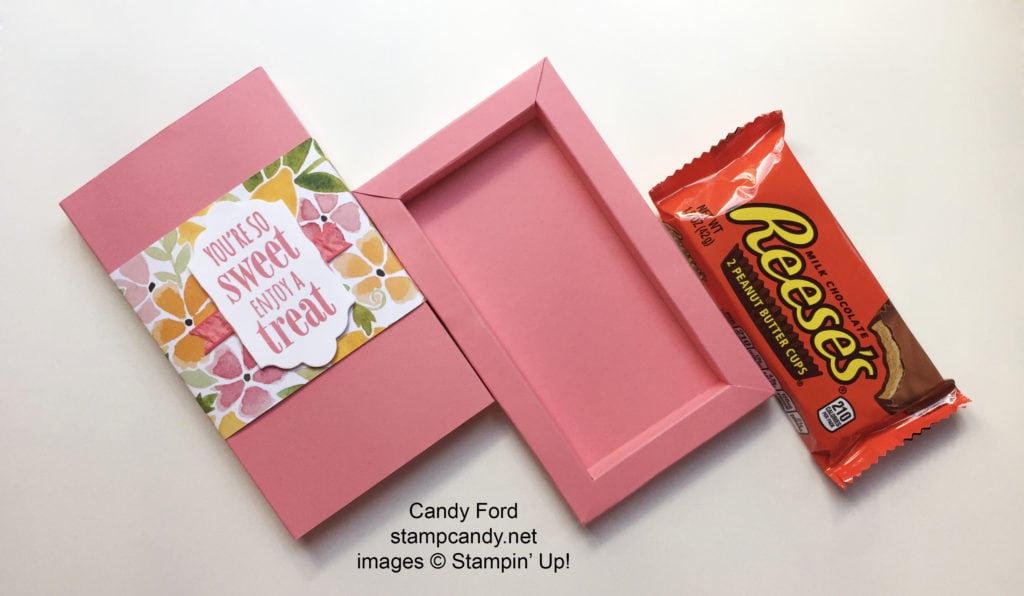
Today’s project was one of the Make & Takes in our July Candy Hearts Team Meeting. It’s a cute little treat box with a sliding tray.
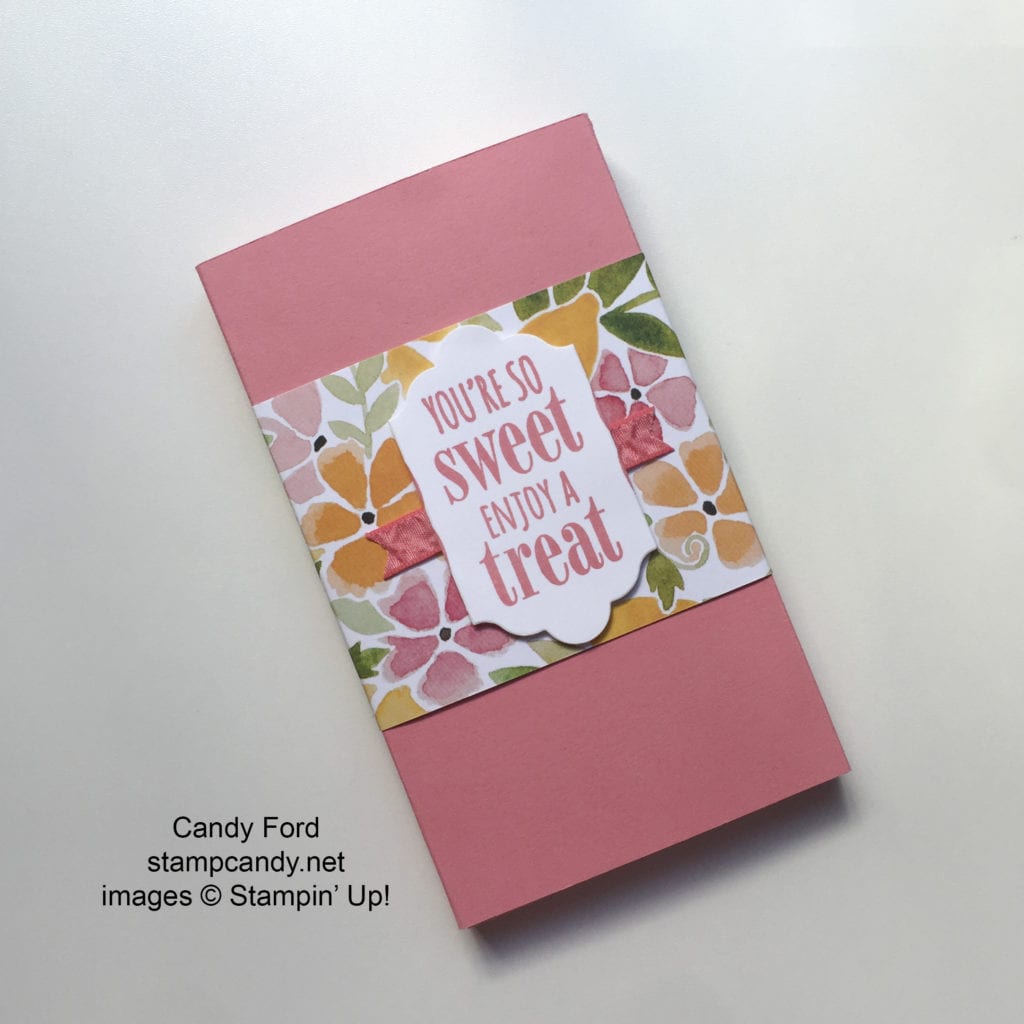
I designed this one to fit a pack of 2 large Reese Cups.
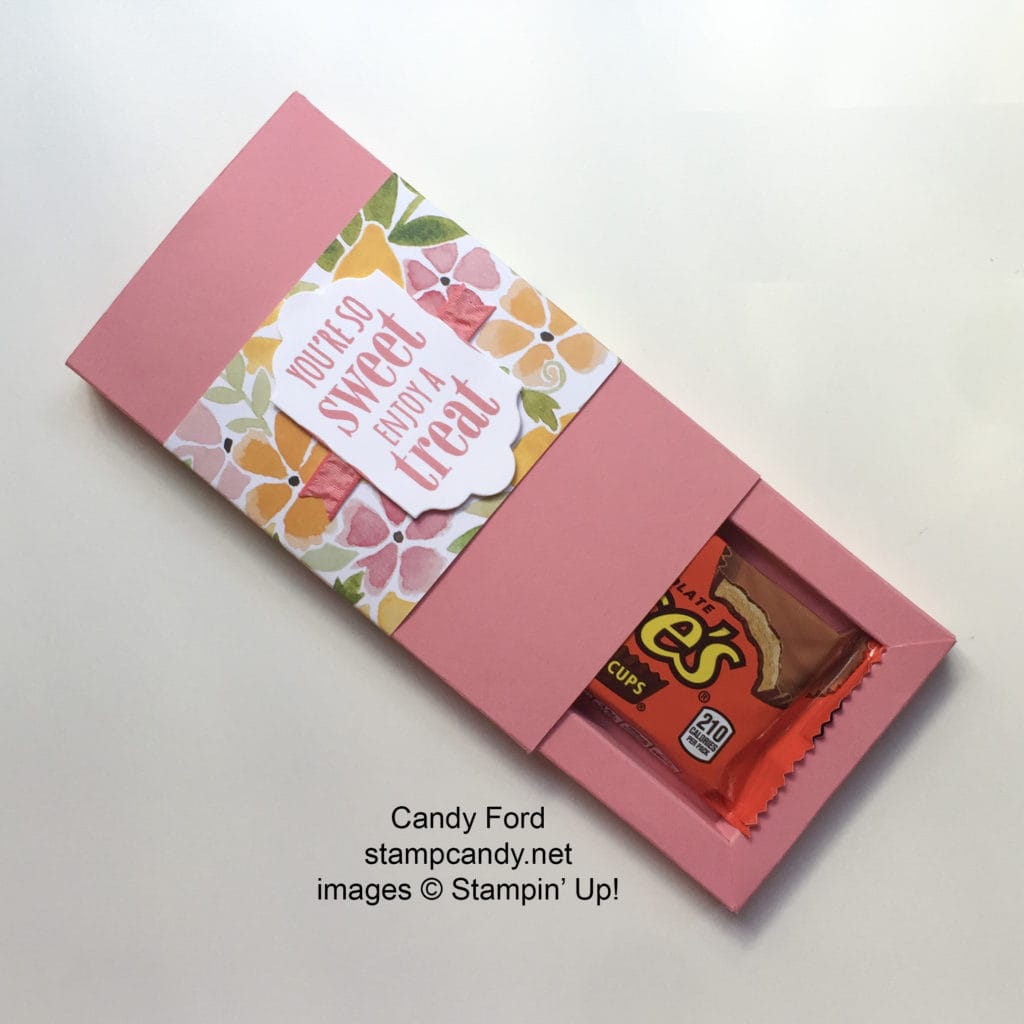
There are two parts to the box: the cover and the tray.
Here’s how I did it:
First determine the dimensions of your box. I measured a Reese’s cup package and determined I needed a box 2-1/2” wide x 5” long x 1/2” deep.
Create the tray:
Add the box depth x 10 to the width and to the length. So for the Reese cup box, the box depth is 1/2” and 1/2” x 10 = 5”. I added 5” to the width and to the length, so I cut my card stock to 7-1/2” x 10”.
Score 4 times from the edge of all four sides, the depth of the box each time. So I scored every 1/2” (the depth of my box.) I scored at 1/2”, 1”, 1-1/2”, and 2” on all four sides.
On the short sides, score one more time, 1/2” in from the last scores, but only down to the second score line. It should look something like this:

Cut the 16 (4 x 4) small squares made by the scored lines from each of the four corners (yellow areas.)
On the short sides cut down the two short scored lines, then cut diagonally down to the next corner (green areas.)

Discard all the pieces you have cut away.
Fold all score lines with a bone folder.
Now you’re ready to make the two long sides of the box. Turn up the scored side and put adhesive on the outermost strip. Roll toward the inside of the box, adhering that strip to the box bottom. Do the same thing on the other side.
Now make the two short sides of the box. Put adhesive on the outermost strip, just like before, and roll so that strip adheres to the box bottom. The skinnier center part will go between the two long sides, and the diagonal cut will lie on top of tip of the long side to create a mitered corner look. Do that on the other short side.
Create the cover:
Cut a piece of card stock the size you need to wrap around your tray and overlap by an inch or so. I cut mine to 6-1/8” wide (the length of my box plus 1/8”) by 10” long.
Wrap it around the tray, making sure it isn’t too snug, because it needs to slide on and off. Pinch where the bends need to be. Score and fold along the pinched areas. Wrap it around the tray and adhere the ends.
Now decorate:
I cut a piece of Fruit Stand Designer Series Paper to 3″ x 10″ and wrapped it around the cover, gluing it in place.
I stamped the sentiment from the You’re So Sweet stamp set in Flirty Flamingo ink onto Whisper White card stock, then cut it with a die from the Lots of Labels Framelits. I adhered a piece of Flirty Flamingo Ruched Ribbon to the cover with Fast Fuse, then adhered the sentiment over than with Stampin’ Dimensionals.
I realize these directions can seem a bit confusing. It’s much easier to show how to make this than to write it. Please contact me if you have any questions at all!
Here’s what I used:
![]()
AUGUST HOSTESS CODE
PMTWBJMQ
If you are placing an order for less than $150, please use this Hostess Code.
Click here for details on how to use the Hostess Code.
If you are placing an order of $150 or more, you will receive Stampin’ Rewards on your order, so do not use the Hostess Code.
![]()
Thanks for stopping by today, and Sweet Stamping!


I love anything that hold peanut butter cups. I REALLY love this!
Love it!
What a great treat box. Thanks for sharing.
Yum yum! Love this!