
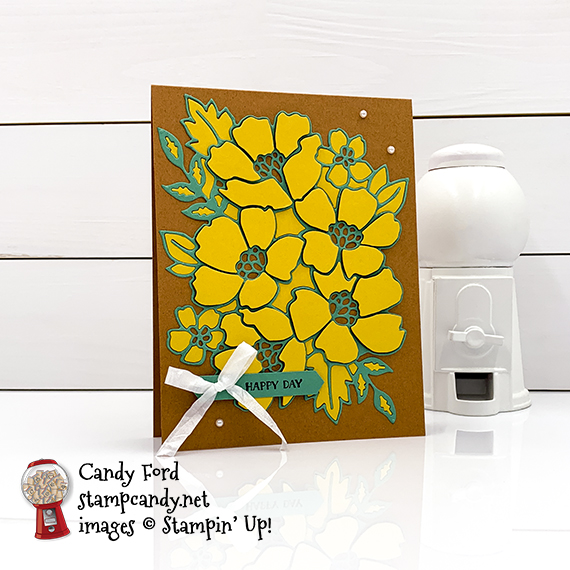
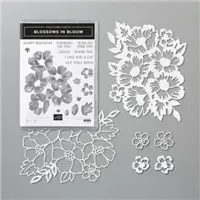
Its a New Review for the 06-2020 OSAT Blog Hop! Today we are featuring brand new products from the brand new 2020-2021 Annual Catalog. I used the Many Layered Blossoms Dies and the PPPS Technique by Kylie Bertucci of Australia to create my card. I used three of the new In Colors: Cinnamon Cider, Bumblebee, and Just Jade.
What is the PPPST? Paper Piecing Press n Seal Technique. Press n Seal plastic wrap is slightly sticky on one side, and it makes paper piecing from intricate die cuts so much easier! It’s available in your local grocery store.
Be sure to hop around to all the stops to see all the great new projects! Use the line up below if you get lost.
If you are reading this in email, some photos may appear blurry, or may not appear at all. Please click here to see the post on my blog.
S 06-2020 OSAT 06-2020 OSAT 06-2020 OSAT 06-2020 OSAT 06-2020 OSAT
Here’s what I made:

S
Here’s what I did:
Cut and scored with my paper trimmer:
- Cinnamon Cider card stock (CS) cut to 4-1/4″ x 11″, then scored in half at 5-1/2″
- Whisper White CS cut to 4″ x 5-1/4″ for the inside of the card base
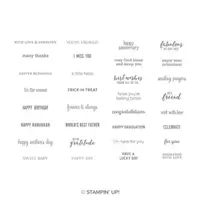
Stamped with the Itty Bitty Greetings stamp set:
- sentiment in black Memento ink onto a scrap of Just Jade CS
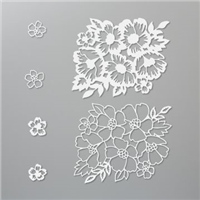
Cut using the Many Layered Blossoms Dies:
- a piece of Bumblebee CS using the large outline die
- a piece of Just Jade CS using the same die
- NOTE: before removing each die cut from the die cutting machine, burnish a piece of Press n Seal over it to keep all the pieces in place
Cut using the Classic Label Punch:
- sentiment
Assembled the card:
- burnished the fold in the card base with a Bone Folder
- removed the outline piece from the Bumblebee CS die cut
- onto the back of the Bumblebee CS die cut, applied Stampin’ Dimensionals onto the large flower petals, and glue onto the other pieces
- pressed the whole thing in place onto the front of the card base, then very gently peeled back the Press n Seal
- removed the outline piece from the Just Jade CS die cut, applied glue onto the back, and glued it around the Bumblebee CS pieces (A pointy tip, like a Take Your Pick Tool, is very helpful.)
- tied a piece of ribbon in a bow and adhered it onto the sentiment using a Mini Glue Dot
- adhered sentiment over flowers (I used a Mini Stampin’ Dimensional at the left end, and glued the rest of it onto the large petals.
- 3 pearls applied onto the front of the card base
- Whisper White CS glued onto the inside of the card base
What I would do differently:
- After looking at the photo, I think the bow seems a bit large. I would probably make it smaller.
- Maybe I’d emboss the background, probably with the Subtle embossing folder.
- Maybe I’d heat emboss the sentiment in white.
- How would you change this card?
S
Here’s the 06-2020 OSAT Blog Hop:
S
Here are today’s colors:
You can click on each one to see all the products that come in that color!
S
Here’s what I used:
Click on these images for more details and to purchase. If you are reading this post in email, the product images may not show up. Please click here to see the post on my blog.


Supply List <— Click for a clickable and printable list of the products!
S
Here are some helpful links:
- June Host Code DXD9JX2S – receive free product!
- Shop my online store
- Clearance Rack
- Request a free catalog
- SUBSCRIBE to my weekly newsletter and/or daily blog updates.
- Paper Pumpkin: buy a Prepaid Subscription or subscribe month to month
- Earn Gumball Rewards – receive free products!
- Gift Certificates are available in any U.S. dollar amount from me. Contact me for details.
- Have you shopped from me within the past year? Join my private VIP Facebook group for exclusive project tutorials and more!
- Join my team and enjoy a 20% discount (or more) on all your purchases! You choose $125 in products and pay only $99, and get free shipping! No obligation! No selling required!
S
Thanks for stopping by today, and Sweet Stamping!


GORGEOUS! Love these colors and the fun technique! Brilliant, Candy! ♥
Thanks, B!