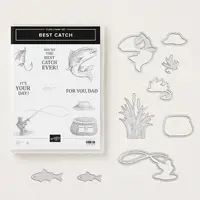
Today I have a masculine card to share with you. I think the colors are what makes it masculine. Obviously it’s perfect for a fisherman. But the sentiment, taken as a pun, makes it great for anyone. The layers are cut using the Rectangle Stitched Framelits Dies (I LOVE them!) and lined up at a corner, instead of centered. I did that so I would have more space for the die cuts from the Catch of the Day Thinlits Dies, which I tucked in around the layers.

S
Here’s what I made:
Up 
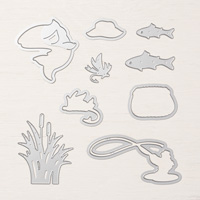
Can you tell how the fins on the large fish are curved up just a little bit? I just used my fingers to do that. I love how the die cuts the fin in the middle of the fish so you can curl it up separately from the body.


Here’s what I did:
Cut and scored with my Stampin’ Trimmer:
- Early Espresso card stock (CS) cut to 5-1/2″ x 8-1/2″, then scored in half at 4-1/4″
- Very Vanilla CS cut to 5-1/4″ x 4″ for the inside of the card base
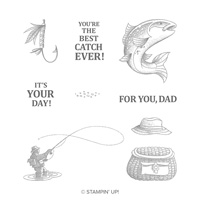
Stamped with the Best Catch stamp set:
- creel, hook, hat, large fish, and small fish spots in black Memento ink onto a scrap of Very Vanilla CS
- creel in Crumb Cake ink into the front of a Very Vanilla envelope, bottom left
- fisherman in Crumb Cake ink onto the envelope flap, and onto a scrap of Very Vanilla CS that will be the top layer of the card
- sentiment in Early Espresso ink next to the fisherman on the Very Vanilla CS scrap
Die cut using the Catch of the Day Thinlits:
- creel, hook, hat, large fish, and small fish
- 3 cattails from a scrap of Mossy Meadow CS
Die cut using the Rectangle Stitched Framelits:
- fisherman/sentiment
- second layer from Early Espresso CS
- third layer from Crumb Cake CS
- fourth layer from Very Vanilla CS
- fifth and largest layer from Soft Suede CS
Colored using Stampin’ Blends Markers:
- hat and creel in Crumb Cake
- hook in Pool Party
- large fish in Soft Sea Foam
Assembled the card:
- burnished the fold in the card base with a Bone Folder
- die cut layers glued together in order of size, lining them all up at the bottom right corner, and leaving some of the left sides and top with no adhesive.
- bottom layer glued onto the front of the card base
- die cut pieces (except for the large fish) tucked into the spaces between the layers and glued in place
- large fish adhered onto the left side of the card using Stampin’ Dimensionals
- Very Vanilla CS glued onto the inside of the card base
S
Here are today’s colors:
You can click on each one to see all the products that come in that color!
S
Here’s what I used:
Click on these images for more details and to purchase.


S
Preorder the Vibrant Vases Online Class by April 10:
- Make 6 gorgeous cards at home in your PJs!
- 2 each of 3 designs
- perfect for assorted occasions including love, celebration, and thanks
- You’ll receive all you need to make the cards, including the stamp set, punch, and the precut/prescored card kits.
- Limited spots available
Click on the image below for details and class options:

S
Here are some helpful links:
- Shop my online store
- Clearance Rack
- NEW Storage by Stampin’ Up!
- SUBSCRIBE to my weekly newsletter and daily blog updates.
- April Host Code G – receive free product!
- Earn Gumball Rewards – receive free products!
- Gift Certificates are available in any U.S. dollar amount from me. Contact me for details.
- Have you shopped from me within the past year? Join my private VIP Facebook group for exclusive project tutorials and more!
- Join my team!
S
Thanks for stopping by today, and Sweet Stamping!


Love this! I’ve been searching Pinterest searching for inspiration for this set, and I found it in your card! Thank you!
I’m so happy you like it, Sue!