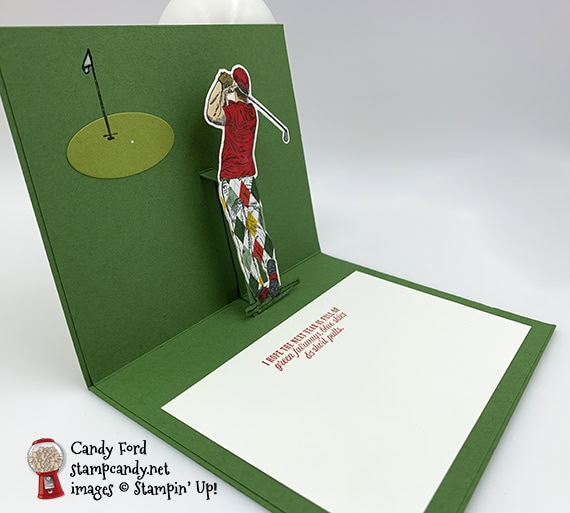
Today’s project is a pop up card I made using the Country Club Suite, including the Clubhouse stamp set, Golf Club Dies, Absolutely Argyle 3D Embossing Folder, Country Club Designer Series Paper, and Country Club Elements.
pop up pop up
Here’s what I made:
S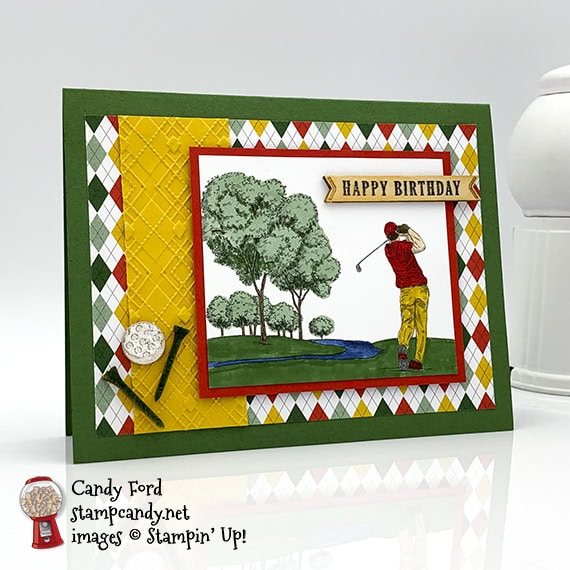
You may notice I have two layers of Garden Green card stock as a card base. That’s because I made a mistake that I had to cover up. You only need the one layer.
S
Here’s what I did:
Cut and scored with my paper trimmer:
- Garden Green card stock (CS) cut to 5-1/2″ x 8-1/2″, then scored in half at 4-1/4″
- Country Club Designer Series Paper (DSP) layer cut to 5″ x 3-3/4″
- Crushed Curry CS layer cut to 1-1/2″ x 3-3/4″
- Poppy Parade CS layer cut to 4-1/4″ x 3-1/4″
- DSP layer cut to 4″ x 3″ (golf scene)
- Whisper White CS cut to 5″ x 3-1/4″ for the inside of the card base
- Garden Green CS cut to 1/4″ x 4-3/4″, and scored at 1/4″, 2-1/4″, 2-1/2″, 4-1/2″ for the pop up mechanism
Stamped with the Clubhouse stamp set:
- front sentiment in black Stazon ink onto a wooden banner element
- inner sentiment in Poppy Parade ink onto the Whisper White CS
- flag in black ink onto the inside of the card base
- bottom part of the flag onto a scrap of Old Olive CS
- golfer in black ink onto a scrap of Whisper White Thick CS
- golfer in black ink onto a scrap of DSx
Embossed using the Absolutely Argyle 3D Embossing Folder:
- Crushed Curry CS layer
Cut using the Golf Club dies:
- the two stamped golfers
Cut using the Layering Ovals Dies:
- Old Olive CS scrap with bottom part of flag
Cut using Paper Snips:
- trimmed only the pants from the golfer stamped on DSP
Colored using Stampin’ Blends Markers (SB) and Stampin’ Write Markers (SW):
- die cut golfer in Poppy Parade, Ivory, Soft Suede, and Basic Black SB; and Garden Green SW
- DSP layer image in Poppy Parade, Night of Navy, Soft Suede, and Mint Macaron SB; and Crushed Curry and Garden Green SW
- 2 wooden tees in Garden Green SW
Colored in White:
- golf ball wooden element using Whisper White Craft Ink, then set with a heat tool
- flag and ball on the green (inside) using a White Chalk Marker
Assembled the pop up card:
- burnished the fold in the card base, and the folds in the pop up mechanism, with a Bone Folder
- DSP layer glued onto the front of the card base
- Crushed Curry CS layer glued onto the DSP layer
- DSP scene glued onto the Poppy Parade CS layer
- Poppy Parade CS layer adhered onto the DSP layer using Stampin’ Dimensionals
- wooden sentiment banner glued onto the DSP scene
- golf ball and tees glued onto the Crushed Curry CS and DSP layers
- folded the mechanism into a rectangular box shape and glued the ends together, then glued the back and bottom onto the inside of the card base at the fold
- pants glued onto the golfer, then the golfer glued onto the mechanism, making sure his head doesn’t stick out when the card is closed
- Old Olive CS “green” glued onto the inside of the card base, lining up the flag poles
- Whisper White CS glued onto the inside of the card base, below the golfer
S
Here are today’s colors:
You can click on each one to see all the products that come in that color!
S
Here’s what I used:
Click on these images for more details and to purchase.
Click “Supply List” for a clickable and printable list!
S
Here are some helpful links:
- Shop my online store
- Sale-a-bration!
- Clearance Rack
- SUBSCRIBE to my weekly newsletter and daily blog updates.
- January Host Code HRDJTUGZ – receive free product!
- Paper Pumpkin: buy a Prepaid Subscription or subscribe month to month
- Earn Gumball Rewards – receive free products!
- Gift Certificates are available in any U.S. dollar amount from me. Contact me for details.
- Have you shopped from me within the past year? Join my private VIP Facebook group for exclusive project tutorials and more!
- Join my team and enjoy a 20% discount (or more) on all your purchases! You choose $125 in products and pay only $99, and get free shipping! No obligation! No selling required! AND NOW, only during Sale-a-bration, you’ll also receive an exclusive Mini Paper Cutter a 6″ x 6″ Sampler of Designer Series Paper from the new Mini Catalog, and another stamp set of your choice.
S
Thanks for stopping by today, and Sweet Stamping!


Great card! The colors really pop as well!
Thank you, Tracy!
Love thus card, but with measurements you give, cannot figure out golfer on front, the stamp is too big, what am I missing.
Hi, Pat! The golfer on the front isn’t a stamp. It’s part of the Designer Series Paper.