Today I’m sharing with you one of our April Stamp Club projects, a card in a box. This one is bursting with flowers and butterflies…
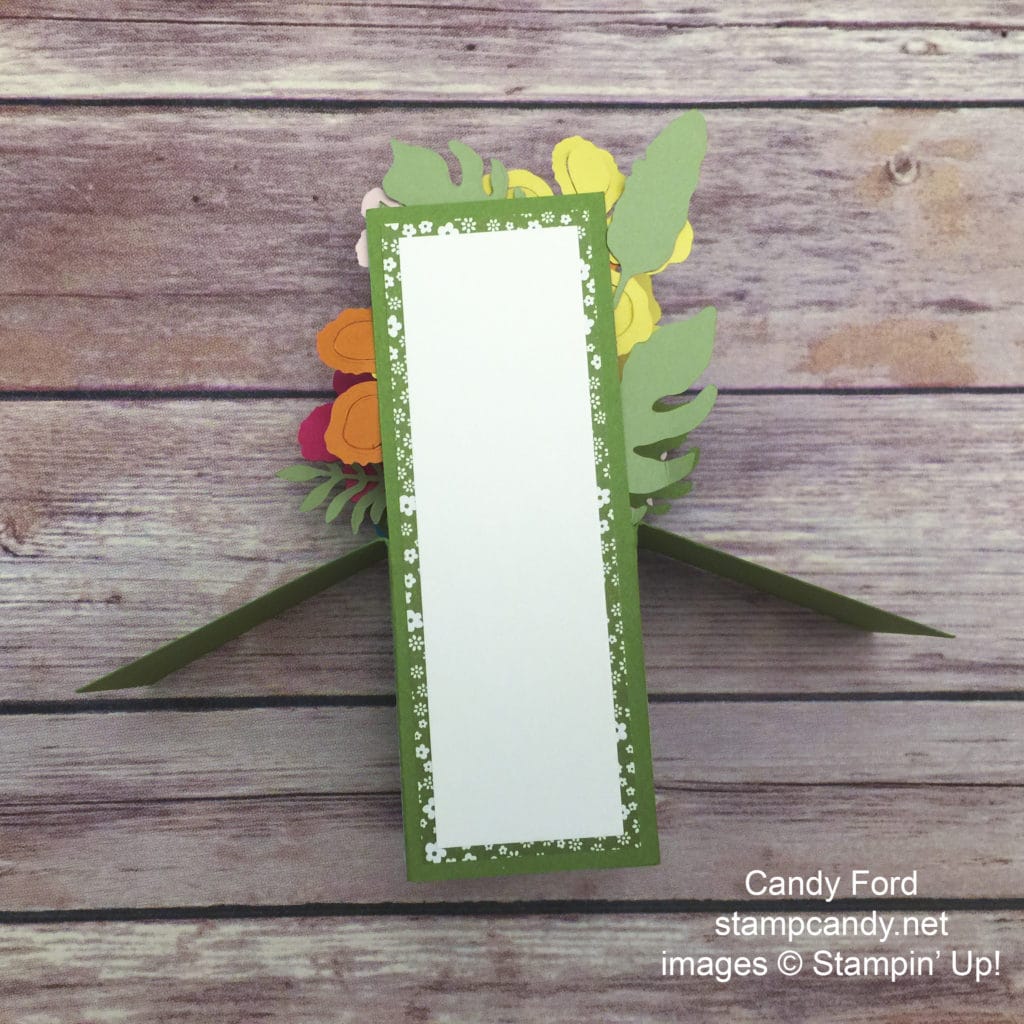
…then it folds flat to go into an envelope.
The back has a blank panel for a handwritten message. It’s easier to write on before gluing it onto the box.
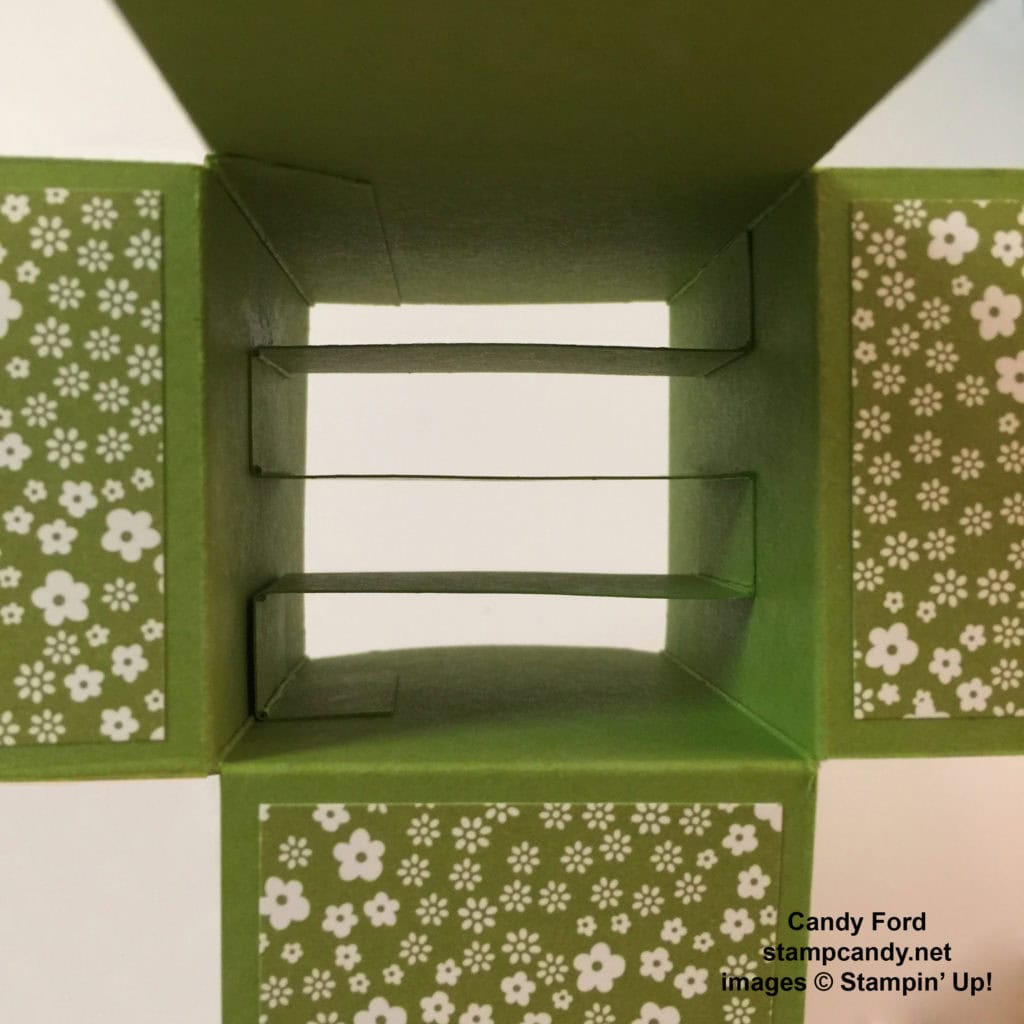
There is a strip of card stock zig-zagged on the inside of the box to attach the flowers & butterflies to. Be sure you attach it so that it runs side to side instead of front to back.
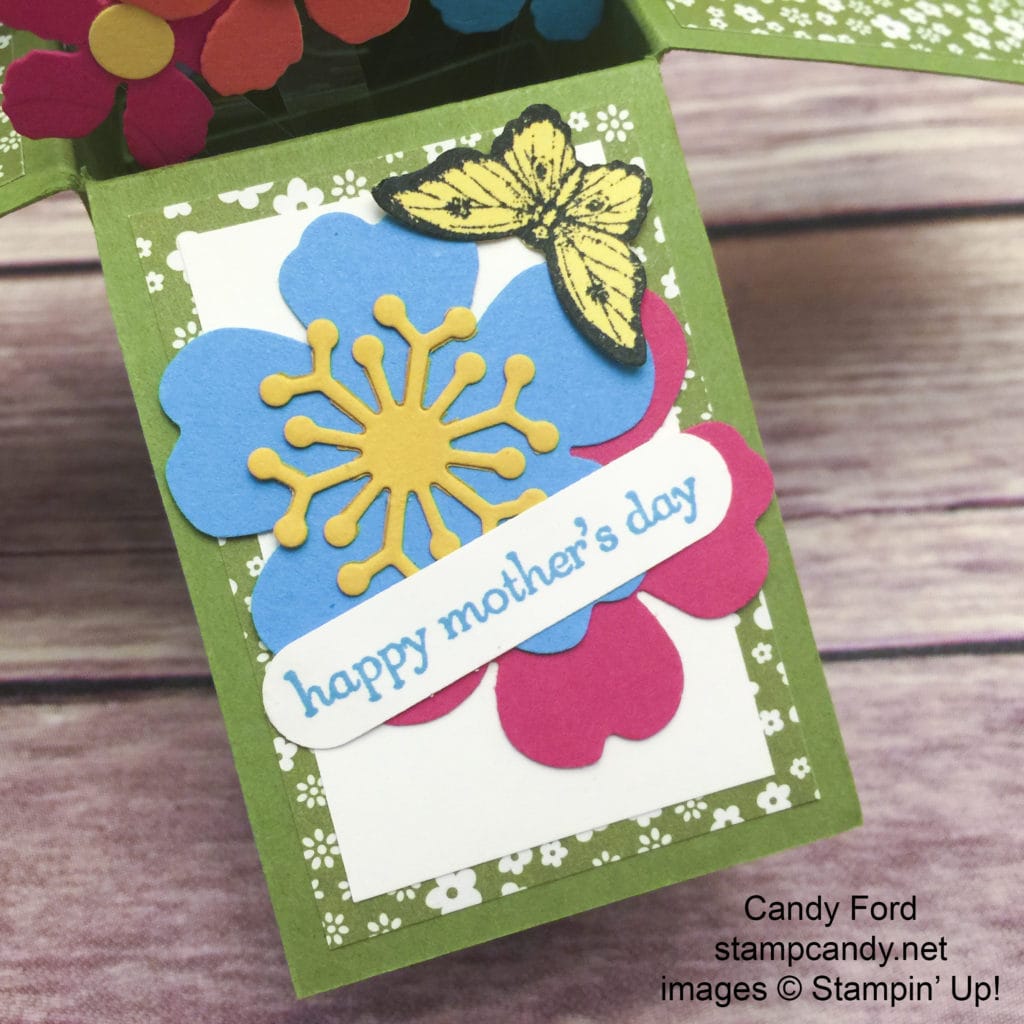
The front panel has the sentiment. I chose to make this a Mother’s Day card, but you could use almost any sentiment from the Teeny Tiny Wishes stamp set.
This card may seem a bit overwhelming at first, but it really isn’t difficult at all. I find the most difficult part is to get the zig-zagged strip glued inside the box. I recommend using liquid glue, so you can slide it into place more easily than if you use a dry adhesive.
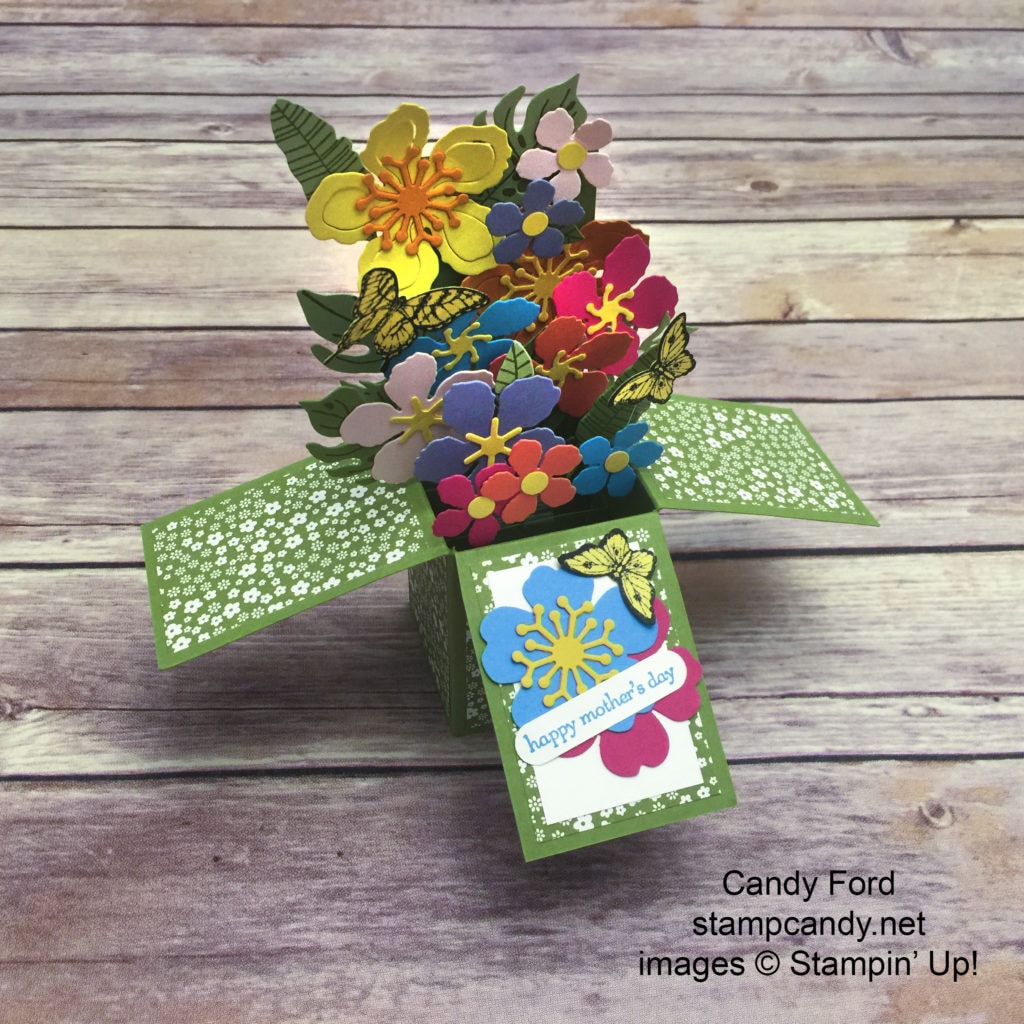
Click here to download the free tutorial for this Floral Card in a Box!

Paper Pumpkin is a great way to spend 30-60 minutes each month relaxing, crafting, and hanging out with friends. Each month you receive a box full of goodies in the mail. It contains everything you need to complete that month’s project including ink pad(s) and an exclusive stamp set (you might need scissors and adhesive.) A clear acrylic block comes in your first kit to use with all your Paper Pumpkin stamps in the future.

When you subscribe month-to-month the kits are $19.95 per month, which includes shipping. When you buy a prepaid subscription of 6- or 12-months, you save money! See the options here.
When you subscribe to Paper Pumpkin in May or June 2016, and the kits ship to you for 6 months, I will send you a Paper Pumpkin shopping bag full of goodies!

Be sure to check out the retiring products here, many of which are discounted up to 50%. Most items are only available while current supplies last, and none of them will be available after May 31. Some things have already sold out, so don’t wait!
Thanks for stopping by today, and Sweet Stamping!

