Today I’m sharing another of the projects we made in this month’s Bundle Class, which featured the Bear Hugs stamp set and Framelits. You can see the first one here.
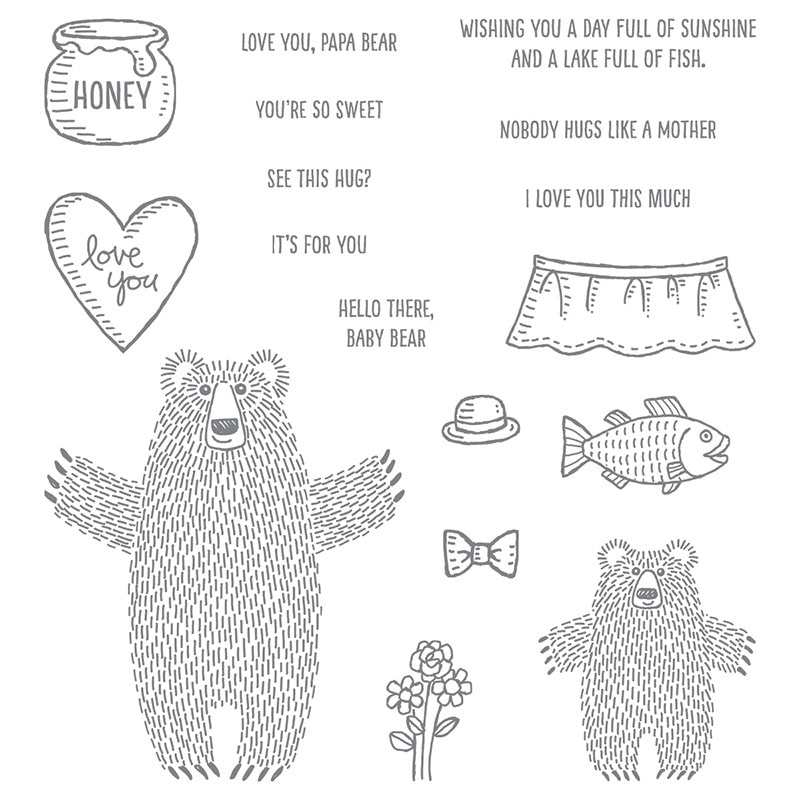
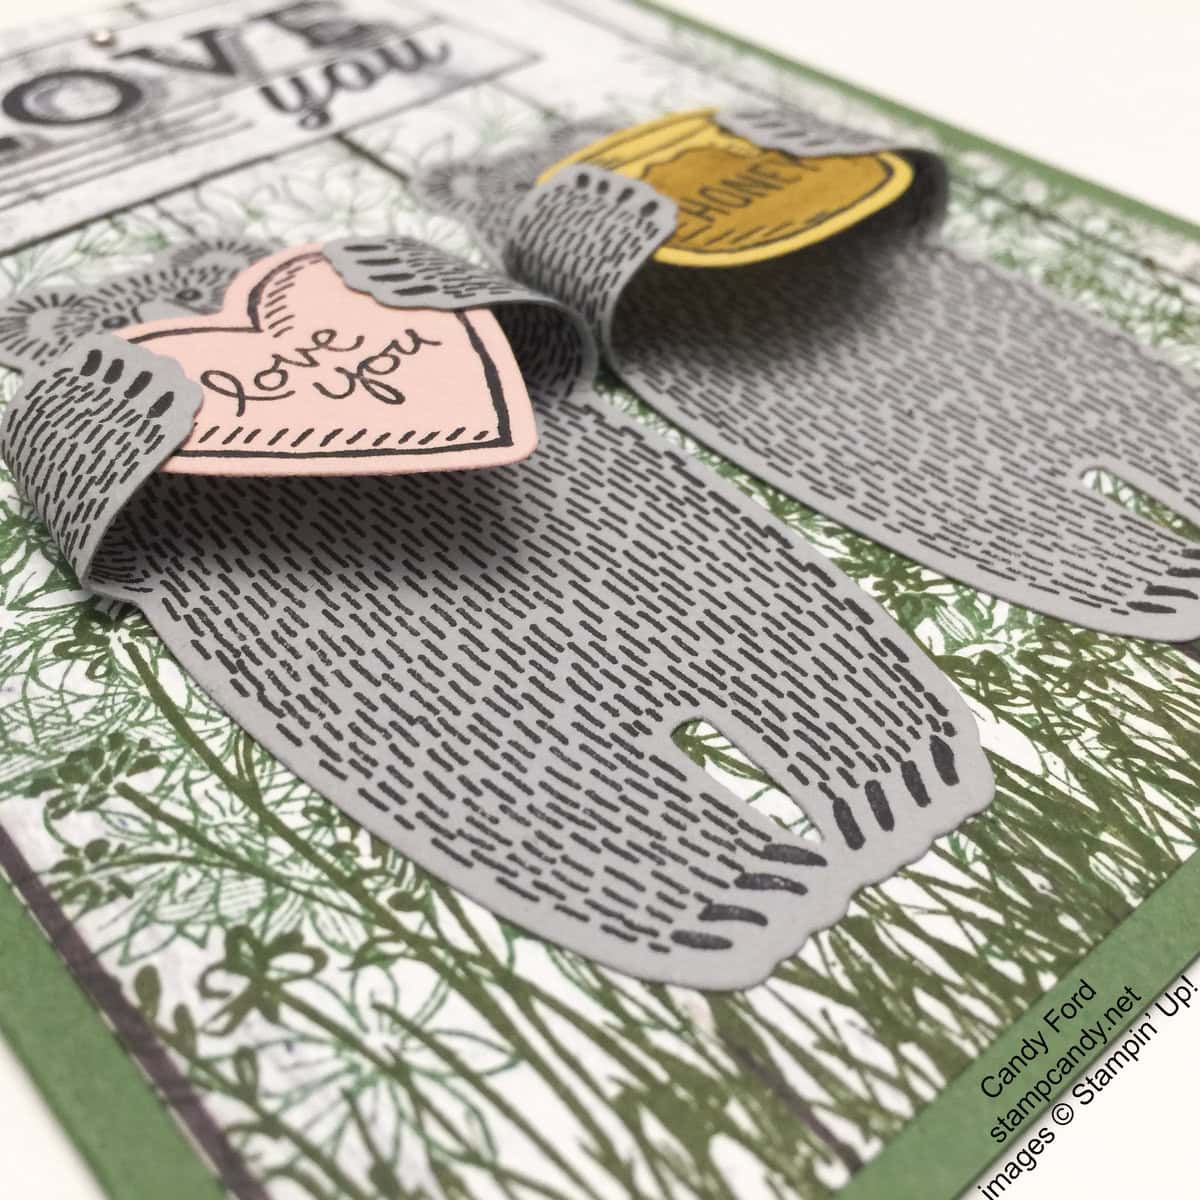
Do you see my mistake on this card? The sentiment on the items the bears are holding is, “Love you, Honey.” I wanted to the sign on the wall behind them to complement that sentiment. But when I was looking at my stamp sets, I became more concerned with the size of image. I chose the “Love you” stamp from the Friendly Wishes stamp set. It wasn’t until the card was completed that I realized I had doubled the “Love you” sentiment. So now the card says, “Love you love you, Honey,” which I suppose is okay, but not what I had in mind. In class, we used the “Happy Anniversary” stamp from the Timeless Love stamp set which worked much better. The sign could also say Happy Birthday, Congratulations, or anything else you might want to say to your honey bear.
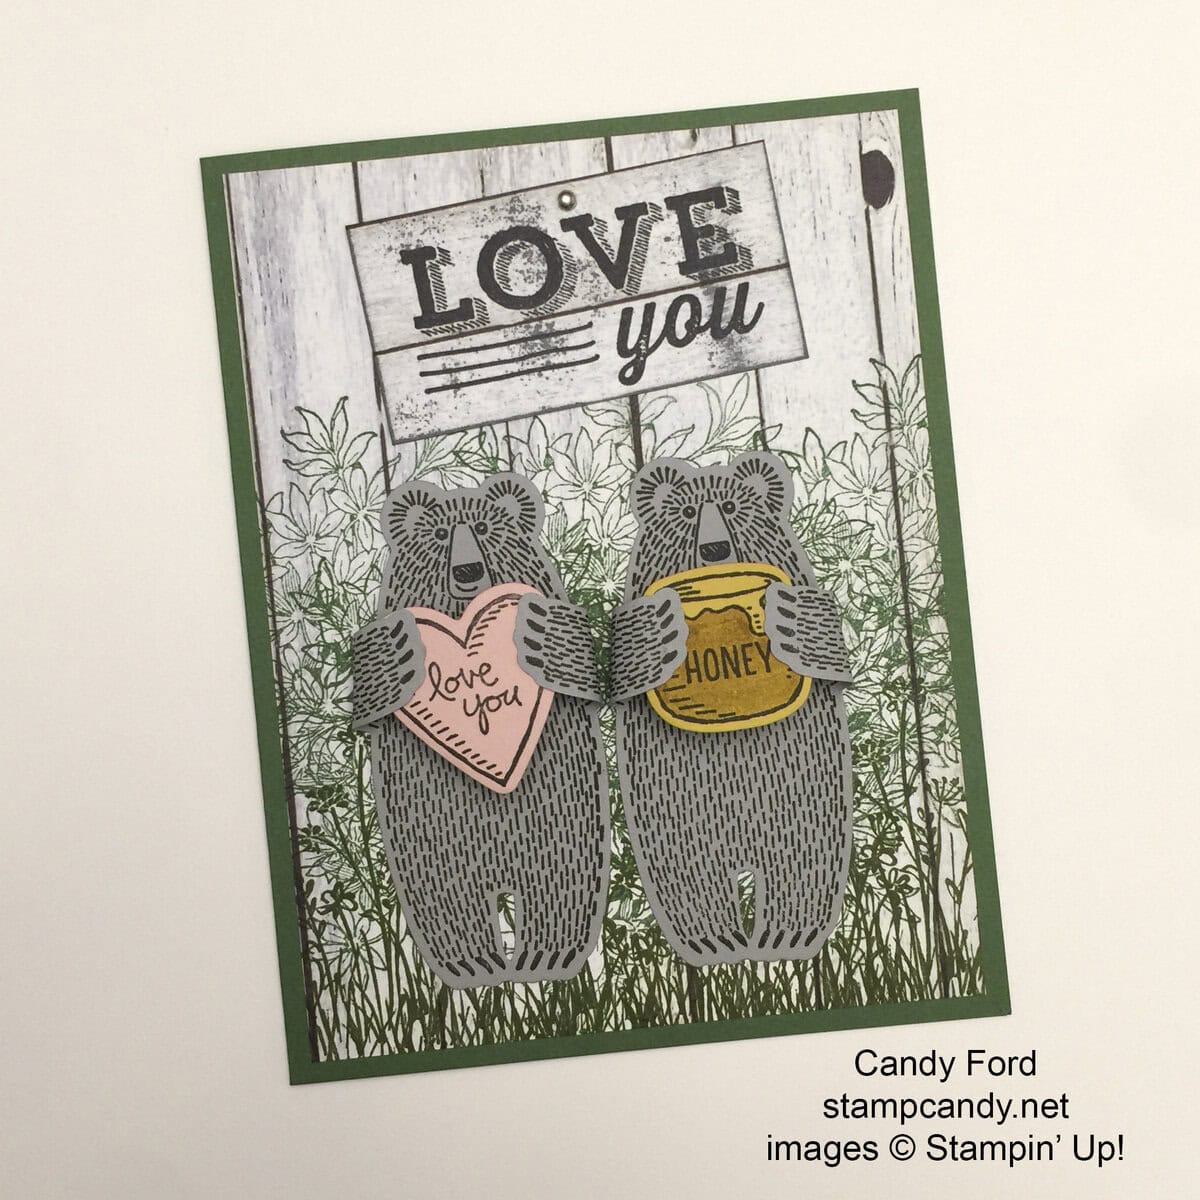
The card base is Garden Green card stock.
For the card front, we used a piece of Farmer’s Market Designer Series Paper. We stamped directly onto the DSP. In Mossy Meadow ink, we stamped foliage and grass from the In the Meadow stamp set. In Garden Green ink, we stamped the largest image from the Awesomely Artistic stamp sets. Then we glued the card front to the card base.
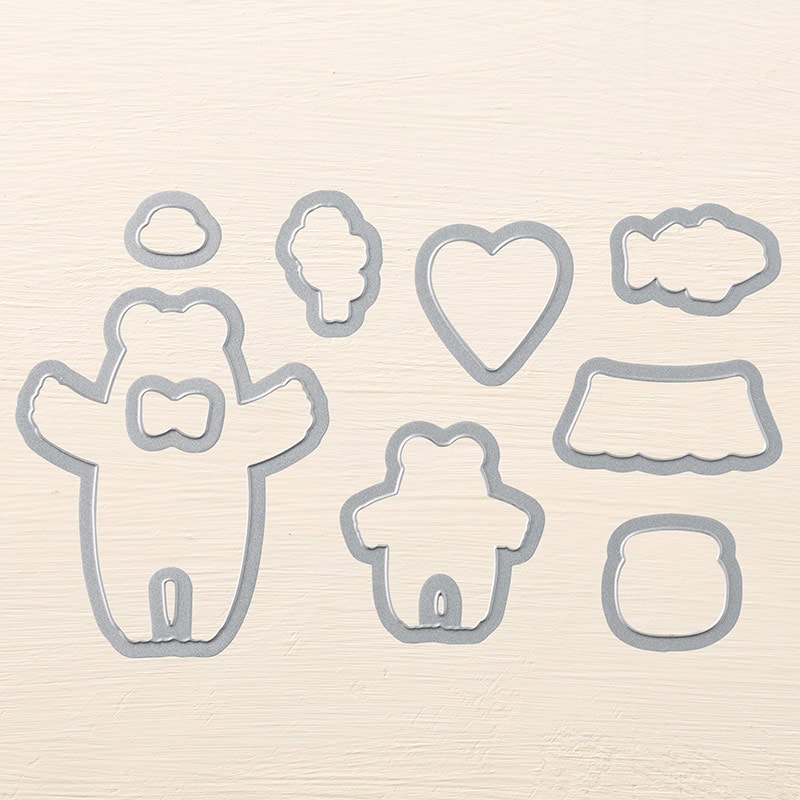
We stamped the bears in Basic Black Archival ink onto Smoky Slate card stock, then cut them with the coordinating die. We then used a Stamp-a-ma-jig to stamp again on the back side of the bears. We used a bone folder to curl the arms.
We used the same black ink to stamp the heart onto Blushing Bride card stock and the honey jar onto Crushed Curry card stock, then cut them with the coordinating dies. We colored in the jar with a Delightful Dijon Stampin’ Write Marker.
We used a tiny dot of glue to attach each of the bears’ paws to the item they are holding. Then we glued the bears onto the card front.
If you intend to mail this card, you should put some Stampin’ Dimensionals under the heart and jar, unless you don’t mind if they get smashed flat. If you are hand delivering it, you should be fine without them.
We stamped the larger sentiment onto a piece of the same DSP, then cut it down to size. We inked the edges of the sign, still using the same black ink. We also dirtied up the front by gently laying it face down on the ink pad and just barely pressing down in a few spots. We used a Paper Piercing Tool to poke a hole in the sign and inserted a 1/8″ Mini Brad, so it would look like the sign is hung on the wall with a nail. We then glued the sign to the card front, a little askew.
Here’s a video from Stampin’ Up! featuring the Bear Hugs Bundle, including how to stamp on both sides of the bear using the Stamp-a-ma-jig:
 There are only 6 days left to shop from the 2015-2016 Annual Catalog’s Retiring List! Click here to shop what is still available.
Thanks for stopping by today, and Sweet Stamping!

