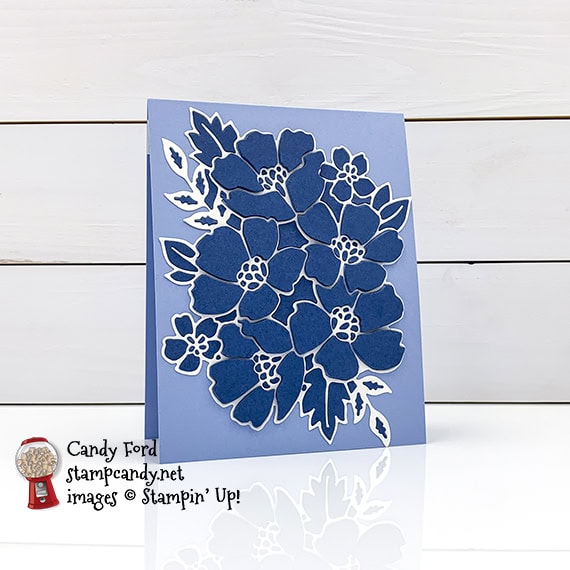
Okay, I know, I know. Enough already, right? I just can’t stop playing with these Many Layered Blossoms Dies. Today’s card is very much like the one I posted yesterday, but the colors are just so striking on this one, I had to share it. I again used the PPPS Technique from Kylie Bertucci, a Stampin’ Up! Demonstrator in Australia. Misty Moonlight, one of the new 2020-2022 In Colors, and Seaside Spray, one of the returning 2019-2021 In Colors, are so perfect together, especially when separated by Whisper White.
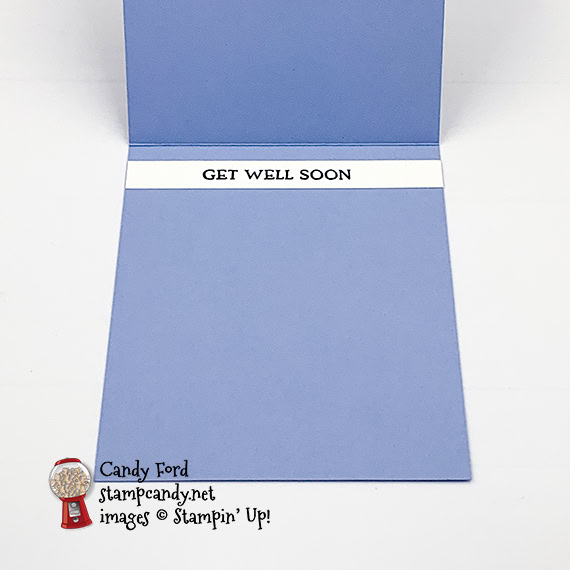
I love the front of this card so much that I didn’t even add a sentiment or any embellishments or other doodahs. The Get Well sentiment is on the inside of the card base. I stamped it onto a 1/2″ strip of Whisper White card stock, instead of onto the usual 4″ x 5-1/4″ piece, to let the Seaside Spray show. It’s still plenty light enough to write on.
If you are reading this in email, some photos may appear blurry, or may not appear at all. Please click here to see the post on my blog.
S Blossoms Dies Blossoms Dies Blossoms Dies Blossoms Dies
Here’s what I made:
S
Here’s what I did:
Cut and scored with my paper trimmer:
- Seaside Spray card stock (CS) cut to 4-1/4″ x 11″, then scored in half at 5-1/2″
- Whisper White CS cut to 4-1/4″ x 1/2″ for the inside of the card base
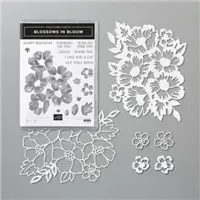
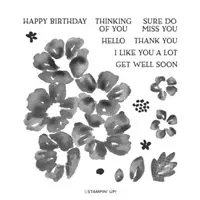
Stamped with the Blossoms in Bloom stamp set:
- sentiment in Misty Moonlight ink onto the Whisper White CS strip
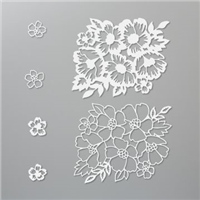
Cut using the Many Layered Blossoms Dies:
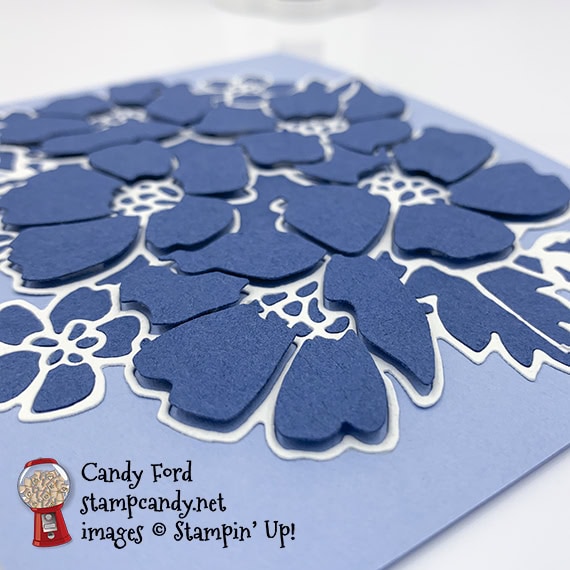
- a piece of Whisper White CS and a piece of Misty Moonlight CS cut using the large outline die
- a piece of Press n Seal plastic wrap burnished onto each die cut before removing it from the cutting plate, to keep all the pieces in place
Assembled the card:
- burnished the fold in the card base with a Bone Folder
- peeled the outline piece from the Misty Moonlight CS die cut
- on the back of the Misty Moonlight CS die cut, Stampin’ Dimensionals applied onto the backs of the large flowers petals, and glue applied onto the smaller pieces
- pressed the whole Misty Moonlight piece onto the front of the card base, then carefully peeled away the plastic wrap, making sure all the pieces stay stuck to the card base
- peeled the outline piece from the Whisper White CS die cut, then glued it onto the front of the card base, around the Misty Moonlight pieces, making sure it sticks to the card base (A sharp point, like a Take Your Pick Tool or a paper piercer, can help with this.)
- sentiment glued onto the inside of the card base
What I would do differently:
A word of advice on placing the little pieces of Misty Moonlight card stock in the flower centers: don’t. I mean, you can if you really want to, of course, but they are very fiddly little bits that can be a real pain to deal with, or even keep track of. I recommend allowing the background color to show through the flower centers, like I did on the card I posted yesterday. Or cut pieces of a different color CS the size of the whole flower centers and glue them to the backs of the flower centers.
Also like the card I posted yesterday, I ended up gluing down all of the filler pieces. I wish I had thought to leave them out and let the background show through. The pieces I’m talking about are the ones between the flowers that aren’t actually a part of the flowers or leaves. There are a couple of bigger ones in the middle of the cluster of flowers, and several small ones around the periphery.
S
Here are today’s colors:
You can click on each one to see all the products that come in that color!
S
Here’s what I used:
Click on these images for more details and to purchase. If you are reading this post in email, the product images may not show up. Please click here to see the post on my blog.


Supply List. <— Click for a clickable and printable list of the products!
S
Here are some helpful links:
- June Host Code DXD9JX2S – receive free product!
- Shop my online store
- Clearance Rack
- Request a free catalog
- SUBSCRIBE to my weekly newsletter and/or daily blog updates.
- Paper Pumpkin: buy a Prepaid Subscription or subscribe month to month
- Earn Gumball Rewards – receive free products!
- Gift Certificates are available in any U.S. dollar amount from me. Contact me for details.
- Have you shopped from me within the past year? Join my private VIP Facebook group for exclusive project tutorials and more!
- Join my team and enjoy a 20% discount (or more) on all your purchases! You choose $125 in products and pay only $99, and get free shipping! No obligation! No selling required!
S
Thanks for stopping by today, and Sweet Stamping!


Candy, I’m loving your Blossoms in Bloom cards. It is one of my favorite sets in the new catalog. Thanks for all the details of how you made them. Enjoy your day!