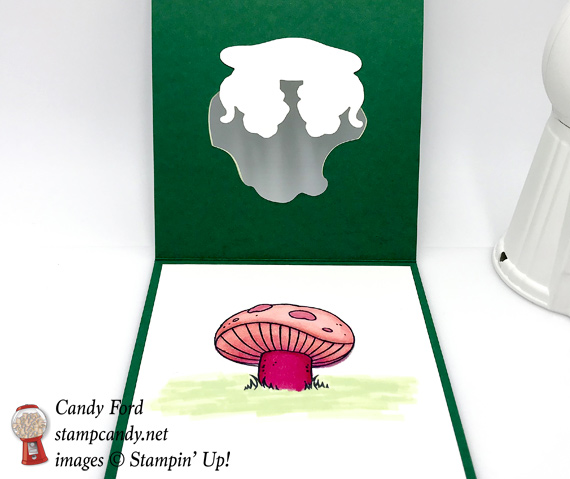
I got the idea for today’s card from the one on page 160 of the annual catalog. I used different colors, and a simpler card fold. The Sweet Storybook Bundle (Sweet Storybook stamp set and Storybook Scene Thinlits Dies) are adorable. Don’t let the creepy rat shapes throw you off – they’re just to fill in some shading on the cute mice. There’s also a stamp to fill in the top of the mushroom, but I used Stampin’ Blends Markers to color it in.
Here’s what I made:


Here’s what I did:
Cut and scored with my Stampin’ Trimmer:
- Shaded Spruce card stock (CS) cut to 4-1/4″ x 11″, then scored in half at 5-1/2″
- Whisper White CS cut to 4″ x 5-1/4″
Stamped with the Sweet Storybook stamp set:
- mice outlines in Basic Gray ink onto a scrap of Whisper White CS
- mice filled in with Smoky Slate ink
- NOTE: I went over the eyes using a size 01 Journaling Pen
- leaf frame in Shaded Spruce ink onto a scrap of Soft Sea Foam CS
- small flowers in Shaded Spruce ink onto the front of the card base
- mushroom in Memento black ink onto the 4″ x 5-1/4″ Whisper White CS
- sentiment in Flirty Flamingo and Lovely Lipstick (inked the stamp in Flirty Flamingo, then rolled the edges on a Lovely Lipstick ink pad) onto a 1″ strip of Whisper White CS
Die cut using the Storybook Scene Thinlits:
- mice
- leaf frame
- hole in front of card base to fit the leaves around (it’s the odd looking die that doesn’t look like it goes with anything)
Cut using the Everyday Label Punch:
- sentiment
Colored using Stampin’ Blends Markers:
- mushroom in Flirty Flamingo and Lovely Lipstick
Colored using Stampin’ Write Markers:
- areas around mushroom and around mice in Soft Sea Foam
- mice ears and feet in Powder Pink
Assembled the card:
- burnished the fold in the card base with a Bone Folder
- leaves glued onto the front of the card base around the die cut hole
- mice glued onto the inside of the front of the card base, so they show through the hole
- Whisper White layer glued onto the inside of the card base
- three pieces of Lovely Lipstick 1/8″ ribbon adheres to the front of the card base using Tear & Tape
- adhered sentiment over the ribbon using Stampin’ Dimensionals (I cut two thin strips from the edge of a sheet of Dimensionals, and put them along the top and bottom of the sentiment piece.)
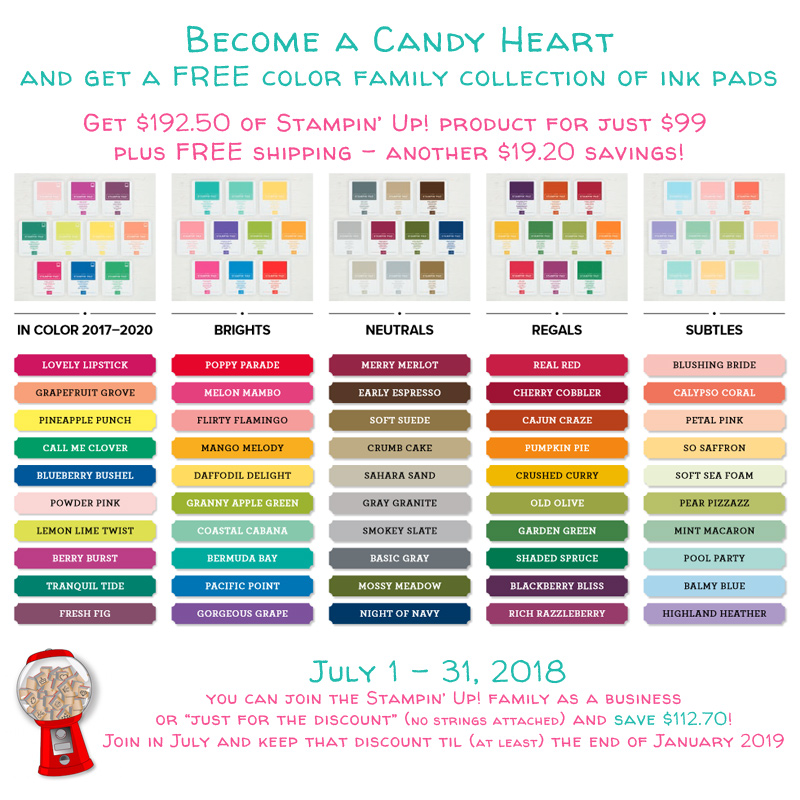
Here are today’s colors:
You can click on each one to see all the products that come in that color!
Here’s what I used:
Click on these images for more details and to purchase.
Here are 3 amazing limited time offers:
1) Free ink pads:
- Join my team by July 31 and receive a family of 10 ink pads for free!
- In addition to everything you already get with the Starter Kit!
- Click the image for more information
2) Designer Series Paper Sale:
- Buy 3 packs of select DSP and receive 1 pack free
- Mix and match
- Stock up on all your favorites
- Click the image for details and to purchase

3) Paper Pumpkin Sale:
- Subscribe between now and August 10
- Use promo code BLOOM0818
- Get 50% off your first kit
- CLICK HERE to subscribe

Here’s some more stuff you should check out:
- Shop my online store
- Clearance Rack
- Click here for your free catalog.
- Join my team to get a discount on your stamping supplies!
- SUBSCRIBE to my weekly newsletter and daily blog updates.
- July Host Code F2ZF736E– receive free product!
- Earn Gumball Rewards – receive free products!
- Gift Certificates are available in any U.S. dollar amount from me. Contact me for details.
Thanks for stopping by today, and Sweet Stamping!

