Saturday was World Card Making Day. I attended an all day event here in Atlanta hosted by Brian King and Pam Morris, two of my Stampin’ Up! uplines. There were 100 of us in attendance, and we all had a fantastic time. One of our many activities of the day was a card swap. Today I’m sharing the card I made for that swap.
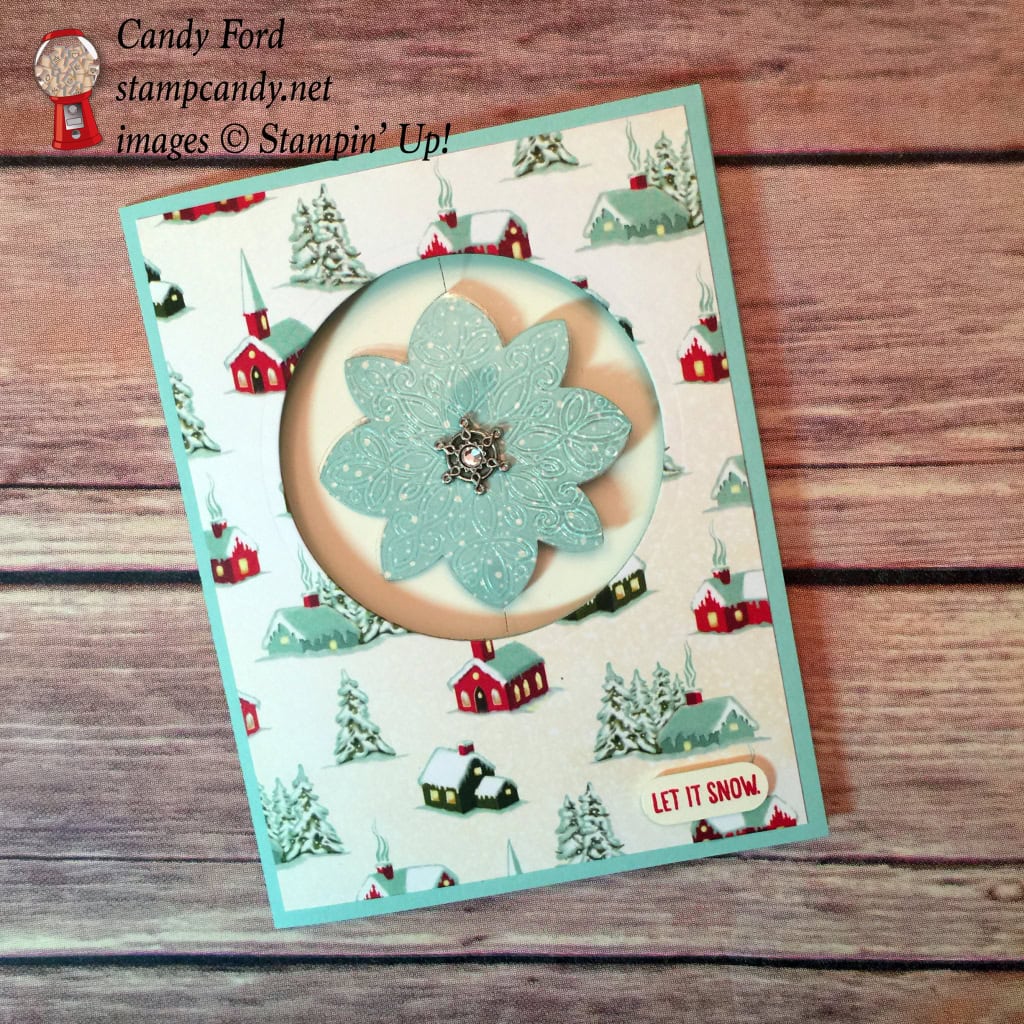
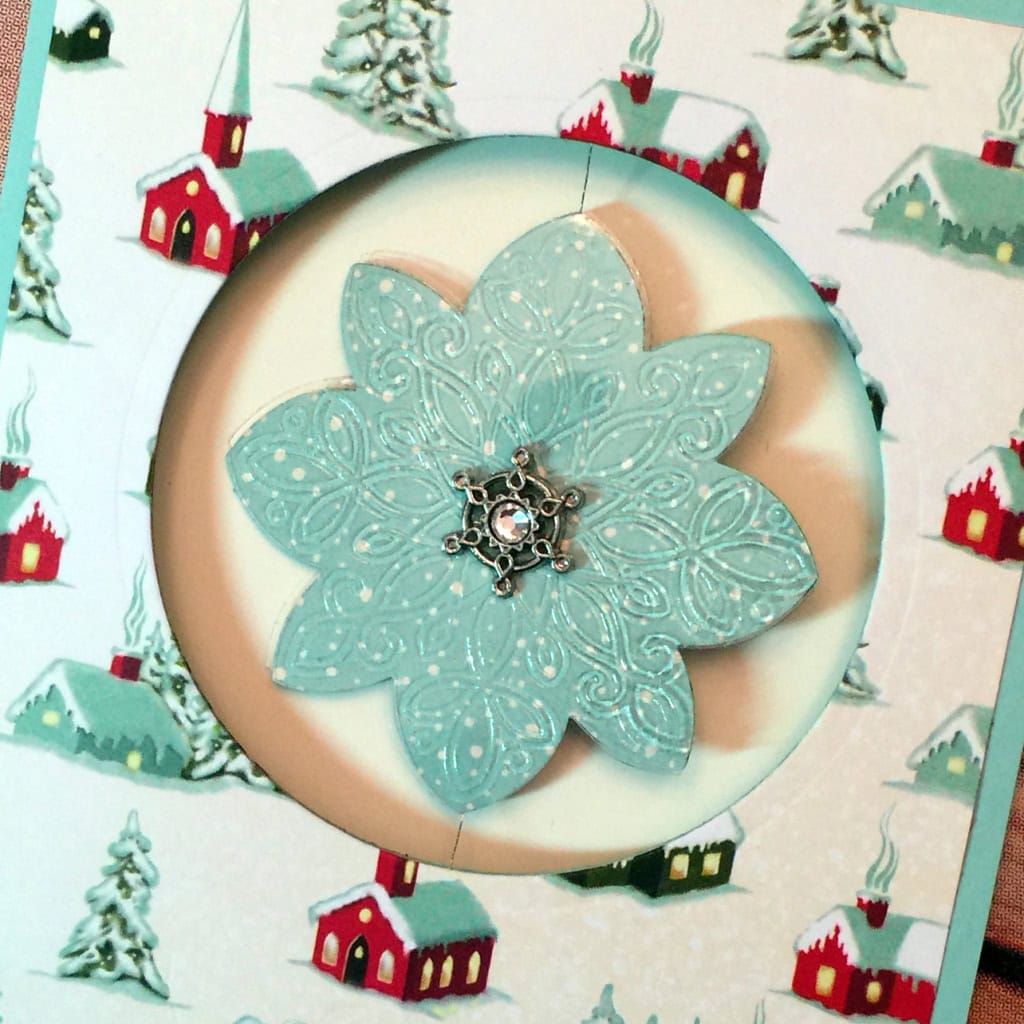
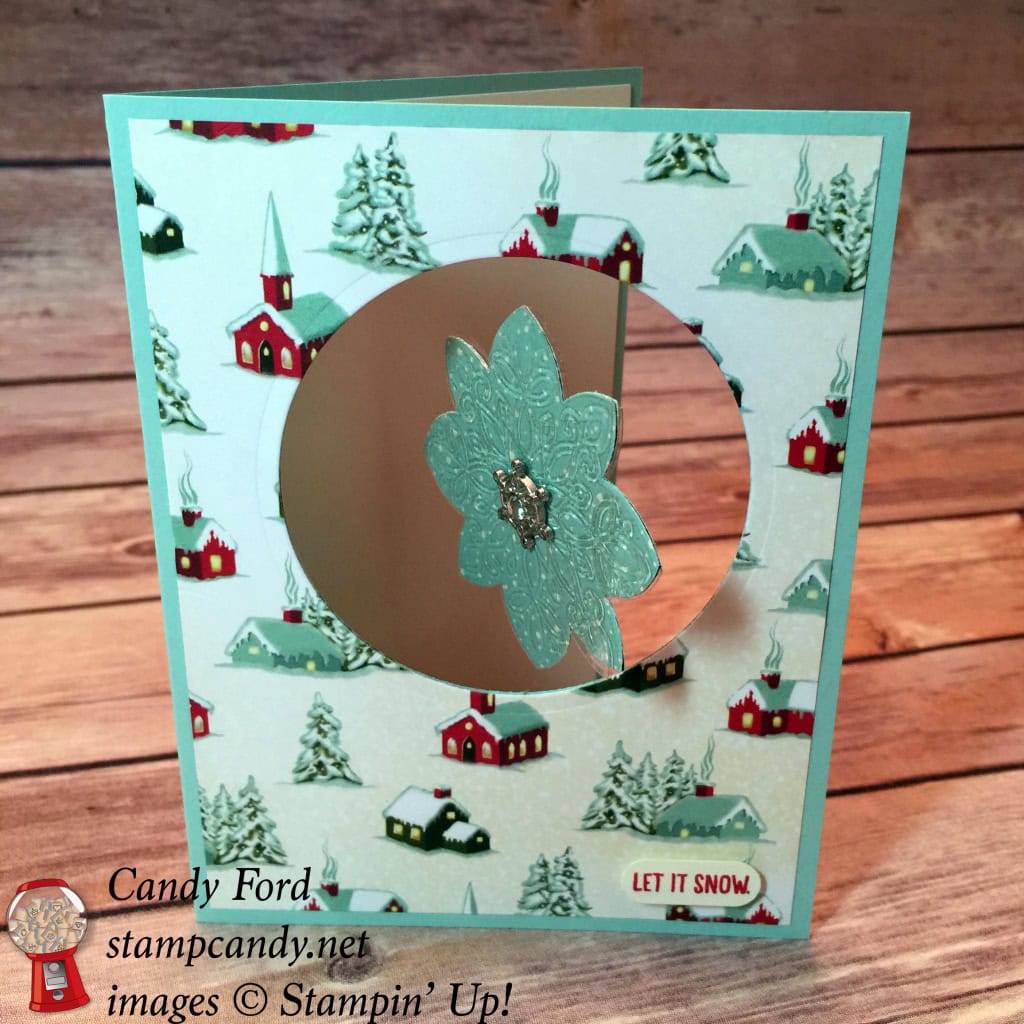
This is a spinner card. The snowflake is suspended from Silver Metallic Thread within a die cut circle. When the card is open, the snowflake can spin freely. The thread is glued between the layers of the snowflake, and attached to the card between the card front and the DSP.
Isn’t this snowy scene from the Home For Christmas DSP peaceful? It provides a perfect background for the snowflake. I chose Pool Party, one of the colors in the DSP, for the card base – it adds to the overall calm and soothing effect.
I used the Circles Collection Framelits Dies to cut the round hole in the card front. It’s important to cut the two pieces together so they line up perfectly, but do not glue them together before cutting. You still have to adhere the thread between the two layers. I used Tear & Tape on some and Fast Fuze on others. They both work well.
Very Vanilla card stock glued to the interior of the card makes the snowflake really stand out.
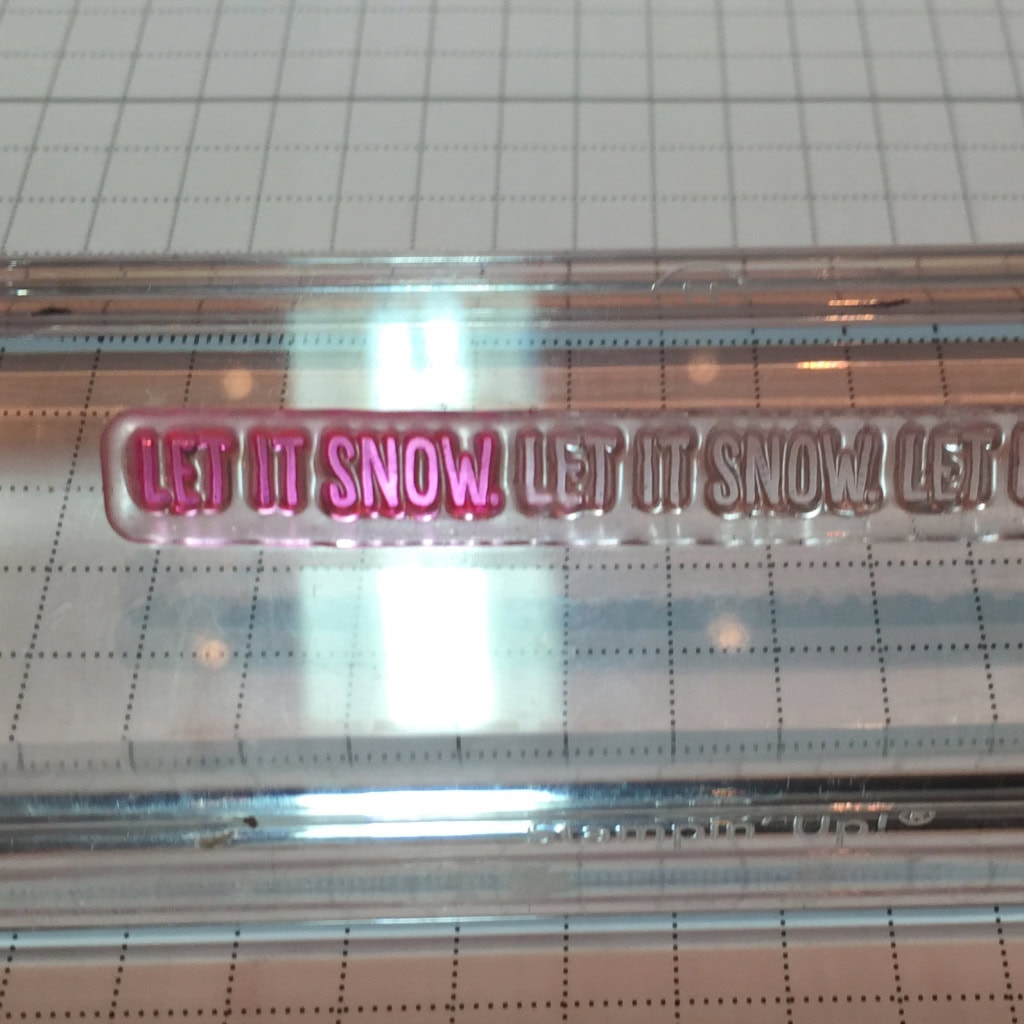
The teeny tiny Real Red sentiment in the corner is from the Happy Scenes stamp set. The stamp says “Let it snow. Let it snow. Let it snow.” but I only wanted one “Let it snow.” Some stamps would need to be masked, but this one was very easy to ink up at just one end.
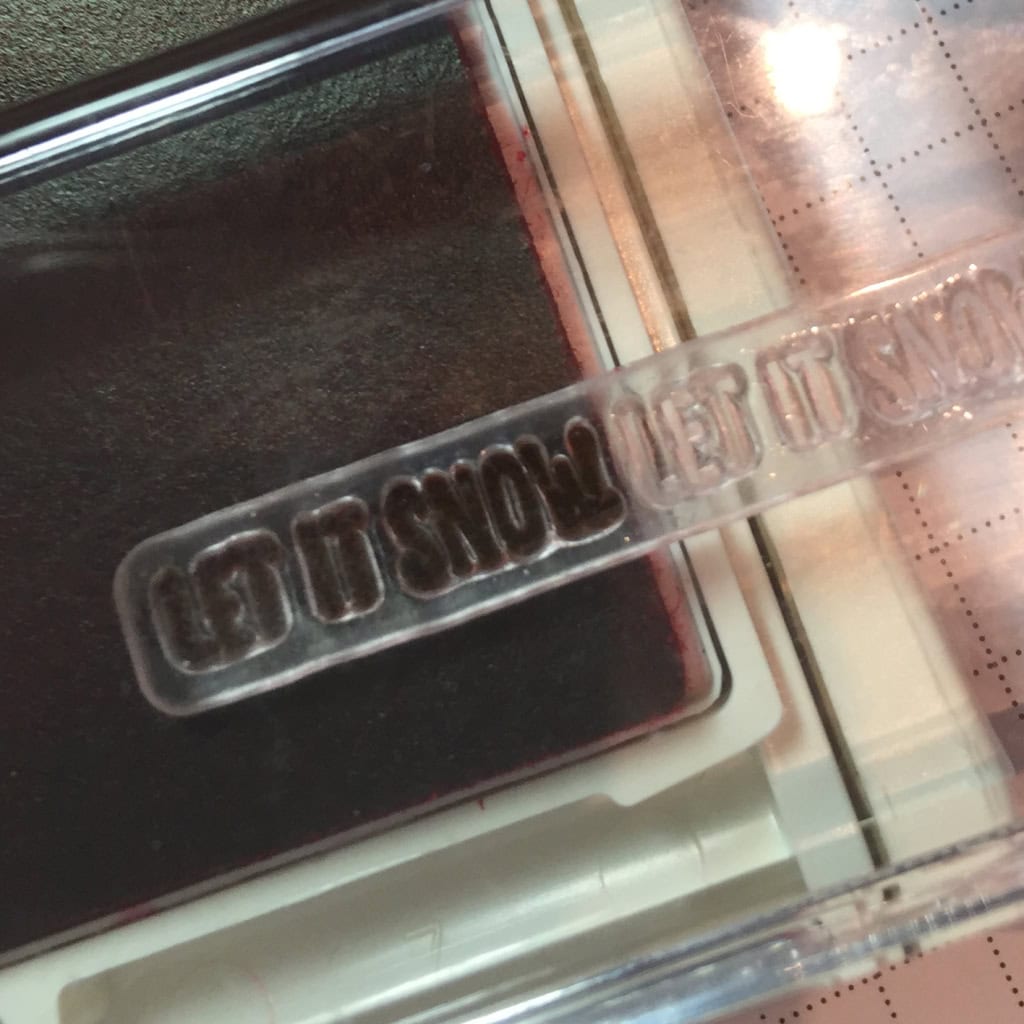
I cut the sentiment with the Word Window Punch.
I cut the snowflakes from Home For Christmas DSP with the Flower Medallion Punch, and glued two together with a length of thread between them, leaving 2-3 inches hanging out of each side.
I used the Flurry of Wishes stamp set to stamp the snowflake in Versamark in on clear Window Sheets, then heat embossed them with Clear Stampin’ Emboss Powder. I cut these out with the same punch, and adhered one to each side of the DSP snowflakes with a glue dot in the center. The glue dots were covered up with the Winter Wonderland Embellishments.
TIP: Be very careful not to get the Window Sheet too hot or it will warp, or even melt.
Today I’m sharing my original design for the card. I found the snowflakes were a bit heavy and made the thread sag, so I omitted the Window Sheet pieces from all of my actual swap cards.
Here’s what I used:
Built for Free Using: My Stampin Blog
I LOVE hearing from you! Please leave your questions and comments below!
Thanks for stopping by today, and Sweet Stamping!

While I will try to post as much as I can, you might not see quite as much of me in the next week or so. Halloween is very big in our household, and we are getting ready for our annual party on the 17th. The whole house is in the throes of party prep, i.e. it’s a huge mess! There are boxes everywhere – the Halloween decor comes out and the regular decor goes into storage. I’ve even had to move some things out of my studio, so they will be harder to get to for a while.

I love this card!
I received this card at the swap and it is one of my favorites. Your presentation at WCMD was full of wonderful Halloween ideas and after seeing those, I’m sure your Halloween party is an awesome event! Glad I got to meet you.
Thank you, Angie! Getting to meet everyone is one of my favorite parts of WCMD!
Beautiful card Candy! I love that it has movement :). Was the pattern on the snowflake stamped? It almost looks like it was partially cut with a thinlit. Great effect!
Thanks, Dana! The snowflake was punched from Home for Christmas DSP. Then I heat embossed the stamped image in clear on a clear Window Sheet, and punched it out. Then I layered the two.
Thanks for the how-to Candy. I’m going have to try that, awesome technique!