Oct 25, 2015 | Cards, Challenges, Christmas, CYCI, Holiday, Sketches |

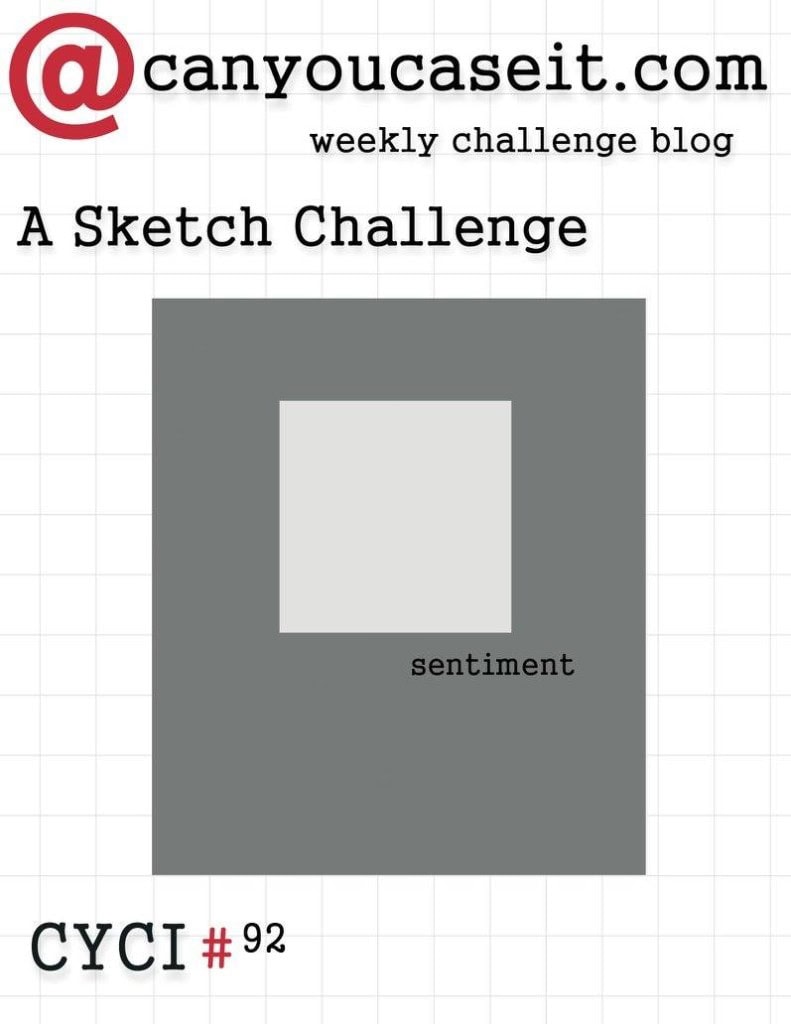
Here is this week’s CanYouCaseIt sketch challenge:
And here is my card:
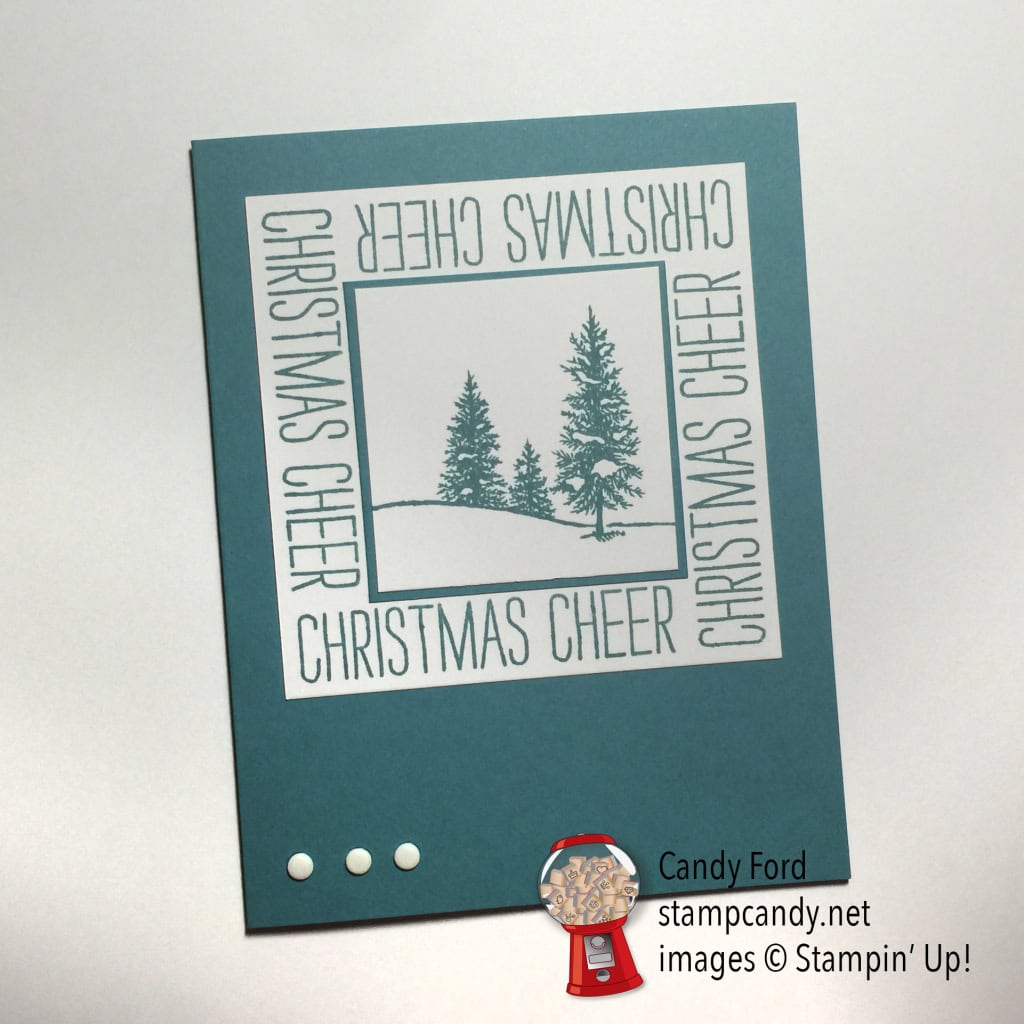
I love the simplicity of this week’s sketch. Just one block on the card front with a sentiment. I started looking through my stamp sets for just the right thing. First I came upon the sentiment from the Cheer A;; Year stamp set. The crisp, clean lettering fits the simplicity of the sketch. I started playing around with it, then had the idea to stamp it “in the round” – or maybe it should be “in the square.”
Then I needed something for the center. I tried several images before settling on this peaceful, snowy scene from the Happy Scenes stamp.
Since my sentiment is within the block, I needed something else to balance the design. Very Vanilla Candy Dots were just the right thing. Usually I would put the Dots on the right side of the card, but here they seemed more balanced on the left, perhaps because the trees are toward the right. How did I find just the right place? I cut a strip of three Dots from the package and moved them around the card until it felt right. This is a good time to use Brian King’s patented Squinting Technique (I owe him a nickel now.)
I was very tempted to add just a tiny pop of Real Red somewhere, but I resisted. Again, I wanted to keep with the simplicity of the sketch. But some time I may add a tiny red bird in one of the trees.
For these particular images to line up just right, here are the measurements I used for the panels: 2-1/8″ x 2-1/8″ Very Vanilla; 2-1/4″ x 2-1/4″ Lost Lagoon; 3-1/2″ x 3-1/2″ Very Vanilla. You’ll need to experiment if you use other images. For example, the largest Very Vanilla piece is the length of the sentiment plus the height of the sentiment plus just a tinch. I added enough to make it a nice even 3-1/2″.
(Tinch is a Southern term. It’s a cross between a touch and a pinch. It’s usually pronounced “teench” or “taynch.”)
Here’s what I used:
Be sure to check out the other projects at canyoucaseit.com.
Thanks for stopping by today, and Sweet Stamping!

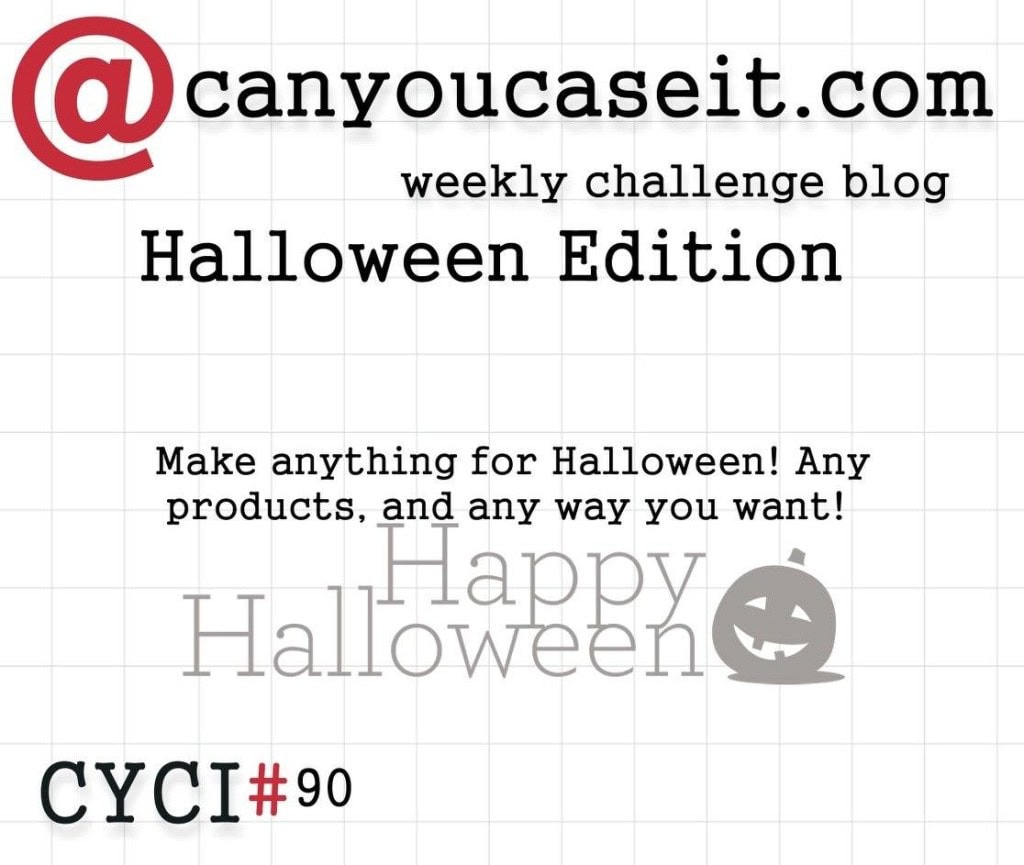
Oct 11, 2015 | Challenges, CYCI, Food, Halloween, Holiday |
This week at CanYouCaseIt.com, we have a themed challenge:
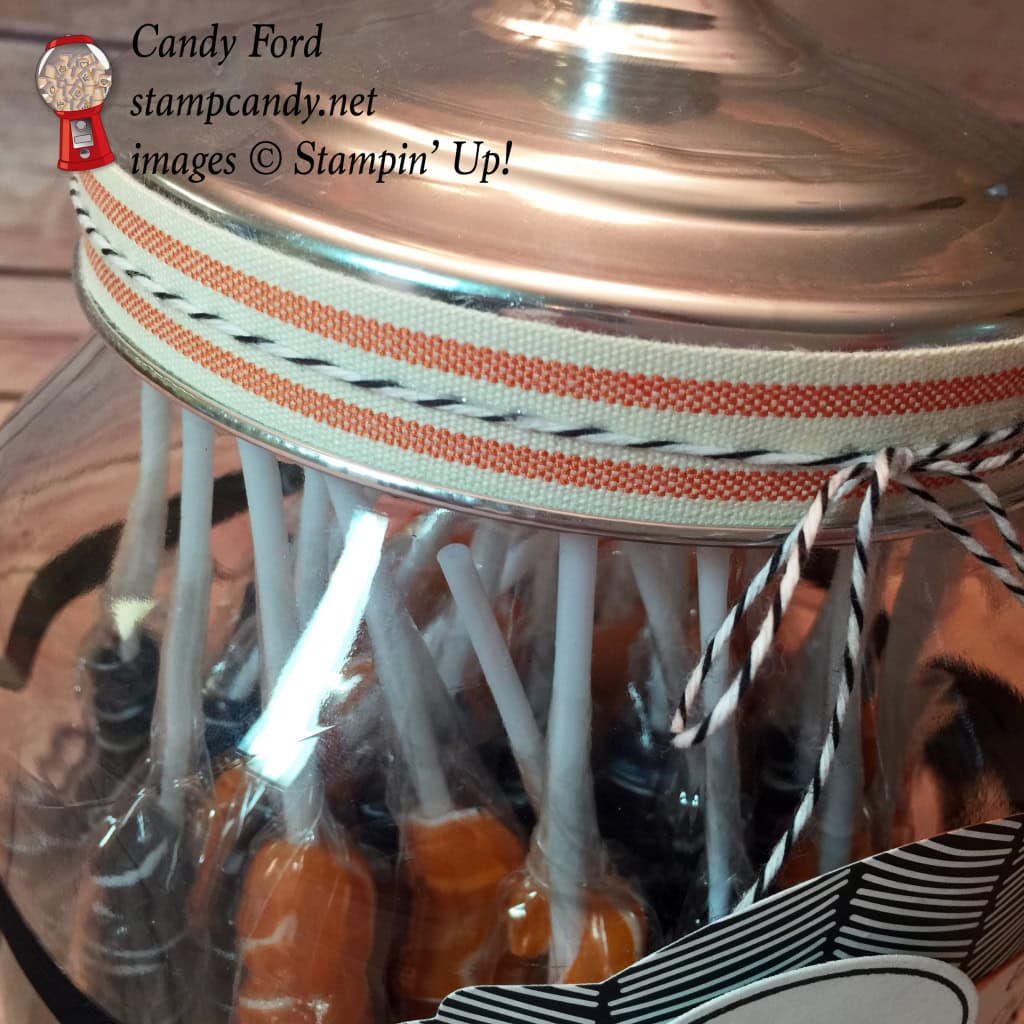
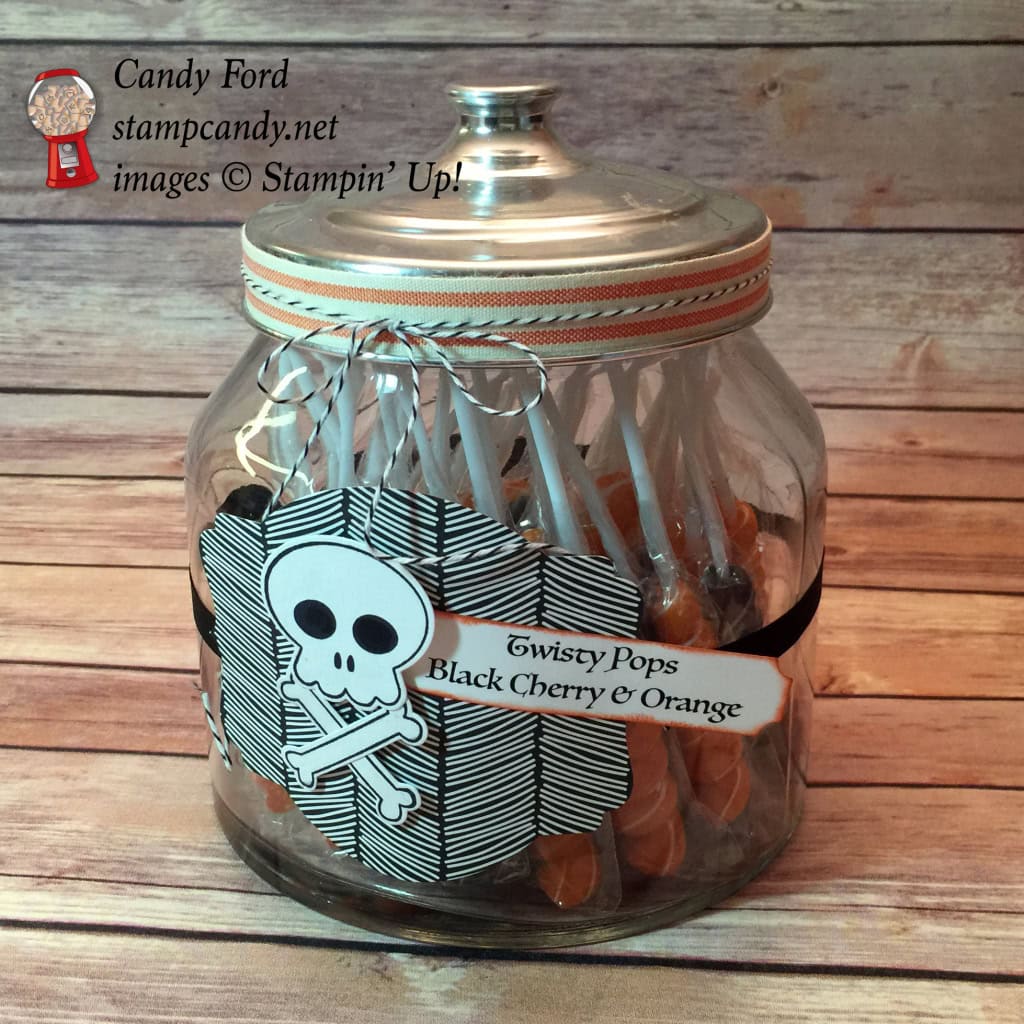
I was asked to do a Halloween presentation at the World Card Making Day event I attended last weekend. Today I’m sharing one of the projects I made for that.
I already had this big jar with a metal lid. I filled it with black and orange Twisty Pops, then decorated it with ribbon, baker’s twine, and a label made from Everyday Chic Designer Series Paper, Howl-o-ween Treat stamp set, Boo To You Framelits Dies, Deco Labels Collection Framelits Dies, and Project Life Cards & Labels Framelits Dies.
For the words, I ran Whisper White card stock through my printer. The font is Luminari. I used a Sponge Dauber to ink the edges in Tangelo Twist.
I chose this piece of DSP because I think it looks “boney” behind the skull and crossbones.
I used a tiny bit of Fast Fuse adhesive to hold the ribbon in place around the lid. I used a skinny line of Multipurpose Liquid Glue to hold the twine in place on the ribbon.
Be sure to check out all the other projects at canyoucaseit.com!
Here’s what I used:
Be sure to check out the Weekly Deals…
…and the Clearance Rack.
___________________________________
New Class!
Come to my Nutty Notecards Class
Oct 30 at 6:30 PM
You’ll make 4 notecards and matching envelopes, and an adorable box to keep them in!
PLUS
You get to take home the Acorny Thank You stamp set, the Acorn Punch, and the Into the Woods Designer Series Paper pack! All this for only $45!
Email me today for payment information: candy@stampcandy.net.
Hurry! Seating is limited!
___________________________________
I love hearing from you! Please leave your questions and comments below.
Thanks for stopping by today, and Sweet Stamping!
Oct 4, 2015 | Cards, Challenges, CYCI |
Here is this week’s CanYouCaseIt Sketch Challenge:

And here is my project:
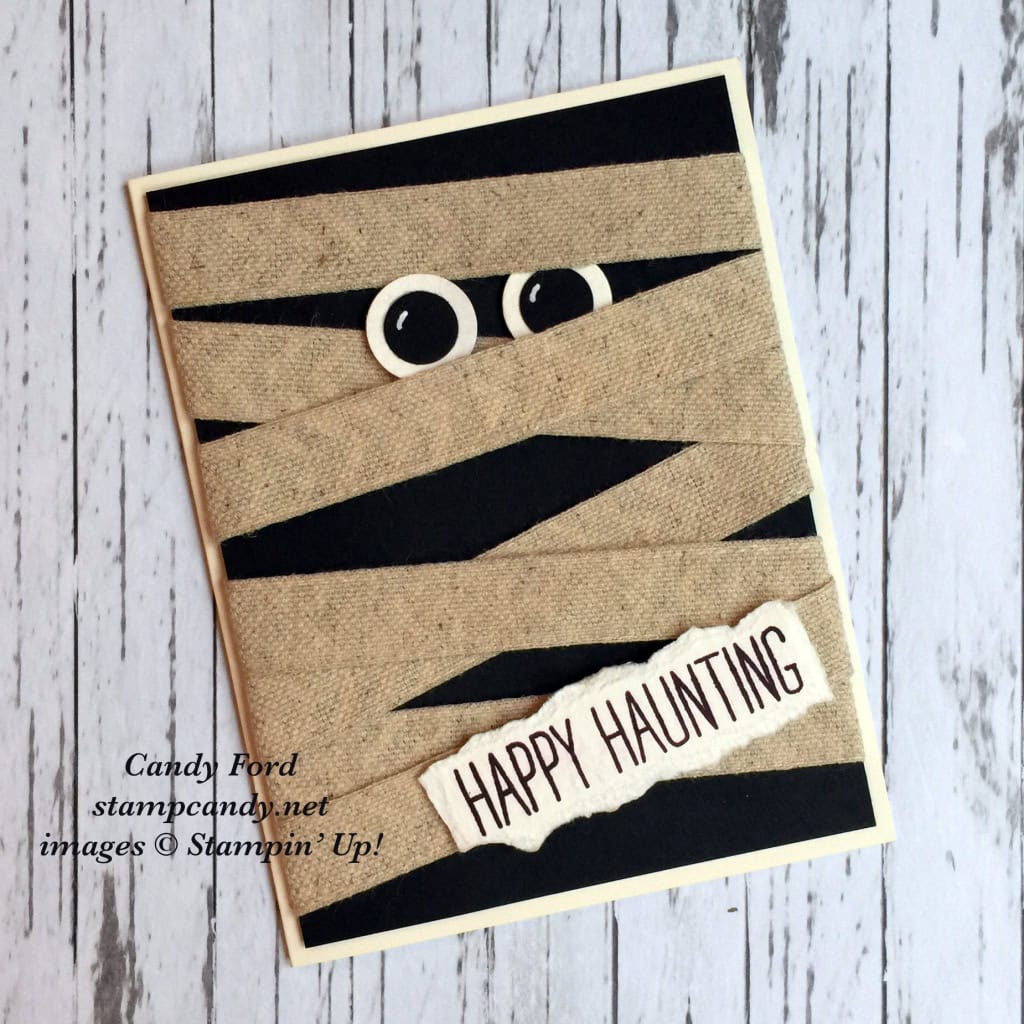
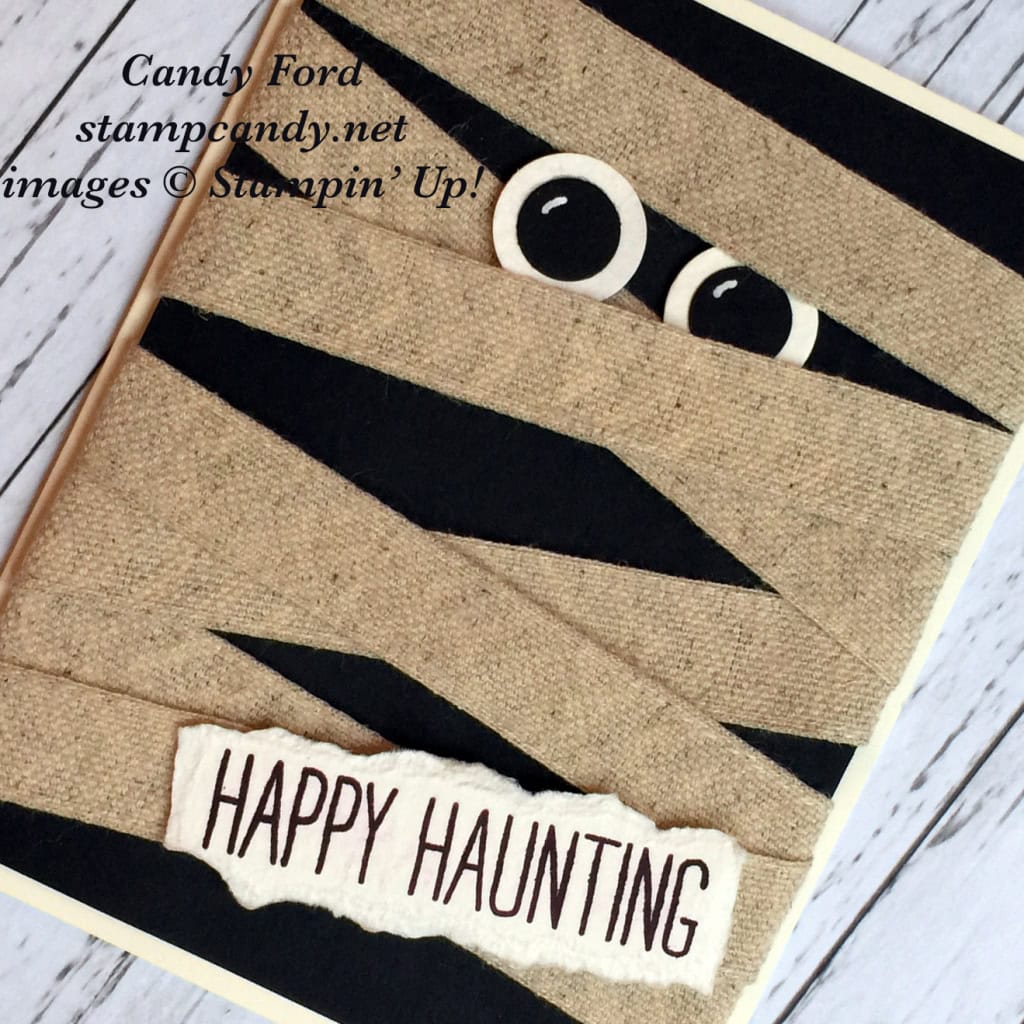
This cute little mummy looks more frightened than frightening, but he’s here to wish you a Happy Halloween! I wish I could take credit for this design, but my friend and fellow Stampin’ Up! Demo Jackie Bak saw the sketch and said a mummy was the first thing that came to her mind. So I said, “let’s go with that!”
This card could hardly be any simpler. Some Natural 5/8″ Chevron Ribbon was wrapped – pattern side down – around a piece of Basic Black card stock. That was attached to a Very Vanilla card base.
Each eye is a 1/2″ circle of Basic Black CS and 3/4″ circle of Watercolor Paper, with a glint from a White Signo Uni-ball Gell Pen. They were attached with Stampin’ Dimentionals.
The sentiment, from the Cheer All Year stamp set, is stamped in Blackberry Bliss on Watercolor Paper, then the paper is hand torn. It is also attached with Stampin’ Dimensionals.
Super easy! Thanks, Jackie!
Halloween has to be my favorite holiday. For some it’s all about the candy. For some it’s about getting together with friends. For some it’s about the costumes and pretending to be something/someone else. For me it’s a little of each. It doesn’t matter who you are, how old you are, or to what religion you belong. Halloween is for everyone. I hope you enjoy a very fun and very safe Halloween this year!
Here’s what we used:
Thanks for stopping by today, and Sweet Stamping!
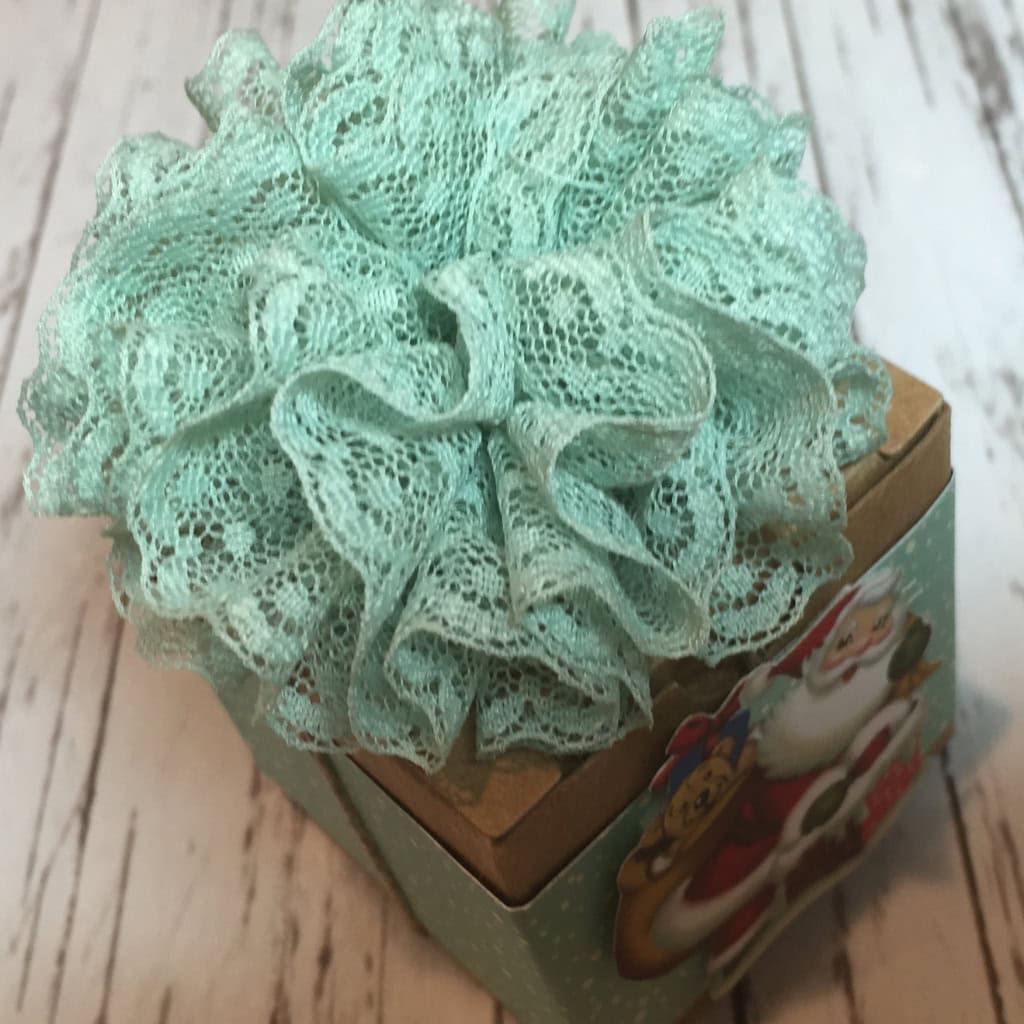
Sep 27, 2015 | Boxes, Challenges, Christmas, CYCI, Gift Wrap, Gifts, Holiday, Techniques |
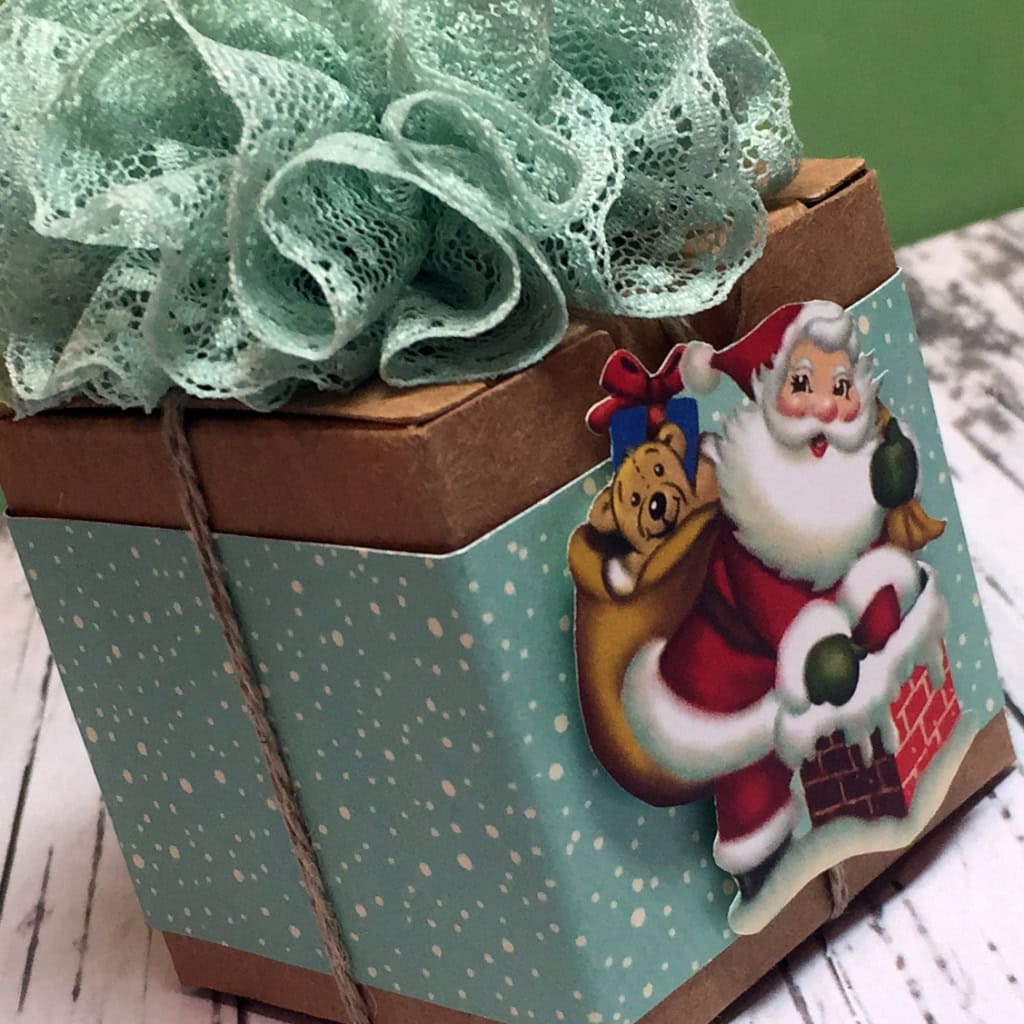
With this week’s CanYouCaseIt.com Designer’s Choice challenge, you can make whatever you want!

Be sure to check out all the great projects here. Here’s mine.
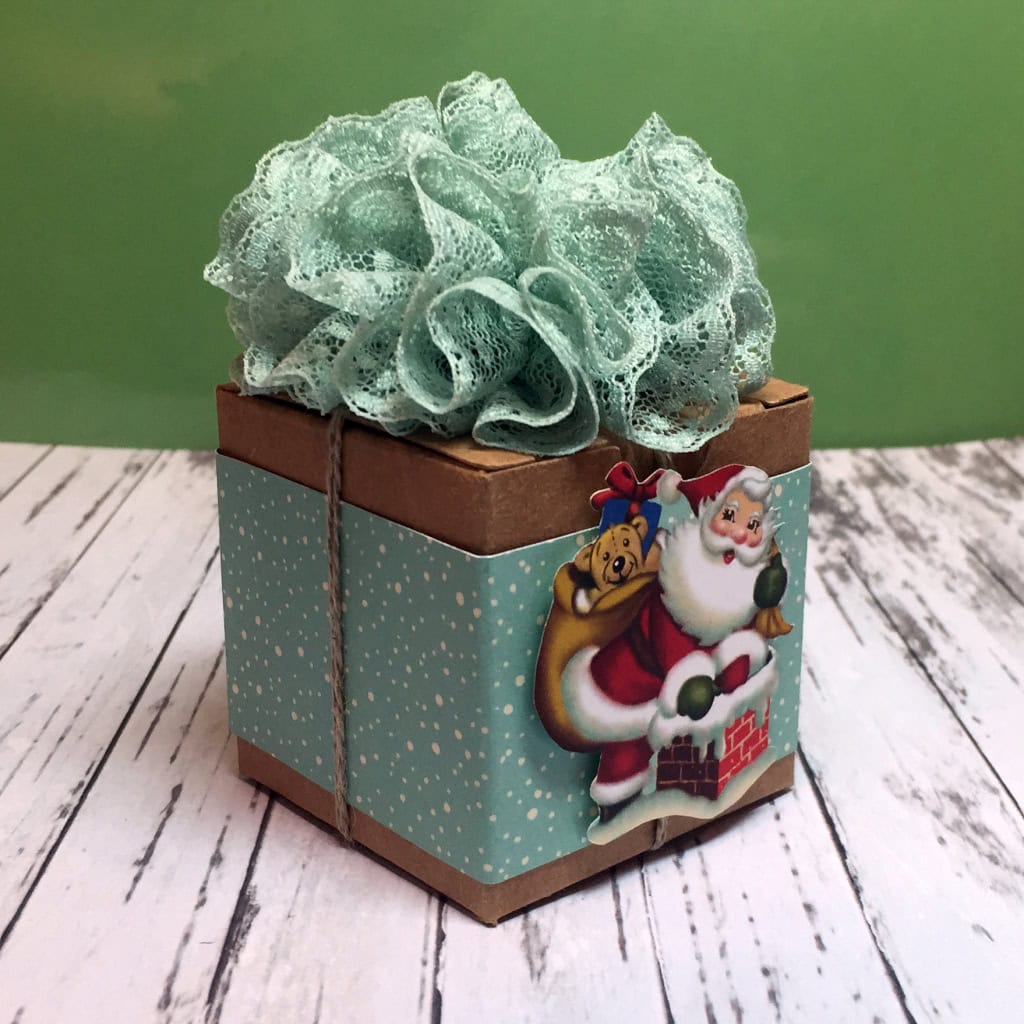
I just love these Tiny Treat Boxes. They’re so versatile. They are a great size for little treats and small gifts. (A Pandora charm box fits in perfectly.) You can use them individually, or stack them together to make an Advent calendar, for instance.
Today I’ve wrapped one with a belly band made from Home for Christmas Designer Series Paper. I used my Paper Snips to fussy cut a Santa from the same DSP, then attached it with Stampin’ Dimensionals.
I tied up the box with Linen Thread and topped it with a pompom made of Mint Macaron 1″ Dotted Lace Trim.
TECHNIQUE: The pompom is easy to make. Cut a length of the Dotted Lace Trim (I used about 6 feet) and use a needle and thread to gather it along the straight edge. I used Linen Thread and a floss threader, because I had it at hand. Just gather it up and tie it off, then tie onto the box.
Here’s what I used:
I love hearing from you! Please leave your comments and questions below.
Thanks for stopping by today, and Sweet Stamping!
Sep 20, 2015 | Boxes, Challenges, Christmas, Color Palette, CYCI, Gift Wrap, Techniques |

CanYouCaseIt.com has a color challenge this week:
Here’s my project:
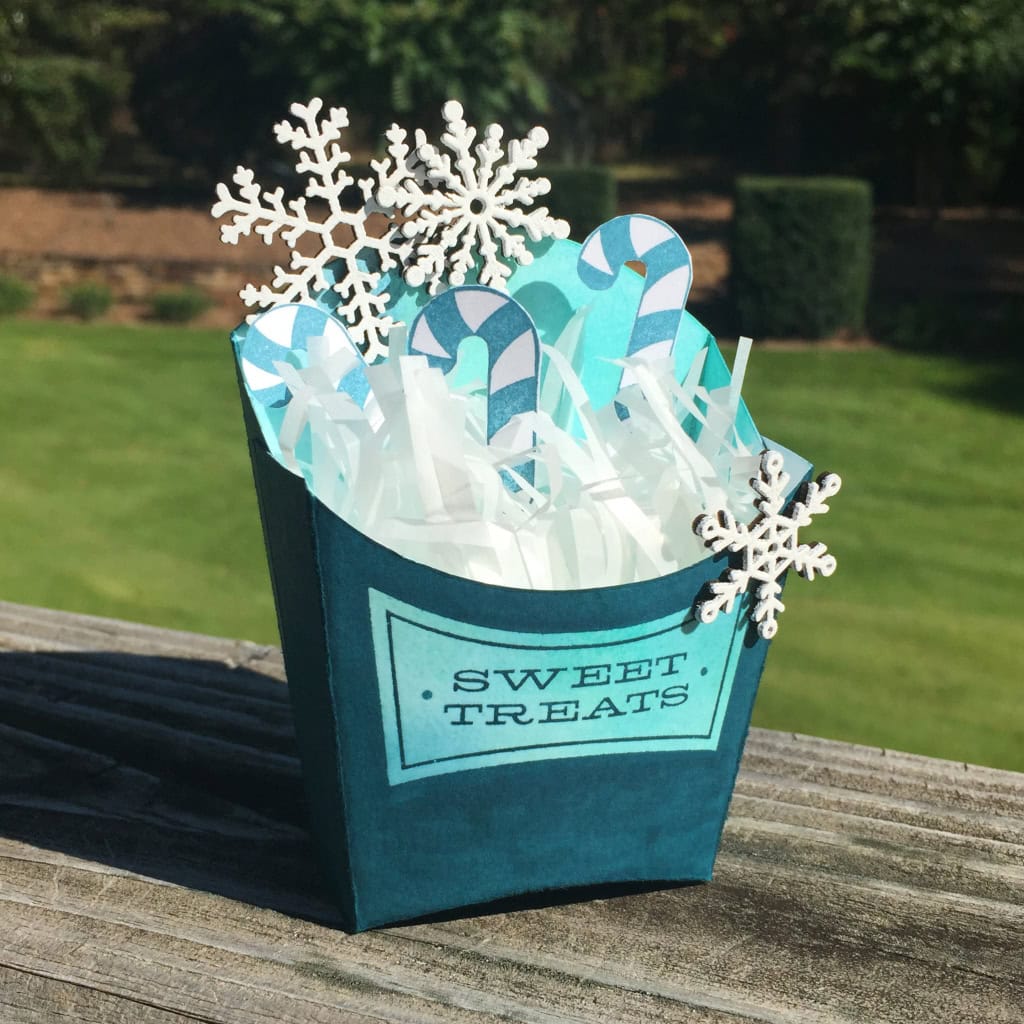
This would be perfect as a party favor, or for each place setting at a holiday gathering.
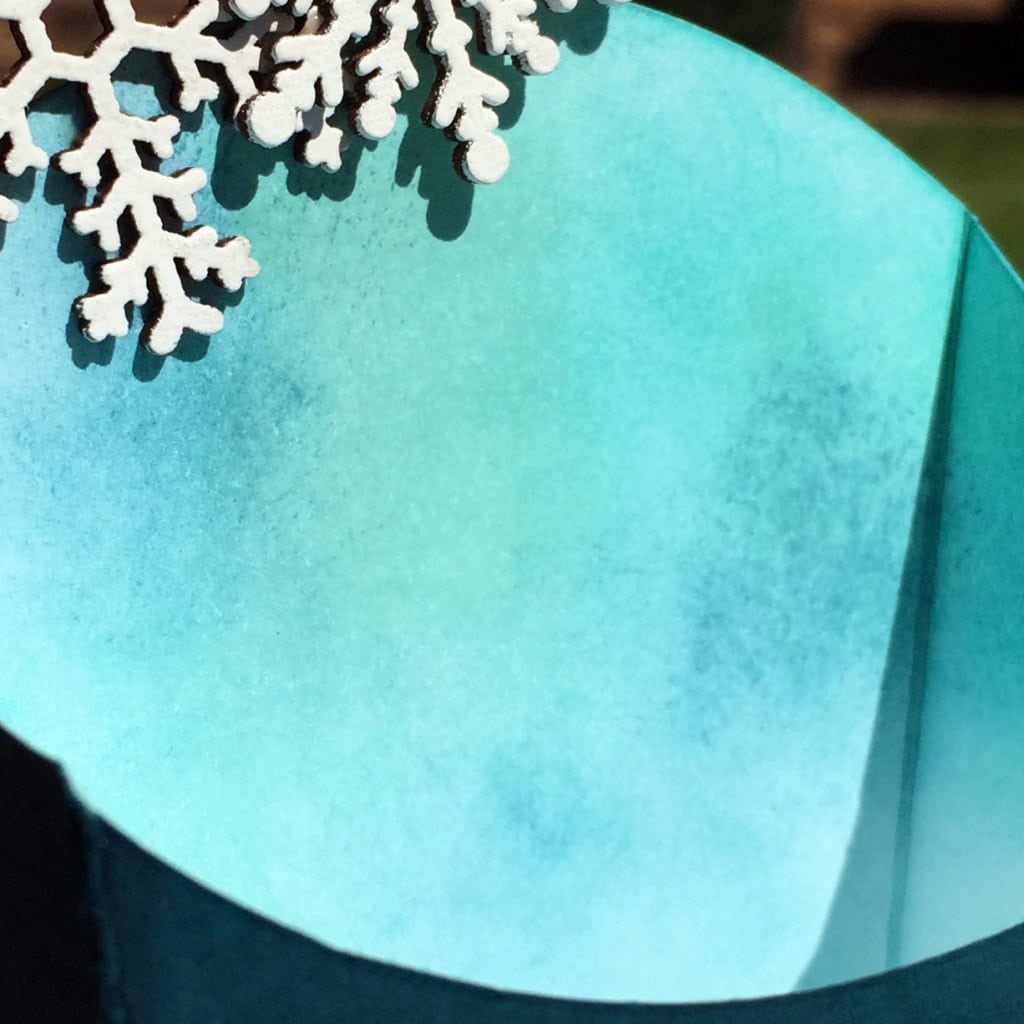
I used Soft Sky, Bermuda Bay, and Island Indigo as my three blues. I cut the Fry Box out of Whisper White Thick Card Stock. Then I sponged the whole thing, inside and out, with the three colors of blue for a marbled/mottled sort of look.
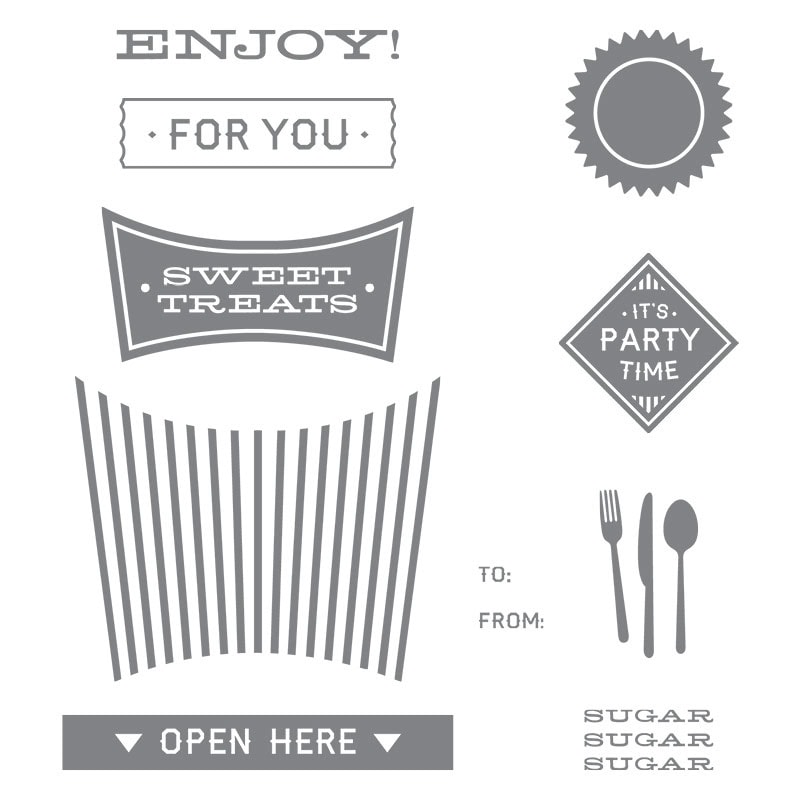
On the front of the box I stamped the sentiment in Versamark ink, then heat embossed it with Clear Stampin’ Embossing Powder.
The All About Sugar stamp set is made to coordinate with the Fry Box Bigz L Die, and the two are available as a bundle to save 15%!
After heat embossing, I colored the entire exterior of the box with Island Indigo ink. This is called the Joseph’s Coat technique. There are a few ways to do this, but the two most efficient are 1) using a brayer, and 2) taking your ink pad directly to the paper. You could also use a Stamping Write Marker, but that will take longer. Be careful as you’re doing this, as the card stock can start to pill if it gets too wet. As it happened, I got it just wet enough to make the fibers stand up a tiny bt, so it looks like suede. I love happy accidents!
I assembled the box by adhering the sides with Tear & Tape. Now I had an Island Indigo Fry Box, with a mottled tri-color sentiment and interior.
The three snowflakes are from the new Snowflake Elements wooden embellishments. Holding each one with tweezers, I pressed it into the Versamark ink pad, then into White Stampin’ Emboss Powder, then heated it with my Heat Tool. I adhered them with Multipurpose Liquid Glue.
For the filler, I cut a Glassine Sheet with Fringe Scissors, then crumpled it with my fingers.
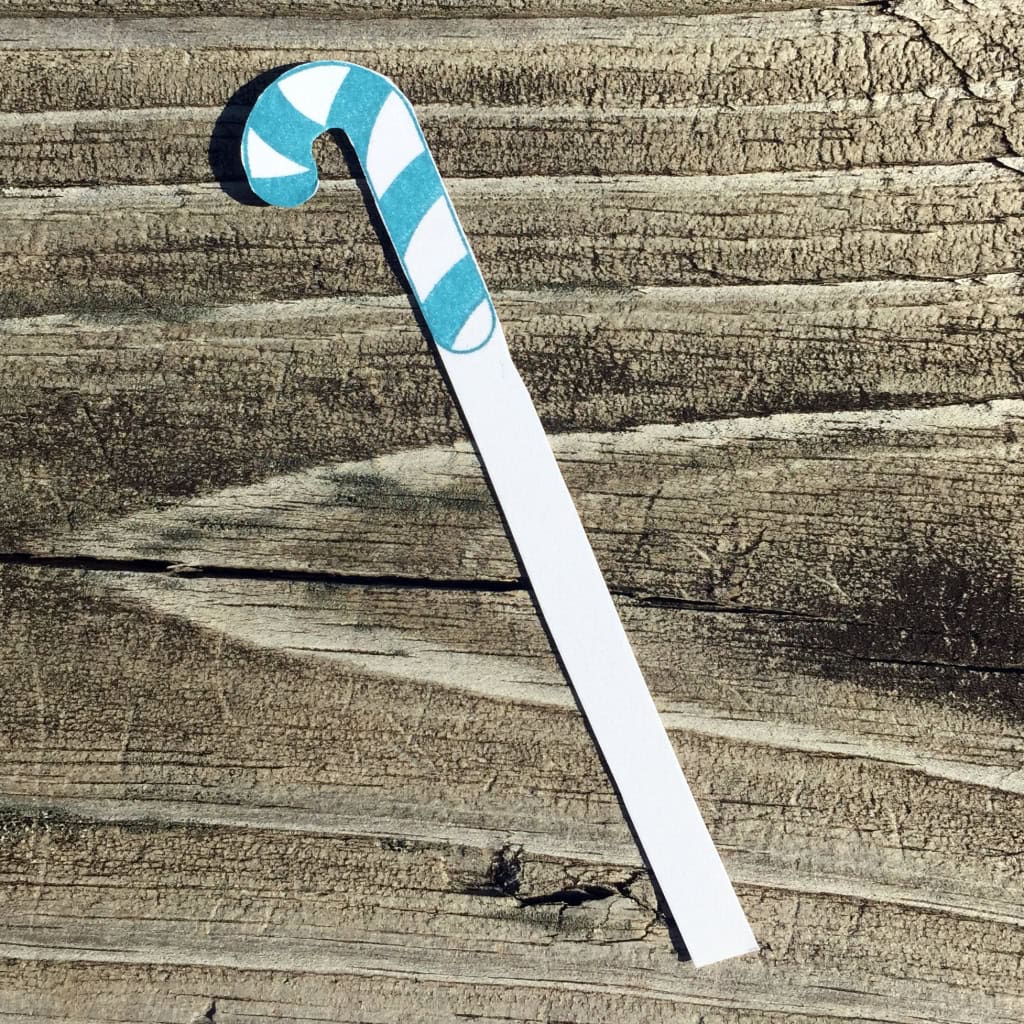
I stamped the candy cane from the A Little Something stamp set three times in Island Indigo. I fussy cut them with my Paper Snips, leaving a long stem to stick down into the Glassine filler. (The Snow Place stamp set has a longer, thinner candy cane stamp, but I preferred the fatter one for this project.)
 Here’s what I used:
I love hearing from you! Please leave your questions and comments below.
Thanks for stopping by today, and Sweet Stamping!
Sep 6, 2015 | Cards, Challenges, Color Palette, CYCI |
Here is this week’s CYCI color challenge:

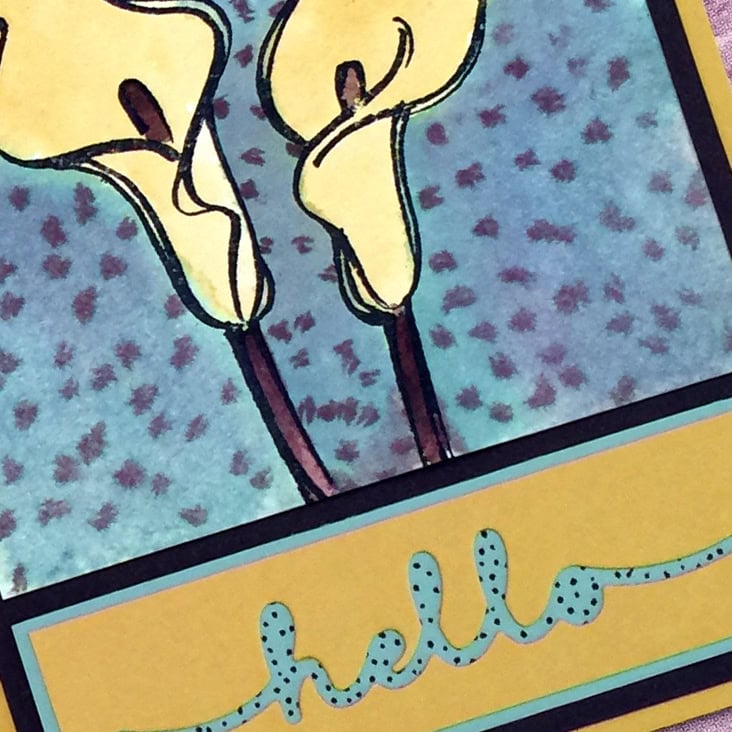
And here’s my card:

This is my first official entry as a CanYouCaseIt Design Team Member. I’m thrilled to be a part of such a talented group!
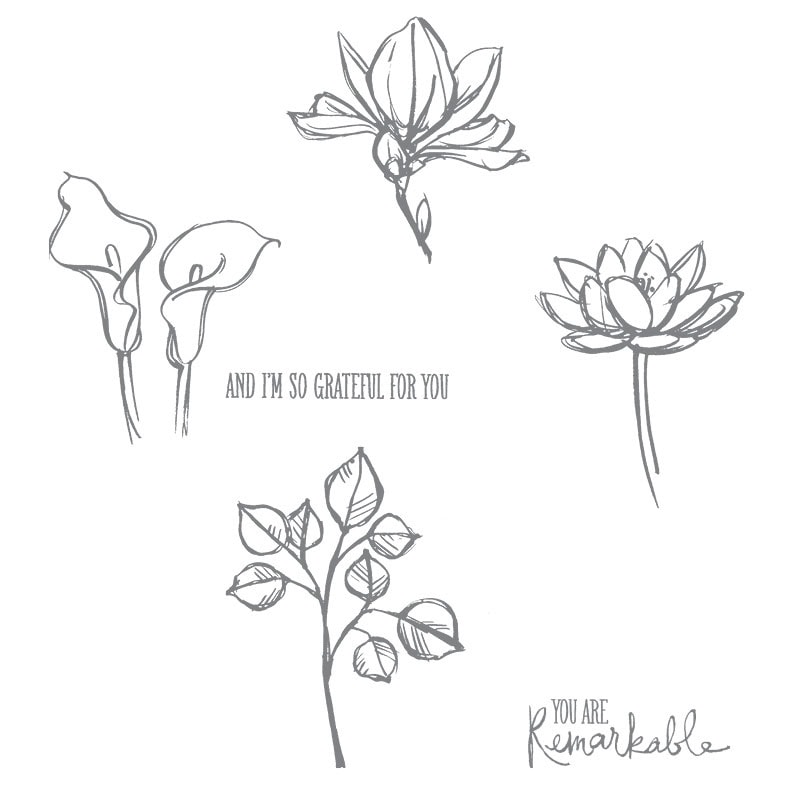
After stamping the flowers from the Remarkable You stamp set in black Staz-On ink on a piece of Watercolor Paper, I used an Aqua Painter and Early Espresso, Mint Macaron, and Hello Honey inks to watercolor the flowers and background. I was trying for that messy sort of watercolor look, but I still kept pretty close to the lines. I guess I’ll have to practice being messier – something I never thought I would say!
I used the Greetings Thinlits Dies to cut the word HELLO from a piece of Hello Honey card stock. I backed it with a piece of Mint Macaron card stock on which I drew lots of dots with an Early Espresso Stampin’ Write Marker.
An Early Espresso mat and a Hello Honey card base finish the card.
I made a Mint Macaron envelope using the 2015-2017 In Color Envelope Paper and the Envelope Punch Board. I adhered the leftover die cut HELLO with Multipurpose Liquid Glue (still my favorite adhesive!)
Here’s what I used:
Be sure to check out the other projects at the CYCI web site!
Thanks for stopping by today, and Sweet Stamping!