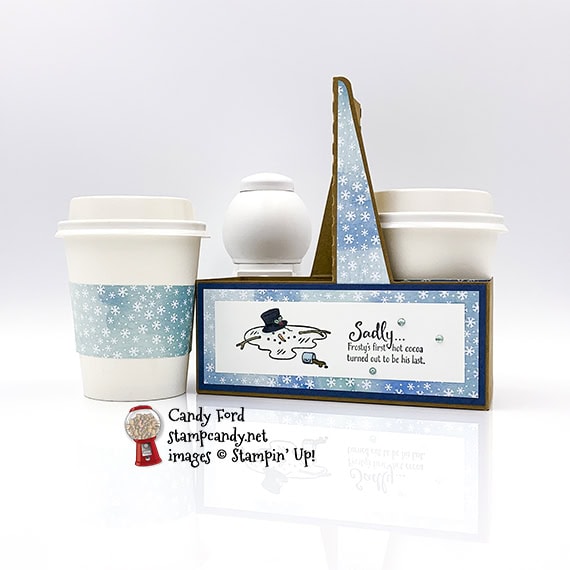
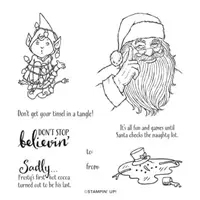
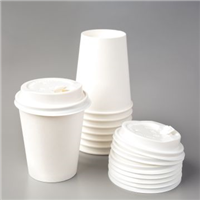
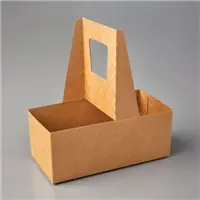
I used the Don’t Stop Believin’ stamp set, Snowflake Splendor Designer Series Paper, and Warm Wraps Dies to decorate these Mini Coffee Cups and Holder. Poor Frosty thought some hot cocoa sounded so tasty, but no one warmed him of the danger. This is a perfect way to give someone some hot cocoa mix. or maybe some K-cups.
If you are reading this in email, some photos may appear blurry, or may not appear at all. Please click here to see the post on my blog.
S Don’t Stop Believin Don’t Stop Believin Don’t Stop Believin Don’t Stop Believin
Here’s what I made:
S
Here’s what I did:
Cut and scored with my paper trimmer:
- Night of Navy card stock (CS) cut to 5-3/4″ x 2-1/4″ (2 pieces)
- Snowflake Splendor Designer Series Paper (DSP) cut to 5-1/2″ x 2″ (2 pieces)
- Night of Navy CS cut to 2-3/4″ x 2-1/4″ (2 pieces)
- DSP cut to 2-1/2″ x 2″ (2 pieces)
- DSP cut to 1-1/4″ x 4-1/2″ (2 pieces)
- Whisper White CS cut to 5″ x 1-1/2″
Stamped with the Don’t Stop Believin’ stamp set:
- image and sentiment in Memento Tuxedo Black ink onto the Whisper White CS
Cut using the Warm Wraps Dies:
- DSP for the cups (4 pieces)
Cut using Paper Snips:
- laid the coffee holder on its side and traced around the handle onto the back of the DSP strips
- cut around the traced shapes using Paper Snips, then cut about 1/8″ off the long straight side with my Paper Trimmer
- You could lay the holder over the strip so that the straight side of the handle extends 1/8″ past the edge of the DSP strip. That will keep you from having to trim off the 1/8″ afterward.
Colored using Stampin’ Blends Markers:
- stamped image in Basic Black, Just Jade, Real Red, Pumpkin Pie, Soft Suede, Pool Party, and Seaside Sprayx
Assembled the project:
- burnished the folds in the holder with a Bone Folder, then popped up to open
- fussy cut strips glued onto the sides of the holder handles
- stamped layer glued onto one of the longer DSP layers
- DSP layers glued onto the corresponding Night of Navy CS layers
- Night of Navy CS layer glued onto the sides of the holder
- 3 Coastal Cabana rhinestones applied onto the stamped layer using a Take Your Pick tool
- die cut DSP glued together at the ends to make 2 cup wraps, then the wraps slipped onto the cups
S
Here are today’s main colors:
You can click on each one to see all the products that come in that color!
S
Here’s what I used:
Click on these images for more details and to purchase. If you are reading this post in email, the product images may not show up. Please click here to see the post on my blog.


Supply List. <— Click for a clickable and printable list of the products!
S
Here’s the new Curvy Celebrations offering:
Click the image to see the products in my online store. Available through 4 January 2021.

S
Here are some helpful links:
- November Host Code T9TNBY67 – receive free product!
- Shop my online store
- Shop the new Curvy Celebrations products – available only through January 4
- Clearance Rack
- Request a free catalog
- SUBSCRIBE to my weekly newsletter and/or daily blog updates.
- Paper Pumpkin: buy a Prepaid Subscription or subscribe month to month
- Earn Gumball Rewards – receive free products!
- Gift Certificates are available in any U.S. dollar amount from me. Contact me for details.
- Have you shopped from me within the past year? Join my private VIP Facebook group for exclusive project tutorials and more!
- Join my team and enjoy a 20% discount (or more) on all your purchases! You choose $125 in products and pay only $99, and get free shipping! No obligation! No selling required!
S
Thanks for stopping by today, and Sweet Stamping!


I love Frosty’s First Cocoa. Way too cute. I agree, it’s a great way to give a gift. My neighbor uses K-cups and there are K-cup cocoa mixes. Yay – one holiday neighbor gift solved! Thank you.
Thank you, Nancy! I’m so glad to know you’ll be using this!