
A couple days ago I shared my January swap card made with the Lily Impressions Designer Series Paper. You can see that post here. The swap theme was Sale-A-Bration. Coincidentally, Judy Newsome used the very same pattern from the same Lily Impressions Designer Series Paper for her swap cards, and out layouts are even very similar. You know what they say: great minds think alike! Judy, a member of my Candy Hearts team, lives in LaFayette, GA.
Lily Impressions Lily Impressions
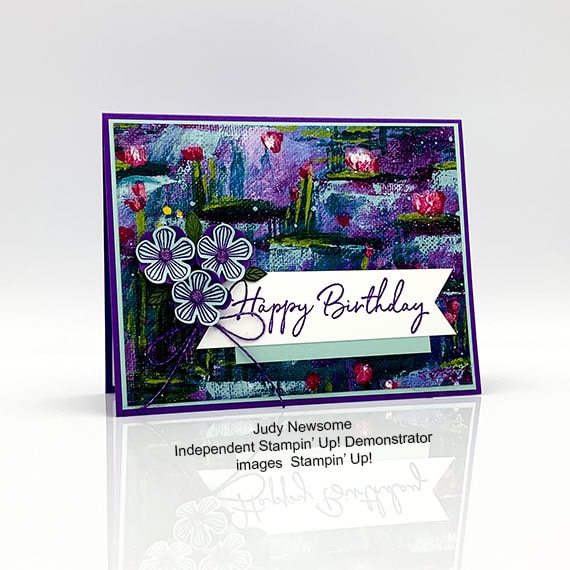
Here’s what she made:
S
S
Here’s what she did:
Cut and scored with her paper trimmer:
- Gorgeous Grape card stock (CS) cut to 5-1/2″ x 8-1/2″, then scored in half at 4-1/4″
- Pool Party CS layer cut to 5-3/8″ x 4-1/8″
- Lily Impressions Designer Series Paper (DSP) layer cut to 5-1/4″ x 4″
- Whisper White CS layer cut to 4-1/2″ x 1″
- Pool Party CS layer cut to 3″ x 1/2″
- Whisper White CS cut to 5-1/4″ x 4: for the inside of the card base
Stamped with the Thoughtful Blooms stamp set:
- 3 flowers in Gorgeous Grape ink onto a scrap of Pool Party CS
- 3 leaves in Gorgeous Grape ink onto a scrap of Garden Green CS
Stamped with the Happy Birthday to You stamp set:
- sentiment in Gorgeous Grape ink onto the Whisper White CS layer
Cut using the Small Blossom Punch:
- 3 stamped flowers
- 3 flowers from a scrap of Gorgeous Grape CS
Cut using the Banner Triple Punch:
- both ends of the sentiment layer
Cut using Paper Snips:
- 3 leaves
Colored using a Stampin’ Write Marker:
- a piece of Linen Thread in Gorgeous Grape
Assembled the card:
- burnished the fold in the card base with a Bone Folder
- large Pool Party CS layer glued onto the front of the card base
- DSP layer glued onto the Pool Party CS layer
- small Pool Party CS layer glued onto the back of the sentiment layer, then both glued onto the DSP layer
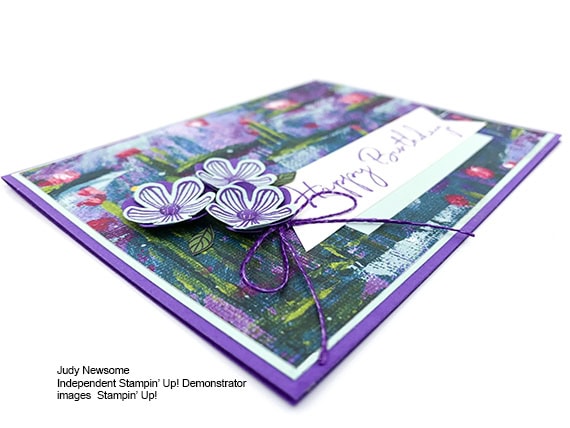
- all 6 punched flowers burnished, using the bottom round end of an Aqua Painter and a Stampin’ Pierce Mat, so the petals curl up
- 3 stamped flower glued onto the 3 Gorgeous Grape CS flowers
- Gorgeous Grape Glitter Enamel Dot applied onto the center of each flower
- flowers and leaves glued onto the DSP layer
- thread tied into a bow and adhered onto the DSP layer using a Mini Glue Dot
- Whisper White CS glued onto the inside of the card base
S
Here are today’s main colors:
You can click on each one to see all the products that come in that color!
S
Here’s what she used:
Click on these images for more details and to purchase.
Click “Supply List” for a clickable and printable list of the products!
S
Here are some helpful links:
- Shop my online store
- Sale-a-bration!
- Coordination Product Release – available only through March 31 or while supplies last!
- Clearance Rack
- SUBSCRIBE to my weekly newsletter and daily blog updates.
- February Host Code SYG4ATBH – receive free product!
- Paper Pumpkin: buy a Prepaid Subscription or subscribe month to month
- Earn Gumball Rewards – receive free products!
- Gift Certificates are available in any U.S. dollar amount from me. Contact me for details.
- Have you shopped from me within the past year? Join my private VIP Facebook group for exclusive project tutorials and more!
- Join my team and enjoy a 20% discount (or more) on all your purchases! You choose $125 in products and pay only $99, and get free shipping! No obligation! No selling required! PLUS only during Sale-a-bration, you’ll also receive an exclusive Mini Paper Cutter a 6″ x 6″ Sampler of Designer Series Paper from the new Mini Catalog, and another stamp set of your choice.
S
Thanks for stopping by today, and Sweet Stamping!

