Dec 13, 2016 | Blog Hop, Cards, Christmas, Color Palette, Gallery, Holiday, Retiring Products |

Welcome to InKing Royalty’s December Blog Hop! While Stampin’ Up! demonstrators are actively ordering from the 2017 Occasions Catalog and earning products from the 2017 Sale-a-Bration brochure, we are also getting ready for the upcoming holidays. We are excited to share some fun winter-themed projects with you! Today’s Winter Wishes Blog Hop is filled with inspiring projects that feature each artist’s take on Winter. After you read my post, I hope you’ll hop over to the next person on the list at the base of this post.
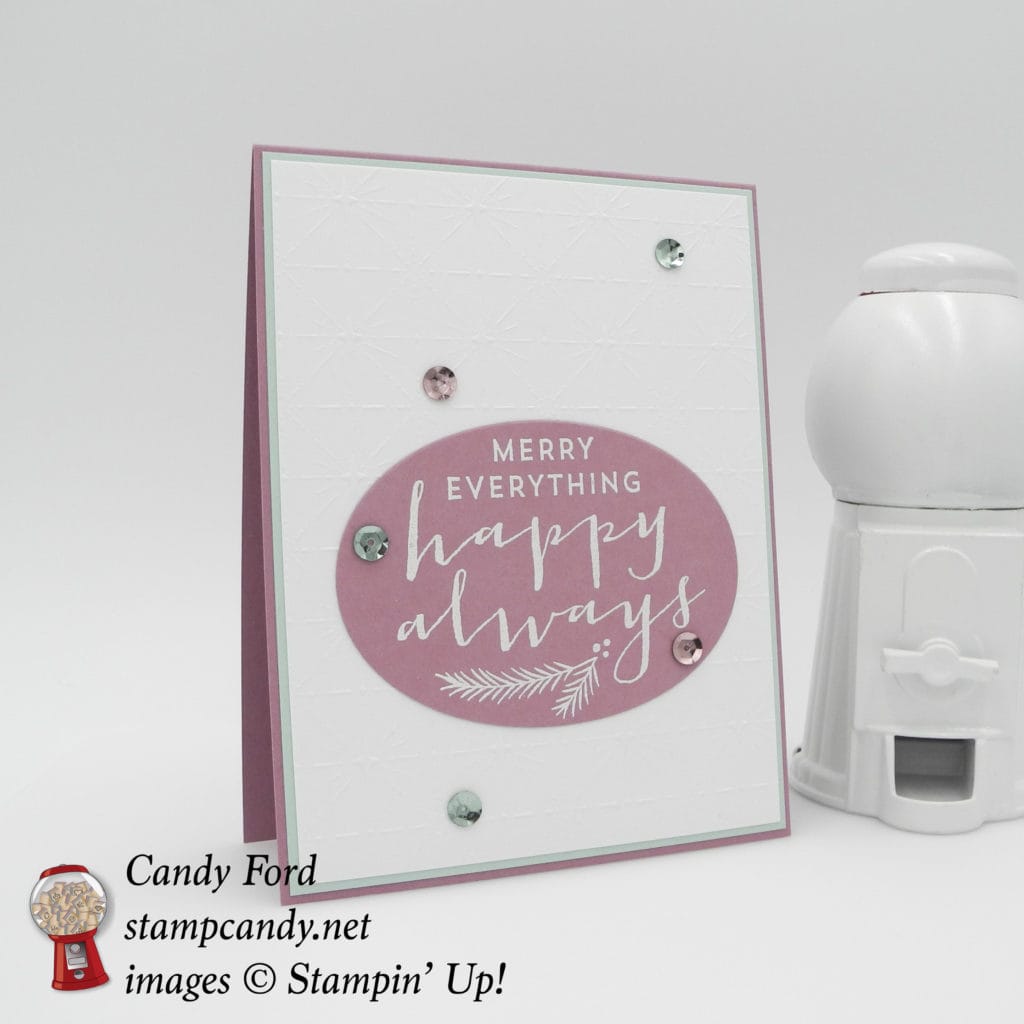
Here’s what I made:
I decided to go simple and pretty for today’s project. The Sweet Sugarplum, Soft Sky, and white color palette is soft and wintery. And I love this sentiment from the Suite Seasons stamp set.

Here’s how I did it:
The card base is Sweet Sugarplum card stock. The next layer up is Soft Sky card stock. On top of that is a piece of Fancy Frost Specialty Designer Series Paper.
I heat embossed the sentiment in white onto Sweet Sugarplum card stock, then I cut it out with a die from the Layering Ovals Framelits. I glued that onto the card front.
Finally I glued on some Soft Sky and Sweet Sugarplum sequins from the Fancy Frost Sequins.
Here are the Hop Stops:
I always feel so honored to be included in the InKing Royalty blog hop with such a talented group paper crafters. I hope you’ll hop along to the next stop on the blog hop, the amazing Jennifer Spiller at Westside Paper Creations, as well as the rest of the hoppers on the list. There’s a lot of inspiration to be found in this group – and you don’t want to miss it!
If you get stuck during the Blog Hop, please use this line-up as a guide. Thank you for hopping along with us!
- Brian King at Stamp with Brian
- Lisa Pretto at InkBig Academy Stamps
- Pam Morris at Tap Tap Stamp
- Candy Ford at Stamp Candy
- Jennifer Spiller at Westside Paper Creations
- Becky Volpp at InkBlossom with Becky
- Robin Myren at Songbird Designs by Robin
- Karen Browning at StampWithMeKZB
- Lory Robinson at The Robin’s Nest Designs
- Shawn de Oliveira at ShawnStamps
Here’s what I used:
Thanks for stopping by today, and Sweet Stamping!

Dec 7, 2016 | Blog Hop, Cards, Christmas, Color Palette, Gallery, Holiday |
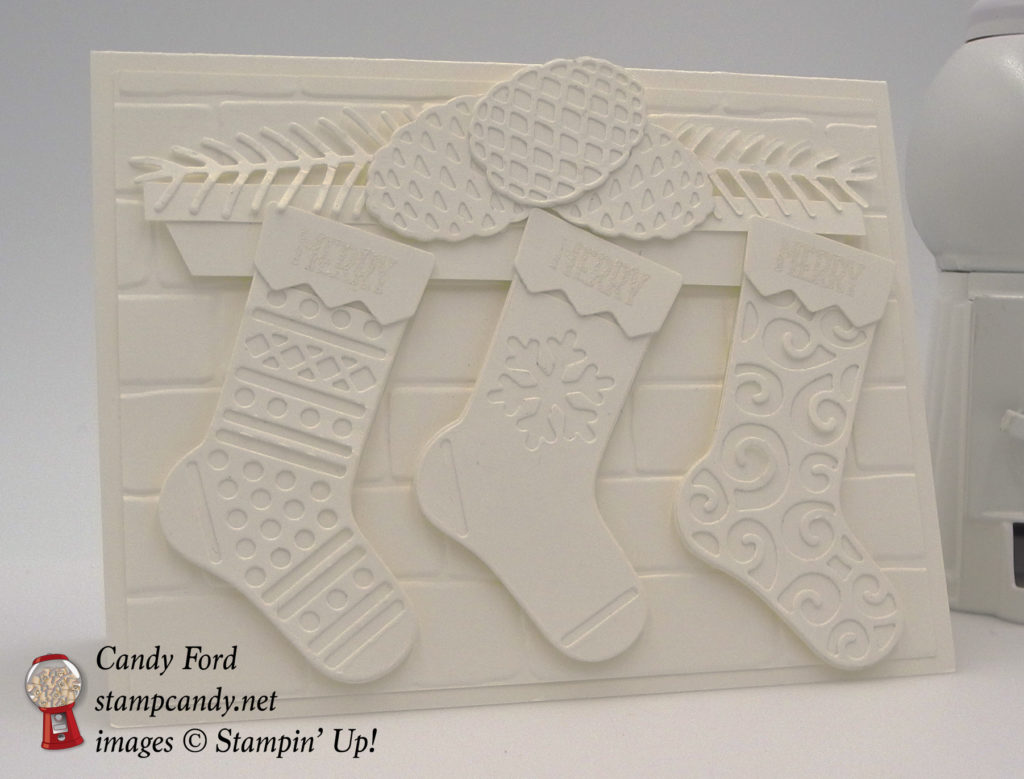
This month the Inspire, Create, & Share Blog Hop is all about white-on-white projects. I love tone-on-tone projects, and white-on-white is my favorite. I also enjoy using different products together, and I used several to create today’s card.
Here’s what I made:
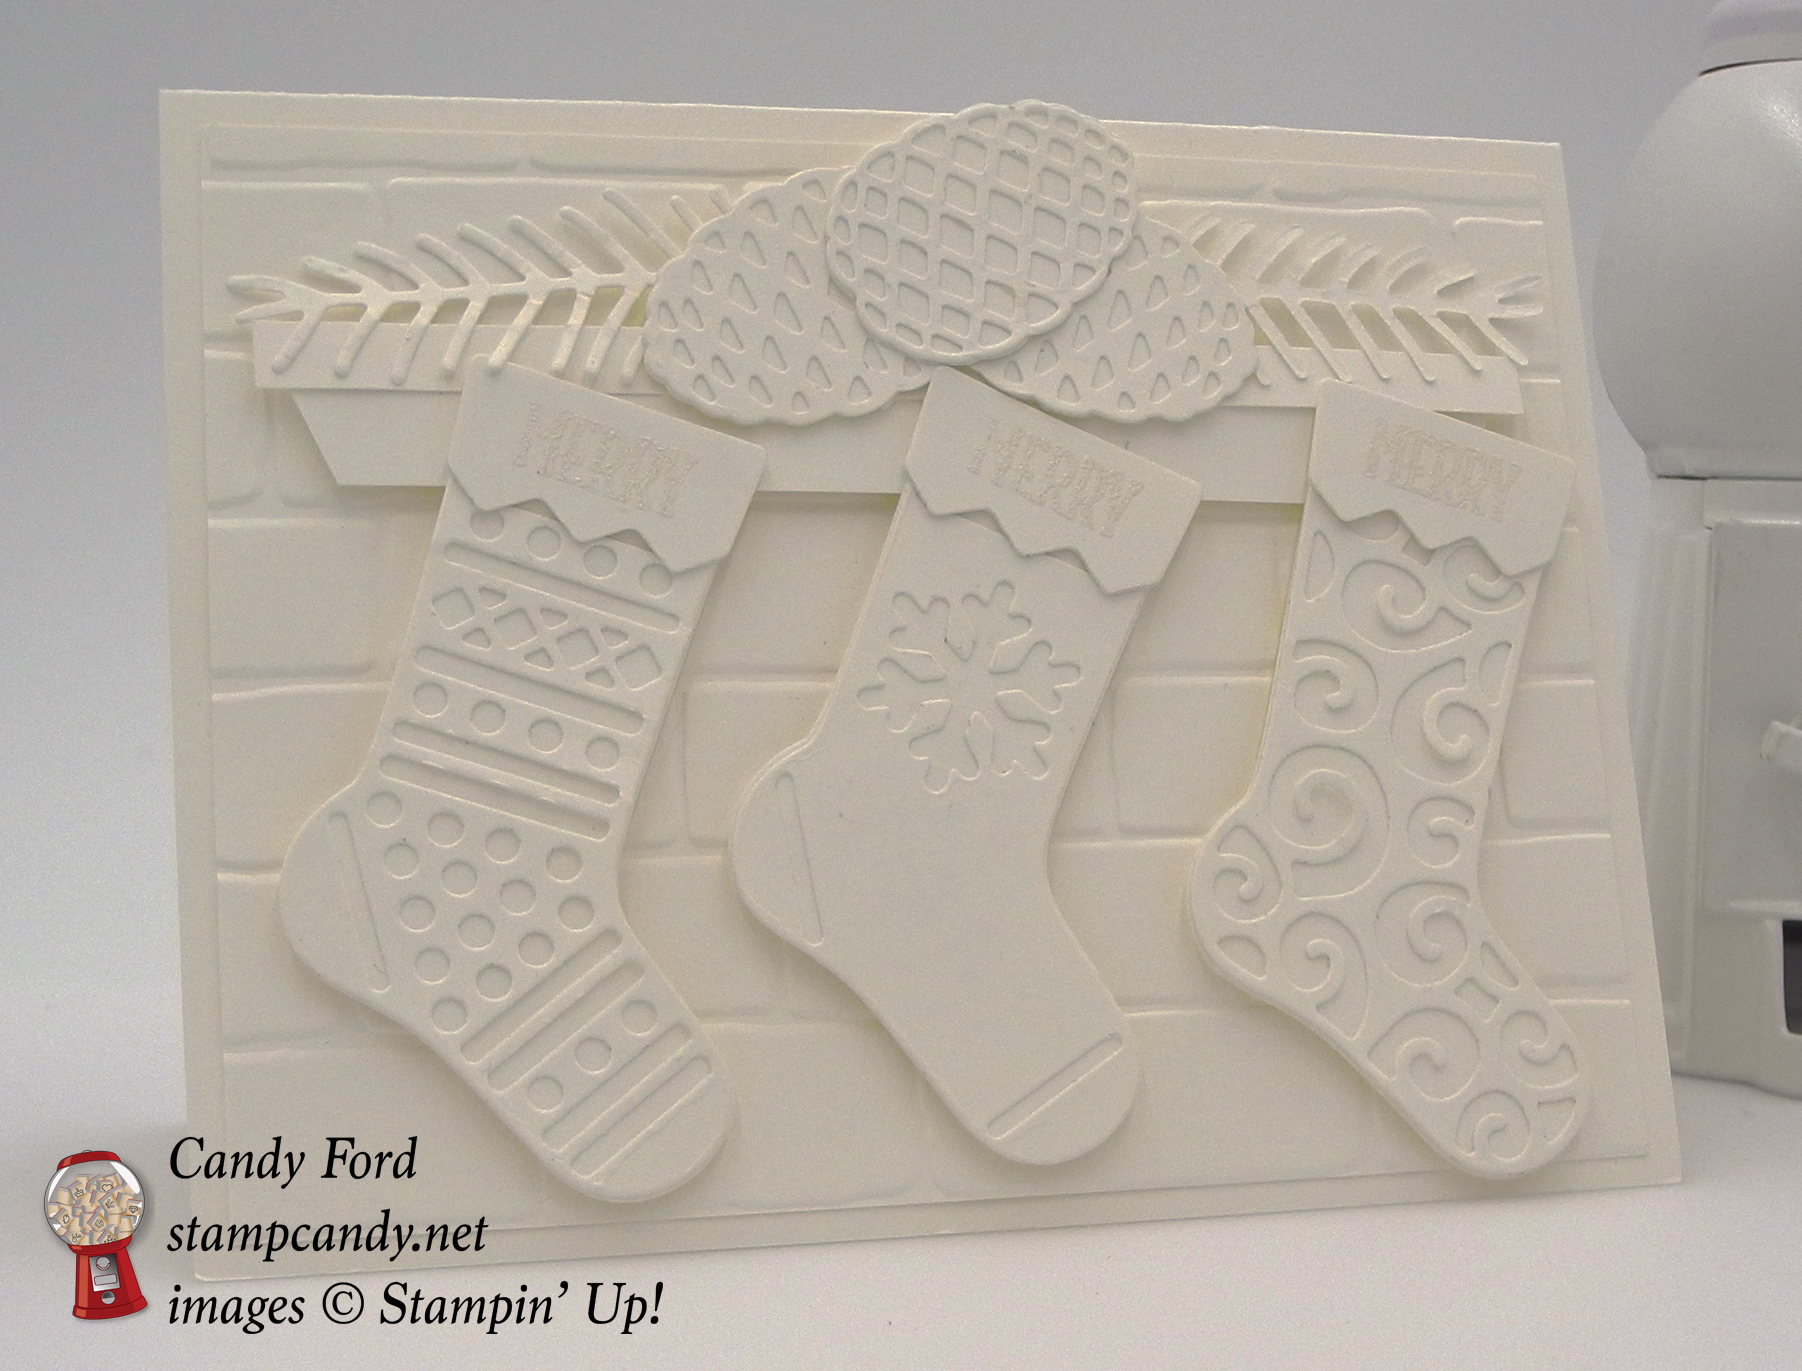
My card has three stockings hanging from a mantle covered in pine boughs and pinecones. The sentiment is subtle: each stocking has the word Merry.

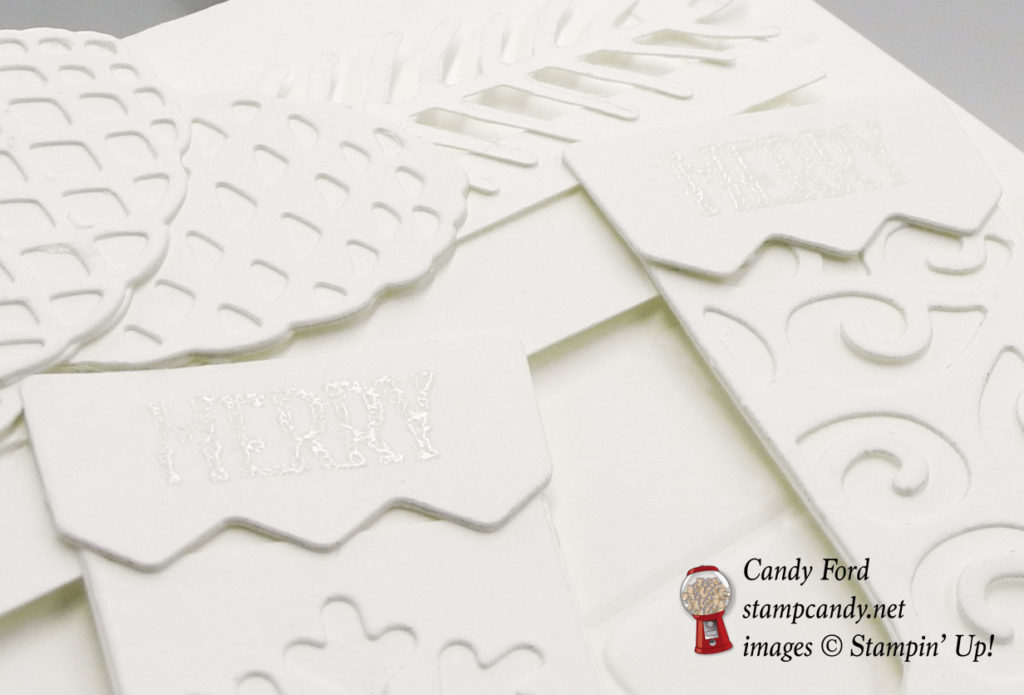
While the details are visible in person, it’s hard to make them show up in a photo. Here’s a darkened photo to help.
Here’s how I did it:
The card base is Thick Whisper White card stock. Everything else is the regular Whisper White card stock (CS.)
I used the Christmas Stocking Thinlits to cut the three stockings: back, front, and topper. For the toppers, I first heat embossed the word Merry in white onto CS, then cut them with the die. I glued the pieces together.
The word Merry is from this stamp in the Hang Your Stocking stamp set:

Here’s a close up of the heat embossed words:
I cut a 1/4″ x 5″ strip of CS for the mantle top, and a 1/2″ x 4-3/4″ strip of CS for the mantle base. I used Paper Snips to cut an angle at each end of the base. I glued the two pieces together.
I used the Pretty Pines Thinlits to cut the pine boughs and the pinecone backs and fronts.
I ran a 5-1/4″ x 4″ piece of CS through the Big Shot with the Brick Wall embossing folder, and glued it to the card base.
I attached the mantle to the brick wall with Stampin’ Dimensionals. I attached the stockings to the brick wall with Stampin’ Dimensionals, and to the mantle with glue.
I attached the pine boughs with glue, then attached the pinecones with Fast Fuse.
Click on this image to see the next blog on the hop, Darla Roberts of Stampin’ With Darla!

Here’s what I used:

DECEMBER HOST CODE
U3YAHB4R
If you are placing an order for less than $150, please use this Host Code.
If you are placing an order of $150 or more, you will receive Stampin’ Rewards on your order, so do not use the Host Code.
Place at least one individual order of $75 or more from me in December and use the Host Code, and I will send you a package of Pearl Basic Jewels! (Shipment within US only.) If you place an order of $150 or more, you will automatically get the Pearl Basic Jewels!
Click here for details on how to use the Hostess Code.
Thanks for stopping by today, and Sweet Stamping!
Oct 19, 2016 | Blog Hop, Cards, Gallery |

Welcome to our International Project Highlights using current Stampin’ Up!® Products. We have all created this gallery of projects for you to be inspired by! We would love it if you could visit every one of our blogs and see a close up of our projects. You can see the gallery below and this will be on every blog that you click on so you will never be lost.
I love finding ways to use stamp sets that you might not think of when you first see the them. For today’s card, I used the Bella & Friends stamp set, which has images of cute dogs and birds and some sentiments. But look down in the corner. See that adorable little cupcake and the sentiment next to it? That’s what I decided to use.

Here’s what I made:
…at first.

It’s a very simple card. The card base is Basic Black card stock with a Whisper White layer glued to it. There are two more black/white layers in smaller sizes. All the layers are glued together.
I stamped the cupcake and sentiment in Basic Black Archival ink onto the smallest Whisper White layer, then colored in the image with Stampin’ Write Markers in Melon Mambo, Tempting Turquoise, and Daffodil Delight.
I like this card fine, but the 1/8″ black borders seemed a bit heavy, so I made the same card again with 1/16″ borders.
Which do you like better?

(The color is a bit different in the two photos because I took them at different times of the day, and the light coming in the window changed.)
Thanks for visiting my blog today! There are so many amazing ideas and inspiration on this hop that you don’t want to miss. We know that you will love our gallery of projects made from Stampin’ Up!® Demonstrators around the world!
Here’s what I used:
Thanks for stopping by today, and Sweet Stamping!
Oct 5, 2016 | Blog Hop, Cards, Club, Gallery |
I am very excited! This is my first post for the monthly Inspire, Create & Share Blog Hop. I am thrilled to be included in this group of talented paper crafters!
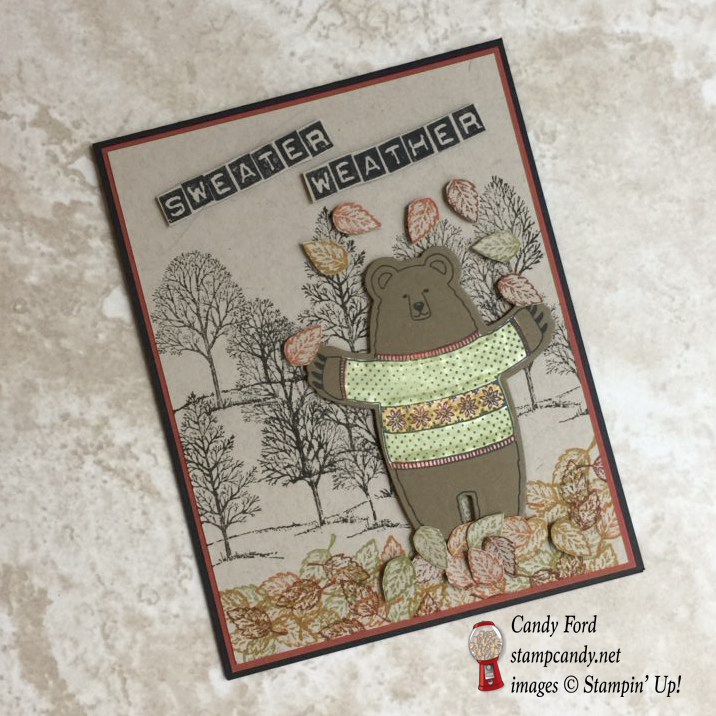
I designed Autumnal projects for my October Stamp Club meeting, and I thought one of those would be perfect for this hop’s Fall Fun theme. Two of my favorite things about Fall are “sweater weather” and playing in the leaves. This bear is enjoying both.
Here’s what I made:
Here’s how I did it:
The Basic Black card base is the traditional size: 4-1/4″ x 5-1/2″. I glued a 4-1/8″ x 5-3/8″ piece of Cajun Craze card stock onto the card front.
On a 4″ x 5-1/4″ piece of Crumb Cake card stock, I stamped the trees from the Lovely As a Tree stamp set 3 times in black Memento ink, making sure to stagger the images. At the bottom I stamped the small leaf from the same stamp set in Cajun Craze, Tangerine Tango, Pumpkin Pie, Delightful Dijon, and Pear Pizzazz. I stamped a few of each color onto another piece of Crumb Cake and used my Paper Snips to cut out the leaves.
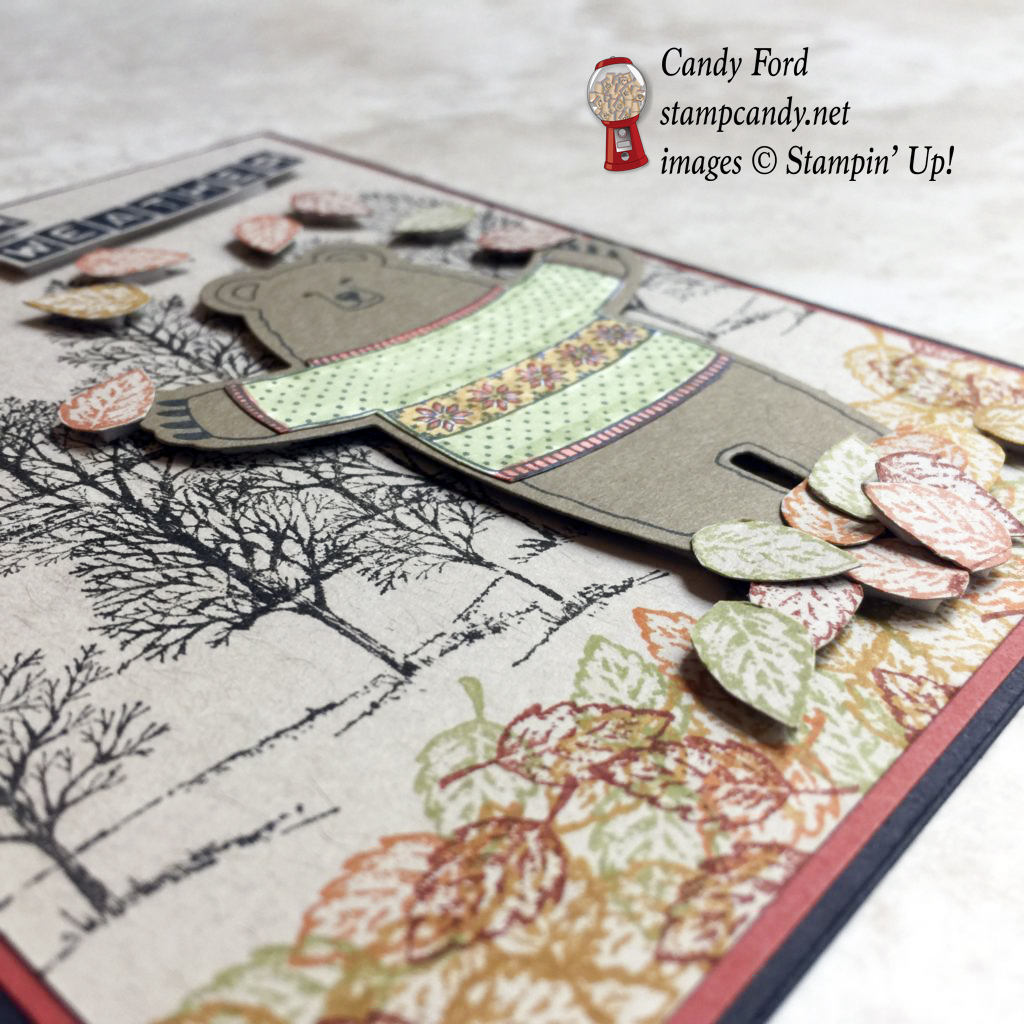
I stamped the bear from the Fa-la-la-la Friends stamp set in black Memento ink twice: once onto Soft Suede and once onto Whisper White. I cut them out with the Bear Hugs Framelits. I trimmed the white one down to only the sweater, and colored it with Stampin’ Write Markers in Delightful Dijon, Old Olive, and Tangerine Tango. I added streaks in the green parts to try to make it look more like it’s woven. I’m not sure I like the result. What do you think?
I glued the sweater onto the bear and adhered him to the stamped card front with Stampin’ Dimensionals. I cut more Stampin’ Dimensionals in 1/4 and adhered each leaf with one of the pieces. I covered his feet, so it would look like he’s standing in a pile of leaves, and I put some above his head, like he just threw them into the air. Doesn’t it look fun?
I stamped the title with the Labeler Alphabet stamp set in black Memento ink onto Crumb Cake card stock, then cut out each word with my Paper Snips. I adhered it to the card front with Stampin’ Dimensionals.
Lastly, I glued the card front onto the Cajun Craze layer.
This is an easy card to make, but there is some fuzzy cutting involved. If you have a die or punch for a tiny leaf, you could use that to speed things up.
Be sure to check out the next blog on the list, Terri Takazhige at Territerbears’s Stamp & Scrap Spot! Just click on this image:
Here’s what I used:
Contact your demonstrator to place an order for these products. If you don’t have a demonstrator, feel free to order by clicking on the images below, or contact me at candy@stampcandy.net.
Thanks for stopping by today, and Sweet Stamping!
Oct 3, 2016 | Blog Hop, Cards, Gallery |

Welcome to the first ever Ultimate Pink Blog Hop – a collection of ideas from Stampin’ Up! demonstrators all over the globe featuring shades of pink in honor Breast Cancer Awareness Month.
When I thought about what to make for this hop, I started looking at my stamp sets for inspiration. When I came across the Letters For You stamp set, I felt it would be a good choice, but what would I spell? Then the perfect word popped into my head. What word would you use to describe anyone who has dealt with breast cancer?
Here’s what I made:

Here’s how I did it:
This is a very simple card with a big impact. I used white and two shades of pink.
The card base is Blushing Bride card stock, with a 5-3/8″ x 4-1/8″ Whisper White layer, then a 5-1/4″ x 4″ Melon Mambo layer, glued on.
The next three layers up, in the same color order, are 4-3/4″ x 3-1/2″, 4-5/8″ x 3-3/8″, 4-1/2″ x 3/1-4″. All layers on the card are glued together.
I stamped the letters in Melon Mambo ink onto Whisper White card stock, then cut them out with the Large Letters Framelits Dies. I glued them onto the top most layer.
The final touch is a tiny bow made with Melon Mambo 1/8″ Stitched Ribbon and adhered with a Mini Glue Dot.
I am excited you’re here! All blog hop participants are listed below, to help you as you journey among us being filled with pink inspiration.
Here’s what I used:
There is so much going on in October!
Here are details on THREE promotions!
This one lasts only until October 5th. It’s a great way to stock up on cardmaking basics!

This one lasts only until October 10th. Buy one month and get your second month FREE!

This one lasts until October 31st. It’s a great time to stock up on Designer Series Paper!


Thanks for stopping by today, and Sweet Stamping!
Sep 30, 2016 | Blog Hop, Cards, Gallery, Halloween, Holiday |

Happy World Card Making Day! And welcome to the World Card Making Day International Blog Hop! We think using current Stampin’ Up!® products to share lots of amazing inspiration with you is a fantastic way to celebrate this annual event. You are currently visiting my blog, Stamp Candy, in the US, but you will be visiting different countries in your hop today. There is a list near the bottom of this post which will help you hop along from blog to blog, so you can see all the amazing projects we have lined up for you.
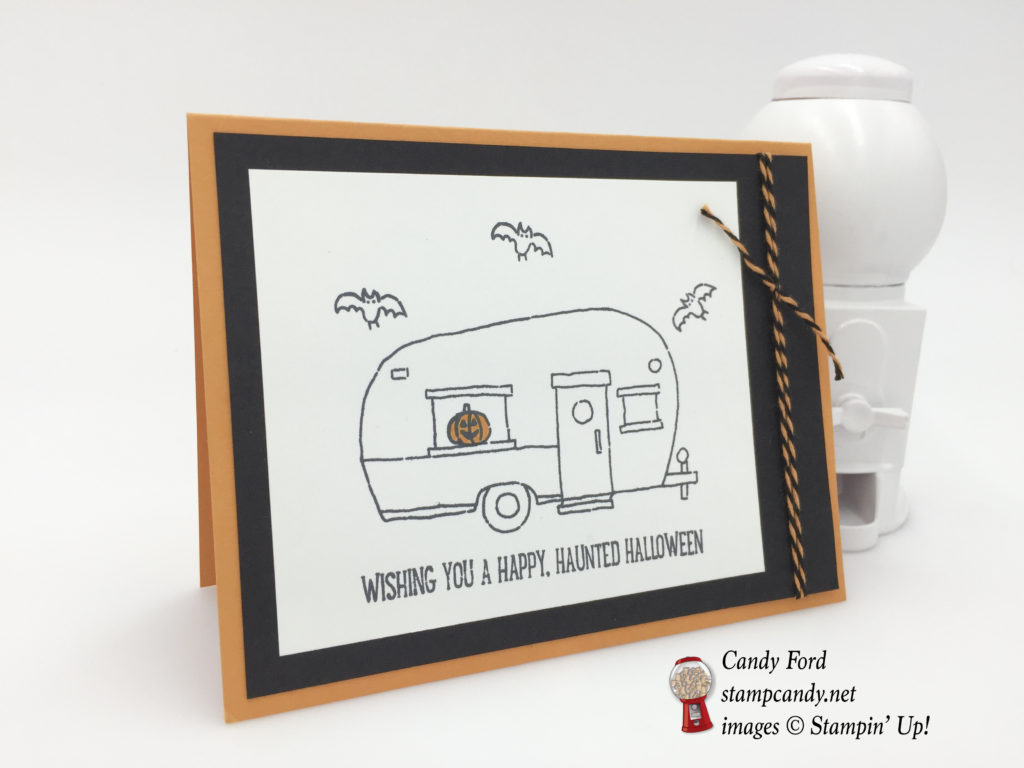
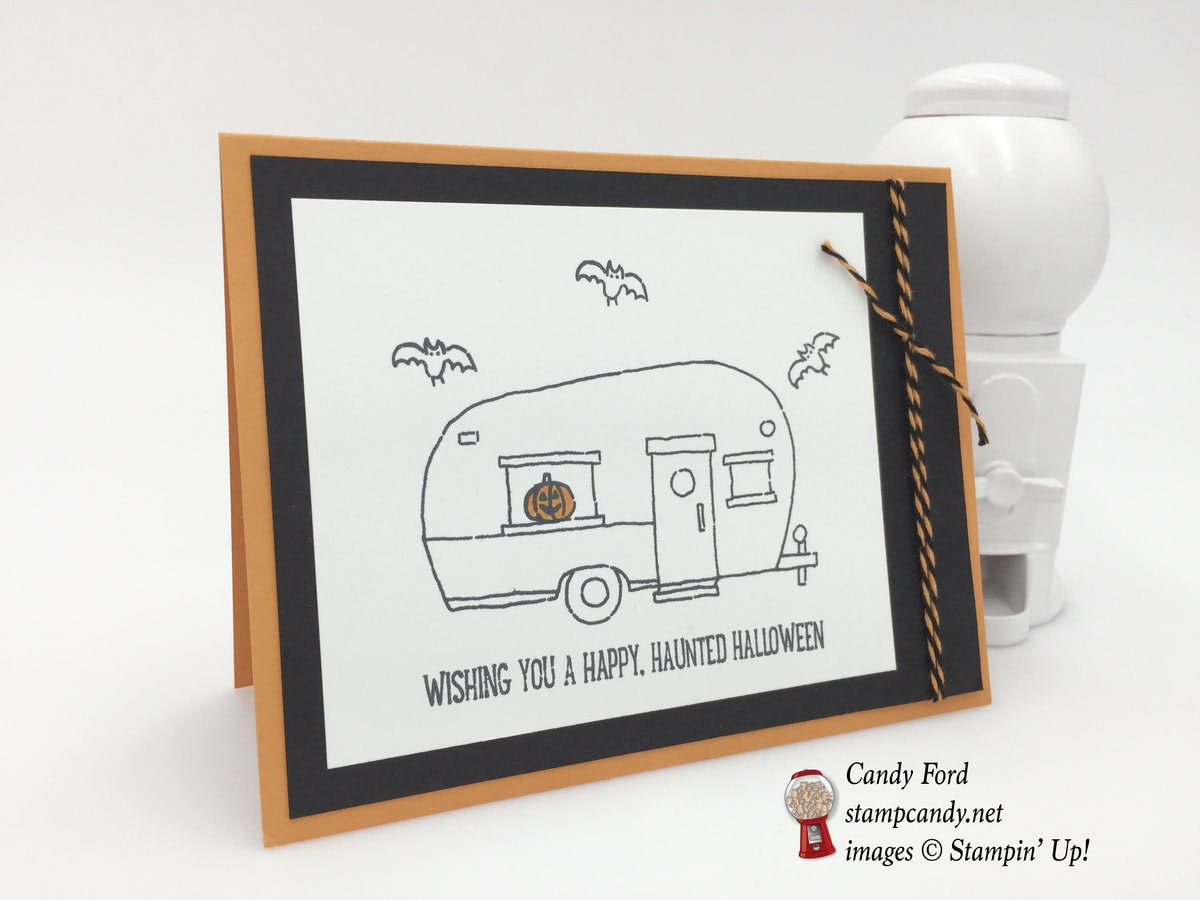
I am in serious Halloween mode right now. We have a party every year and there’s a lot to do to get ready: costumes, decorating, food, etc. So today I’m sharing a sweet Halloween card with you.
Here’s what I made:
Here’s how I did it:
All the images are from the Glamper Greetings stamp set. I stamped them in Black Memento ink onto Whisper White card stock. You could also use Basic Black Archival ink. I used a Pumpkin Pie Stampin’ Write Marker to color in the jack-o-lantern.
I glued this to a piece of Basic Black card stock. I cut a couple pieces of twine, from the Halloween Night Baker’s Twine pack. I wrapped them around and adhered them to the back. Then I tied a smaller piece around those two pieces. I did this for two reasons: 1) there is less bulk on the back of the layer, and 2) it’s easier to get it smooth and not twisted, and to tie the knot where you want it.
I then glued that to the Pumpkin Pie card base. That’s it! Easy peasy!
Thanks for hopping with us today! Remember that you are currently at my blog, Candy Ford at Stamp Candy. For lots of amazing ideas and inspiration that you don’t want to miss, check the line up below to see who is next on the list. Have fun hopping around the world with us!
Here’s what I used:
Thanks for stopping by today, and Sweet Stamping!


