Aug 30, 2015 | Cards, Challenges, Christmas, Holiday, New Products |
I am thrilled to announce that, as of next week, I will be a member of the Can You Case It? Design Team! I am honored to have been selected to be a part of such a talented group.
For this week, I am a challenge participant. Here is this week’s CYCI sketch challenge:

And here is my card:

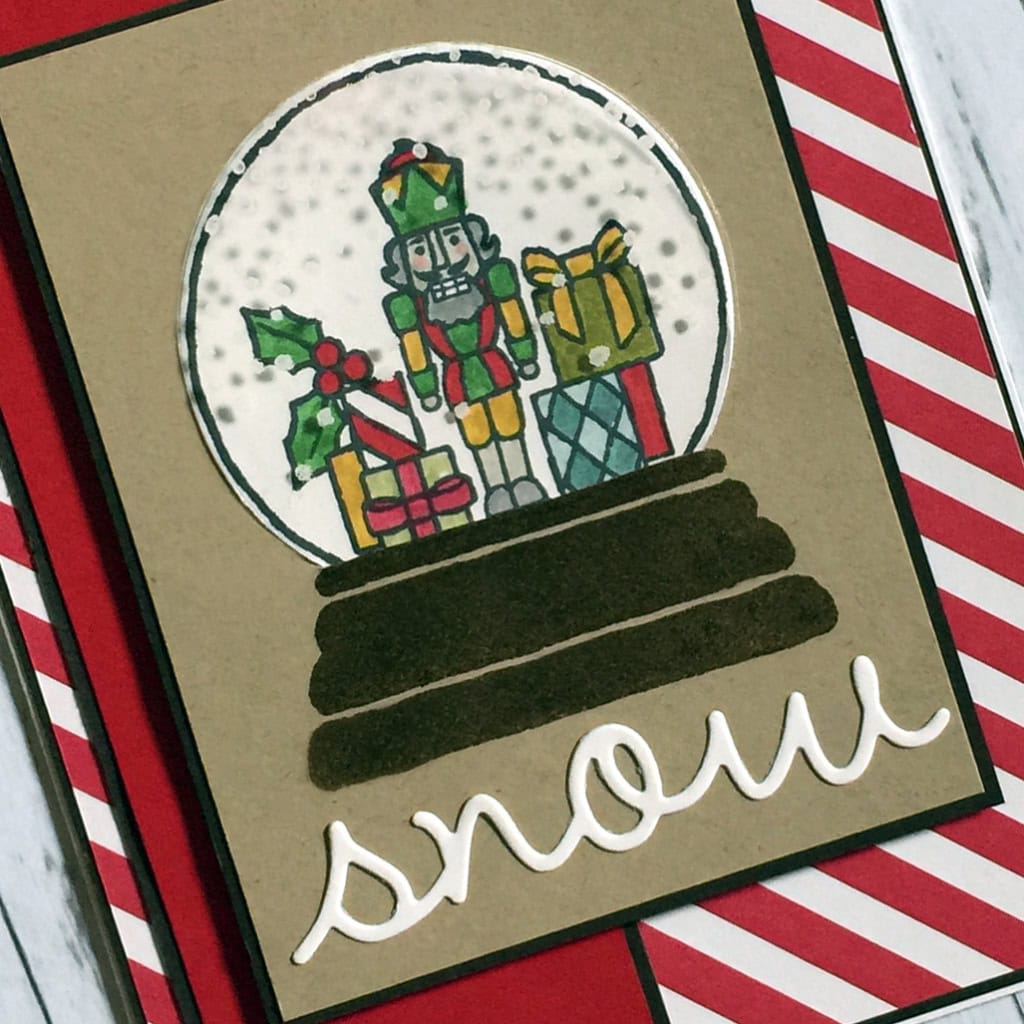
I used the Sparkly Seasons photopolymer stamp set and Seasonal Frame Thinlits Dies, which will be available individually and as a Bundle on September 1. (Bundle = save 15%!)
The card base is Thick Whisper White card stock. Each of the three panels is matted with Early Espresso card stock. The Real Red stripe is from the Brights DSP stack. The other two panels are Real Red & Crumb Cake card stock.
I stamped the snow globe base in Early Espresso on the Crumb Cake panel. Then I used my Paper Snips to cut a slit in the panel along the top edge of the base. I opened the snips all the way and used the super sharp tip of one of the blades like a craft knife. It cut through the card stock like buttah!
I stamped the globe and contents on Whisper White card stock, colored it with Stampin’ Write Markers, and cut it with the circle die from the set. I stamped snow on the Window Sheet with White Staz-on ink and cut it with the same die. I used Tear & Tape to adhere them together at the bottom. Then I slipped that bottom part into the slit of the Crumb Cake panel and adhered it.
The only thing left to do was die cut the word SNOW from Whisper White card stock. The new Precision Base Plate for the Big Shot makes cutting intricate things like this so easy! Be sure to put it on your wish list for the new catalog when it goes live on September 1.
My sentiment placement is a bit different from the sketch. It didn’t show up well at the bottom right, and I didn’t like it in the other colors I tried, so I opted to make the center panel a bit larger and put the sentiment there. The center panel is attached with Stampin’ Dimensionals.
Here’s what I used. The links to the new products will go live on September 1. Links to current products are live now. Click on the images to purchase your own!
Be sure to check out the other CYCI Challenge entries here.
————————————————————-

If you haven’t tried Paper Pumpkin, now is a great time to sign up.
For new subscribers only. Use the code HALFOFF to join Paper Pumpkin before September 10, 2015, and get 50% off the first two months!
After that, keep the creativity coming for only $19.95 + tax per month (includes shipping!) Or purchase a prepaid subscription HERE. Save $1 per month with a 6 month subscription, or $2 per month with a one year subscription.
SIGNING UP IS EASY!
- CLICK HERE to sign up
- Click subscribe
- Enter HALFOFF in the promo code
- Check out. If you are my customer or would like to be, please be sure to add my name as your demonstrator when prompted before check out.
SEE PAPER PUMPKIN KITS IN ACTION with these Stampin’ Up! YouTube videos!

This is just one example of a past Paper Pumpkin kit. Each month is a surprise, but they are always wonderful, and include everything you need except scissors and adhesive. I took this “pie” to my family’s Thanksgiving gathering last year with each “slice” full of nuts, candies, and other goodies.
Current subscribers – and ONLY current subscribers – can purchase past kits and refills.
All stamp sets in Paper Pumpkin kits are exclusive to Paper Pumpkin and will never be seen elsewhere.
Here’s the skinny:
- For new subscribers only.
- Available for month-to-month subscriptions, not prepaid subscriptions.
- Discount applied to one kit per month for the first two months of a new subscription. After the first two months, the price for each month’s kit will renew at the regular price: $19.95.
- A Paper Pumpkin membership is $19.95 per month (and shipping is included!)
- There’s no commitment. You can cancel your monthly Paper Pumpkin or skip a month by logging into your Paper Pumpkin account and changing your preference at “manage my account” on or before the 10th of the month.
- Click here to subscribe.
- Enter the Promo Code, HALFOFF when you sign up.
————————————————————-
Coming soon!
The all new 2015-2016 Holiday Catalog!
Catalog dates are September 1, 2015 through January 4, 2016.
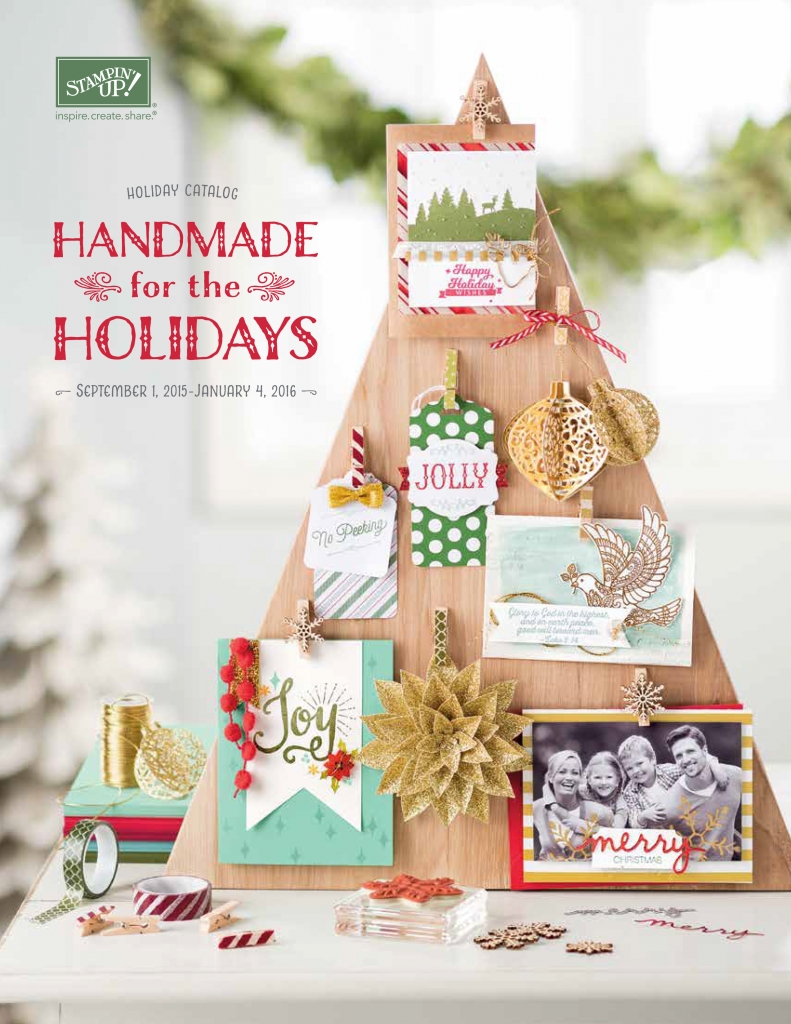
Keep checking back for more sneak peeks of the new products! See my first sneak peek videos here and here.
If you don’t have a demonstrator and would like a free catalog, please email me at candy@stampcandy.net. If you already have a demonstrator, please get your catalog from them. Thank you.
————————————————————-
Thanks for stopping by today, and Sweet Stamping!

Aug 29, 2015 | Cards, Christmas, Classes, Holiday, New Products |

Here’s yet another sneak peek at a card from my Christmas Bundle Up class. I’m using the Berry Merry stamp set and Boughs & Berries TIEF, which will be available on September 1 to buy individually or in a Bundle (save 15%.)
Today is the last day to sign up for tomorrow’s class, and there are limited seats available. Click on EVENTS at the top of the page to RSVP. Make 12 projects for only $25!!!
This is a super quick and simple card. Emboss the front of the card with the new Boughs & Berries Textured Impressions Embossing Folder.
Adhere two pieces of ribbon – here I’ve used the new Very Vanilla Subtle Stripes Satin Ribbon and Gold Glitter Ribbon. The glitter ribbon comes in a pack with one roll of gold and one roll of white. What a deal!
Stamp JOY in Cherry Cobbler on Very Vanilla card stock and cut with a die from the Circles Collection Framelits Dies. Attach with Stampin’ Dimensionals.
That’s it!
 Here’s what I used. Please note that the links to new holiday products will activate September 1, 2015. Links to current products are live now.
Thanks for stopping by today, and Sweet Stamping!
Aug 28, 2015 | Cards, Christmas, Classes, Holiday, New Products |

Today I’m sharing a sneak peek, not only at some of the new products coming out soon in the Holiday catalog, but also at one of the projects we’ll be making this Sunday in my Bundled Up for Christmas class. We’ll be using the new Christmas bundles. Click on the Events tab at the top of this page for details and to register.
This card uses the Happy Scenes photopolymer stamp set and Hearth & Home Thinlits Dies Bundle on page 11 of the Holiday catalog.
For the scene outside the window, I stamped it twice. I cut one along the curved hill to create a mask. I covered the bottom part of the other stamped scene with the mask, then used a Stampin’ Sponge to create a soft Soft Sky sky. Try saying that three times fast.
Here are the current products I used:
Thanks for stopping by today, and Sweet Stamping!
Aug 27, 2015 | Cards, Christmas, Holiday, New Products |
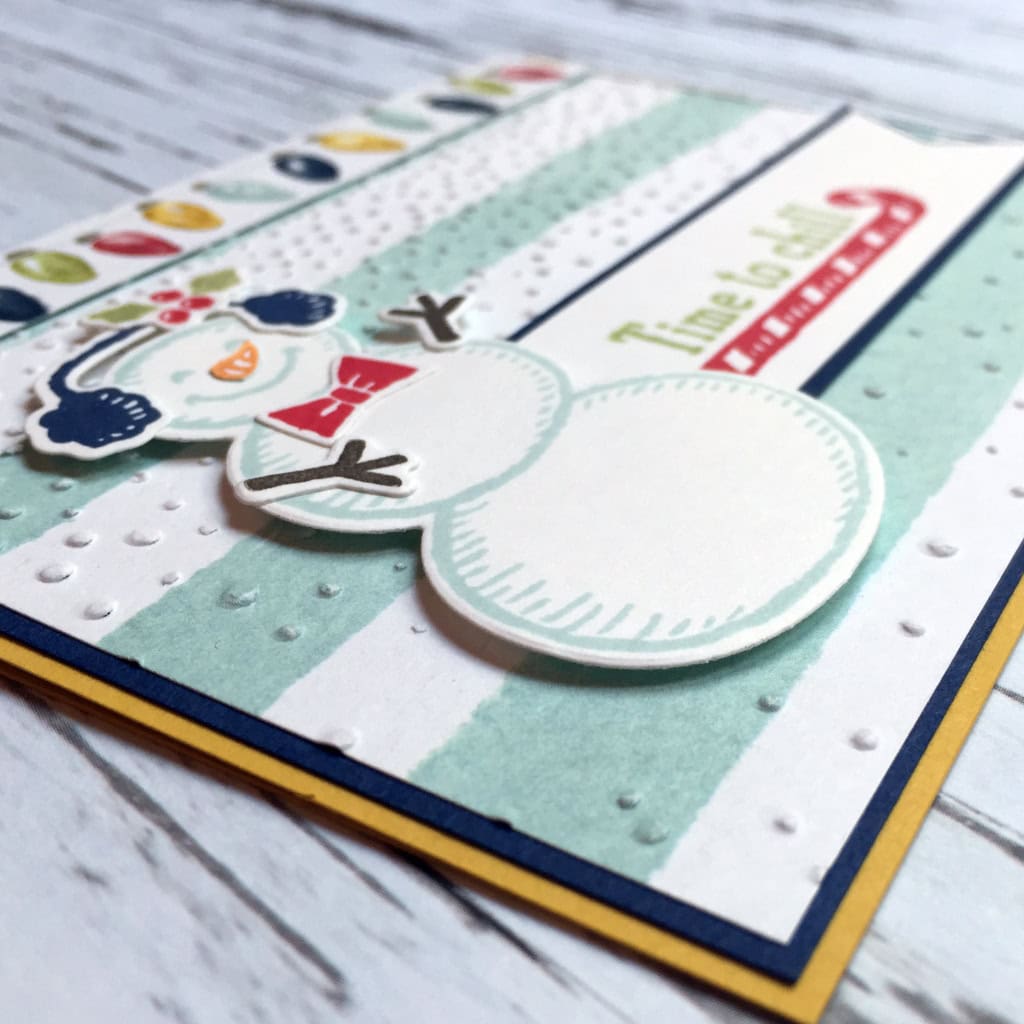
The new Season of Cheer Designer Series Paper was my color inspiration for this card. This sweet and friendly snowman from the new Snow Place/Snow Friends Bundle is stamped in Soft Sky, Night of Navy, Pear Pizzazz, and Real Red. I added Pumpkin Pie for his carrot nose and Early Espresso for his twig arms.
I trimmed one strand of lights from a sheet of the DSP to “hang” above the snowman.
I used the Banner Triple Punch to cut the Whisper White banner matted with Night of Navy.
The new Softly Falling Textured Impressions Embossing Folder adds snowy motion to the background DSP.

Here are the new Holiday products I used: Season of Cheer DSP, Snow Place stamp set/Snow Friends Framelits Dies Bundle, and Softly Falling TIEF.
And here are the current products I used:
I love hearing from you, and I welcome your comments and questions.
Thanks for stopping by today, and Sweet Stamping!
Aug 26, 2015 | Blog Hop, Cards, Christmas, Holiday, New Products |

Welcome to InKing Royalty’s August Blog Hop. Stampin’ Up!’s 2015 Holiday Catalog is just around the corner (it’s live on September 1) – and this amazing book is filled to the brim with incredible bundles at discounted prices. Who doesn’t love to save with bundles?!? Today we are Bundled Up for the Holidays as we celebrate these amazing stamp set bundles from the Holiday Catalog. After you read my post, I hope you’ll hop over to the next person on the list at the base of this post.
I’d like to propose a toast to all the InKing Royalty team members, and to the new Holiday catalog!
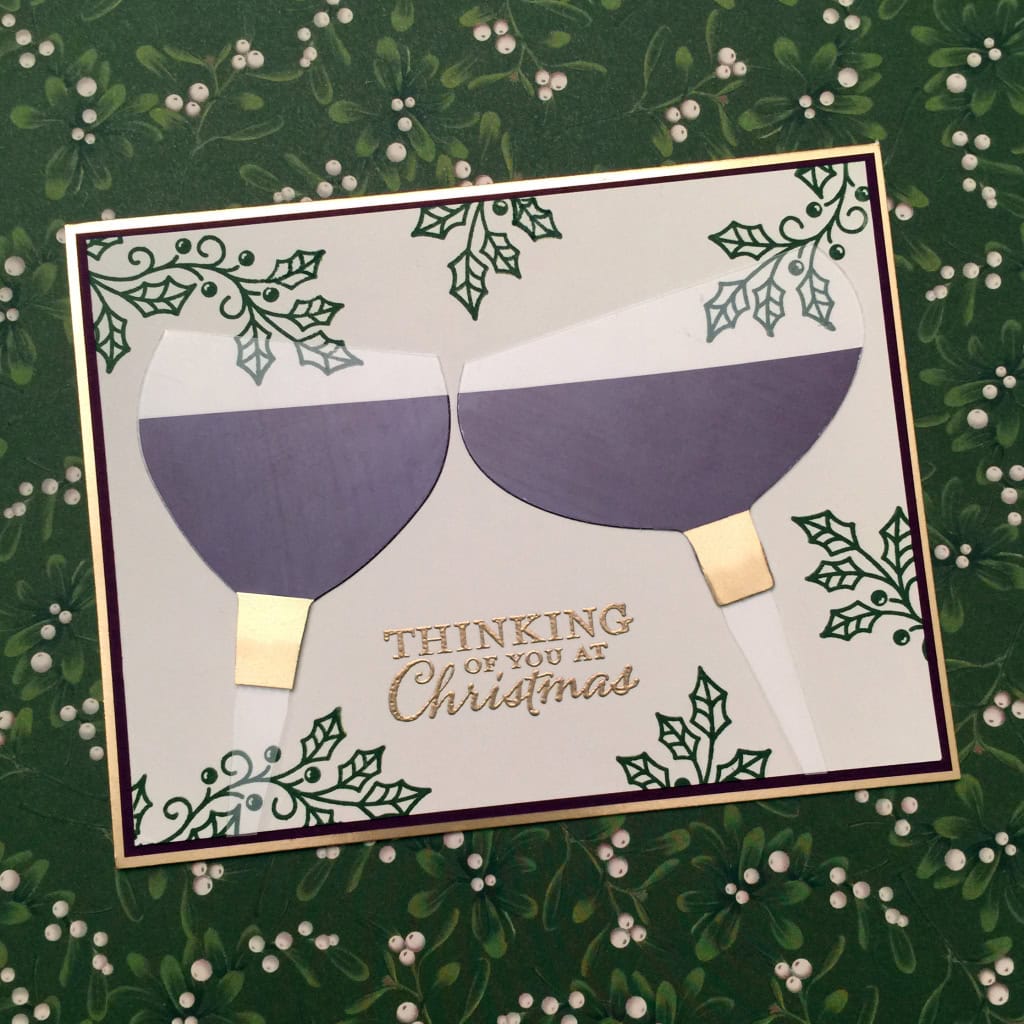
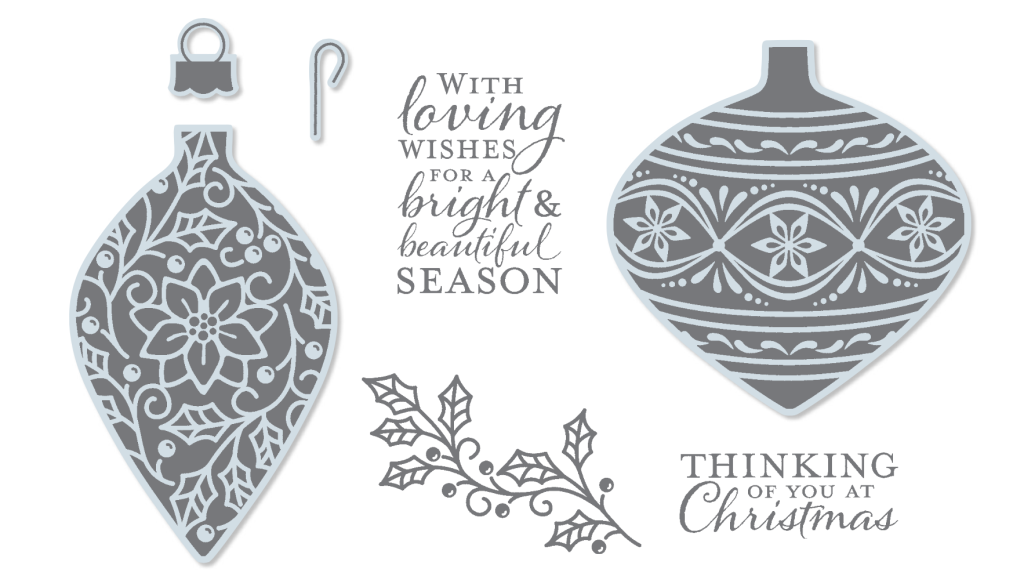
I love to use products in alternative ways from their original intention. I happened to glance at page 15 of the new Holiday catalog upside down. The Embellished Ornaments stamp set and Delicate Ornament Thinlits Dies help us create gorgeous ornaments, but upside down they reminded me of wine glasses.
I used the two open ornament dies to cut Blackberry Bliss card stock and a clear Window Sheet. I cut the clear pieces straight across to make the bowls. Then I cut the Blackberry Bliss pieces at an angle, because I knew I wanted the glasses of wine to be tilted in for a toast. I would like to note that the Blackberry Bliss looks much richer in person. In the photo, there is a lot of reflection off the clear wine glass.
I used my Paper Snips to cut the stems from the Window Sheet, and then to cut some scraps of a Gold Foil Sheet as a decorative element – and to hide where the pieces are adhered together!
On a piece of Very Vanilla card stock, I stamped the holly in Mossy Meadow, and I heat embossed the sentiment in gold. Then I adhered the wine glasses. I cut the mat from Blackberry Bliss card stock, and the card base from a Gold Foil Sheet.
The mistletoe background of the photo is a piece of Home for Christmas Designer Series Paper.
I hope you’ll hop along to the next stop on the blog hop. There’s a lot of inspiration to be found in this group – and you don’t want to miss it!
Thank you for stopping by today, and Sweet Stamping!
InKing Royalty Blog Hop Lineup – please hop over to the next person on the list for more inspiration and exciting bundles from the Holiday Catalog:
Aug 24, 2015 | Cards, Christmas, Holiday, Techniques |
Today I’m sharing a Christmas card I made using only products from the current annual catalog. I want to make sure you know that you don’t have to wait for the Holiday catalog to go live before you start working on your holiday cards. There are several wonderful holiday stamp sets already available!
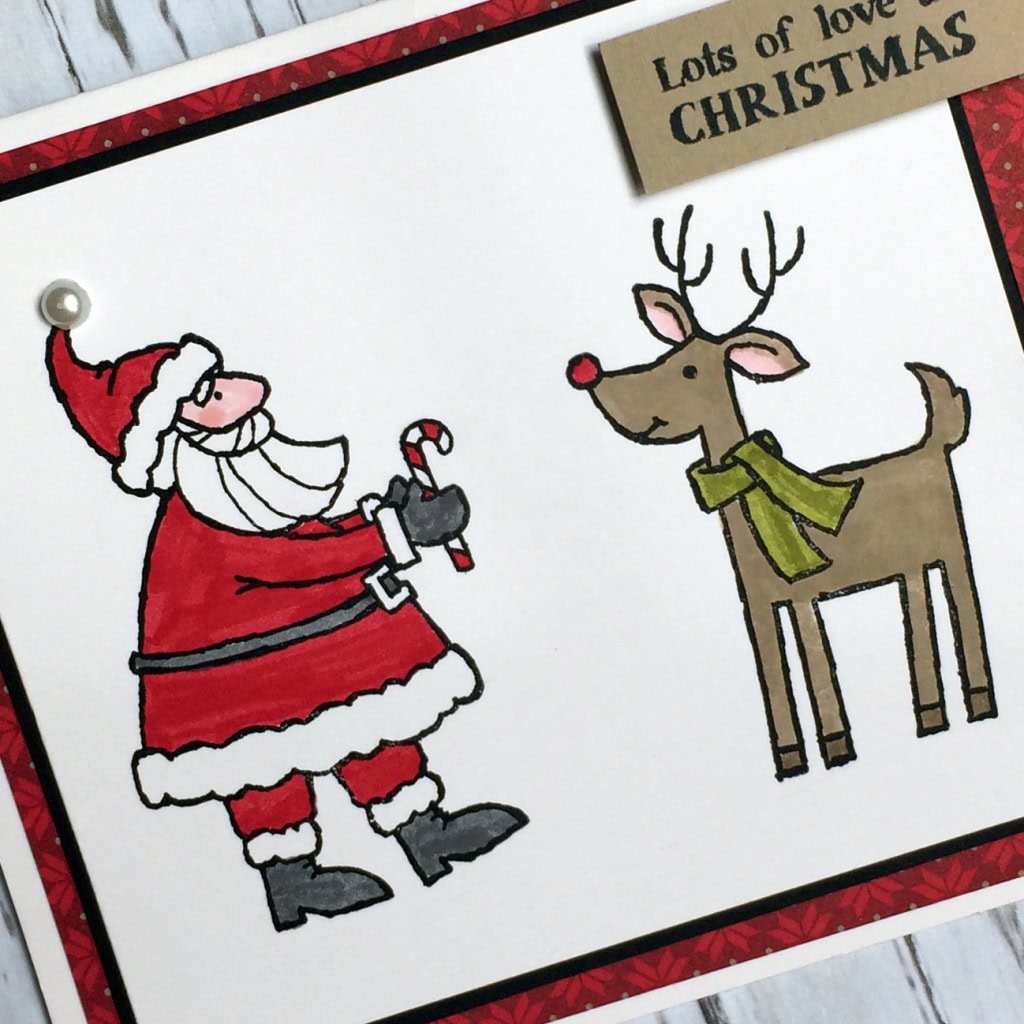
Today I’m using the Santa’s Gifts photopolymer stamp set, which is A-DOR-A-BLE. Just look at these little characters, ready to color, or leave plain.
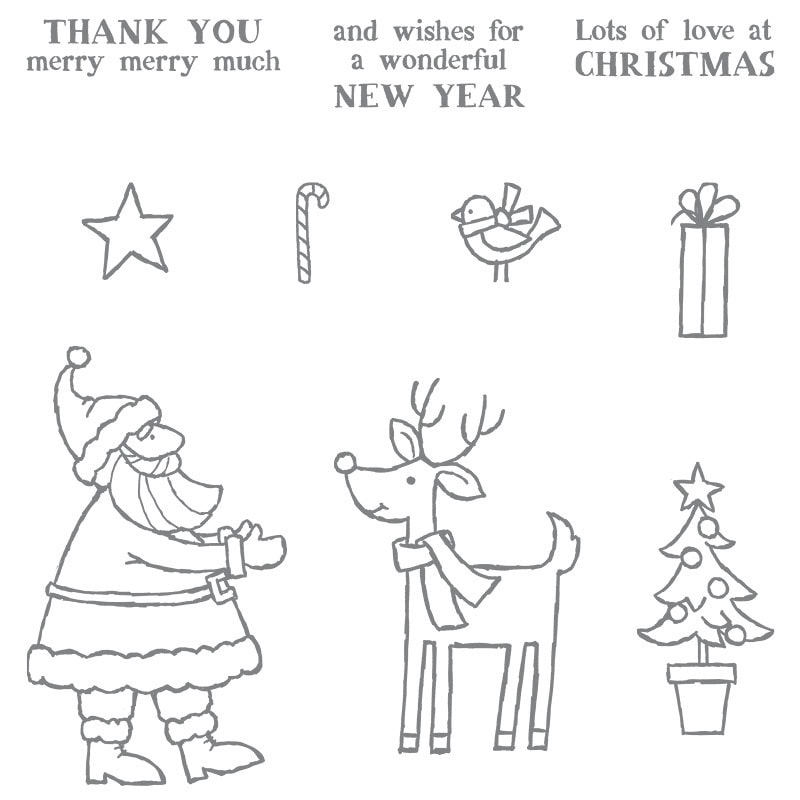
I thought about stamping on Watercolor Paper and using an Aqua Painter to color, but in the end I decided to stamp on Whisper White card stock and color with Stampin’ Write Markers in Real Red, Pink Pirouette, Blushing Bride, Basic Gray, Crumb Cake, Soft Suede, and Old Olive. That beautiful piece of DSP is from the Merry Moments Designer Series Paper. I used a Pearl Basic Jewel for the pompom on Santa’s hat.

Tip 1: The photopolymer stamps are see through so they’re super easy to stamp right where you want them. But to make it even easier, I laid the Santa and Reindeer stamps on my grid paper to line up their feet, then picked them both up with one large acrylic block (size E) instead of stamping them separately.

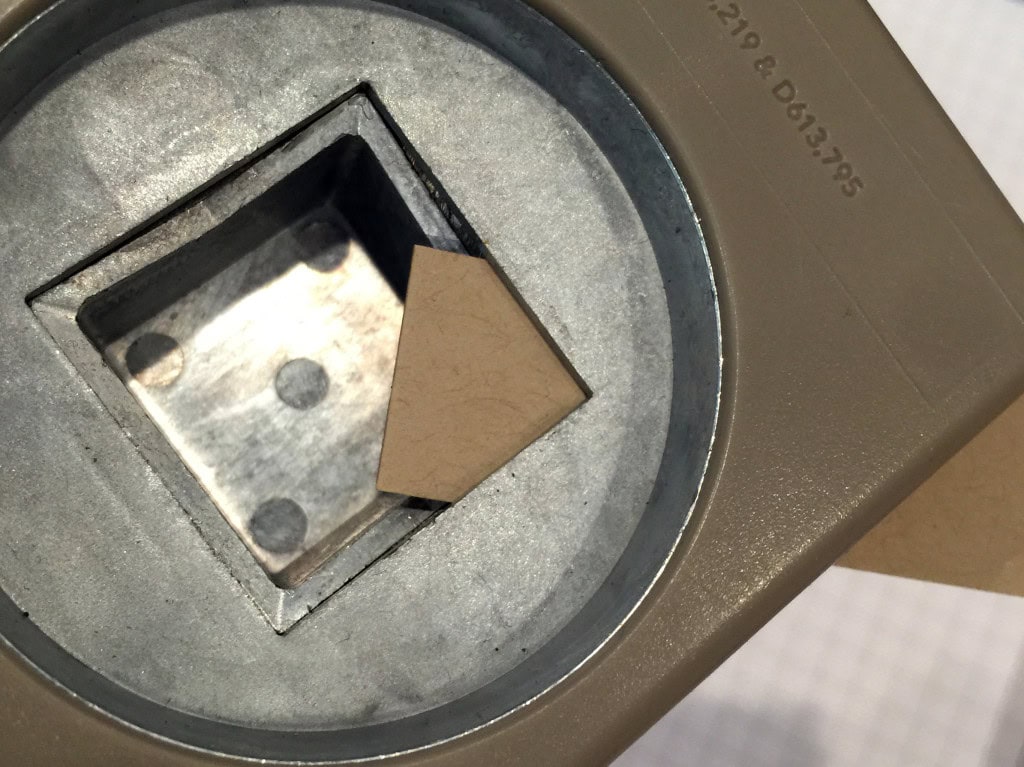
Tip 2: I stamped the sentiment on a small strip of Crumb Cake card stock. It was too small to use the Banner Triple Punch, so I used a corner of the 1″ Square Punch to cut the notch.
Tip 3: To get the candy cane in Santa’s hand, I used a masking technique. First I stamped him on a sticky note, making sure his hands were on the area with sticky behind it. I cut out his hands with my Paper Snips, then stuck it to the original stamped image, making sure to line it up just right. I stamped the candy cane, so when I removed the sticky note, it really looks like it’s part of the original image.


Here’s what I used. Click on the images to purchase your own!
I really love hearing from you! Please comment below or email me (candy@stampcandy.net) with what you think of today’s post, what you’re working on now, or to ask any paper crafting related questions.
Thanks for stopping by today, and Sweet Stamping!