Nov 15, 2014 | Blog Candy, Christmas, Decor |
Geodesic, adjective, of, relating to, or denoting the shortest possible line between two points on a sphere or other curved surface.
I’m still in an ornament making mood. It’s been years since I made any of the Geodesics, so I thought I’d give it a go. After a couple of practice runs, to remember how, I now feel I could crank these out pretty quickly and neatly.
You can tell the one on the right was my first one – the points don’t all come together as neatly as on the other one. Neither is perfect, but hey, they’re hand made. The imperfections in our crafts are what make them ours.

The template is simple – it’s just a circle with an equilateral triangle inside.

Cut 20 circles of the same size: 5 for the top, 5 for the bottom, and 10 for the middle. Fold in the three sides of each circle. I used the 1-3/8″ Circle Punch to cut mine. This made ornaments approximately 2-1/2″ wide. Obviously, larger circles would yield a larger ornament. I laid the template on top of each circle and used that as a guide to fold.

By the way, you know all those little paper scraps you’ve been holding onto just in case they would come in handy someday? Well, today’s the day! This is a great way to use them.
Multipurpose Liquid Glue is perfect for gluing the pieces together. Line up the sides, then pinch together while pressing on the table to keep everything straight. The glue sets quickly, so this just takes a few seconds per circle. (Yes, I know I need a manicure.)

First glue 5 circles together so that all 5 share a point. Then glue together another 5 the same way. These will be the top and bottom of the ornament.

TIP: Make a loop with your ribbon/twine and tie a knot at the end. Just before you glue together the last two circles of the ornament top, put the knot end inside the point with the loop end hanging out. Then add a dab of glue to the inside of the point to make sure the hanger doesn’t pull out. You can do this to the bottom as well, if you want something dangling from the bottom of the ornament.

Glue together the remaining ten circles in a line. The glued sides should make a zig zag.

Glue together the two ends to create the “belly band” of the ornament.
 Now glue the top onto the belly band. Repeat with the bottom.
 Et voila! You have a beautiful ornament that looks like it took much more time and effort than it really did.
I know my instructions are probably as clear as mud. I hope the photos help. Please let me know if you have any questions at all.


Here’s what I used:
THERE’S STILL TIME TO ENTER! If you haven’t yet entered to win the current blog candy, all you have to do is comment on yesterday’s post. Click here for details. The earlier you comment, the more chances you have to win. Tell your friends! Tell your family!! Tell everyone!!! The more people who comment, the more chances you have to win. Thanks for stopping by today, and Sweet Stamping!
Nov 13, 2014 | Christmas, Decor |
I’ve been collecting ornaments for most of my adult life. Some of the ones I love the most are the old hand made ones.
Yesterday I helped a friend of mine with a display she was creating for her church. She had most of it done already, but we made tags and ornaments to add to it. It got me thinking how easy it would be to make some new Christmas ornaments for my collection. So I started playing, and here’s the first one I came up with.


These are the two sides of the same ornament.
Stamp & Emboss – The largest stamp from the Bright & Beautiful stamp set is practically an ornament itself. I heat embossed it twice – once in Cherry Cobbler on a piece of All Abloom DSP and once in Pool Party on Cherry Cobbler card stock – for a positive/negative look.
Cut & Paste – I cut out both stars with the corresponding Stars Framelits die, so they fit perfectly together. To attach them, I put a little Multipurpose Liquid Glue on the back of one star, then used a scrap piece of paper to smear it around to all the edges. The glue gives you a couple seconds to get it lined up just right. The two pieces glued together make a much sturdier ornament that if I’d only used one piece.
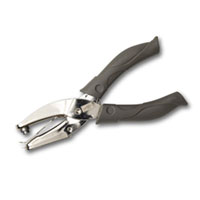
Hang – Cherry Cobbler Baker’s Twine makes the perfect hanger for this color combo. The white in the twine helps bring out the delicate white designs in the DSP. I thought about adhering the twine between the star layers, but I thought it might make a lump. So I ran it through a 1/16″ hole that you can hardly see. (I hesitated buying the handheld circle punches, but now that I have them, I use them all the time! They come in 1/16″, 1/8″ and 1/4″.)
Thanks for stopping by today, and Sweet Stamping!
Nov 10, 2014 | Cards, Christmas |
Okay, here’s my first attempt at a stair step card. Yesterday I posted three templates. You can see those here. Today I’m using the 5 1/2″ wide by 4 1/4″ tall template.
I love the adorable houses from the Nordic Noel DSP, as well as the coordinating stamp set, Holiday Home. I thought the houses would look good on the card steps, like looking down on a whole neighborhood all decorated for the holidays.


Here’s what I used:
Thanks for stopping by today, and Happy Stamping!
Nov 8, 2014 | Christmas, Club, Food |
For our Stamp Club meetings, I like to keep refreshments simple (chocolates and bottled water) but that doesn’t mean they have to be boring.

I always use a label from one of the bottles as a template for my hand stamped labels. For these I used Whisper White card stock, Pear Pizzazz and Soft Sky ink pads, the Ornamental Pine stamp set, and the Sassy Salutations stamp set for the sentiment. Fast Fuse adheres the labels.
This is such an easy way to take something as mundane as a bottle of water and turn it into something much more special and personal.
Thanks for stopping by today, and Sweet Stamping!
Sep 9, 2014 | Christmas, Gift Wrap |
I’ve always loved gift tags. It seems you can always make a gift seem more special, even if it has very plain wrapping, with a great tag.
I really like the Cheerful Tags stamp set. So simple, yet so versatile. I can see myself using it a lot in the future.

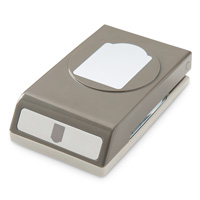
Here I began with Whisper White card stock. Then I stamped the lined background with Smoky Slate, the trees with Garden Green, the Merry with Real Red, and the to/from with Basic Gray. The Note Tag Punch made quick work of cutting out the tag shapes, while the holes were punched with the 1/8″ Handheld Circle punch. 1/8″ Taffeta Ribbon in Smoky Slate tops it off.
It was so quick and easy! And I’d be happy to receive any gift with one of these tags attached. How about you?
Sweet Stamping!


 Now glue the top onto the belly band. Repeat with the bottom.
 Et voila! You have a beautiful ornament that looks like it took much more time and effort than it really did.