Apr 3, 2017 | Cards, Classes, Gallery |
I’ve been playing with the Jar of Love Bundle quite a bit lately. It’s really versatile. It consists of the Jar of Love stamp set and the Everyday Jars Framelits Dies – bundled together to save you 10%! For today’s For You card, I used the bundle along with the Scalloped Tag Topper Punch, Ruched Ribbon, and Affectionately Yours Designer Series Paper. It looks more complicated and time consuming than it is. The dies and Big Shot make quick work of all that cutting.
Here’s what I made:

Here’s what I did:
Cut and scored with my Stampin’ Trimmer:
- Night of Navy card stock (CS) to 4-1/4″ x 11″, then scored in half at 5-1/2″
- Affectionately Yours Designer Series Paper (DSP) to 4″ x 5-1/4″
- Whisper White CS to 2″ x 5-1/2″
- Whisper White CS to 4″ x 5-1/4″ for inside
Use Scalloped Tag Topper Punch:
- one end of 2″ Whisper White CS (if it is longer than you’d like, trim off some from the other end with your Stampin’ Trimmer)
Stamped with the Jar of Love stamp set:
- medium sized jar in Basic Gray ink onto Window Sheet
- medium sized jar in Smoky Slate ink onto 2″ Whisper White tag
- burlap in Delightful Dijon ink onto Whisper White CS scrap
- sentiment in Night of Navy ink onto burlap image
- two-step flowers in Flirty Flamingo and Watermelon Wonder inks onto Whisper White CS
- stems in Pear Pizzazz ink onto Pear Pizzazz CS
Die cut using the Everyday Jars Framelits:
- jar stamped on Window Sheet
- flowers and stems
Fussy cut with Paper Snips:
Assembled the card:
- stems and flowers glued onto tag, using Smoky Slate jar image as a guide
- adhered clear jar over jar stamped on tag, using Fast Fuse around bottom and side edges
- adhered burlap image to clear jar using Fast Fuse
- tied a piece of Flirty Flamingo 3/8″ Ruched Ribbon through the hole in the tag
- tag glued to DSP
- DSP glued to front of card base
- Whisper White CS glued to inside of card base
Here’s what I used:
Click on the images for more details and to purchase.

RETIRING IN COLORS
DID YOU KNOW the 2015-2017 In Colors will retire at the end of May? That means that they will no longer be available to order on June 1. Don’t wait until then to order them. At some point before the end of May, they will become available only while supplies last. So get what you need now.
SPEAKING OF RETIRING PRODUCTS
The Designer Series Papers always retire, too. So these products won’t be available after May 31. And just like the retiring In Colors above, at some point before the end of May, these items will become available only while supplies last. Don’t wait until the last minute. Get them now!
Gum Ball Rewards
 You always earn a Gum Ball for every $50 you spend on an order with me. Earn 10 Gum Balls and I’ll send you a free stamp set of your choice! See the Gum Ball Rewards page for details.
Click here to shop my online store!
April Host Code
HV6MJT2X
Use the Host Code on online orders less than $15o. See how to use a Host Code here.
Online orders of $75-149.99 placed with the Host Code will receive the gift of the month!
Online orders of $150 or more will automatically receive the gift of the month! Do not use the Host Code.
April’s gift is a pack of Urban Underground Embellishments! Each pack contains 24 brushed silver embellishments – 8 each of 3 designs. (I can ship within US only.)
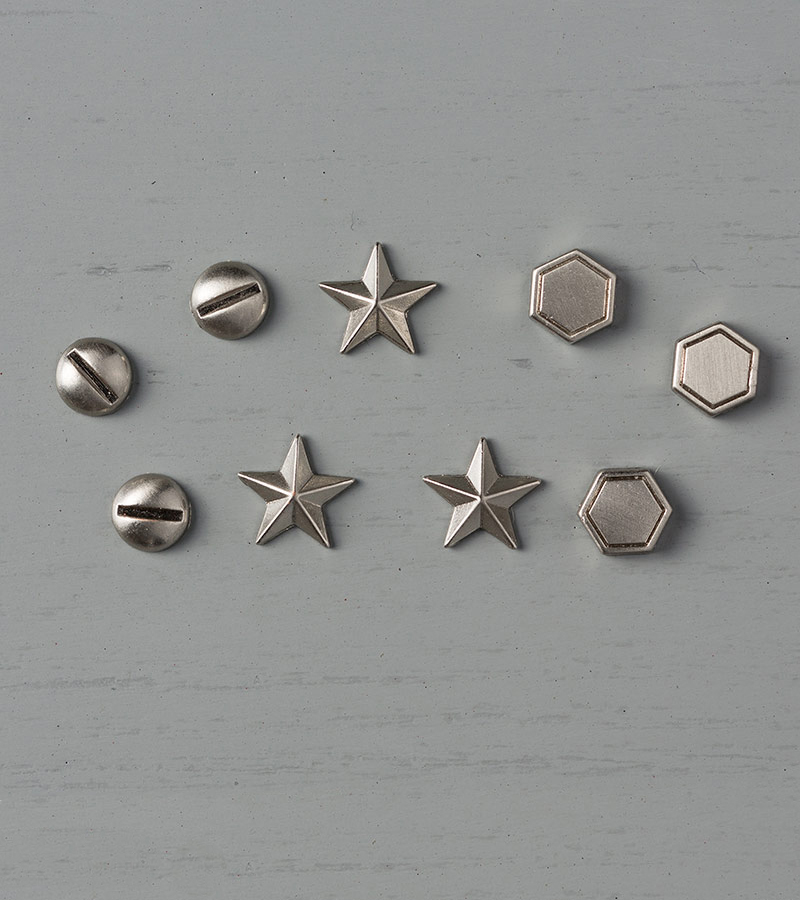
Urban Underground Embellishments © Stampin’ Up!
Thanks for stopping by today, and Sweet Stamping!

Aug 16, 2016 | Christmas, Classes, Events, Food, Gallery, Holiday, New Products |

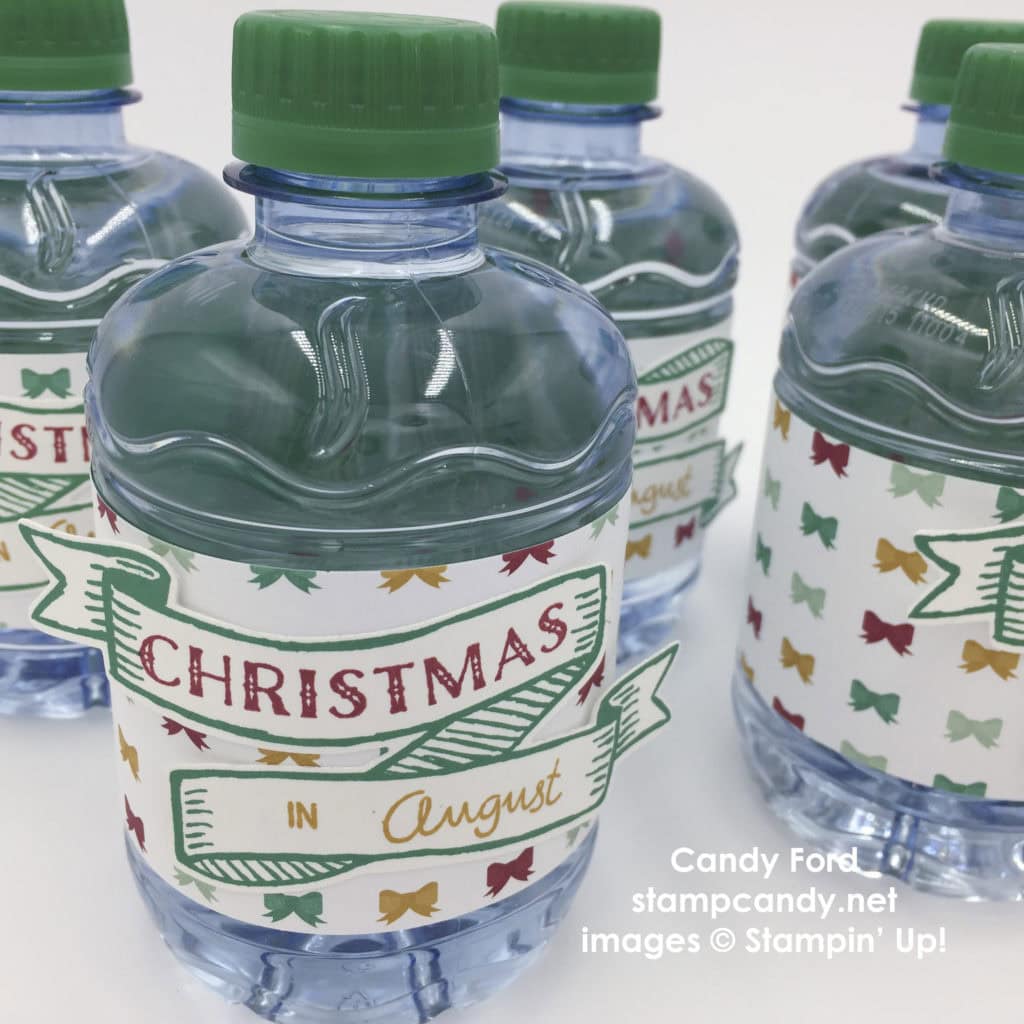
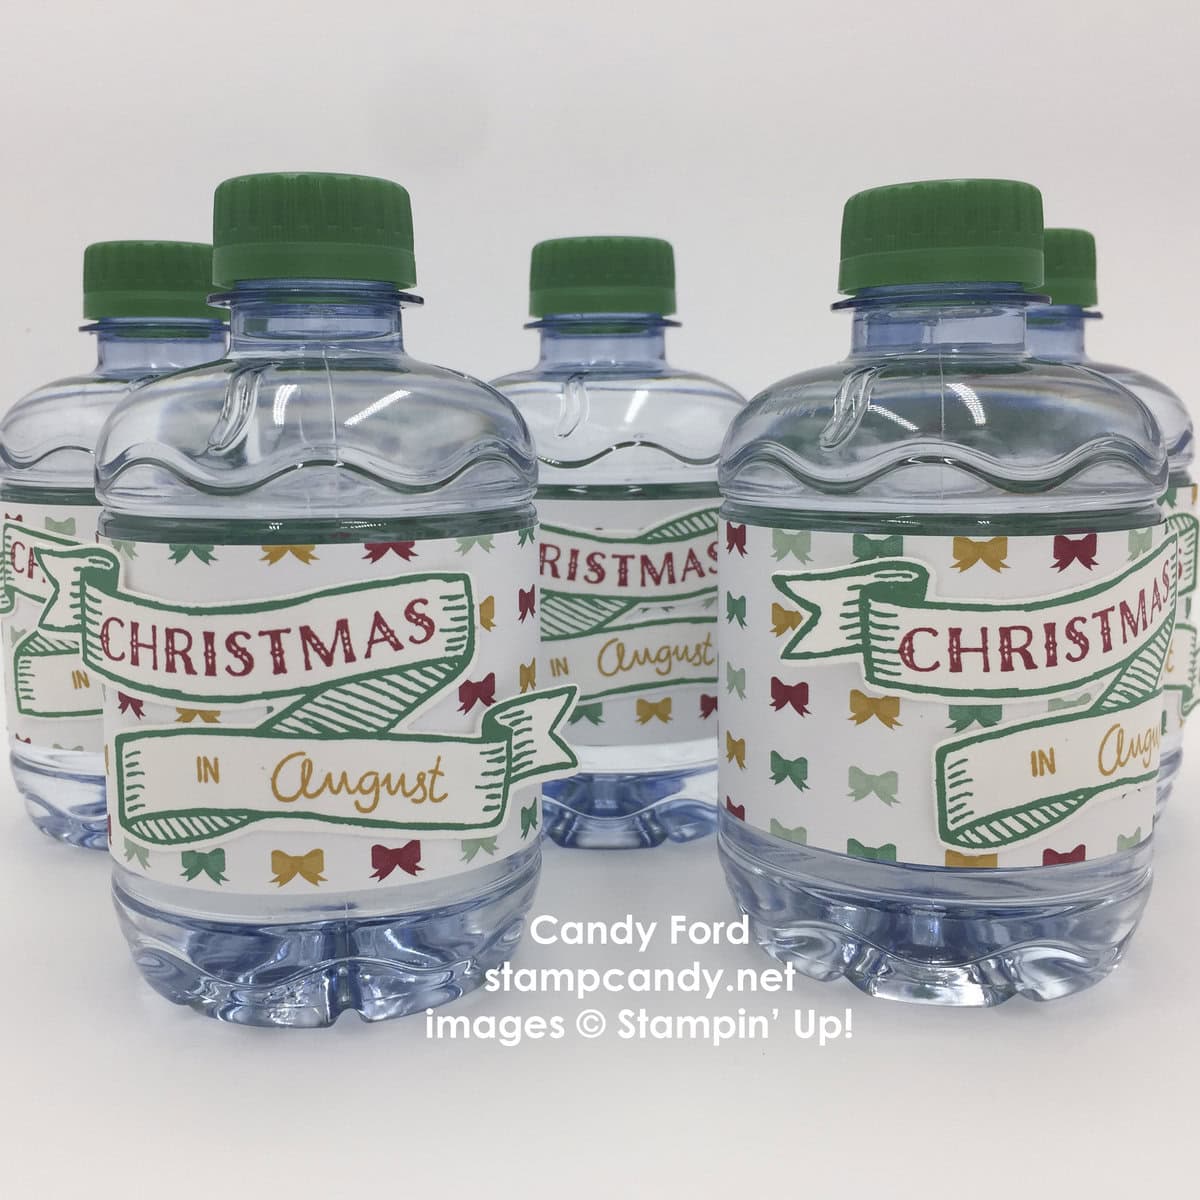
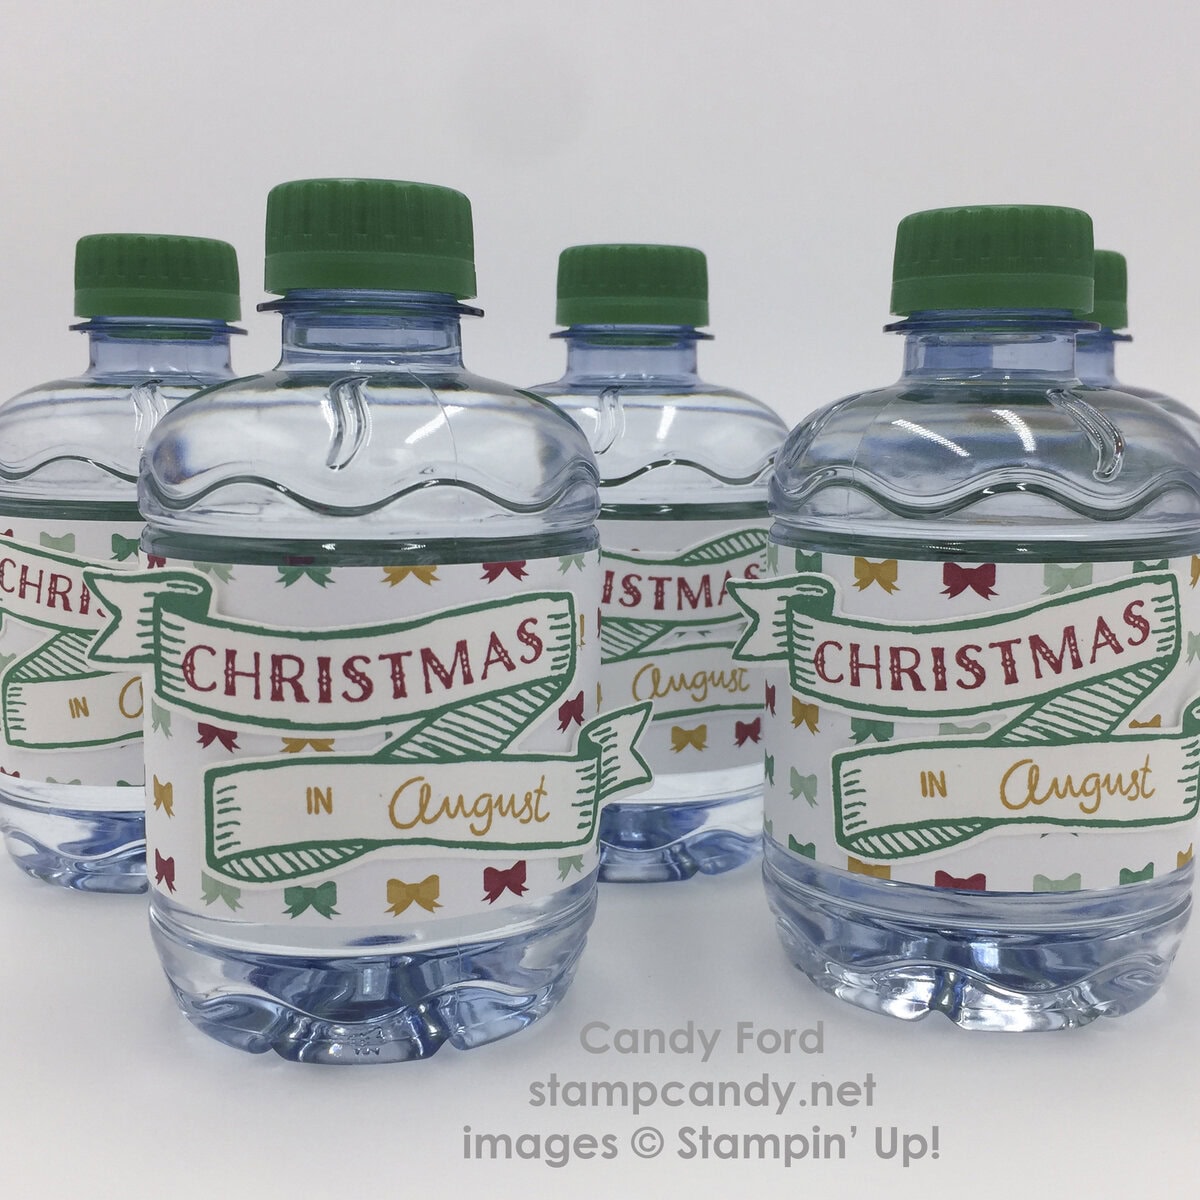
I always decorate bottles of water for my classes, not only because attendees need to stay hydrated, but mostly to let them know how special I think they are, and how much I appreciate them. My Christmas in August card class was this Sunday, and I thought I would share those bottles with you today.
I used to buy larger bottles, but too much was wasted. These smaller ones are just right. The brand doesn’t matter. Remove the original label and measure it. Cut your paper to that measurement, or maybe just a little longer.
Here’s how I did it:
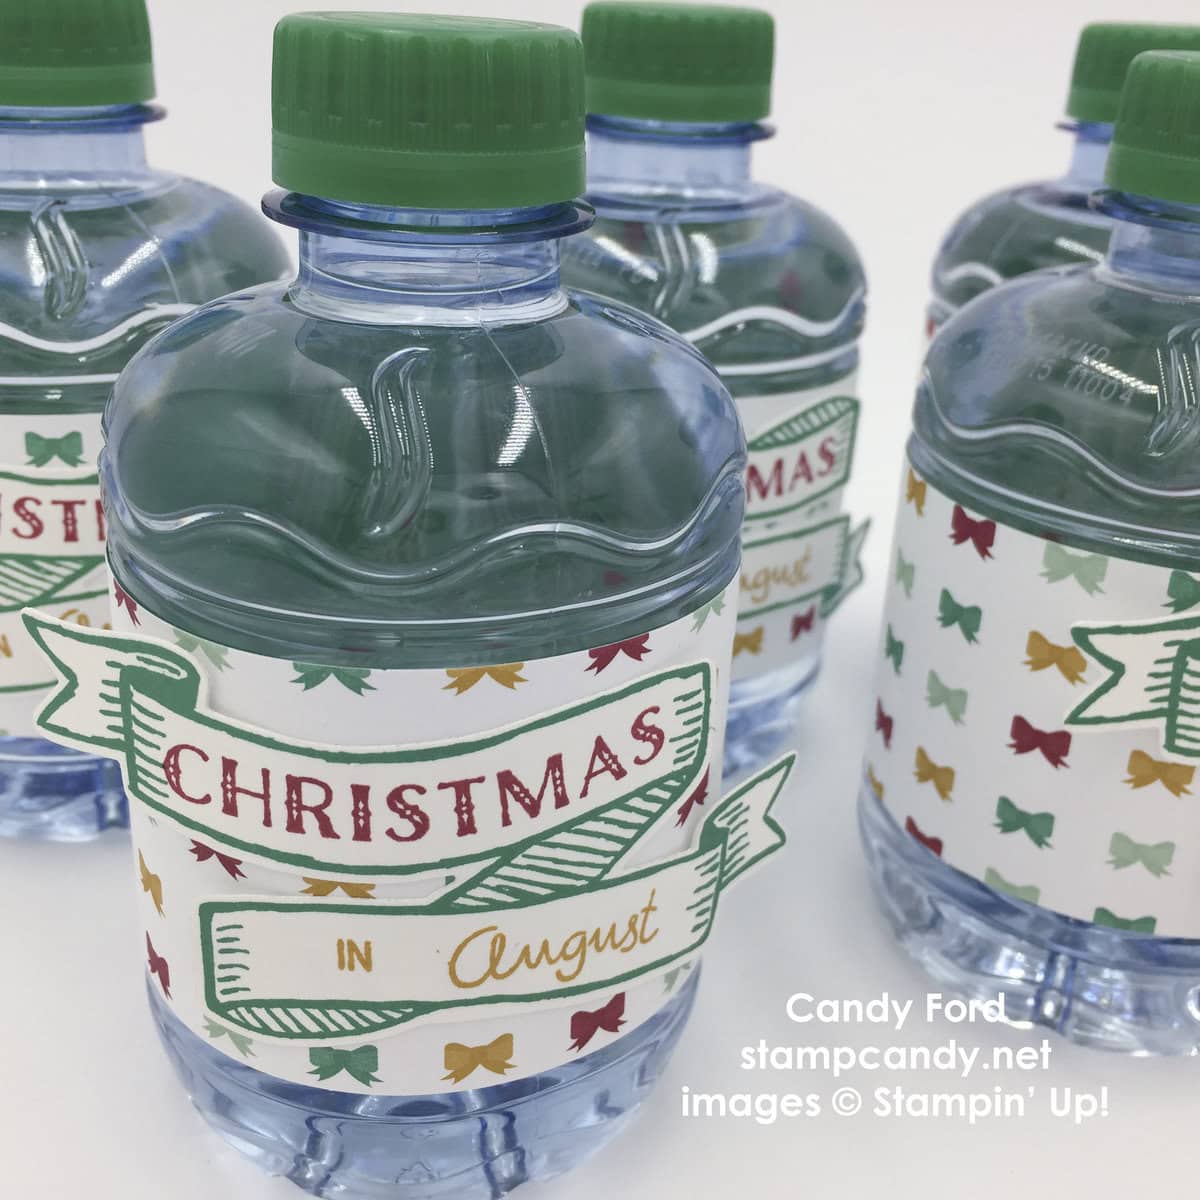
These particular bottles are Dasani 10.1 fl.oz. I cut the 9″ x 2″ belly band from the new Presents & Pinecones Designer Series Paper. I put some Fast Fuse adhesive at each end, and wrapped it around the bottle.
I stamped the banner from the new Banners for Christmas stamp set in Emerald Envy ink onto Whisper White card stock. I then stamped “Christmas” from the same stamp set in Cherry Cobbler ink, and “in August” from the Project Life Date It stamp set in Delightful Dijon ink, inside the banner. Then I cut it out with the coordinating die from the Bunch of Banners Framelits. I attached the banner to the bottle with Fast Fuse, leaving just the two ends loose.
I recommend adding any ornamentation to the belly band after it’s on the bottle. If you add it before, it might pop off or stretch oddly when you curve the band around the bottle.
I hope this inspires you to do little things like this for your own events. Even just turning a boring old bottle of water into something that will make your guests feel special, since you went to the time and trouble (almost none of either, actually!) to create this for them.
Here’s what I used:
The first 2 items will be available when the new Holiday catalog goes live on September 1. Everything else is available now!
AUGUST HOSTESS CODE
PMTWBJMQ
If you are placing an order for less than $150, please use this Hostess Code. Click here for details on how to use the Hostess Code.If you are placing an order of $150 or more, you will receive Stampin’ Rewards on your order, so do not use the Hostess Code.
Thanks for stopping by today, and Sweet Stamping!
Aug 2, 2016 | Cards, Classes, Gallery, Guest Stamper |
I love showing off other stampers’ work. Today I’m sharing a card that one of my customers, Katie Carter, made in my July Card Smorgasbord. Usually attendees make the cards just like the samples, but Katie decided to change this one up. The sample is a card I made months ago – you can see it here.
And here’s Katie’s card. I love the way she used different colors for the balloons. She used Pink Pirouette, Blushing Bride, Flirty Flamingo, Watermelon Wonder, Mint Macaron and Emerald Envy.

This isn’t the first card of Katie’s that I’ve shared on my blog. You can see her adorable blue baby card here.
Thanks, Katie, for allowing me to share your talent with my blog followers!
Thanks for stopping by today, and Sweet Stamping!
Jul 31, 2016 | Cards, Christmas, Classes, Gallery, Holiday |

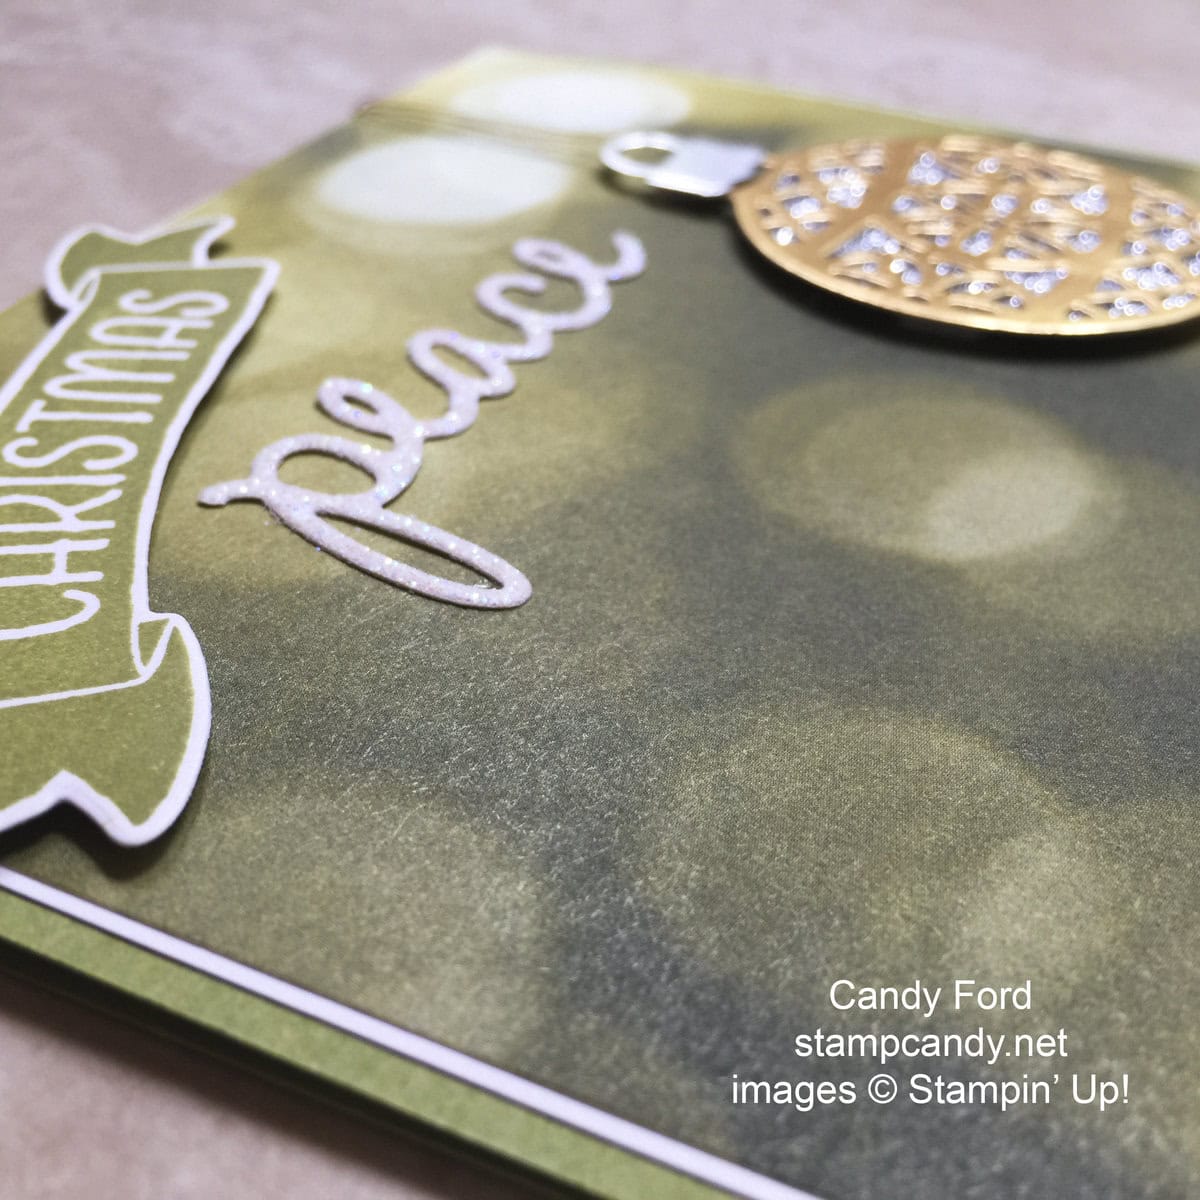
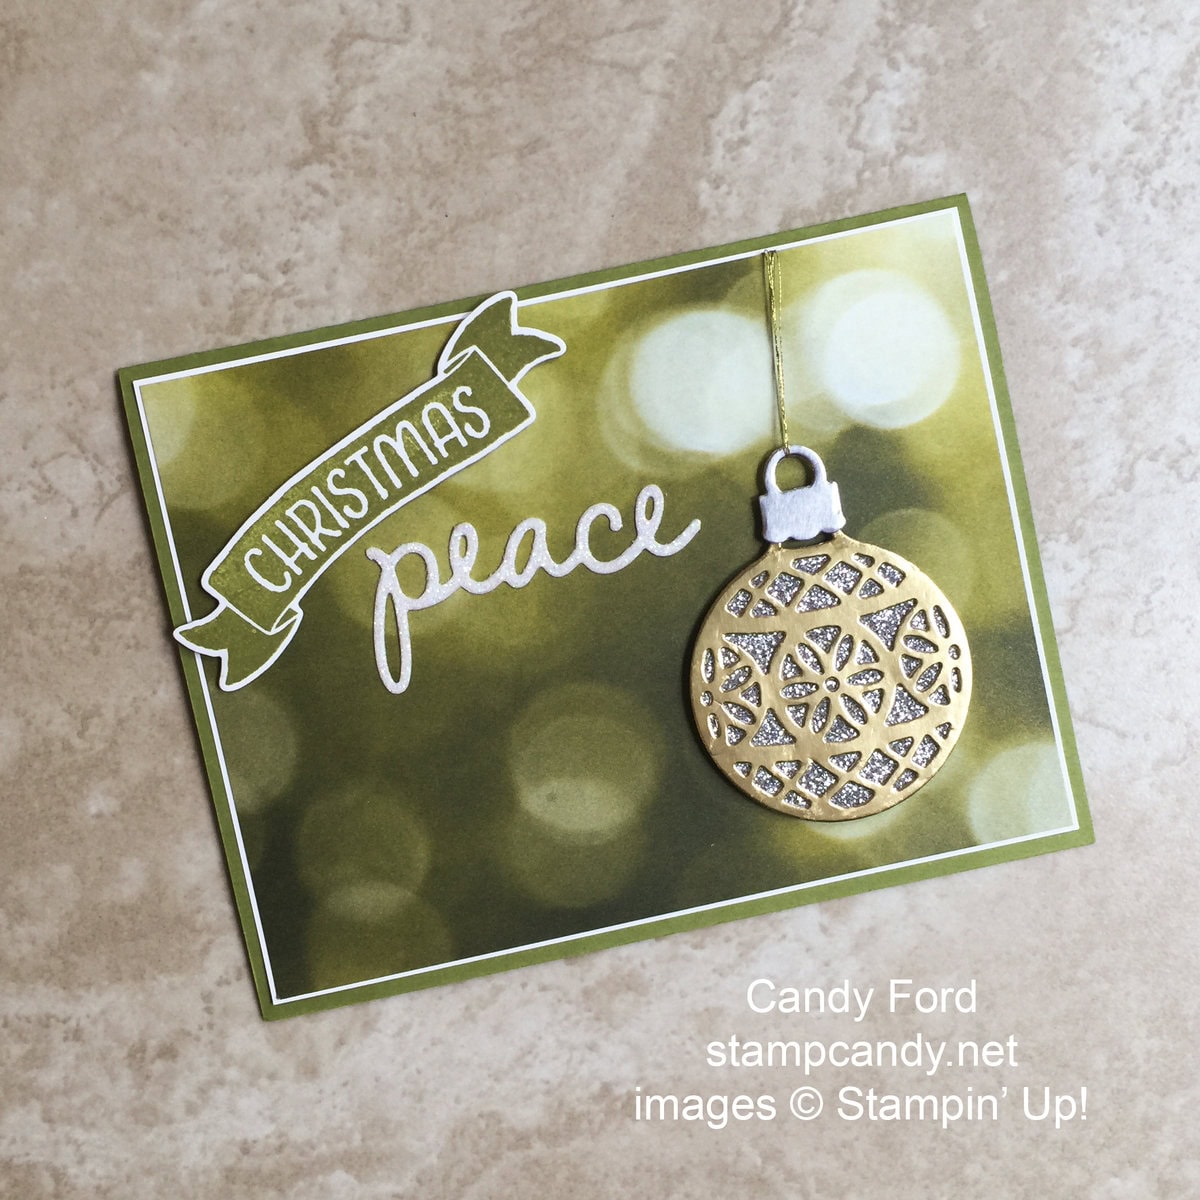
Today I’m sharing another project from my Christmas in July class. I used a design from the Serene Scenery Designer Series Paper Stack that you might not think of as Christmasy at first, but it’s all in how you use it. You can see a more summery card I made with this same designer paper here.
Here’s how I did it.
The card base is Old Olive card stock with a Whisper White card stock layer.
I stamped the first part of the sentiment, from the Time of Year stamp set, in Old Olive ink onto Whisper White card stock, then cut it out with the coordinating die from the Bunch of Banners Framelits. I adhered it to the DSP with Stampin’ Dimensionals.
I cut the second part of the sentiment from Dazzling Diamonds Glimmer Paper with a die from the Christmas Greeting Thinlits. I glued it to the DSP layer.
I used the Delicate Ornaments Thinlits to cut the lacy ball from a Gold Foil Sheet and the ornament top from a Silver Foil Sheet. I used the 1-3/4″ Circle Punch to cut a piece of Silver Glimmer Paper, and glued the gold piece to the front of it. I used Fast Fuse to adhere the silver top to the ornament. I attached it to the DSP layer with Stampin’ Dimensionals.
I ran a double piece of Gold Metallic Thread through the ornament top and over the top of the DSP, then taped it to the back of the DSP with Fast Fuse.
I then glued the DSP layer to the card.

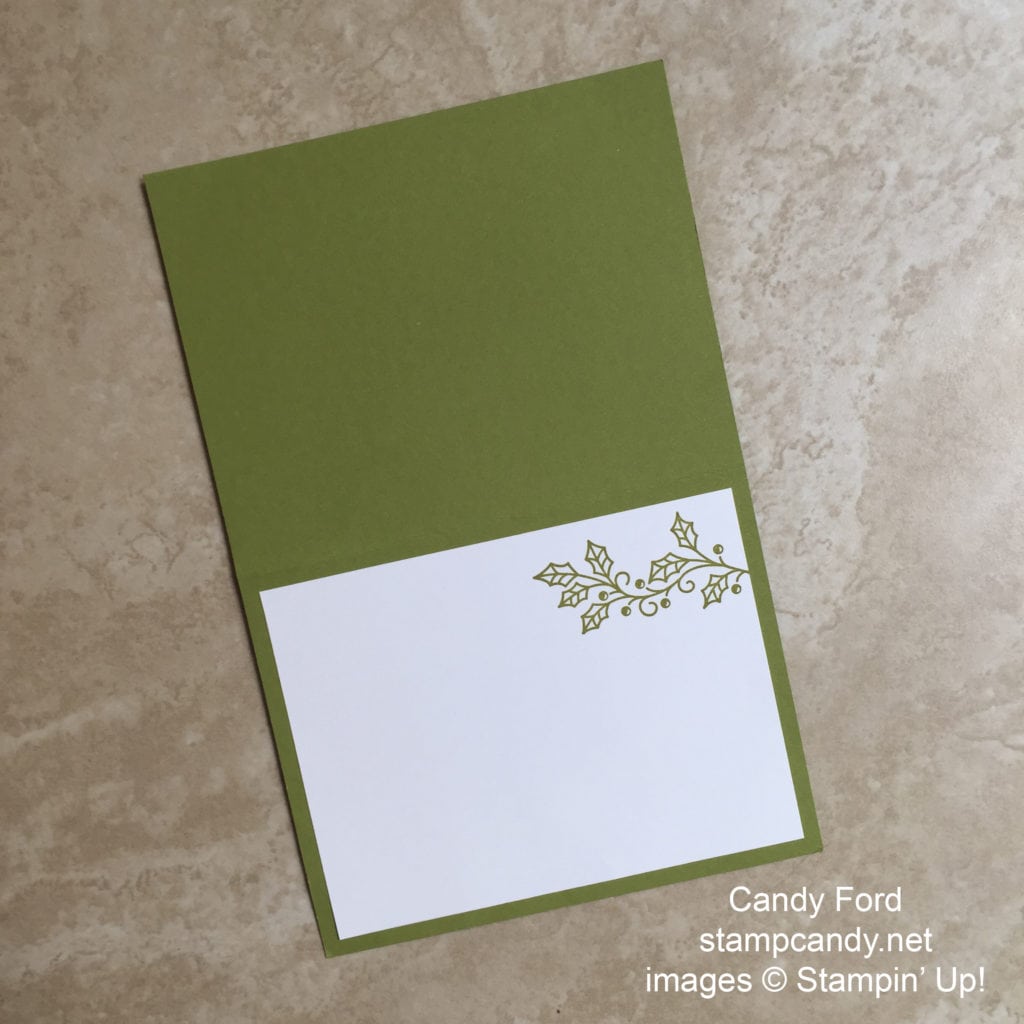
For the card’s interior, I stamped an image from the Embellished Ornaments stamp set in Old Olive ink onto a piece of Whisper White card stock, then glued it to the card.
Here’s what I used:
TODAY IS THE LAST DAY TO TAKE ADVANTAGE OF THIS PROMOTION!
Click on image to shop now!

Thanks for stopping by today, and Sweet Stamping!
Jul 30, 2016 | Cards, Christmas, Classes, Gallery, Holiday |
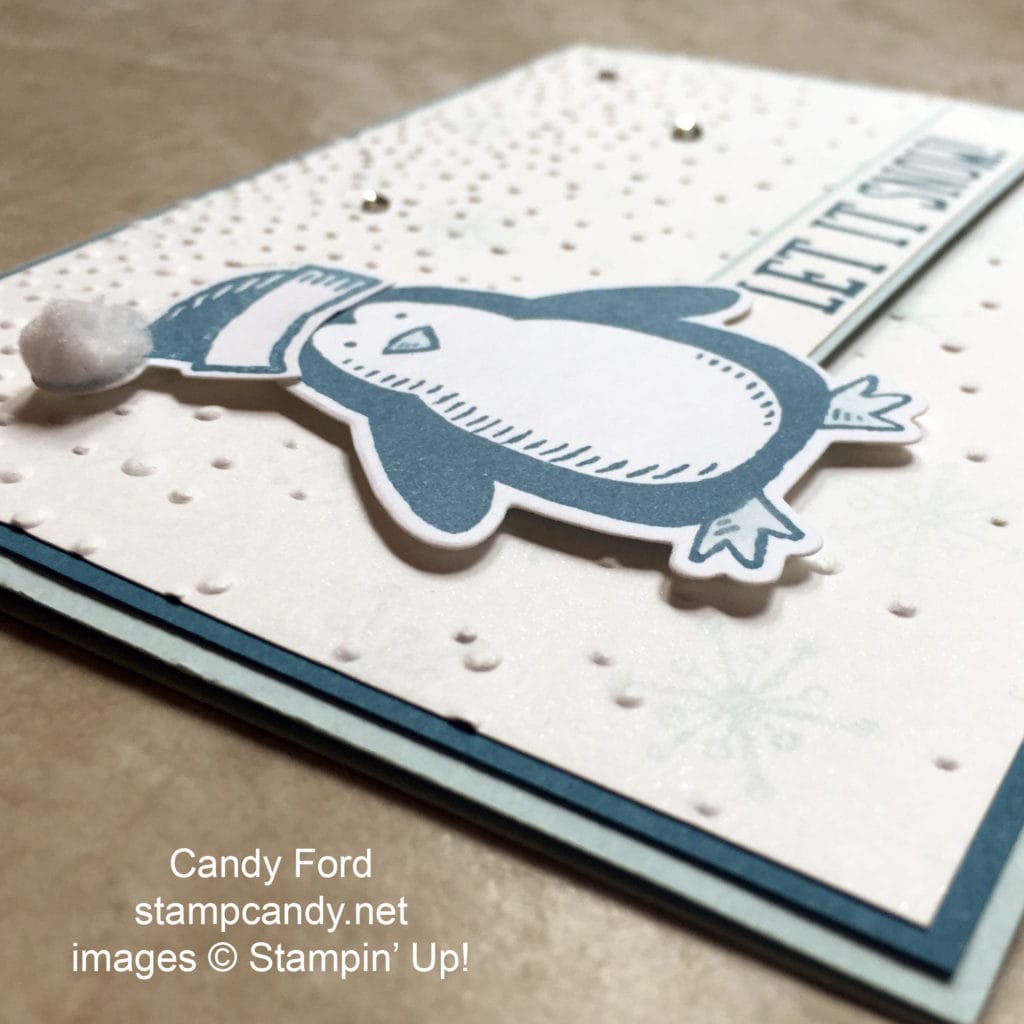
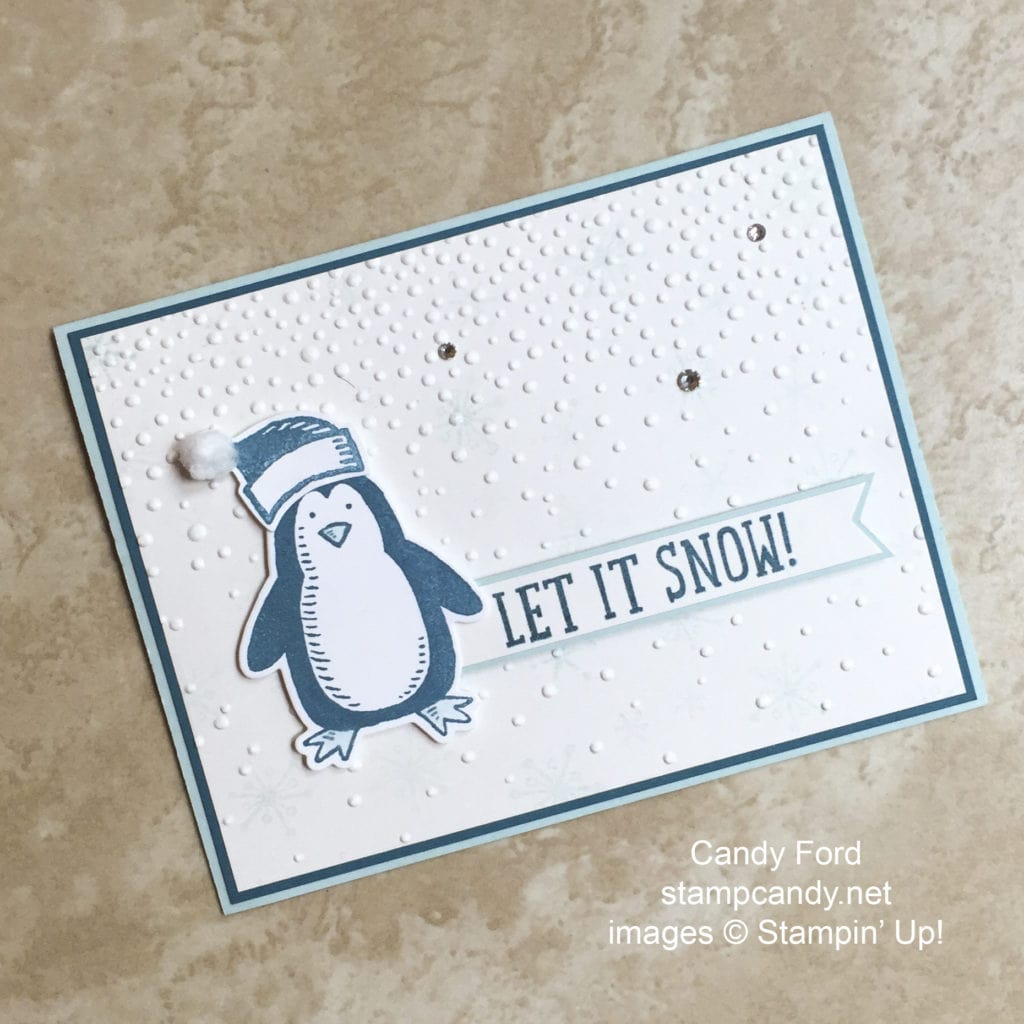
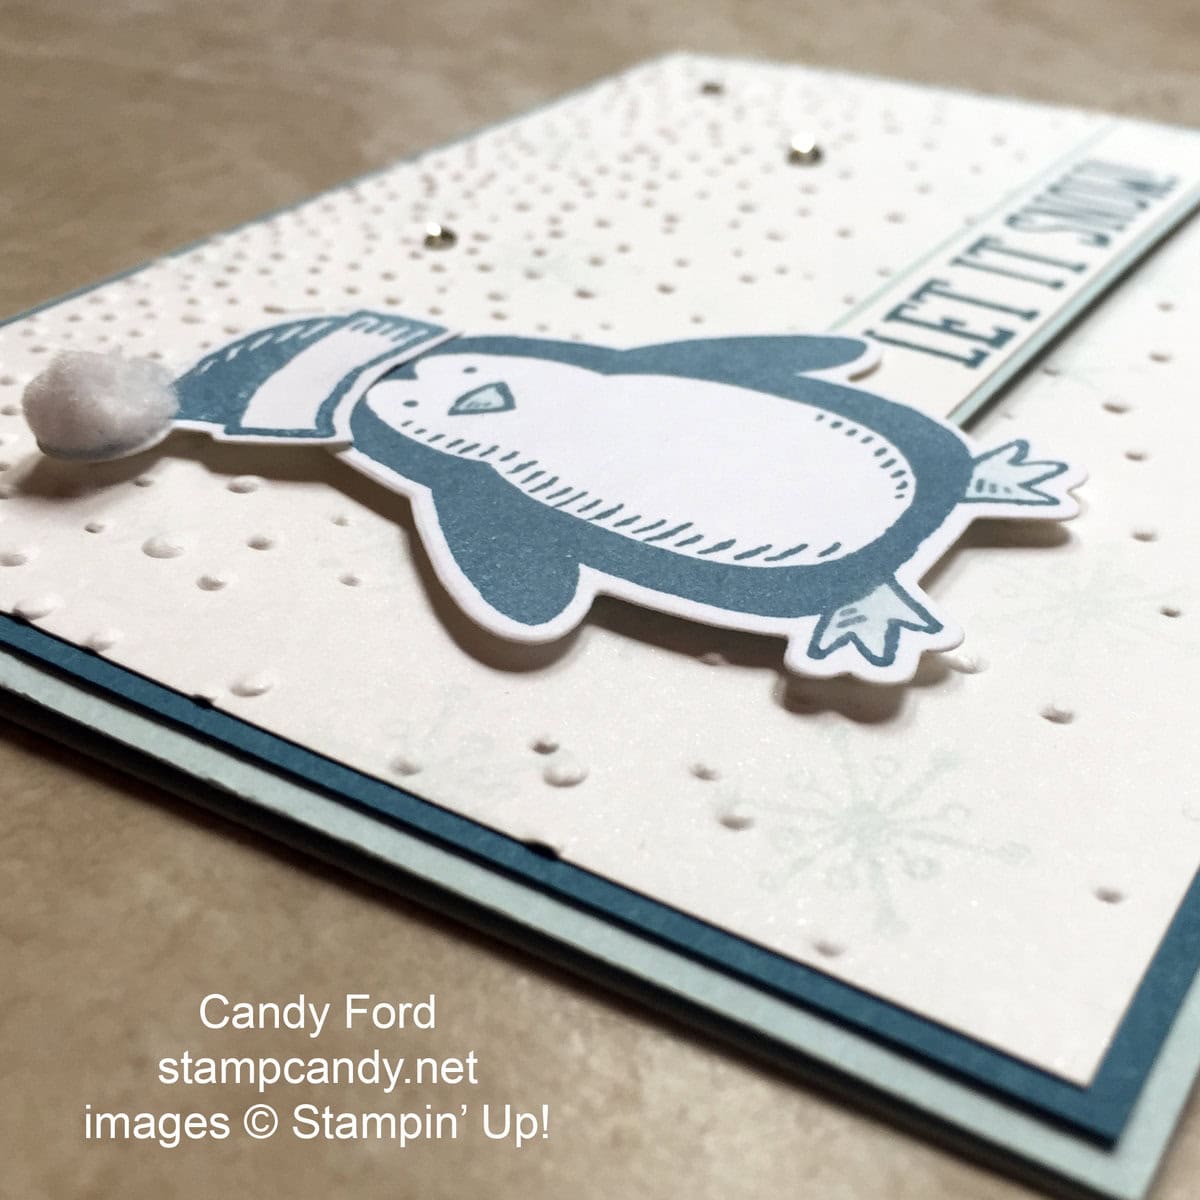
Today I’m sharing a project from my Christmas in July class. This cute little guy is so cold he’s blue. But I think he likes it that way. It’s a cute card that actually could be used for any winter occasion.
Here’s how I did it.
The card base is Soft Sky card stock with an Island Indigo layer on top. All the stamped images are from the Snow Place stamp set.
I stamped the Whisper White layer with snowflakes in Soft Sky. They’re subtle and don’t show well in this photo, I’m afraid. I ran it through the Big Shot using the Softly Falling embossing folder, then glued it to the card front.
I stamped the penguin and hat in Island Indigo ink onto another piece of Whisper White card stock, and cut them out with the coordinating dies from the Snow Friends Framelits. I used a Blender Pen to spread the ink of his beak and feet – it’s a very subtle way to color them in.
I stamped the sentiment in Island Indigo onto a strip of Whisper White card stock, and notched the right end – you can do this with the Banner Triple Punch or with Paper Snips. I matted the sentiment on a slightly wider strip of Soft Sky card stock and cut the end to match the white piece. I attached this to the card front with Stampin’ Dimensionals.
I glued a pompom from the Whisper White Mini Pompom Trim to the hat as shown, then glued the hat to the penguin’s head. I attached this whole piece to the card with Stampin’ Dimensionals, covering the left end of the sentiment.
The final touch is three Rhinestone Basic Jewels, 2 small and 1 medium size, on the snowy background.
Here’s what I used:
TOMORROW IS THE LAST DAY TO TAKE ADVANTAGE OF THIS PROMOTION!
Click on image to shop now!
Thanks for stopping by today, and Sweet Stamping!
Jul 1, 2016 | Classes, Events, Scrapbooking |

Here are my events coming up in the next few months:
July 6 – Stamp Club – RSVP by July 3
$25 minimum order, 6 month commitment
July 9 – Stamp Club Weekend Edition – RSVP by July 3
$25 minimum order, 6 month commitment
July 17 – Candy Hearts Team Meeting – RSVP by July 14
(demonstrators or prospective demonstrators only)
$5 (your first time is free)
July 18 – Card Smorgasbord – RSVP by July 15
Make any 6 cards for $15. You can make extras at $2.50 each.
July 23 – Memory Keeping Class – RSVP by July 20
$34 –cover a 6×8 album and create inserts for 24 pages (12 double sided)
July 24 – Christmas in July – Prepay by July 17
$30 – Create 12 Christmas cards (4 each of 3 different designs)
July 25 – Paper Pumpkin Party (for June kit) – RSVP by July 22
Bring your July Paper Pumpkin kit and we’ll assemble them together.
$5 class fee (FREE if you are my subscriber or my team member)
July 26 – Jar of Love Bundle Class – Prepay by July 12
$62 and you get to keep the stamp set & the dies!
If you own the bundle and bring it to class, you can make the projects for $15!
Aug 3 – Stamp Club – RSVP by July 31
$25 minimum order, 6 month commitment
Aug 6 – Stamp Club Weekend Edition – RSVP by July 3
$25 minimum order, 6 month commitment
Aug 15 – Card Smorgasbord – RSVP by Aug 12
Make any 6 cards for $15. You can make extras at $2.50 each.
Aug 20 – Memory Keeping Class – RSVP by Aug 17
$18 – use Good Vibes set to create 12×12 layouts: one 2-page and two 1-page (page protectors included)
Aug 21 – Candy Hearts Team Meeting – RSVP by July 14
(demonstrators or prospective demonstrators only)
$5 (your first time is free)
Aug 23 – Foxy Friends Bundle Class – Prepay by Aug 9
$52 and you get to keep the stamp set and punch!
If you own the bundle and bring it to class, you can make the projects for $15!
Aug 25 – Paper Pumpkin Party (for June kit) – RSVP by July 22
Bring your August Paper Pumpkin kit and we’ll assemble them together.
$5 class fee (FREE if you are my subscriber or my team member)
Sep 7 – Stamp Club – RSVP by Sep 4
$25 minimum order, 6 month commitment
Sep 10 – Stamp Club Weekend Edition – RSVP by Sep 4
$25 minimum order, 6 month commitment
Sep 17 – Memory Keeping Class – RSVP by Sep 14
$18 – use Blooms & Bliss paper to create four 1-page traditional 12×12 layouts
Sep 18 – Candy Hearts Team Meeting – RSVP by Sep 15
(demonstrators or prospective demonstrators only)
$5 (your first time is free)
Sep 19 – Card Smorgasbord – RSVP by Sep 16
Make any 6 cards for $15. You can make extras at $2.50 each.
Sep 27 – Best Birds Bundle Class – Prepay by Sep 13
$58 and you get to keep the stamp set and dies!
If you own the bundle and bring it to class, you can make the projects for $15!
Sep 29 – Paper Pumpkin Party (for June kit) – RSVP by July 22
Bring your September Paper Pumpkin kit and we’ll assemble them together.
$5 class fee (FREE if you are my subscriber or my team member)
Please contact me with any questions or for payment information: candy@stampcandy.net
Sweet Stamping!


