May 2, 2016 | Boxes, Cards, Club, Events, Occasions |
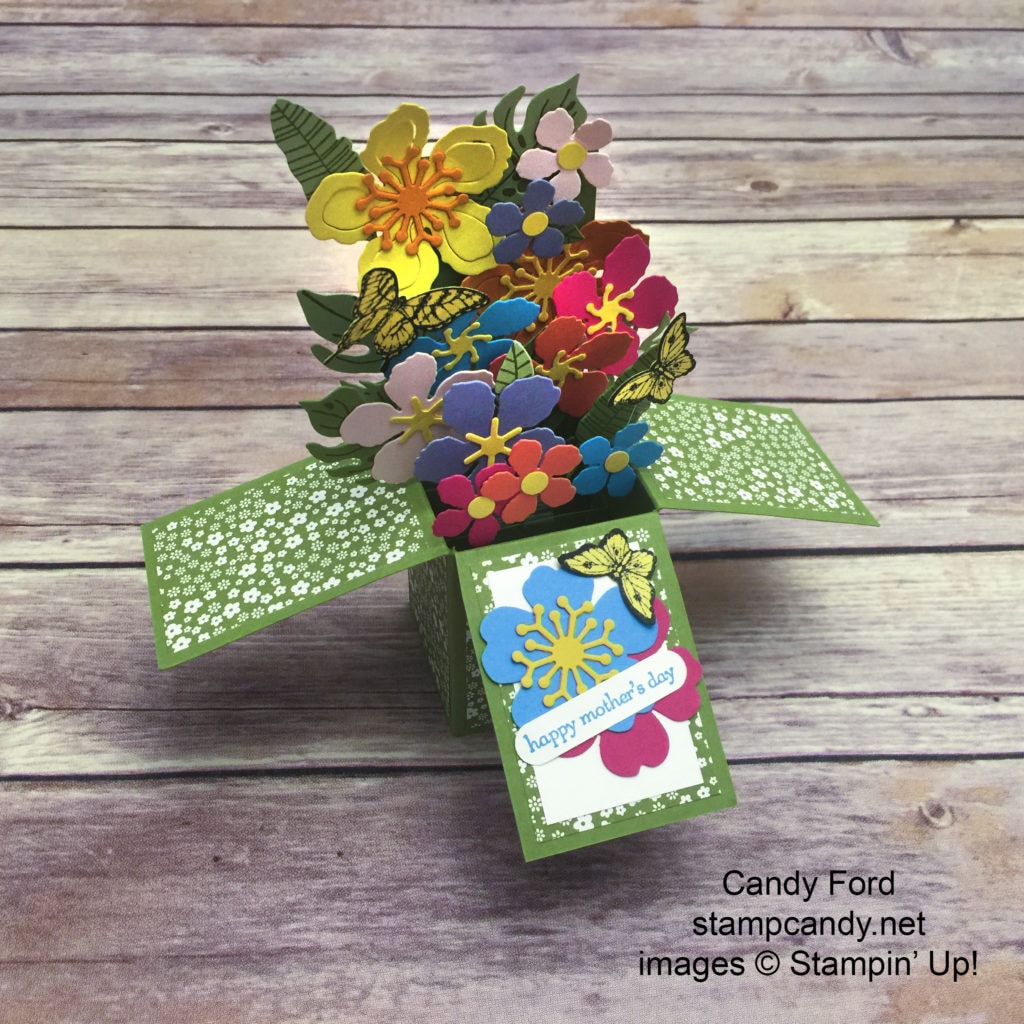
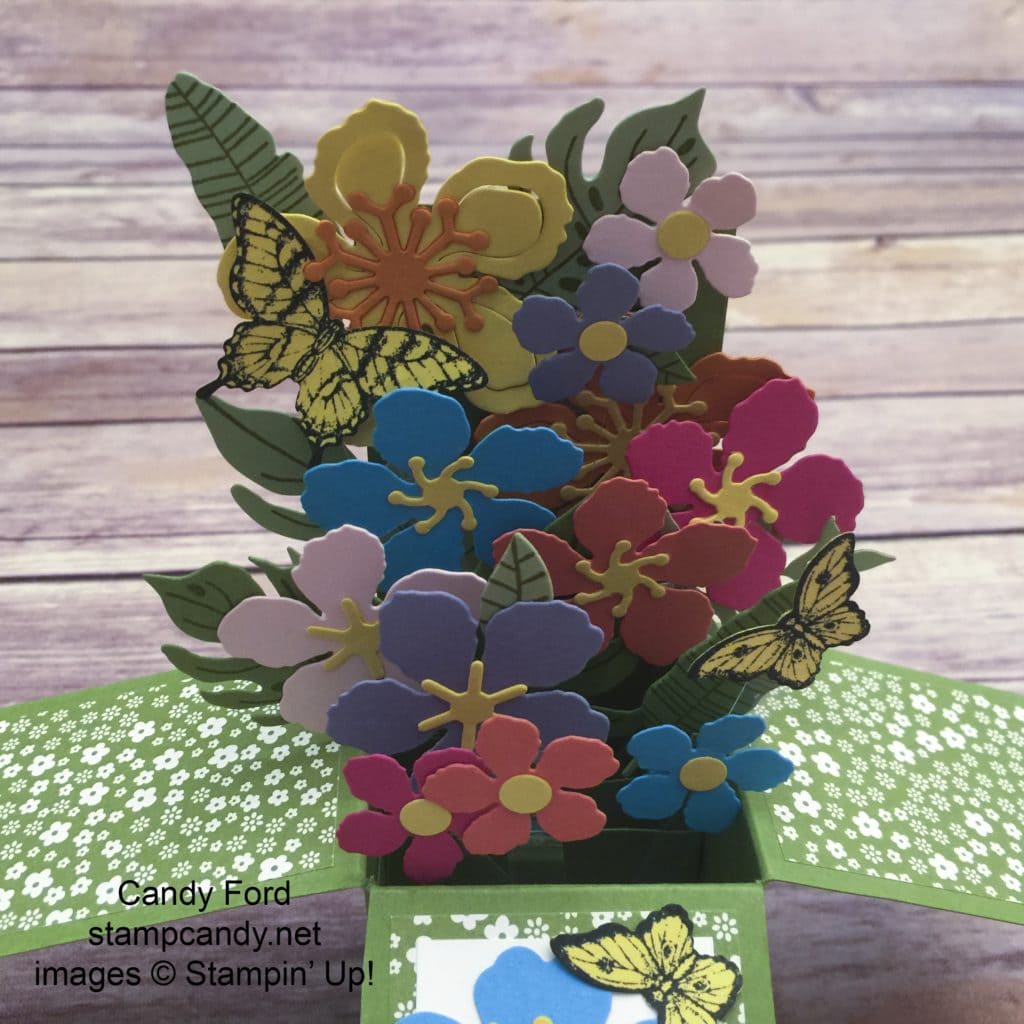
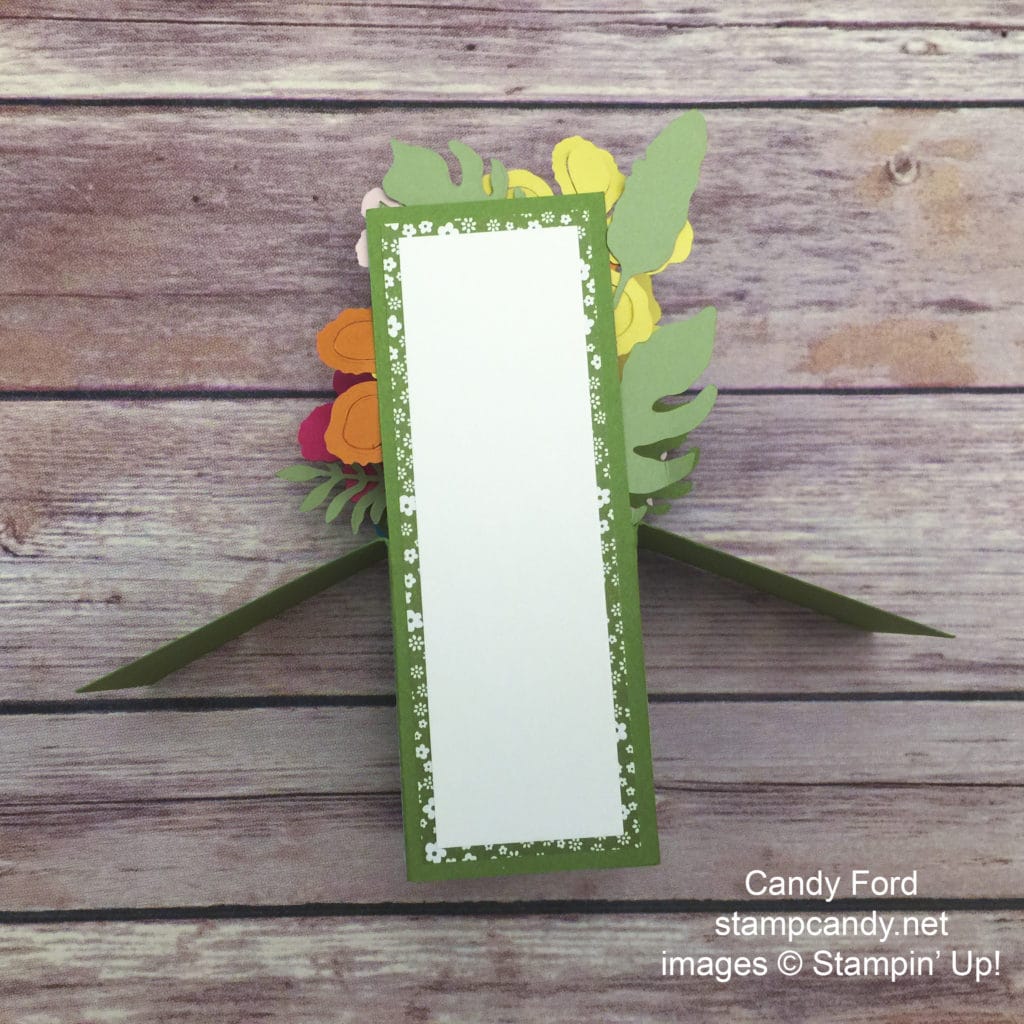
Today I’m sharing with you one of our April Stamp Club projects, a card in a box. This one is bursting with flowers and butterflies…
…then it folds flat to go into an envelope.
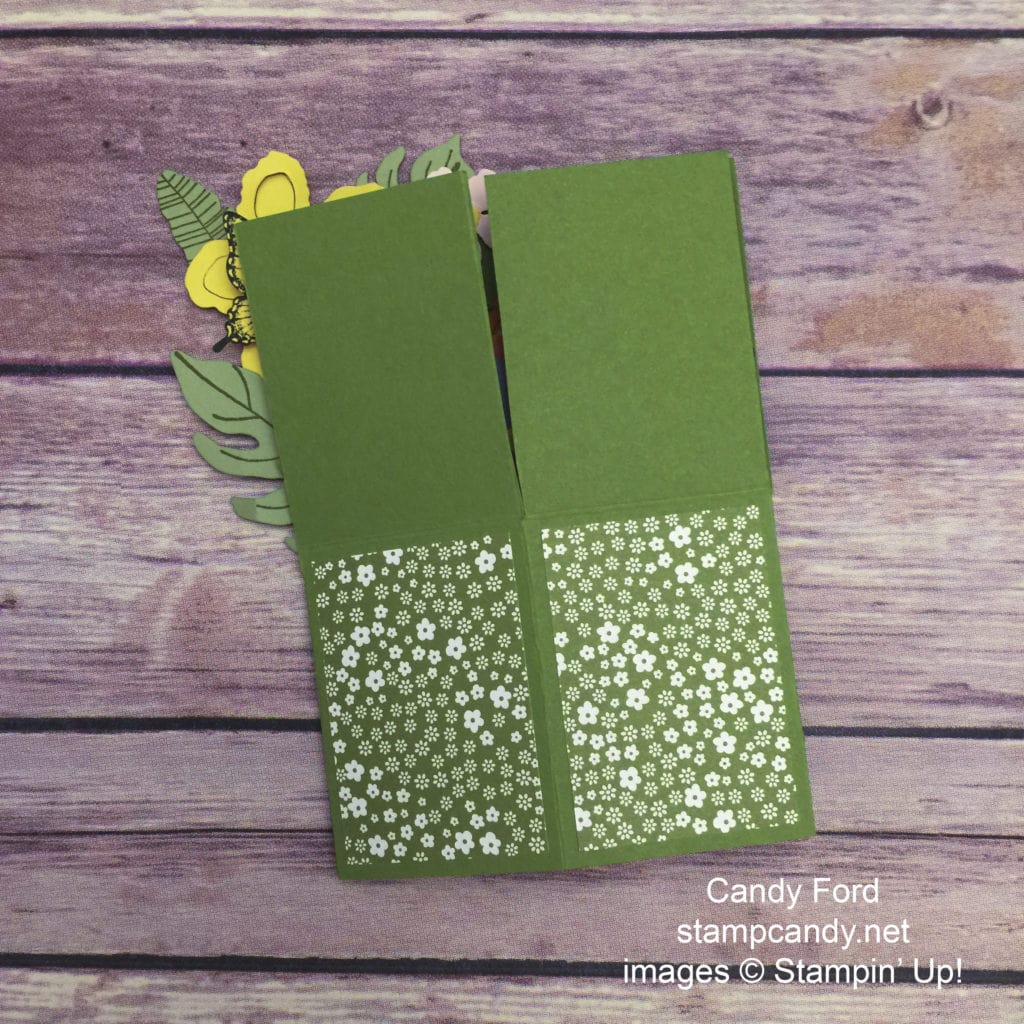
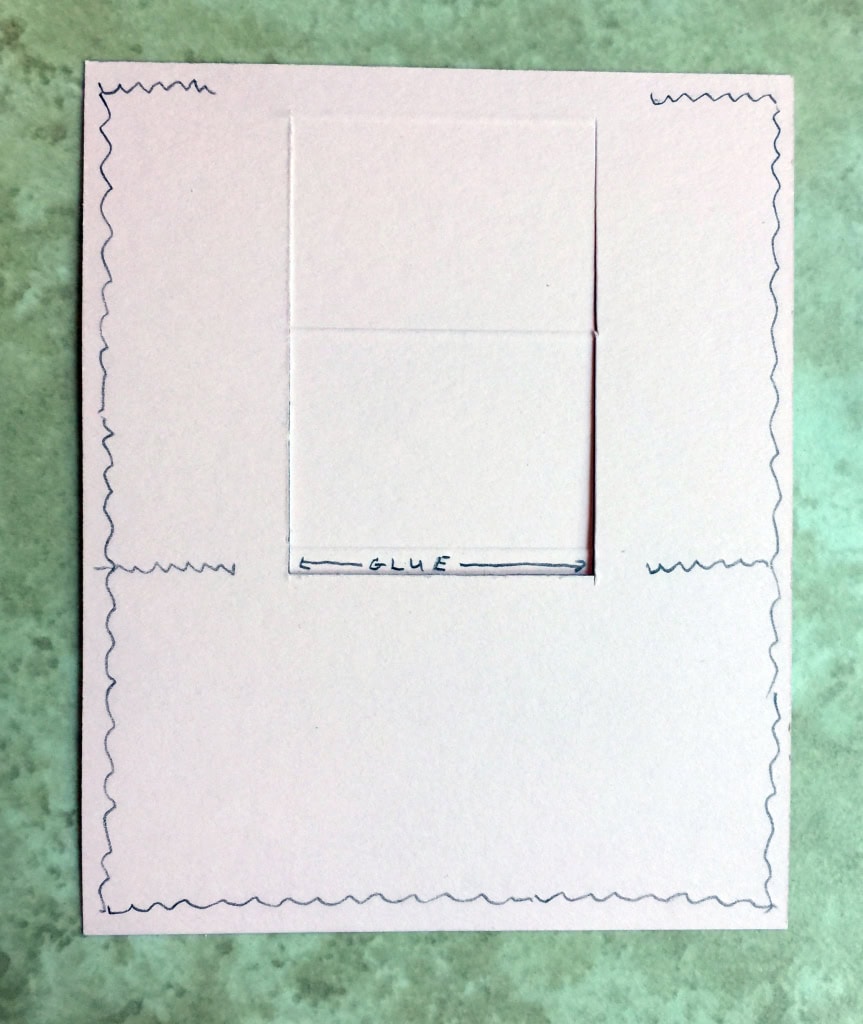
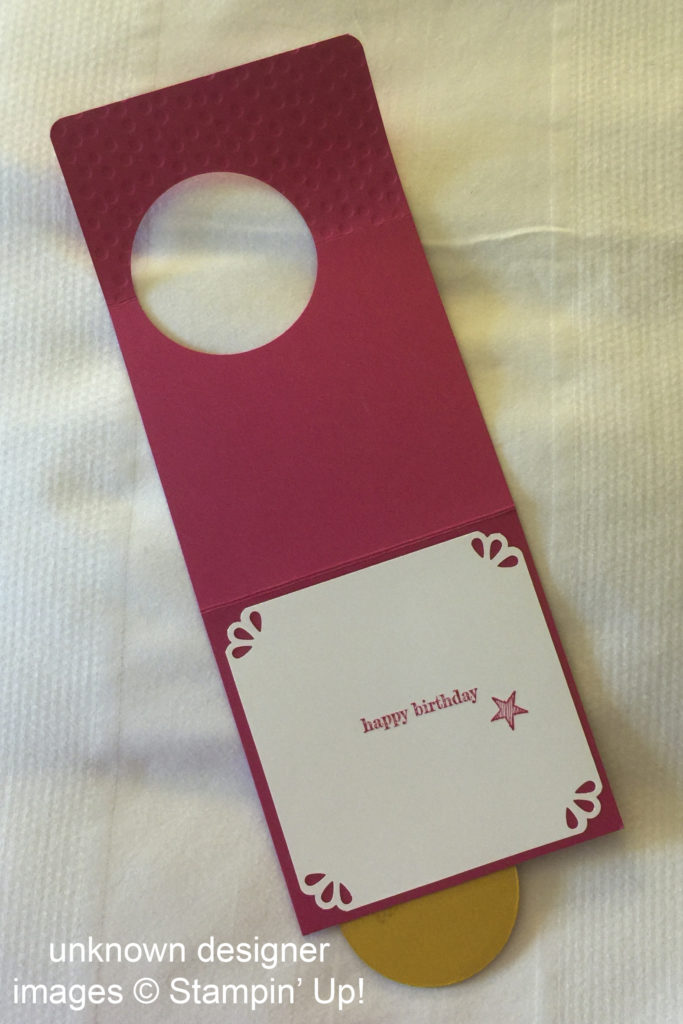
The back has a blank panel for a handwritten message. It’s easier to write on before gluing it onto the box.
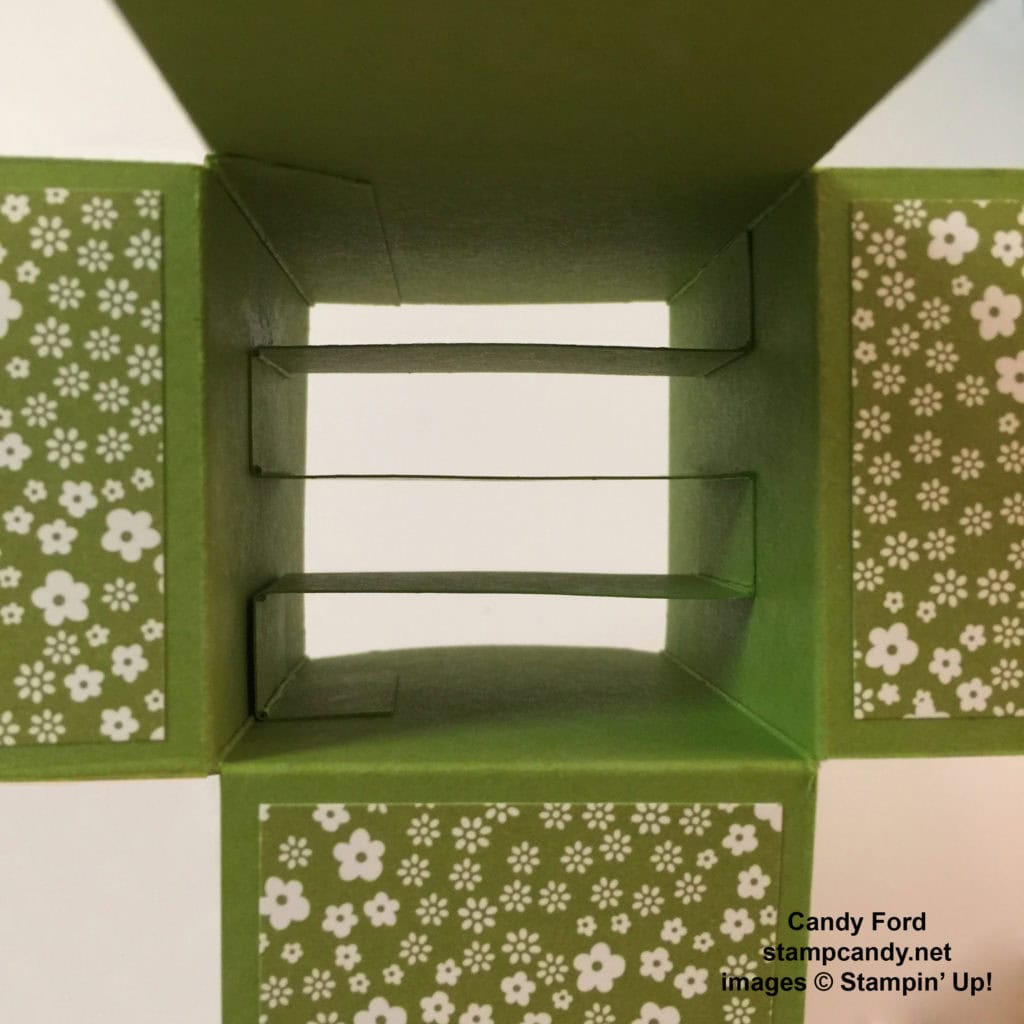
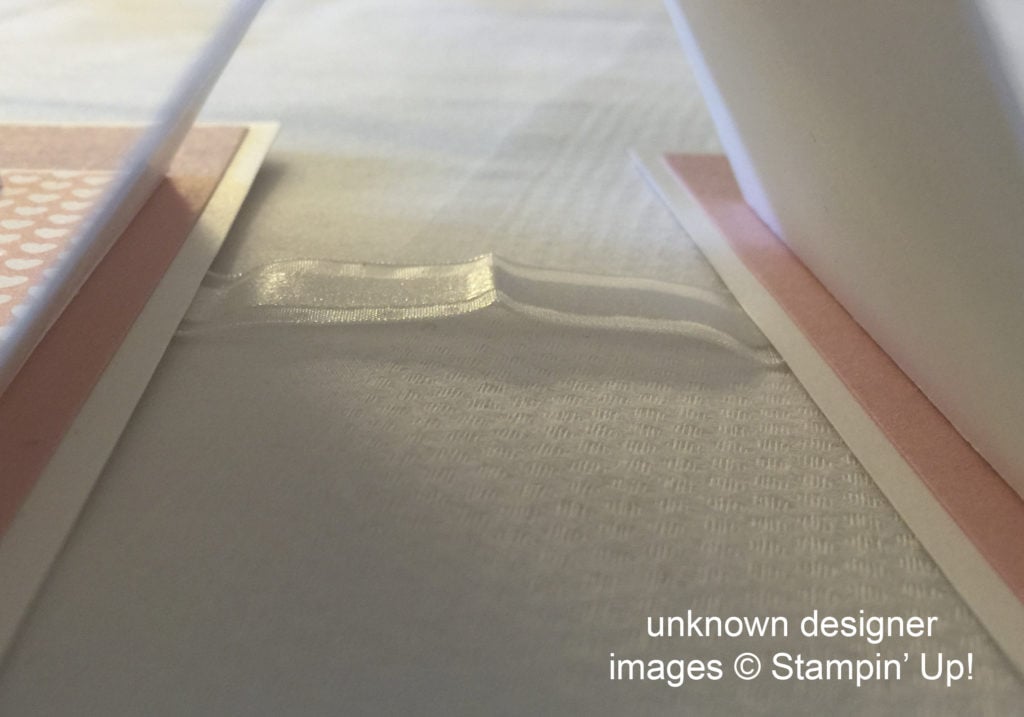
There is a strip of card stock zig-zagged on the inside of the box to attach the flowers & butterflies to. Be sure you attach it so that it runs side to side instead of front to back.
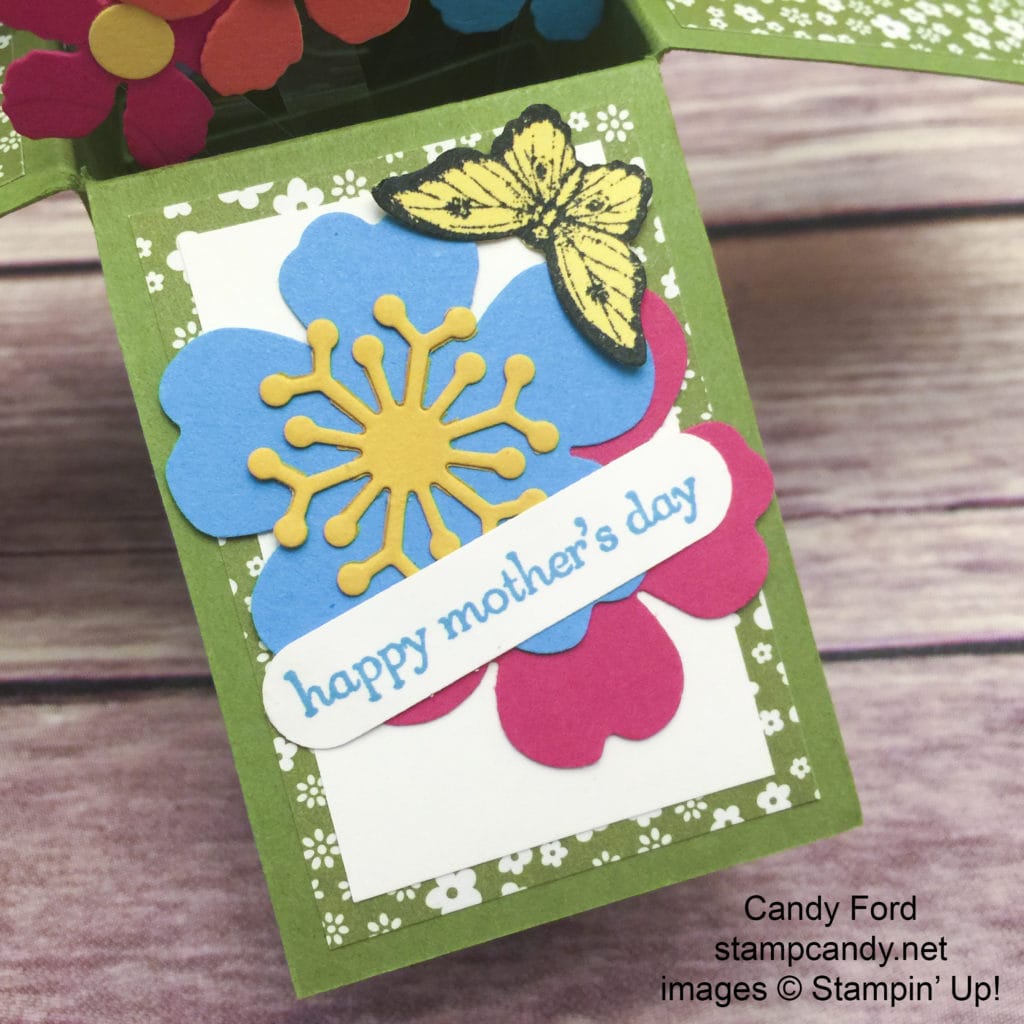
The front panel has the sentiment. I chose to make this a Mother’s Day card, but you could use almost any sentiment from the Teeny Tiny Wishes stamp set.
This card may seem a bit overwhelming at first, but it really isn’t difficult at all. I find the most difficult part is to get the zig-zagged strip glued inside the box. I recommend using liquid glue, so you can slide it into place more easily than if you use a dry adhesive.

Click here to download the free tutorial for this Floral Card in a Box!

Paper Pumpkin is a great way to spend 30-60 minutes each month relaxing, crafting, and hanging out with friends. Each month you receive a box full of goodies in the mail. It contains everything you need to complete that month’s project including ink pad(s) and an exclusive stamp set (you might need scissors and adhesive.) A clear acrylic block comes in your first kit to use with all your Paper Pumpkin stamps in the future.

When you subscribe month-to-month the kits are $19.95 per month, which includes shipping. When you buy a prepaid subscription of 6- or 12-months, you save money! See the options here.
When you subscribe to Paper Pumpkin in May or June 2016, and the kits ship to you for 6 months, I will send you a Paper Pumpkin shopping bag full of goodies!

Be sure to check out the retiring products here, many of which are discounted up to 50%. Most items are only available while current supplies last, and none of them will be available after May 31. Some things have already sold out, so don’t wait!
Thanks for stopping by today, and Sweet Stamping!

Apr 30, 2016 | Cards, Events, Swaps |
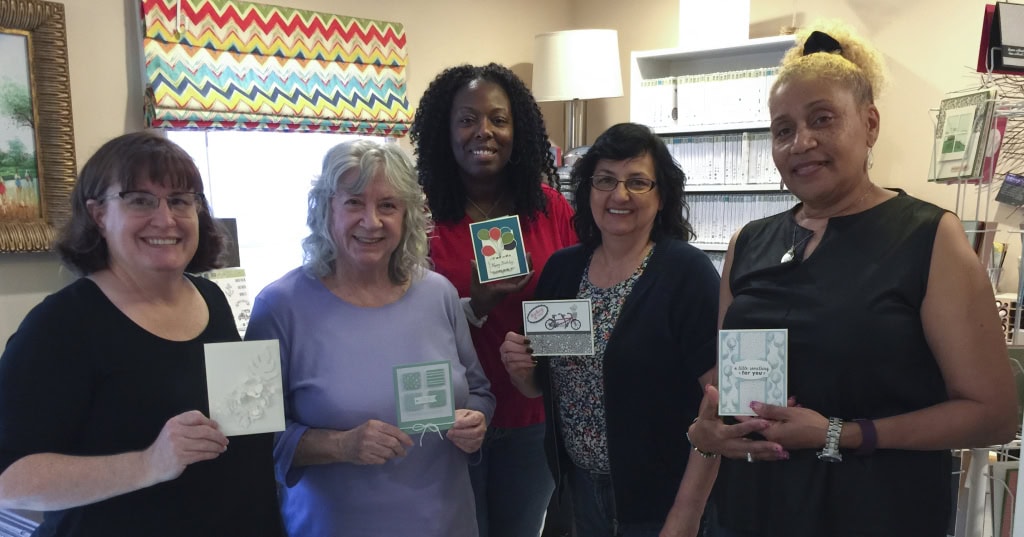
Today I’m thrilled to share with you some of the projects I received during OnStage Live in Salt Lake City. Most I received as swaps, and some I received as gifts.
A couple of the projects have no name. If you know who made them, please let me know so I can give them credit.
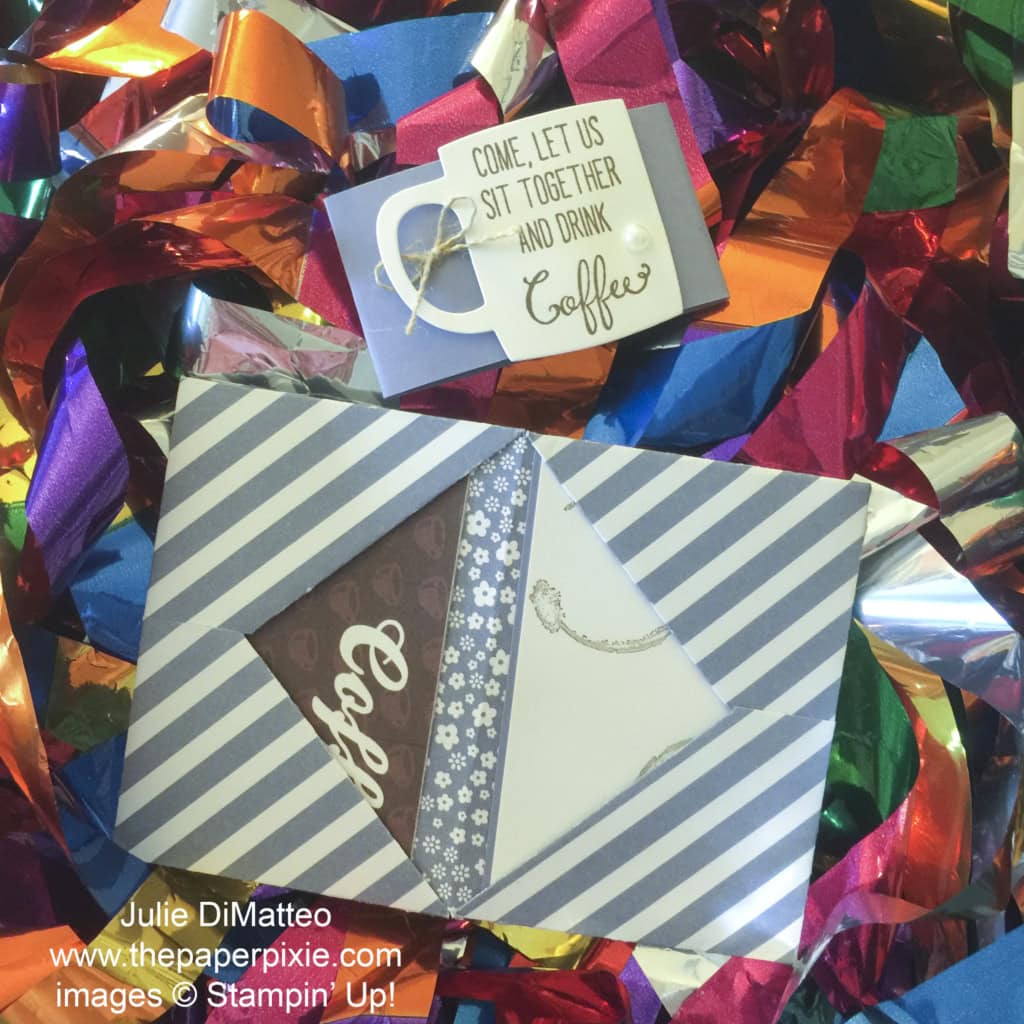
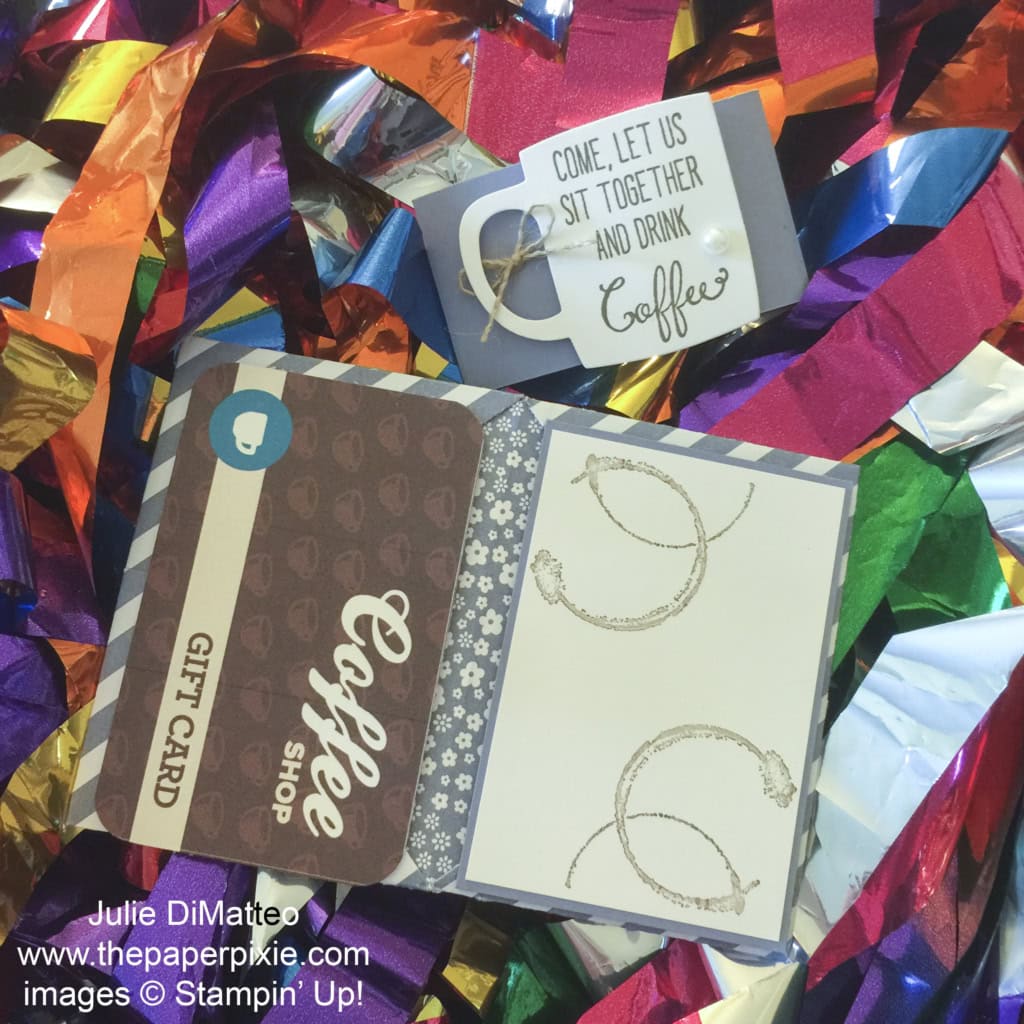
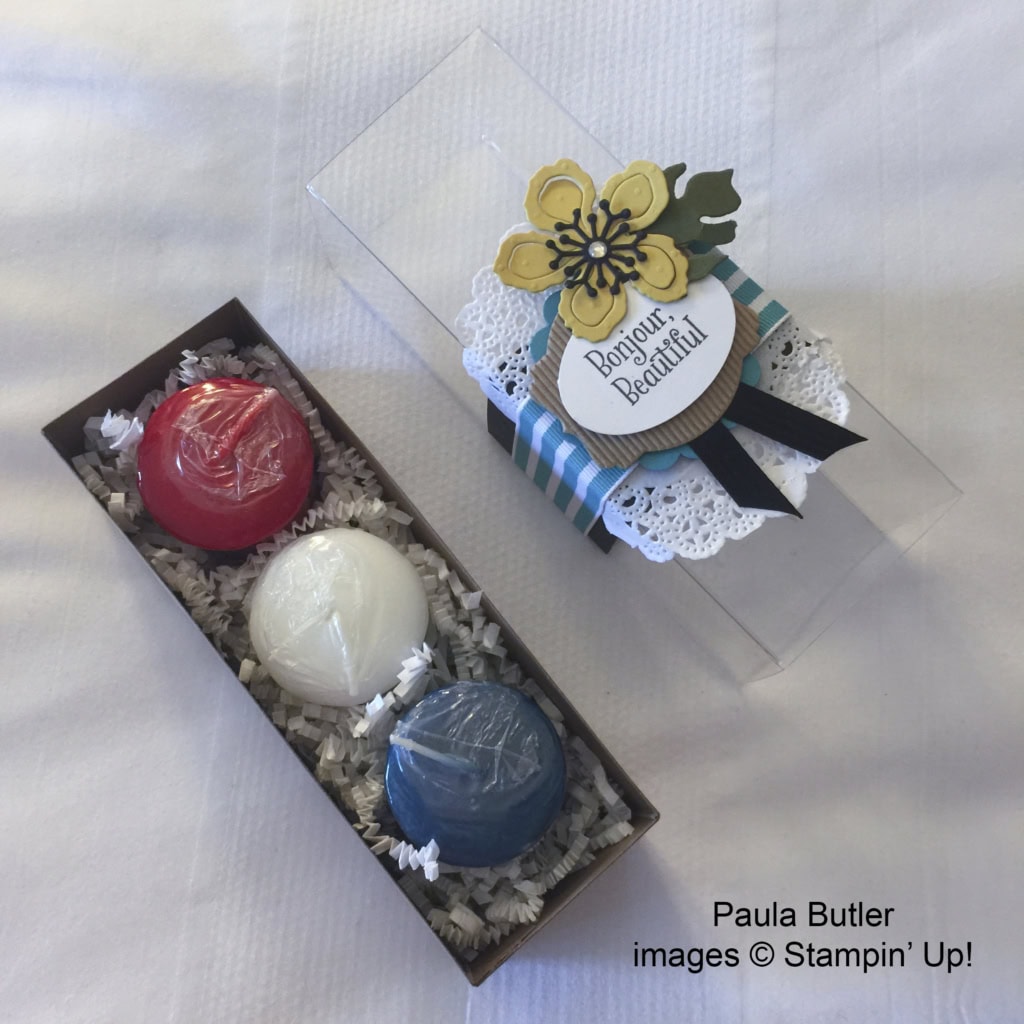
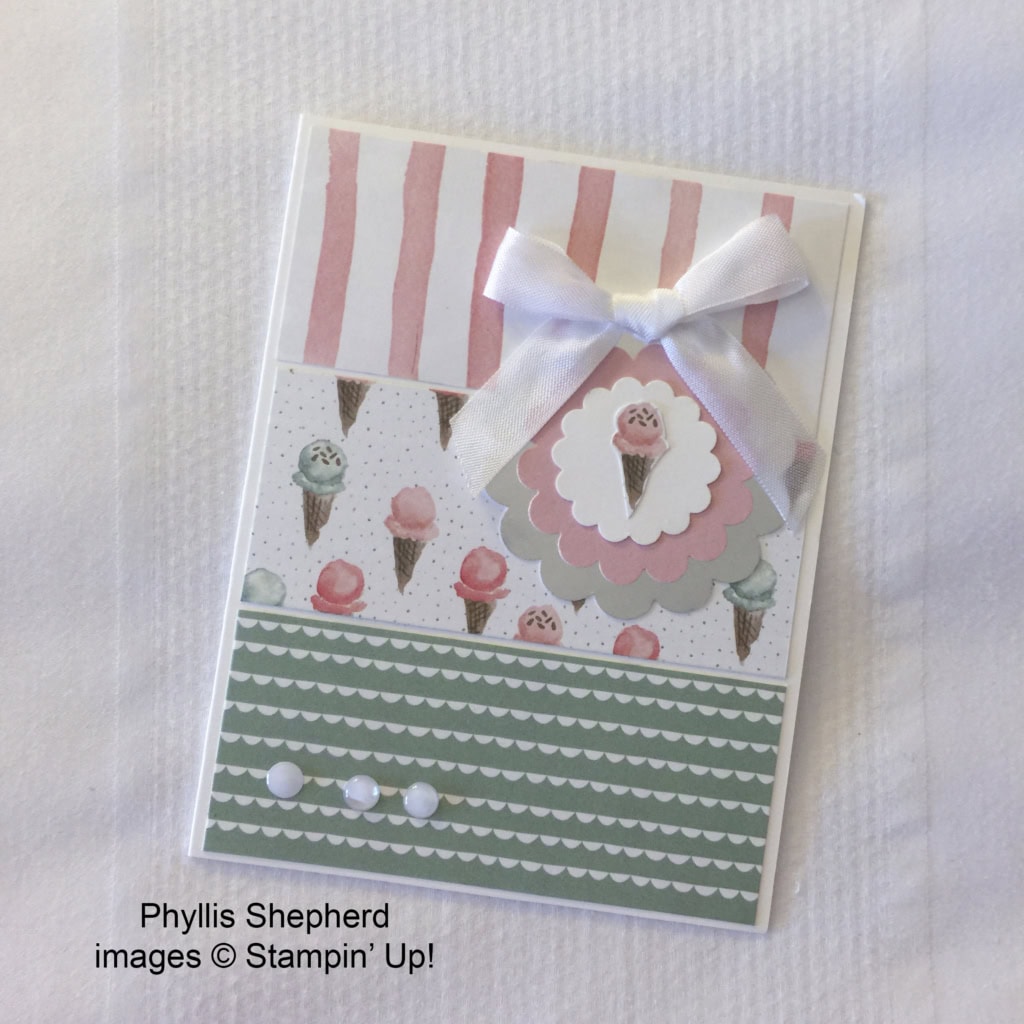
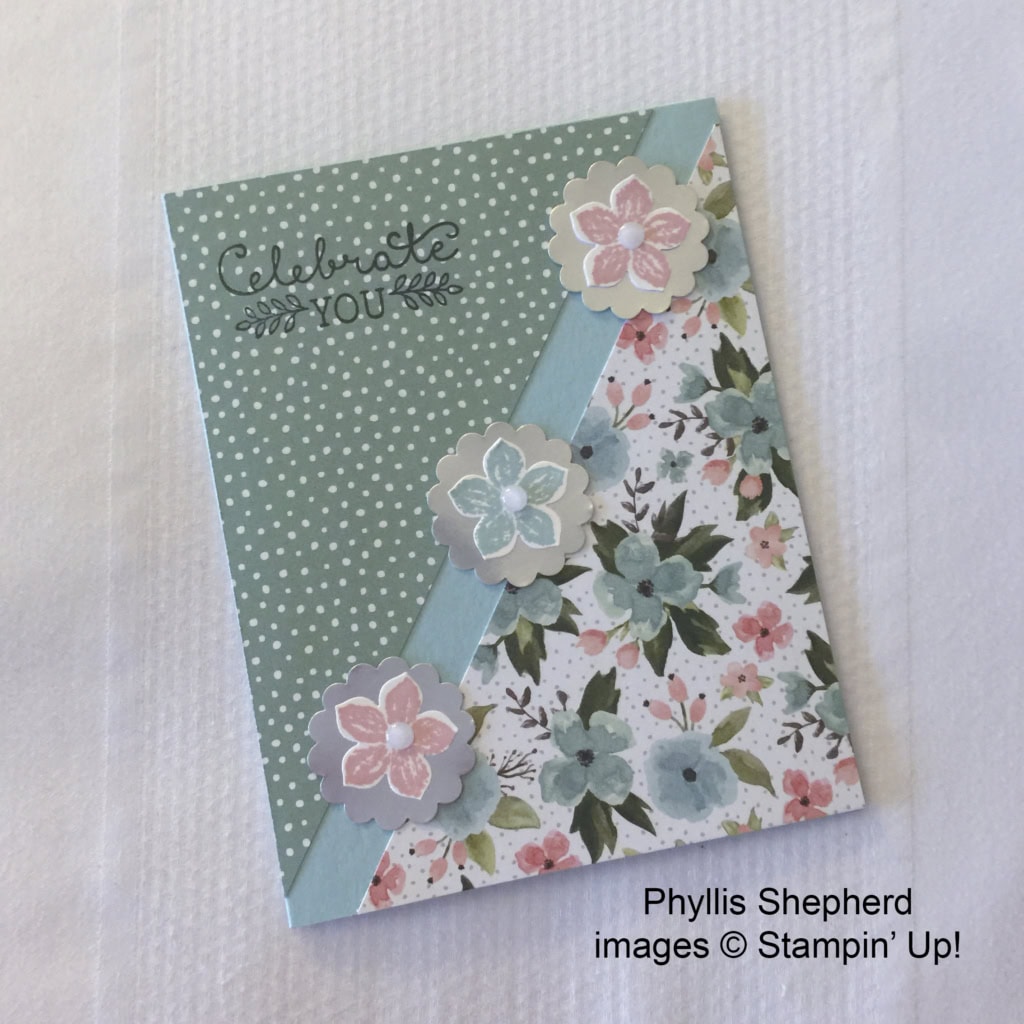
I was fortunate enough to receive two cards from the very talented Phyllis Shepherd, both made with Birthday Bouquet Designer Series Paper.


I hope you found as much inspiration in these projects as I did.
Paper Pumpkin is a great way to spend 30-60 minutes each month relaxing, crafting, and hanging out with friends. Each month you receive a box full of goodies in the mail. It contains everything you need to complete that month’s project including ink pad(s) and an exclusive stamp set (you might need scissors and adhesive.) A clear acrylic block comes in your first kit to use with all your Paper Pumpkin stamps in the future.
When you subscribe month-to-month the kits are $19.95 per month, which includes shipping. When you buy a prepaid subscription of 6- or 12-months, you save money! See the options here.
Be sure to check out the retiring products here, many of which are discounted up to 50%. Most items are only available while current supplies last, and none of them will be available after May 31. Some things have already sold out, so don’t wait!
Thanks for stopping by today, and Sweet Stamping!
Apr 4, 2016 | Cards, Classes, Events, Occasions, Techniques |
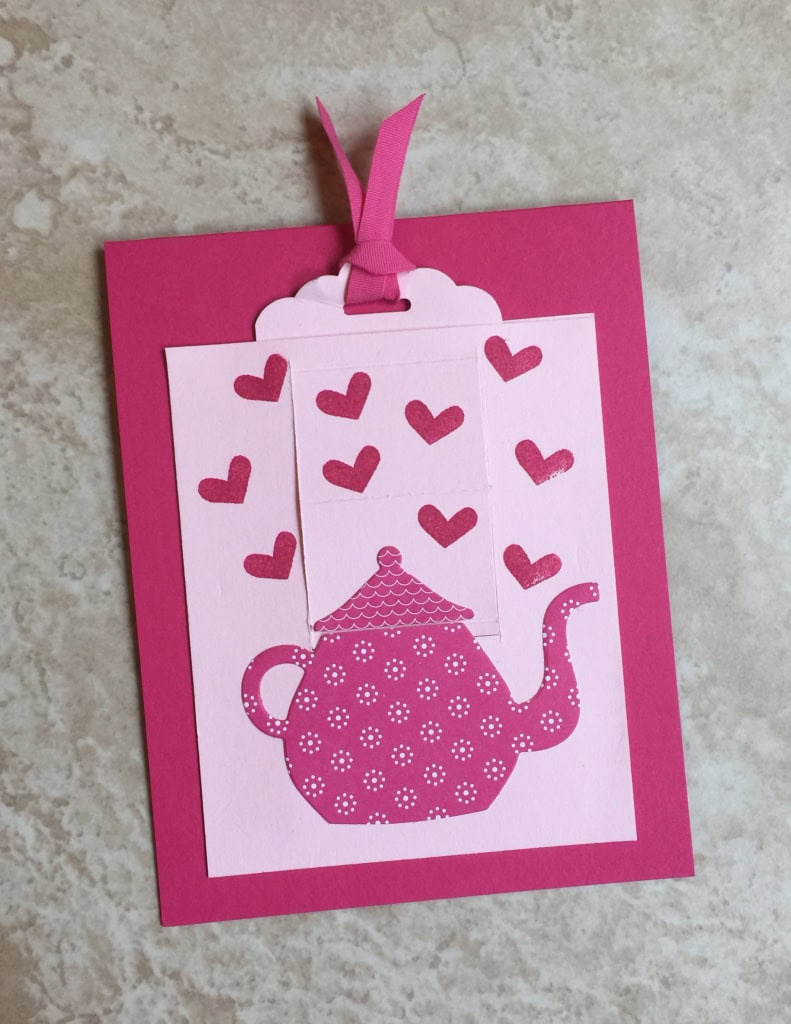
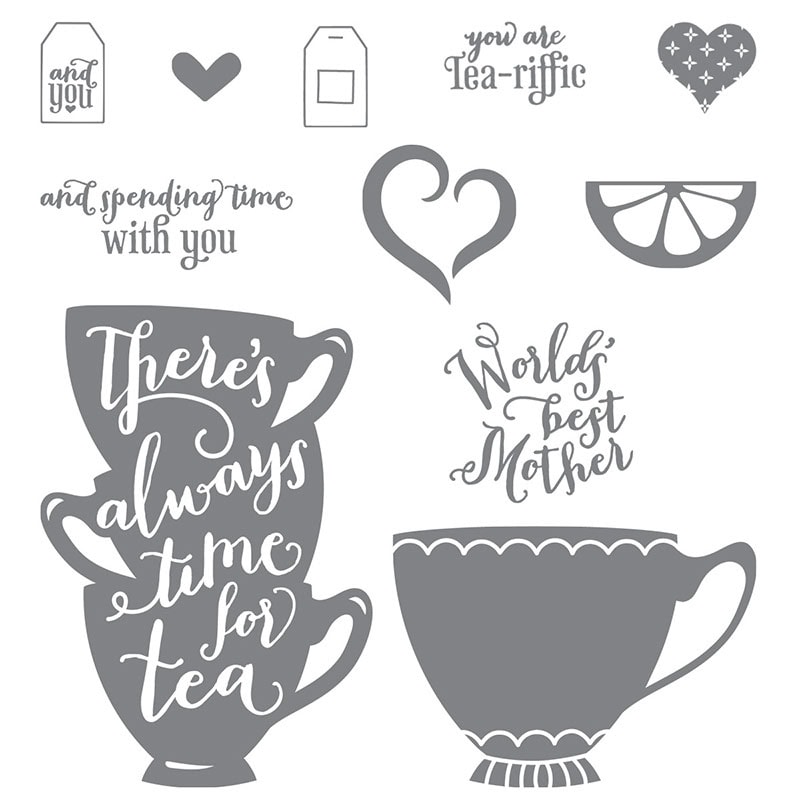
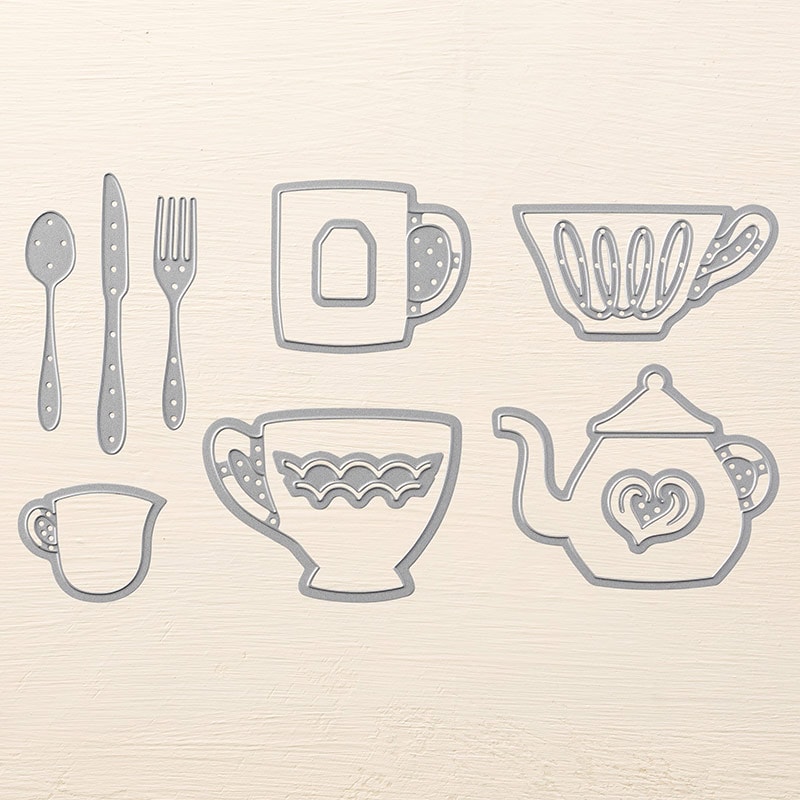
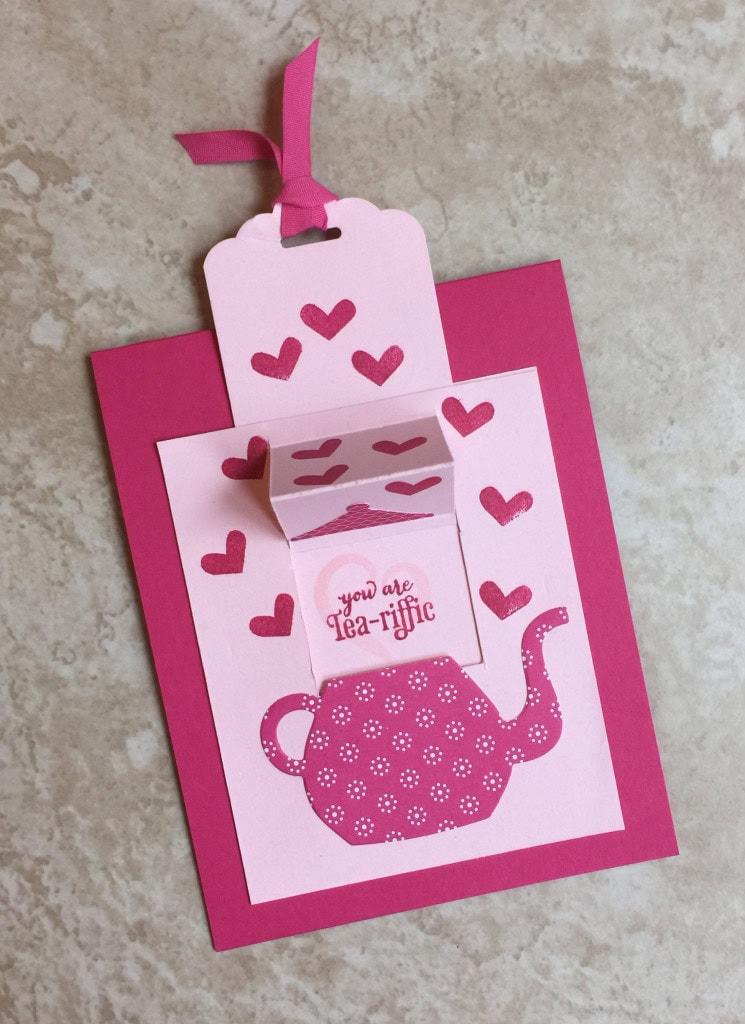
I recently held a Bundle Class using A Nice Cuppa stamp set + Cups & Kettle Framelits Dies bundle.
Today I’m sharing one of the projects from that class: a slider card. When you pull the slider up, the lid lifts off the teapot to reveal the sentiment. This example is in Pink Pirouette and Melon Mambo. I CASEd this card from Catherine Carroll at Ideas Inkorporated.

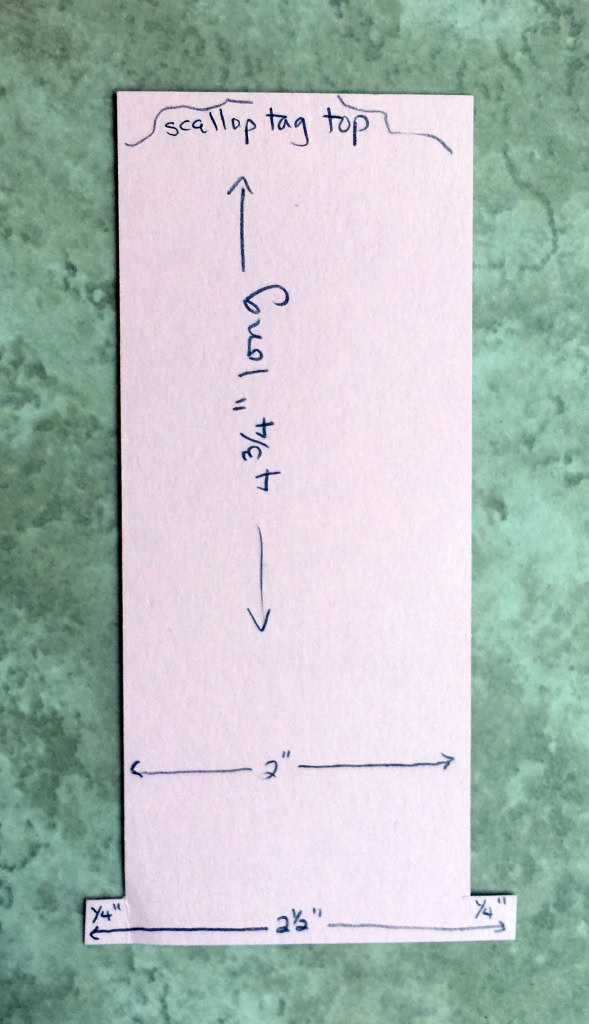
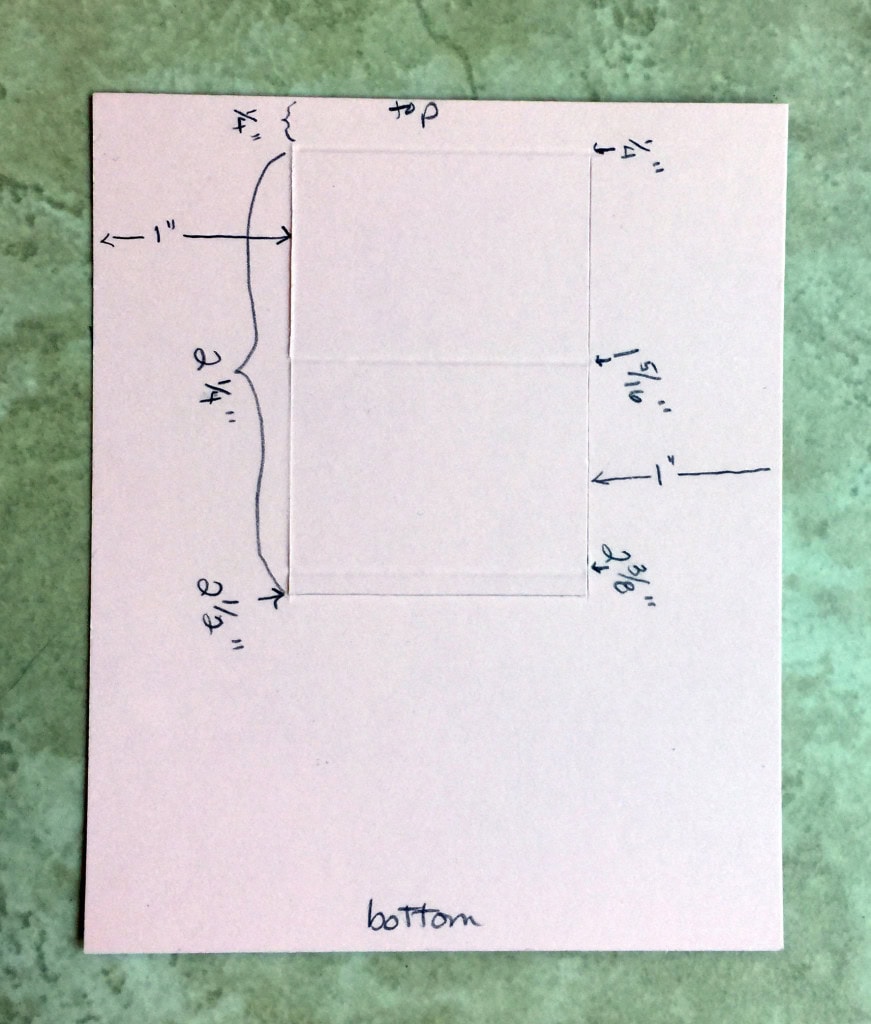
For the slider, cut 1 piece of card stock 4.75 x 2.5. Cut ¼” in from sides, from the top down to ¼” from the bottom. Punch the top with the Scalloped Tag Topper Punch.

Cut 2 pieces of card stock 3.5 x 4.25 each. Cut one piece from 1/4″ to down to 2-1/2″(1” from each side.) Then cut across this area 2-1/2” down. This creates a flap.
Score across the flap at 1/4”, 1-5/16”, and 2-3/8” from the top. The Stampin’ Trimmer makes all this very easy, since you can trim and score without having to change blades.
Put adhesive along both sides and the bottom. Put glue on the tiny bottom piece of the scored center flap and glue slider in place. Put adhesive on sides beside the bottom of the flap, and along the top as far in as the slider. This is to keep the slider moving up and down, and not side to side, and to keep it from pulling out to far.

Adhere the other (solid) large piece to the back. Be sure you can move the slider up and down.
Stamp on slider bottom area. Here I’ve stamped the heart in the lighter color and the sentiment in the darker color.
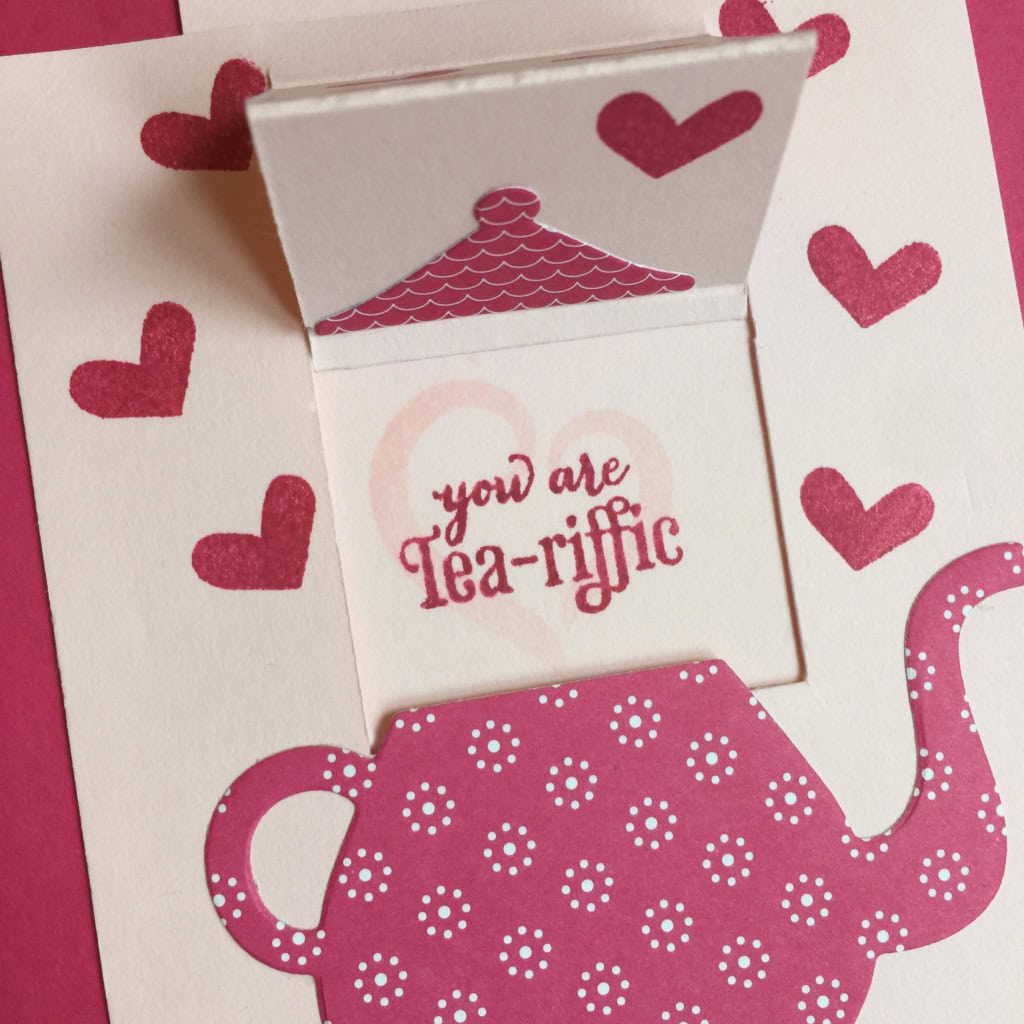
Cut the teapot and lid from Have a Cuppa Designer Series Paper Stack with the Cups & Kettle Framelits Dies. Glue the teapot onto the card and the lid onto the slider, meeting at the bottom score line on the slider. Be careful not to put glue under the very top of the teapot, so it won’t stick to the slider.

Stamp hearts on the card front in Melon Mambo. Tie the ribbon through the tag top. Adhere the whole thing to the front of a Melon Mambo card base. You have the inside of the card base to write a note.
Email me for a free .pdf of these instructions: candy@stampcandy.net.
Here’s what I used:
Please don’t hesitate to ask questions! I love hearing from you!!!
Thanks for stopping by today, and Sweet Stamping!
Mar 23, 2016 | Cards, Events |
Today I’m sharing the second Make & Take from the March Candy Hearts team meeting. Click here to see the first one.
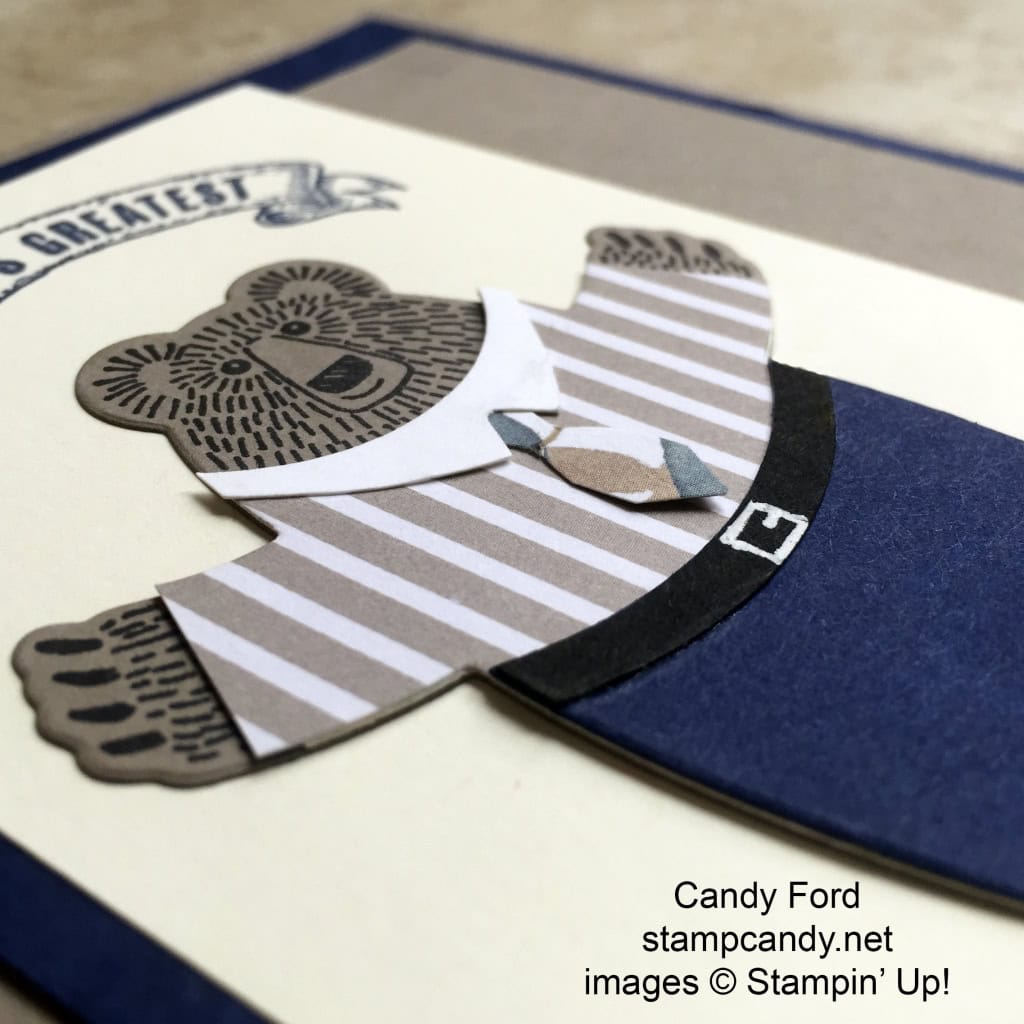
Papa Bear is all dressed up in his Night of Navy slacks, his Tip Top Taupe/Whisper White striped shirt, his necktie, and his belt.
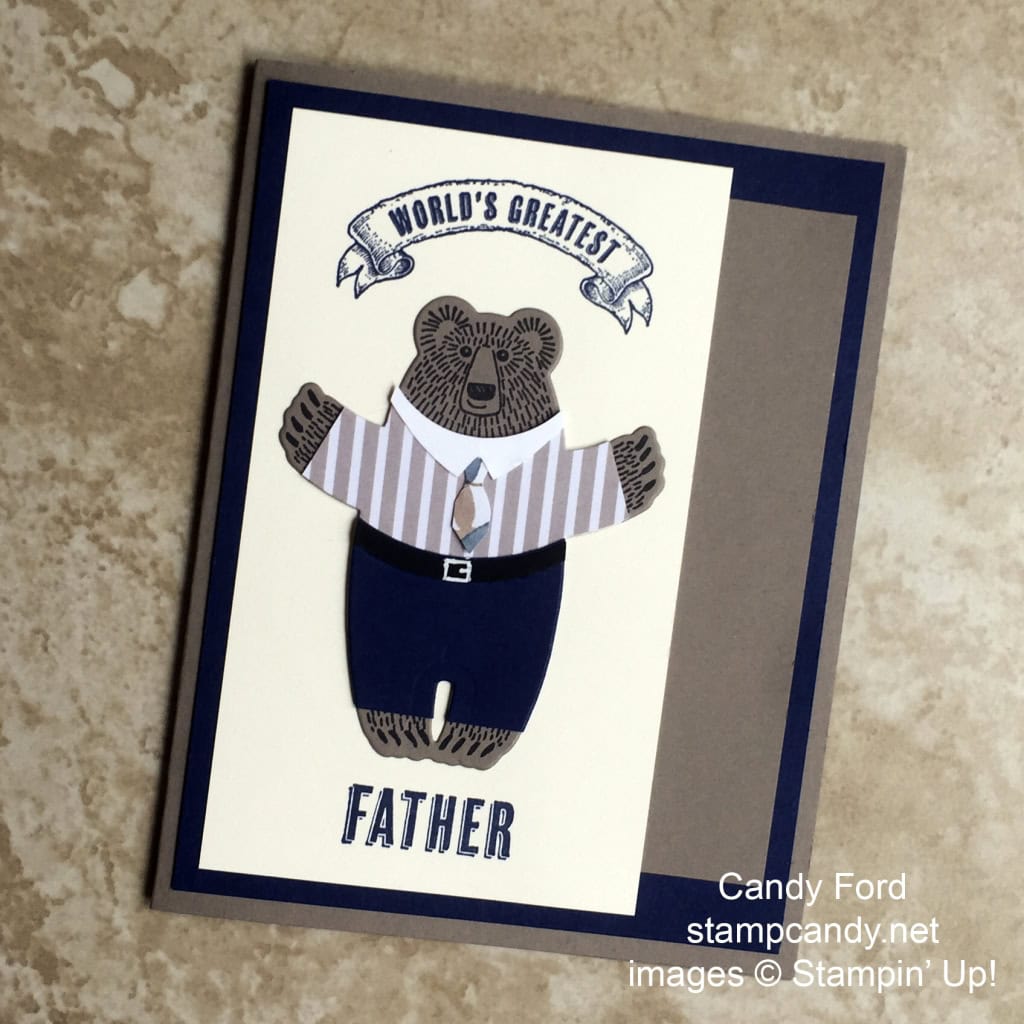
The card base is Tip Top Taupe card stock with a layer of Night of Navy CS and a smaller layer of Tip Top Taupe.
The top most layer is Very Vanilla CS. We stamped the sentiments from the Guy Greetings stamp set in Night of Navy ink directly onto the Very Vanilla layer.
We stamped the bear from the Bear Hugs stamp set in Basic Black onto Tip Top Taupe CS, and cut him out with the Bear Hugs Framelits. We glued him to the card front.
We used the same Framelit to cut the striped piece of Cherry On Top Designer Series Paper and a piece of Night of Navy CS. We cut the shirt and Whisper White collar just like the ones on Mama Bear from yesterday. We glued that onto the bear.
For the pants, we cut off the feet. Then we cut off the top part, just below the arm pits, with the 2-1/2″ Circle Punch, to make a curved waist line.
For the belt we cut a piece of Basic Black CS twice with the 2-1/2″ Circle Punch to make an arc. We lined it up along the top of the pants, glued it down, then trimmed the extra off the sides. We drew on a buckle with a White Signo Uni-ball Gel Pen. We glued the pants onto the bear over the shirt tail.
We used Paper Snips to fussy cut the necktie from a 1/4″ x 1″ piece of paper, them glued it onto the shirt, tucking the top under the collar (you could also glue on the necktie before adding the collar.) For the tie on this sample, I used English Garden DSP, and used a Crumb Cake Stampin’ Write Marker to draw a tiny line where the knot would be. At the meeting we used Night of Navy CS, since it shows up better.
This card could be used for Father’s Day, or for Dad’s birthday, or really any occasion when you want to send a special greeting to a father. Or you could use one of the other stamps in the Guy Greetings stamp set to send it to the world’s greatest, brother, uncle, or grandpa.
I have one more Bear Hugs card to share with you tomorrow, so be sure to check back!
Here’s what we used today:
Thanks for stopping by today, and Sweet Stamping!
Mar 22, 2016 | Cards, Events |
Today I’m sharing one of the two Make & Takes from our March Candy Hearts team meeting.
I hadn’t really played much with the Bear Hugs Bundle, but I was looking at it recently and came up with the idea to make clothes for the bears.
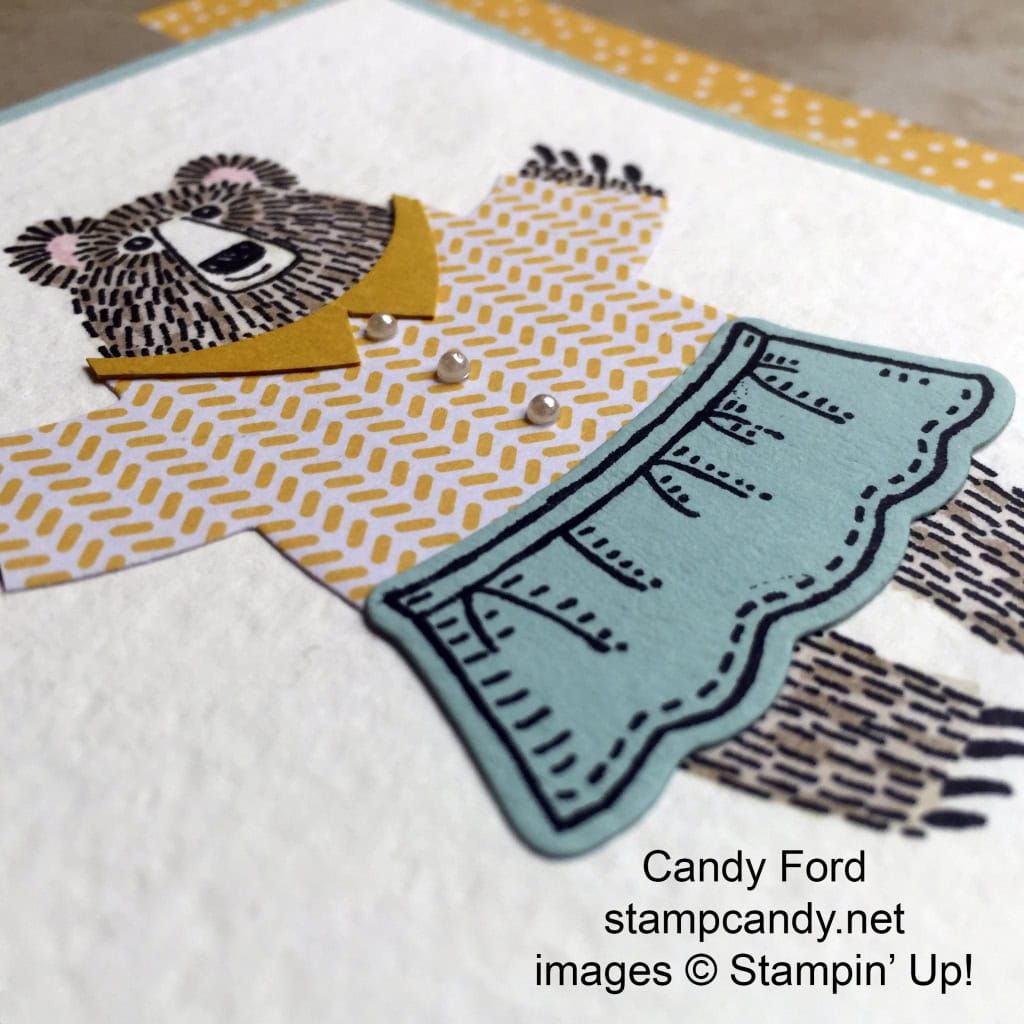
Say hello to Mama Bear! She’s dressed in a lovely ensemble of Crushed Curry and Pool Party. I cut her blouse with the same die I would use to cut out the bear, so everything fits perfectly!
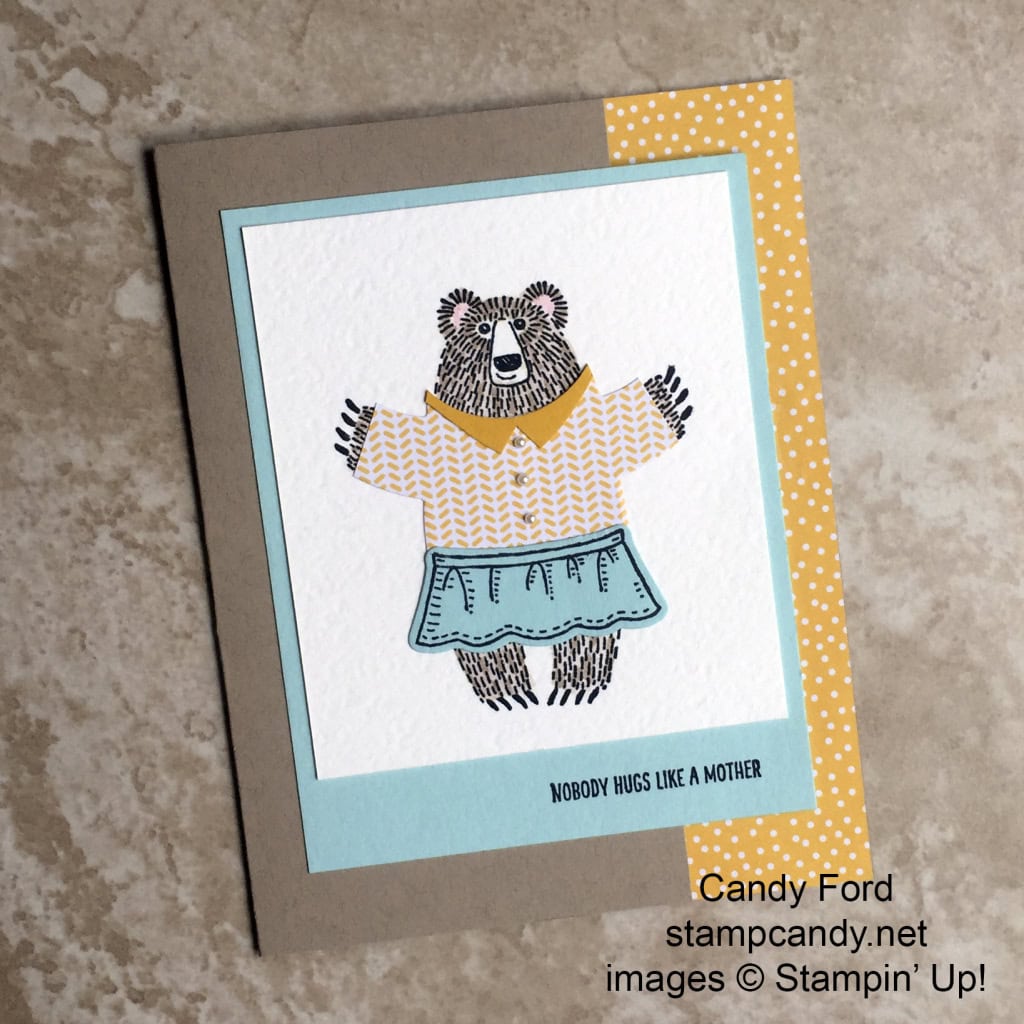
The card base is Crumb Cake card stock. The front is cut narrower than the back, so the strip of Cherry On Top Designer Series Paper glued to the back shows when the card is closed.
The front panel of Pool Party CS is centered but only glued to the front of the card. The sentiment from the Bear Hugs stamp set is stamped in Basic Black directly onto the Pool Party layer.
We stamped the bear in Basic Black directly onto a piece of Watercolor Paper. We used an Aqua Painter to color in the bear with Crumb Cake ink. We used a Pink Pirouette Stampin’ Write Marker to color the inside of her ears.
We used the Bear Hugs Framelits to cut the shirt from a piece of Cherry on Top DSP. We used the 1-3/8″ Circle punch to cut off the head and create a curved neckline. We used Paper Snips to cut off the hands and the bottom of the body, then we glued it on top of the bear. We glued that onto the shirt.
We stamped the skirt in Basic Black onto Pool Party CS, then cut it with the coordinating Framelit. We glued that onto the bear over the shirt tail.
Then we added three of the smallest Pearl Basic Jewels as buttons.
It’s so much easier than it looks! Check back tomorrow to see Papa Bear!!!
Here’s what we used:
Thanks for stopping by today, and Sweet Stamping!
Mar 21, 2016 | Cards, Events, Swaps |

Recently I’ve shared photos from our March Candy Hearts team meeting, including my swap card and the Creative Challenge entries. You can see those posts here, here, and here.
Today I’m sharing all the other cards from our monthly swap. You’ll see there are some very talented people in our group!

Candy, Judy, Donica, Debbie, Tamara
Margie showing her swap card
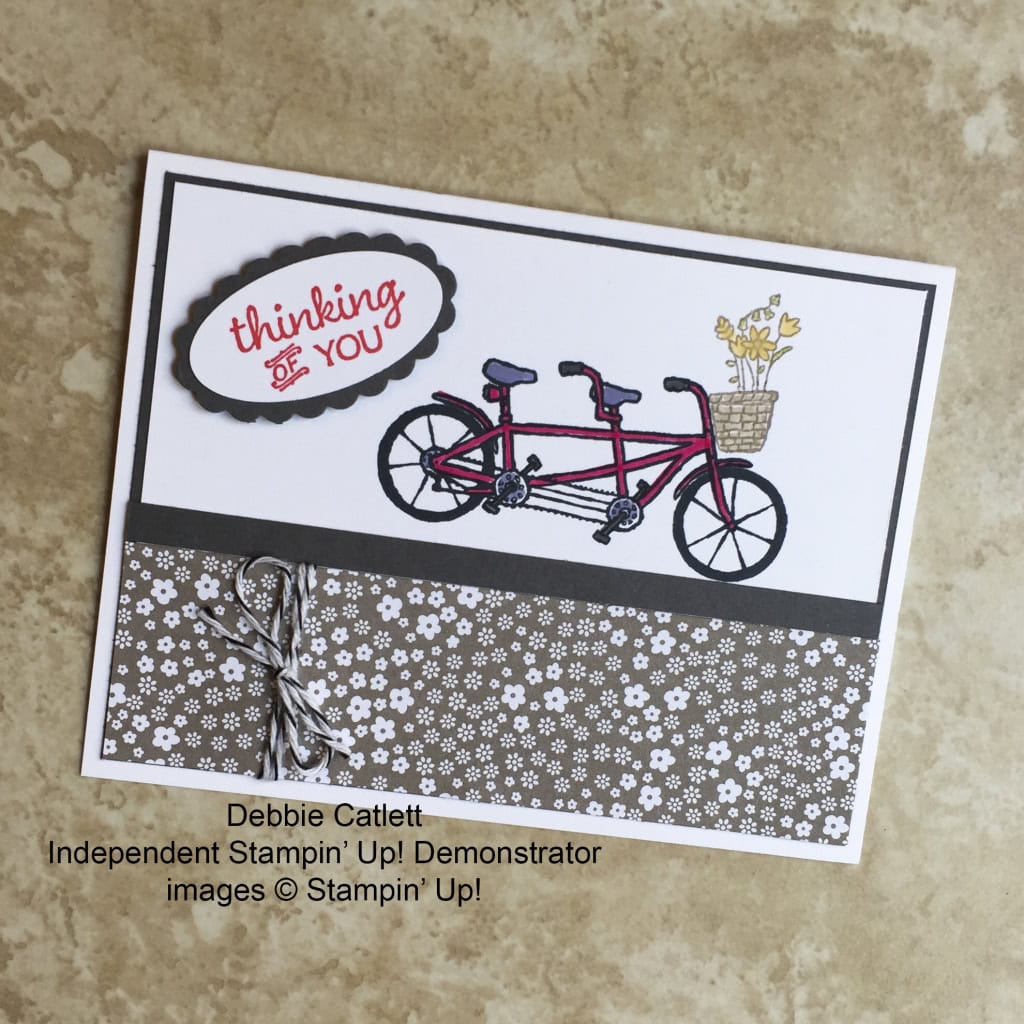
Debbie’s card uses the Pedal Pusher and Party Pants stamp sets.
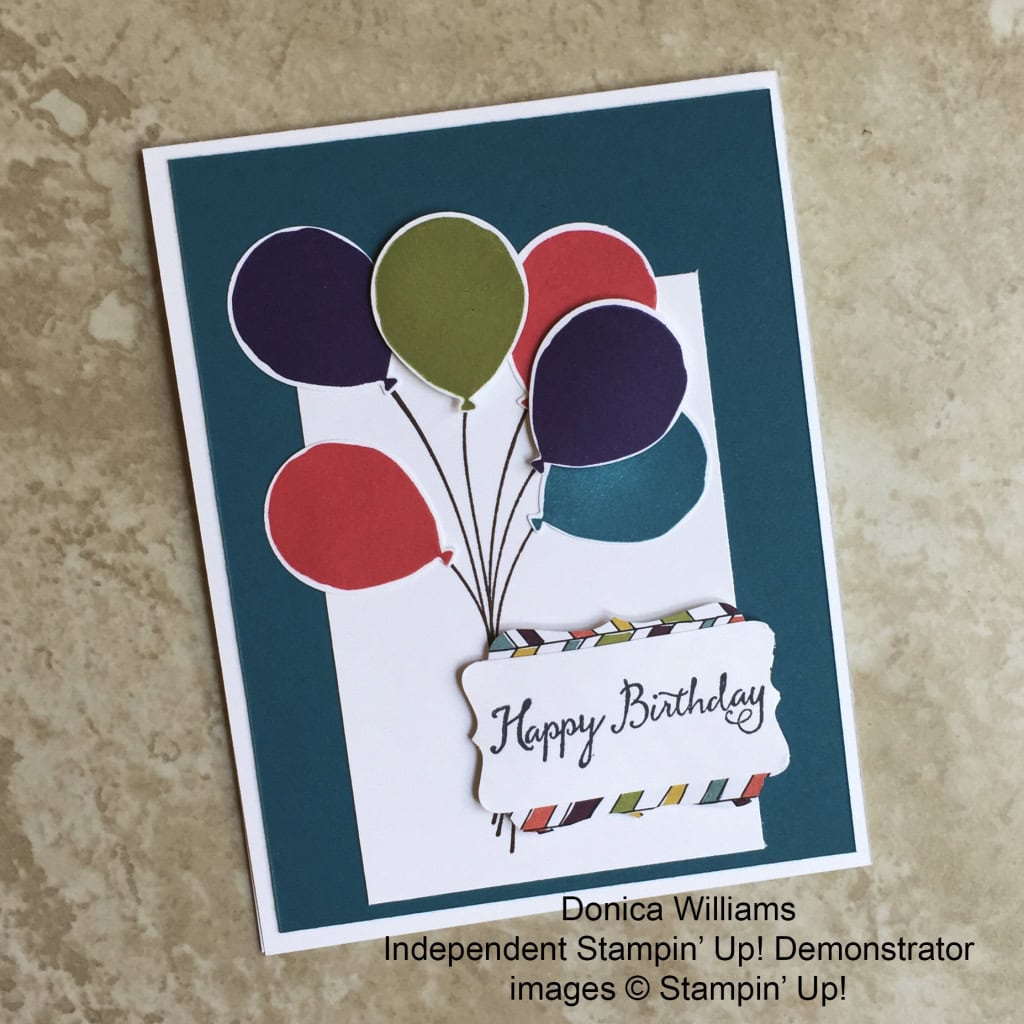
Donica’s card uses the Balloon Celebration stamp set, Balloon Bouquet Punch, and Wildflower Fields Designer Series Paper.
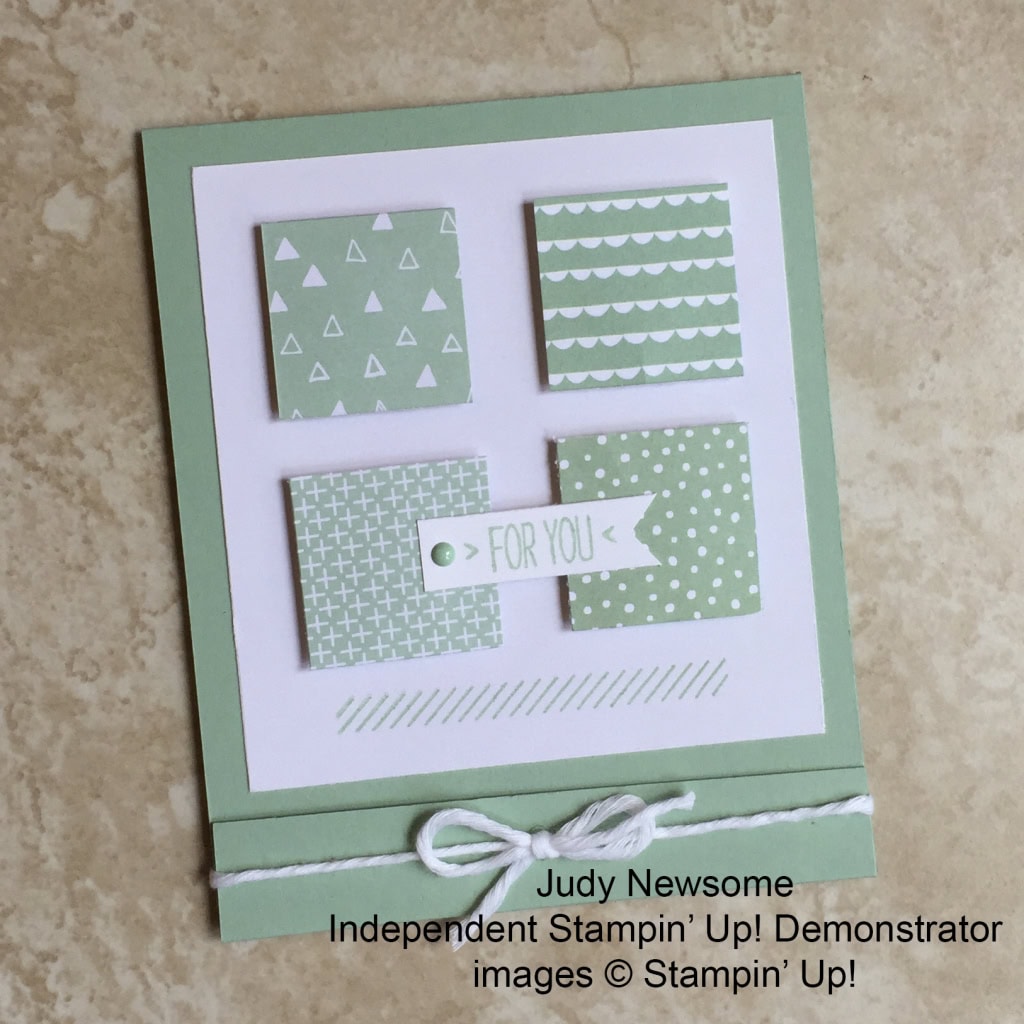
Judy’s matchbook card in Mint Macaron uses It’s My Party and Birthday Bouquet Designer Series Papers, You’re So Lovely stamp set, and It’s My Party Enamel Dots. She CASEd a card from Mary Fish and made it her own.
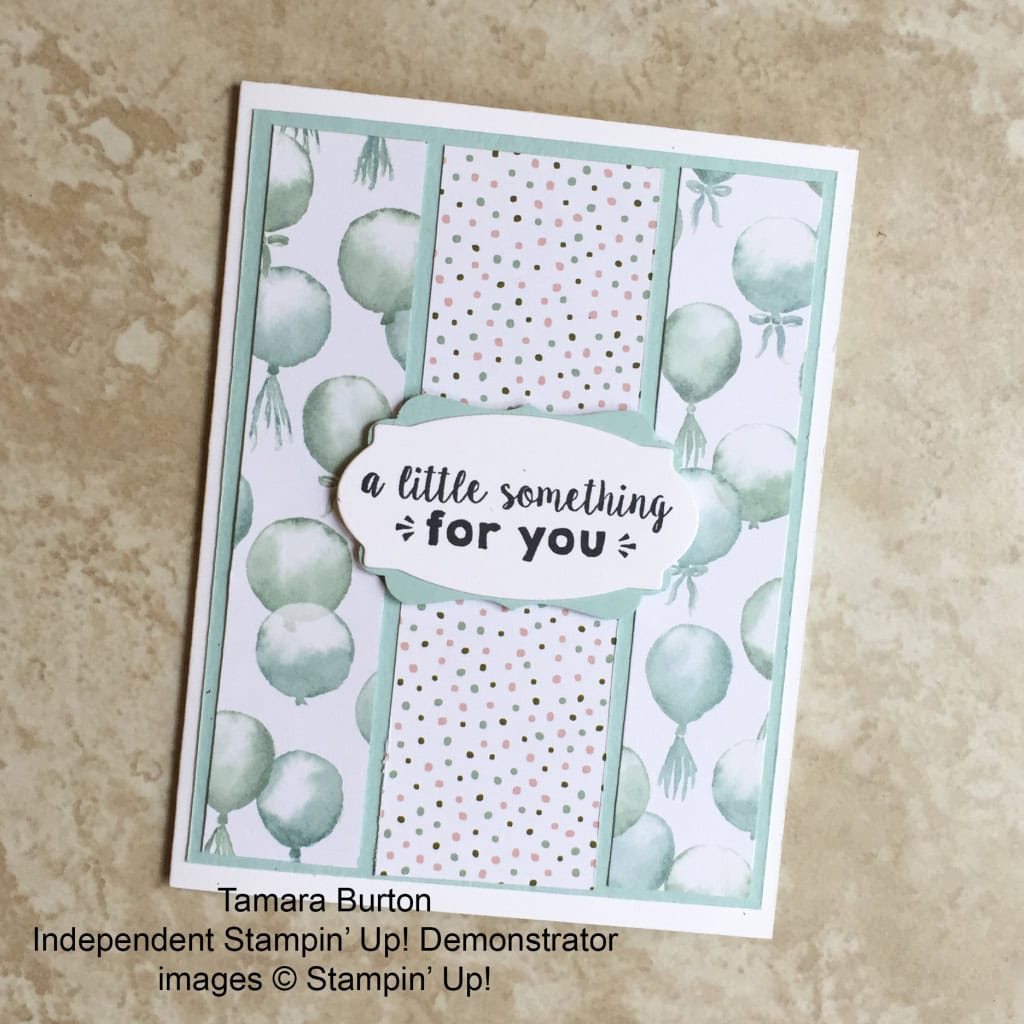
Tamara’s card uses Birthday Bouquet Designer Series Paper and the Party Wishes Stamp set.
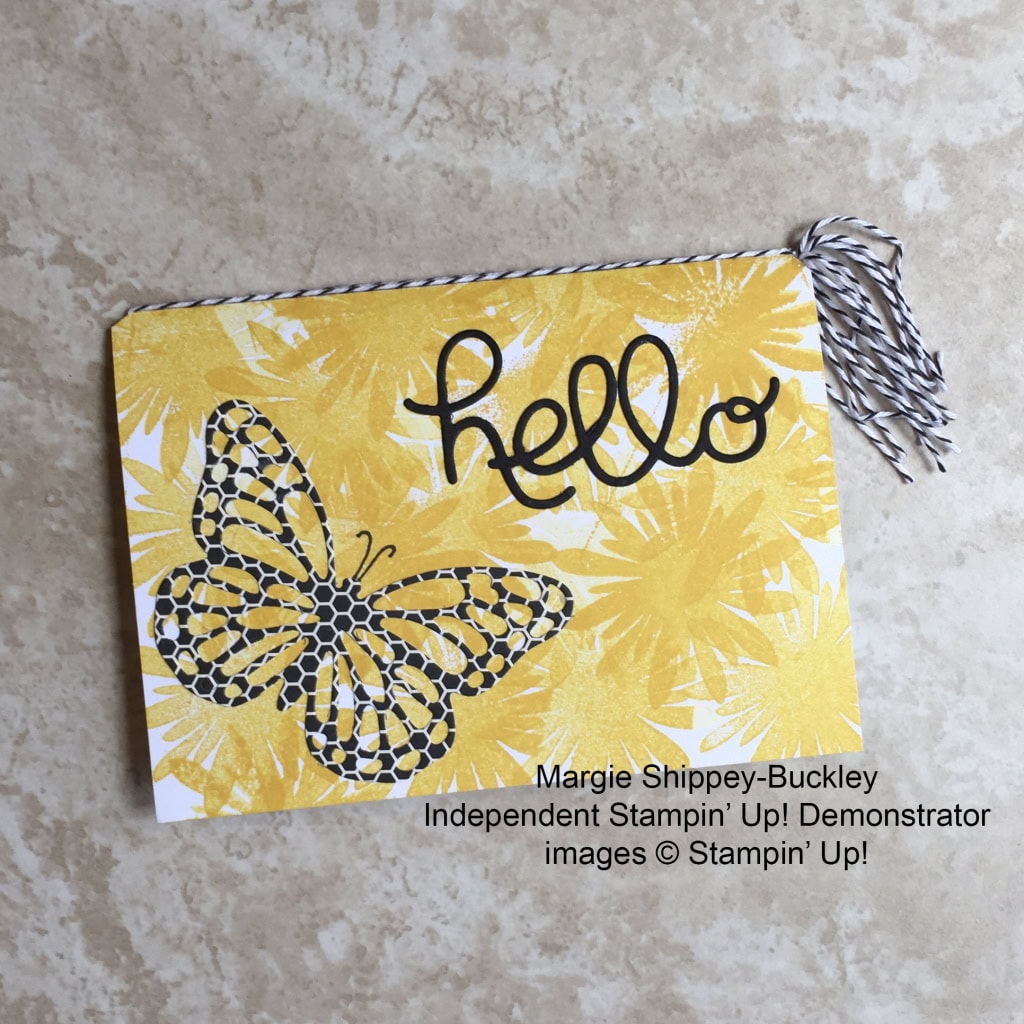
Margie’s card uses the Flower Patch stamp set, Flower Fair Framelits, Hello You Thinlits, and Butterfly Thinlits.
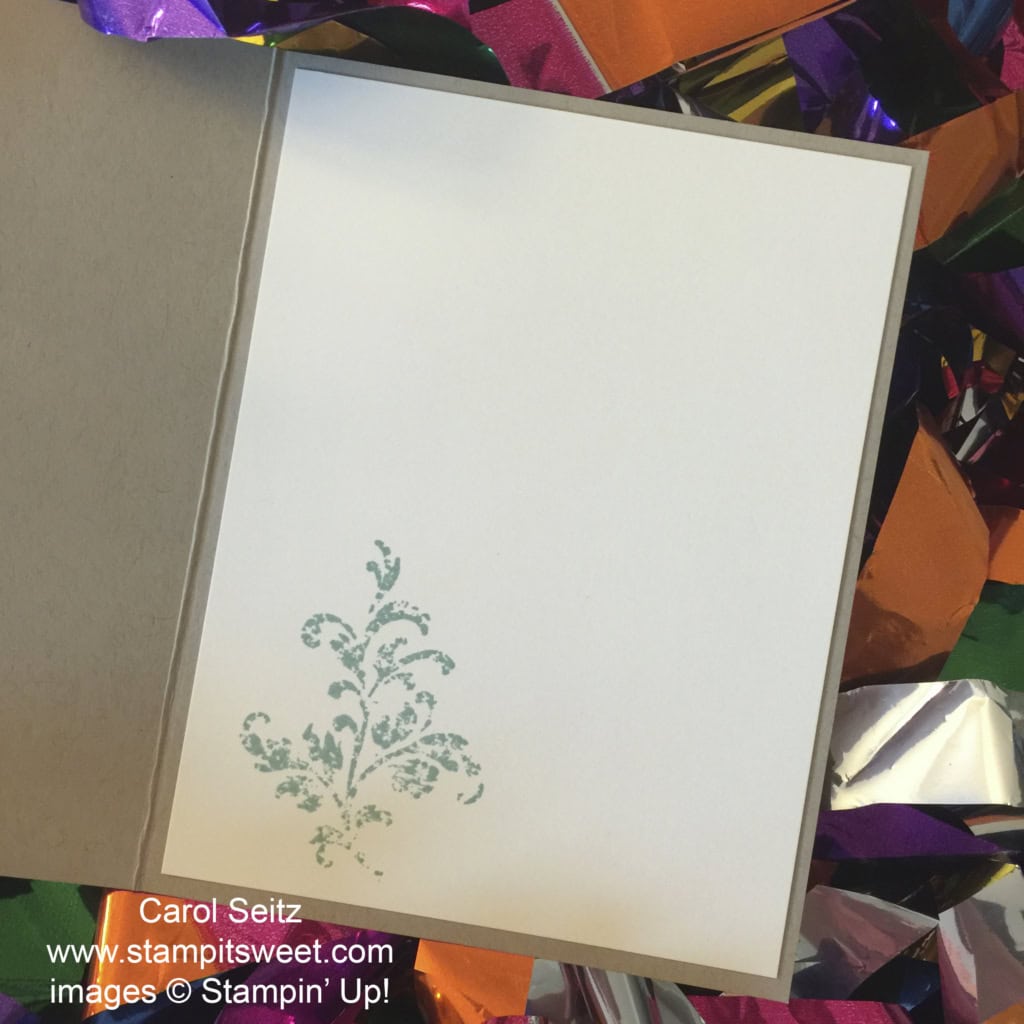
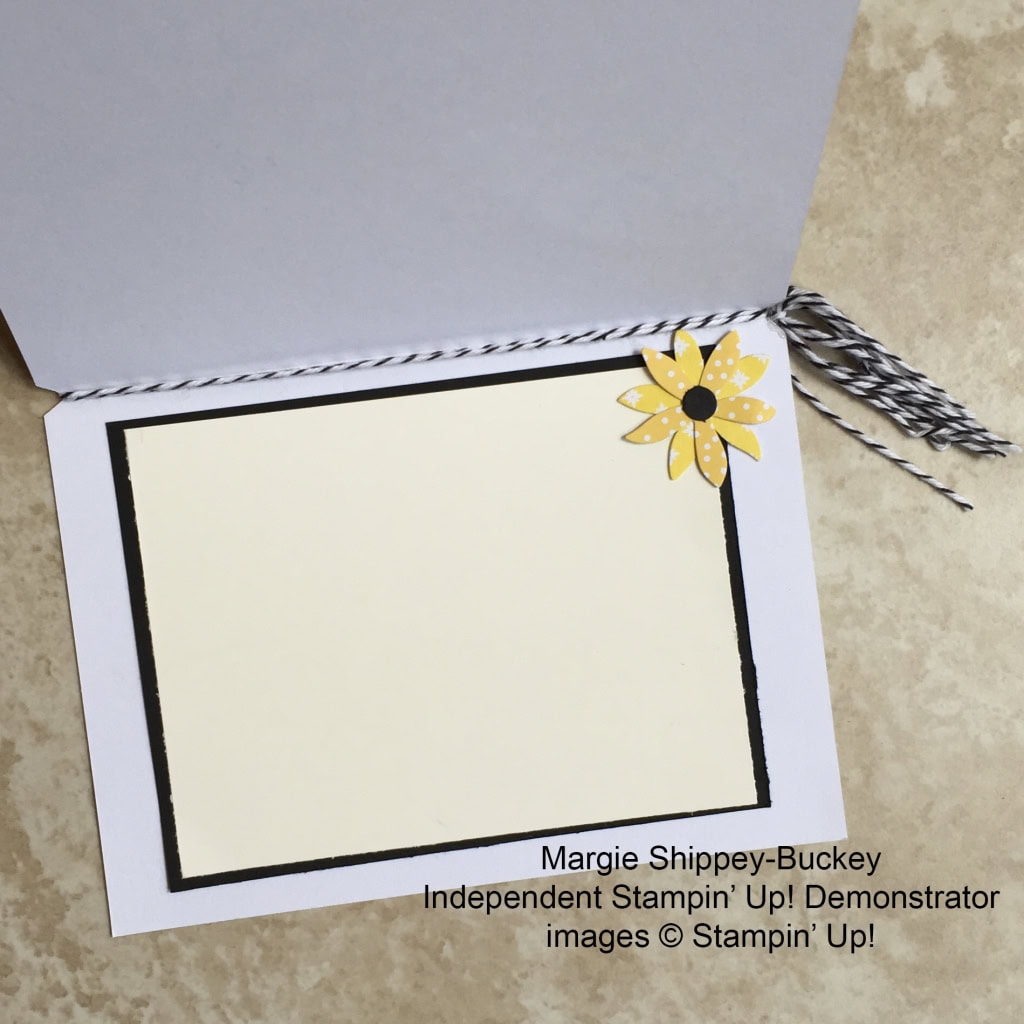
Margie also decorated the inside of her cards.
Thanks for stopping by today, and Sweet Stamping!