Dec 5, 2016 | Christmas, Food, Gallery, Gift Wrap, Gifts, Holiday |
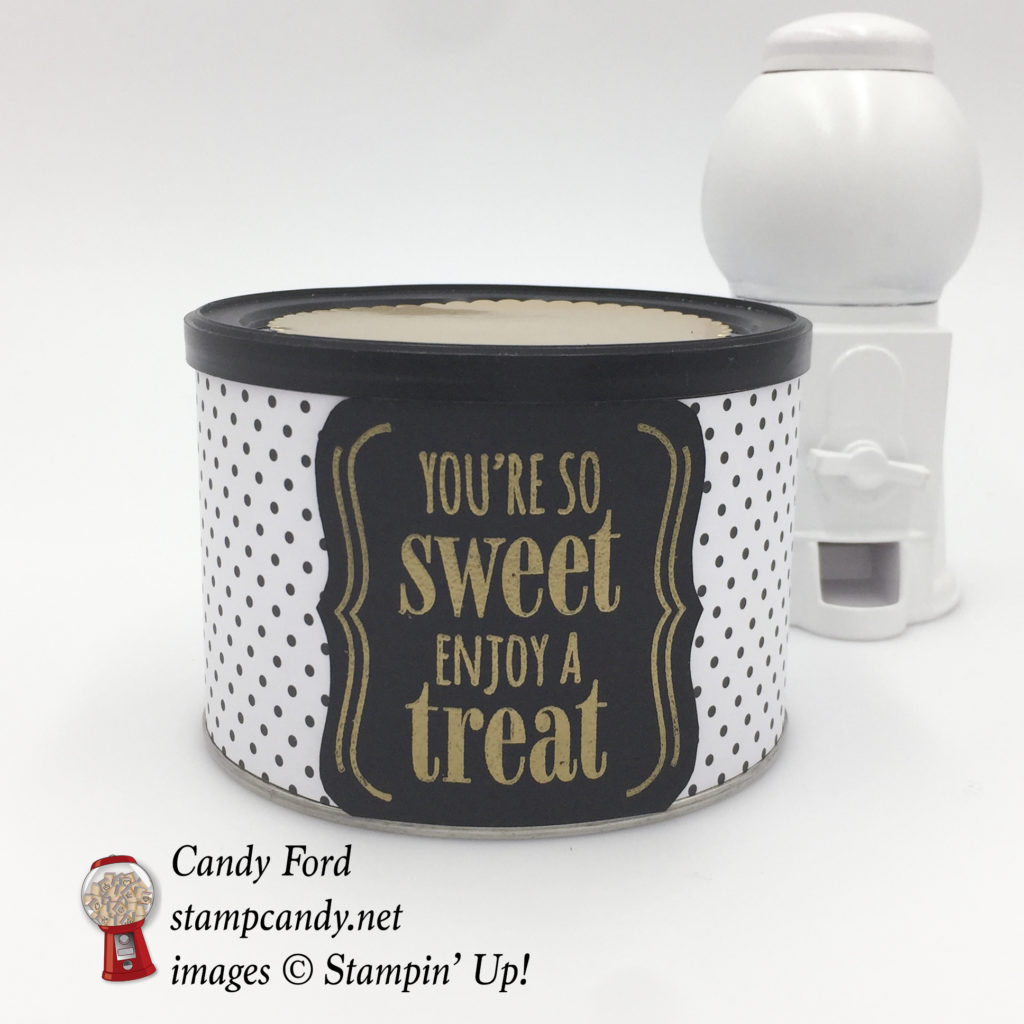
Recently I’ve been sharing projects that are great for small gifts – perfect for people you want to give just a little something to. The projects are inexpensive items dressed up with papercrafting products. This one is a can of honey roasted cashews. Or you could eat the cashews and use the empty container for another small gift – cookies maybe?
Here’s what I made:
Here’s how I did it:
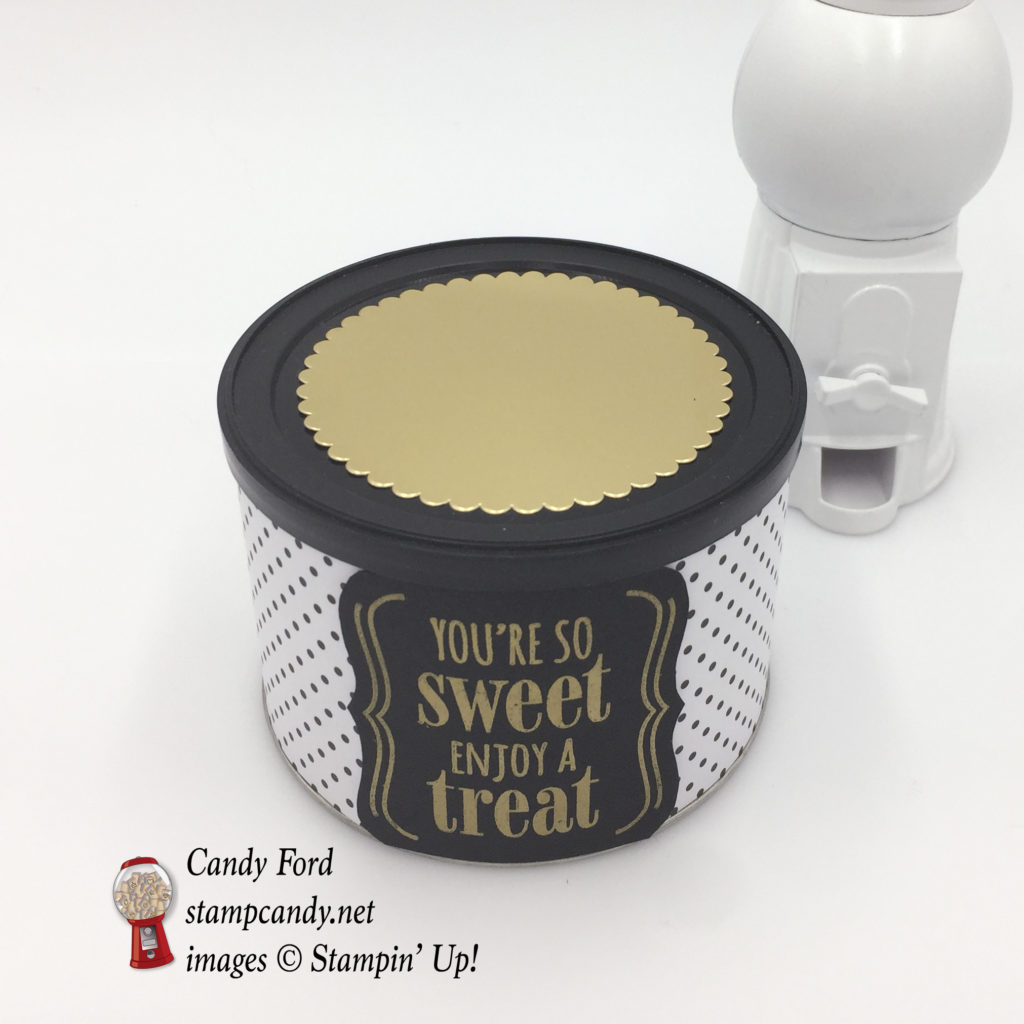
The can came with a black lid, which prompted my choice of colors. I cut a piece of Pop of Pink Designer Series paper (white with black dots) to fit around the can and adhered it with Fast Fuse.
On a piece of Basic Black card stock, I heat embossed in gold a sentiment from the You’re So Sweet stamp set. I cut it out with Paper Snips and glued it to the DSP. I wrapped a couple of rubber bands around it until the glue dried.
For the final touch, I cut a piece of Gold Foil Sheet with the Layering Circles Framelits and adhered it to the lid with Fast Fuse.
Here’s what I used:
Thanks for stopping by today, and Sweet Stamping!

Dec 4, 2016 | Boxes, Cards, Christmas, Gallery, Gift Wrap, Gifts, Holiday, Tags |
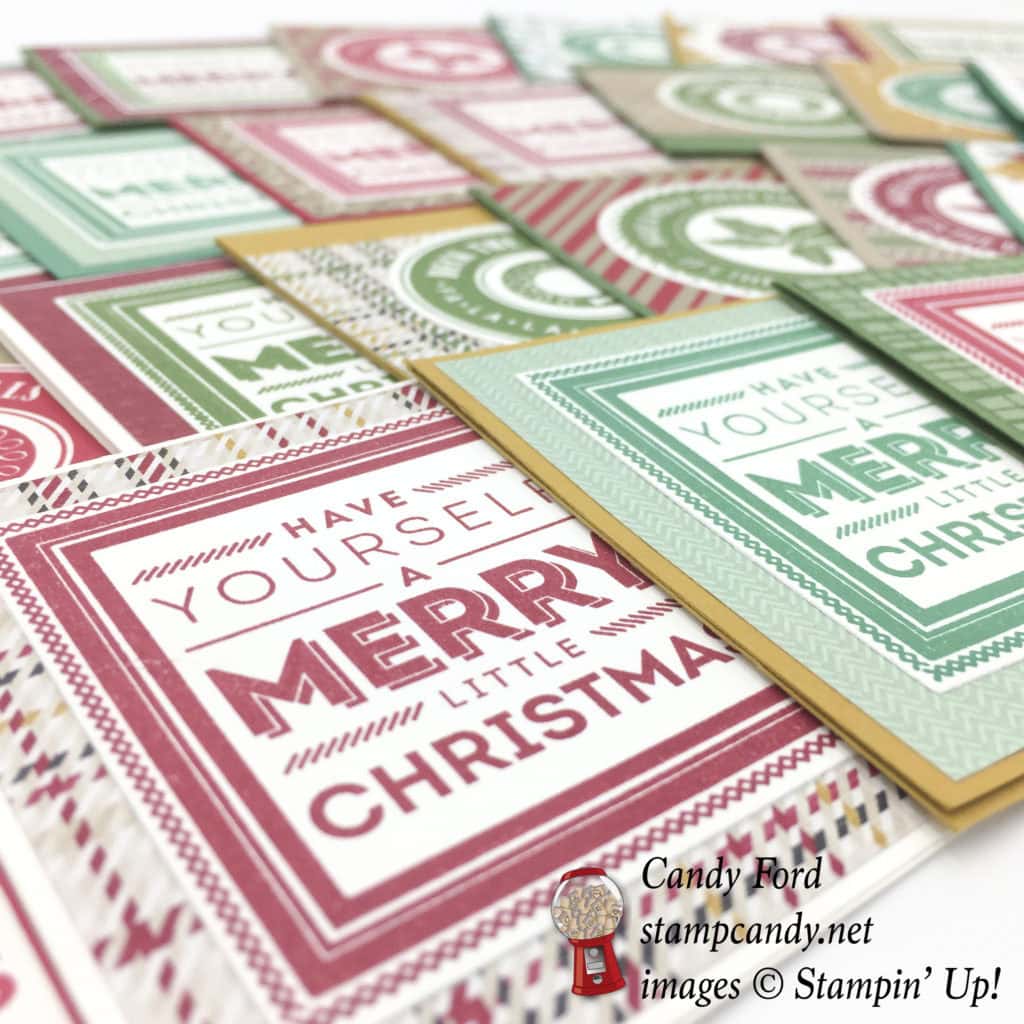
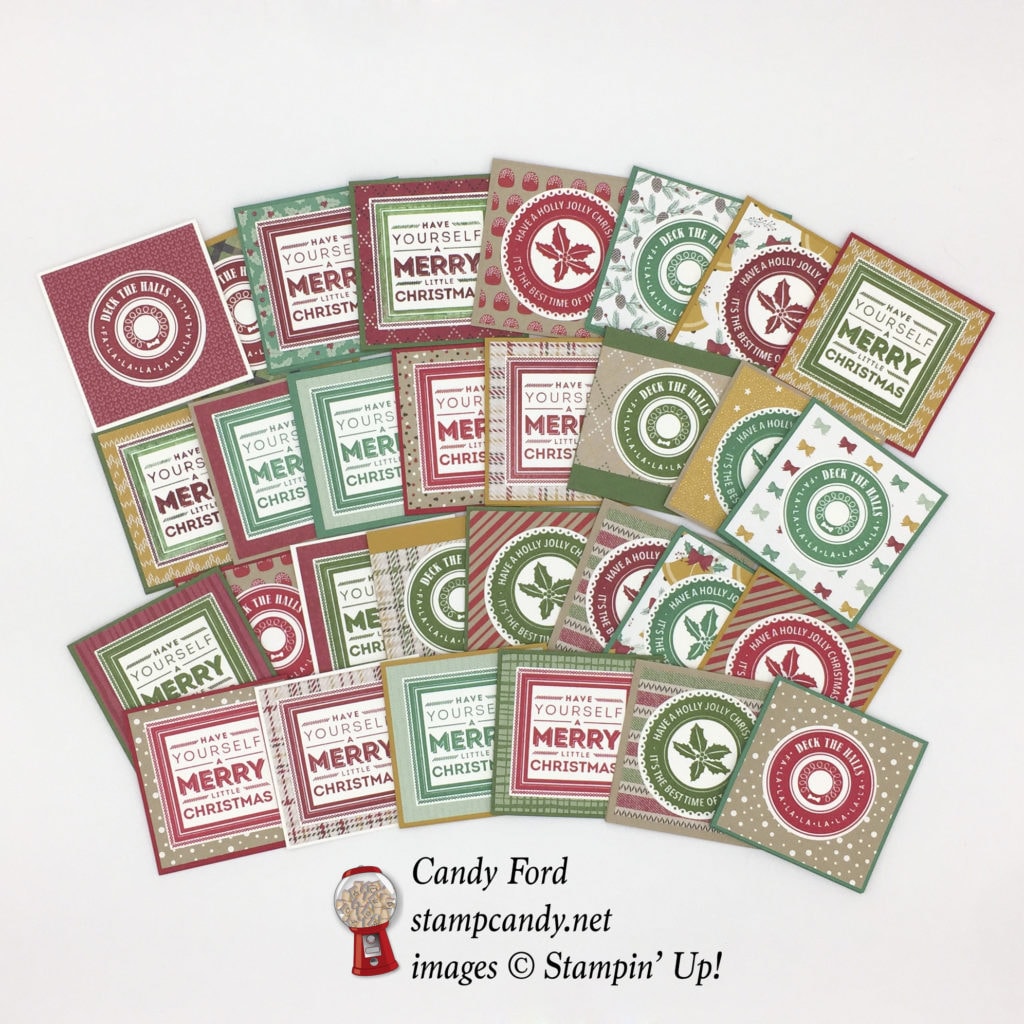
Yesterday I showed you a box I decorated to hold Christmas tags. You can see that post here. Today I’m sharing the actual tags. I made an assortment, as you can see. No two are exactly alike.
Here’s what I made:
Here’s how I did it:
I cut pieces of card stock to 2-3/4″ x 5-1/5″, then scored them on the long side at 2-3/4″, then folded them in half. I used Thick Whisper White, Delightful Dijon, Garden Green, Cherry Cobbler, Real Red, Emerald Envy, and Crumb Cake card stocks.
For the card fronts I cut an assortment of 2-1/2″ x 2-1/2″ squares from Designer Series Paper. I used Candy Cane Lane, Warmth & Cheer, and Presents & Pinecones DSPs. For a few, I used a leftover scrap of paper that was about 2″ tall x 2-3/4″ wide.
Onto Whisper White CS, I stamped images from the Holly Jolly Layers (host) stamp set in Garden Green, Cherry Cobbler, Real Red, and Emerald Envy inks. I cut them out with the Layering Circles and the Layering Squares Framelits Dies.
I glued all the pieces together. That’s it!
By the way, the White Gift Box will hold more tags than this, but I thought 30 was a pretty good number.
Here’s what I used:
Thanks for stopping by today, and Sweet Stamping!
Dec 3, 2016 | Boxes, Christmas, Gallery, Gift Wrap, Gifts, Holiday, Tags |
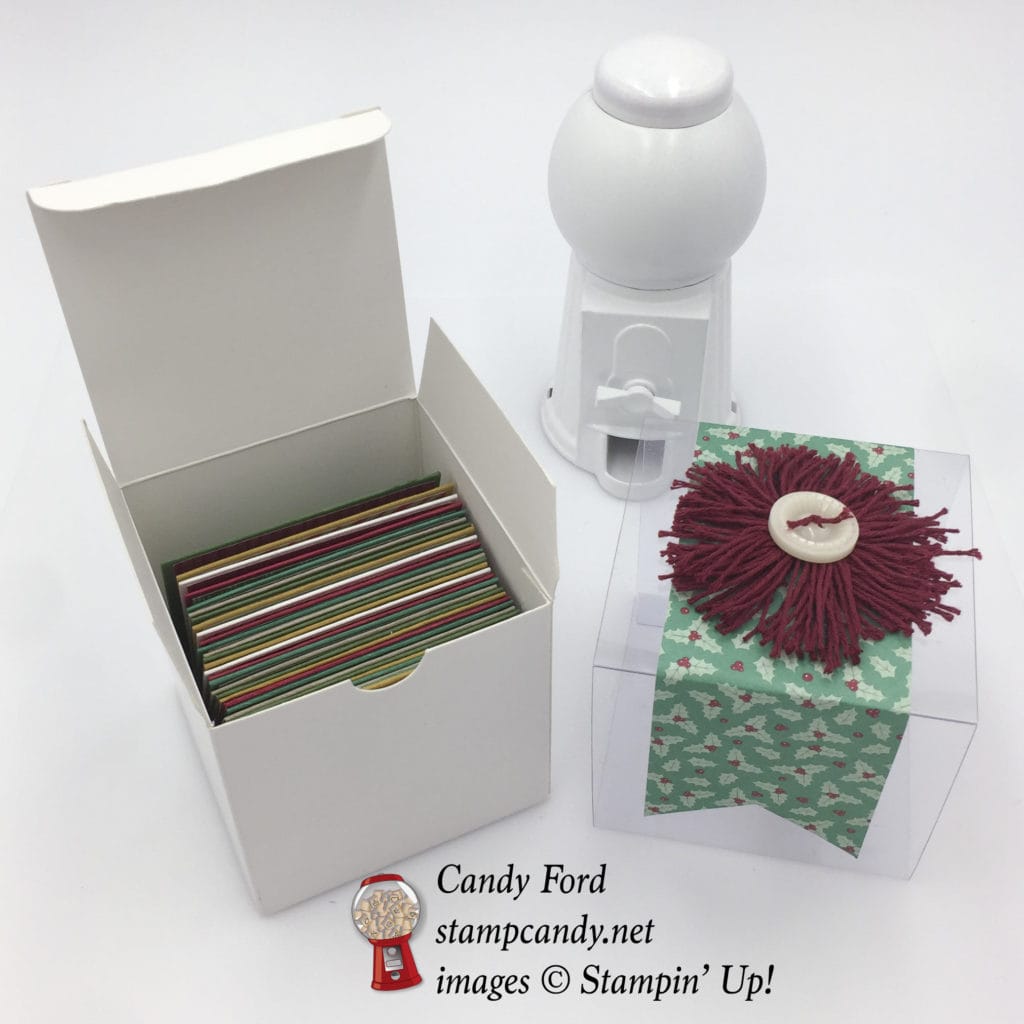
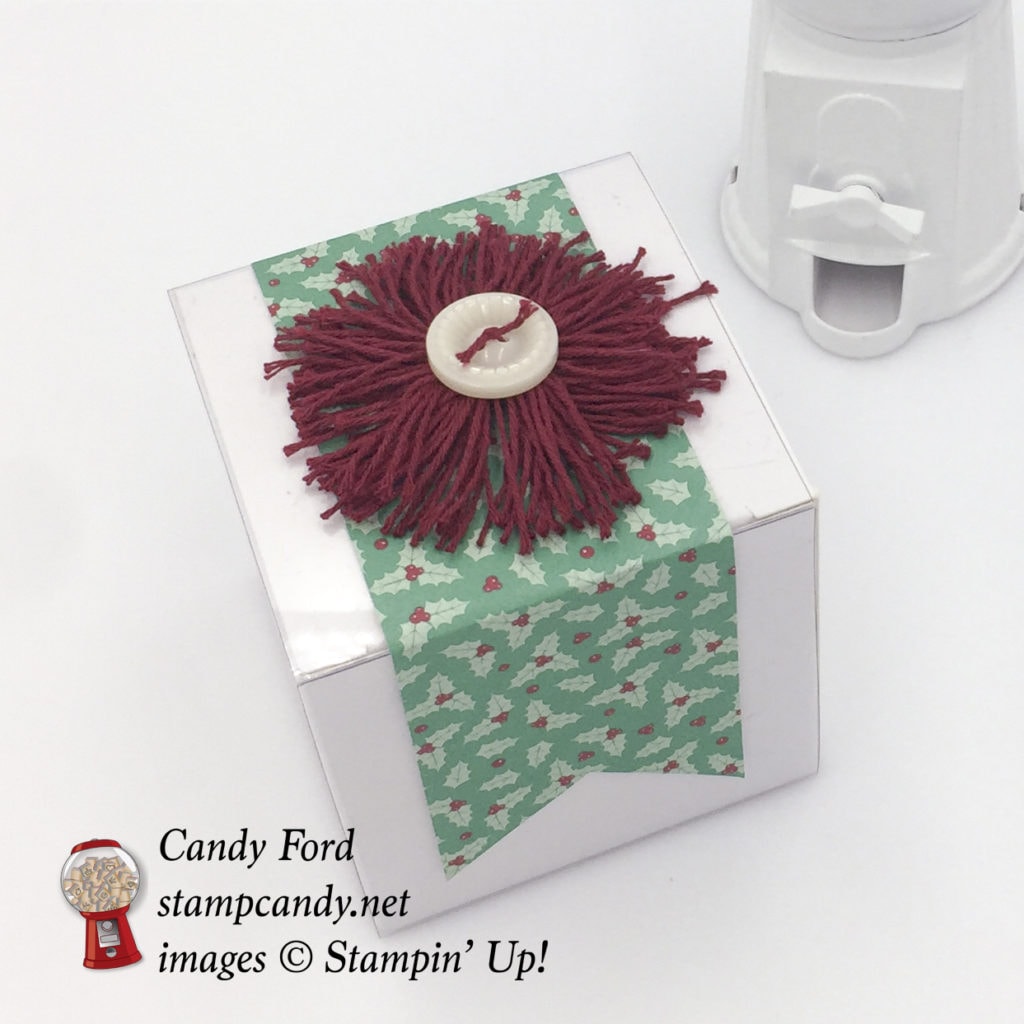
Today’s project is sort of a meta-gift. It’s basically gift wrap for gift wrap. Everyone needs tags for their gifts, right? I decorated this little box full of Christmas gift tags to give someone with a lot of gifts to wrap.
Here’s what I made:
Here’s how I did it:
The White Gift Boxes in the 2016 Holiday Catalog are 3″ x 3″ x 3″, the perfect size for so many small gifts. For this project I left the box as is, and decorated the clear acetate sleeve.
I cut a piece of Presents & Pinecones Designer Series Paper to 2″ x 9″. I notched both ends with the Banner Triple Punch, then adhered it with Fast Fuse to the sleeve as shown.
I attempted to make a pompom out of Cherry Cobbler Thick Baker’s Twine, but I am an abysmal pompom maker. So I flattened it out and put a button on top. I tied the button onto the flattened pompom with another piece of twine, then adhered the whole thing to the DSP with Glue Dots.
I slid the sleeve onto the box and voila!
Check back tomorrow to see all the tags inside!
Here’s what I used:
Thanks for stopping by today, and Sweet Stamping!
Dec 2, 2016 | Boxes, Food, Gallery, Gift Wrap, Gifts |
Recently I had the honor of presenting at an event for Stampin’ Up! Demonstrators. Today I’m sharing one of the small gift ideas I showed. (I didn’t photograph the items until after the event, so some of them are a bit worn looking. Lots of people handled and looked at them.)
Here’s what I made:
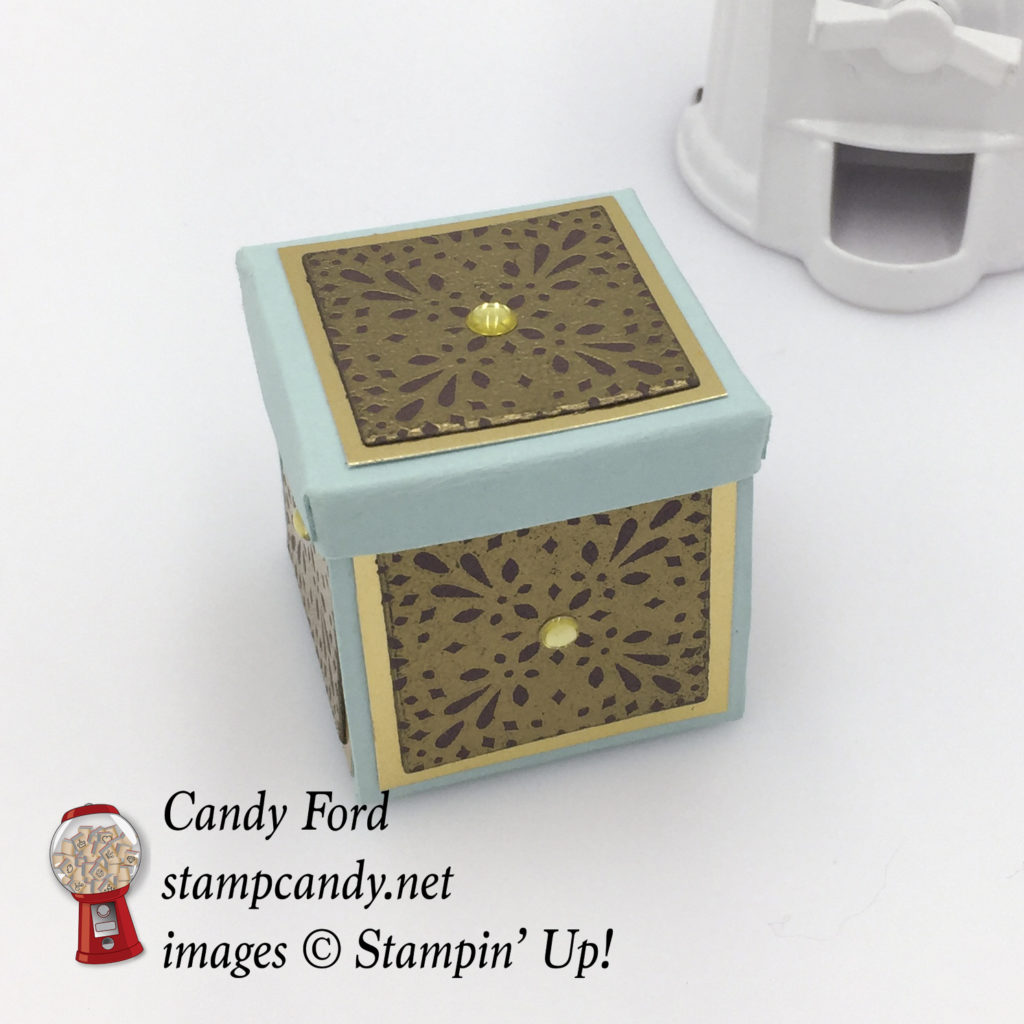
It’s just a tiny blue box (1-1/2″ x 1-1/2″ x 1-1/2″) with brown and gold on all sides.
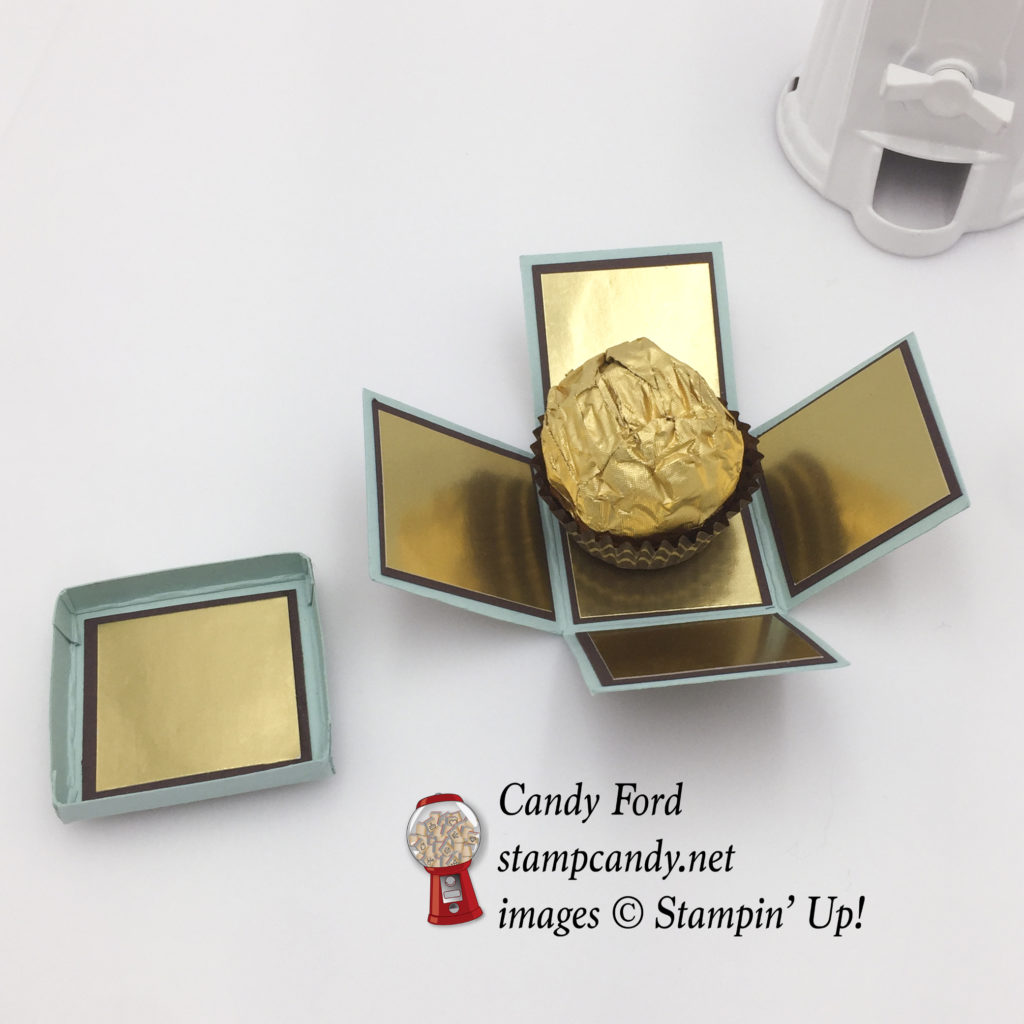
When you lift the top off, the sides fall away to expose one delicious Ferrero Rocher candy. It’s an elegant way to dress up a very small gift.
Here’s how I did it:
For the box:
I cut a piece of Soft Sky card stock to 4-1/2″ x 4-1/2″. I scored it 1-1/2″ and 3″, then turned it a quarter turn and scored at1-1/2″ and 3″. I cut away the corner areas, then folded on all score lines.
For the interior, I cut 6 pieces Chocolate Chip CS to 1-3/8″ x 1-3/8″, and I cut 6 pieces of Gold Foil Sheet to 1-1/4″ x 1-1/4″. I glued 5 of the Chocolate Chip pieces to the interior squares, and 5 of the gold pieces on top of those. I saved the other 2 pieces for the lid’s interior.
For the exterior, I stamped and heat embossed the smaller medallion image from the Frosted Medallions stamp set in gold onto Chocolate Chip CS 5 times. I used the Layered Squares Framelits to cut each image. I cut 5 pieces of Gold Foil Sheet to 1-3/8″ x 1-3/8″. I glued the gold pieces onto the 4 sides of the box, and the embossed pieces on top of those. I put a gold embellishment from the Metallic Enamel Shapes on the center of each embossed piece. I saved the other 2 pieces for the top of the lid.
For the lid:
I cut a piece of Soft Sky CS to 2-1/16″ x 2-1/16″. I scored it 1/4″ in from each of the four sides. I cut one score line at each corner, and folded all score lines. I glued the small pieces at the corners to the inside of the adjacent side, forming the lid.
I glued the leftover pieces from above to the lid’s interior and exterior, to match the box.
Note: I almost always use glue for this kind of project, but I prefer to use Fast Fuse when adhering something to a slick surface, like the gold side of the Gold Foil Sheet.
TIP: When making this type of box, I find it helpful to make it just big enough to hold the contents without any extra room. In this instance, the candy helps to hold up the sides of the box when the lid is on. If there is too much empty space inside, the sides can lean in and your box won’t look, well, like a very good box.
Here’s what I used:


YEAR-END CLOSEOUT DEALS HAVE BEGUN!
Stampin’ Up! has been doing a little year-end cleaning, and we’ve got some great deals to offer you and your customers! Our Year-End Closeouts will include holiday retiring products, clearance rack items, and current high-inventory catalog products. Read below for promotion rules and information.
Details
• Promotion period: December 1, 2016 – January 3, 2017
• All products (and discounts, if any) can be found in the Year-End Closeouts category of the online store beginning December 1.
• Year-end closeout items may be added to all order types: demonstrator, workshop, customer, and online.
• Clearance Rack items are only available while supplies last.
• Following the Year-End Closeouts promotion, some products may remain on the Clearance Rack; other items may be removed from the Clearance Rack to be added at another undetermined time.
• High-inventory items will only be discounted through January 3; beginning January 4, they will still be available, but at regular price.
• Retiring item availability will follow standard retiring item rules:
• Retiring stamp sets are guaranteed available until December 21, after which they will be only available while supplies last.
• Retiring accessories will only be available while supplies last.
• Retiring items will only be available while supplies last. All retiring items will be discontinued after January 3.
Other Year-End Closeouts products and applicable discounts can be found in the online store.
• No minimum purchase is required to participate in Year-End Closeouts.
• Year-End Closeouts are eligible for Stampin’ Rewards with qualifying orders.
• New demonstrators may add Year-End Closeouts items to their Starter Kit! Click on Be a Candy Heart at the top of the page!
Thanks for stopping by today, and Sweet Stamping!
Dec 1, 2016 | Boxes, Christmas, Gallery, Gift Wrap, Holiday, Tags |
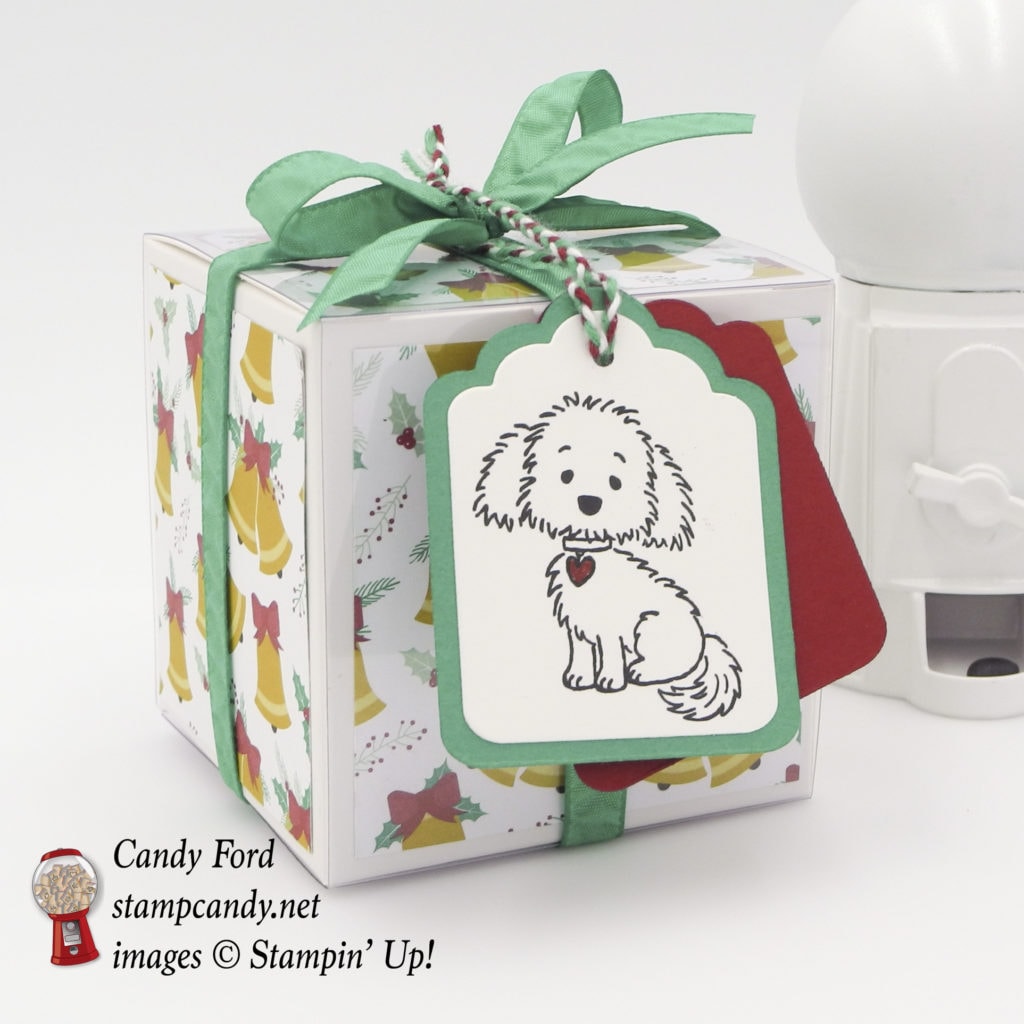
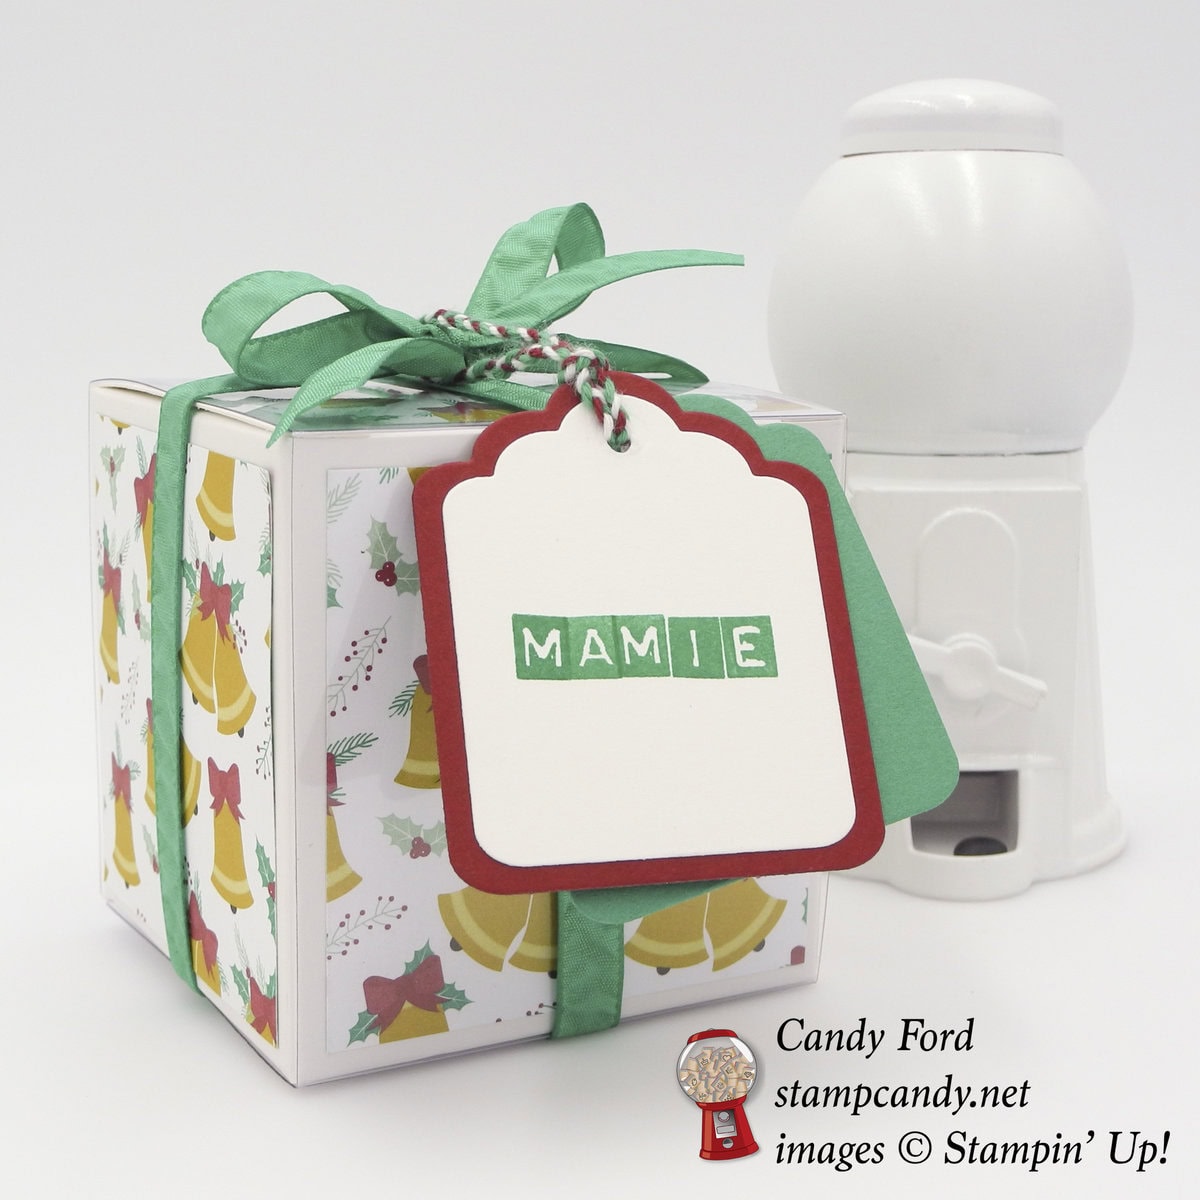
Our former neighbors have a little dog named Mamie. I get her a cute outfit each Christmas. This year I didn’t find anything I liked, except a little knit hat. I can’t wait to get a photo of her wearing it! Of course, the hat needed just the right gift wrap.
Here’s what I made:
 Here’s how I did it:
For the box:
The White Gift Boxes from this year’s Holiday Catalog are the perfect size for a small gift like this. They are 3″ x 3″ x 3″ and come with clear acetate sleeves. I cut 5 pieces ofPresents & Pinecones Designer Series Paper to 2-3/4″ x 2-3/4″. I used the 1″ circle punch to cut small piece from the top of the front piece to accommodate the cut out in the box. I glued the DSP pieces to the four sides and the top of the box. I slipped the clear sleeve over the box, then tied a piece of Emerald Envy Ruched Ribbon around it.
For the tag:
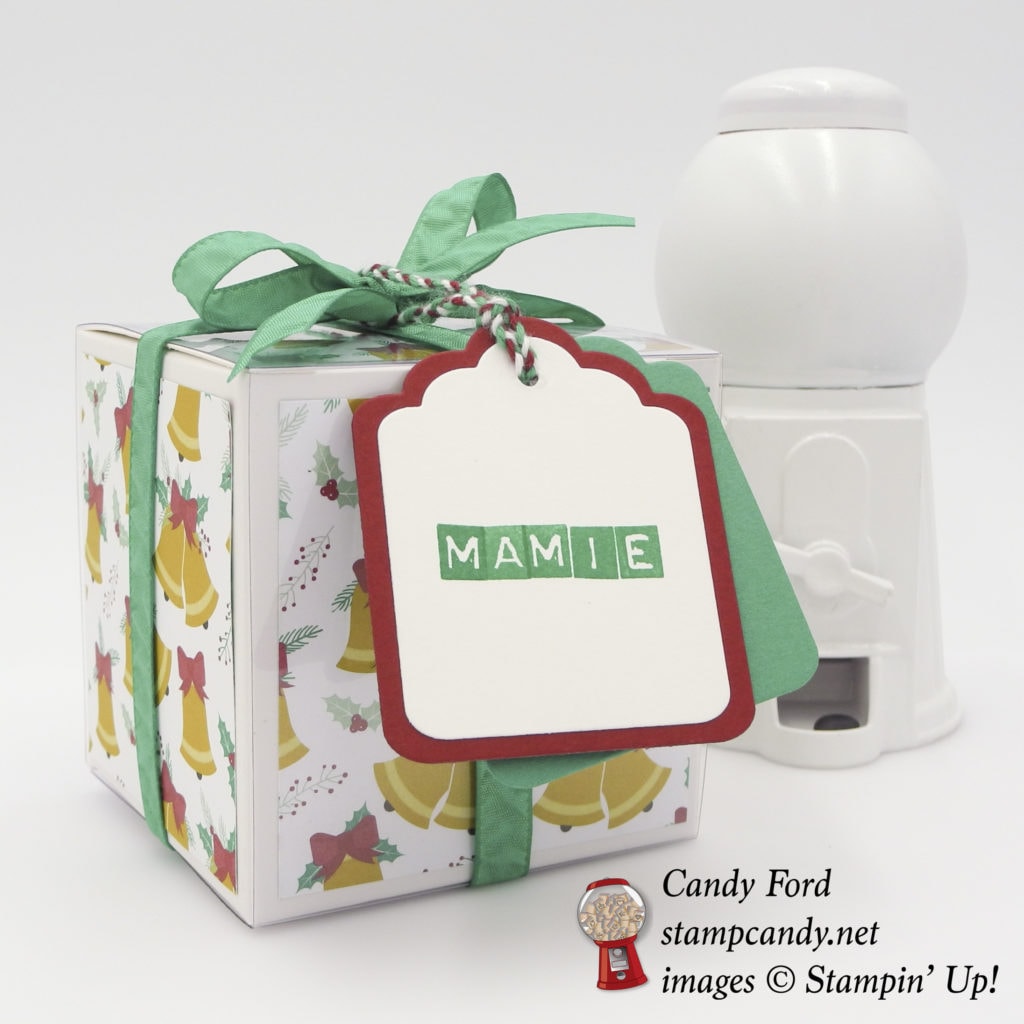
I stamped the dog from the Bella & Friends stamp set in Basic Black ink onto Thick Whisper White card stock. I used a Cherry Cobbler Stampin’ Write Marker to color in the heart. Then I cut it out with the Tags & Labels Framelits. Using the Labeler Alphabet stamp set, I stamped MAMIE in Emerald Envy ink onto Thick Whisper White CS, then cut it out with the same tag Framelit.
I used a larger Framelit from the same set to cut a piece of Cherry Cobbler CS and a piece of Emerald Envy CS. I glued the white pieces onto the colored pieces, then punched holes in the tops with the 1/8″ Circle Punch.
I braided pieces of Emerald Envy, Cherry Cobbler, and Whisper White Baker’s Twine and used it to tie the tag onto the gift’s bow.
Here’s what I used:
Thanks for stopping by today, and Sweet Stamping!
Aug 3, 2016 | Boxes, Events, Gallery, Gift Wrap, Gifts, Techniques |
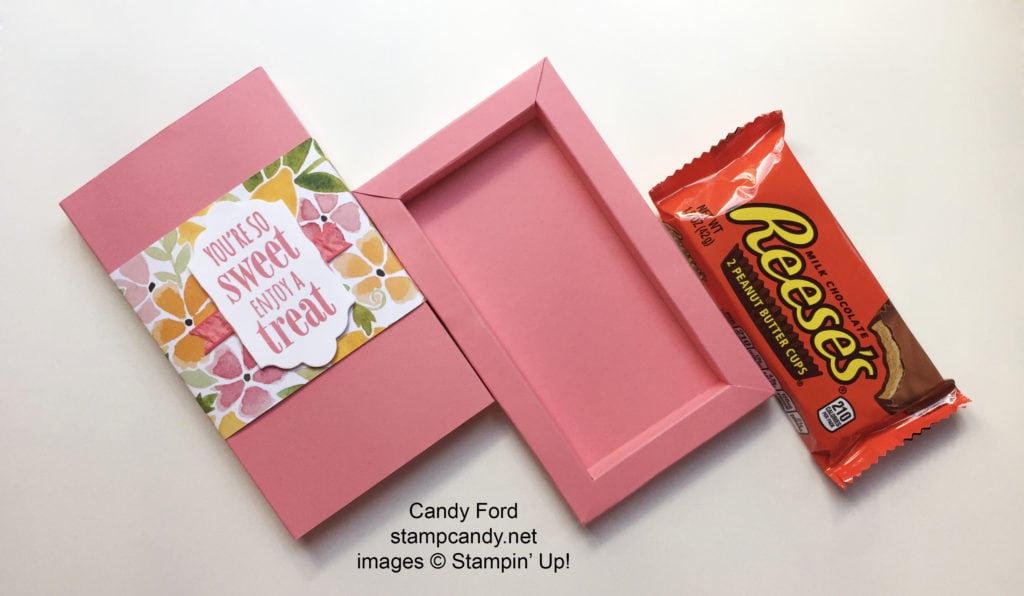
Today’s project was one of the Make & Takes in our July Candy Hearts Team Meeting. It’s a cute little treat box with a sliding tray.
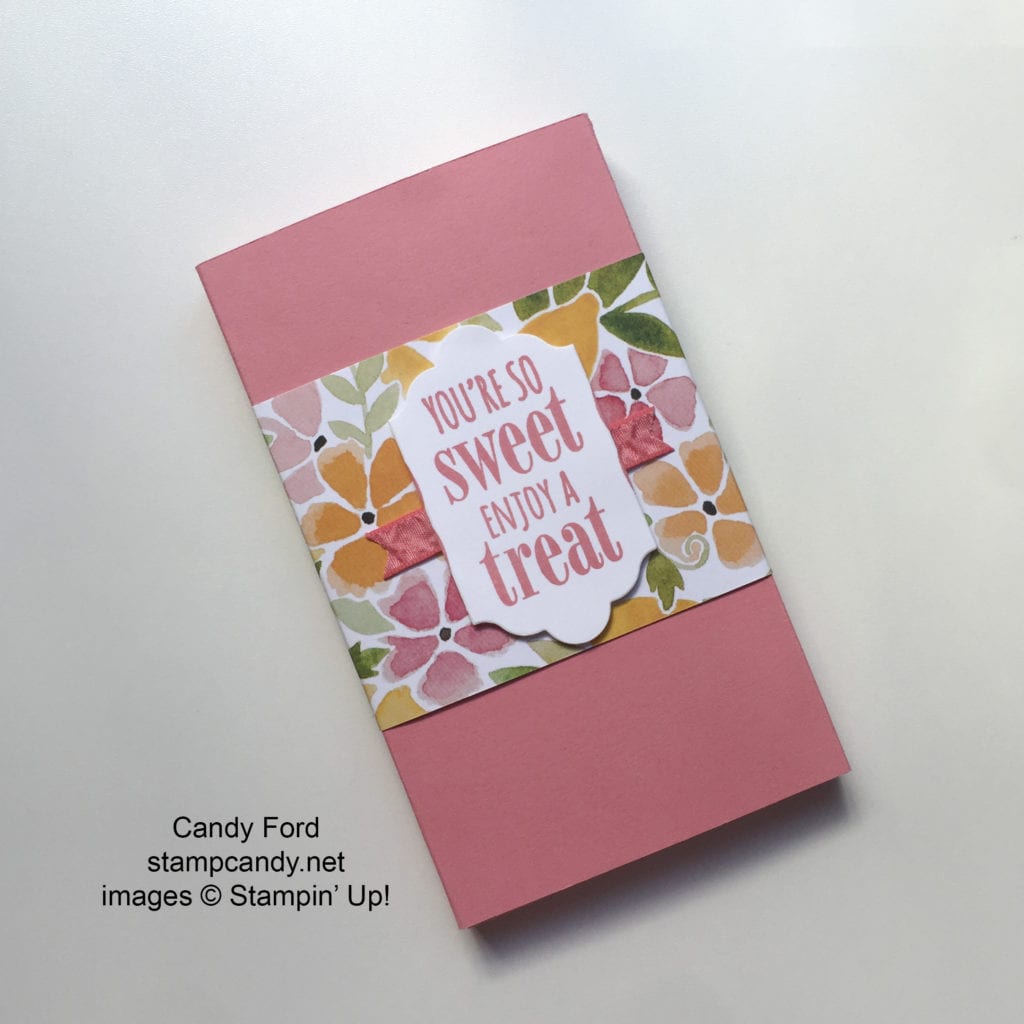
I designed this one to fit a pack of 2 large Reese Cups.
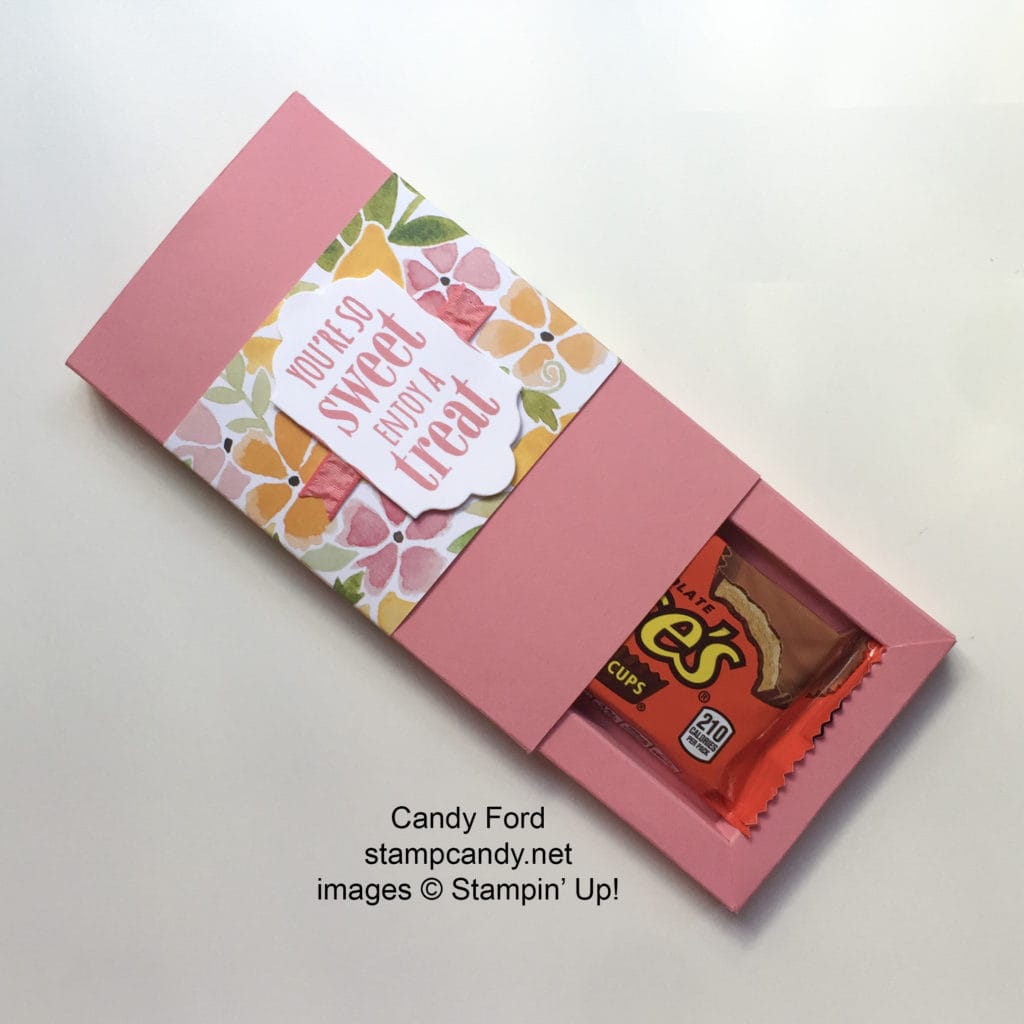
There are two parts to the box: the cover and the tray.
Here’s how I did it:
First determine the dimensions of your box. I measured a Reese’s cup package and determined I needed a box 2-1/2” wide x 5” long x 1/2” deep.
Create the tray:
Add the box depth x 10 to the width and to the length. So for the Reese cup box, the box depth is 1/2” and 1/2” x 10 = 5”. I added 5” to the width and to the length, so I cut my card stock to 7-1/2” x 10”.
Score 4 times from the edge of all four sides, the depth of the box each time. So I scored every 1/2” (the depth of my box.) I scored at 1/2”, 1”, 1-1/2”, and 2” on all four sides.
On the short sides, score one more time, 1/2” in from the last scores, but only down to the second score line. It should look something like this:
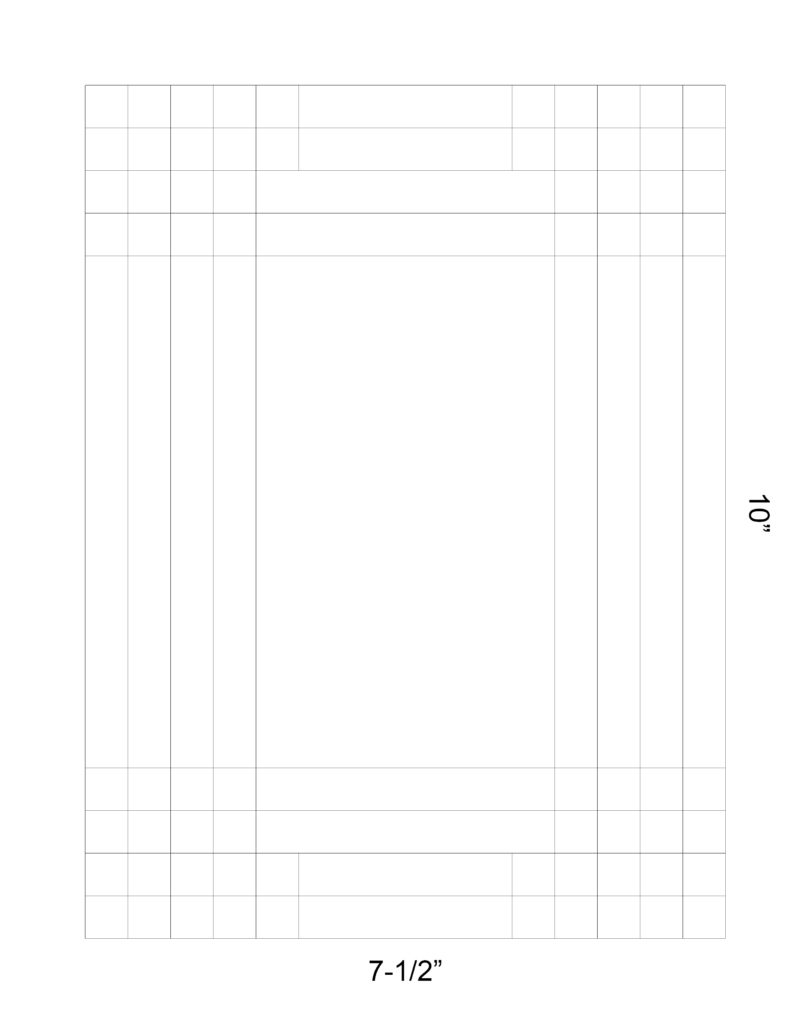
Cut the 16 (4 x 4) small squares made by the scored lines from each of the four corners (yellow areas.)
On the short sides cut down the two short scored lines, then cut diagonally down to the next corner (green areas.)

Discard all the pieces you have cut away.
Fold all score lines with a bone folder.
Now you’re ready to make the two long sides of the box. Turn up the scored side and put adhesive on the outermost strip. Roll toward the inside of the box, adhering that strip to the box bottom. Do the same thing on the other side.
Now make the two short sides of the box. Put adhesive on the outermost strip, just like before, and roll so that strip adheres to the box bottom. The skinnier center part will go between the two long sides, and the diagonal cut will lie on top of tip of the long side to create a mitered corner look. Do that on the other short side.
Create the cover:
Cut a piece of card stock the size you need to wrap around your tray and overlap by an inch or so. I cut mine to 6-1/8” wide (the length of my box plus 1/8”) by 10” long.
Wrap it around the tray, making sure it isn’t too snug, because it needs to slide on and off. Pinch where the bends need to be. Score and fold along the pinched areas. Wrap it around the tray and adhere the ends.
Now decorate:
I cut a piece of Fruit Stand Designer Series Paper to 3″ x 10″ and wrapped it around the cover, gluing it in place.
I stamped the sentiment from the You’re So Sweet stamp set in Flirty Flamingo ink onto Whisper White card stock, then cut it with a die from the Lots of Labels Framelits. I adhered a piece of Flirty Flamingo Ruched Ribbon to the cover with Fast Fuse, then adhered the sentiment over than with Stampin’ Dimensionals.
I realize these directions can seem a bit confusing. It’s much easier to show how to make this than to write it. Please contact me if you have any questions at all!
Here’s what I used:
AUGUST HOSTESS CODE
PMTWBJMQ
If you are placing an order for less than $150, please use this Hostess Code.
Click here for details on how to use the Hostess Code.
If you are placing an order of $150 or more, you will receive Stampin’ Rewards on your order, so do not use the Hostess Code.
Thanks for stopping by today, and Sweet Stamping!


