Nov 25, 2014 | Gift Wrap |
I was getting ready to leave for a family gathering when I realized I didn’t have a hostess gift for my sister-in-law. I needed to make something very quickly. It was very easy to turn a plain candle into a great gift, and it only took a few minutes.


I had a short plain white candle on hand that I had planned to stamp on. I didn’t think I had enough time to do that, so I opted to wrap the candle in a piece of Color Me Autumn DSP. I used Color Me Autumn Washi Tape around the bottom.
I used what was left of the sheet of DSP to cover the four sides and the top of the gift box. This acorn pattern is one of my favorites in the collection.
Thanks for stopping by today, and Sweet Stamping!
Here’s what I used:
Nov 23, 2014 | Food, Gift Wrap, Paper Pumpkin |
As soon as I saw October’s Paper Pumpkin kit, I knew I wanted to make it for both the family gatherings I’ll be attending this month. I ordered refills almost immediately so I would have enough slices for everyone. This one is for the gathering with my brother and sister and their families. I’m not sure who all will be there, so I made up two whole pies worth – 16 slices – and stacked them in two layers on a cake stand.

Inside each little treat box is a bag of nut clusters tied with the Two-Tone Trim in either Tangerine Tango/White or Old Olive/Natural. I got a little carried away with the nut clusters, stuffing the boxes a bit too full, so I had to use tape to keep them shut.
Because I would be transporting it a long way, and I made two layers, I decided not to use the pompoms – well, except for the one on the top. So I used buttons instead: some from the Brights Designer Buttons and some from the Very Vintage Designer Buttons. Everything else is just like the photo on the kit – if it ain’t broke don’t fix it, right?
I wrapped the whole thing in plastic wrap to keep it together on the trip. Tip: I wrapped the plastic wrap around the sides first, then over the top, like movers wrap furniture nowadays. To keep it upright, I put the whole thing in a cardboard box filled with packing material.

Thanks for stopping by today, and Sweet Stamping!
Nov 19, 2014 | Blog Hop, Christmas, Gift Wrap |

Welcome to the November InKing Royalty Blog Hop. We’re excited to share projects that showcase fun gift wrap and packaging ideas for the holidays.
You may have started the Blog Hop here or may have hopped over from Angie Coleman at Coastal Stamping. After you read my post, I hope you’ll hop over to the next. If you get off track at any point during the blog hop, there’s a complete list of participants at the end of this post.
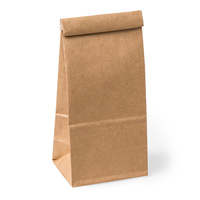
Funny story. I was on my way to the Stampin’ Up! convention in July. I bought some food on the plane (I’m being very liberal with the word food here – it was inedible) but it came in a cafe bag with the roll down top. I thought, these would make such great gift bags, and they’d be so easy to decorate. I’m gonna find some for Christmas gifts this year. Skip to the next day at convention when we got our Holiday Catalogs, and what did I find on page 10? Petite Cafe Gift Bags! I couldn’t believe it.
I have loved the old animated TV show, Rudolph the Red Nosed Reindeer since I was a child. Silver and Gold sung by Burl Ives was one of my favorites songs from that show. Why do I mention this? Because I’m combining the Petite Cafe Bag with Silver and Gold!

I’m afraid my lighting just isn’t right to capture how pretty this is. But trust me, in person the silver and gold really show. I tried to get some shots that showed the shininess, but the silver and gold look sort of blue and green. I hope you can at least get an idea of what it really looks like.


The tags – I stamped one in silver, one in gold, and one in baked brown sugar to match the bag. I tied them onto the silver ribbon with linen thread. I like the look of the shiny metallics against the matte brown.


Thank you for stopping by today. I hope you’ll hop along to the next stop on the blog hop, Kelly DeTommaso at Kelly’s Creative Corner. You certainly won’t want to miss any of these projects.
Thanks for stopping by today, and Sweet Stamping!
Candy Ford
- Lynn Kolcun at Avery’s Owlery
- Angie Coleman at Coastal Stamping
- Candy Ford at StampCandy
- Kelly DeTommaso at Kelly’s Creative Corner
- Amy Whelan at Amy’s Inklings
- Katie Ferguson at Cottage Paper
- Brian King at Stamp with Brian
- Becky Volpp at Ink Blossom with Becky
- Pam Morris at Tap Tap Stamp
Here’s what I used for this project:
Nov 7, 2014 | Cards, Club, Gift Wrap, Techniques |
Hello, everyone!
The Stamp Candy Stamp Club had our November meeting this week. We always laugh and have lots of fun. This month we made projects in preparation for the upcoming Christmas season.

I love the color scheme of the All Is Calm DSP. Soft Sky, Lost Lagoon and Pear Pizzazz have such a calming, Wintery feel. We used these colors, along with Whisper White, for all the projects.
First, we used 1″ strips of DSP to make bows and belly bands for Kraft Gift Boxes. I highly recommend using Liquid Multipurpose Glue for assembling the bow. Here’s a link to the instructions: http://www.stampinup.com/us/documents/paper_bows(contact).pdf


Next we made the tags. We stamped the snowflakes in Soft Sky, and the To/From in Lost Lagoon.

Margie & Judy each added a touch of All Is Calm Designer Washi Tape to their tags. (I forgot to take any photos at the evening meeting, but Martha and Linda did an excellent job on their projects, too.)


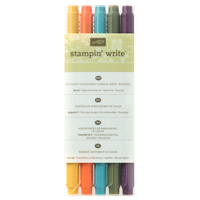
Now, of course, we needed cards to match, right? We stamped the sentiment in Lost Lagoon and Pear Pizzazz. Normally we would color each area of the stamp with a Stampin’ Write Marker, but we did something a little different this time. When I was designing this project, I used markers at first, but realized there was a lot of ground to cover with the Lost Lagoon. So I inked up the whole stamp image with the Lost Lagoon ink pad, then used a baby wipe to remove the ink only where I wanted to color it in with the Pear Pizzazz marker. If I accidentally removed too much Lost Lagoon with the wipe, I simply filled it in with the Lost Lagoon marker. And that’s how we did it at Club.
After embossing the card front with the Filigree Frame TIEF, it was beautiful, but it seemed just a little too calm. We used a Cherry Cobbler Candy Dot to dot the “i” in Christmas. It added just that little pop of something that it needed. We adhered the card front to a Soft Sky card base and rounded all four corners with the Project Life corner rounder punch.

We stamped the envelope with the same Soft Sky Snowflakes as on the tag.

Here are the products we used:
Thanks for stopping by today, and Sweet Stamping!
Sep 9, 2014 | Christmas, Gift Wrap |
I’ve always loved gift tags. It seems you can always make a gift seem more special, even if it has very plain wrapping, with a great tag.
I really like the Cheerful Tags stamp set. So simple, yet so versatile. I can see myself using it a lot in the future.

Here I began with Whisper White card stock. Then I stamped the lined background with Smoky Slate, the trees with Garden Green, the Merry with Real Red, and the to/from with Basic Gray. The Note Tag Punch made quick work of cutting out the tag shapes, while the holes were punched with the 1/8″ Handheld Circle punch. 1/8″ Taffeta Ribbon in Smoky Slate tops it off.
It was so quick and easy! And I’d be happy to receive any gift with one of these tags attached. How about you?
Sweet Stamping!