Sep 27, 2014 | Decor, Techniques |
A local craft store recently had their faux pumpkins on sale, so I got a few (okay a few dozen.) I know most people carve a face into their pumpkin, and I’ll do that with some, but I decided to do something a little different with this one.
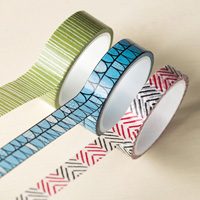
The Witch’s Brew washi tape I’ve used here is still available in the Stampin’ Up! Clearance Rack for only $1.99! Click here to buy it now.
 This was so easy and quick! Just hold the end of the washi tape at the base of the pumpkin stem and run a strip down to the bottom, across to the other side, and back up to the stem. Continue around the pumpkin, smoothing as you go, until it’s covered. The tape will overlap at the top and bottom. One pack of the washi tape covered this small pumpkin with a bit left over.

When I was finished with the tape, I painted the stem with acrylic craft paint, covering the ends of the tape around the stem area.
Thanks for stopping by today! Come back tomorrow for more decorated pumpkins!
Sep 8, 2014 | Cards, Club, Deals, Techniques |
Okay, the truth is I wasn’t sure I would like the new Wondrous Wreath stamp set. I mean, could it really be that easy? Then I got to try it out at Convention in July, and I knew I had to have it. Not only is it super easy to line up the stamped layers; it’s also super easy to cut out the pieces with the corresponding Wonderful Wreath Framelits Dies.
It may seem that I used two colors of green ink on this card, but actually I used only one. I inked the base layer of the wreath with Pear Pizzazz, then “stamped off” once before stamping onto the Whisper White card stock, making the leaves a paler green. I inked the second layer with Pear Pizzazz and stamped directly on top of the first layer, making those leaves a darker green. Thanks to Sean Douglass at Stampin’ Up (he does all the wonderful kits we love so much) for teaching me this two-tone technique in Salt Lake City this past July!

Did you know…
…you save 15% when you buy the Wondrous Wreath Stamp Set & Wonderful Wreath Framelits together in a bundle?
…you can receive the Good Greetings Stamp Set for FREE? Now until October 31, you will earn an exclusive Good Greetings Stamp Set (clear mount or wood mount – your choice) when your party total, or your order total, reaches $300 – that’s in addition to the other exciting benefits! That’s right, a FREE stamp set IN ADDITION TO all the other exciting and generous benefits you get when you host a party, but only until October 31! This versatile stamp set covers holidays from Halloween to Valentines and more. Contact me today to schedule your party! candy@stampcandy.net or 404-661-5222
Below what I used to make this card. Thanks for stopping by!
Sep 7, 2014 | Cards, Techniques |
Yesterday I said I would post a template for the 3D Visions of Santas card once I figured out how. This is my first attempt at creating a template. I hope you find it useful.

Looking at this template, all the vertical lines are to be scored and all the horizontal lines are to be cut.
Begin with an 8-1/2″ x 11″ sheet of card stock for the card base.
Along the long side, score all the way down the paper at 3-3/4″, 5-5/8″, 7-3/8″, and 9-1/8″.
Turn the paper counterclockwise to the short side and cut only from the 2nd score line to the 4th score line at 1/2″, 2″, 2-1/2″, 4″, 4-1/2″, 6″, 6-1/2″, and 8″.
Fold on the vertical score lines. The one score line that is cut through should be folded with the 1/2″ pieces pointed up (mountain folds) and the 1-1/2″ pieces pointed down (valley folds.)
Now you’re ready to begin decorating your card. If you want to cover each panel with DSP as I did on yesterday’s card, you’ll need these pieces, which will have a 1/8″ border around each, once adhered to card:
3-1/2″ x 8-1/4″ one piece for the card front
3-1/2″ x 8-1/4″ one piece for the largest inside panel
1-5/8″ x 8-1/4″ two pieces for the two long slender inside panels
1-1/2″ x 1-1/4″ eight pieces for the 8 small panels
1-1/2″ x 1/4″ ten pieces for the 1/2″ panels (if you choose to cover those, which I didn’t)
If you’d like to decorate the back side, just cut twice as many of all the pieces except the 3-1/2″ x 8-1/4″ (largest) ones, since you’re already covering both sides of that panel.
Tip: if you want to cover all the inner panels with the same paper, start with one sheet that is 8-1/4″ x 9-3/4″ and cut all the pieces like so:

I hope this isn’t too confusing. Please don’t hesitate to post any questions or comments below.
Sep 6, 2014 | Cards, Deals, Techniques |
Here’s another card I CASEd from someone at last weekend’s crop. A lovely lady named Shirley was using a kit that made beautiful cards with panels that folded in different directions for a 3D look. It took me a couple of attempts before I figured out the right measurements, but I finally came up with a card. Once I figure out how to make a template that you can actually read, I’ll post it.
Here’s the front…

…and here’s the inside.

I just love the Santa & Co. DSP with all its cute little images: the Santas, the moose, the trees, the mountains,… I used an 8.5″ x 11″ piece of Old Olive card stock for the base. Then I started cutting the DSP into pieces that fit the panels.
I stamped the front sentiment with black Staz-On ink onto SU Vellum and used Santa & Co. Designer Washi Tape to hold it in place.
I stamped the merry, merry, merry, merry christmas with the Good Greetings stamp set in black; but then I decided I liked white better, so I traced over the words slowly with a white Uni-Ball Signo Gel Pen. This has been my favorite white pen for years, and I’m so glad Stampin’ Up! carries it.
A few Frosted Sequins scattered here and there and I was done. I left the back of the card blank so there’s plenty of room for writing a sentiment. Or you could leave the far right panel (where I have the mountains) blank for writing.
Here are a couple more angles…

…from above…

… and from below.
Thanks for stopping by today!
Have a party or place an order totaling $300 and you will receive the exclusive Good Greetings stamp set FREE in addition to the regular host benefits

Here’s what I used to make today’s card:
Sep 3, 2014 | Blog Hop, Classes, Club, Techniques |

Welcome to the very first InKing Royalty Blog Hop. For our very first hop, we’re excited to share projects that showcase the fun of the holidays – from Halloween through Christmas, this certainly is the season to be jolly!
You may have started the Blog Hop here or may have hopped over from Deb Cozzone at Deb Cozzone’s Stamping Zone. After you read my post, I hope you’ll hop over to the next. If you get off track at any point during the blog hop, there’s a complete list of participants at the end of this post.
I’m very excited because my Stamp Club will meet for the first time today. I thought I’d share with you one of the projects I have prepared. Wouldn’t you love to get some sweets in this little Halloween treat box?


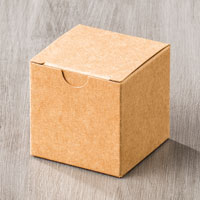
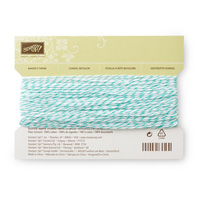
It was so simple! I began with the Tiny Treat Boxes from the Holiday Catalog. They are 2″ x 2″ x 2″. I covered it with various pieces of Motley Monsters DSP – all the squares were cut to 1-7/8″ x 1-7/8″ and the circles were punched with the 1-3/4″ circle punch. I used the 3/4″ circle punch to cut around the crescent on the front, just above “Happy Halloween.” The sentiment is from the Good Greetings stamp set – stamped with Memento Tuxedo Black Ink on a piece of Motley Monsters DSP, punched with the Modern Label punch, and adhered with Stampin’ Dimensionals. I used Baker’s Twine in three colors – Basic Black, Tangerine Tango, and Bermuda Bay – to match the DSP. That’s all there is to it!
Thank you for stopping by today. I hope you’ll hop along to the next stop on the blog hop, Pam Morris at Tap Tap Stamp. You certainly won’t want to miss any of these projects.
Sweet Stamping! Candy Ford
- Brian King at Stamp with Brian
- Deb Cozzone at Deb Cozzone’s Stamping Zone
- Candy Ford at StampCandy
- Pam Morris at Tap Tap Stamp
- Lynn Kolcun at Avery’s Owlery
- Bonnie Garrett at Stampin’ Bon
- Kelly DeTommaso at Kelly’s Creative Corner
- September Gray at SeptemberGray.com
- Mary Fish at Stampin’ Pretty
- Angie Coleman at Coastal Stamping
- Alison Bilohlavek at Ribbon and Brad
- Lisa Pretto at DIY Royalty
- Katie Ferguson at Cottage Paper
—————————————————————————————————–
The exclusive Good Greetings stamp set is only available until October 31. Host a party (or place an order) of $300 or more and you’ll receive this stamp set FREE, and that’s in addition to all the other host benefits! You can choose clear mount or wood mount, your choice. Contact me now to get your FREE Good Greetings stamp set!
Here are the other Stampin Up products I used for the Halloween treat box:
Sep 2, 2014 | Cards, Techniques |
I was at a crop this past weekend and saw some lovely creations. As I walked past one lady, I saw she was working on a scrapbook page kit that included big umbrellas. Well, you know me, I want to copy everything I see. And I thought to myself, I could make that. So I started working on a prototype. Here’s the card I came up with.

I used the Circles Framelits dies to cut a large circle. I cut it about in half – maybe a little less than half. Then I used a 1-1/4 inch circle punch to cut the scallops along the bottom. For more scallops, you could use a smaller punch. I drew the ribs with the light Smoky Slate Stampin’ Blendabilities marker from each scallop point to the top.
I actually made two of these – one out of the All Is Calm DSP and one out of Lost Lagoon card stock. I put the DSP on top of the card stock with Stampin Dimensionals to create a 3D effect.
I took a thin scrap of Smoky Slate card stock, punched a 1/2 inch circle near one end, then cut the rest of the handle with my paper snips.
I stamped the sentiment from the Holiday Cheer stamp set onto Soft Sky card stock, then punched it out with the mitten builder punch. I punched another mitten from Lost Lagoon card stock and trimmed it for the cuff.
I used the silver dotted All Is Calm DSP for falling snow, layered it on a Silver Foil Sheet, and layered that onto a Lost Lagoon card.
Here’s what I used:
 This was so easy and quick! Just hold the end of the washi tape at the base of the pumpkin stem and run a strip down to the bottom, across to the other side, and back up to the stem. Continue around the pumpkin, smoothing as you go, until it’s covered. The tape will overlap at the top and bottom. One pack of the washi tape covered this small pumpkin with a bit left over.