This past Saturday I went to Monika Davis’ team meeting (her team is called the PAWS) where we talked, laughed, did some Make & Takes, and a tag swap.
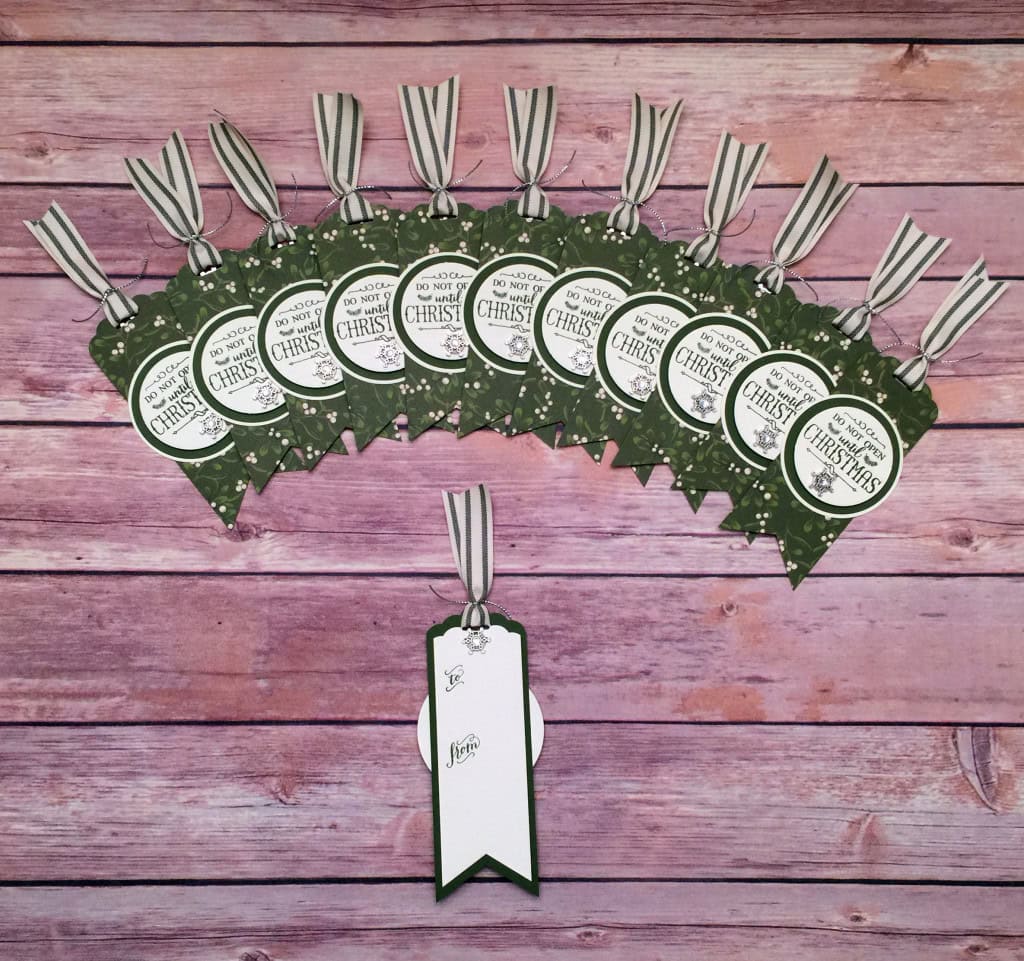
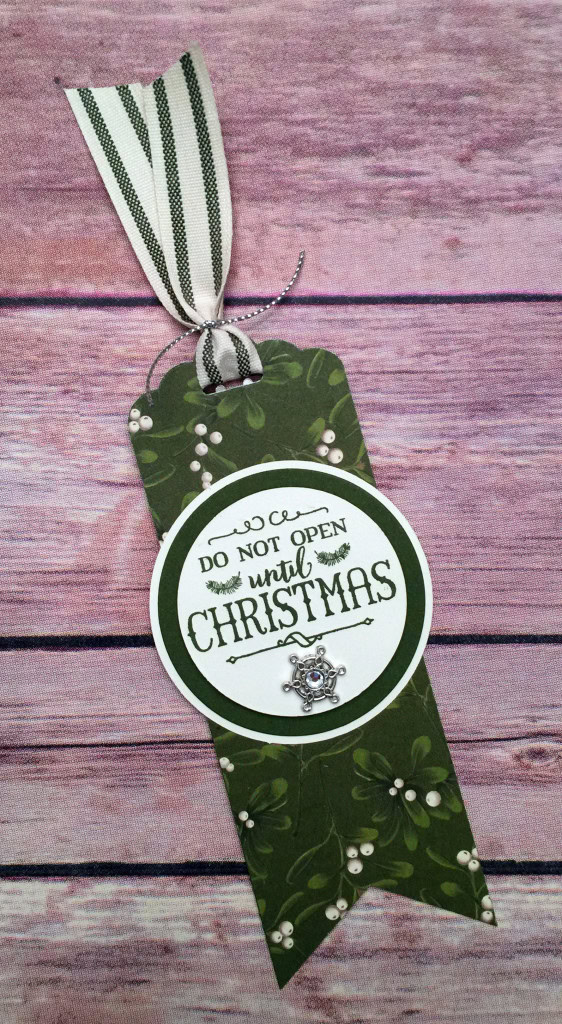
For my swap tag, I cut Home for Christmas Designer Series Paper (I love this mistletoe design) and Mossy Meadow card stock to 2″ x 5″ strips, then glued them back to back. I used the Scalloped Tag Topper Punch on one end and the Banner Triple Punch on the other end.
front of tag
I cut Very Vanilla card stock to 1-3/4″ x 4-1/2″ strips. I punched both ends the same way, stamped To and From in Mossy Meadow, then glued it to the card stock side of the tag base. I used the Scalloped Tag Topper Punch again to re-punch the original hole that just got covered by the Very Vanilla piece. Hold the punch upside down so you can see how to line it up.
back of tag

I stamped the front sentiment in Mossy Meadow on Very Vanilla card stock, then cut it with the 2″ Circle Punch, so that the sentiment is near the top of the circle. I cut another piece of Very Vanilla with the 2-1/2″ Circle Punch, and a piece of Mossy Meadow with the Circles Collection Framelits Dies. I glued together the bottom two circles, and attached the top one with Stampin’ Dimensionals. I attached a Winter Wonderland Embellishment with Glue Dots, then glued the whole thing to the DSP side of the tag base.
I attached another Winter Wonderland Embellishment on the back to cover the hole in the Very Vanilla piece made by the Scalloped Tag Topper Punch.
I finished the tag with a piece of Mossy Meadow 5/8″ Striped Cotton Ribbon and a piece of Silver Cording Trim.
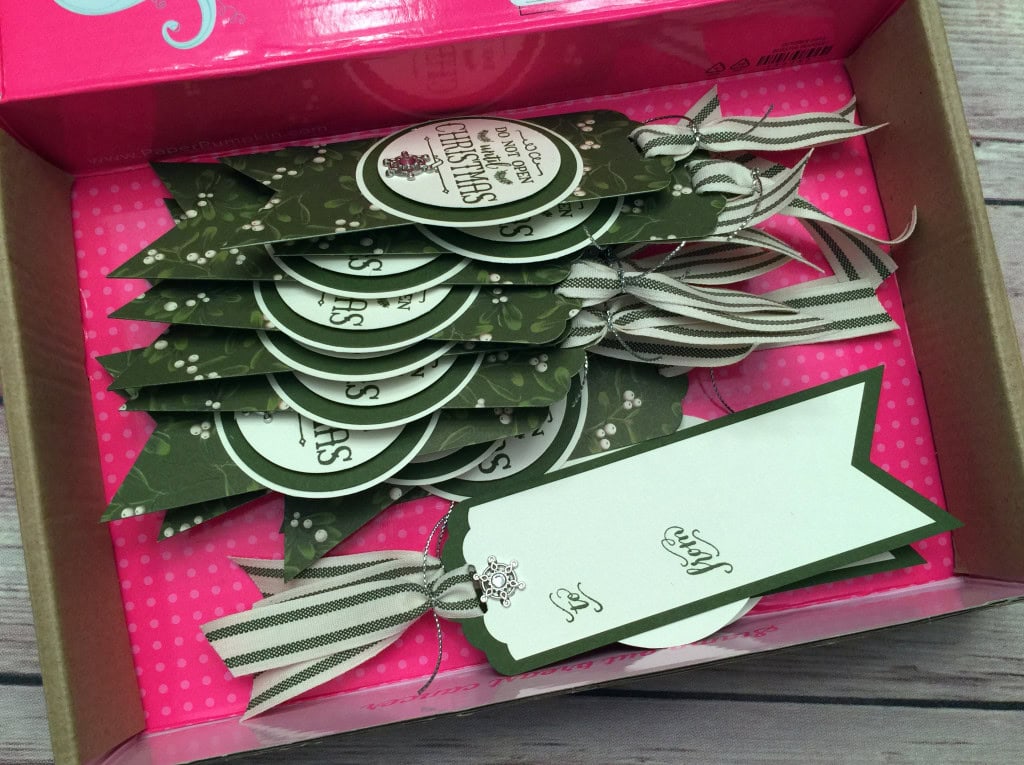
Here are the tags ready to go in their box. Paper Pumpkin boxes are great for so many things, including transporting swaps. See the video here showing how to turn the boxes inside out to create a plain kraft exterior. In this photo you can see I’ve turned one of the pink October 2015 boxes inside out.
Here’s what I used:
Built for Free Using: My Stampin Blog
Thanks for stopping by today, and Sweet Stamping!


Candy – These tags are great! Every detail is perfect.