Feb 17, 2018 | Cards, Gallery |
Happy Purple Birthday! I made today’s card with the Happy Birthday Gorgeous Bundle (Happy Birthday Gorgeous stamp set and Happy Birthday Thinlits Die.) I used three colors of card stock and two colors of ink. Easy peasy!!!
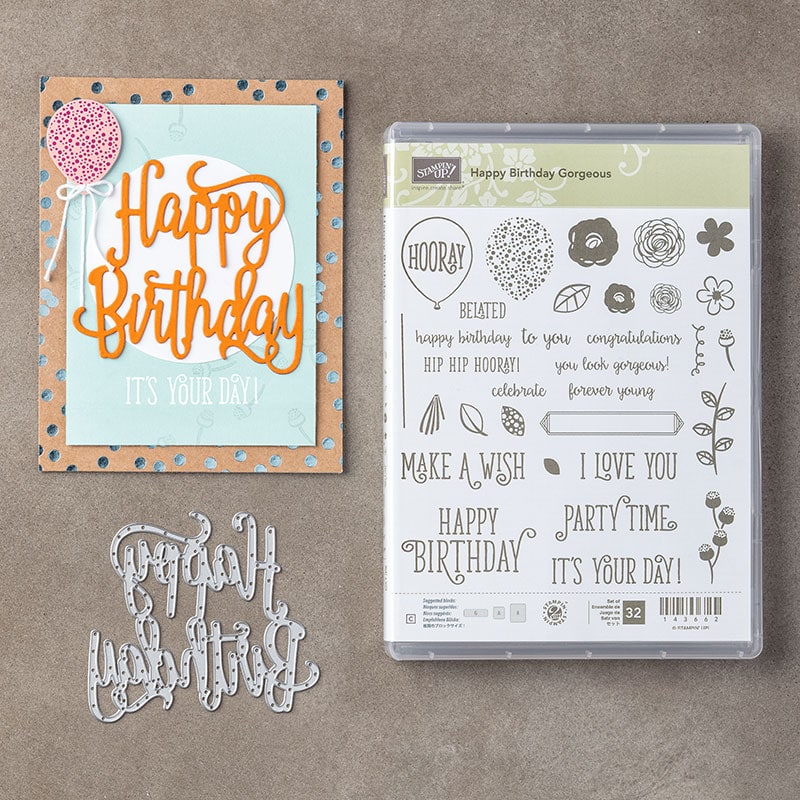
Happy Birthday Gorgeous Bundle © Stampin’ Up!
Here’s what I made:

Here’s what I did:
Cut and scored with my Stampin’ Trimmer:
- Wisteria Wonder card stock (CS) cut to 5-1/2″ x 8-1/2″, then scored in half at 4-1/4″
- Elegant Eggplant CS cut to 5-1/4″ x 4″
- Whisper White CS cut to 5-1/8″ x 3-7/8″
- Whisper White CS cut to 5-1/4″ x 4″ for the inside of the card
Stamped with the Happy Birthday Gorgeous stamp set:
- flowers and leaves in Elegant Eggplant ink onto the 5-1/8″ x 3-7/8″ Whisper White CS layer
- filled in flowers with Wisteria Wonder ink
Die cut using the Happy Birthday Thinlits:
- one from a scrap of Whisper White CS
- one from a scrap of Elegant Eggplant CS
Assembled the card:
- burnished the fold in the card base with a Bone Folder
- Elegant Eggplant die cut glued onto the Whisper White die cut, slightly offset
- die cuts glued onto the stamped layer
- stamped layer glued onto the Elegant Eggplant CS layer
- Elegant Eggplant CS layer glued onto the front of the card base
- 5-1/4″ x 4″ Whisper White CS glued onto the inside of the card base
Here are today’s colors:
You can click on each one to see all the products that come in that color!
Here’s what I used:
Click on these images for more details and to purchase.
Here’s some stuff you should know:
- This is a fabulous time to join my team! Sale-A-Bration is the biggest event of the Stampin’ Up! year and you can save big on the ultimate bundle, the Starter Kit. CLICK HERE for more information. Contact me with any questions: email candy@stampcandy.net or call/text 404-661-5222
- Newsletter: subscribe for exclusive deals, projects, and more! Enter your email address and click SUBSCRIBE at the top right of this page, just under the picture of my smiling face. You can also choose to receive an email every day that I have a blog post.
- Check out My Events Calendar HERE
- Host Code for the month of February (2T9AQTKG) Find out more about HOW, WHEN and WHY to use the code HERE.
- My Thank You Gift to You in February: Narrow Note Cards & Envelopes – Find out more HERE.
- Gift Certificates are available in any U.S. dollar amount from me. Contact me – email: candy@stampcandy.net OR call/text: 404-661-5222
- Gumball Rewards for all orders over $50. Find out more HERE.
Thanks for stopping by today, and Sweet Stamping!

Jan 21, 2018 | Cards, Gallery |
There are a couple Stampin’ Up! colors that are considered by many to be the…well, the least appealing of the lot: Always Artichoke and Cajun Craze. They’re both great colors, and are must haves for Autumn projects, but maybe they aren’t the first ones you turn to this time of year. I decided to use a pretty stamp set – Happy Birthday Gorgeous – with these colors, just to see what I could do. I also tried something different with the layers, by lining them up at one corner instead of centering them. It’s an especially quick and easy card. Let me know what you think.
Here’s what I made:


Here’s what I did:
Cut and scored with my Stampin’ Trimmer:
- Cajun Craze card stock (CS) cut to 5-1/2″ x 8-1/2″, then scored in half at 4-1/4″
- Always Artichoke CS cut to 5″ x 3-3/4″
- Very Vanilla CS cut to 4-1/2″ x 3-1/4″
- Very Vanilla CS cut to 5-1/4″ x 4″ for the inside
Stamped with the Happy Birthday Gorgeous stamp set:
- sentiment in Cajun Craze ink onto the Very Vanilla CS layer
- flowers in Cajun Craze and Always Artichoke inks onto the Very Vanilla CS layer
- flower in Always Artichoke ink onto the larger Very Vanilla CS piece
Assembled the card:
- stamped Very Vanilla CS layer glued onto the Always Artichoke CS layer
- Always Artichoke CS layer glued onto the front of the card base
- larger Very Vanilla CS piece glued to the inside of the card base
Here are today’s colors:
You can click on each one to see all the products that come in that color!
Here’s what I used:
Click on these images for more details and to purchase.
Here’s some stuff you should know:
- It’s Sale-A-Bration! Earn free product three different ways! CLICK HERE for all the details!
- This is a fabulous time to join my team! Sale-A-Bration is the biggest event of the Stampin’ Up! year and you can save big on the ultimate bundle, the Starter Kit. CLICK HERE for more information. Contact me with any questions: email candy@stampcandy.net or call/text 404-661-5222.
- Newsletter: subscribe for exclusive deals, projects, and more! Enter your email address and click SUBSCRIBE at the top right of this page, just under the picture of my smiling face. You can also choose to receive an email every day that I have a blog post.
- Check out My Events Calendar HERE
- Host Code for the month of January (XNNMNZSZ) Find out more about HOW, WHEN and WHY to use the code HERE.
- My Thank You Gift to You in January: Silver Embossing Paste – Find out more HERE.
- Gift Certificates are available in any U.S. dollar amount from me. Contact me – email: candy@stampcandy.net OR call/text: 404-661-5222
- Gumball Rewards for all orders over $50. Find out more HERE.
Thanks for stopping by today, and Sweet Stamping!
Dec 5, 2017 |
You must register here by January 28 to hold your spot!
In this class you will use brand new products from the 2018 Occasions Catalog to make 6 cards (2 each of 3 different designs) for only $15! All you need to bring are scissors and adhesives, and a bone folder if you have one. I’ll supply the rest. (I have adhesives here to purchase if you need them.)
Class By Mail:
If you can’t make it to the live class, I will be happy to mail the kits to you, along with instructions and a list of everything else you need (stamps, ink, etc.) Add $5 for postage.
Cancellation:
If you cancel before the registration deadline, you will receive a full refund.
If you cancel after the registration deadline, contact me to arrange a time when you can pick up your kits
Please let me know if you have any questions: candy@stampcandy.net
Remember to register by January 27!
Dec 5, 2017 |
You must register here by January 27 to hold your spot!
In this class you will use brand new products from the 2018 Occasions Catalog to make 6 cards (2 each of 3 different designs) for only $15! All you need to bring are scissors and adhesives, and a bone folder if you have one. I’ll supply the rest. (I have adhesives here to purchase if you need them.)
Class By Mail:
If you can’t make it to the live class, I will be happy to mail the kits to you, along with instructions and a list of everything else you need (stamps, ink, etc.) Add $5 for postage.
Cancellation:
If you cancel before the registration deadline, you will receive a full refund.
If you cancel after the registration deadline, contact me to arrange a time when you can pick up your kits
Please let me know if you have any questions: candy@stampcandy.net
Remember to register by January 27!
Oct 11, 2017 | Cards, Gallery, Halloween, Holiday |
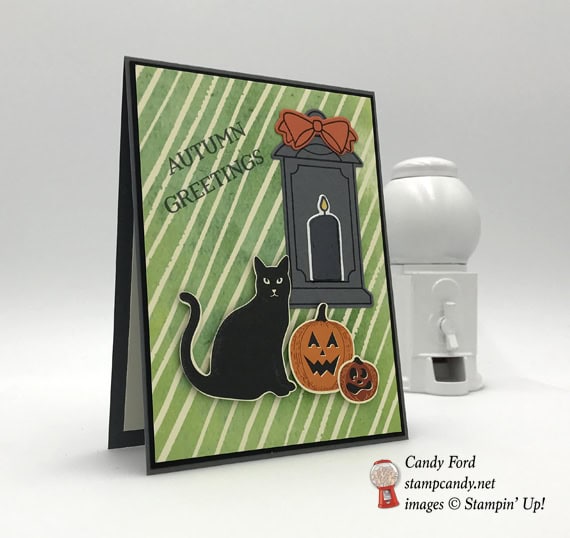
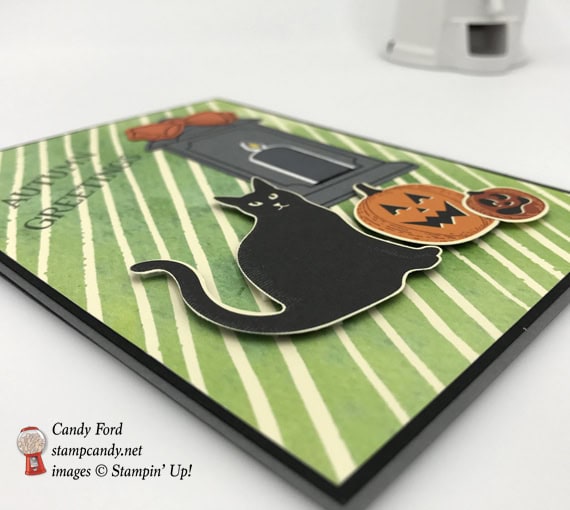
Autumn Greetings from Stamp Candy! Autumn (or Fall, as we call it here) is in the air and with it comes Halloween with its black cats and pumpkins and spooky lanterns. I made today’s card with the Spooky Cat Bundle, the Seasonal Lantern Bundle, and the Spooky Night and Painted Autumn Designer Series Papers (DSP.) And I used the Patterned Pumpkins Thinlits Dies to cut the pumpkins from the Spooky Night DSP. I love how there is so much crossover between products in the 2017!
Here’s what I made:
Here’s what I did:
Cut and scored with my Stampin’ Trimmer:
- Basic Gray card stock (CS) cut to 4-1/4″ x 11″, then scored in half at 5-1/2″
- Basic Black CS cut to 5-1/4″ x 4″
- Painted Autumn Designer Series Paper (DSP) cut to 5″ x 3-3/4″
- Very Vanilla CS cut to5″ x 3-3/4″ for the inside
Stamped with the Seasonal Lanterns stamp set:
- lantern in black ink* onto a scrap of Basic Gray CS
- bow in black ink* onto a scrap of Tangerine Tango CS
- candle outline in black ink* onto a scrap of Very Vanilla CS
- candle fill in black* ink
- flame fill in Daffodil Delight ink
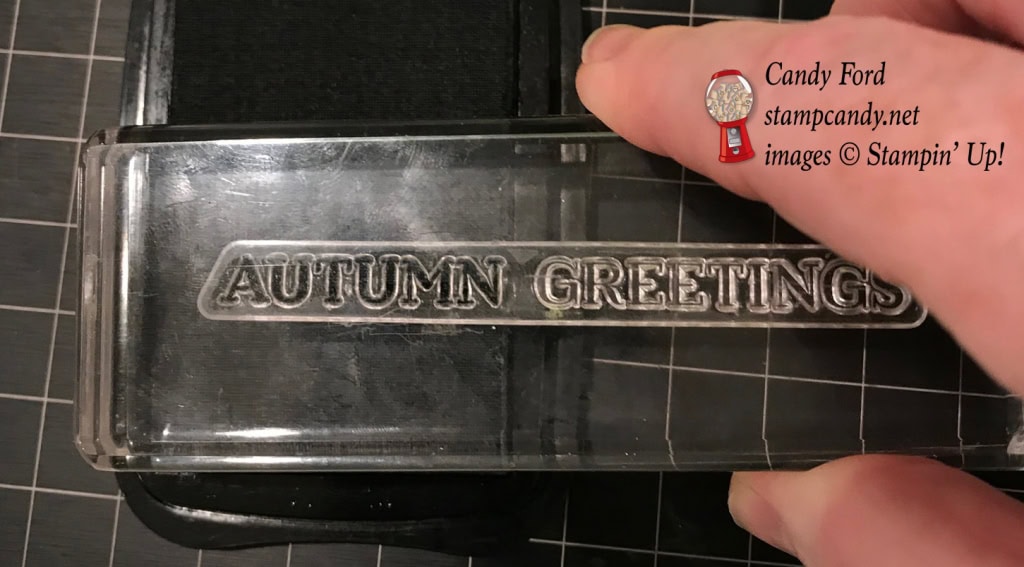
- sentiment in black ink* onto the DSP layer
- *I used Memento black ink, but you can also use Archival Basic Black ink
- NOTE: for the sentiment, I inked up the first word and stamped, then cleaned it, inked up the second word, and stamped

Cut with the Patterned Pumpkins Thinlits:
- pumpkins from Spooky Night DSP
Punched using the Cat Punch:
- black cat from Spooky Night DSP
Cut using the Lantern Builder Framelits:
Assembled the card:
- lantern glued onto the DSP layer
- candle and bow glued to the lantern
- cat and pumpkins adhered to DSP layer with Stampin’ Dimensionals
- DSP layer glued onto the Basic Black CS layer
- Basic Black CS layer glued onto the front of the card base
- Very Vanilla CS glued to the inside of the card base
Here are today’s colors:
You can click on each one to see all the products that come in that color!
Here’s what I used:
Click on the images for more details and to purchase.
Here are some key points to remember:
- World Card Making Day Sale October 1-10, 15% off select card making essentials. See details HERE.
- Designer Series Paper Sale October 1-31, Buy 3 Get 1 FREE! See details HERE.
- Hostess Code for the month of October (HGB2HGXK)
Find out more about HOW, WHEN and WHY to use that HERE. - October’s FREE gift
Mini Pizza Boxes
Find out more HERE. - New Merry Patterns Hostess Stamp Set – added to your Host Rewards
There’s a brand new stamp set that isn’t in any catalog. You can’t buy it, but you can get if for free with a qualifying order! You can host a party, or place your own order, or join under me and get a 20% discount on your demonstrator order. Find out more HERE. - Gumball Rewards for all orders over $50
Find out more HERE.
Thanks for stopping by today, and Sweet Stamping!

