Dec 20, 2018 | Bags, Christmas, Gallery, Gift Wrap, Gifts, Holiday |
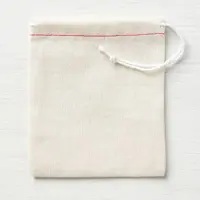
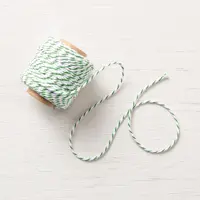
Today I’m sharing a super quick and easy treat idea. I stamped directly onto a Santa’s Bag using the Candy Cane Season stamp set and Real Red ink. It isn’t waterproof, but as long as it stays dry it’s makes a great little gift. I cut the tag using the Everyday Label Punch, and tied it onto the bag using Garden Green Baker’s Twine.
Here’s what I made:


Here’s what I did:
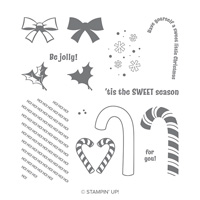
Stamped with the Candy Cane Season stamp set:
- candy cane hearts in Real Red ink onto the bag, 5 on each side
- candy cane outline and sentiment in Real Red ink onto a scrap of Whisper White card stock (CS)
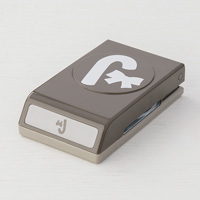
Cut using the Candy Cane Builder Punch:
Cut using the Everyday Label Punch:
- a scrap of Garden Green CS
Cut using the 1/8″ Circle Punch:
- a hole in one end of the Garden Green CS tag
Assembled the project:
- punched candy cane glued onto the Garden Green CS tag
- treats put inside bag
- tag tied onto bag with a piece of Garden Green twine
- That’s it!
Here are today’s colors:
You can click on each one to see all the products that come in that color!
Here’s what I used:
Click on these images for more details and to purchase.
Clearance Rack and Year-End Closeout! Get ’em while you can!
Stampin’ Up! added a lot of goodies to the Clearance Rack! Check it out now!
During the Year-End Closeout promotion, you can save on a selection of retiring and surplus items—while supplies last. Definitely place your orders sooner rather than later, because supplies are limited and the Year-End Closeout ends on January 2. After that, some of your favorite retiring items may be gone for good!
Here’s how to get your copy of the new catalogs:
Just click on this button and I’ll send you the new catalogs, along with a list of the bundles, the Designer Series Paper coordinating colors, and a handmade card!
Here’s how to shop 2019 Occasions/Sale-a-bration items now!
- Become a Candy Heart!
- Join my team and you can order the new products right now, instead of having to wait another month!
- No selling required! I welcome Hobby Demos! (Hobby Demos join to get the discount for themselves.)
- CLICK HERE for the details!
Here’s more stuff to check out:
Thanks for stopping by today, and Sweet Stamping!
Dec 18, 2018 | Cards, Christmas, Gallery, Guest Stamper, Holiday |
Joanne Brown is one of my amazing Candy Hearts team members. She made today’s card using three stamp sets (Gallery Grunge, Lovely as a Tree, and Farmhouse Christmas) and1 the Stitched Shapes Framelits Dies. I love how she combined all these different products in a way that makes you think they’re all from the same set!
Here’s what she made:


Here’s what (I think) she did:
Cut and scored with her Stampin’ Trimmer:
- Whisper White Thick card stock (CS) cut to 8-1/2″ x 5-1/2″, then scored in half at 4-1/4″
- Basic Black CS cut to 4″ x 5-1/4″
- Basic Gray CS cut to 3-3/4″ x 5″
- Whisper White CS cut to 3-1/2″ x 4-3/4″
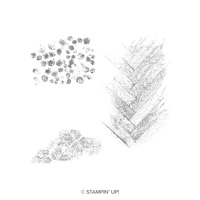
Stamped with the Gallery Grunge stamp set:
- wood background image in Basic Gray ink (stamped off once) onto the Whisper White CS layer
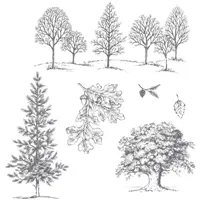
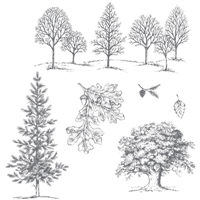
Stamped with the Lovely as a Tree stamp set:
- tree in Basic Gray ink over the wood background image
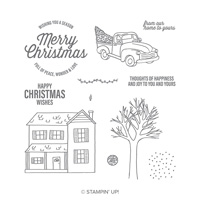
Stamped with the Farmhouse Christmas stamp set:
- sentiment in Cherry Cobbler ink onto a scrap of Whisper White CS
Die cut using the Stitched Shapes Framelits:
Assembled the card:
- burnished the fold in the card base with a Bone Folder
- Basic Black CS layer glued onto the front of the card base
- Basic Gray CS layer glued onto the Basic Black CS layer
- stamped Whisper White CS layer glued onto the Basic Gray CS layer
- sentiment adhered to the Whisper White CS layer using Stampin’ Dimensionals
Here are today’s colors:
You can click on each one to see all the products that come in that color!
Here’s what she used:
Click on these images for more details and to purchase.
Here’s the newly updated Clearance Rack!
A whole lot of new goodies have been added to the Clearance Rack! Get them before they’re gone!

Here’s the Year-End Closeout!
The Year-End Closeout has officially begun! During this promotion, you will be able to save on a selection of retiring and surplus items—while supplies last. Definitely place your orders sooner rather than later, because supplies are limited and the Year-End Closeout ends on January 2. After that, some of your favorite retiring items may be gone for good!
CLICK HERE to see all the Year-End Closeout items. Here’s how to get your copy of the new catalogs:
Just click on this button and I’ll send you the new catalogs, along with a list of the bundles, the Designer Series Paper coordinating colors, and a handmade card!
Here’s how to shop from the 2019 Occasions catalog and earn 2019 Sale-a-bration items now!
- Become a Candy Heart!
- Join my team and you can order the new products right now, instead of having to wait another month!
- No selling required! I welcome Hobby Demos! (Hobby Demos join to get the discount for themselves.)
- CLICK HEREfor the details!
Here’s more stuff to check out:
Thanks for stopping by today, and Sweet Stamping!
Dec 16, 2018 | Boxes, Christmas, Gallery, Gift Wrap, Gifts, Holiday |
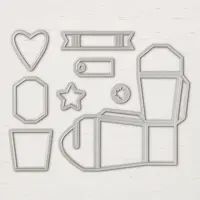
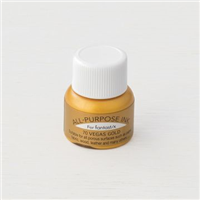
Today I’m sharing a fun little Takeout Treat Box I made for a group of stampers at my retreat last month. I used the Takeout Thinlits Dies to cut the box out of Broadway Bound Specialty Designer Series Paper. I tied a piece of Basic Black Solid Twine around the box, and the finishing touch is a little wooden element I painted with Vegas Gold Shimmer Paint, adhered using a Mini Glue Dot. Easy peasy quick and easy!
Here’s what I made:

Here’s what I did:
Die cut using the Takeout Thinlits:
- two pieces of Broadway Bound Specialty Designer Series Paper (DSP)
Colored using a Stampin’ Sponge:
- tree from the Festive Farmhouse Elements in Vegas Gold Shimmer Paint
Assembled the Takeout Treat Box:
- burnished the folds in the DSP pieces with a Bone Folder
- DSP pieces glued together on the bottom and up all four sides
- inserted treats into the box, and closed the top
- tied Basic Black Solid Twine around the box and tied it in a bow
- adhered tree element using a Mini Glue Dot

Here are today’s colors:
You can click on each one to see all the products that come in that color!
Here’s what I used:
Click on these images for more details and to purchase.
Here’s the Year-End Closeout!
The Year-End Closeout has officially begun! During this promotion, you will be able to save on a selection of retiring and surplus items—while supplies last. Definitely place your orders sooner rather than later, because supplies are limited and the Year-End Closeout ends on January 2. After that, some of your favorite retiring items may be gone for good!
CLICK HERE to see all the Year-End Closeout items. Here’s how to get your copy of the new catalogs:
Just click on this button and I’ll send you the new catalogs, along with a list of the bundles, the Designer Series Paper coordinating colors, and a handmade card!
Here’s how to shop 2019 Occasions/Sale-a-bration items now!
- Become a Candy Heart!
- Join my team and you can order the new products right now, instead of having to wait another month!
- No selling required! I welcome Hobby Demos! (Hobby Demos join to get the discount for themselves.)
- CLICK HERE for the details!
Here’s more stuff to check out:
Thanks for stopping by today, and Sweet Stamping!
Dec 15, 2018 | Cards, Christmas, Gallery, Holiday, Swaps |
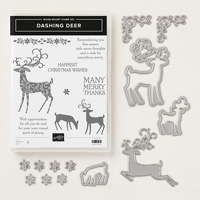
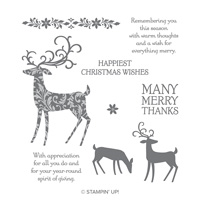
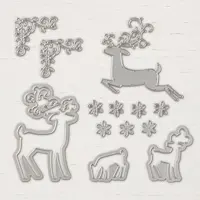
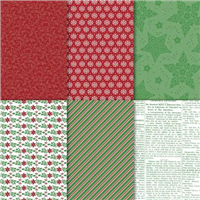
Today I’m sharing the card I made for the Candy Hearts card swap for November. I used the Dashing Deer Bundle and Dashing Along Designer Series Paper to create this card with multiple layers. I cut some of the pieces using the Layering Circles Framelits Dies and the Lakeside Framelits Dies.
Here’s what I made:


Here’s what I did:
Cut and scored with my Stampin’ Trimmer:
- Cherry Cobbler card stock (CS) cut to 4-1/4″ x 11″, then scored in half at 5-1/2″
- Garden Green CS cut to 4-1/8″ x 5-3/8″
- Dashing Along Designer Series Paper (DSP) cut to 4″ x 5-1/4″
- DSP cut to 4″ x 1-1/2″
- Whisper White CS cut to 4″ x 5-1/4″ for the inside of the card base
Stamped with the Dashing Deer stamp set:
- 2 deer and the sentiment in Garden Green ink onto a scrap of Whisper White CS
- flourish in Cherry Cobbler and Garden Green inks onto the Whisper White CS for the inside of the card base
- NOTE: I colored the flourish stamp using Stampin’ Write Markers
Die cut using the Detailed Deer Thinlits:
Die cut using the Lakeside Framelits:
Die cut using the Layering Circles Framelits:
- a scrap of vellum CS into a circle
- a scrap of Cherry Cobbler CS into the same size circle, then the center cut out using a smaller die, to create a frame
Assembled the card:
- burnished the fold in the card base with a Bone Folder
- Garden Green CS layer glued onto the front of the card base
- larger DSP layer glued onto the Garden Green CS layer
- Cherry Cobbler CS frame glued onto the vellum circle
- vellum circle glued onto the larger DSP layer (put glue only where it would be hidden under the Cherry Cobbler frame)
- smaller DSP layer glued onto the larger DSP layer, covering the bottom part of the circles
- deer glued onto the vellum
- sentiment adhered onto the smaller DSP layer using Stampin’ Dimensionals
- 2 Red Rhinestones applied to the sentiment
- Whisper White CS glued onto the inside of the card base
Here are today’s colors:
You can click on each one to see all the products that come in that color!
Here’s what I used:
Click on these images for more details and to purchase.
Here’s the Year-End Closeout!
The Year-End Closeout has officially begun! During this promotion, you will be able to save on a selection of retiring and surplus items—while supplies last. Definitely place your orders sooner rather than later, because supplies are limited and the Year-End Closeout ends on January 2. After that, some of your favorite retiring items may be gone for good!
CLICK HERE to see all the Year-End Closeout items. Here’s how to get your copy of the new catalogs:
Just click on this button and I’ll send you the new catalogs, along with a list of the bundles, the Designer Series Paper coordinating colors, and a handmade card!
Here’s how to shop 2019 Occasions/Sale-a-bration items now!
- Become a Candy Heart!
- Join my team and you can order the new products right now, instead of having to wait another month!
- No selling required! I welcome Hobby Demos! (Hobby Demos join to get the discount for themselves.)
- CLICK HERE for the details!
Here’s more stuff to check out:
Thanks for stopping by today, and Sweet Stamping!
Dec 14, 2018 | Cards, Christmas, Gallery, Holiday |
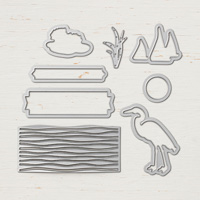
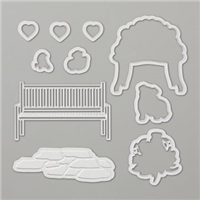
Today I’m sharing a card I made using the Homemade Kindness stamp set, which has cozy, sweet images from an old fashioned kitchen. I stamped the images in black Stazon ink onto watercolor paper, then used an Aqua Painter to watercolor the images. I used the embossing die from the Pretty Park Framelits Dies to emboss – or actually deboss – the stones on the kitchen floor, and I cut the sentiment using the Lakeside Framelits Dies.
Here’s what I made:


Here’s what I did:
Cut and scored with my Stampin’ Trimmer:
- Pool Party card stock (CS) cut to 4-1/4″ x 11″, then scored in half at 5-1/2″
- Flirty Flamingo CS cut to 3-7/8″ x 5-1/8″
- watercolor paper cut to 3-3/4″ x 5″
- Whisper White CS cut to 4″ x 5-1/4″ for the inside of the card base
Stamped with the Handmade Kindness stamp set:
- stove and bricks in black Stazon ink onto the watercolor paper
- sentiment in black Stazon ink onto a scrap of watercolor paper
Die cut using the Lakeside Framelits:
Embossed using the Pretty Park Framelits Dies:
- stones onto the watercolor paper layer, under the stove
- yes, there is an embossing die in this set of framelits
Colored using an Aqua Painter:
- stove in Pool Party, Flirty Flamingo, and Basic Gray inks
- sentiment in Flirty Flamingo ink
- oven window with a Basic Black watercolor pencil, then blended slightly using the Aqua Painter
Colored using a Stampin’ Write Marker:
- edges of the die cut sentiment in Flirty Flamingo
Assembled the card:
- burnished the fold in the card base with a Bone Folder
- Flirty Flamingo CS layer glued onto the front of the card base
- watercolor paper layer glued onto the Flirty Flamingo CS layer
- sentiment adhered to the watercolor paper layer using Stampin’ Dimensionals
- Whisper White CS glued onto the inside of the card base
Here are today’s colors:
You can click on each one to see all the products that come in that color!
Here’s what I used:
Click on these images for more details and to purchase.
Here’s the Year-End Closeout!
The Year-End Closeout has officially begun! During this promotion, you will be able to save on a selection of retiring and surplus items—while supplies last. Definitely place your orders sooner rather than later, because supplies are limited and the Year-End Closeout ends on January 2. After that, some of your favorite retiring items may be gone for good!
CLICK HERE to see all the Year-End Closeout items. Here’s how to shop 2019 Occasions/Sale-a-bration items now!
- Become a Candy Heart!
- Join my team and you can order the new products right now, instead of having to wait another month!
- No selling required! I welcome Hobby Demos! (Hobby Demos join to get the discount for themselves.)
- CLICK HERE for the details!
Here’s more stuff to check out:
Thanks for stopping by today, and Sweet Stamping!
Dec 6, 2018 | Cards, Christmas, Gallery, Holiday |
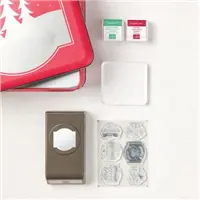
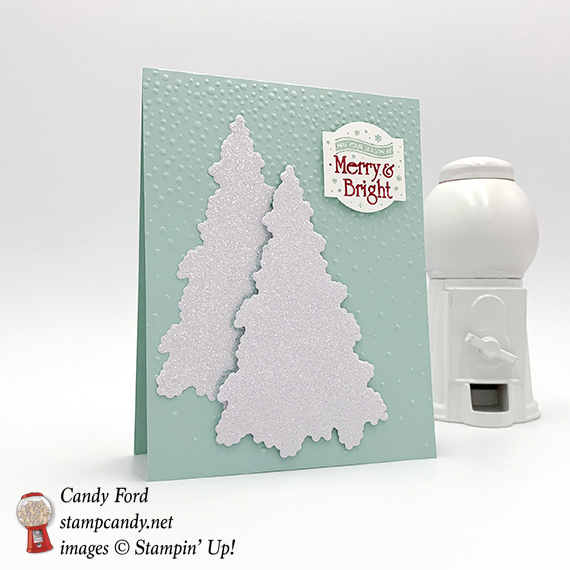
Today’s card combines The Christmas Traditions Punch Box with the In The Woods Framelits Dies and the Softly Falling embossing folder to create a soft and sweet holiday card. The colors are Pool Party and Whisper White, with just a little pop of Real Red on the sentiment, which reads, “May Your Season Be Merry & Bright.”
Here’s what I made:
Here’s what I did:
Cut and scored with my Stampin’ Trimmer:
- Pool Party card stock (CS) cut to 4-1/4″ x 11″, then scored in half at 5-1/2″
- Optional: Whisper White CS cut to 4″ x 5-1/4″ for the inside of the card
Stamped with the Christmas Traditions stamp set:
- sentiment in Pool Party and Real Red inks onto a scrap of Whisper White CS
- NOTE: I colored the different parts of the stamp using Stampin’ Write Markers.
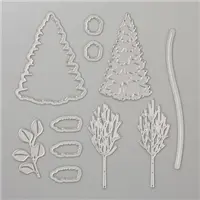
Die cut using the In the Woods Framelit Dies:
- 2 trees from a scrap of Sparkle Glimmer Paper
Dry Embossed with the Softly Falling TIEF:
Punched using the Christmas Traditions Punch:
Assembled the card:
- burnished the fold in the card base with a Bone Folder
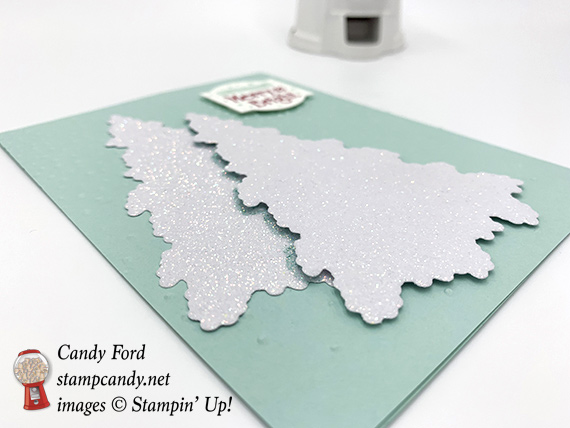
- one tree glued onto the front of the card base
- second tree adhered using Stampin’ Dimensionals
- shadow drawn onto the bottom tree, around the edge of the top tree, using a Pool Party Stampin’ Write Marker
- sentiment adhered using Stampin’ Dimensionals
- optional: Whisper White CS glued onto the inside of the card base
Here are today’s colors:
You can click on each one to see all the products that come in that color!
Here’s what I used:
Click on these images for more details and to purchase.
Correction: I later realized that I cut the trees with the Christmas Staircase Thinlits Dies instead of the In the Woods Framelits Dies. They both have a tree and I just forgot which one I used by the time I wrote this blog post. Either one would work great on this card. You can get the set I actually used here: Christmas Staircase Thinlits Dies (144679) 20 dies for $39. Here’s the Year-End Closeout!
The Year-End Closeout has officially begun! During this promotion, you will be able to save on a selection of retiring and surplus items—while supplies last. Definitely place your orders sooner rather than later, because supplies are limited and the Year-End Closeout ends on January 2. After that, some of your favorite retiring items may be gone for good!
CLICK HERE to see all the Year-End Closeout items. Here’s how to shop 2019 Occasions/Sale-a-bration items now!
- Become a Candy Heart!
- Join my team and you can order the new products right now, instead of having to wait another month!
- No selling required! I welcome Hobby Demos! (Hobby Demos join to get the discount for themselves.)
- CLICK HERE for the details!
Here’s more stuff to check out:
Thanks for stopping by today, and Sweet Stamping!