Oct 1, 2018 | Cards, Christmas, Gallery, Holiday |
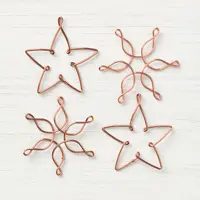
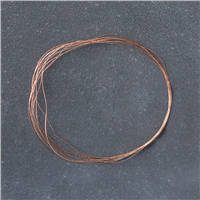
Today I’m sharing a window card I made with the All is Bright Designer Series Paper, Merry Christmas to All bundle, Layering Circles Framelits Dies, and Snowflakes & Stars Wire Elements. The key to this card is to cut through both layers of paper at the same time before you adhere them together. That way you can hang the snowflake with copper thread and hide where the thread is adhered to the card.
Here’s what I made:


Here’s what I did:
Cut and scored with my Stampin’ Trimmer:
- Crumb Cake card stock (CS) cut to 4-1/4″ x 11″, then scored in half at 5-1/2″
- All Is Bright Designer Series Paper (DSP) cut to 4″ x 5-1/4″
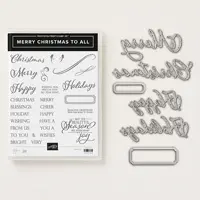
Stamped with the Merry Christmas to All stamp set:
- inside sentiment in Soft Suede ink onto the inside of the card base
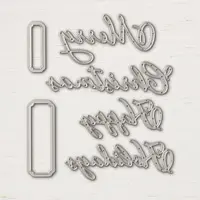
Die cut using the Merry Christmas Thinlits:
- outside sentiment from a scrap of Copper Foil Sheet
Die cut using the Layering Circles Framelits:
- circle from the DSP layer and the front of the card base
- NOTE: I laid the card base on the Big Shot, positioned the DSP layer on the front, then cut through both layers. DO NOT adhere the DSP layer before cutting. The Magnetic Platform helps hold the die in place which keeps the paper in place.
Assembled the card:
- burnished the fold in the card base with a Bone Folder
- strung a piece of Copper Metallic Thread through a wire snowflake, positioned the snowflake so it would hang in the die cut hole, then adhered the thread to the front of the card base using Tear & Tape
- DSP layer glued onto the front of the card base, lining up the die cut holes
- die cut sentiment glued onto the DSP layer
- If you’d like, you can glue a piece of Whisper White CS onto the inside of the card base. I decided to write directly onto the Crumb Cake card base.
Here are today’s colors:
You can click on each one to see all the products that come in that color!
Here’s what I used:
Click on these images for more details and to purchase.
Here’s some cool stuff you should check out:
Thanks for stopping by today, and Sweet Stamping!
Sep 30, 2018 | Cards, Christmas, Gallery, Holiday |
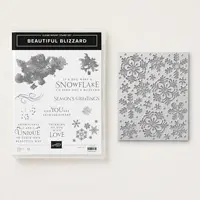
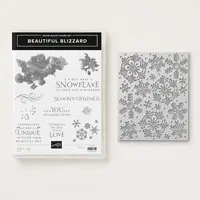
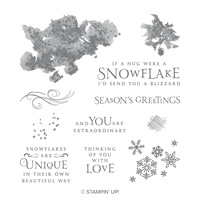
Today’s card features the Beautiful Blizzard bundle (Beautiful Blizzard stamp set and Blizzard Thinlits Die) and the Swirls & Curls Textured Impressions Embossing Folder (TIEF.) I used Sparkle Glimmer Paper and Shimmery White card stock (CS) to add to the glittery wonder of winter snow. The sentiment is perfect for anyone you love, or like enough to send a hug.
Here’s what I made:
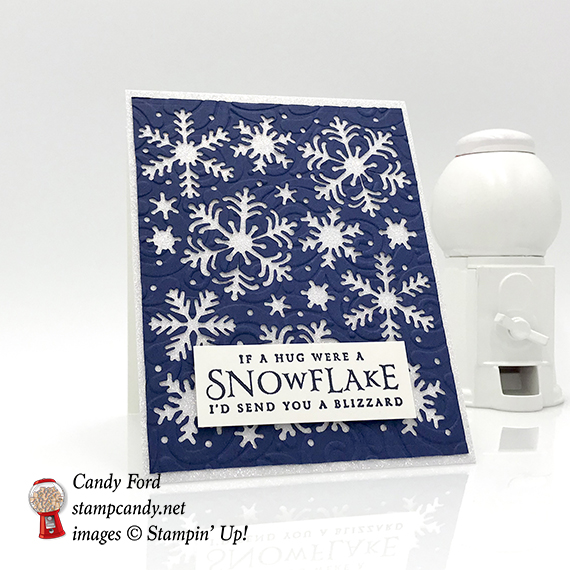

I wish you could see how sparkly this card is in person. The photos don’t do it justice. Well, you’ll see for yourself when you make it!
Here’s what I did:
Cut and scored with my Stampin’ Trimmer:
- Whisper White Thick card stock (CS) cut to 4-1/4″ x 11″, then scored in half at 5-1/2″
- Sparkle Glimmer Paper layer cut to 4-1/4″ x 5-1/2″
- Night of Navy cardstock (CS) layer cut to 4-1/8″ x 5-3/8″
- Shimmery White CS cut to 2-3/4″ x 1″
Stamped with the Beautiful Blizzard stamp set:
- sentiment in Night of Navy ink onto the Shimmery White CS
Die cut using the Blizzards Thinlits:
Embossed using the Swirls & Curls Embossing Folder:
- die cut Night of Navy CS layer
Assembled the card:
- burnished the fold in the card base with a Bone Folder
- glimmer paper layer glued onto the front of the card base
- Night of Navy CS layer glued onto the glimmer paper layer
- sentiment adhered to the card front using Stampin’ Dimensionals
Here are today’s colors:
You can click on each one to see all the products that come in that color!
Here’s what I used:
Click on these images for more details and to purchase.
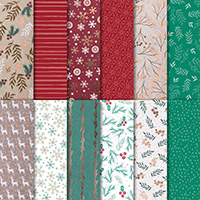
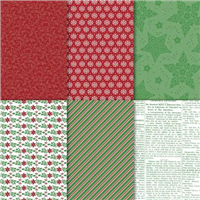
Today is the last day of the Dashing Along special from Stampin’ Up!!!

- Receive one pack of Dashing Along Designer Series Paper with any $250 order in September!
- Perfect for layering, this beautiful, traditional Christmas paper includes a mix of old favorites and new patterns to create a festive, eclectic feel.
- Item number 149903
- 12 sheets: 3 double-sided sheets (6 total designs); 4 sheets of each design – perfect for making lots of Christmas cards!
- 12″ x 12″
- Promotion period: September 1–30
- Dashing Along Designer Series Paper is exclusive to this promotion and will not be available after September 30.
- In order to qualify, the event merchandise total must reach $250 (before shipping and handling).
- One package of Designer Series Paper may be redeemed per qualifying order, with no limit on how many packages of Designer Series Paper can be earned.
- Demonstrator, Customer, Workshop, and online orders qualify.
- Dashing Along Designer Series Paper may not be redeemed using Stampin’ Rewards. You will receive this FREE gift with a qualifying order in addition to any Stampin’ Rewards you may earn.
- Dashing Along Designer Series Paper may not be exchanged for other paper.
Dashing Along DSP © Stampin’ Up!
Here’s some more cool stuff you should check out:
Thanks for stopping by today, and Sweet Stamping!
Sep 29, 2018 | Cards, Christmas, Gallery, Holiday |
On yesterday’s card I all the colors in the Joyous Noel Designer Series Paper (DSP) except Merry Merlot. On today’s card I used all the colors except Soft Suede. Share some holiday happiness with this simple card that would be easy to make a lot of for all your family and friends this holiday season.
Here’s what I made:

I’m not good at doing the little swirl of thread behind an element on a card. I keep thinking that I’ll get better, but so far that hasn’t happened. So I hope you can imagine this card either without the mess of thread, or with a nice looking swirt of thread.

Here’s what I did:
Cut and scored with my Stampin’ Trimmer:
- Merry Merlot card stock (CS) cut to 5-1/2″ x 8-1/2″, then scored in half at 4-1/4″
- Joyous Noel Designer Series Paper (DSP) cut to 5-1/2″ x 4″ (white background)
- Merry Merlot CS layer cut to 5-1/2″ x 2-1/4″
- DSP cut to 5-1/2″ x 2″ (deer)
- Whisper White CS cut to 5-1/4″ x 4″ for the inside of the card
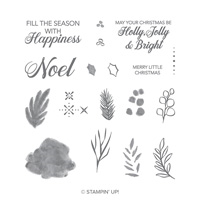
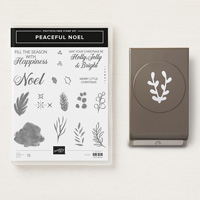
Stamped with the Peaceful Noel stamp set:
- sentiment in Tranquil Tide ink onto a scrap of Whisper White CS
Die cut using the Layering Ovals Framelits:
- sentiment
- a scrap of Merry Merlot CS
Assembled the holiday happiness card:
- burnished the fold in the card base with a Bone Folder
- larger DSP layer glued onto the front of the card base
- Merry Merlot CS layer glued onto the larger DSP layer
- smaller DSP layer glued onto the Merry Merlot CS layer
- sentiment oval glued onto the Merry Merlot CS oval
- Copper Metallic Thread adhered to the back of the Merry Merlot CS oval using Tear & Tape
- ovals adhered onto the card front using Tear & Tape
- Whisper White CS glued onto the inside of the card base
Here are today’s colors:
You can click on each one to see all the products that come in that color!
Here’s what I used:
Click on these images for more details and to purchase.
Here’s the Dashing Along September special from Stampin’ Up:
Only 1 day left!!!
- Receive one pack of Dashing Along Designer Series Paper with any $250 order in September!
- Perfect for layering, this beautiful, traditional Christmas paper includes a mix of old favorites and new patterns to create a festive, eclectic feel.
- Item number 149903
- 12 sheets: 3 double-sided sheets (6 total designs); 4 sheets of each design – perfect for making lots of Christmas cards!
- 12″ x 12″
- Promotion period: September 1–30
- Dashing Along Designer Series Paper is exclusive to this promotion and will not be available after September 30.
- In order to qualify, the event merchandise total must reach $250 (before shipping and handling).
- One package of Designer Series Paper may be redeemed per qualifying order, with no limit on how many packages of Designer Series Paper can be earned.
- Demonstrator, Customer, Workshop, and online orders qualify.
- Dashing Along Designer Series Paper may not be redeemed using Stampin’ Rewards. You will receive this FREE gift with a qualifying order in addition to any Stampin’ Rewards you may earn.
- Dashing Along Designer Series Paper may not be exchanged for other paper.
Dashing Along DSP © Stampin’ Up!
Here’s some more cool stuff you should check out:
Thanks for stopping by today, and Sweet Stamping!
Sep 27, 2018 | Cards, Christmas, Gallery, Holiday, Promotions |
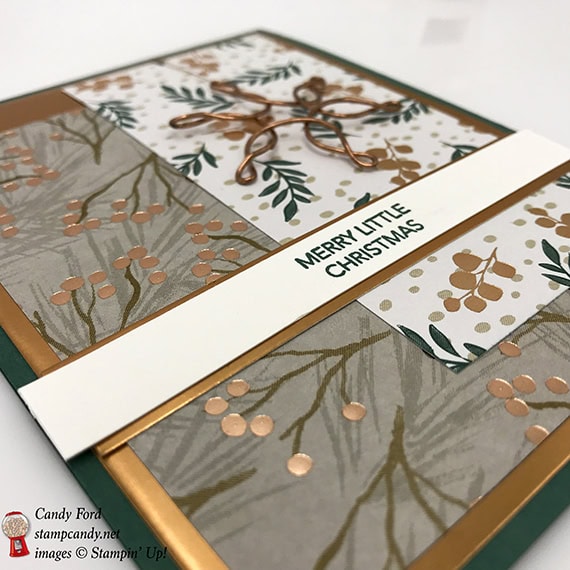
The Joyous Noel Designer Series Paper (DSP) has 7 colors in the pack. Today’s card used all but one of them. (Don’t worry, you’ll see Merry Merlot on tomorrow’s card.) It’s a simple card, using straight cut pieces of paper (no die cutting,) one stamp, and a copper wire element.
Here’s what I made:
Here’s what I did:
Cut and scored with my Stampin’ Trimmer:
- Tranquil Tide card stock (CS) cut to 4-1/4″ x 11″, then scored in half at 5-1/2″
- Copper Foil Sheet cut to 4″ x 5-1/4″
- Joyous Noel Designer Series Paper (DSP) cut to 2-1/2″ x 4-1/2″ (sand background)
- Joyous Noel Designer Series Paper (DSP) cut to 2-1/4″ x 4-1/2″ (white background)
- Copper Foil Sheet cut to 4″ x 5/8″
- Whisper White CS cut to 4-1/4″ x 1/2″
- Whisper White CS cut to 4″ x 5-1/4″ for the inside of the card
Stamped with the Peaceful Noel stamp set:
- sentiment in Tranquil Tide ink onto the Whisper White CS strip
Assembled the card:
- burnished the fold in the card base with a Bone Folder
- DSP pieces adhered onto the Copper layer (overlapping as shown) using Snail or Tear & Tape
- Copper strip adhered over the DSP pieces
- snowflake wire element strung onto a piece of Copper Metallic Thread
- thread adhered to the back of the copper layer using Tear & Tape
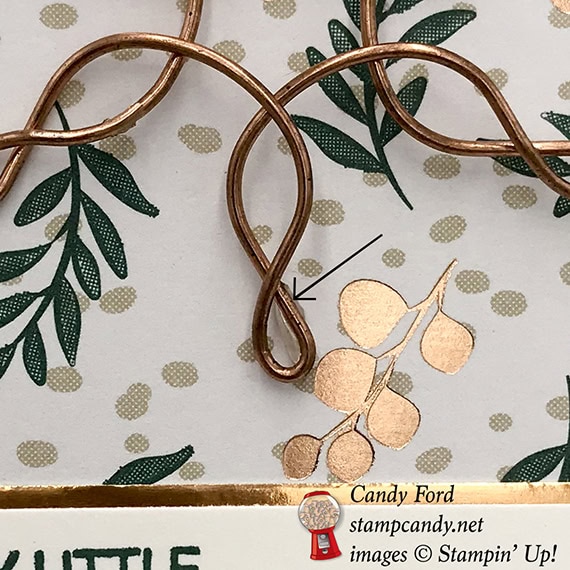
- bottom point of the snowflake adhered to the DSP using a rolled up Mini Glue Dot (just rolled it between my thumb and forefinger)
- You can barely see the rolled up Mini Glue Dot:
- copper layer adhered onto the front of the card base using Tear & Tape
- sentiment strip adhered over copper strip using Tear & Tape
- Whisper White CS glued onto the inside of the card base
Here are today’s colors:
You can click on each one to see all the products that come in that color!
Here’s what I used:
Click on these images for more details and to purchase.
Here’s the Dashing Along September special from Stampin’ Up:
Only 3 days left!
- Receive one pack of Dashing Along Designer Series Paper with any $250 order in September!
- Perfect for layering, this beautiful, traditional Christmas paper includes a mix of old favorites and new patterns to create a festive, eclectic feel.
- Item number 149903
- 12 sheets: 3 double-sided sheets (6 total designs); 4 sheets of each design – perfect for making lots of Christmas cards!
- 12″ x 12″
- Promotion period: September 1–30
- Dashing Along Designer Series Paper is exclusive to this promotion and will not be available after September 30.
- In order to qualify, the event merchandise total must reach $250 (before shipping and handling).
- One package of Designer Series Paper may be redeemed per qualifying order, with no limit on how many packages of Designer Series Paper can be earned.
- Demonstrator, Customer, Workshop, and online orders qualify.
- Dashing Along Designer Series Paper may not be redeemed using Stampin’ Rewards. You will receive this FREE gift with a qualifying order in addition to any Stampin’ Rewards you may earn.
- Dashing Along Designer Series Paper may not be exchanged for other paper.
Dashing Along DSP © Stampin’ Up!
Here’s some more cool stuff you should check out:
Thanks for stopping by today, and Sweet Stamping!
Sep 25, 2018 | Cards, Christmas, Gallery, Holiday |
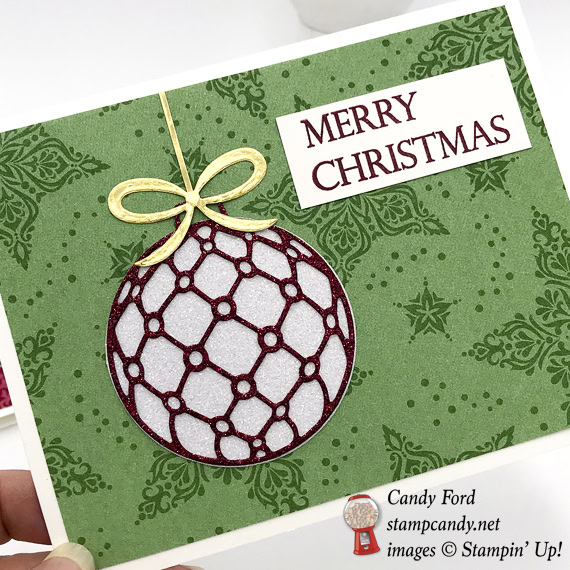
In yesterday’s post I said I saved all the little pieces when I die cut the two baubles. In today’s post I’ll show you how I used those pieces. I used the same Detailed Baubles Thinlits Dies along with the Pretty Pines Thinlits Dies, Circle Punches, Feathers & Frost stamp set, Black Foil sheets, and Joyous Noel Designer Series Paper.
Here’s what I made:


Here’s what I did:
Cut and scored with my Stampin’ Trimmer:
- Tranquil Tide card stock (CS) cut to 5-1/2″ x 8-1/2″, then scored in half at 4-1/4″
- Basic Black CS cut to 5-3/8″ x 4-1/8″
- Joyous Noel Designer Series Paper (DSP) cut to 5-1/4″ x 4″
- Basic Black CS cut to 2″ x 7/8″
- DSP cut to 2″ x 3/4″
- Whisper White CS cut to 5-1/4″ x 4″ for the inside of the card base
Stamped with the Feathers & Frost stamp set:
- sentiment in black ink onto the 2″ DSP strip
Cut using Circle Punches:
- one end of the DSP strip using the 1″ punch
- one end of the Basic Black CS strip using the 1-1/4″ punch
- NOTE: I held the punch upside down, then inserted the paper down into the hole and out the side.
Die cut using the Pretty Pines Thinlit Dies:
- pine sprigs (3 each of the longest and middle size in the die set) from a scrap of Tranquil Tide CS
Die cut using the Detailed Baubles Thinlit Dies:
- 2 ornaments from a scrap of a Black Foil Sheet
- 1 ornament from a scrap of Tranquil Tide glimmer paper*
- 1 ornament from a scrap of Merry Merlot glimmer paper *
- * I used the 2 glimmer paper ornament outlines on yesterday’s card, which you can see here, and saved all the little pieces for today’s card.
- NOTE: I find it easier to die cut glimmer paper with the glitter side down. If you do that, be sure to cut the black foil ornaments face down as well, so all the pieces will line up correctly.
Assembled the Beautiful Baubles card:
- burnished the fold in the card base with a Bone Folder
- two black foil ornament outlines glued onto the DSP layer
- black foil ornaments filled using the glimmer paper die cut pieces, gluing each piece in place
- sentiment glued onto the Basic Black CS strip, lining up the punched ends, then glued onto the DSP layer
- die cut pine sprigs glued onto the DSP layer over the tops of the ornaments
- DSP layer glued onto the Basic Black CS layer
- Basic Black CS layer glued onto the front of the card base
- Whisper White CS glued onto the inside of the card base
Here are today’s colors:
You can click on each one to see all the products that come in that color!
Here’s what I used:
Click on these images for more details and to purchase.
Here’s the new Dashing Along September special from Stampin’ Up:
Only 5 days left!
- Receive one pack of Dashing Along Designer Series Paper with any $250 order in September!
- Perfect for layering, this beautiful, traditional Christmas paper includes a mix of old favorites and new patterns to create a festive, eclectic feel.
- Item number 149903
- 12 sheets: 3 double-sided sheets (6 total designs); 4 sheets of each design – perfect for making lots of Christmas cards!
- 12″ x 12″
- Promotion period: September 1–30
- Dashing Along Designer Series Paper is exclusive to this promotion and will not be available after September 30.
- In order to qualify, the event merchandise total must reach $250 (before shipping and handling).
- One package of Designer Series Paper may be redeemed per qualifying order, with no limit on how many packages of Designer Series Paper can be earned.
- Demonstrator, Customer, Workshop, and online orders qualify.
- Dashing Along Designer Series Paper may not be redeemed using Stampin’ Rewards. You will receive this FREE gift with a qualifying order in addition to any Stampin’ Rewards you may earn.
- Dashing Along Designer Series Paper may not be exchanged for other paper.
Dashing Along DSP © Stampin’ Up!
Here’s some more cool stuff you should check out:
Thanks for stopping by today, and Sweet Stamping!
Sep 24, 2018 | Cards, Christmas, Gallery, Holiday |
Today I’m sharing two Christmas cards with you. They are essentially the same, but in different colors. They both use the same Designer Series Paper pack, Glimmer Paper, stamp set, and dies. One is in Merry Merlot and Garden Green, and the other is Cherry Cobbler and Tranquil Tide.
There are only 6 days left to get the beautiful Dashing Along Designer Series Paper. Scroll down to the bottom of this post to see all the details of the special.
I know I’ve talked about this before, but I think it’s worth mentioning again. The new Glimmer Paper is amazing! Not a single piece of glitter comes off! I keep waiting to see it happen, but it hasn’t. If you like the glittery look without the glittery mess, you need to get some of Stampin’ Up!’s glimmer paper. There are 4 colors in the annual catalog, and there’s a pack of 3 colors in the holiday catalog. Click here to see them all.
Here’s what I made:

The Merry Merlot parts look darker in these photos that they do in real life. 
Here’s what I did:
Cut and scored with my Stampin’ Trimmer:
- Whisper White Thick card stock (CS) cut to 5-1/2″ x 8-1/2″, then scored in half at 4-1/2″ (one for each card)
- Dashing Along Designer Series Paper (DSP) cut to 5-1/4″ x 4″ (one for each card)
- Whisper White CS cut to 2-1/4″ x 7/8″ (one for each card)
- Gold Foil Sheet cut to 1-16″ x 1-1/2″ (one for each card)
Stamped with the Merry Christmas To All stamp set:
- sentiment Tranquil Tide ink onto one of the 2-1/4″ x 7/8″ Whisper White CS pieces
- sentiment Merry Merlot ink onto the other 2-1/4″ x 7/8″ Whisper White CS piece
Die cut using the Detailed Baubles Thinlits:
- one ornament from Tranquil Tide Glimmer Paper
- one ornament from Merry Merlot Glimmer Paper
- NOTE: Keep all the die cut little pieces for tomorrow’s card!
Die cut using the Pretty Pines Thinlits:
- 1 bow from a scrap of Gold Foil Sheet for each card
NOTE: I had no trouble using the thinlits dies using the Magnetic Platform on the Big Shot. If you do, you should try the Precision Base Plate. But use the PB P only with Thinlits. They have more metal than Framelits. Framelits will warp when used with the PBP.
Cut using the 2-1/4″ Circle Punch:
- 1 circle from a scrap of Sparkle Glimmer Paper for each card
Assembled each card:
- burnished the fold in the card base with a Bone Folder
- DSP layer glued onto the front of the card base
- glimmer paper die cut ornament glued onto a 2-1/4″ Sparkle Glimmer Paper circle
- Sparkle Glimmer circle glued onto the DSP layer
- 1-16″ Gold Foil strip glued onto the DSP layer, as a hanger for the ornament
- Gold Foil bow glued over the top of the ornament
- sentiment glued onto the DSP layer
Here are today’s colors:
You can click on each one to see all the products that come in that color!
Here’s what I used:
Click on these images for more details and to purchase.
Here’s the Dashing Along Designer Series Paper special:
Only 6 days left!
- Receive one pack of Dashing Along Designer Series Paper with any $250 order in September!
- Perfect for layering, this beautiful, traditional Christmas paper includes a mix of old favorites and new patterns to create a festive, eclectic feel.
- Item number 149903
- 12 sheets: 3 double-sided sheets (6 total designs); 4 sheets of each design – perfect for making lots of Christmas cards!
- 12″ x 12″
- Promotion period: September 1–30
- Dashing Along Designer Series Paper is exclusive to this promotion and will not be available after September 30.
- In order to qualify, the event merchandise total must reach $250 (before shipping and handling).
- One package of Designer Series Paper may be redeemed per qualifying order, with no limit on how many packages of Designer Series Paper can be earned.
- Demonstrator, Customer, Workshop, and online orders qualify.
- Dashing Along Designer Series Paper may not be redeemed using Stampin’ Rewards. You will receive this FREE gift with a qualifying order in addition to any Stampin’ Rewards you may earn.
- Dashing Along Designer Series Paper may not be exchanged for other paper.
Dashing Along DSP © Stampin’ Up!
Here’s some more cool stuff you should check out:
Thanks for stopping by today, and Sweet Stamping!