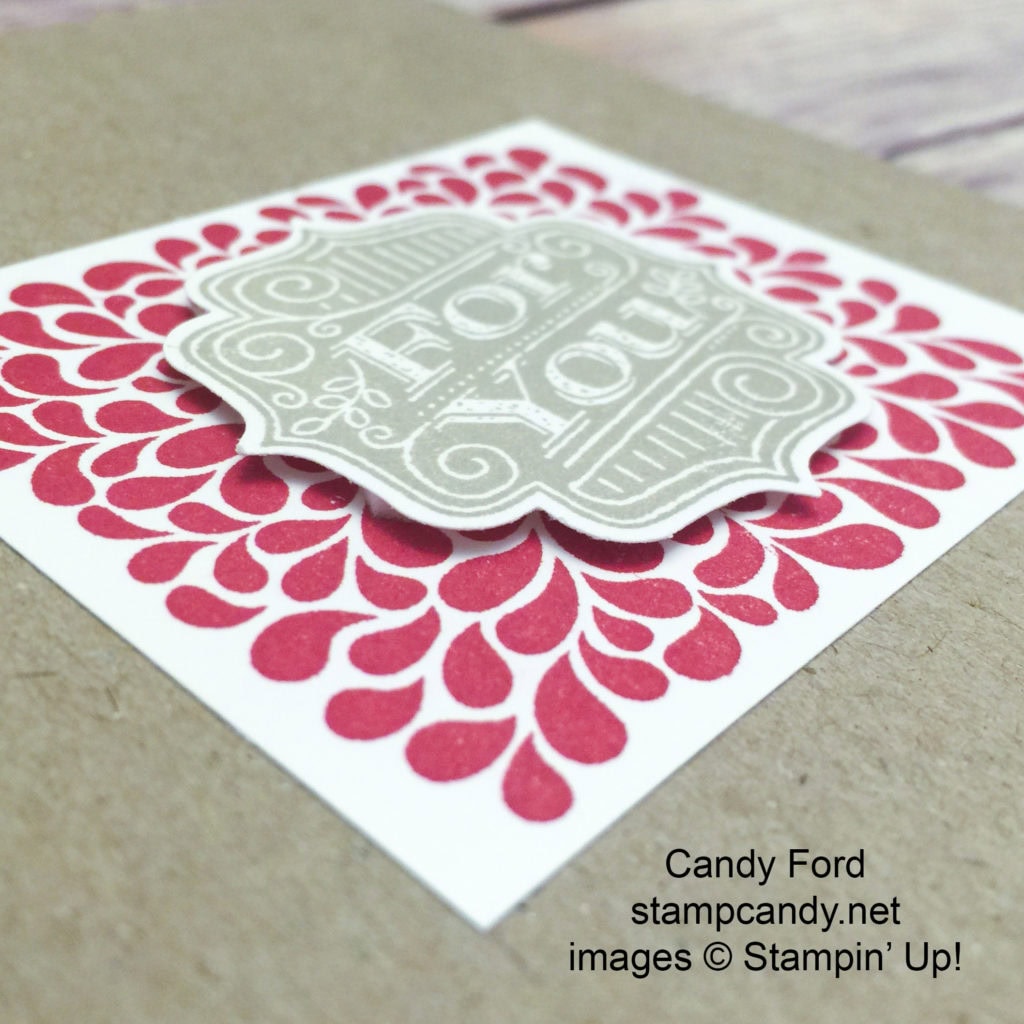
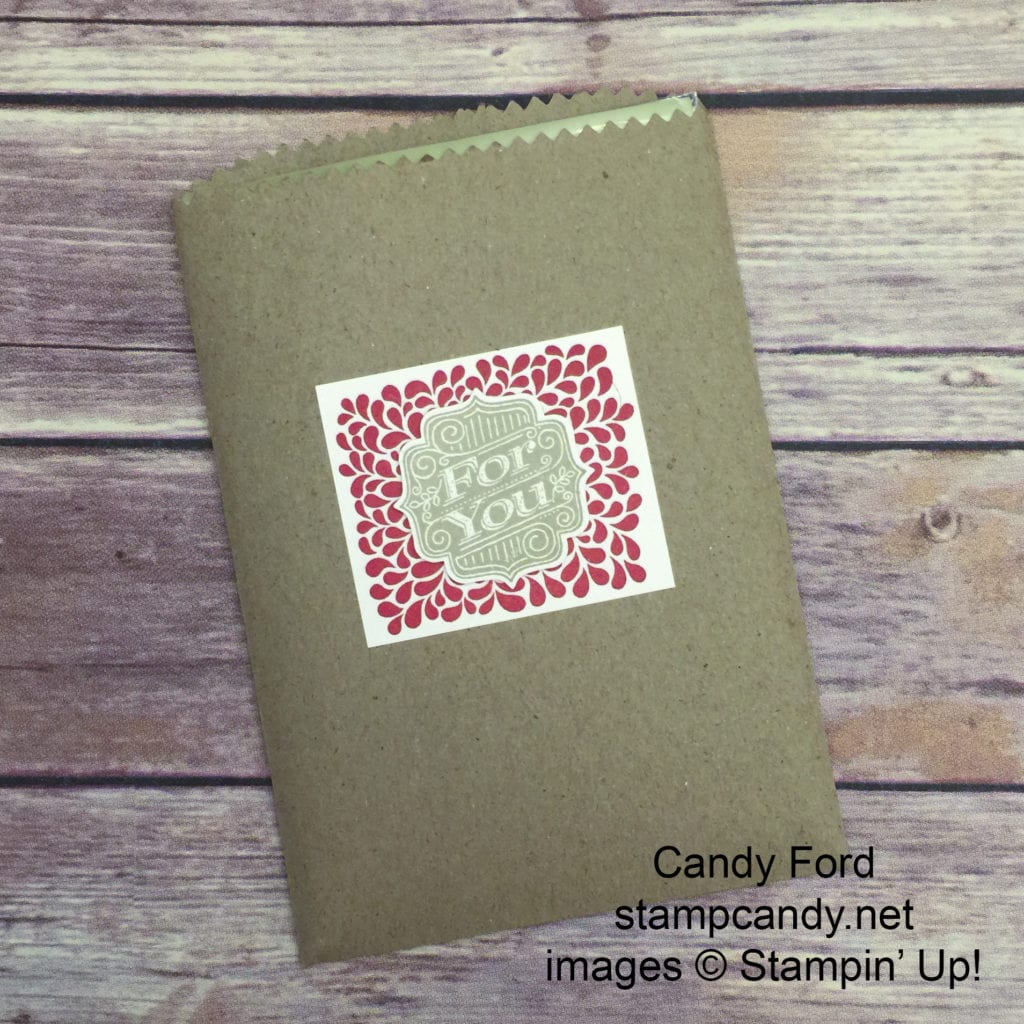
Jul 17, 2016 | Boxes, Club, Gallery, Gift Wrap, New Products |
Today’s project is another from July’s Stamp Club. (You can see the first two here and here.) This one is so quick and easy, you won’t believe it!
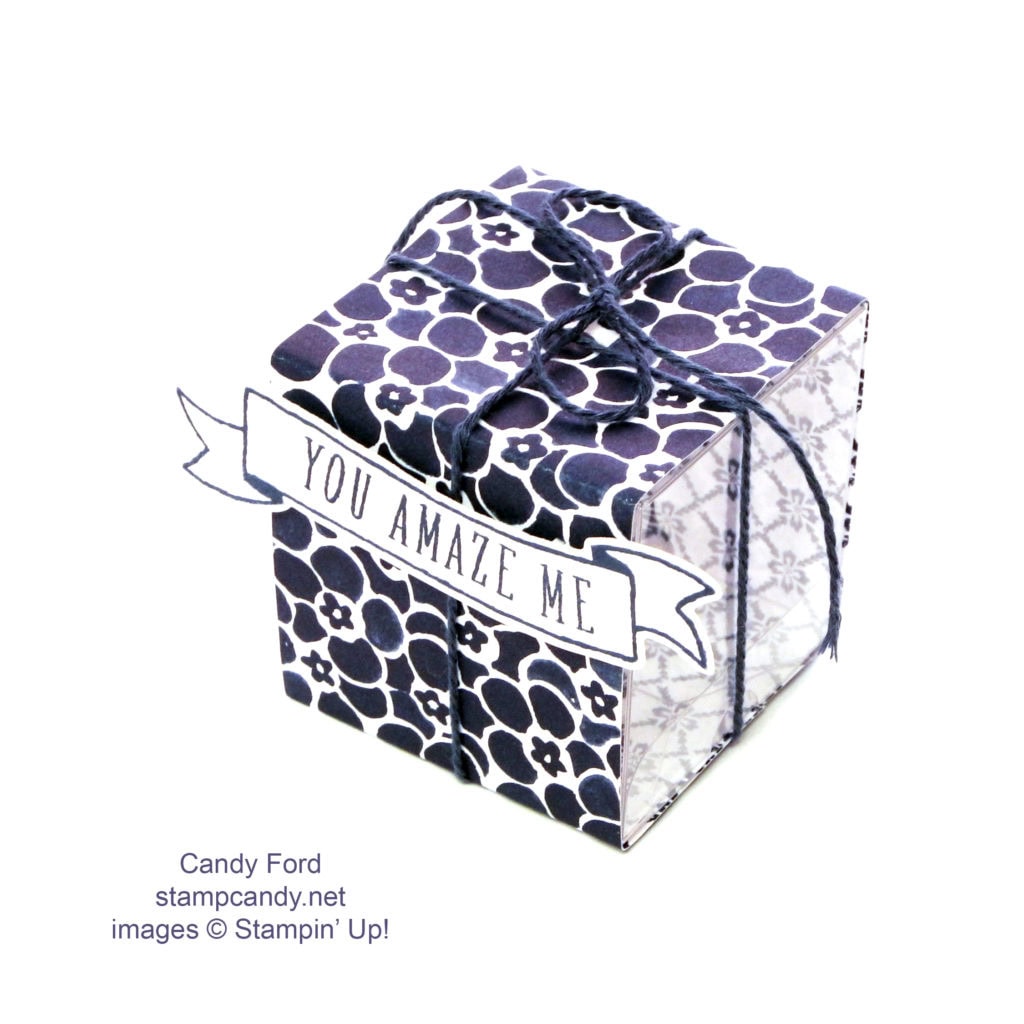
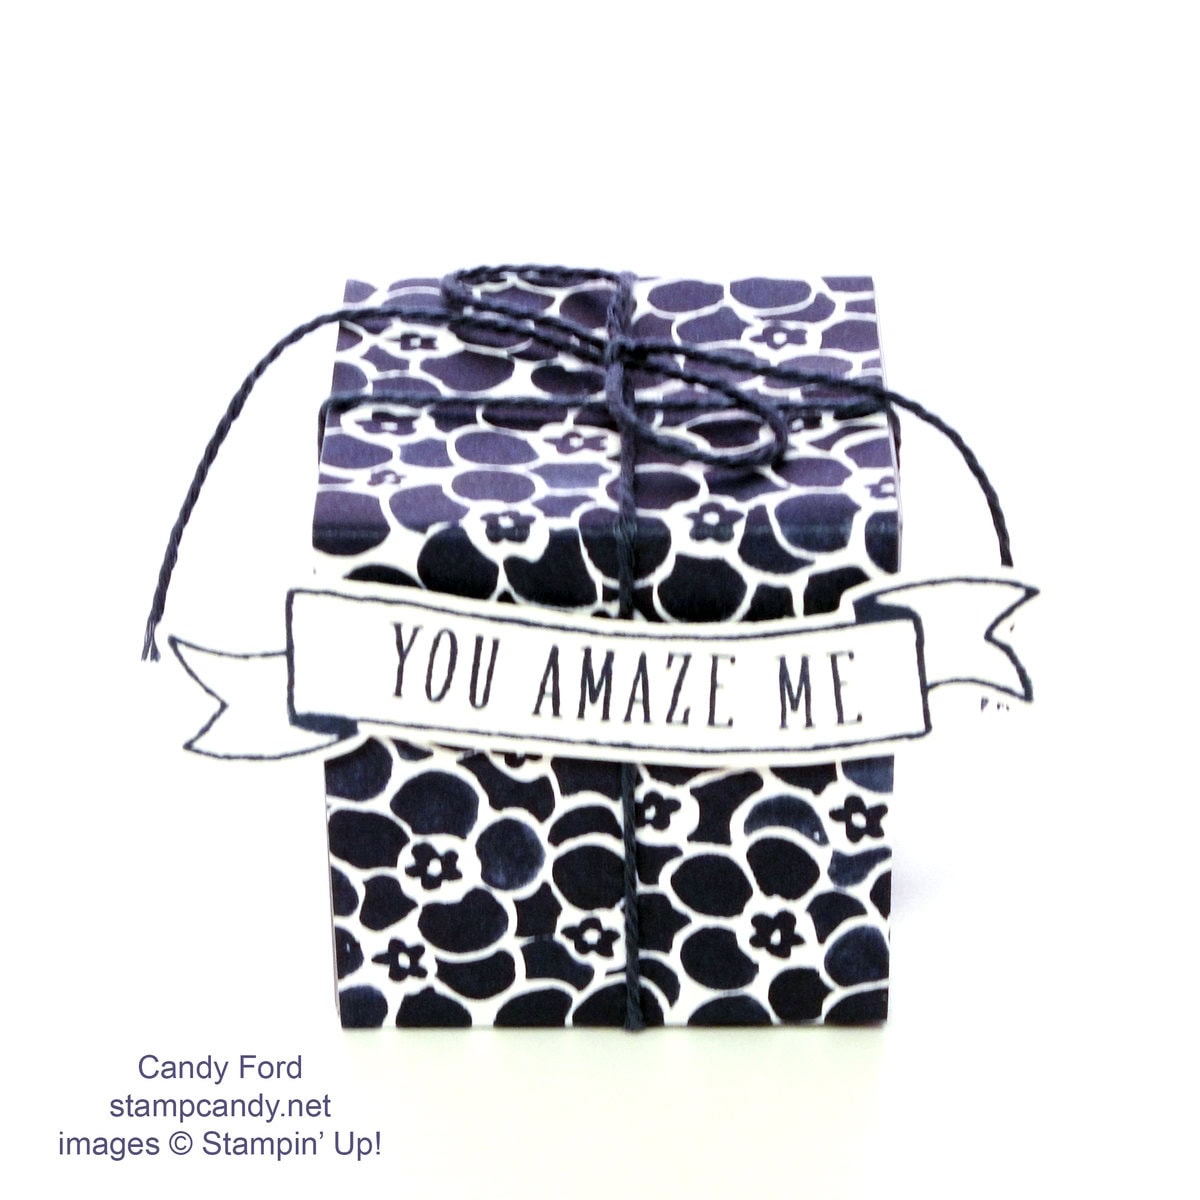
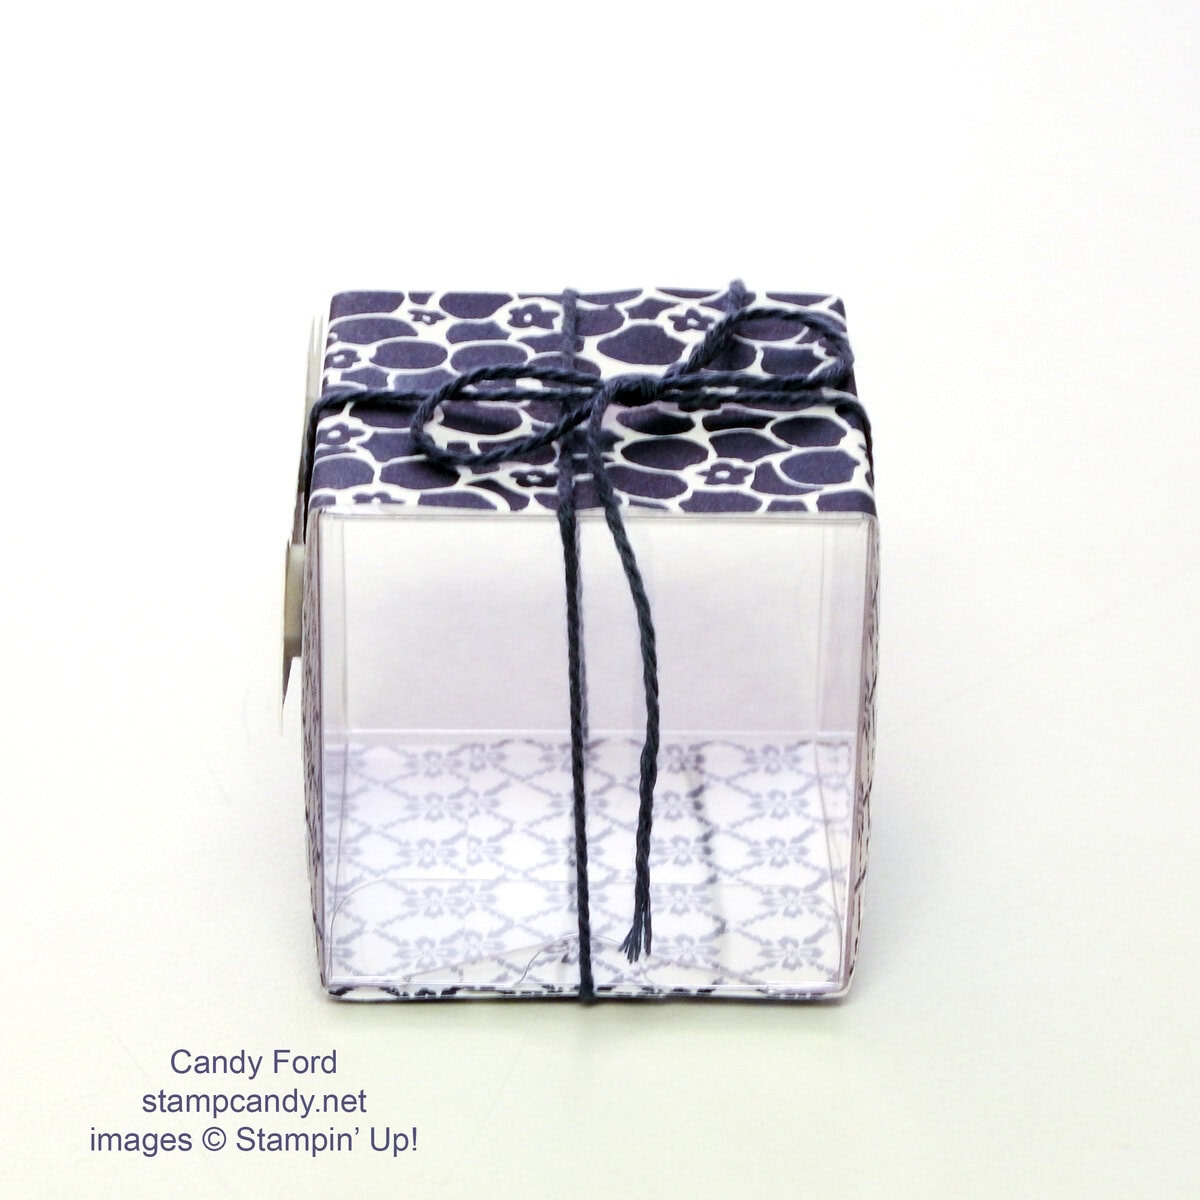
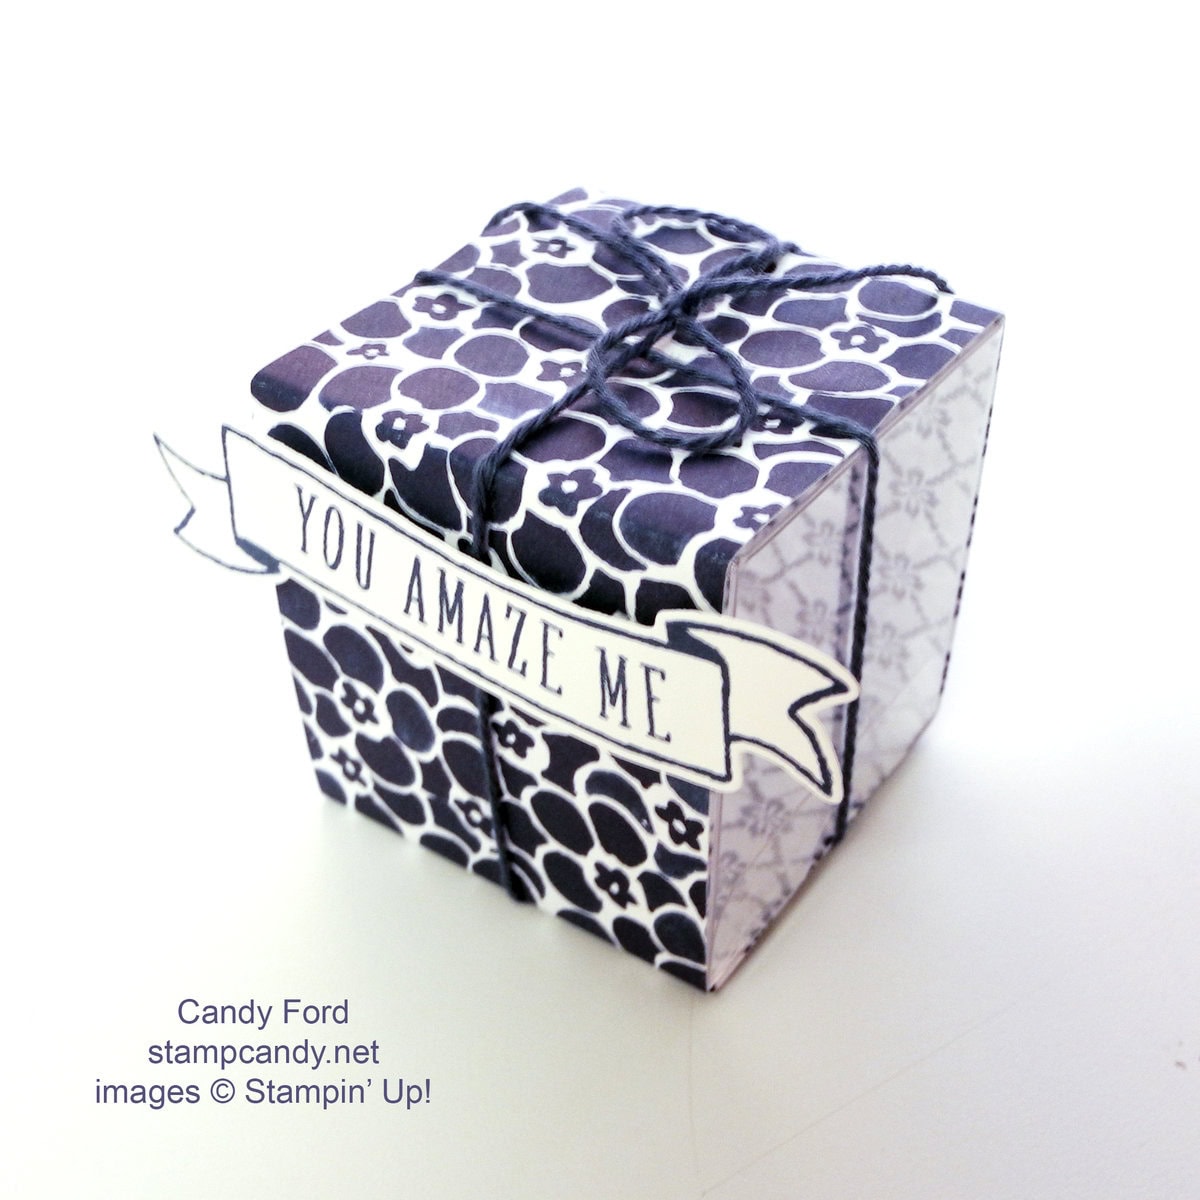
Assemble a Clear Tiny Treat Box.
Cut a piece of Floral Boutique Designer Series Paper to 2″ x 9″. Wrap it around the box and glue the ends together. Do not glue it to the box because it needs to be able to slide on and off.
Tie a piece of Night of Navy Solid Baker’s Twine around the box and tie in a bow on top.
Stamp the banner and sentiment from the Banners for You stamp set in Night of Navy ink onto Whisper White card stock, then cut out with the coordinating die from the Bunch of Banners Framelits dies. Attach it to the DSP with Stampin’ Dimensionsals. Do not put one in the center of the banner, so the twine can slide through easily.
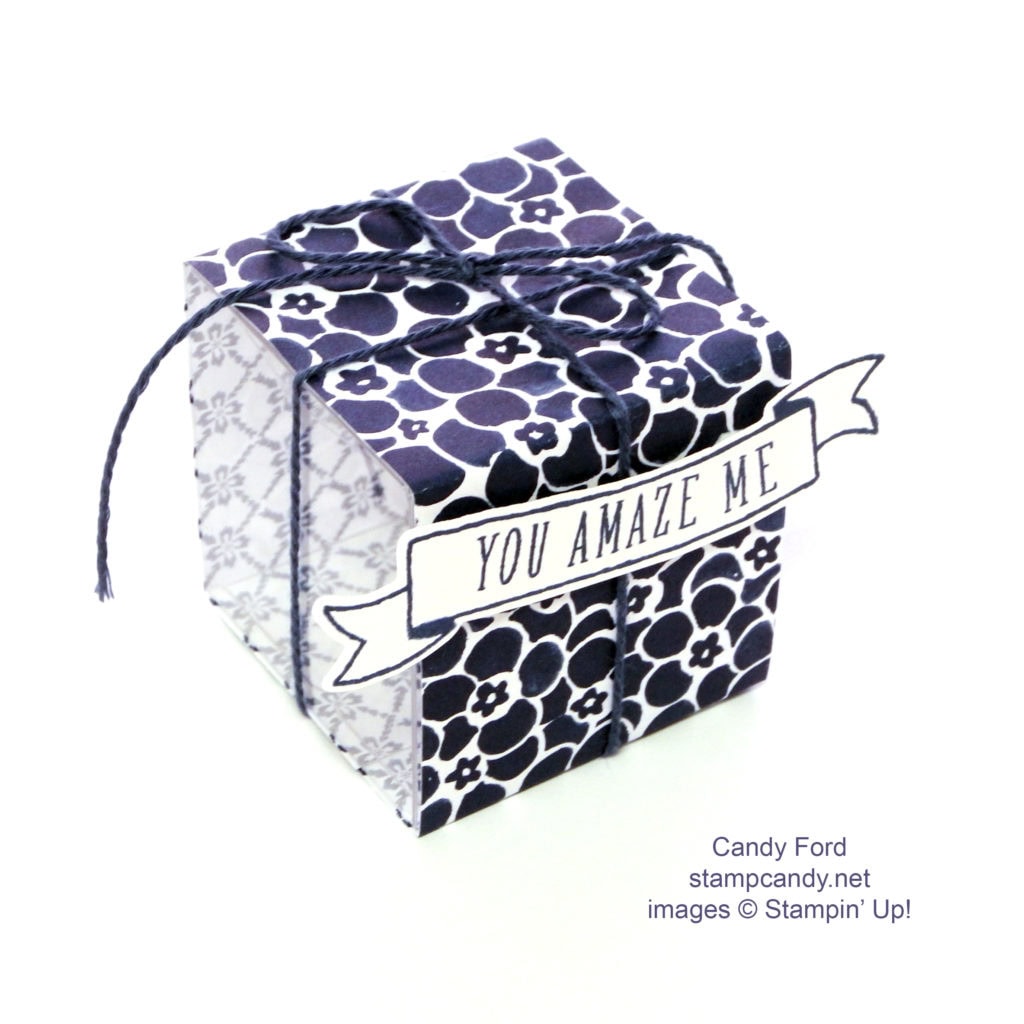
You can fill this with all sorts of little goodies. You can use your Fringe Scissors to cut strips of paper then crinkle it with your hands for filling. By the way, a Pandora Charm box fits perfectly inside this little box. Just sayin’.

Here’s what we used:
Thanks for stopping by today, and Sweet Stamping!

May 14, 2016 | Bags, Gift Wrap, Gifts |
Recently I whipped up this quick and simple gift wrap idea when I gave Bohemian Washi Tape as a gift. It’s simply a Mini Muslin Bag and a tag.
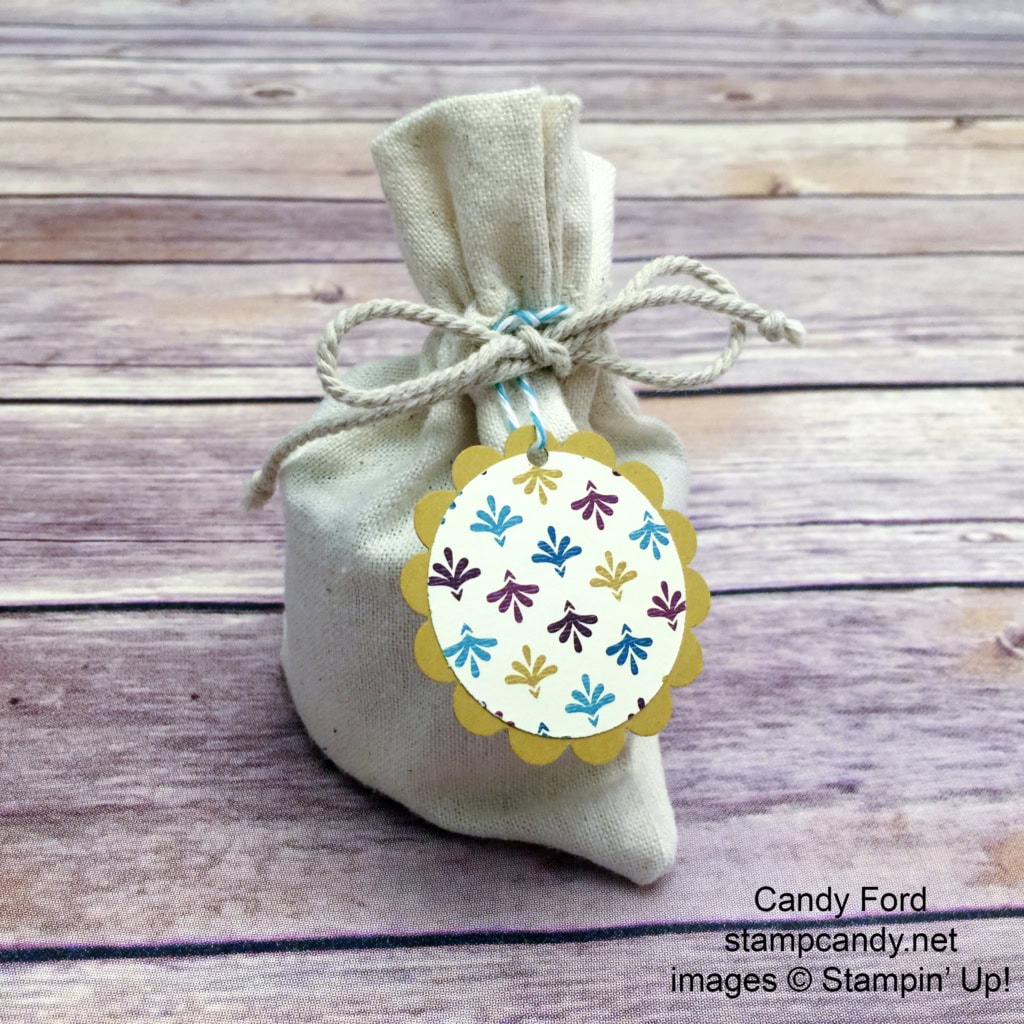
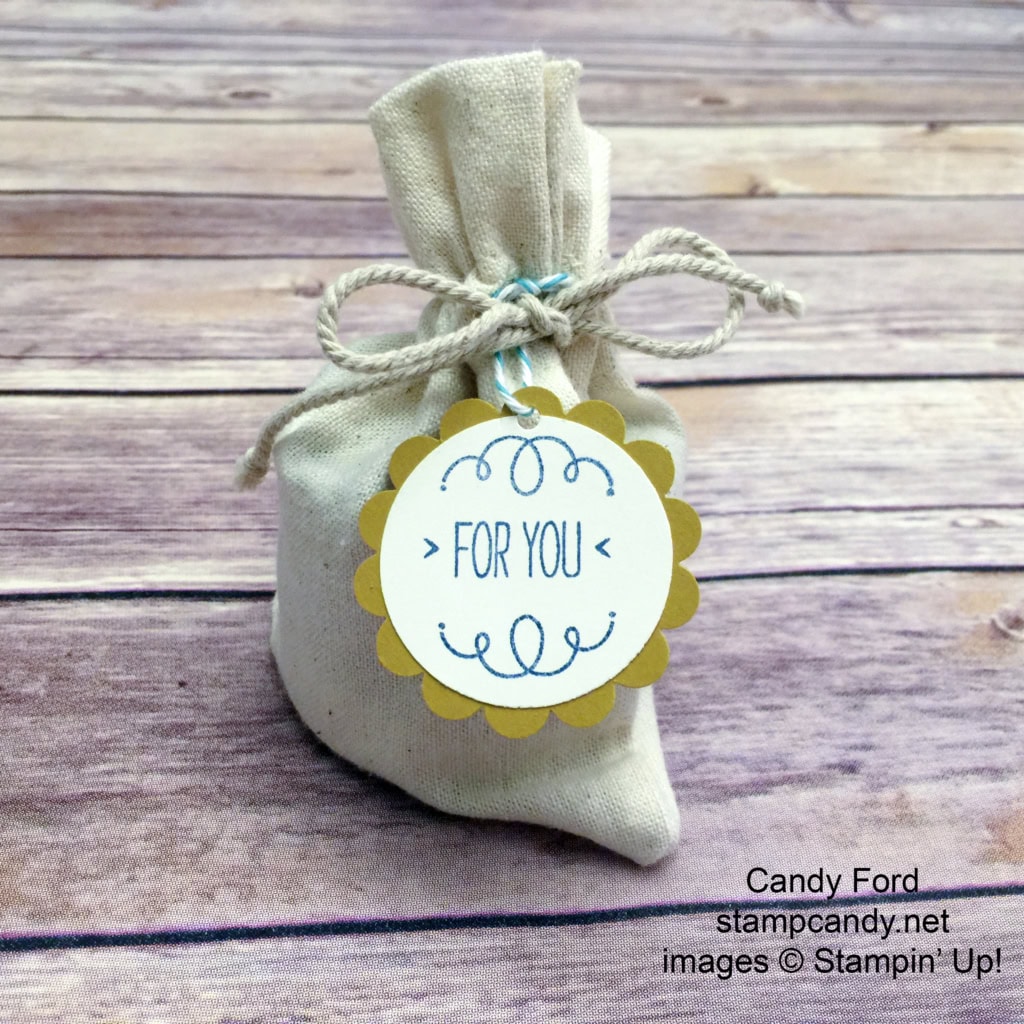
I stamped the sentiment from the You’re So Lovely stamp set on a piece of Very Vanilla card stock, then cut it with the 1-1/2″ Circle Punch. I cut a piece of Bohemian Designer Series Paper with the same punch.
I cut a piece of Delightful Dijon card stock with the 1-3/4″ Scalloped Circle Punch and glued the two smaller circles to either side. I punched a hole with the 1/8″ Circle Punch and tied it onto the bag with a piece of Bermuda Bay Baker’s Twine.
Here’s what I used:
 There are only 17 days left to shop from the 2015-2016 Annual Catalog’s Retiring List! Click here to see what is still available.
Thanks for stopping by today, and Sweet Stamping!

May 10, 2016 | Bags, Gift Wrap, Gifts |
Need a super quick and easy gift bag for a small gift? I have just the thing. I was giving an embossing folder to someone and needed a really quick gift wrap solution.
The folder fit great inside a Kraft Tag a Bag Gift Bag.
I stamped the design from the I Think You’re Great stamp set in Real Red onto Whisper White card stock, then cut around it with my Stampin’ Trimmer.
I stamped the sentiment from the Tag Talk stamp set in Crumb Cake onto Whisper White card stock and cut it with the Label Bracket Punch. I attached the sentiment to the red piece with Stampin’ Dimensionals, which I then glued to the bag.
Voila! Awesome gift wrap in just a few minutes! And it was still nice and flat (no bulky bow to get crushed) so I could sneak it in tucked inside my catalog.
Here’s what I used:
There are only 21 days left to shop from the 2015-2016 Annual Catalog’s Retiring List! Click here to see what is still available.
Thanks for stopping by today, and Sweet Stamping!

Mar 5, 2016 | Boxes, Club, Gift Wrap, Gifts |
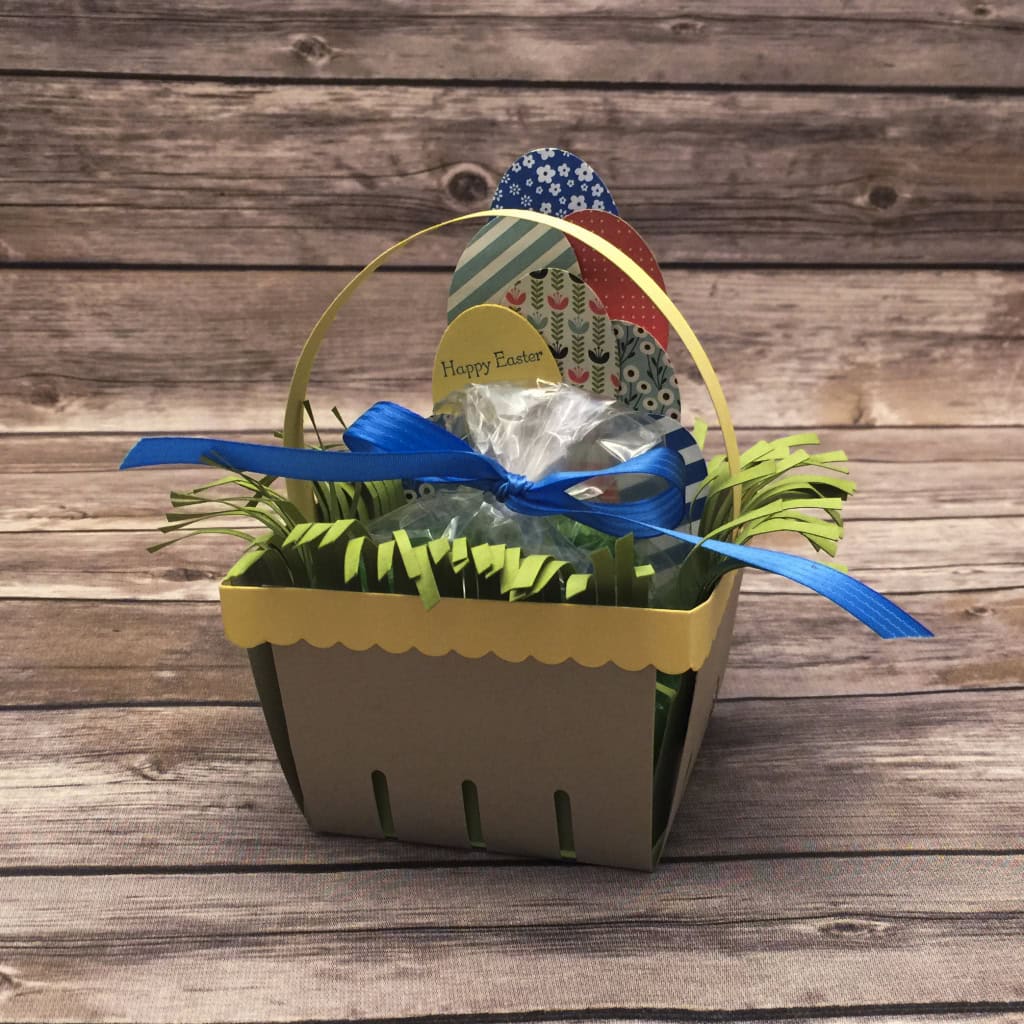
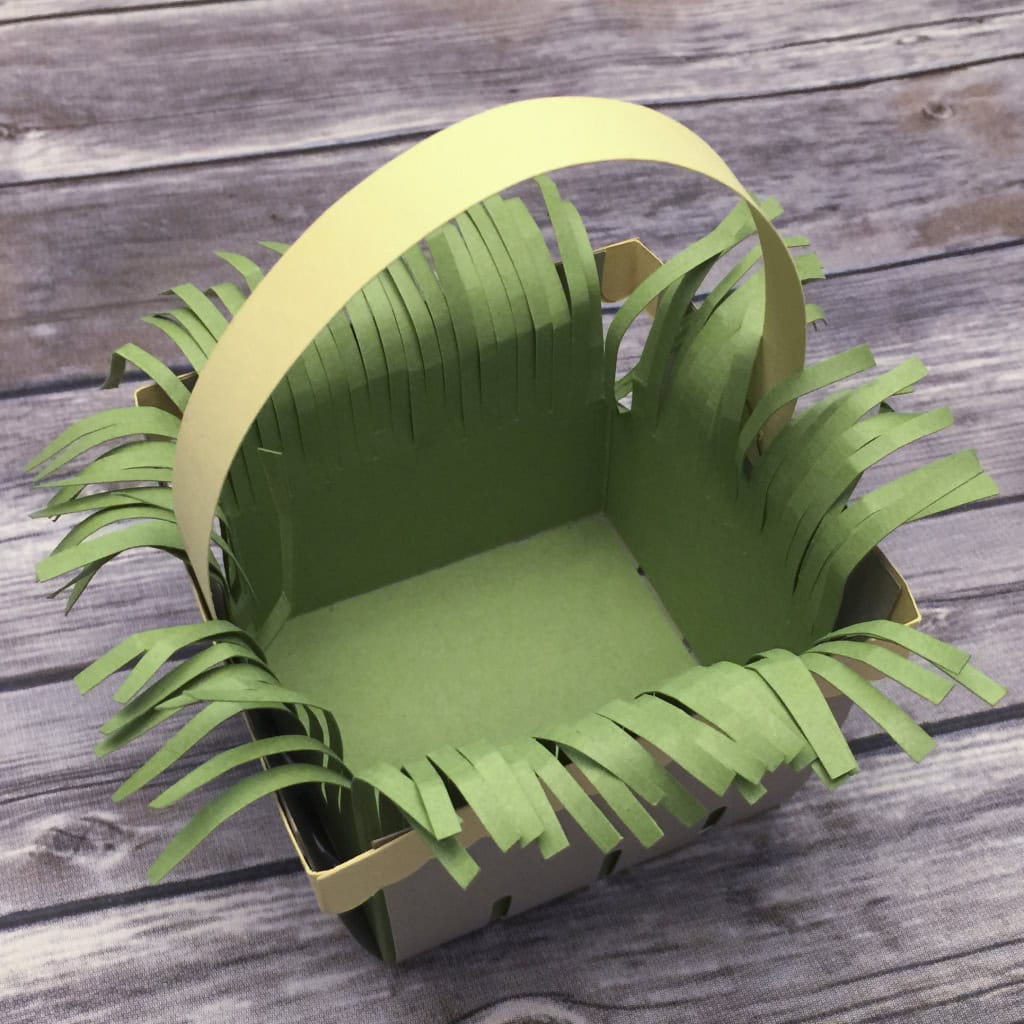
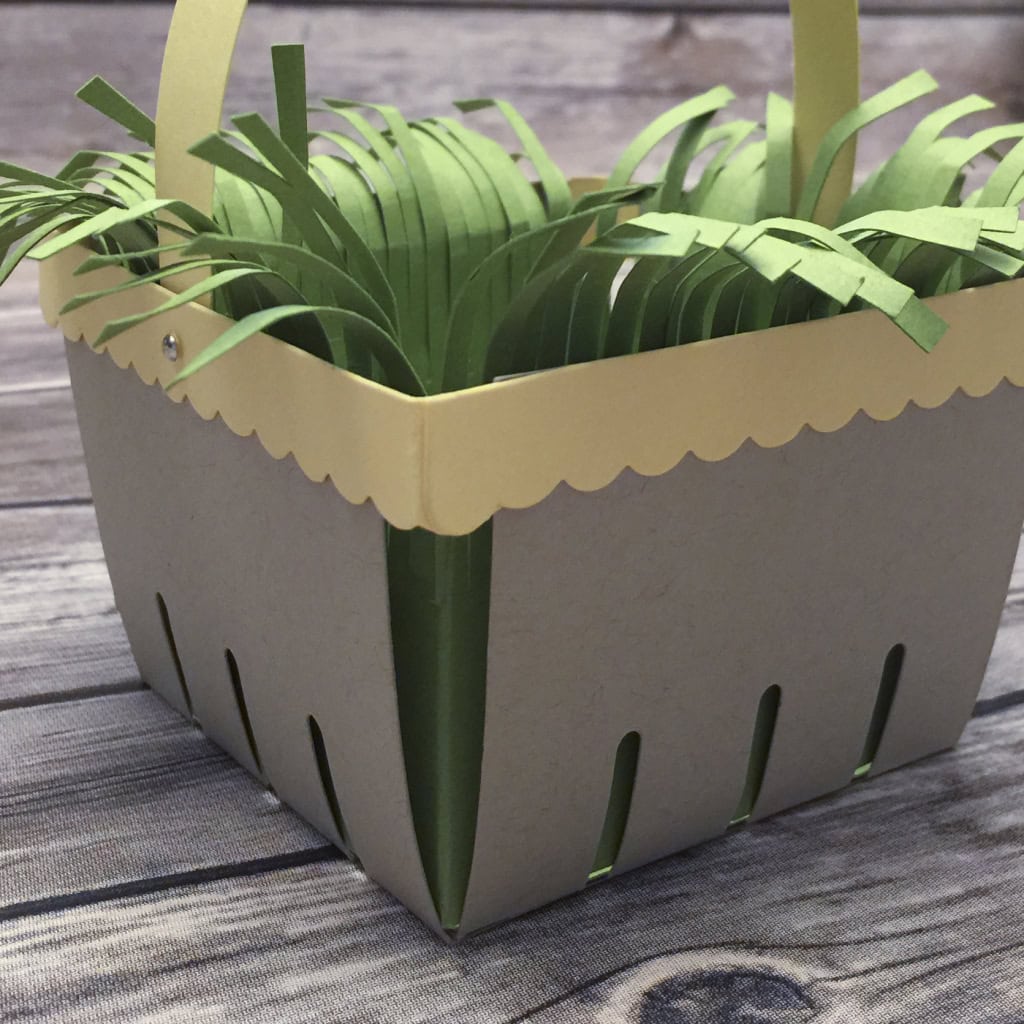
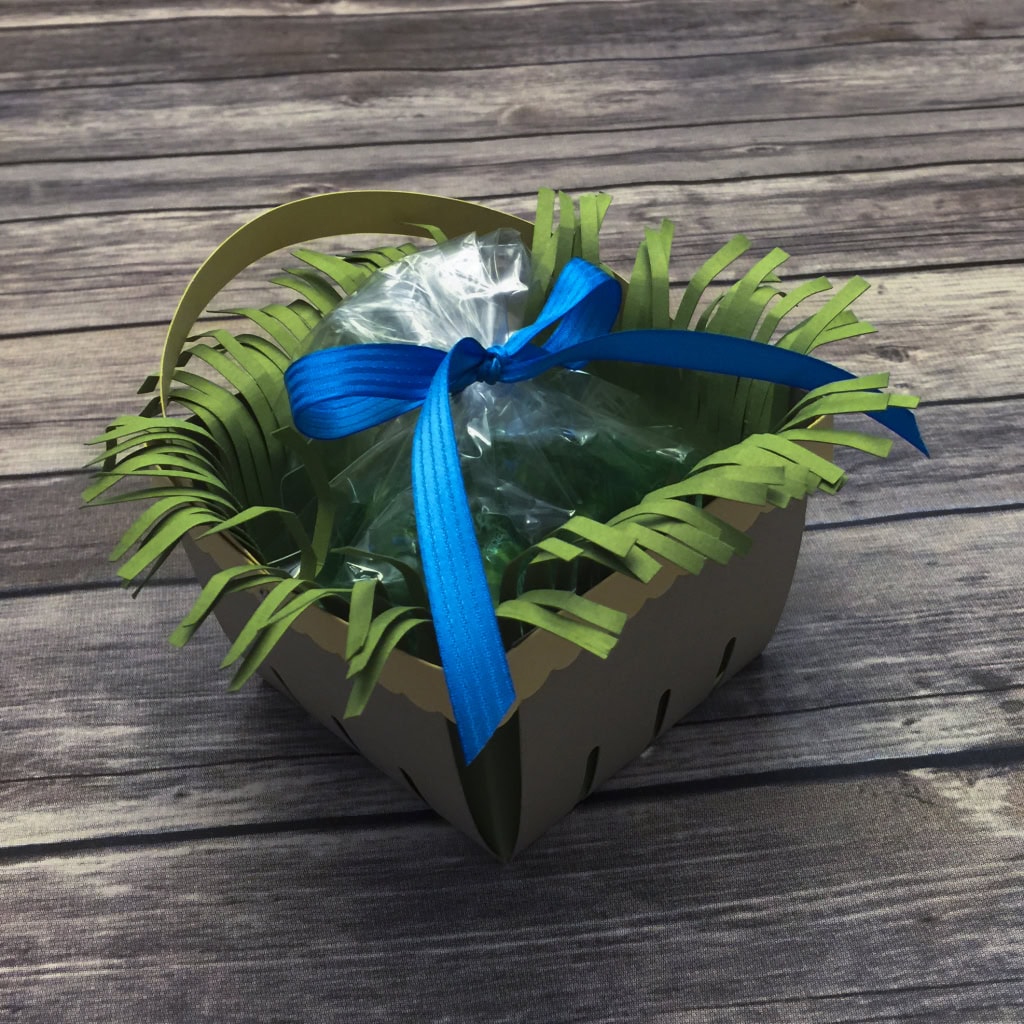
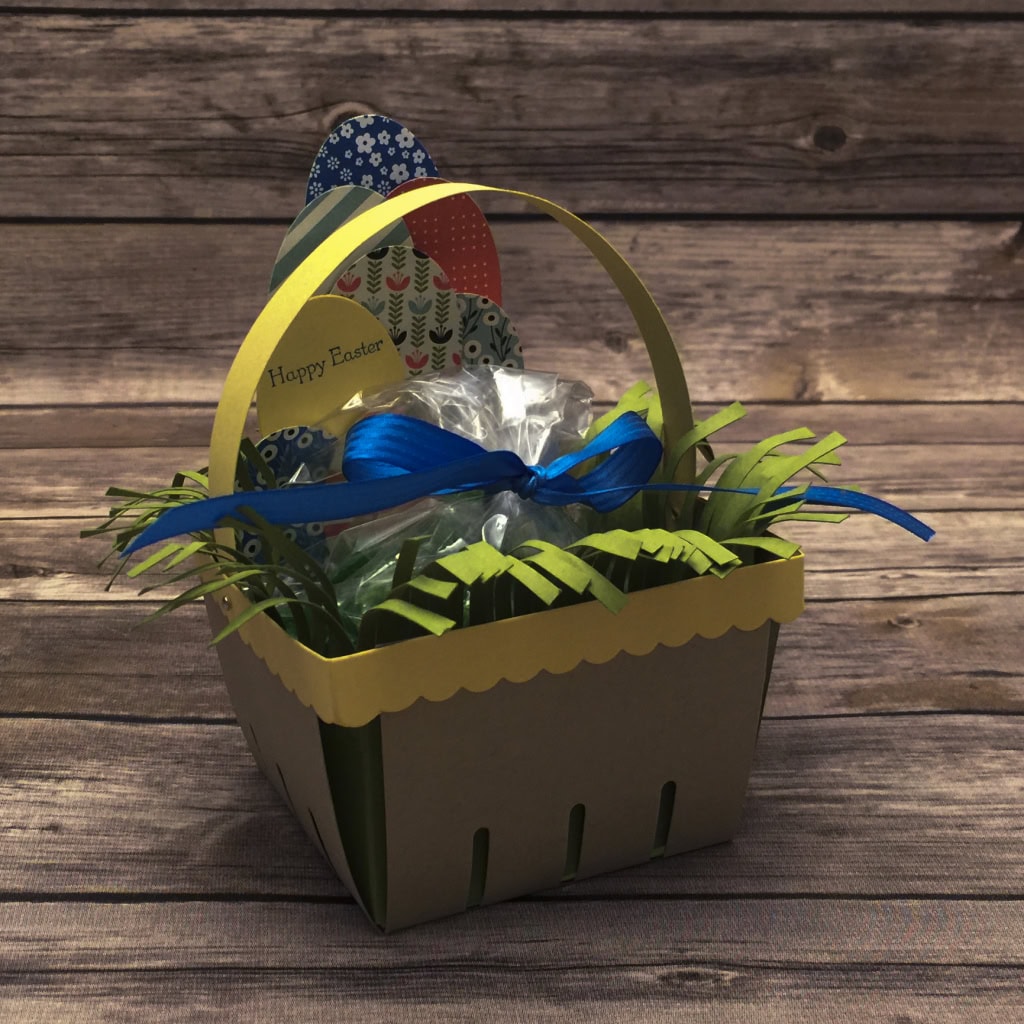
Today I’m sharing with you another project we made during our March Stamp Club gathering. You can see the first project here. This Easter Basket made with the Berry Basket Bigz Die is much easier than it might look.
First we assembled the basket using Crumb Cake card stock for the body and So Saffron CS for the handle and trim. We attached the handle with Tiny Brads, so it can be rotated out of the way to fill the basket. The Piercing Tool and Stampin’ Pierce Mat are perfect for creating the tiny holes.
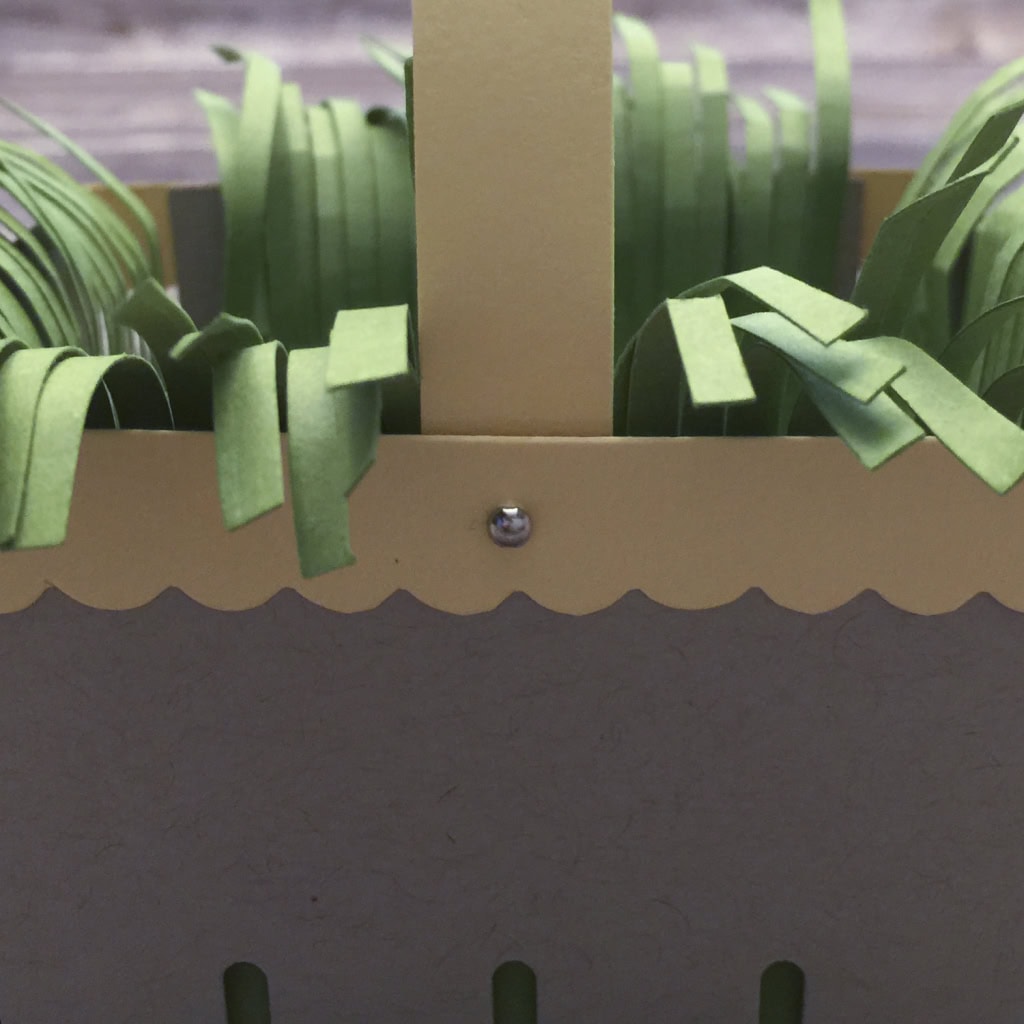
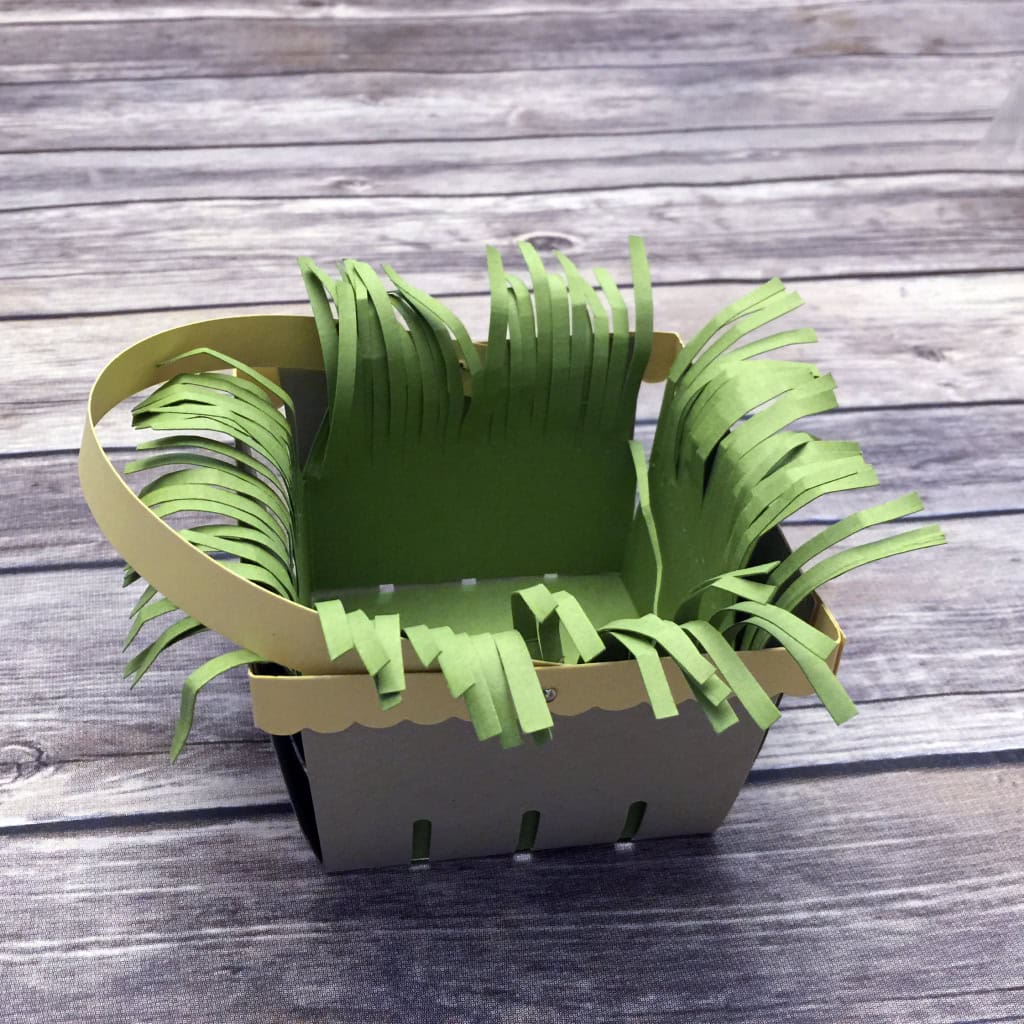
We scored a 4″ x 12″ piece of Old Olive CS along the long side at 3″, 6″, and 9″. Then we cut along the long side with Fringe Scissors, cutting with the full length of the blades to make long blades of grass. We taped the two ends together to make a square, then inserted it into the basket. We curled and scrunched the blades of grass to hang over the basket’s edges.
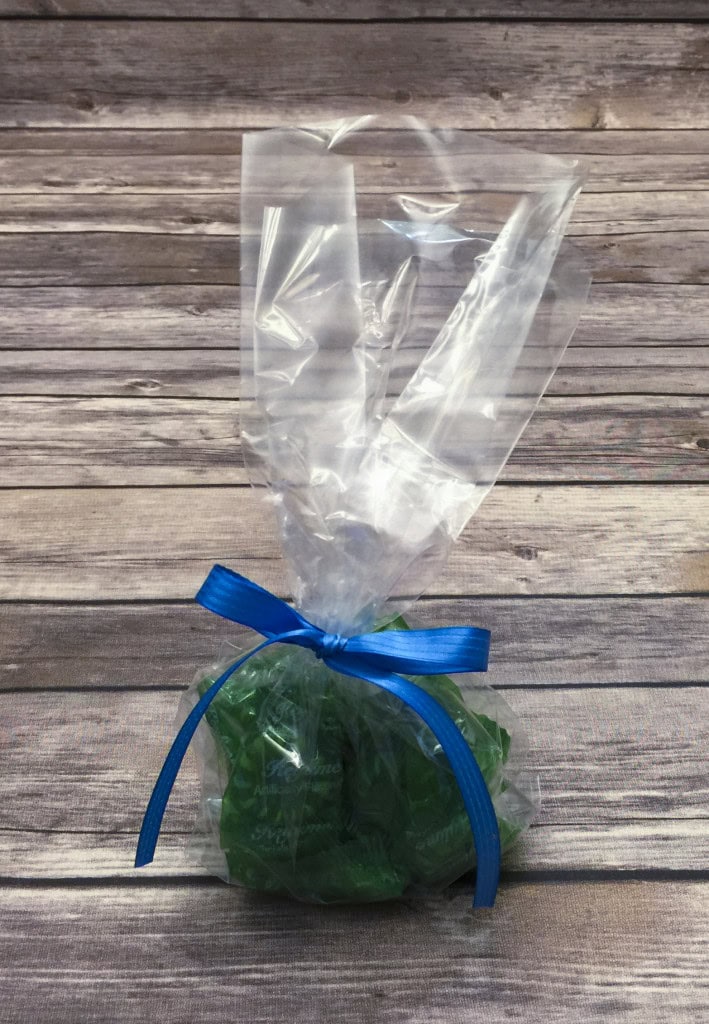
We used a Gusseted Cellophane Bag to hold treats and tied it with a piece of Pacific Point Stitched Satin Ribbon. Since the bag is very tall, we tucked the top of it down behind the bag. You could also cut the top of the bag, but we opted to tuck it so the eggs would be more visible.
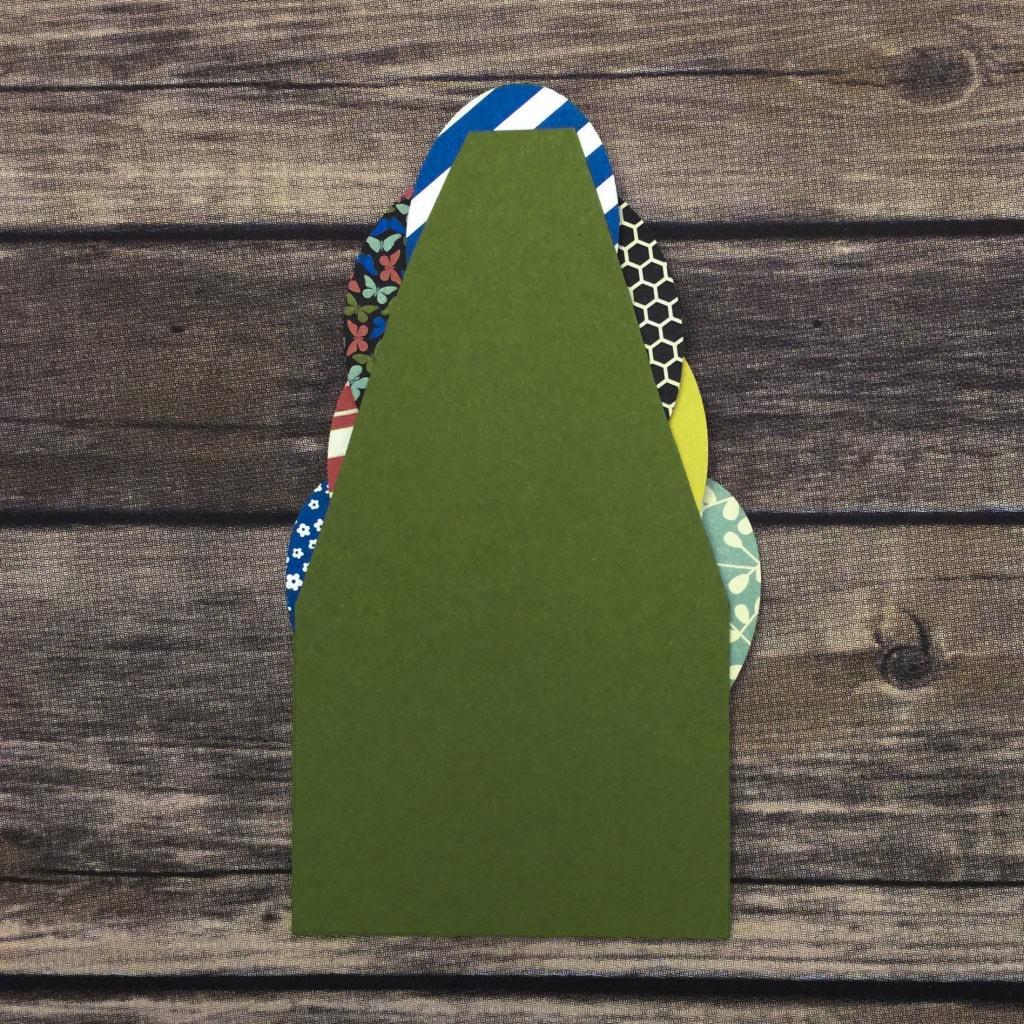
We cut eggs from the Pretty Petals Designer Series Paper Stack and from So Saffron CS using the Extra Large Oval Punch. We stamped the sentiment from the Teeny Tiny Wishes stamp set in Pacific Point on the So Saffron egg. We glued the eggs to a piece of Old Olive CS cut to fit into the basket and tapered to create a stacked shape.
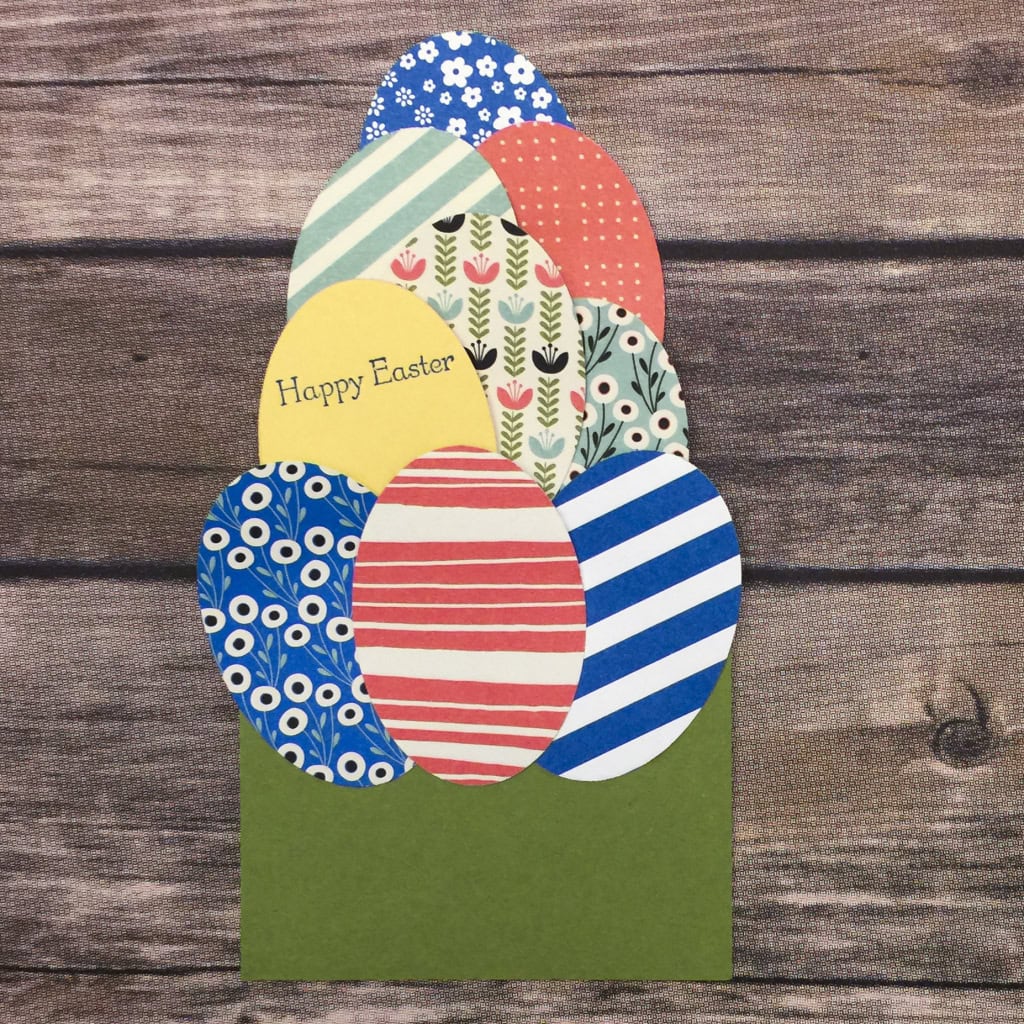
Note: this sample also has a couple of Pacific Point/Whisper White eggs (top and bottom right) cut from the Brights Designer Series Paper Stack.
We tucked the egg stack into the back of the basket, and voila, an Easter Basket! Wouldn’t your loved ones enjoy receiving their Easter goodies in this?
Check back for another project from our March Stamp Club gathering!
Here’s what we used:
Thanks for stopping by today, and Sweet Stamping!

Feb 5, 2016 | Boxes, Classes, Gift Wrap, Gifts, New Products, Occasions, Paper Pumpkin |
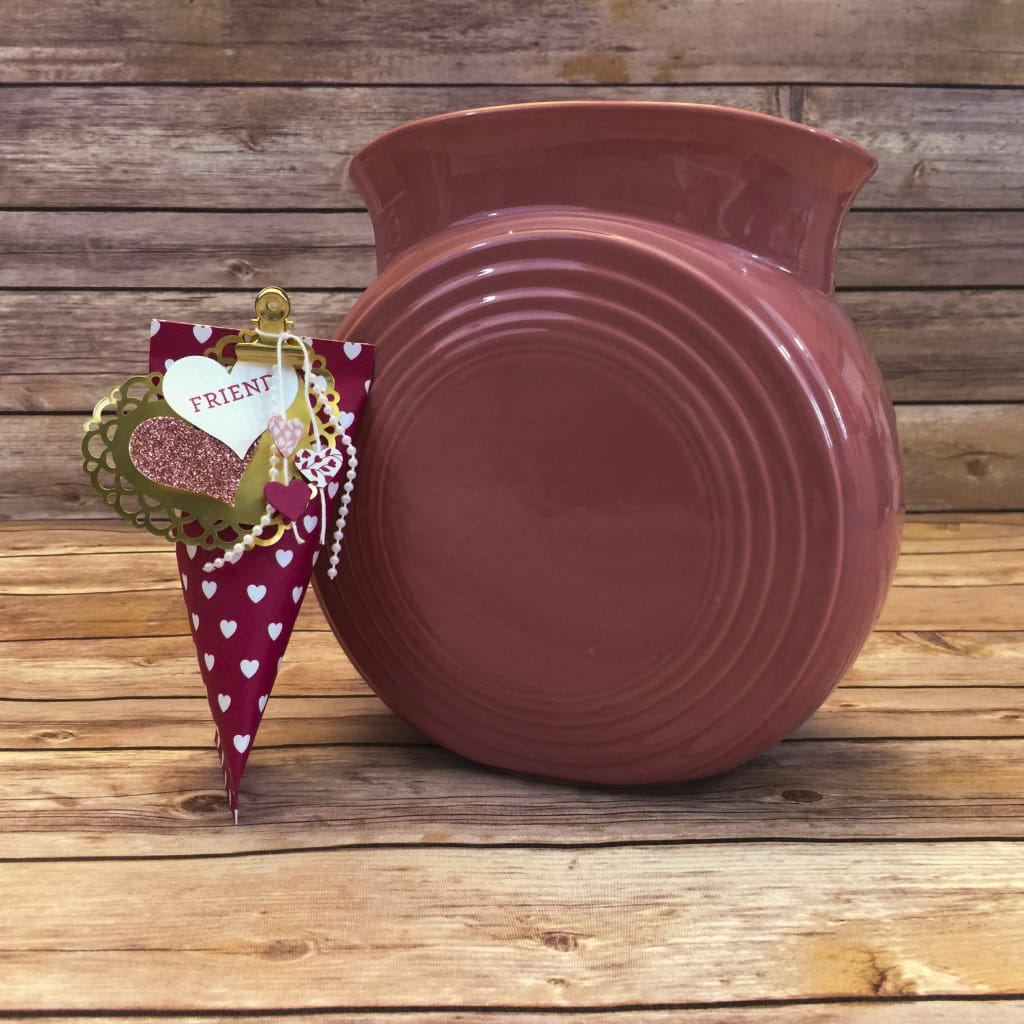
This weekend I’m in Phoenix, AZ, spending some quality time with, and learning a lot from, some wonderful Stampin’ Up! Demonstrators from all over the country. Lisa Pretto of InkBig Academy is the organizer and leader of the weekend. I thought one of the projects we made in the January Bloomin’ Love Bundle Class would be a perfect thank you gift for her, so today I’m sharing that with you.

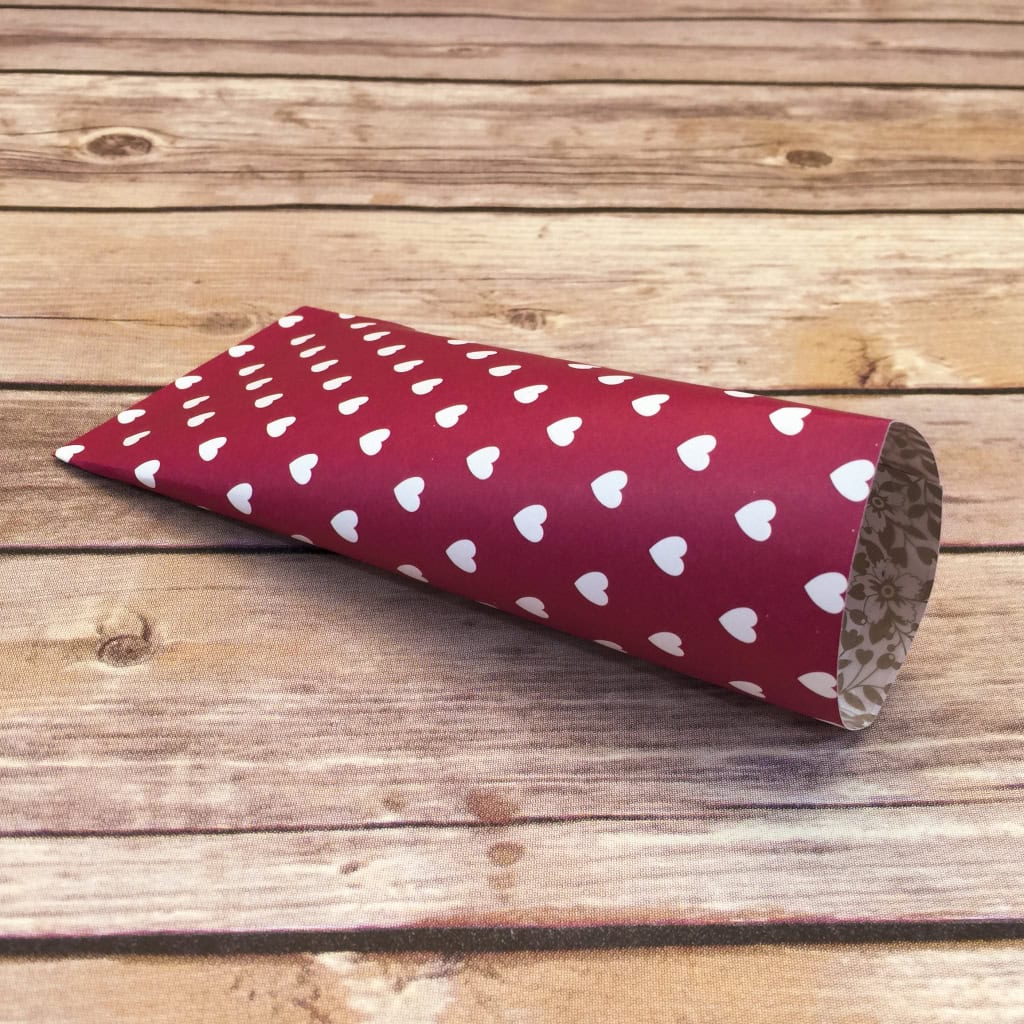
The sour cream containers – so called because single servings of sour cream usually come in containers shaped like this – are incredibly easy to make, even though they look much more complicated.
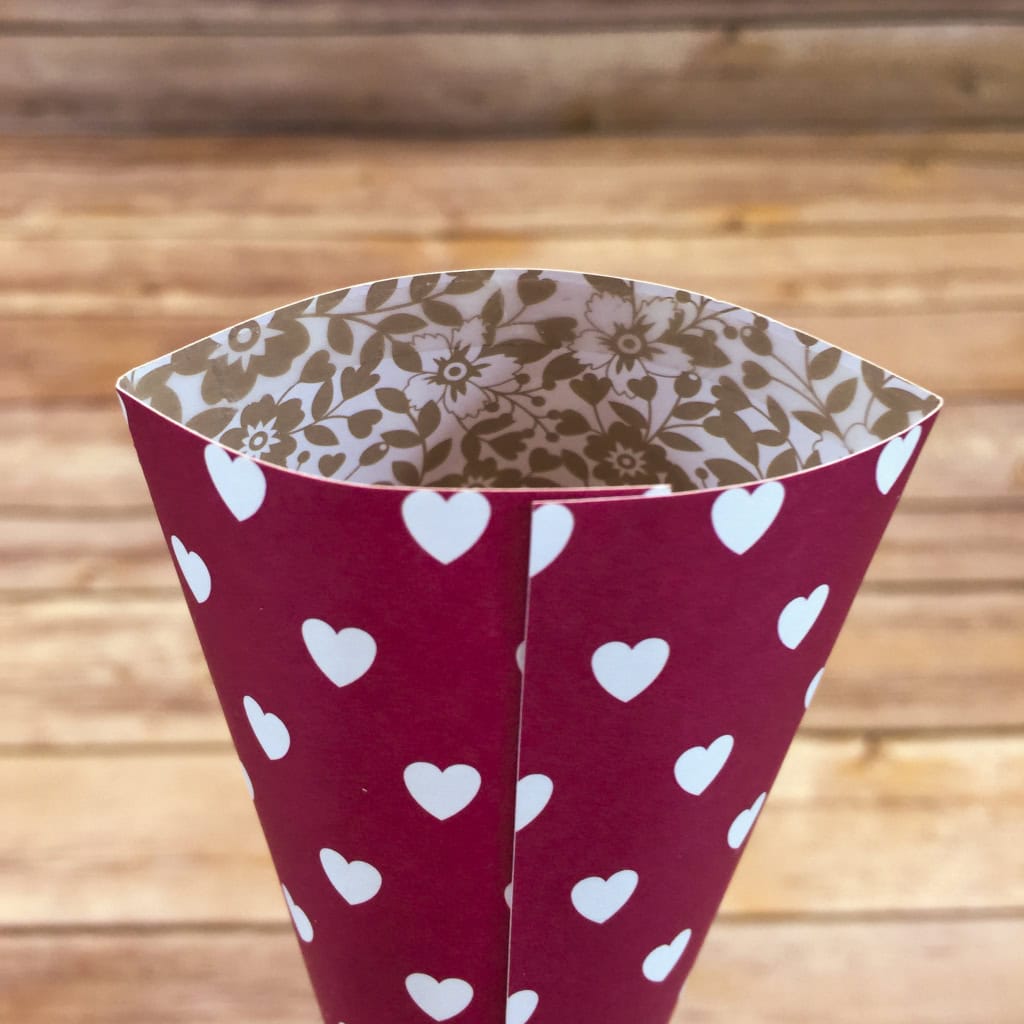
For today’s container, I started with a sheet from the Love Blossoms Designer Series Paper Stack. The 6″x6″ size is perfect for this project, so no cutting required!
On the side of the paper that will be on the inside of the container, I put strong adhesive (I recommend Tear & tape or Fast Fuse) along three of the edges. Then I rolled the paper and adhered the two sides together to create a tube.
NOTE: If the paper design has a definite direction, make sure you put the adhesive along the top and bottom edges and along one side edge.
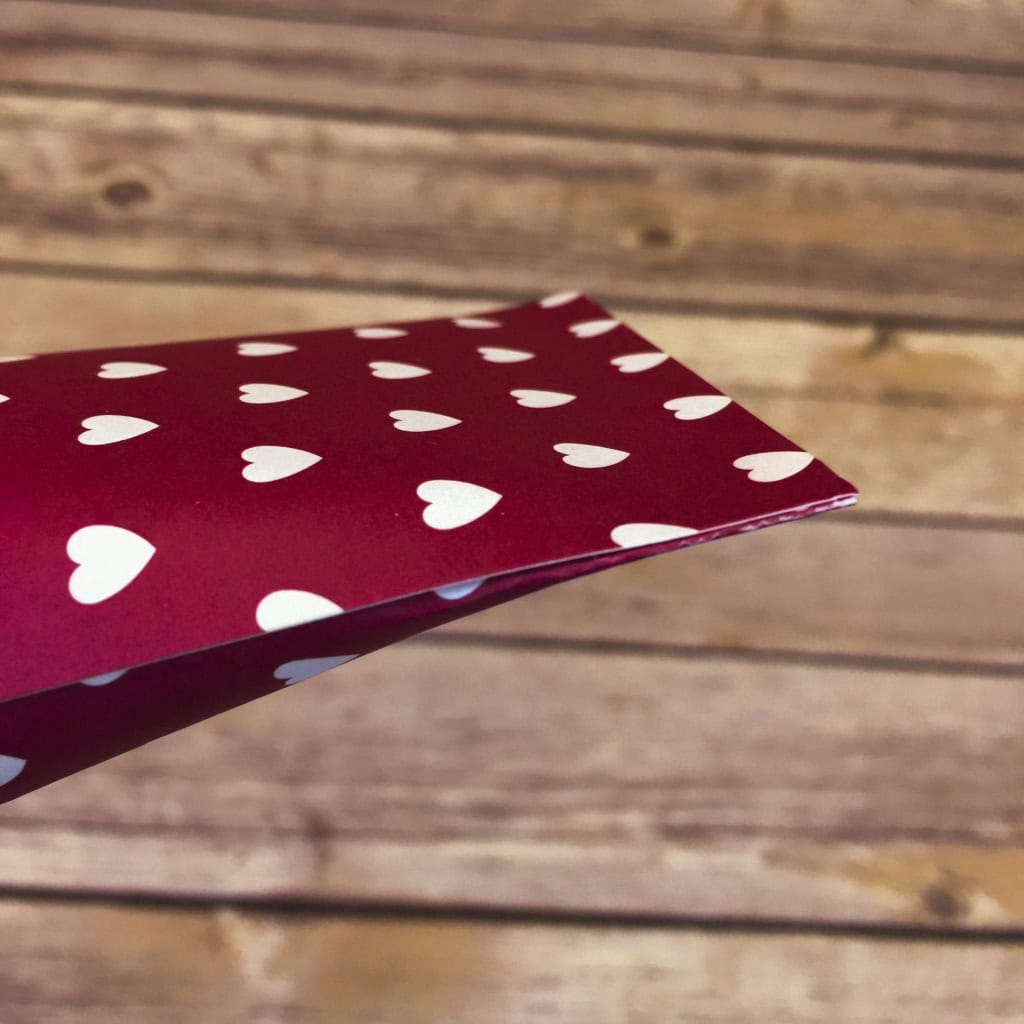
I pinched the bottom end closed, with the seam along one edge of the bottom.
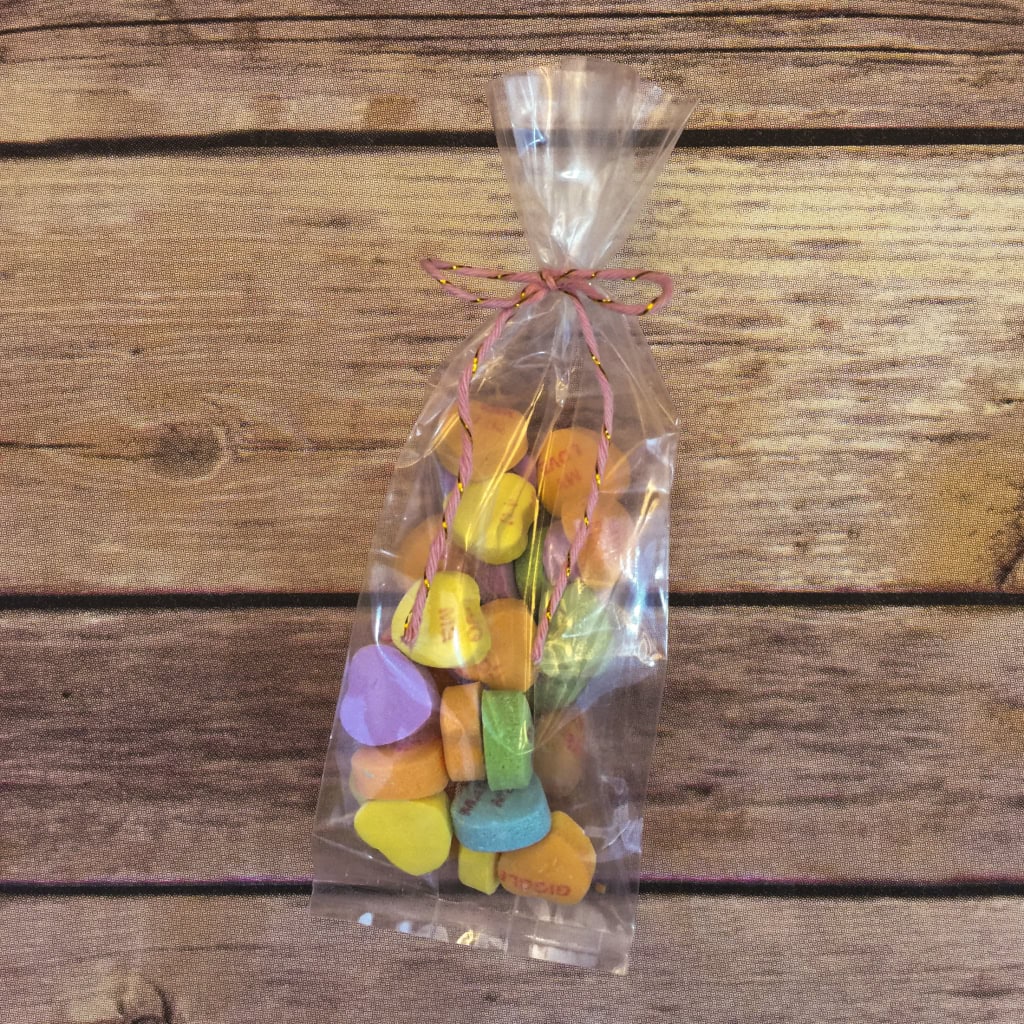
I used a gusseted bag and twine from the Filled With Love Paper Pumpkin Kit Refill and filled it with Candy Hearts. This and other past Paper Pumpkin kits and refills are available for purchase to any current Paper Pumpkin subscriber.
I pinched the top of the container closed, with the seam in the center of the top. This created the interesting shape, with one end flat in one direction and the other end flat in the other direction.
NOTE: Don’t over fill the bag before putting it into the container. It should be skinny enough to insert without it getting caught on the adhesive around the interior edge of the container.

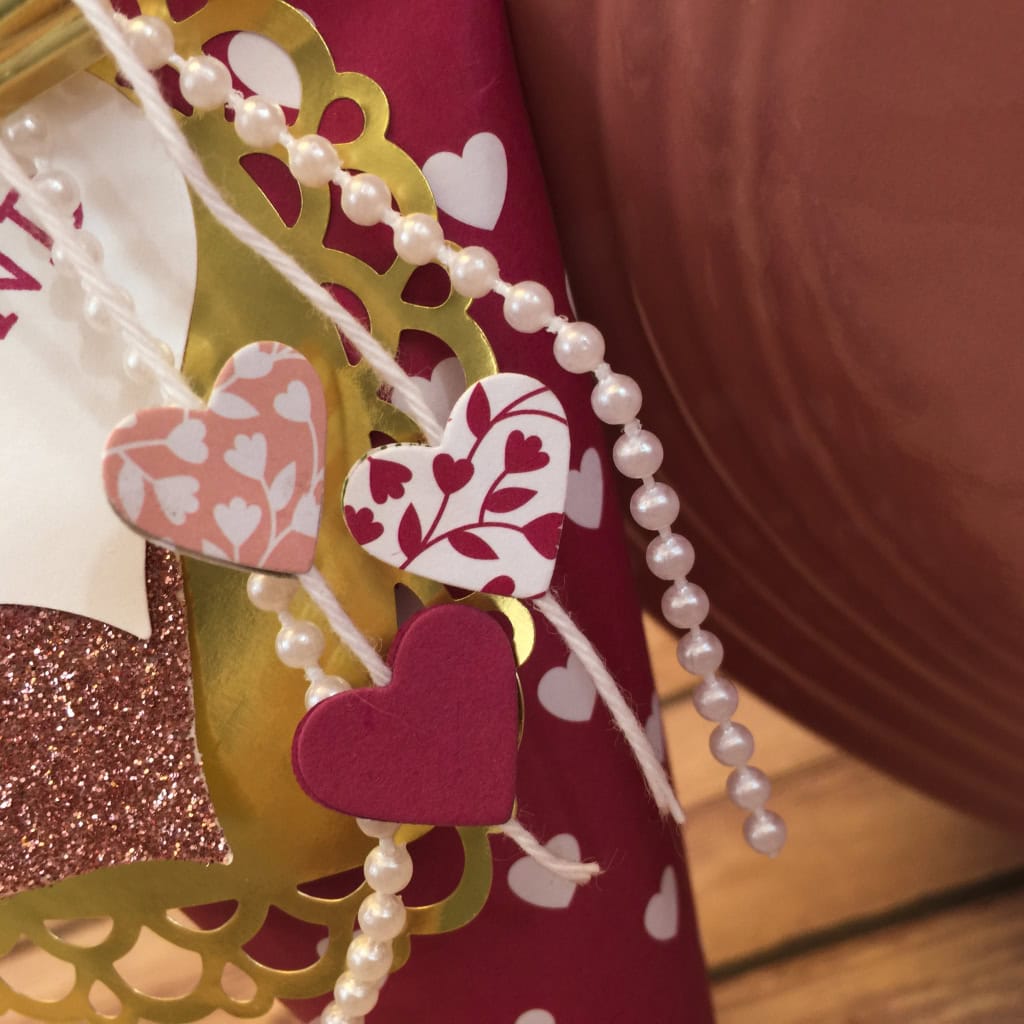
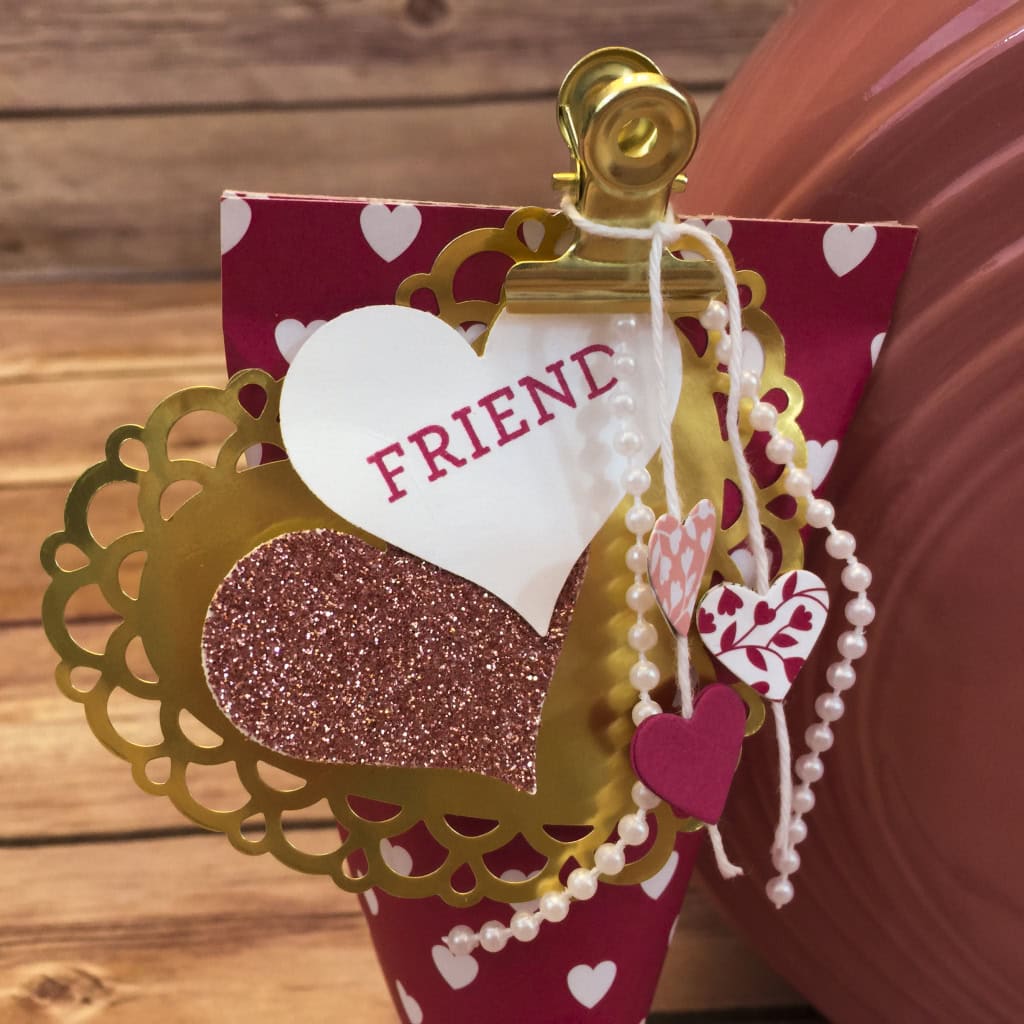
I stamped the word FRIEND, from the Bloomin’ Love stamp set, in Rose Red on a piece of Whisper White card stock, then punched it out with the Sweetheart Punch. I used the same punch to cut a heart out of Blushing Bride Glimmer Paper. Then I glued the two hearts together.
I used the heart punch from the Itty Bitty Accents Punch Pack to cut two hearts each from two different designs in the Love Blossoms DSP Stack and from Rose Red CS. I glued them together along a length of Whisper White Baker’s Twine, sandwiching the twine between the two hearts, and tied the twine around one of the gold clips from the same Filled With Love PP kit refill.
I used the clip to attach the two glued-together hearts as well as a gold heart doily and length of pearl trim from the Love Blossoms Embellishment Kit. The layers make it look much more complicated that it really is.
Here’s what I used today. Click on the images below to get what you need to make your own sweet sour cream container!
Thanks for stopping by today, and Sweet Stamping!
Jan 17, 2016 | Boxes, Challenges, Color Palette, CYCI, Gift Wrap, New Products, Occasions |

It’s CYCI’s 3rd birthday! To celebrate, this week’s color challenge is Black & White.
It can be either elegant or fun. I chose to do a little of both. I mean, this little penguin is definitely fun, and what’s more elegant than a tuxedo? And he/she is perfect for giving a small birthday gift or treat.

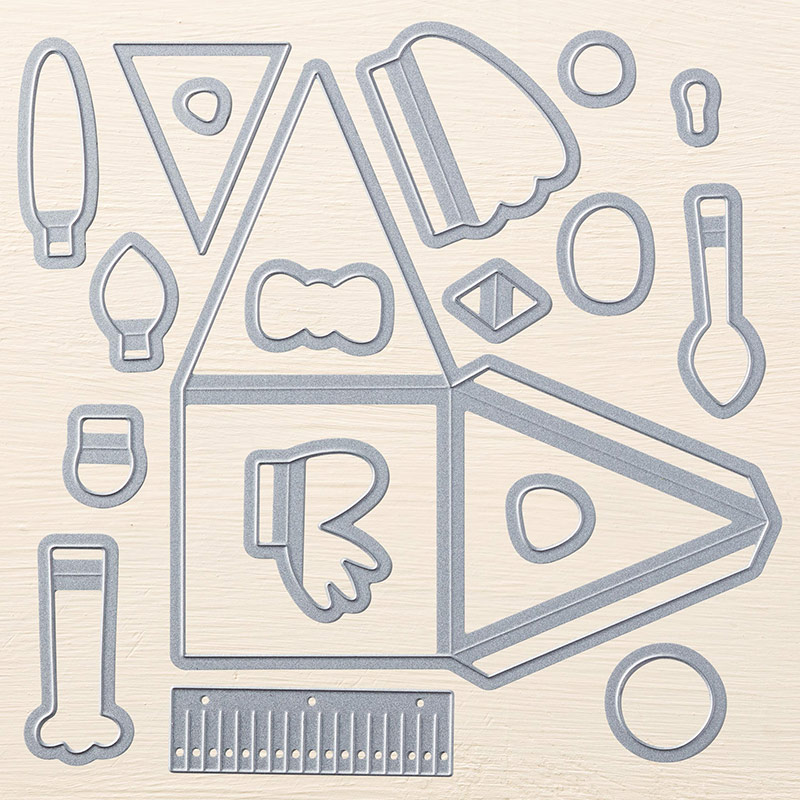
I’ve never made the little animal boxes that have been so popular. But the Playful Pals stamp set and the Pyramid Pals Thinlits Dies (available individually, or together in a bundle to save 15%!) make it so easy, and they’re so darn cute, who can resist?

To make the box, I cut out two pieces of Basic Black card stock with the pyramid box die and glued them together on the bottom panels – the same way you make a Curvy Keepsake Box. I then glued the flaps on one side to the two adjacent sides, so the box would keep its shape. I tucked in the flaps on the other side, so it could be opened easily.
For the feet, I cut two of the “frog feet” from Pumpkin Pie card stock and glued them to the box’s bottom, so just the webbed toes extended past the box’s edge.

I stamped the eyes in black Memento ink onto Whisper White CS and cut them with the coordinating die. I cut the triangular chest piece from Whisper White CS and the two long flippers from Basic Black CS. I cut the beak from Pumpkin Pie CS with the little diamond shaped die. Then I glued everything in place on the box.
This adorable penguin opens in the back to tuck in tiny treats.
Here’s what I used, or mentioned. Click on the images below to get your very own!
Be sure to check out the other projects, and share your own, at canyoucaseit.com!
Thanks for stopping by today, and Sweet Stamping!


