Jun 12, 2015 | Boxes, Food, Gift Wrap, Gifts, New Products |
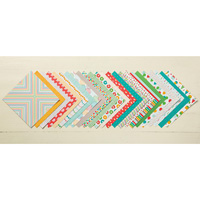
 Today I really wanted to use this sheet of the Cherry On Top DSP stack with the sweet little cherries on it. For inspiration, I looked at the list of colors in the stack. I knew I would use Watermelon Wonder and Cucumber Crush – they’re in this piece of DSP along with Whisper White. So I cut the Fry Box from Cucumber Crush card stock and lined it with the DSP. Now what?
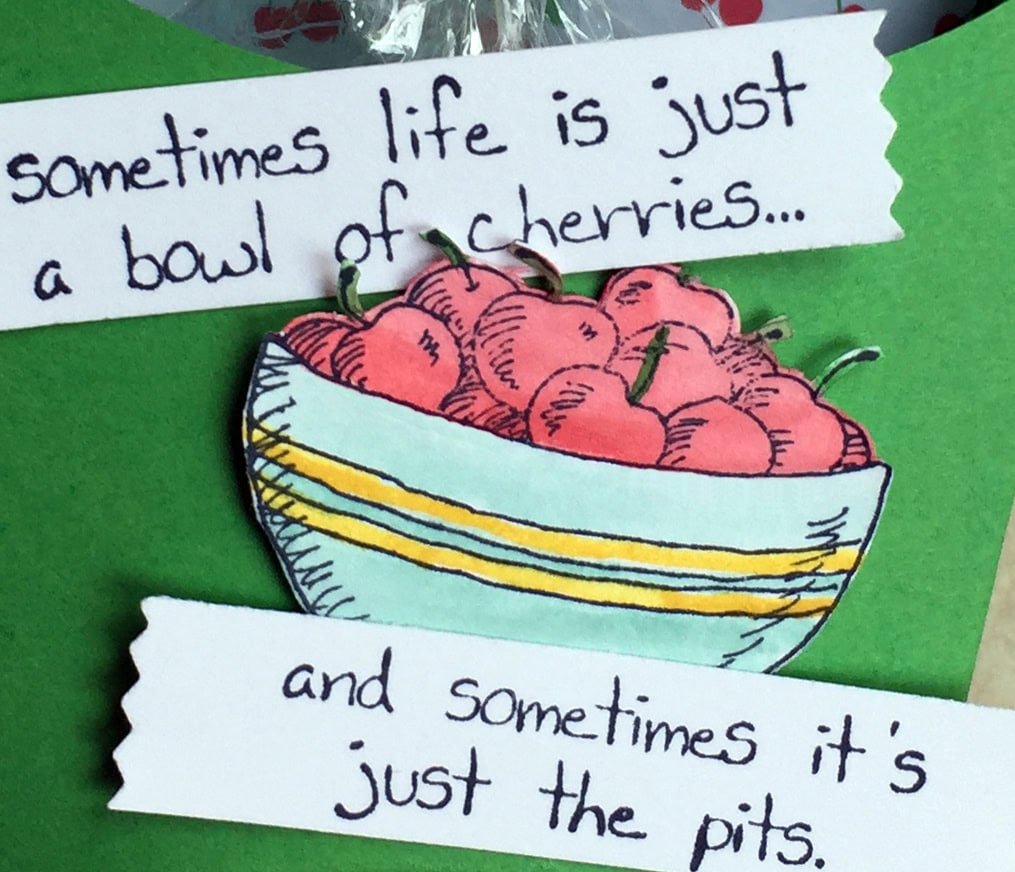
I started shopping in my catalog for a saying or image that felt right. I was thinking cherry pie, but then I came across the Giggle Greetings stamp set with its bowl of cherries and funny sentiment. Bingo!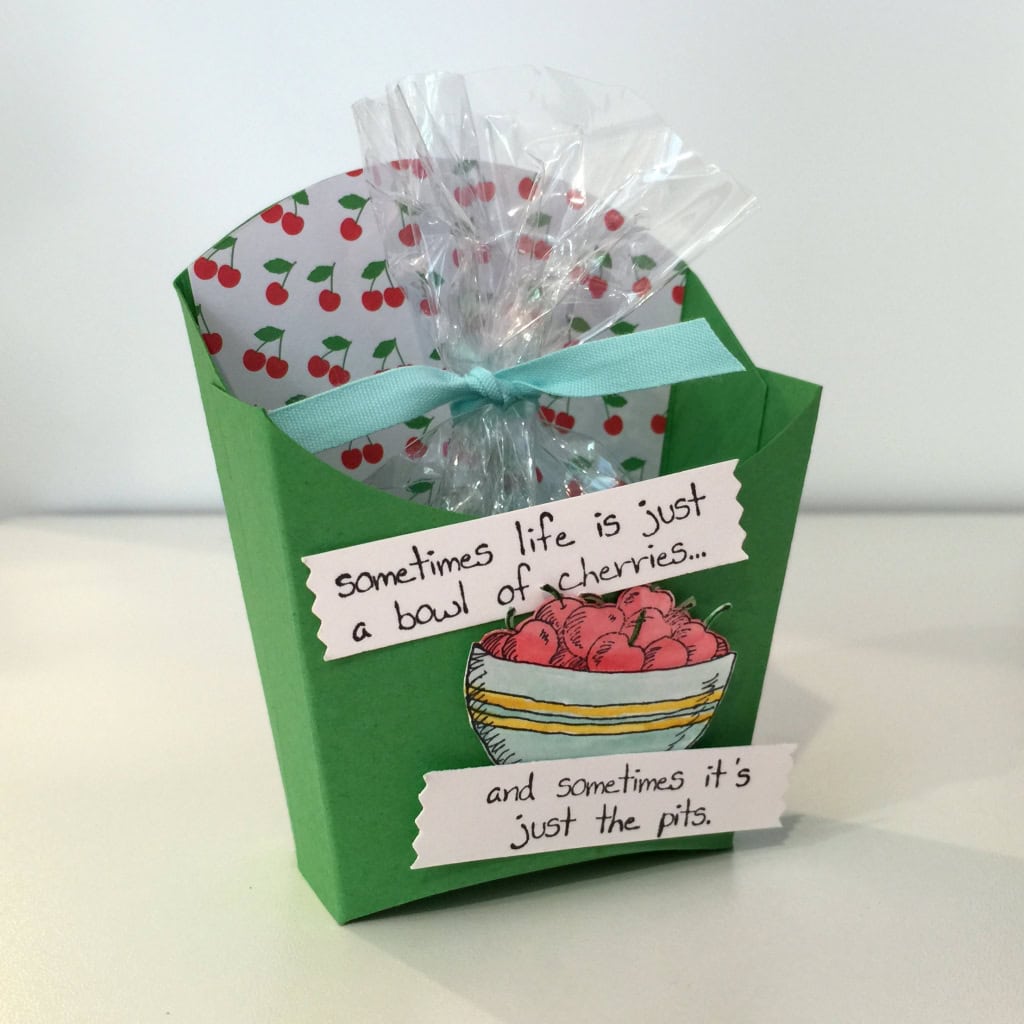
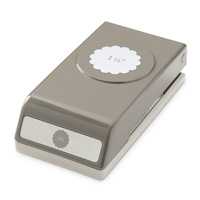
I stamped the image in black on Heavy Whisper White card stock, then cut the two parts of the sentiment with the new Washi Label punch. The punch was a bit larger than I needed, so I trimmed some off the top/bottom with my Craft Scissors. I used my Paper Snips to fussy cut the bowl of cherries.
Scissors: For the most part, I use my Paper Snips for paper; but sometimes it’s nice to have a longer pair. I keep one pair of Craft Scissors for paper and another pair for only ribbon.
I used an Aqua Painter to color the bowl of cherries in colors from the DSP stack. The 4″x6″ Cellophane Bag tied with a piece of Pool Party ribbon contains chocolate covered dried cherries. Yum!
Don’t you think this is a cheerful gift for someone going through a rough time?
Here’s what I used:
Thanks for stopping by today, and Sweet Stamping!
Apr 28, 2015 | Events, Gifts, Kits |
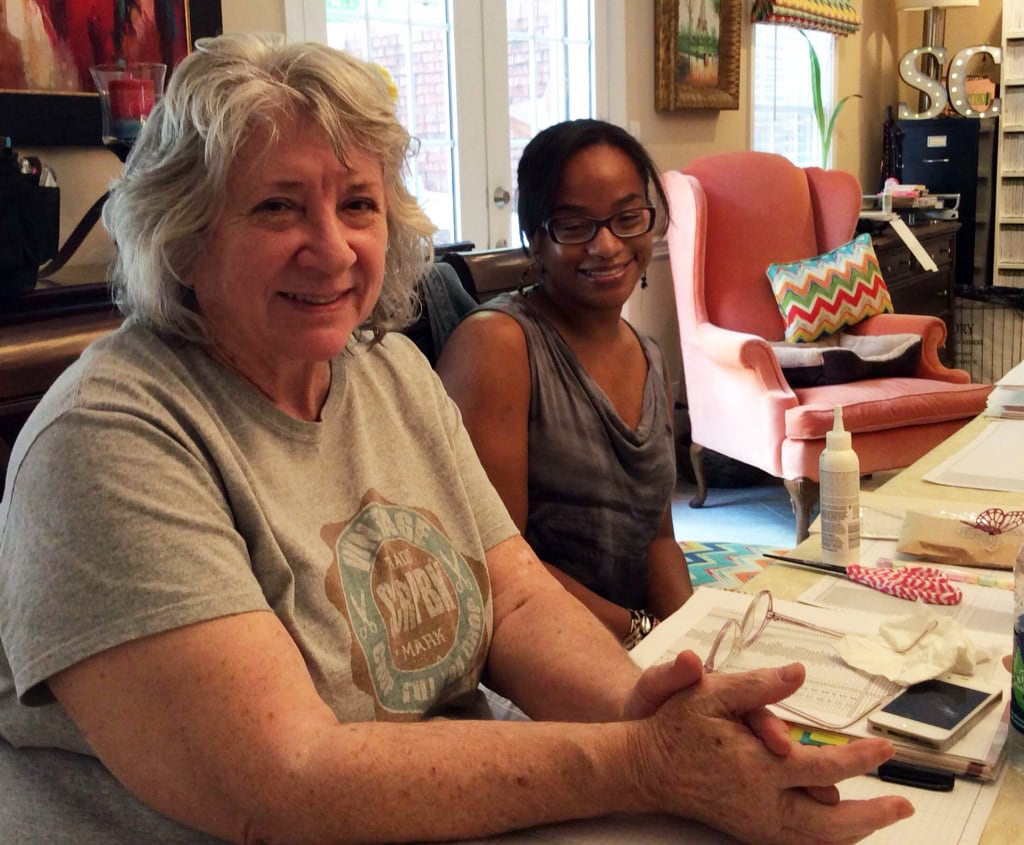
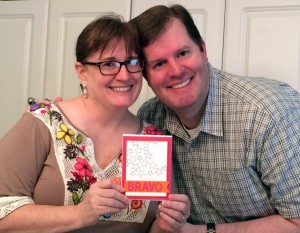
We had so much fun at our April team meeting! We do this every couple of months to make sure everyone stays up to date on everything Stampin’ Up and, of course, to have fun! All five of my downlines were able to attend. Also a dear friend and avid Stampin’ Up user, Sharon, was visiting from Tennessee and was able to join us. Brian King was able to stop by for a while, and he brought a wonderful giveaway prize – Chalkboard Banner Simply Created Kit and Build A Banner Simply Created Kit – which the lovely Marion won.
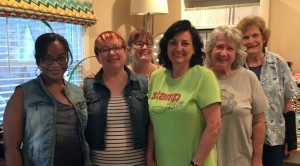
The Sweethearts: Marion, Angel, Candy, Debbie, Judy, Margie (Don’t you just love Debbie’s “Stamp Junkie” shirt?)
Here are a few snapshots from our meeting:
 Judy & Marion
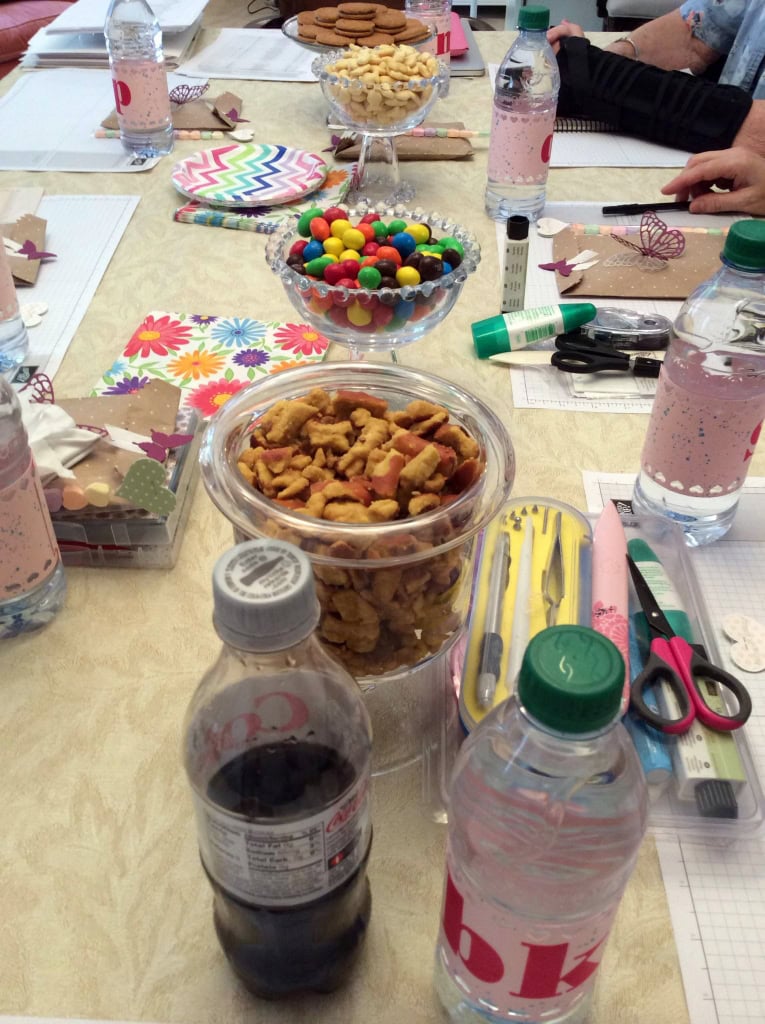
 Treats
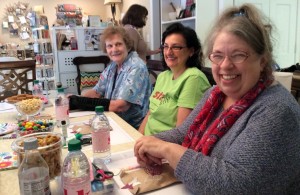 Margie, Debbie, and Sharon
 Brian gave me this beautiful card
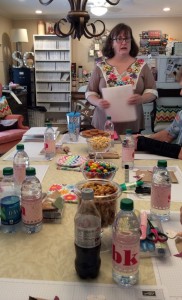
Don’t you just love it when someone snaps a photo of you while you’re talking and you come out looking like this? But you can see all the fun chaos we had going on.
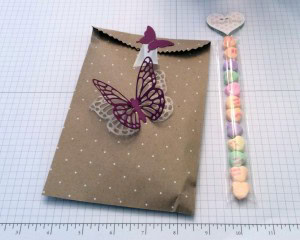
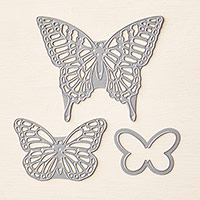
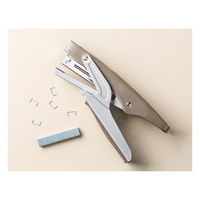
These are the treats I put at each Sweetheart’s place setting. Inside the Polka Dot Tag a Bag Gift Bag are a pack of Candy Dots and an In Color Accessory Pack from the recent Sale-a-Bration. The large Rich Razzleberry butterfly was cut using the Butterflies Thinlit Dies. I used wax paper to help them pop out of the die more easily. I thought the wax paper butterlies were so pretty, I used them on the bags as well. The small butterfly was cut using the Elegant Butterfly Punch, then it and a piece of Whisper White Seam Binding Ribbon were stapled on with the Handheld Stapler, positioning the staple to be the body of the butterfly.
The sweethearts candies fit perfectly in a 1″ x 8″ Cellophane Bag. I used stamps from the Groovy Love stamp set to stamp a Pink Pirouette heart with Pistachio Pudding sentiment. I cut it using the Sweetheart Punch. I punched another heart from a piece of Pistachio Pudding paper out of the 2013-2015 In Color Background DSP Stack. Then I stapled both hearts to the top of the bag.
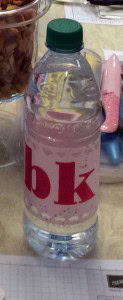
I decorated bottles of water with each person’s initials. I cut Pink Pirouette card stock to size, then stamped the initials in Melon Mambo with the Larger Than Life Alphabet stamp set. I used the Gorgeous Grunge stamp set to create Tempting Turquoise speckles. Then I used the Hearts Border Punch along the top and bottom edges. I attached the labels with a piece of Sticky Strip at each end.
Check back to see our two Make & Take projects!
Thank you for stopping by today, and Sweet Stamping!
Here are products mentioned in today’s post:
Apr 22, 2015 | Baby, Blog Hop, Boxes, Gift Wrap, Gifts |
Welcome to InKing Royalty’s April Blog Hop. Today we are celebrating April Showers – not only is this the season for Baby Showers and Wedding Showers, but May flowers are just around the corner, so you’re certain to see a great variety of projects along the hop. You may have started the Blog Hop here or may have hopped over from Amy Whelan at Amy’s Inklings. After you read my post, I hope you’ll hop over to the next. If you get off track at any point during the blog hop, there’s a complete list of participants at the end of this post.
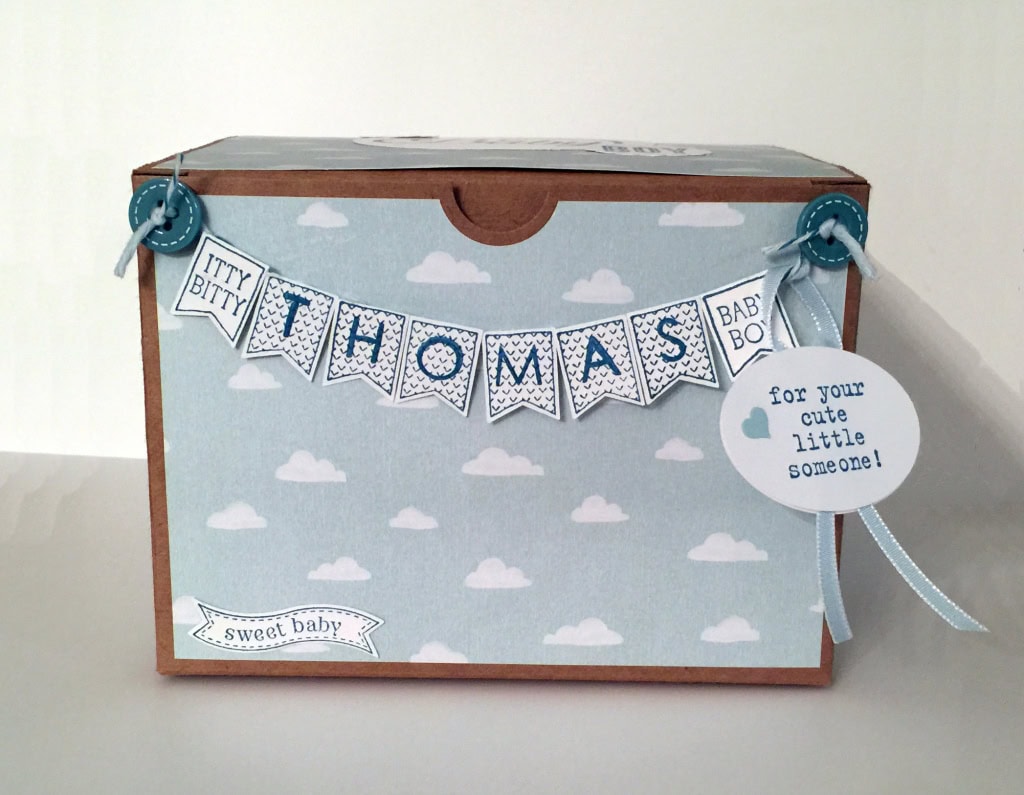
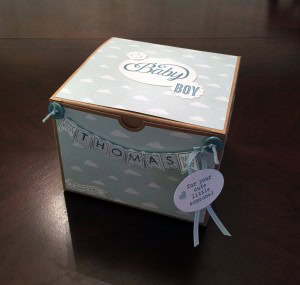
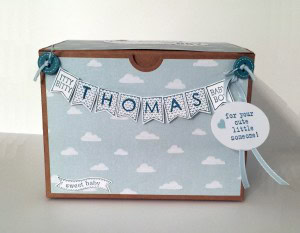
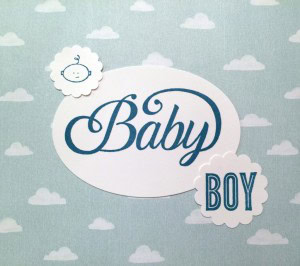
There are two new additions to my neighborhood: a boy and a girl who were born just a month apart. And they are both adorable! I wanted to make their gifts adorable, too.
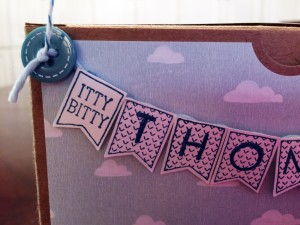
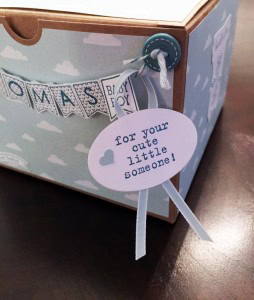
Here’s the gift box in Soft Sky and Island Indigo for Thomas…
…and here’s the gift box in Pink Pirouette and Sahara Sand for Juliette.
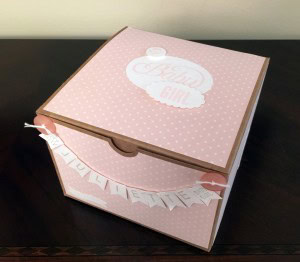
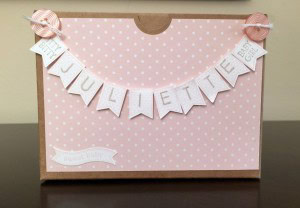
Here are a few details.
Thank you for stopping by today. I hope you’ll hop along to the next stop on the blog hop, Katie Ferguson at Cottage Paper. You certainly won’t want to miss any of these projects.
- Lynn Kolcun at Avery’s Owlery
- Pam Morris at Tap Tap Stamp
- Denise Hopefner at The Mountain Magpie
- Becky Volpp at Ink Blossom with Becky
- Lisa Pretto at DIY Royalty
- September Gray at SeptemberGray.com
- Brian King at Stamp with Brian
- Amy Whelan at Amy’s Inklings
- Candy Ford at Stamp Candy <– YOU ARE HERE
- Katie Ferguson at Cottage Paper
And as always, Sweet Stamping!
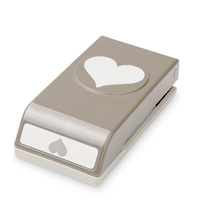
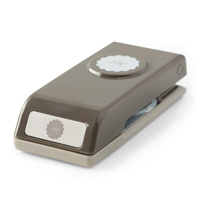
Here’s what I used for the boxes:
Apr 8, 2015 | Blog Hop, Boxes, Gifts |

Welcome to the Pals Blog Hop for April where every day is Earth Day. This month we are showcasing projects that use recycled, reused or other earth inspired elements and colors. We hope you enjoy the Pals creative projects.
You may just be starting the blog hop or may have come from Mary Fish at Stampin’ Pretty, number 9 on the Pals Hop. If you get off track at any time, the full lineup below will help you move along from blog to blog so you see all the projects.
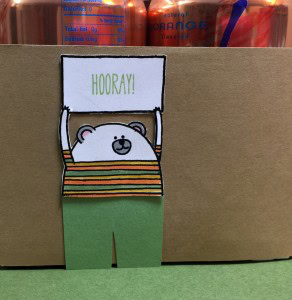
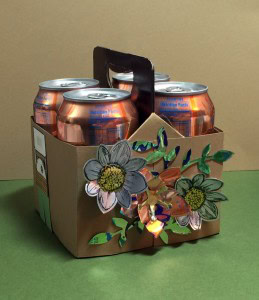
What better way to showcase today’s blog hop theme than to use actual recyclables? I had some empty drink cans in various colors and thought they would be perfect. Did you know that you can cut thin metal with your punches and dies? The box is a leftover drink carrier that I covered with leftover scraps of Baked Brown Sugar card stock. Almost everything in my project today came from the recycling bin or my paper scraps.
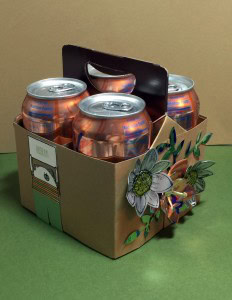
This cute little guy is from the Cheerful Critters stamp set. I stamped him in Versamark ink on Whisper White card stock, then heat embossed in black. I then stamped the sentiment in Wild Wasabi. I colored him in with Stampin’ Write Markers in Wild Wasabi, Pumpkin Pie, Crushed Curry, Pink Pirouette, and Smoky Slate. I attached a scrap of Wild Wasabi card stock and trimmed it with my Paper Snips to make him a pair of pants. Since he’s looking to the right, I placed him a little left of the center of the box. He’s adhered with Mini Glue Dots.
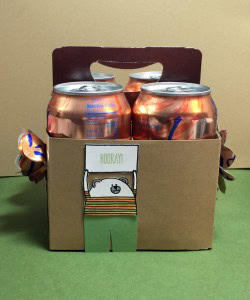
I like the way light shimmers off the metal flowers, and I like how easily you can bend them into shape. For the two silver flowers, I used a stamp from the Petal Potpourri stamp set and black Staz-On ink directly on the metal, then punched out the pieces with the Flower Medallion punch and the 7/8″ Scallop Circle Punch. A Stampin’ Dimensional holds the center on the flower. For the orange flower and the leaves, I punched out the pieces with the Flower Frenzy Bigz L Die. They are held on with Stampin’ Dimensionals and Mini Glue Dots.
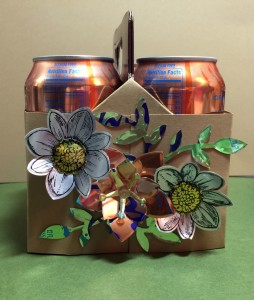

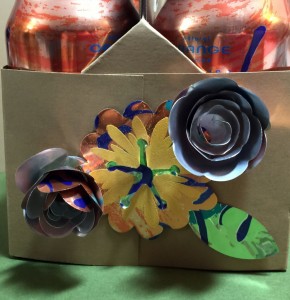
BLOOPER: I wasn’t going to show this side of the box, because I don’t like the way it turned out. However I do think that it could look great after a bit more experimentation. For example, I cut the two 3D flowers with the Originals Spiral Flower Bigz Die, but then I wrapped them with the color to the outside, when it would have shown much better if the color was on the inside – now you mostly see silver instead of orange. I like the Crushed Curry Stampin’ Emboss Powder on the center flower, but I got a little messy with it. I’d like to try again without getting specks of extra powder where I didn’t want it. But I was running out of cans, and I can only drink the flavored sparkling water so fast! The flower and leaf were cut with the Flower Fair Framelits Die set, and stamped with the Flower Patch Photopolymer stamp set.
Oops!
The next stop is Karen Hallam at Karen’s Stampin’ Site, number 11 on the Pals Blog Hop! Thanks for visiting today; I hope to see you on next month’s Pals Hop!
And as always, Sweet Stamping!
- Michelle Gleeson at StampinMojo
- Lynn Kolcun at Stamping with Avery’ s Owlery
- Amy Hoptay at Inking of You
- Becky Volpp at inkblossomwithbecky.com
- Natalie Bradley at Soiree by Natalie Bradley
- Jackie Diediker at Stampin’ Jackie
- Maggie Mata at Maggie Made Cards
- Kim Jolley at Stampin’ Artfully
- Mary Fish at Stampin’ Pretty
- Candy Ford at Stamp Candy <–YOU ARE HERE
- Karen Hallam at Karen’s Stampin’ Site
- Lisa Ann Bernard at Queen B Creations
- Benjaman Turner at He Stamps
- Susan Itell at Simple Stampin
- Beth McCullough at Stamping Mom
- Jane Knudsen at see jane stamp
- Kerry Willard Bray at Peonies and Paper Chains
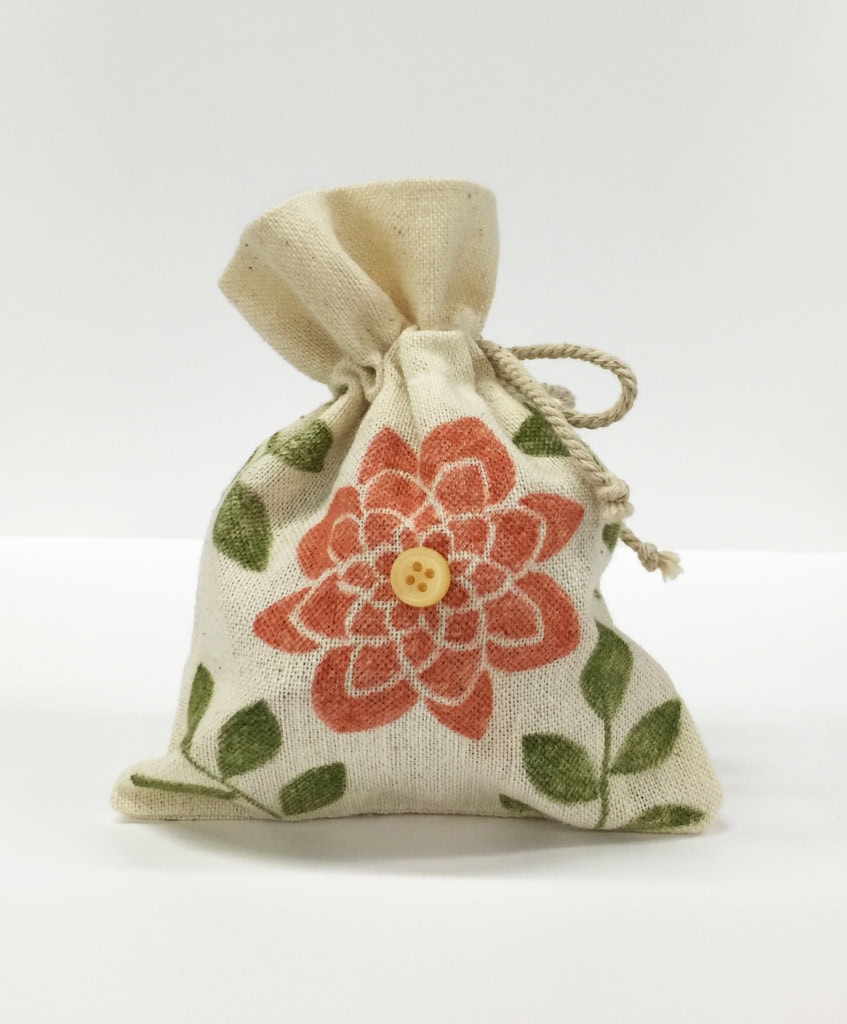
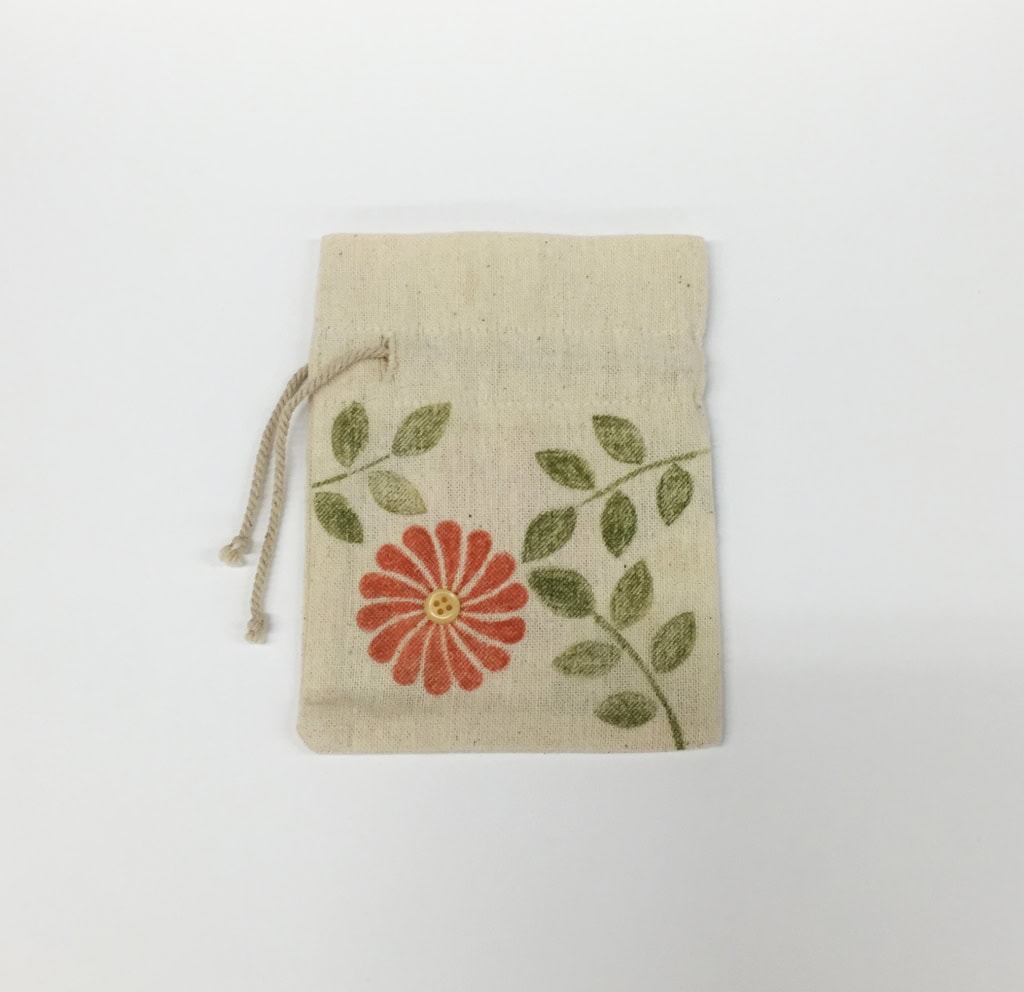
Mar 30, 2015 | Bags, Gifts |
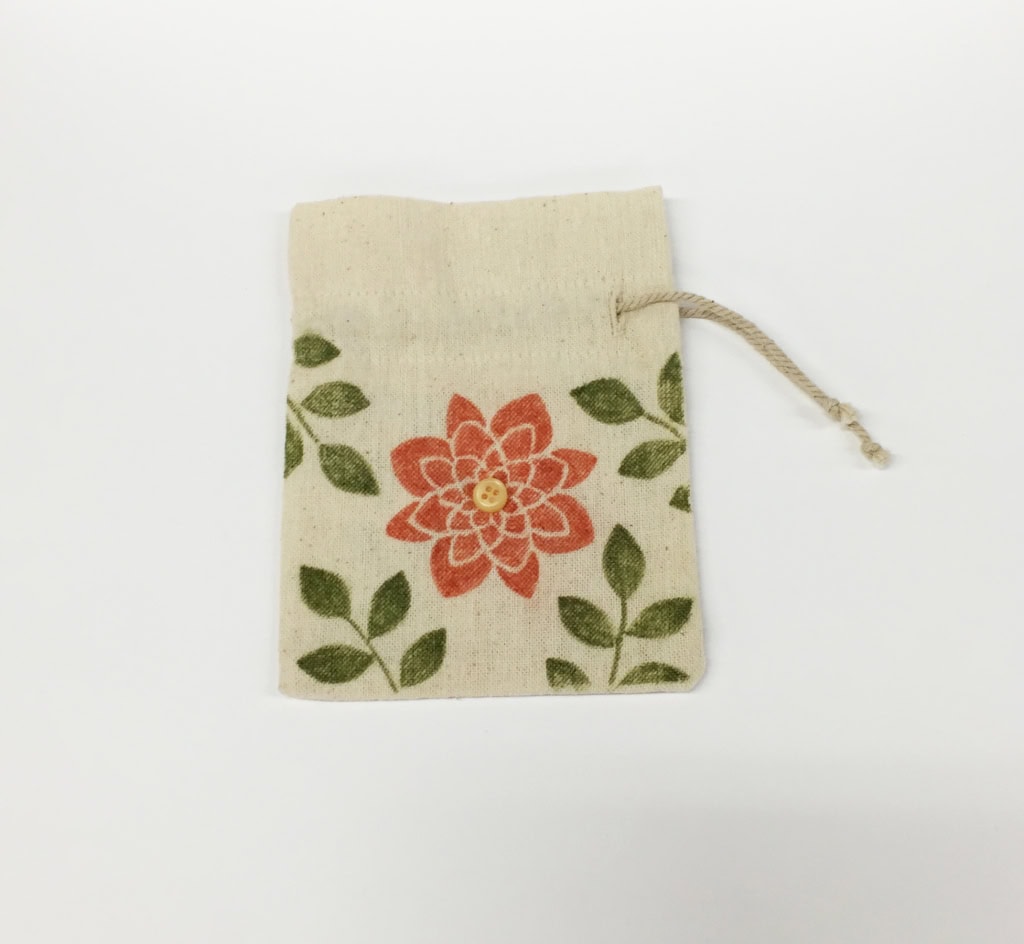
Need something sweet to put little goodies in for someone dear? Or even for yourself? Try stamping a Mini Muslin Bag. They’re pretty darn cute as they come, but with the Crazy About You stamp set, some ink, and buttons, they become something truly special.
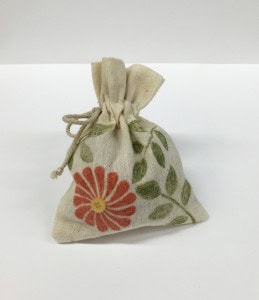

I cut a piece of cardboard that just would fit inside the bag. This provided a flat stamping surface, and prevented any ink from seeping through to the other side. I stamped the images in Calypso Coral and Pear Pizzazz. It looked great as it was, but I decided to color over the stamped images with Stampin’ Write Markers in the same colors to darken and fill them in more.
Here are both sides of the bag lying flat.
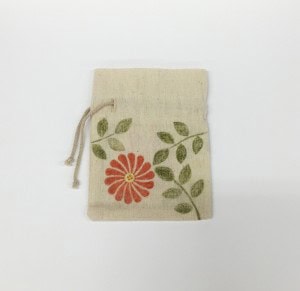

Did you know that the Crazy About You stamp set from the 2015 Occasions Catalog has 33 stamps? 33 stamps! I used the three image stamps for this project, but the 30 verbal stamps are amazingly versatile. Order yours today!
Here’s what I used for today’s project:
Thanks for stopping by today, and Sweet Stamping!
Mar 2, 2015 | Boxes, Cards, Decor, Gift Wrap, Gifts, Kits, Paper Pumpkin |
Here are some ideas for the February Paper Pumpkin kit.


USING THE ACCORDION FOLD CARD IN THE KIT

made according to the kit instructions

made according to the kit unstructions, but with a different stamp on the front


made according to the kit unstructions, but with Tangerine Tango and Basic Black

colored backgrounds with markers instead of stamps; used THANKS negative space, Coastal Cabana thick twine on box

cut the long accordion fold card into 4 small cards
DIFFERENT SIZED CARDS

These fit into a standard letter sized envelope


4-1/4″ x 5-1/2″ cards


5 x 7 card
GIFT BOXES

Kraft Gift Box, organza ribbon colored with Bermuda Bay Blendabilities marker

tag is stamped onto Tangerine Tango card stock with Lots of Thanks stamp set and cut with Decorative Label punch

Tag-a-Bag Gift Box, Bermuda Bay 1-1/4″ Striped Grosgrain Ribbon; filler is filter paper cut with Fringe Scissors
HANGING SIGN

Cut a piece of chipboard, cover it with card stock, add THANKS sheet negative space, hang with ribbon
Here are the supplies I used in addition to the Paper Pumpkin Kit:
Thanks for stopping by today, and Sweet Stamping!