Feb 26, 2020 | Cards, Gallery, Guest Stamper |
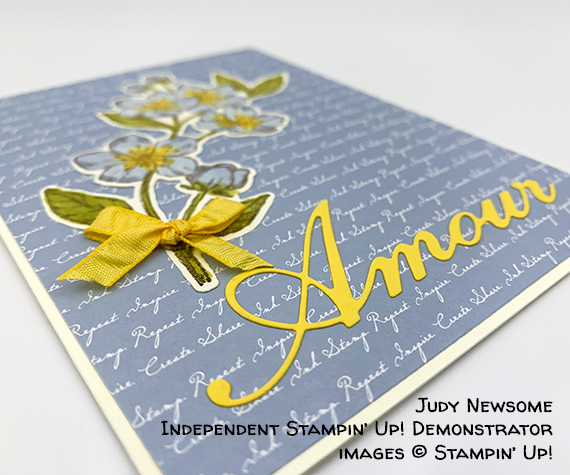
Today I’m sharing a card made by Judy Newsome, a member of my Candy Hearts team, for our February team swap. The theme was Love. She used the Forever Blossoms Bundle (Forever Blossoms stamp set and Cherry Blossoms Dies) and the Parisian Dies (available in a bundle with the Parisian Beauty stamp set) to create this beautiful card.
If you are reading this in email, some photos may appear blurry, or may not appear at all. Please click here to see the post on my blog.
S forever forever forever
Here’s what she made:

S
Here’s what she did:
Cut and scored with her paper trimmer:
- Whisper White card stock (CS) cut to 8-1/2″ x 5-1/2″, then scored in half at 4-1/4″
- 2019-2021 In Color Designer Series Paper (DSP) layer cut to 4-1/8″ x 5-3/8″ (Seaside Spray)
Stamped with the Forever Blossoms stamp set:
- floral image in Tuxedo Black Memento ink onto a scrap of Whisper White CS
Colored using Stampin’ Blends Markers:
- floral image in Seaside Spray, Daffodil Delight, and Old Olive
Cut using the Cherry Blossoms Dies:
Cut using the Parisian Dies:
- “Amour” from a scrap of Daffodil Delight CS
Assembled the card:
- burnished the fold in the card base with a Bone Folder
- DSP layer glued onto the front of the card base
- floral die cut and Amour die cut glued onto the DSP layer
- tied a piece of ribbon in a bow and adhered it onto the floral die cut using a Mini Glue Dot
S
Here are today’s colors:
You can click on each one to see all the products that come in that color!
S
Here’s what she used:
Click on these images for more details and to purchase. If you are reading this post in email, the product images may not show up. Click here to see the post on my blog.
Click “Supply List” above for a clickable and printable list of the products!
S
Here are some helpful links:
Thanks for stopping by today, and Sweet Stamping!
Feb 17, 2020 | Cards, Gallery, Guest Stamper |
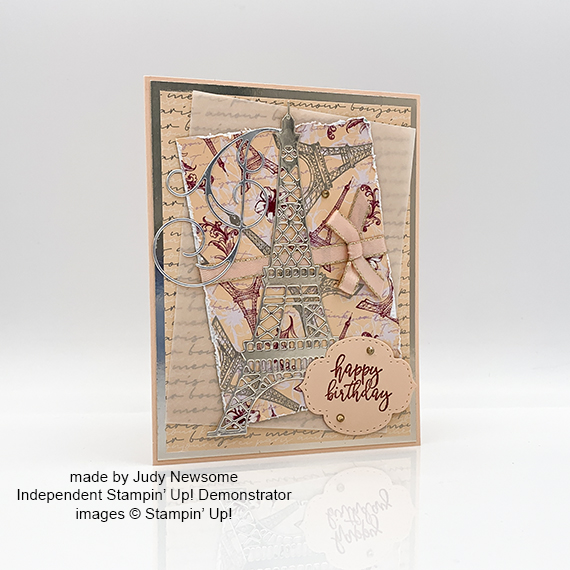
Today I’m sharing a beautiful birthday card made by Judy Newsome, a member of my Candy Hearts team. She used the beautiful Parisian Blossoms Suite of products. There are so many gorgeous details on this card, you have to look at the photo for a minute to make sure you see all of them.
Parisian Blossoms Parisian Blossoms
Here’s what she made:

S
Here’s what she did:
Cut and scored with my paper trimmer:
- Petal Pink card stock (CS) cut to 8-1/2″ x 5-1/2″, then scored in half at 4-1/4″
- Champagne Foil Sheet layer cut to 4-1/8″ x 5-3/8″
- Parisian Blossoms Specialty Designer Series Paper (DSP) layer cut to 3-7/8″ x 5-1/8″
- Vellum layer cut to 3-1/2″ x 4-3/4″
- DSP layer cut to 3″ x 4-1/4″
- Optional: Whisper White CS cut to 4″ x 5-1/4″ for the inside of the card base
Stamped with the By The Dock stamp set:
- sentiment in Cherry Cobbler ink onto a scrap of Petal Pink CS
Cut using the Parisian Dies:
- Eiffel Tower and swirl from a scrap of Champagne Foil Sheet
Cut using the Stitched So Sweetly Dies:
Assembled the card:
- burnished the fold in the card base with a Bone Folder
- foil layer glued onto the front of the card base
- larger DSP layer glued onto the foil layer
- vellum layer glued, at an angle, onto the large DSP layer (only put adhesive on the vellum where will be covered up with the next layer
- roughed up edges of the smaller DSP layer and adhered a piece of ribbon onto it with Tear & Tape, wrapping the ends around to the back of the layer
- smaller DSP layer glued, at an angle, onto the vellum layer
- foil die cuts (tower and swirl) glued onto the card front
- piece of ribbon tied in a bow and adhered onto the first piece of ribbon with a Mini Glue Dot
- sentiment adhered onto the card front using Stampin’ Dimensionals
- 3 Champagne Rhinestones applied onto the card front: 2 on the sentiment and 1 above the bow
S
Here are today’s colors:
You can click on each one to see all the products that come in that color!
S
Here’s what she used:
Click on these images for more details and to purchase.
Click “Supply List” for a clickable and printable list of the products!
S
Here are some helpful links:
Thanks for stopping by today, and Sweet Stamping!
Feb 14, 2020 | Cards, Gallery, Guest Stamper, Sale-A-Bration, Swaps |

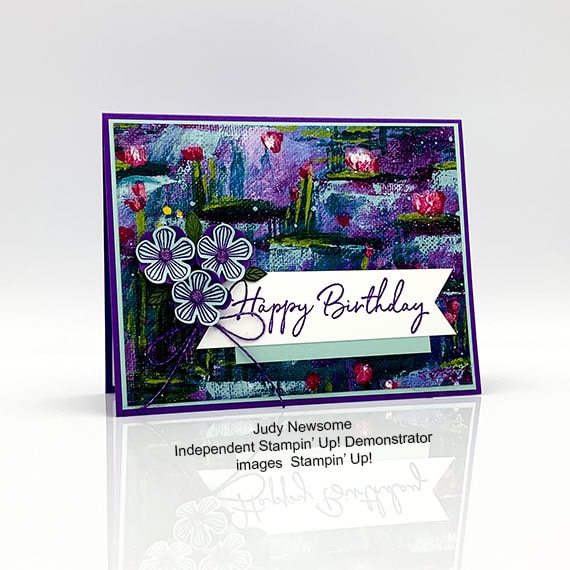
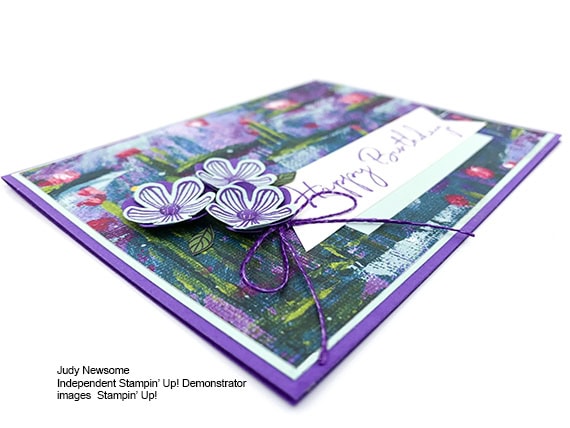
A couple days ago I shared my January swap card made with the Lily Impressions Designer Series Paper. You can see that post here. The swap theme was Sale-A-Bration. Coincidentally, Judy Newsome used the very same pattern from the same Lily Impressions Designer Series Paper for her swap cards, and out layouts are even very similar. You know what they say: great minds think alike! Judy, a member of my Candy Hearts team, lives in LaFayette, GA.
Lily Impressions Lily Impressions
Here’s what she made:
S
S
Here’s what she did:
Cut and scored with her paper trimmer:
- Gorgeous Grape card stock (CS) cut to 5-1/2″ x 8-1/2″, then scored in half at 4-1/4″
- Pool Party CS layer cut to 5-3/8″ x 4-1/8″
- Lily Impressions Designer Series Paper (DSP) layer cut to 5-1/4″ x 4″
- Whisper White CS layer cut to 4-1/2″ x 1″
- Pool Party CS layer cut to 3″ x 1/2″
- Whisper White CS cut to 5-1/4″ x 4: for the inside of the card base
Stamped with the Thoughtful Blooms stamp set:
- 3 flowers in Gorgeous Grape ink onto a scrap of Pool Party CS
- 3 leaves in Gorgeous Grape ink onto a scrap of Garden Green CS
Stamped with the Happy Birthday to You stamp set:
- sentiment in Gorgeous Grape ink onto the Whisper White CS layer
Cut using the Small Blossom Punch:
- 3 stamped flowers
- 3 flowers from a scrap of Gorgeous Grape CS
Cut using the Banner Triple Punch:
- both ends of the sentiment layer
Cut using Paper Snips:
Colored using a Stampin’ Write Marker:
- a piece of Linen Thread in Gorgeous Grape
Assembled the card:
- burnished the fold in the card base with a Bone Folder
- large Pool Party CS layer glued onto the front of the card base
- DSP layer glued onto the Pool Party CS layer
- small Pool Party CS layer glued onto the back of the sentiment layer, then both glued onto the DSP layer
- all 6 punched flowers burnished, using the bottom round end of an Aqua Painter and a Stampin’ Pierce Mat, so the petals curl up
- 3 stamped flower glued onto the 3 Gorgeous Grape CS flowers
- Gorgeous Grape Glitter Enamel Dot applied onto the center of each flower
- flowers and leaves glued onto the DSP layer
- thread tied into a bow and adhered onto the DSP layer using a Mini Glue Dot
- Whisper White CS glued onto the inside of the card base
S
Here are today’s main colors:
You can click on each one to see all the products that come in that color!
S
Here’s what she used:
Click on these images for more details and to purchase.
Click “Supply List” for a clickable and printable list of the products!
S
Here are some helpful links:
Thanks for stopping by today, and Sweet Stamping!
Sep 4, 2019 | Cards, Gallery, Guest Stamper |
Today I’m sharing a project made by Joanne Brown. Joanne is a member of my Candy Hearts team here in the Atlanta area. She used the Forever Lovely stamp set, Stitched Shapes Dies, and Bird Ballad Laser Cut Cards & Envelopes to create this magnificent Very Vanilla card. Isn’t it exquisite? It may be vanilla, but it certainly isn’t plain.
S
Here’s what she made:


Here’s what she did:
Cut and scored with her paper trimmer:
- Very Vanilla card stock (CS) cut to 4-1/8″ x 5-3/8″
Stamped with the Forever Lovely stamp set:
- sentiment in Soft Suede ink onto a scrap of Very Vanilla CS
Cut using the Stitched Shapes Dies:
Assembled the card:
- burnished the fold in the laser cut card base with a Bone Folder
- Very Vanilla CS glued onto the inside of the laser-cut card front
- 4″ piece of Very Vanilla 3/8″ Scalloped Lace Trim adhered onto the card front using Tear & Tape
- sentiment adhered onto the card front using Stampin’ Dimensionals
- Sahara Sand Adhesive-Backed Sequin applied onto the sentiment
S
S
Here are today’s colors:
You can click on each one to see all the products that come in that color!
S
Here’s what she used:
Click on these images for more details and to purchase.
<– Click here for a clickable and printable list!
S
Preorder the Pretty Petals Online Class by TOMORROW:
- Make 6 cards at home in your PJs!
- 2 each of 3 designs
- Features the Pretty Petals Suite on pages 72-74 of the 2019-2020 Annual Catalog
- I’ve done the trimming and scoring for you!
- You’ll receive the stamp set, dies, embossing folder, pre-cut card kits, and 6 Very Vanilla envelopes.
- Full detailed instructions
- Limited spots available
Click on the image below for details and class options, or copy and paste this link into your browser: https://stampcandy.net/online-classes/pretty-petals-class-preorder/

S
Here are some helpful links:
S
Thanks for stopping by today, and Sweet Stamping!
Aug 25, 2019 | Cards, Gallery, Guest Stamper |
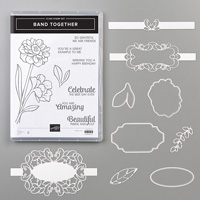
Today I’m sharing a card made by Judy Newsome, a member of my Candy Hearts team who also happens to be my sister. We had a team challenge recently and the theme was Monochromatic. Texture is important when making a monochromatic card. Judy made this lovely card in Crushed Curry using the Born to Shine stamp set, Detailed Bands Dies, and Tufted 3D Embossing Folder.
S
Here’s what she made:


S
Here’s what she did:
Cut and scored with her paper trimmer:
- Crushed Curry card stock (CS) cut to 4-1/4″ x 11″, then scored in half at 5-1/2″
- Crushed Curry CS layer cut to 4″ x 5-1/4″
- Whisper White CS cut to 4″ x 5-1/4″ for the inside of the card base
Stamped with the Born To Shine stamp set:
- sentiment in Crushed Curry ink onto a scrap of Crushed Curry CS
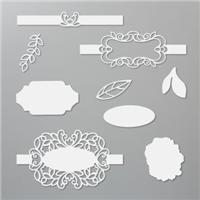
Cut using the Detailed Bands Dies:
- sentiment using the middle sized band die
Embossed Using the Tufted 3D Embossing Folder:
Assembled the card:
- burnished the fold in the card base with a Bone Folder
- band die cut glued onto the embossed layer, and any excess trimmed from two ends
- sentiment glued inside the band
- embossed layer glued onto the front of the card base
- Whisper White CS glued onto the inside of the card base
S
Here is today’s color:
You can click on it to see all the products that come in that color!
S
Here’s what she used:
Click on these images for more details and to purchase.
Supply List <– Click here for a clickable and printable list!
S
Preorder the Pretty Petals Online Class by September 5:
- Make 6 cards at home in your PJs!
- 2 each of 3 designs
- Features the Pretty Petals Suite on pages 72-74 of the 2019-2020 Annual Catalog
- I’ve done the trimming and scoring for you!
- You’ll receive all you need to make the cards, including the stamp set, dies, embossing folder, pre-cut card kits, and 6 Very Vanilla envelopes.
- Full detailed instructions
- Limited spots available
Click on the image below for details and class options, or copy and paste this link into your browser: https://stampcandy.net/online-classes/pretty-petals-class-preorder/
S
Here are some helpful links:
S
Thanks for stopping by today, and Sweet Stamping!
Aug 18, 2019 | Cards, Gallery, Guest Stamper |
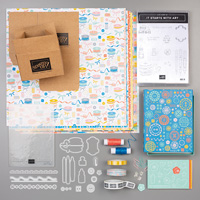
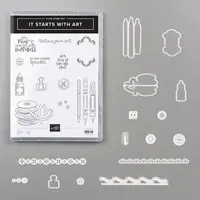
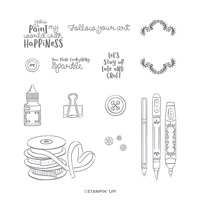
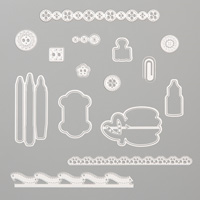
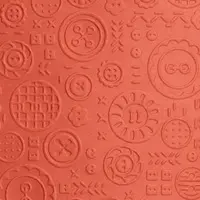
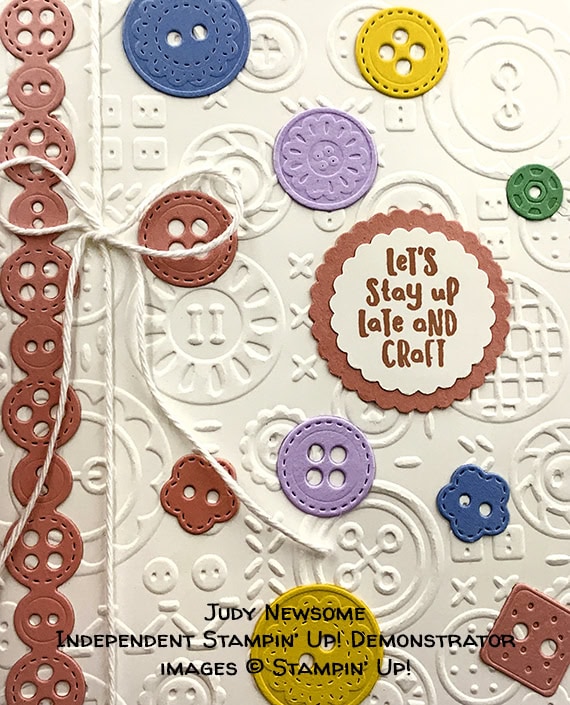
Today I’m sharing a card made by Judy Newsome, a Stampin’ Up! Demonstrator in Lafayette, GA. She used the Button Button embossing folder along with other products from the Follow Your Art Suite to create this adorable card.
The name of this embossing folder (Button Button) reminds me of the sound children make when they’re playing with toy car. I can see them pushing a car around going, “button button button” for the sound of the motor.
S
Here’s what she made:


S
Here’s what she did:
Cut and scored with a paper trimmer:
- Rococo Rose card stock (CS) cut to 8-1/2″ x 5-1/2″, then scored in half at 4-1/4″
- 2 pieces of Whisper White CS cut to 4″ x 5-1/4″
Stamped with the It Starts With Art stamp set:
- sentiment in Rococo Rose ink onto a scrap of Whisper White CS
Cut using the Arts & Crafts Dies:
- long button piece from a scrap of Rococo Rose CS
- assorted individual buttons from scraps of Rococo Rose, Seaside Spray, Daffodil Delight, Highland Heather, and Mint Macaron CS
Cut using the 1-1/8″ Scallop Circle Punch:
Cut using the 1-3/8″ Scallop Circle Punch:
- a scrap of Rococo Rose CS
Embossed using the Button Button embossing folder:
- one of the 4″ x 5-1/4″ pieces of Whisper White CS
Assembled the card:
- burnished the fold in the card base with a Bone Folder
- Whisper White twine wrapped around the embossed layer and tied in a bow
- embossed layer glued onto the front of the card base
- sentiment glued onto the punched Rococo Rose CS piece
- long die cut piece glued onto the left side of the embossed layer
- assorted die cut buttons glued onto the embossed layer
- the second piece of Whisper White CS glued onto the inside of the card base
 S
S
Here are today’s colors:
You can click on each one to see all the products that come in that color!
S
Here’s what she used:
Click on these images for more details and to purchase.
Supply List <– Click here for a clickable and printable list!
Preorder the Mosaic Mood Online Class by August 21:
- Make 6 cards at home in your PJs!
- 2 each of 3 designs
- Features the Mosaic Mood Suite on pages 118-120 of the 2019-2020 Annual Catalog
- I’ve done the trimming and scoring for you!
- You’ll receive all you need to make the cards, including the stamp set, punch, embossing folder, Garden Green ink pad, pre-cut/pre-scored card kits, and 6 Whisper White envelopes.
- Full detailed instructions
- Limited spots available
Click on the image below for details and class options, or copy and paste this link into your browser: https://stampcandy.net/online-classes/mosaic-card-class-preorder/
 S
S
Here are some helpful links:
S
Thanks for stopping by today, and Sweet Stamping!