Feb 26, 2019 | Cards, Gallery, Guest Stamper, Wedding |
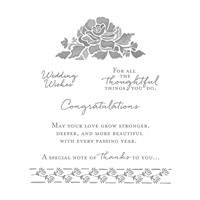
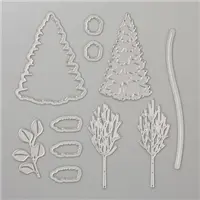
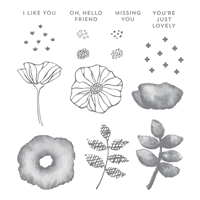
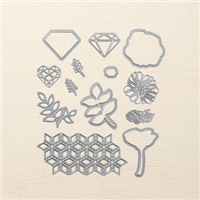
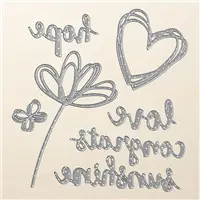
Today I’m happy to get to share a wedding card made by Joanne Brown, one of my Candy Hearts team members. She made it for the February team meeting card swap, which had a wedding/anniversary theme. She used both the Tufted and the Subtle Dynamic Textured Impressions embossing folders, along with the Be Mine Stitched Framelits Dies, Layering Ovals Framelits Dies, and Floral Phrases stamp set to create an elegant card with lots of texture.
The Lovely Lipstick Foil paper she used for the heart is from a Sale-a-bration item that has sold out, but you can make this card with Lovely Lipstick card stock, or with another color foil paper, for the same look.
S
Here’s what she made: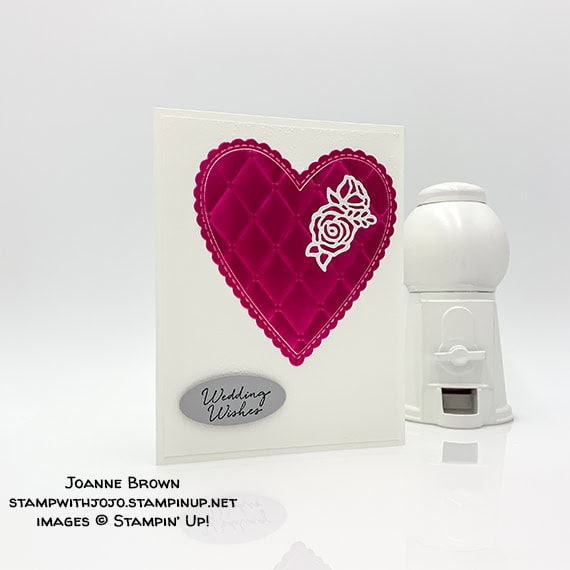
Here you can really see the embossing from both embossing folders: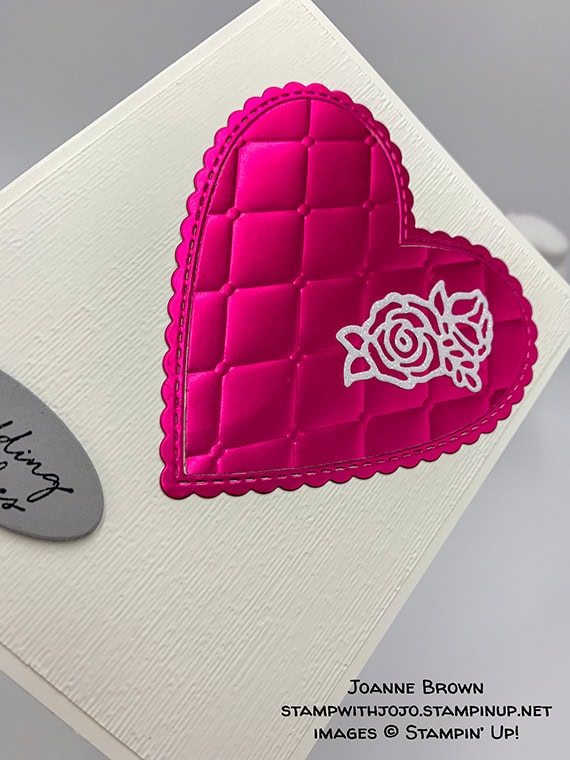
S
Here’s what she did:
Cut and scored with her Stampin’ Trimmer:
- Whisper White Thick CS cut to 8-1/2″ x 5-1/2″, then scored in half at 4-1/4″
- Whisper White CS cut to 4″ x 5-1/4″
Stamped with the Floral Phrases stamp set:
- sentiment in Basic Gray ink onto a scrap of Smoky Slate CS
Cut using the Be Mine Stitched Framelits:
- large heart from a piece of Lovely Lipstick Foil paper
- flower from a scrap of Sparkle Glimmer Paper, with a Multipurpose Adhesive Sheet on the back
Cut using the Layering Ovals Framelits:
Embossed using the Tufted embossing folder:
- middle piece of die cut heart
Embossed using the Subtle embossing folder:
Assembled the card:
- burnished the fold in the card base with a Bone Folder
- Whisper White CS layer glued onto the front of the card base
- heart (tufted middle and frame) glued onto the Whisper White CS layer
- die cut flower applied to the heart
- sentiment adhered onto the Whisper White CS layer using Stampin’ Dimensionals
S
Here are today’s colors:
You can click on each one to see all the products that come in that color!
S
Here’s what she used:
Click on these images for more details and to purchase.
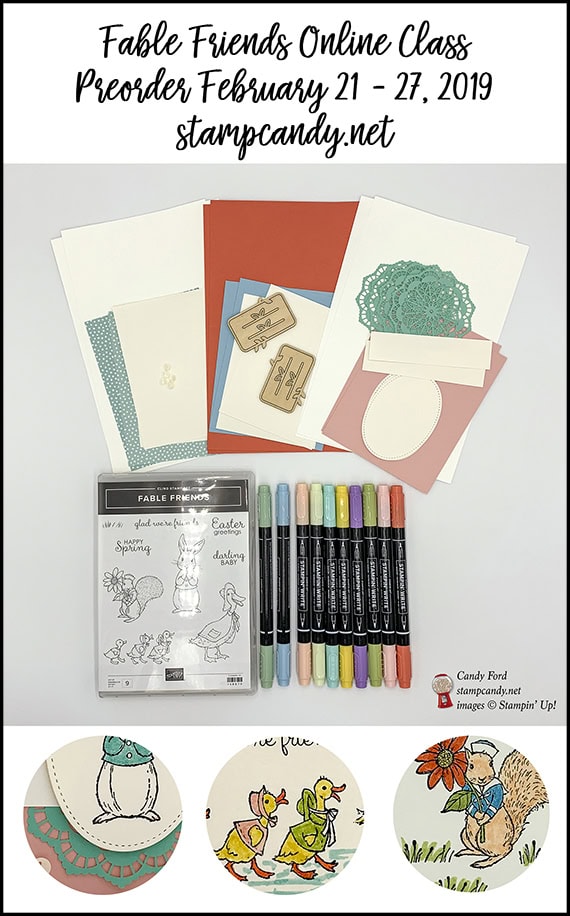
Preorder the Fable Friends Online Class by TOMORROW!
- Make 6 adorable cards at home in your PJs!
- 2 each of 3 designs
- Perfect for Spring!
- Limited spots available!
Click on the image below for details:
 S
S
S
Here are some helpful links:
Thanks for stopping by today, and Sweet Stamping!
Feb 4, 2019 | Cards, Gallery, Guest Stamper |
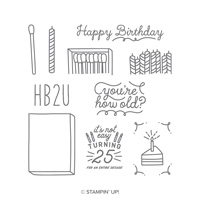
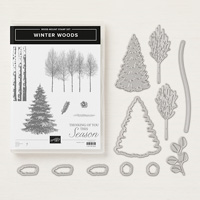
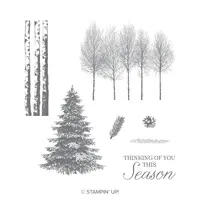
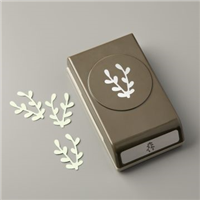
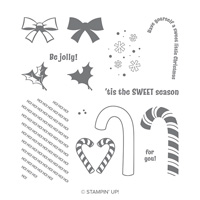
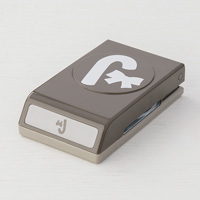
Yesterday I shared a cute Valentine made by Candy Hearts team member, Judy Newsome – you can see it here. Today I’m happy to share another card made by Judy, an elegant wintery birthday card. She used the Winter Woods stamp set, In the Woods Framelits Dies, 25 Again stamp set, Softly Falling Textured Impressions Embossing Folder, and Banner Triple Punch.
S
Here’s what she made:

S
Here’s what she did:
Cut and scored with her Stampin’ Trimmer:
- Whisper White Thick card stock (CS) cut to 5-1/2″ x 8-1/2″, then scored in half at 4-1/4″
- Gray Granite CS cut to 5-3/8″ x 4-1/8″
- Whisper White CS cut to 5-1/4″ x 3-1/2″
- Whisper White CS cut to 4-1/2″ x 7/8″
Stamped with the Winter Woods stamp set:
- tree images in Gray Granite ink onto the Whisper White CS layer
Stamped with the 25 Again stamp set:
- sentiment in Gray Granite ink onto the Whisper White CS strip
Die cut using the In the Woods Framelits:
- a small tree shape from a scrap of Silver Foil Sheet
Embossed using the Softly Falling embossing Folder:
Cut using the Banner Triple Punch:
- the right end of the sentiment strip
Assembled the card:
- burnished the fold in the card base with a Bone Folder
- Gray Granite CS layer glued onto the front of the card base
- silver die cut tree glued onto the embossed layer
- ribbon adhered onto the embossed layer using Tear & Tape, and the ends wrapped around to the back
- embossed layer glued onto the Gray Granite CS layer
- sentiment adhered over the ribbon using Stampin’ Dimensionals
- a piece of ribbon tied into a bow and adhered onto the first piece of ribbon using a Mini Glue Dot
- a silver candle embellishment applied onto the left end of the sentiment strip

S
Here are today’s colors:
You can click on each one to see all the products that come in that color!
S
Here’s what she used:
Click on these images for more details and to purchase.

Sale-a-bration is a fabulous time to join my Candy Hearts team!
- The starter kit is only $99
- You get to choose $175 in product
- Free shipping
- You get a 20%+ discount on all Stampin’ Up! products until at least July 31, 2019
- No risk. No obligation. No penalties. No brainer!
- If you have a big wishlist, this is the time to get it!
- AND for an extra $30 you get the exclusive Craft & Carry Tote
- Click here for more info and to join now!!!

S
Here are some helpful links to check out:
Thanks for stopping by today, and Sweet Stamping!
Feb 3, 2019 | Cards, Gallery, Guest Stamper |
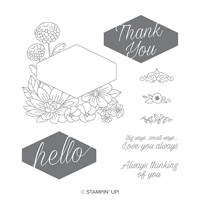
This is the third day I’ve shared a card made by one of my Candy Hearts team members for our January team meeting swap. Judy Newsome of Lafayette, GA, used the Hey Love stamp set with the Dot to Dot embossing folder and a couple of punches to create this fun Valentine. And it has a pun! And you know how I love puns! Look at the cute little gorilla and the sentiment “I’m ape over you.” And the embossed dots in the background add even more whimsy. This card would be perfect for a child, but could also be given to any fun loving adult.
S
Here’s what Judy made:


S
Here’s what she did:
Cut and scored with her Stampin’ Trimmer:
- Real Red card stock (CS) cut to 4-1/4″ x 11″, then scored in half at 5-1/2″
- Smoky Slate CS cut to 4″ x 5-1/4″
- Whisper White CS cut to 2″ x 5-1/2″
- Whisper White CS cut to 3-3/4″ x 5″ for the inside of the card
Cut using the Banner Triple Punch:
- one end of the Whisper White CS strip
Cut using the 1/8″ Circle Punch:
- 2 holes in the top end of the Whisper White CS strip
Stamped with the Hey Love stamp set:
- gorilla in Smoky Slate ink onto the Whisper White strip
- sentiments above and below the gorilla
Embossed using the Dot to Dot embossing folder:
Colored using Stampin’ Blends:
- gorilla in Smoky Slate
- heart in Real Red
Assembled the card:
- burnished the fold in the card base with a Bone Folder
- Smoky Slate CS layer glued onto the front of the card base
- ribbon tied through the 2 holes in the stamped piece and tied in a bow
- stamped piece adhered onto the Smoky Slate CS layer using Stampin’ Dimensionals
- Whisper White CS glued onto the inside of the card base
S
Here are today’s colors:
You can click on each one to see all the products that come in that color!
S
Here’s what she used:
Click on these images for more details and to purchase.
S
Here are some helpful links to check out:
Thanks for stopping by today, and Sweet Stamping!
Feb 2, 2019 | Cards, Gallery, Guest Stamper |
Today I’m sharing another swap card from our January Candy Hearts team meeting. It was made by Joanne Brown of stampingwithjojo.stampinup.net. I love to see how different Stampin’ Up! products can be used together, and Joanne did an excellent job of that on this card. She used two stamp sets, two die sets, an embossing folder, and a punch. You can see them all near the bottom of this post.
S
Here’s what Joanne made:


S
Here’s what Joanne did:
Cut and scored with her Stampin’ Trimmer:
- Whisper White Thick card stock (CS) cut to 5-1/2″ x 8-1/2″, then scored in half at 4-1/4″
- Real Red CS cut to 5-1/4″ x 4″
- Whisper White CS cut to 5″ x 3-3/4″
Stamped with the Detailed With Love stamp set:
- sentiment in Real Red ink onto a scrap of Whisper White CS
Stamped with the Oh So Eclectic stamp set:
- 3 flowers in Real Red ink onto a scrap of Whisper White CS
Die cut using the Eclectic Layers Thinlits:
Die cut using the Layering Ovals Framelits:
- sentiment with a plain die
- a scrap of Real Red CS with a scalloped die
Cut using the Sprig Punch:
- several sprigs from a scrap of Real Red CS
Embossed using the Tufted Dynamic Embossing Folder:
Assembled the card:
- burnished the fold in the card base with a Bone Folder
- Real Red CS layer glued onto the front of the card base
- two pieces of Read Red ribbon stretched across the Whisper White CS layer (together at the left edge of the layer and about 3/4″ apart at the right edge) and the ends adhered onto the back using Tear & Tape
- Real Red CS sprigs glued onto the Whisper White CS layer near the bottom left corner
- 1 flower glued onto the Whisper White CS layer at the bottom left, and the other 2 flowers adhered using Stampin’ Dimensionals
- sentiment glued onto the Read Red CS scalloped oval, then glued near the upper right corner of the Whisper White CS layer
- Red Rhinestones applied onto the Whisper White CS layer, on all the exposed the corners of the tufted shapes
S
Here are today’s colors:
You can click on each one to see all the products that come in that color!
S
Here’s what she used:
Click on these images for more details and to purchase.
S
Here are some helpful links to check out:
Thanks for stopping by today, and Sweet Stamping!
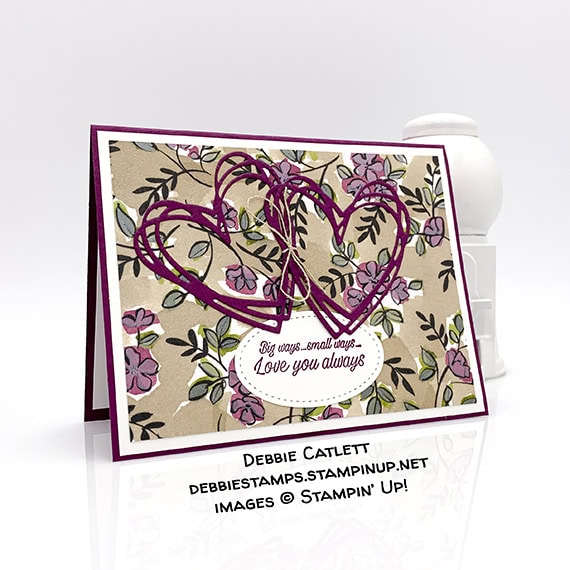
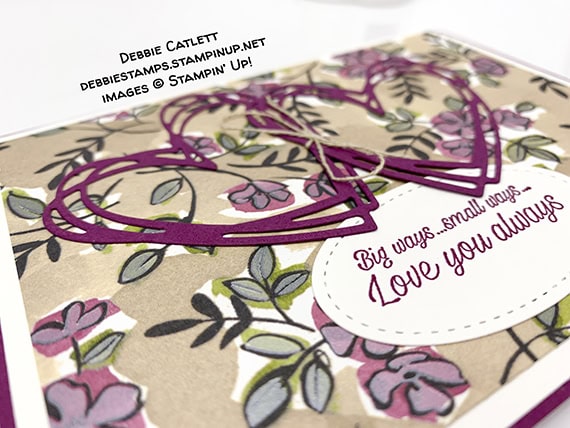
Feb 1, 2019 | Cards, Gallery, Guest Stamper |
For our Candy Hearts team meeting in January, we could make Valentines or red/pink birthday cards. Today I’m sharing one of those swap cards made by the lovely and talented Debbie Catlett of debbiestamps.stampinup.net. She used products from the Annual catalog to create a lovely Valentine: Accented Blooms stamp set, Sunshine Wishes Thinlits Dies, Stitched Shapes Framelits Dies, Share What You Love Specialty Designer Series Paper, and Linen thread.
S
February Host Code
Click on the code to see how to use it and why: X2T6W47T
S
Here’s what Debbie made:
S
Here’s what she did:
Cut and scored with her Stampin’ Trimmer:
- Blackberry Bliss card stock (CS) cut to 5-1/2″ x 8-1/2″, then scored in half at 4-1/4″
- Whisper White CS cut to 5-3/8″ x 4-1/8″
- Share What You Love Specialty Designer Series Paper (DSP) cut to 5-1/8″ x 3-7/8″
- Whisper White CS cut to 5-1/4″ x 4″ for the inside of the card base
Stamped with the Accented Blooms stamp set:
- sentiment in Blackberry Bliss ink onto a scrap of Whisper White CS
Die cut using the Sunshine Wishes Thinlits:
Die cut using the Stitched Shapes Framelits:
Assembled the card:
- burnished the fold in the card base with a Bone Folder
- 5-3/8″ x 4-1/8″ Whisper White CS layer glued onto the front of the card base
- DSP layer glued onto the Whisper White CS layer
- sentiment glued onto the DSP layer
- heart shapes glued onto the DSP layer, overlapping in the middle
- linen thread tied around the overlapping hearts
- 5-1/4″ x 4″ Whisper White CS glued onto the inside of the card base
S
Here are today’s colors:
You can click on each one to see all the products that come in that color!
S
Here’s what she used:
Click on these images for more details and to purchase.
S
Here are some helpful links to check out:
Thanks for stopping by today, and Sweet Stamping!
Dec 25, 2018 | Cards, Christmas, Gallery, Guest Stamper, Holiday |

I hope you’re having a wonderful Christmas day full of warmth, love, and cheer.
Today I’m sharing a wonderful Christmas card made by Judy Newsome, one of my Candy Hearts team members. She used the Candy Cane Season bundle to create this trio of Poppy Parade candy canes on a vellum background over a layer of Santa’s Workshop Designer Series Paper.
Here’s what she made:


Here’s what she did:
Cut and scored with my Stampin’ Trimmer:
- Poppy Parade card stock (CS) cut to 4-1/4″ x 11″, then scored in half at 5-1/2″
- Santa’s Workshop Designer Series Paper (DSP) cut to 4″ x 5-1/4″
- Vellum CS cut to 1-3/4″ x 5″
- Whisper White CS cut to 3-1/2″ x 3/4″ for the sentiment
- Whisper White CS cut to 4″ x 5-1/4″ for the inside of the card base
Stamped with the Candy Cane Season stamp set:
- 3 candy canes in Poppy Parade ink onto a scrap of Whisper White CS
- sentiment in Poppy Parade ink onto the Whisper White CS strip
- 3 sprigs of holly in Garden Green ink onto a scrap of Whisper White CS
- a sprig of holly onto the large piece of Whisper White CS
Cut using the Candy Cane Builder Punch:
Cut using the Detailed Trio Punch:
- rounded the four corners of the large piece of Whisper White CS
Fussy cut using Paper Snips:
Colored using a Poppy Parade Blends Marker:
- 9 small pearls (color them while they are still on their backing, them move them to the card)
Assembled the card:
- burnished the fold in the card base with a Bone Folder
- DSP layer glued onto the front of the card base
- candy canes and holly glued onto the Vellum
- vellum adhered onto the DSP layer using Tear & Tape, hiding the adhesive under the candy canes
- sentiment adhered onto the DSP layer using Tear & Tape
- three pearls applied to each holly sprig
- a piece of Poppy Parade ribbon tied into a box and adhered onto the Vellum using Mini Glue Dots
- large Whisper White CS glued onto the inside of the card base
Here are today’s colors:
You can click on each one to see all the products that come in that color!
Here’s what she used:
Click on these images for more details and to purchase.
Here’s the Year-End Closeout!
During the Year-End Closeout promotion, you can save on a selection of retiring and surplus items—while supplies last. Definitely place your orders sooner rather than later, because supplies are limited and the Year-End Closeout ends on January 2. After that, some of your favorite retiring items may be gone for good!
CLICK HERE to see all the Year-End Closeout items. Here’s how to get your copy of the new catalogs:
Just click on this button and I’ll send you the new catalogs, along with a list of the bundles, the Designer Series Paper coordinating colors, and a handmade card!
Here’s how to shop 2019 Occasions/Sale-a-bration items now!
- Become a Candy Heart!
- Join my team and you can order the new products right now, instead of having to wait another month!
- No selling required! I welcome Hobby Demos! (Hobby Demos join to get the discount for themselves.)
- CLICK HERE for the details!
Here’s more stuff to check out:
Thanks for stopping by today, and Sweet Stamping!