Dec 18, 2018 | Cards, Christmas, Gallery, Guest Stamper, Holiday |
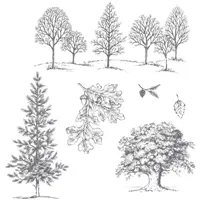
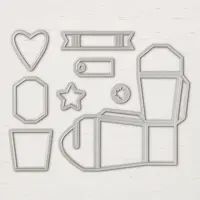
Joanne Brown is one of my amazing Candy Hearts team members. She made today’s card using three stamp sets (Gallery Grunge, Lovely as a Tree, and Farmhouse Christmas) and1 the Stitched Shapes Framelits Dies. I love how she combined all these different products in a way that makes you think they’re all from the same set!
Here’s what she made:


Here’s what (I think) she did:
Cut and scored with her Stampin’ Trimmer:
- Whisper White Thick card stock (CS) cut to 8-1/2″ x 5-1/2″, then scored in half at 4-1/4″
- Basic Black CS cut to 4″ x 5-1/4″
- Basic Gray CS cut to 3-3/4″ x 5″
- Whisper White CS cut to 3-1/2″ x 4-3/4″
Stamped with the Gallery Grunge stamp set:
- wood background image in Basic Gray ink (stamped off once) onto the Whisper White CS layer
Stamped with the Lovely as a Tree stamp set:
- tree in Basic Gray ink over the wood background image
Stamped with the Farmhouse Christmas stamp set:
- sentiment in Cherry Cobbler ink onto a scrap of Whisper White CS
Die cut using the Stitched Shapes Framelits:
Assembled the card:
- burnished the fold in the card base with a Bone Folder
- Basic Black CS layer glued onto the front of the card base
- Basic Gray CS layer glued onto the Basic Black CS layer
- stamped Whisper White CS layer glued onto the Basic Gray CS layer
- sentiment adhered to the Whisper White CS layer using Stampin’ Dimensionals
Here are today’s colors:
You can click on each one to see all the products that come in that color!
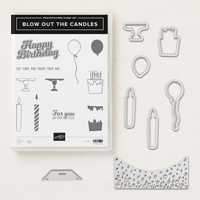
Here’s what she used:
Click on these images for more details and to purchase.
Here’s the newly updated Clearance Rack!
A whole lot of new goodies have been added to the Clearance Rack! Get them before they’re gone!

Here’s the Year-End Closeout!
The Year-End Closeout has officially begun! During this promotion, you will be able to save on a selection of retiring and surplus items—while supplies last. Definitely place your orders sooner rather than later, because supplies are limited and the Year-End Closeout ends on January 2. After that, some of your favorite retiring items may be gone for good!
CLICK HERE to see all the Year-End Closeout items. Here’s how to get your copy of the new catalogs:
Just click on this button and I’ll send you the new catalogs, along with a list of the bundles, the Designer Series Paper coordinating colors, and a handmade card!
Here’s how to shop from the 2019 Occasions catalog and earn 2019 Sale-a-bration items now!
- Become a Candy Heart!
- Join my team and you can order the new products right now, instead of having to wait another month!
- No selling required! I welcome Hobby Demos! (Hobby Demos join to get the discount for themselves.)
- CLICK HEREfor the details!
Here’s more stuff to check out:
Thanks for stopping by today, and Sweet Stamping!
Dec 16, 2018 | Boxes, Christmas, Gallery, Gift Wrap, Gifts, Holiday |
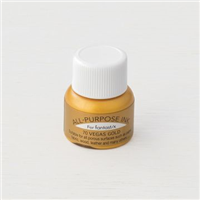
Today I’m sharing a fun little Takeout Treat Box I made for a group of stampers at my retreat last month. I used the Takeout Thinlits Dies to cut the box out of Broadway Bound Specialty Designer Series Paper. I tied a piece of Basic Black Solid Twine around the box, and the finishing touch is a little wooden element I painted with Vegas Gold Shimmer Paint, adhered using a Mini Glue Dot. Easy peasy quick and easy!
Here’s what I made:

Here’s what I did:
Die cut using the Takeout Thinlits:
- two pieces of Broadway Bound Specialty Designer Series Paper (DSP)
Colored using a Stampin’ Sponge:
- tree from the Festive Farmhouse Elements in Vegas Gold Shimmer Paint
Assembled the Takeout Treat Box:
- burnished the folds in the DSP pieces with a Bone Folder
- DSP pieces glued together on the bottom and up all four sides
- inserted treats into the box, and closed the top
- tied Basic Black Solid Twine around the box and tied it in a bow
- adhered tree element using a Mini Glue Dot

Here are today’s colors:
You can click on each one to see all the products that come in that color!
Here’s what I used:
Click on these images for more details and to purchase.
Here’s the Year-End Closeout!
The Year-End Closeout has officially begun! During this promotion, you will be able to save on a selection of retiring and surplus items—while supplies last. Definitely place your orders sooner rather than later, because supplies are limited and the Year-End Closeout ends on January 2. After that, some of your favorite retiring items may be gone for good!
CLICK HERE to see all the Year-End Closeout items. Here’s how to get your copy of the new catalogs:
Just click on this button and I’ll send you the new catalogs, along with a list of the bundles, the Designer Series Paper coordinating colors, and a handmade card!
Here’s how to shop 2019 Occasions/Sale-a-bration items now!
- Become a Candy Heart!
- Join my team and you can order the new products right now, instead of having to wait another month!
- No selling required! I welcome Hobby Demos! (Hobby Demos join to get the discount for themselves.)
- CLICK HERE for the details!
Here’s more stuff to check out:
Thanks for stopping by today, and Sweet Stamping!
Dec 15, 2018 | Cards, Christmas, Gallery, Holiday, Swaps |
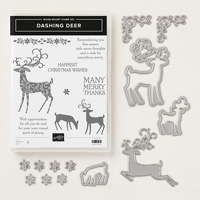
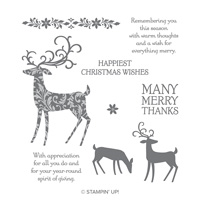
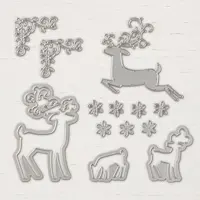
Today I’m sharing the card I made for the Candy Hearts card swap for November. I used the Dashing Deer Bundle and Dashing Along Designer Series Paper to create this card with multiple layers. I cut some of the pieces using the Layering Circles Framelits Dies and the Lakeside Framelits Dies.
Here’s what I made:


Here’s what I did:
Cut and scored with my Stampin’ Trimmer:
- Cherry Cobbler card stock (CS) cut to 4-1/4″ x 11″, then scored in half at 5-1/2″
- Garden Green CS cut to 4-1/8″ x 5-3/8″
- Dashing Along Designer Series Paper (DSP) cut to 4″ x 5-1/4″
- DSP cut to 4″ x 1-1/2″
- Whisper White CS cut to 4″ x 5-1/4″ for the inside of the card base
Stamped with the Dashing Deer stamp set:
- 2 deer and the sentiment in Garden Green ink onto a scrap of Whisper White CS
- flourish in Cherry Cobbler and Garden Green inks onto the Whisper White CS for the inside of the card base
- NOTE: I colored the flourish stamp using Stampin’ Write Markers
Die cut using the Detailed Deer Thinlits:
Die cut using the Lakeside Framelits:
Die cut using the Layering Circles Framelits:
- a scrap of vellum CS into a circle
- a scrap of Cherry Cobbler CS into the same size circle, then the center cut out using a smaller die, to create a frame
Assembled the card:
- burnished the fold in the card base with a Bone Folder
- Garden Green CS layer glued onto the front of the card base
- larger DSP layer glued onto the Garden Green CS layer
- Cherry Cobbler CS frame glued onto the vellum circle
- vellum circle glued onto the larger DSP layer (put glue only where it would be hidden under the Cherry Cobbler frame)
- smaller DSP layer glued onto the larger DSP layer, covering the bottom part of the circles
- deer glued onto the vellum
- sentiment adhered onto the smaller DSP layer using Stampin’ Dimensionals
- 2 Red Rhinestones applied to the sentiment
- Whisper White CS glued onto the inside of the card base
Here are today’s colors:
You can click on each one to see all the products that come in that color!
Here’s what I used:
Click on these images for more details and to purchase.
Here’s the Year-End Closeout!
The Year-End Closeout has officially begun! During this promotion, you will be able to save on a selection of retiring and surplus items—while supplies last. Definitely place your orders sooner rather than later, because supplies are limited and the Year-End Closeout ends on January 2. After that, some of your favorite retiring items may be gone for good!
CLICK HERE to see all the Year-End Closeout items. Here’s how to get your copy of the new catalogs:
Just click on this button and I’ll send you the new catalogs, along with a list of the bundles, the Designer Series Paper coordinating colors, and a handmade card!
Here’s how to shop 2019 Occasions/Sale-a-bration items now!
- Become a Candy Heart!
- Join my team and you can order the new products right now, instead of having to wait another month!
- No selling required! I welcome Hobby Demos! (Hobby Demos join to get the discount for themselves.)
- CLICK HERE for the details!
Here’s more stuff to check out:
Thanks for stopping by today, and Sweet Stamping!
Dec 14, 2018 | Cards, Christmas, Gallery, Holiday |
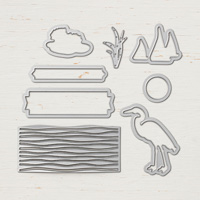
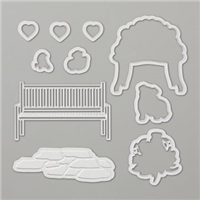
Today I’m sharing a card I made using the Homemade Kindness stamp set, which has cozy, sweet images from an old fashioned kitchen. I stamped the images in black Stazon ink onto watercolor paper, then used an Aqua Painter to watercolor the images. I used the embossing die from the Pretty Park Framelits Dies to emboss – or actually deboss – the stones on the kitchen floor, and I cut the sentiment using the Lakeside Framelits Dies.
Here’s what I made:


Here’s what I did:
Cut and scored with my Stampin’ Trimmer:
- Pool Party card stock (CS) cut to 4-1/4″ x 11″, then scored in half at 5-1/2″
- Flirty Flamingo CS cut to 3-7/8″ x 5-1/8″
- watercolor paper cut to 3-3/4″ x 5″
- Whisper White CS cut to 4″ x 5-1/4″ for the inside of the card base
Stamped with the Handmade Kindness stamp set:
- stove and bricks in black Stazon ink onto the watercolor paper
- sentiment in black Stazon ink onto a scrap of watercolor paper
Die cut using the Lakeside Framelits:
Embossed using the Pretty Park Framelits Dies:
- stones onto the watercolor paper layer, under the stove
- yes, there is an embossing die in this set of framelits
Colored using an Aqua Painter:
- stove in Pool Party, Flirty Flamingo, and Basic Gray inks
- sentiment in Flirty Flamingo ink
- oven window with a Basic Black watercolor pencil, then blended slightly using the Aqua Painter
Colored using a Stampin’ Write Marker:
- edges of the die cut sentiment in Flirty Flamingo
Assembled the card:
- burnished the fold in the card base with a Bone Folder
- Flirty Flamingo CS layer glued onto the front of the card base
- watercolor paper layer glued onto the Flirty Flamingo CS layer
- sentiment adhered to the watercolor paper layer using Stampin’ Dimensionals
- Whisper White CS glued onto the inside of the card base
Here are today’s colors:
You can click on each one to see all the products that come in that color!
Here’s what I used:
Click on these images for more details and to purchase.
Here’s the Year-End Closeout!
The Year-End Closeout has officially begun! During this promotion, you will be able to save on a selection of retiring and surplus items—while supplies last. Definitely place your orders sooner rather than later, because supplies are limited and the Year-End Closeout ends on January 2. After that, some of your favorite retiring items may be gone for good!
CLICK HERE to see all the Year-End Closeout items. Here’s how to shop 2019 Occasions/Sale-a-bration items now!
- Become a Candy Heart!
- Join my team and you can order the new products right now, instead of having to wait another month!
- No selling required! I welcome Hobby Demos! (Hobby Demos join to get the discount for themselves.)
- CLICK HERE for the details!
Here’s more stuff to check out:
Thanks for stopping by today, and Sweet Stamping!
Dec 13, 2018 | Cards, Gallery, Guest Stamper, Holiday |
Today I’m excited to share some great projects I received while I was at OnStage Orlando last month. The ones I’m sharing are the ones that survived the trip home in the best shape! I’ve included links to instructions for the projects on my fellow demonstrators’ web sites.
Here’s what Debbie Mason made:
This cute little jar is full of gingersnaps! She used the Santa’s Workshop Specialty Designer Series Paper, Santa’s Signpost Framelits Dies, Sparkle Glimmer Paper, and Poppy Parade 1/2″ Textured Weave Ribbon.
Debbie’s web site

Here’s what Jackie Beers made:
Jackie’s web site
instructions for this project


Here’s what Julie DiMatteo made:
Julie’s website
instructions for this project


It contained a magnet Julie made using the same paper as on the front of the container:

Here’s what Monika Davis made:
Monika’s website
instructions for this project

It contained two Oreos celebrating Mickey Mouse’s 90th birthday:

Here’s what Shelby Freeman made:
Shelby works for Stampin’ Up! in Utah – she’s my Business Development Advisor. I was happy to get to see her in person in Orlando! She put some candies along with some samples of brand new Designer Series Papers in a 3″ x 6″ Cello Bag and tied it with a piece of Basic Black satin ribbon.


Here’s what they used:
Click on these images for more details and to purchase.
Here’s the Year-End Closeout!
The Year-End Closeout has officially begun! During this promotion, you will be able to save on a selection of retiring and surplus items—while supplies last. Definitely place your orders sooner rather than later, because supplies are limited and the Year-End Closeout ends on January 2. After that, some of your favorite retiring items may be gone for good!
CLICK HERE to see all the Year-End Closeout items. Here’s how to shop 2019 Occasions/Sale-a-bration items now!
- Become a Candy Heart!
- Join my team and you can order the new products right now, instead of having to wait another month!
- No selling required! I welcome Hobby Demos! (Hobby Demos join to get the discount for themselves.)
- CLICK HERE for the details!
Here’s more stuff to check out:
Thanks for stopping by today, and Sweet Stamping!
Dec 6, 2018 | Cards, Christmas, Gallery, Holiday |
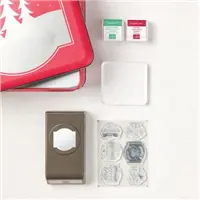
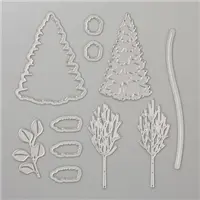
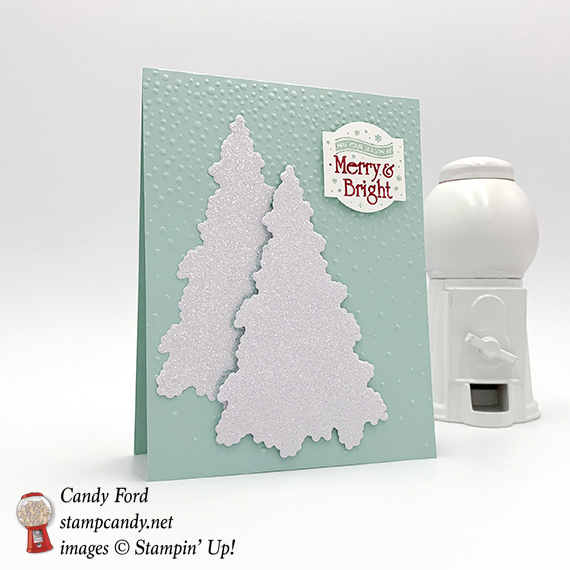
Today’s card combines The Christmas Traditions Punch Box with the In The Woods Framelits Dies and the Softly Falling embossing folder to create a soft and sweet holiday card. The colors are Pool Party and Whisper White, with just a little pop of Real Red on the sentiment, which reads, “May Your Season Be Merry & Bright.”
Here’s what I made:
Here’s what I did:
Cut and scored with my Stampin’ Trimmer:
- Pool Party card stock (CS) cut to 4-1/4″ x 11″, then scored in half at 5-1/2″
- Optional: Whisper White CS cut to 4″ x 5-1/4″ for the inside of the card
Stamped with the Christmas Traditions stamp set:
- sentiment in Pool Party and Real Red inks onto a scrap of Whisper White CS
- NOTE: I colored the different parts of the stamp using Stampin’ Write Markers.
Die cut using the In the Woods Framelit Dies:
- 2 trees from a scrap of Sparkle Glimmer Paper
Dry Embossed with the Softly Falling TIEF:
Punched using the Christmas Traditions Punch:
Assembled the card:
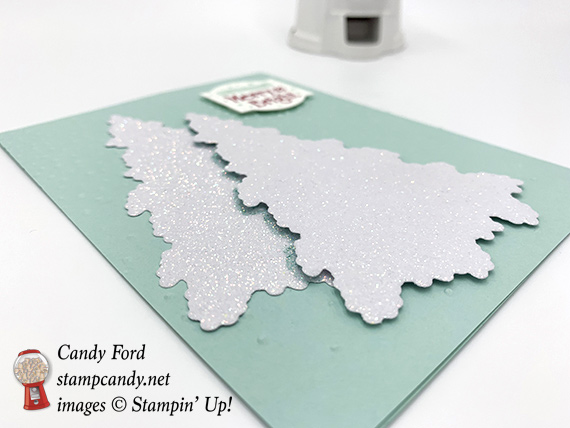
- burnished the fold in the card base with a Bone Folder
- one tree glued onto the front of the card base
- second tree adhered using Stampin’ Dimensionals
- shadow drawn onto the bottom tree, around the edge of the top tree, using a Pool Party Stampin’ Write Marker
- sentiment adhered using Stampin’ Dimensionals
- optional: Whisper White CS glued onto the inside of the card base
Here are today’s colors:
You can click on each one to see all the products that come in that color!
Here’s what I used:
Click on these images for more details and to purchase.
Correction: I later realized that I cut the trees with the Christmas Staircase Thinlits Dies instead of the In the Woods Framelits Dies. They both have a tree and I just forgot which one I used by the time I wrote this blog post. Either one would work great on this card. You can get the set I actually used here: Christmas Staircase Thinlits Dies (144679) 20 dies for $39. Here’s the Year-End Closeout!
The Year-End Closeout has officially begun! During this promotion, you will be able to save on a selection of retiring and surplus items—while supplies last. Definitely place your orders sooner rather than later, because supplies are limited and the Year-End Closeout ends on January 2. After that, some of your favorite retiring items may be gone for good!
CLICK HERE to see all the Year-End Closeout items. Here’s how to shop 2019 Occasions/Sale-a-bration items now!
- Become a Candy Heart!
- Join my team and you can order the new products right now, instead of having to wait another month!
- No selling required! I welcome Hobby Demos! (Hobby Demos join to get the discount for themselves.)
- CLICK HERE for the details!
Here’s more stuff to check out:
Thanks for stopping by today, and Sweet Stamping!