Jul 23, 2016 | Cards, Deals, Gallery, New Products |
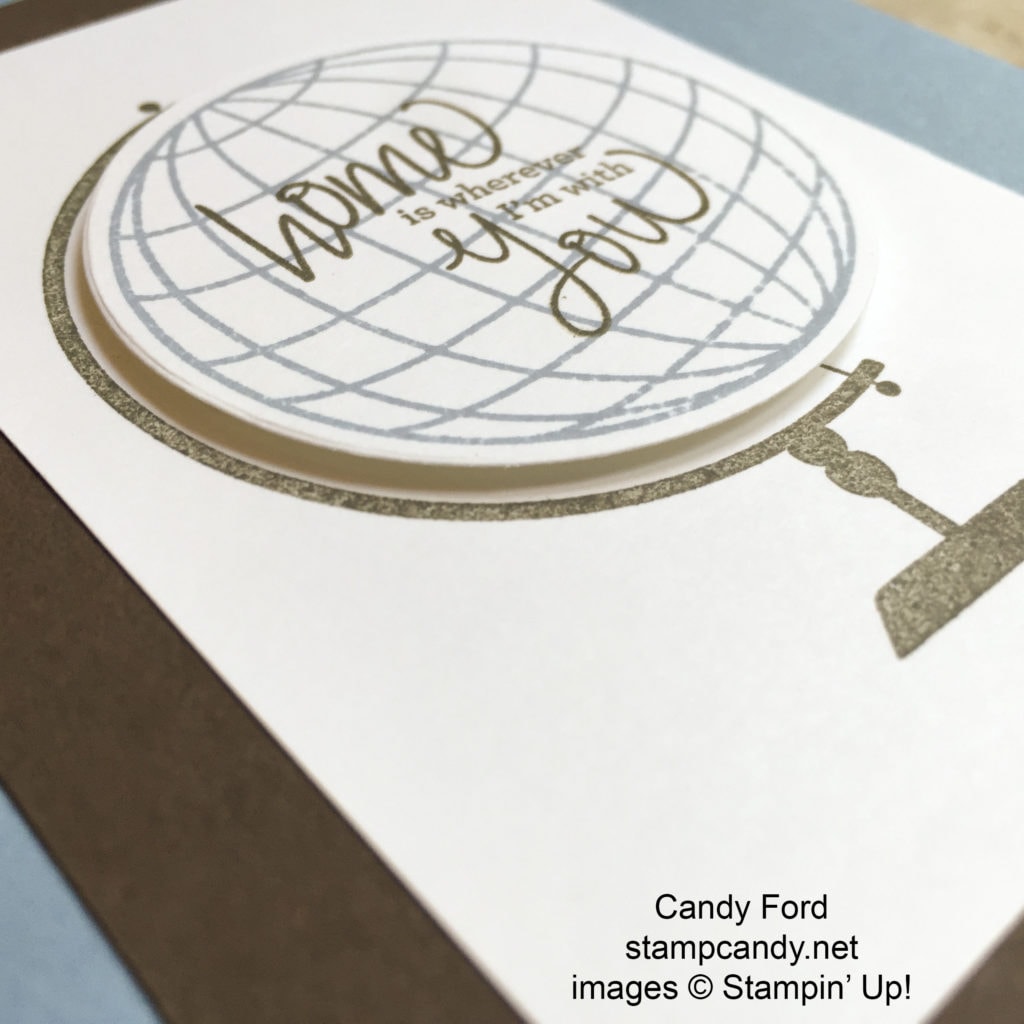
I finally got around to using the Places You’ll Go stamp set. I’m not sure why it took me so long. Well, that’s silly; of course, I know why. There are just so many great products in the new annual catalog, it’ll take me a while to work my way through them. But for today’s card, it’s Places You’ll Go.
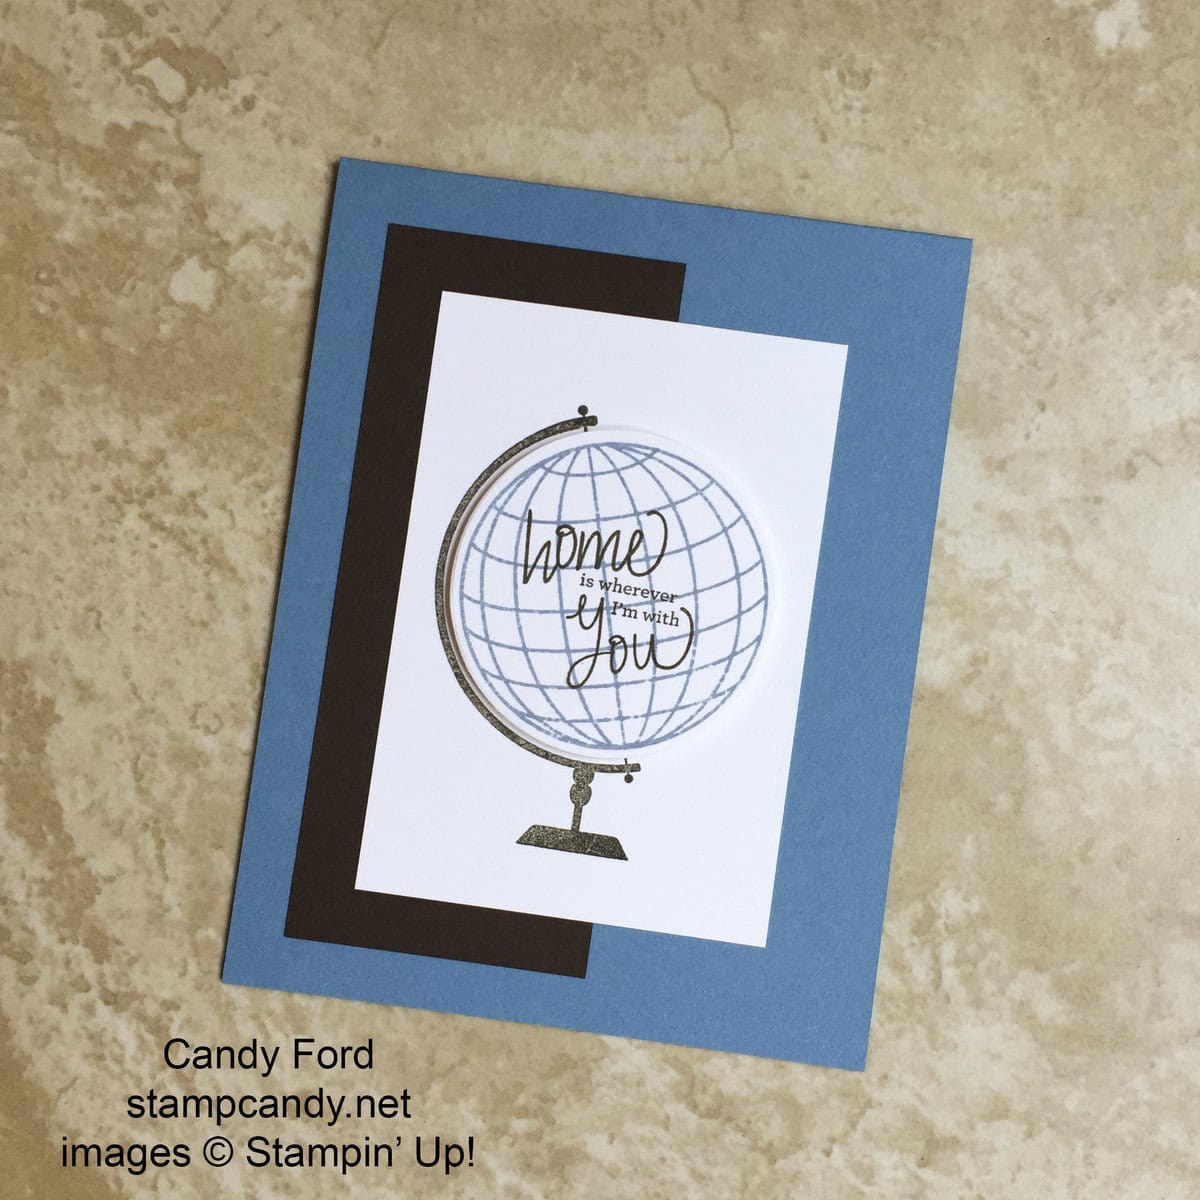
When I was deciding on colors, I thought about how the earth is blue from space, and Marina Mist seemed the perfect misty blue color. Early Espresso grounds the lighter colors on the card, and it’s also the color of earth, as in soil.
It’s a very simple card. The card base is Marina Mist card stock. There is a strip of Early Espresso card stock glued to the front.
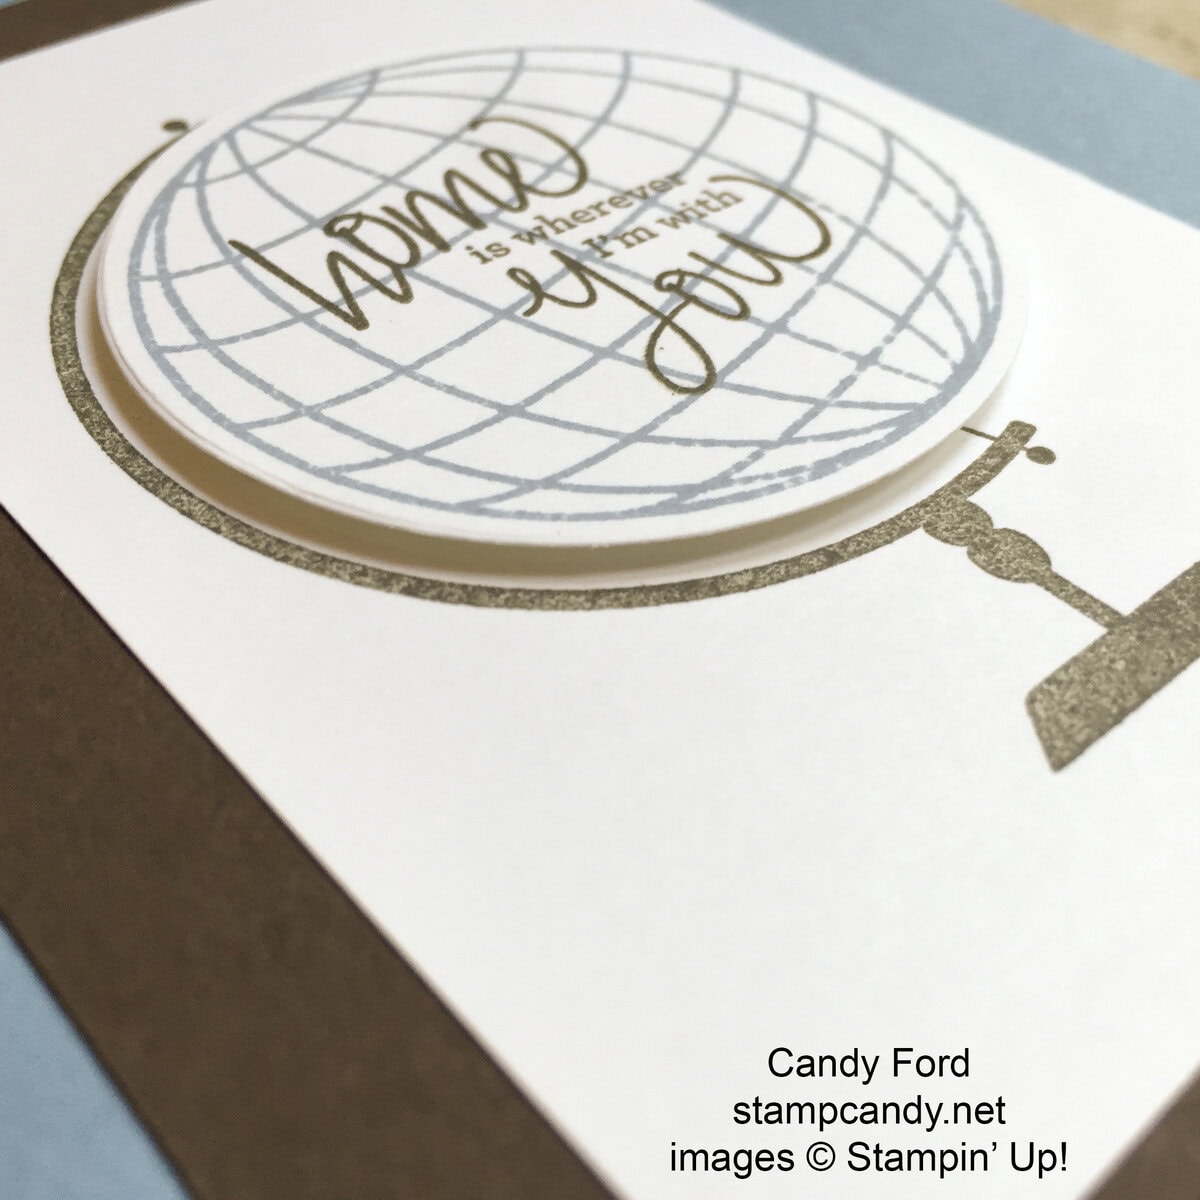
I stamped the globe’s stand in Early Espresso ink onto a piece of Whisper White card stock, which I then glued to the card front.
I stamped the globe in Marina Mist ink onto a separate piece of Whisper White card stock, and stamped sentiment in Early Espresso ink over the top of it. I used a die from the Layering Circle Framelits to cut out the globe, then I attached it to the card front with Stampin’ Dimensionals.

Here’s what I used:

There’s just one more week of
Don’t miss out on this promotion at Stampin’ Up!
Earn Bonus Days coupons in July!
Redeem Bonus Days coupons in August!
Details from Stampin’ Up!
- An email address is required to participate in this promotion; Bonus Days coupon codes can only be delivered to participants via email.
- We strongly recommend that participants both save emails containing their Bonus Days coupon codes AND write down the coupon codes in a safe place—the codes cannot be resent if the participant loses the email, and Stampin’ Up! cannot recover lost codes.
- Participants will receive a $5 Bonus Days coupon code via email for every $50 they spend in a single order (catalog price before shipping and tax). There is no limit to the number of coupons participants can receive per order or throughout the duration of the promotion. There is no limit on the number of coupons participants can use on an order during redemption.
- Bonus Days coupons codes can be used in the checkout process during the redemption period.
- All order types qualify for this promotion. FOR FAX AND MAIL ORDERS, email addresses must still be provided in order to qualify for Bonus Days coupons during the promotion period. During redemption, be sure to include your coupon codes on your fax and mail orders.
- Bonus Days coupon codes can be redeemed for any product, excluding Starter Kits and Paper Pumpkin subscriptions. New prepaid Paper Pumpkin codes can be redeemed.
- Promotion period: July 7–31, 2016
- Promotion Deadlines:
- PHONE/FAX/MAIL: July 29, 2016 by 6:50 PM (MT)
- ONLINE: July 31, 2016 by 11:50 PM (MT)
- Redemption period: August 2–31, 2016
- Redemption Deadlines:
- PHONE/FAX/MAIL: August 31, 2016 by 6:50 PM (MT)
- OONLINE: August 31, 2016 by 11:50 PM (MT)
For Eastern time, add two hours to these times. For Central time add 1 hour. For Pacific time, subtract 1 hour.
Do you know what else you earn for every $50 you spend in a single order? Gum Balls! And they’re good for a year! Click on Gum Ball Rewards at the top of the page for details.
Thanks for stopping by today, and Sweet Stamping!

Jul 22, 2016 | Cards, Gallery, New Products |
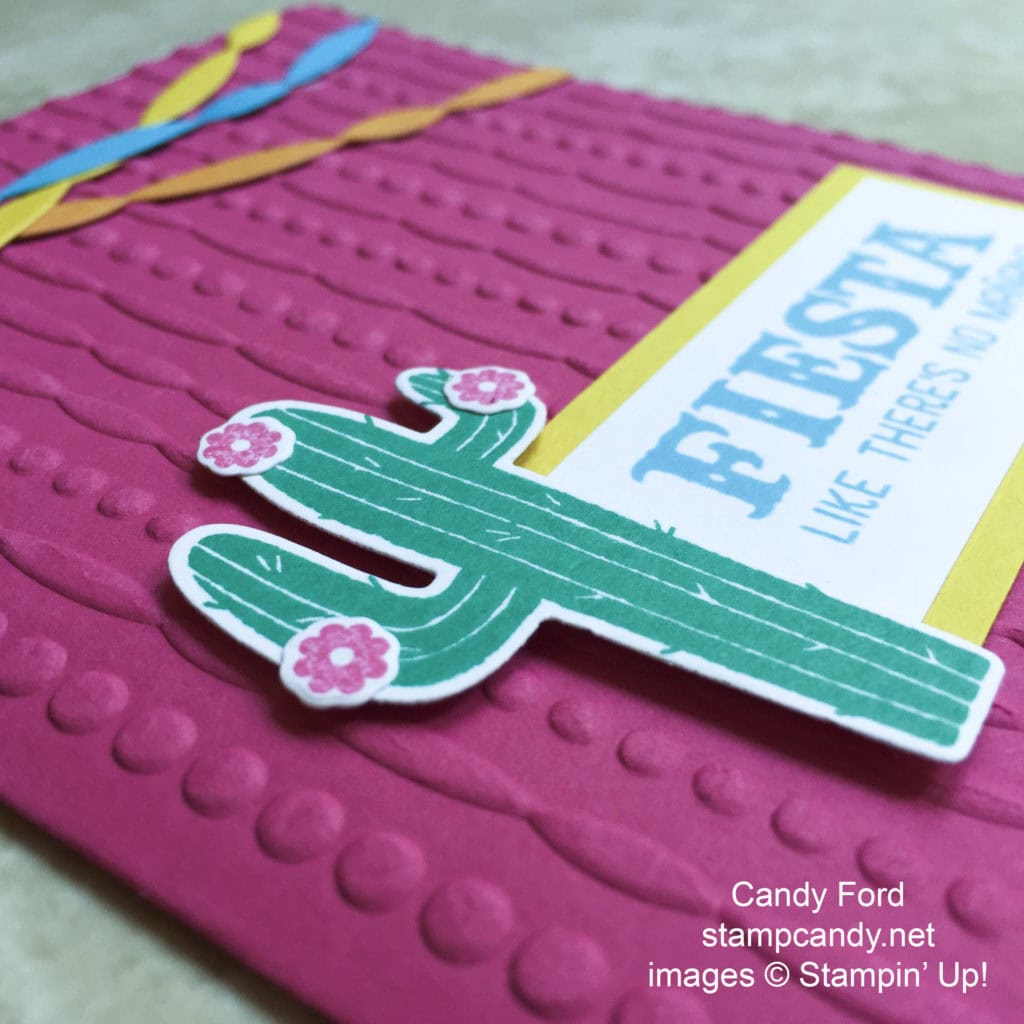
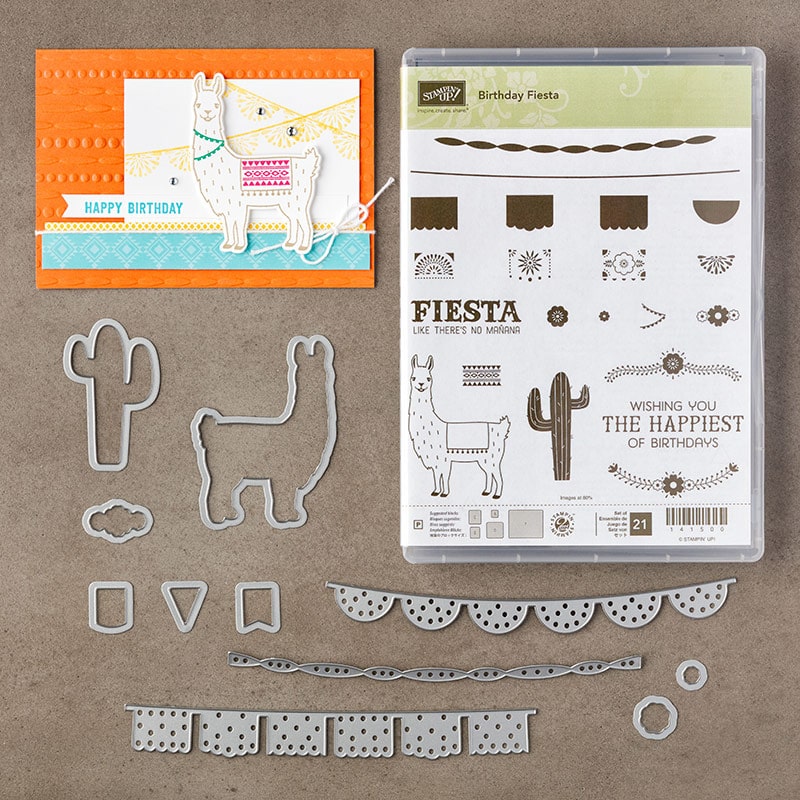
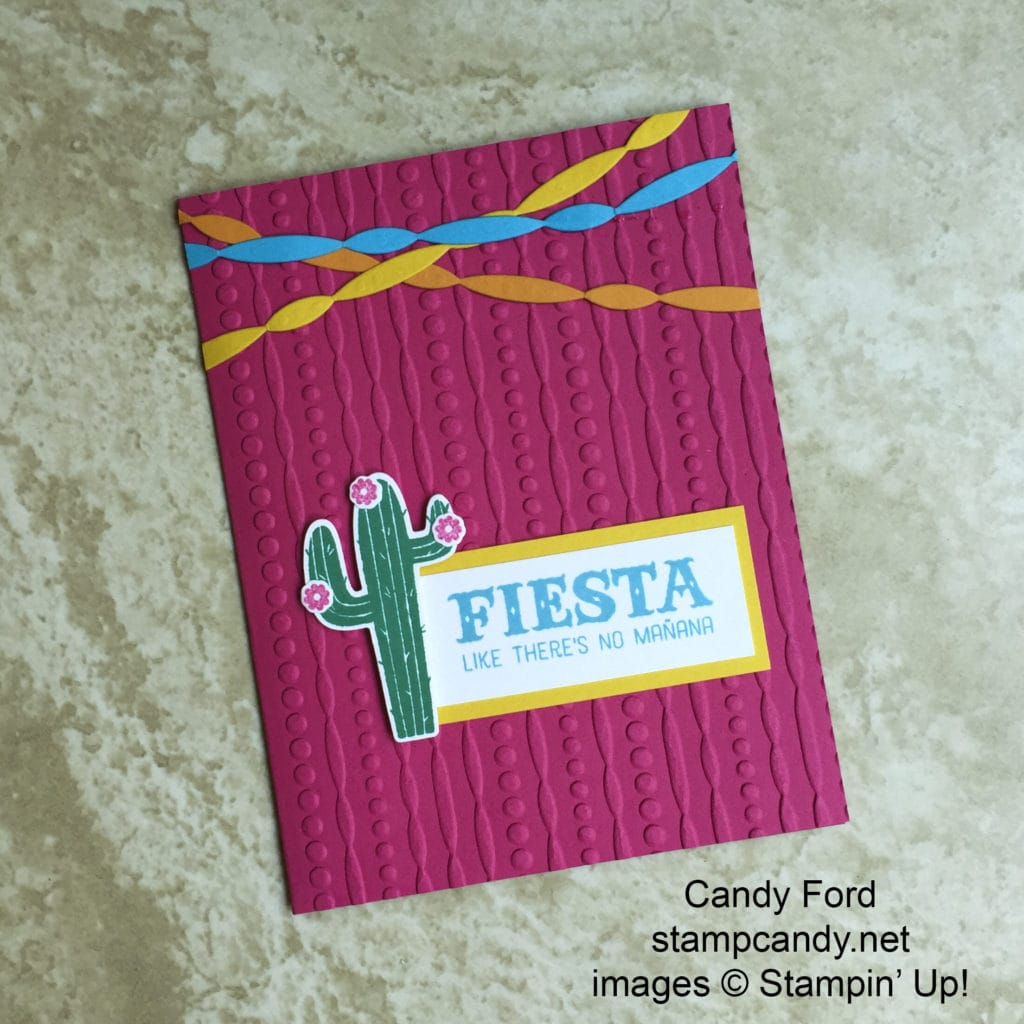
When I first saw the Birthday Fiesta stamp set, I thought the llama was cute, but I wasn’t sure how much I would actually use it. But I was focusing on the llama and not on the rest of the great images in this set. And most of those images have a coordinating die in the Fiesta Time Framelits. (The stamp set and the die set are available as a bundle to save 10%!)
Usually I would use bright colors like this on a card for a child or a woman, but this set makes them great for a man, too. Everybody likes to fiesta! This card could be for a birthday or any other occasion that calls for celebration.
Here’s how I did it:
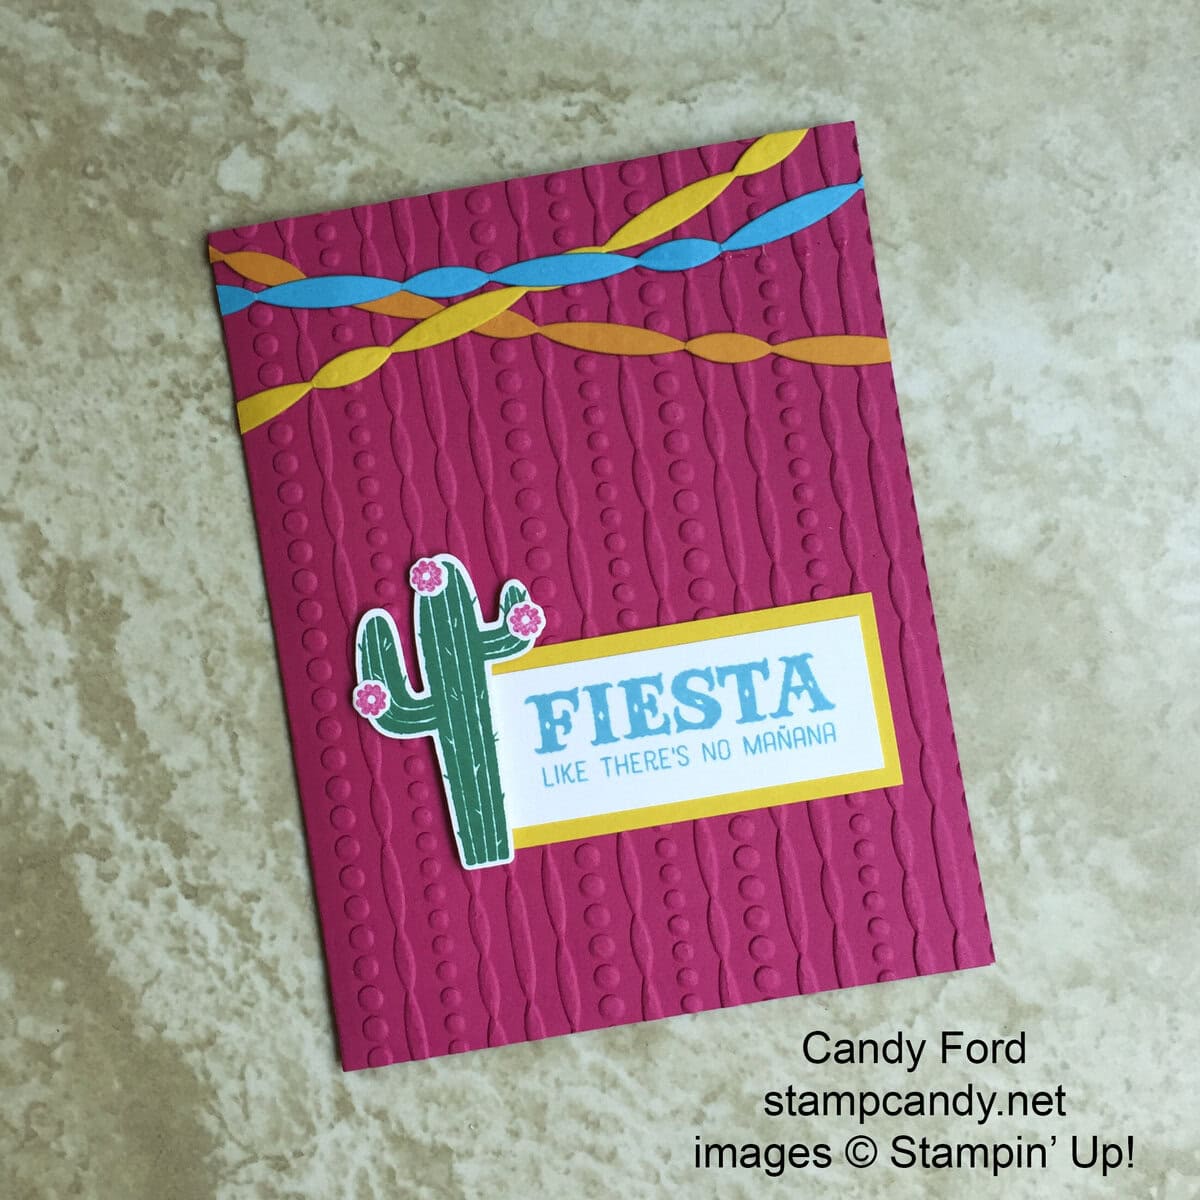
The card base is Melon Mambo card stock. I embossed the front of it with Festive embossing folder.
I cut the streamers with one of the dies from Daffodil Delight, Pumpkin Pie, and Tempting Turquoise card stock. I glued them to the embossed card base.
I stamped the sentiment in Tempting Turquoise onto Whisper White card stock, and matted it with Daffodil Delight card stock.
I stamped the cactus in Emerald Envy onto Whisper White card stock and cut it with the coordinating die.
I stamped the tiny flowers in Melon Mambo onto Whisper White card stock and cut them with the coordinating die.
I glued the flowers onto the cactus, then glued the cactus to the sentiment. I attached that to the card with Stampin’ Dimensionals.
Here’s what I used:

There are only 9 Bonus Days left!
Shop now to get your coupons for August!
Thanks for stopping by today, and Sweet Stamping!

Jul 20, 2016 | Blog Hop, Cards, Christmas, Gallery, Holiday, New Products |

Welcome to InKing Royalty’s July Blog Hop! Can you believe we are half-way to Christmas? It might seem a bit early to start looking at wintry scenes and holiday goodies, but there are so many great products in Stampin’ Up!’s 2016 Annual Catalog that we want to share before the Holiday Catalog is revealed next month. Today’s Blog Hop is filled with inspiring projects that feature each artist’s take on Christmas in July. After you read my post, I hope you’ll hop over to the next person on the list at the base of this post.
When tasked with making a Christmas card for this blog hop, I found it very difficult. Not because I couldn’t get into the Christmas spirit due to the sweltering summer heat, but because there were so many options, I had a hard time deciding what to do. I went to my online store, did a search for “Christmas,” and got 52 results!
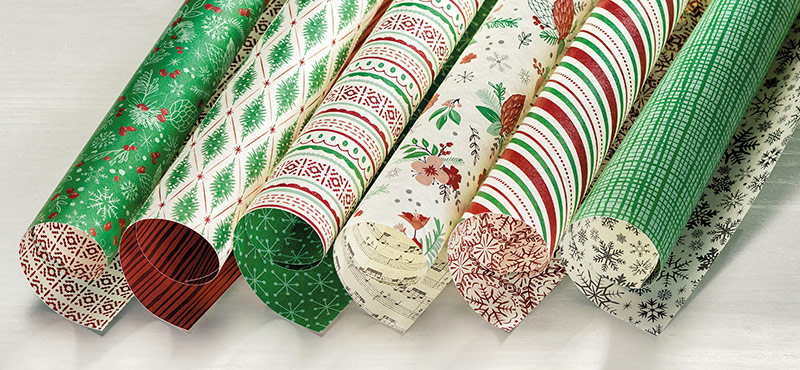
After much deliberation, I decided to use the Festive Flower Builder Punch along with the new This Christmas Specialty Designer Series Paper to create a card in Garden Green, Cherry Cobbler, and Very Vanilla.

Here’s what I came up with:
(The background of this photo is Very Vanilla, not Whisper White in bad lighting.)

Here’s how I did it:
The card base is Garden Green card stock. There’s a layer of the DSP glued to the base, and a smaller layer of the DSP glued to that.
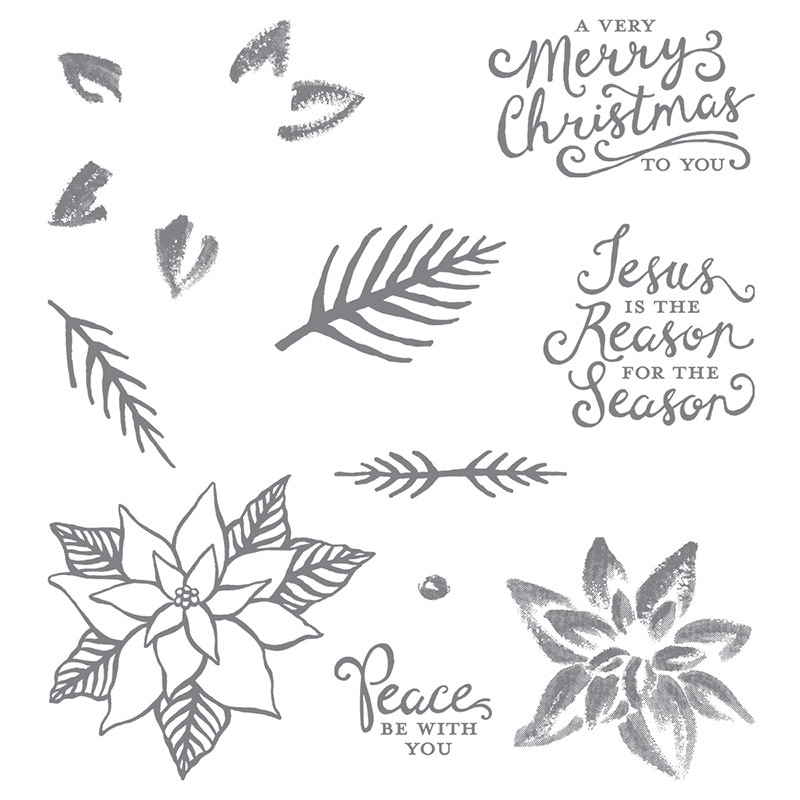
For the poinsettia, I stamped the three sizes of leaf/petal veins from the Reason for the Season stamp set in Cherry Cobbler ink onto Cherry Cobbler card stock – 8 of the largest, 8 of the middle size, and 3 of the small doubles. Then I stamped three of the largest ones in Garden Green ink onto Garden Green card stock. I used the Festive Flower Builder Punch to cut out all the stamped pieces, plus 3 flower centers from Crushed Curry card stock.
I used my Bone Folder to curl all the punched pieces (except the Crushed Curry centers) so the ends curved down. I punched a 1″ circle of Cherry Cobbler card stock and started gluing the inner tips of the pieces onto it, beginning with the largest petals and building up to the smallest on top. I glued the 3 leaves to the bottom of the flower and the 3 centers to the top.
I attached Stampin’ Dimensionals to the underside of the petals to keep them from getting flattened in the envelope. Then I put Fast Fuse on the 1″ circle on the bottom of the flower, and stuck it to a large gold doily from the Metallic Foil Doilies. I used Fast Fuse to attach the whole thing to the card front.
On the card’s interior, I glued a piece of Very Vanilla card stock for a handwritten note. You can also add a stamped greeting, such as one of the three in the Reason for the Season stamp set – I would recommend using Cherry Cobbler ink.
I used another piece of the DSP to create a custom envelope using the Envelope Punch Board.
I hope you’ll hop along to the next stop on the blog hop, Linda Heller at Where the Rubber Hits the Road…. There’s lots of inspiration to be found in this group – and you don’t want to miss it!
If you get stuck during the Blog Hop, please use this line-up as a guide:
- Brian King at Stamp with Brian
- Candy Ford at Stamp Candy
- Linda Heller at Where the Rubber Hits the Road…
- Shawn de Oliveira at ShawnStamps
- Karen Browning at StampWithMeKZB
- Lory Robinson at The Robin’s Nest Designs
- Imogene Thomas at MomoMakes.com
- Lynn Kolcun at Avery’s Owlery
- Jennifer Spiller at Westside Paper Creations
- Becky Volpp at InkBlossom with Becky
- Natalie Bradley at NatalieBradley.com
Here’s what I used today:
Thanks for hopping along with us today, and Sweet Stamping!
Jul 19, 2016 | Cards, Gallery, New Products, Parties |

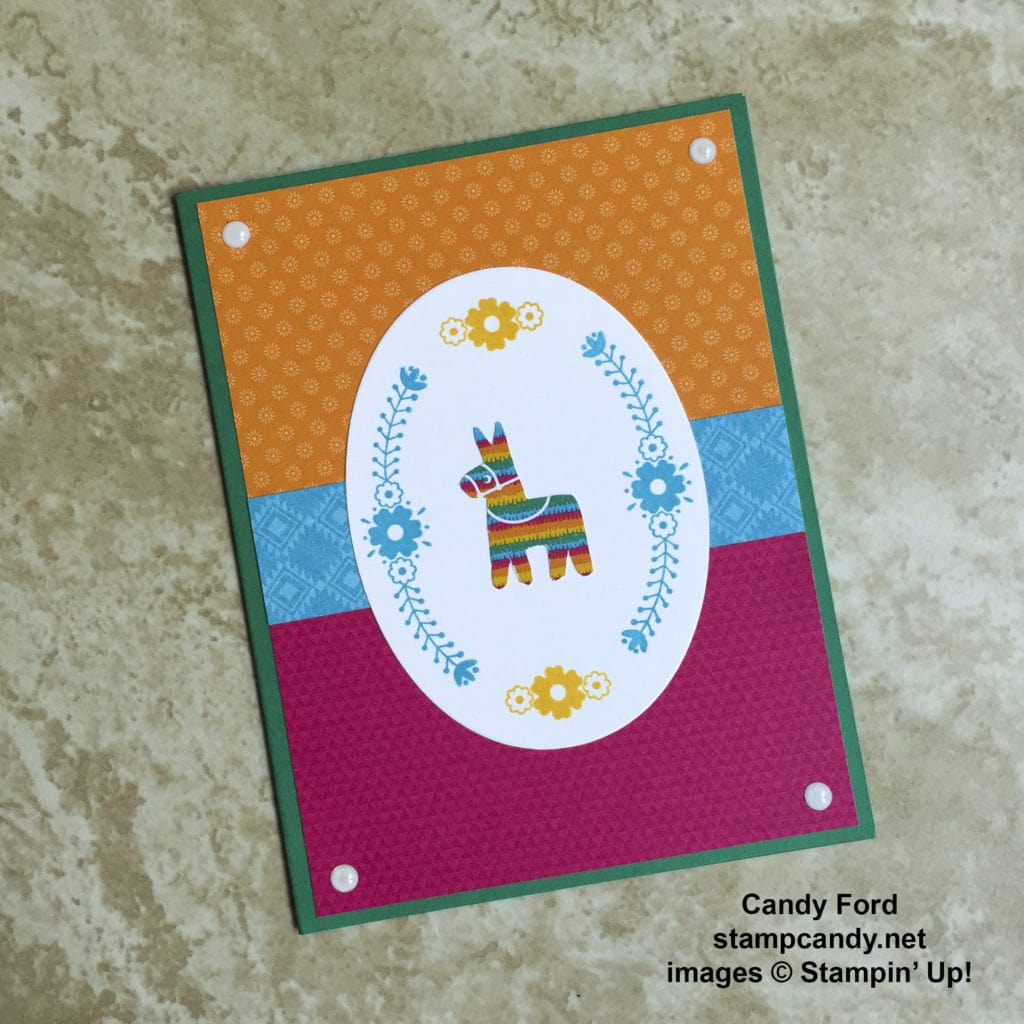
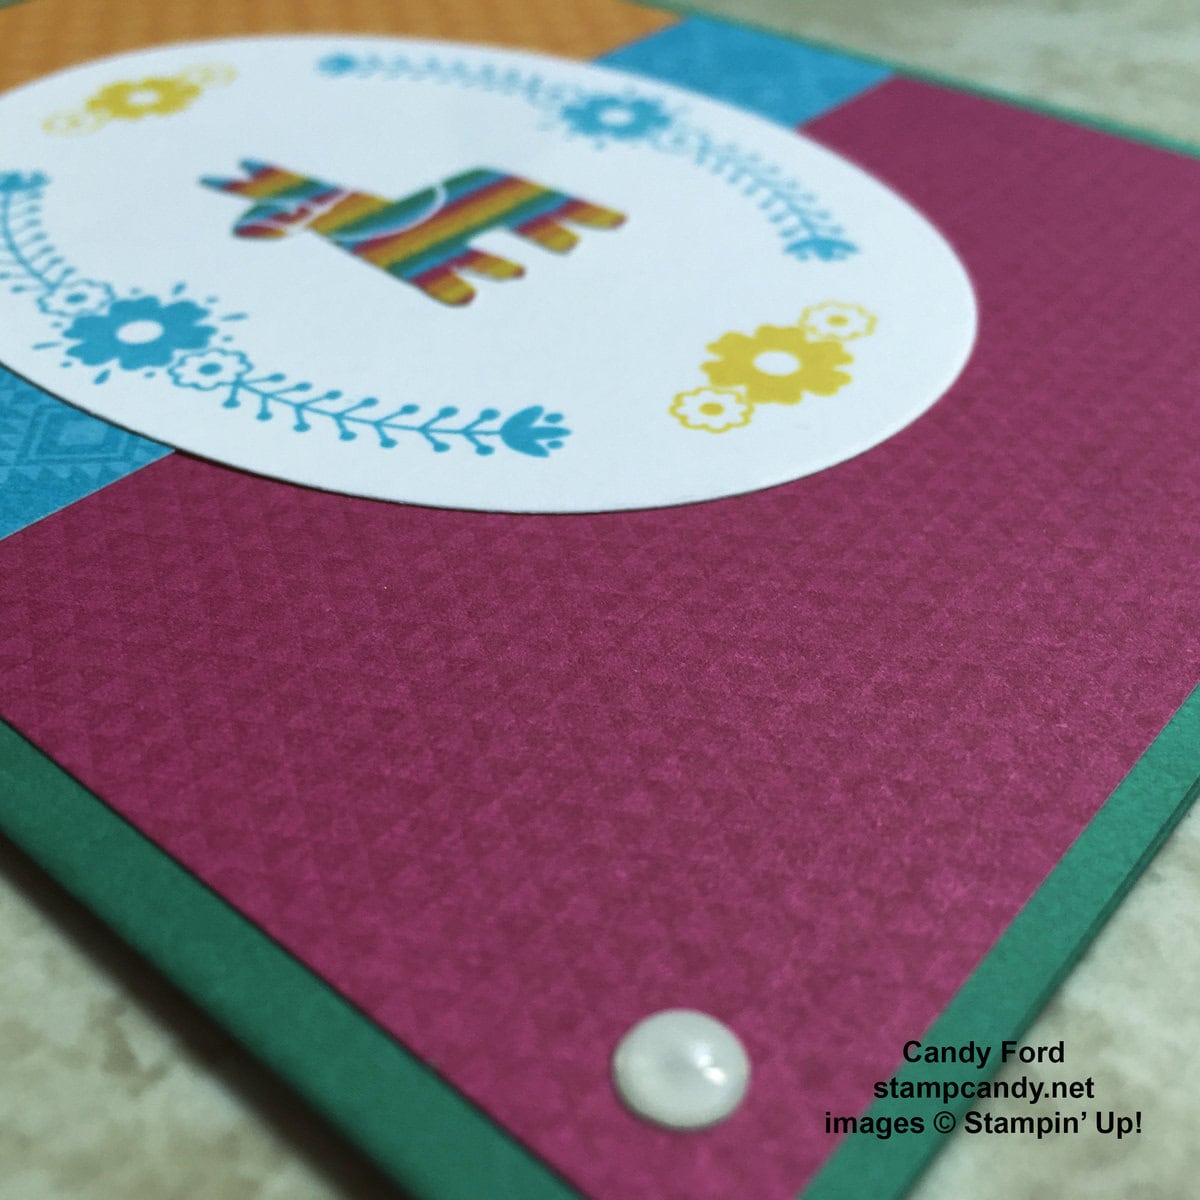
Can I just say that I love the Festive Birthday Designer Series Paper? It’s bright colors speak to my personality. And the images are a-dor-a-ble. This card uses four different designs from the pack: the pumpkin pie design, the Tempting Turquoise design, the Melon Mambo design, and the one with the piñatas & sombreros and guitars.
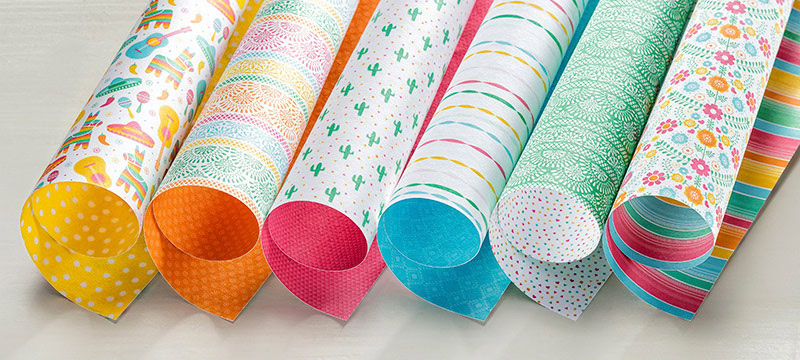
The card base is Emerald Envy card stock. I glued the strips of DSP to the base. I cut a piece of Whisper White card stock with the largest die from the Layering Ovals Framelits, then stamped it with two stamps from the Birthday Fiesta stamp set, the larger one in Tempting Turquoise and the smaller one in Crushed Curry.
I cut the piñata with Paper Snips and glued it to the center of the oval, then glued the oval to the card front.
For the final touch, I added a White Perfect Accent to each corner.
Here’s what I used:
Thanks for stopping by today, and Sweet Stamping!
Jul 18, 2016 | Cards, Gallery, New Products |
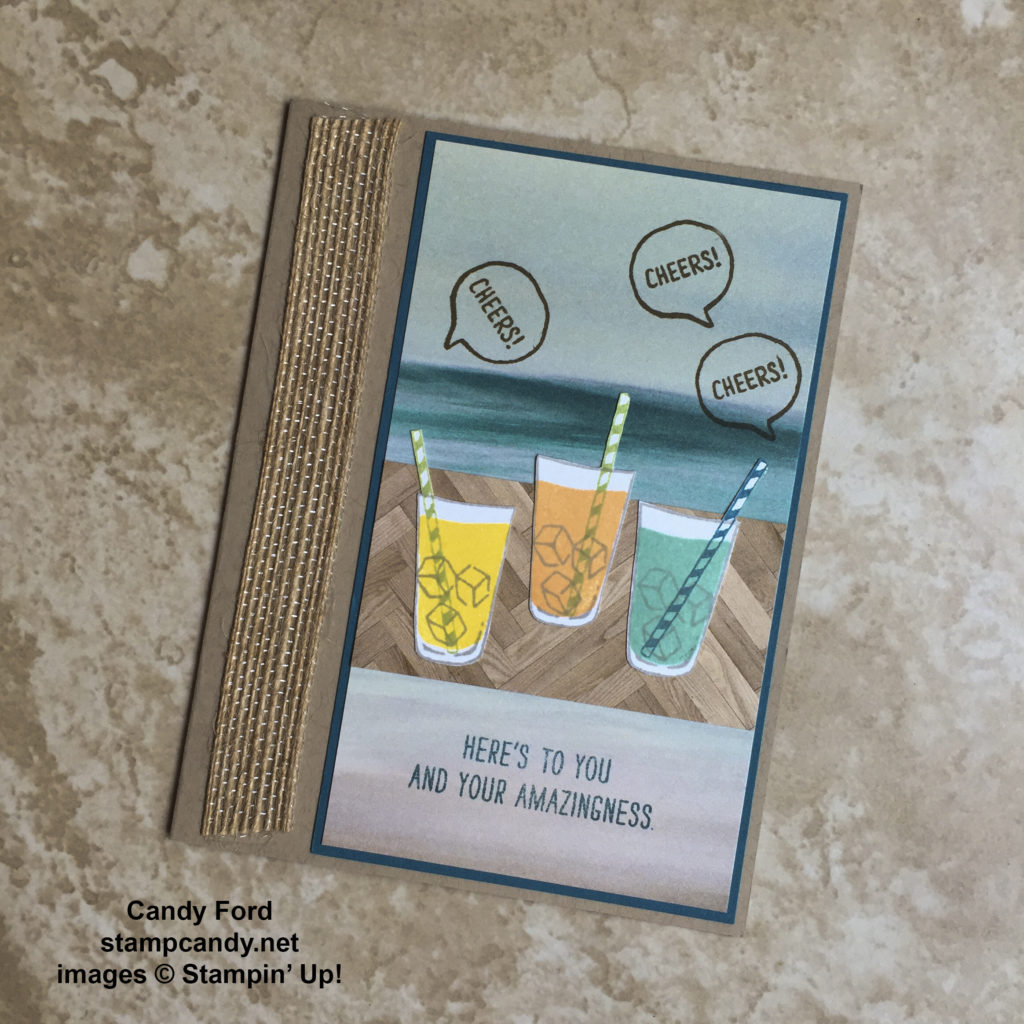
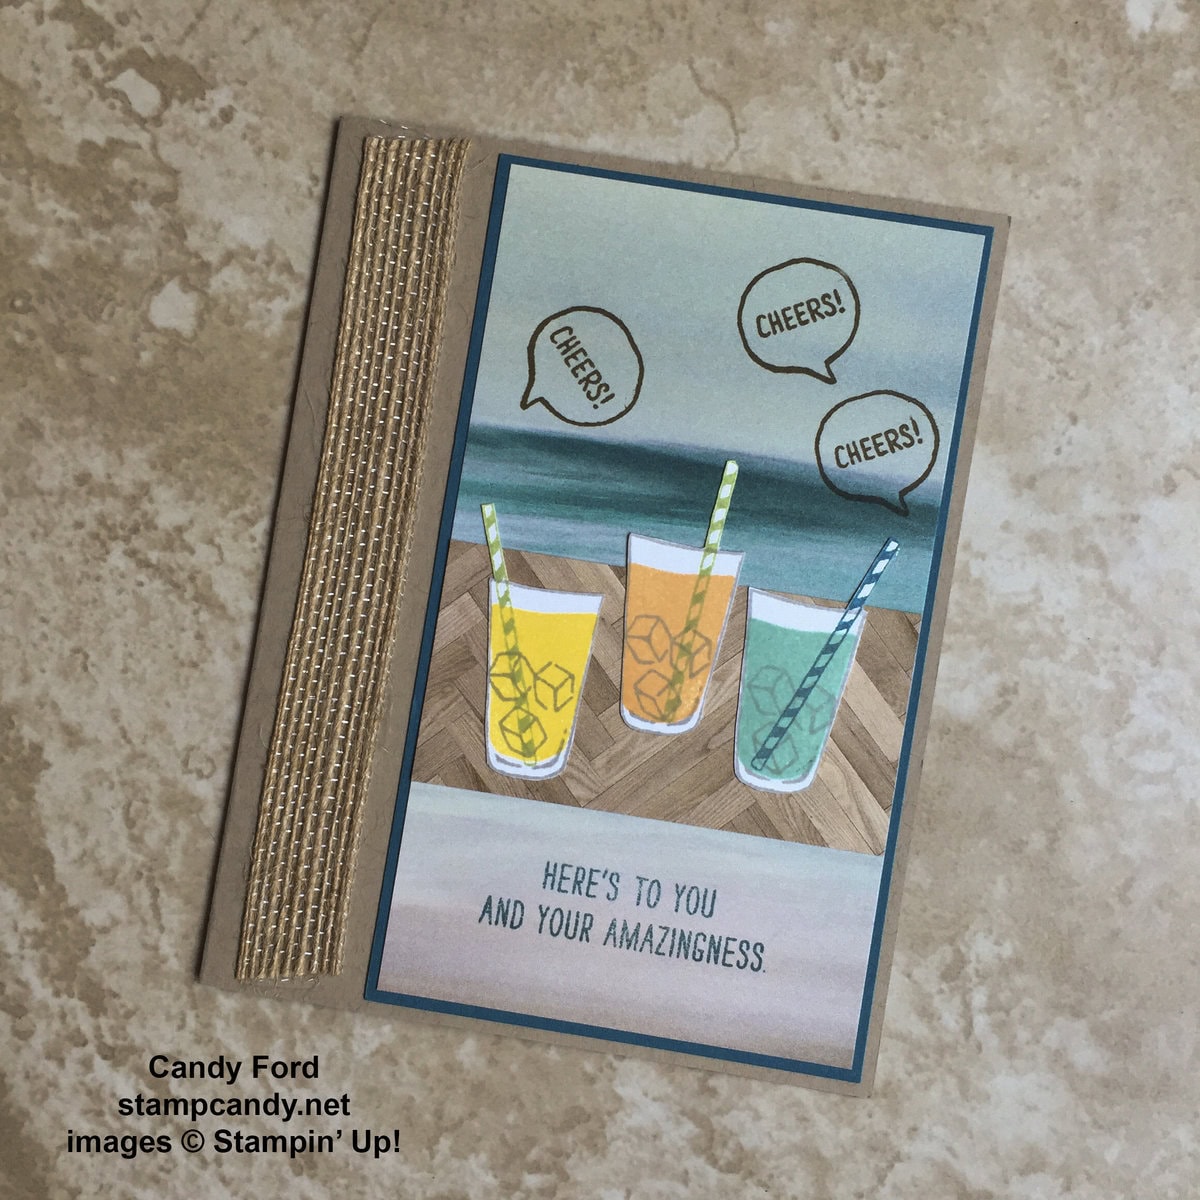
Ahhhhh, summertime. When we go to the beach or the lake and lie in a chair with an iced beverage and a good book. There’s nothing else quite as relaxing. Today’s card came from that thought.
The card base is Crumb Cake card stock. There’s a piece of the new 5/8″ Burlap Ribbon adhered to the left side of the card. For ribbon I like to use a dry adhesive like Fast Fuse or Tear & Tape.
There’s a piece of Serene Scenery Designer Series Paper matted with Island Indigo card stock. There’s smaller piece that looks like wood from the same DSP glued onto the middle of the larger piece. To me this looks like a table on the beach.
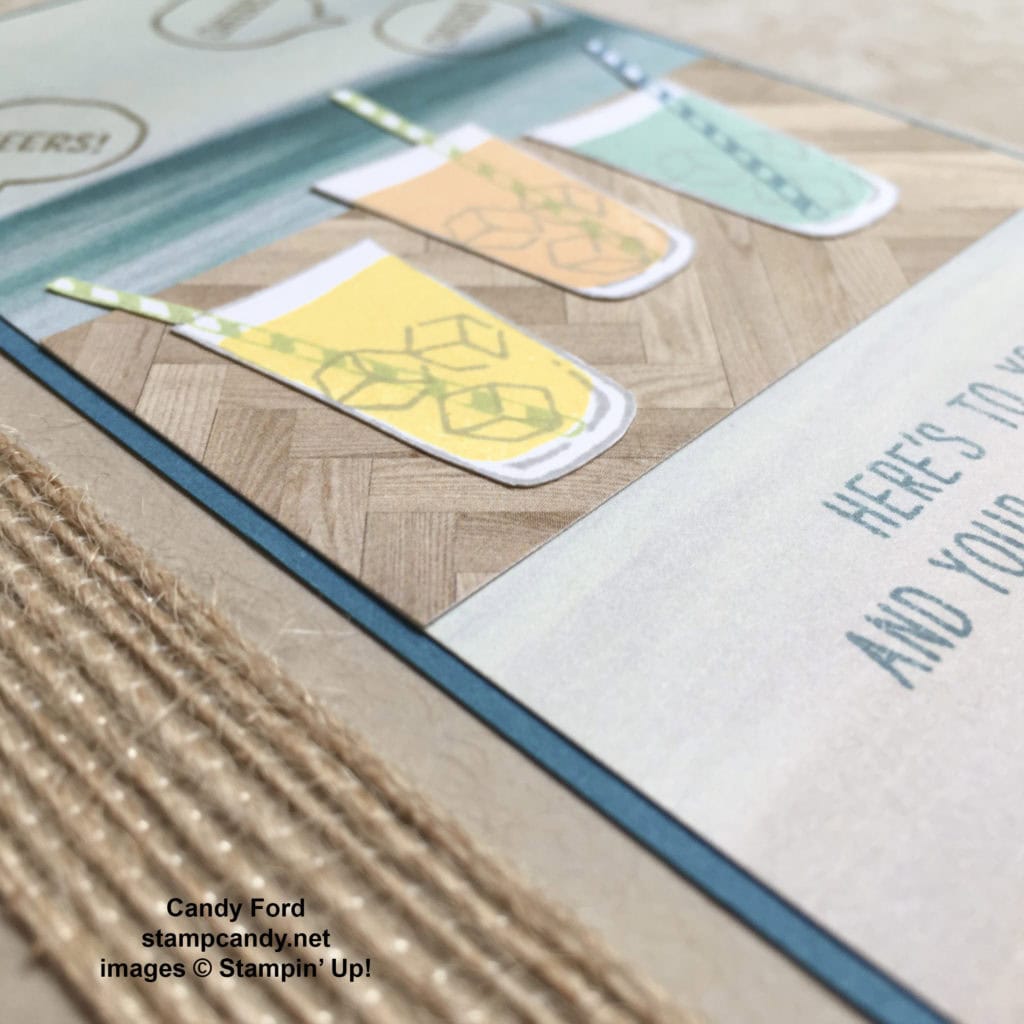
The drinks and sentiments are from the Mixed Drinks stamp set.

I stamped the drinks onto Whisper White card stock, cut them with my Paper Snips, then glued them to the “table.” I used Smoky Slate, Daffodil Delight, Pear Pizzazz, Peekaboo Peach, Pool Party, and Island Indigo ink pads.
I stamped the word bubbles and “Cheers” in Basic Black, and the bottom sentiment in Island Indigo, directly onto the DSP.
That’s it!
Here’s what I used:
Bonus Days are still here!
For every $50 you spend July 2-31, you get a $5 coupon you can use August 2-31.
Thanks for stopping by today, and Sweet Stamping!
Jul 17, 2016 | Boxes, Club, Gallery, Gift Wrap, New Products |
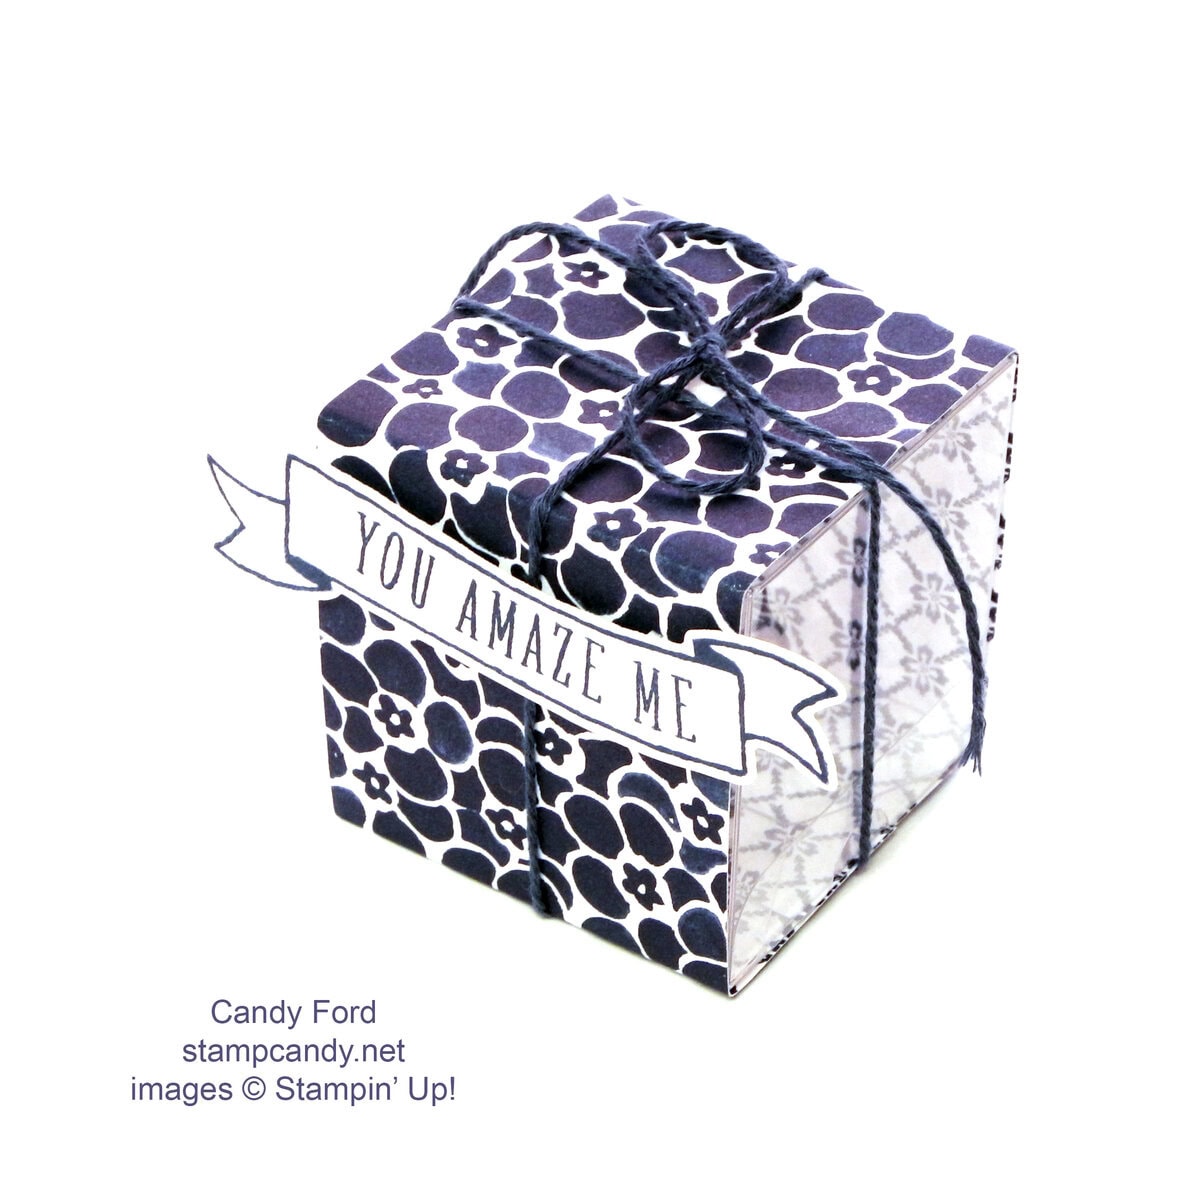
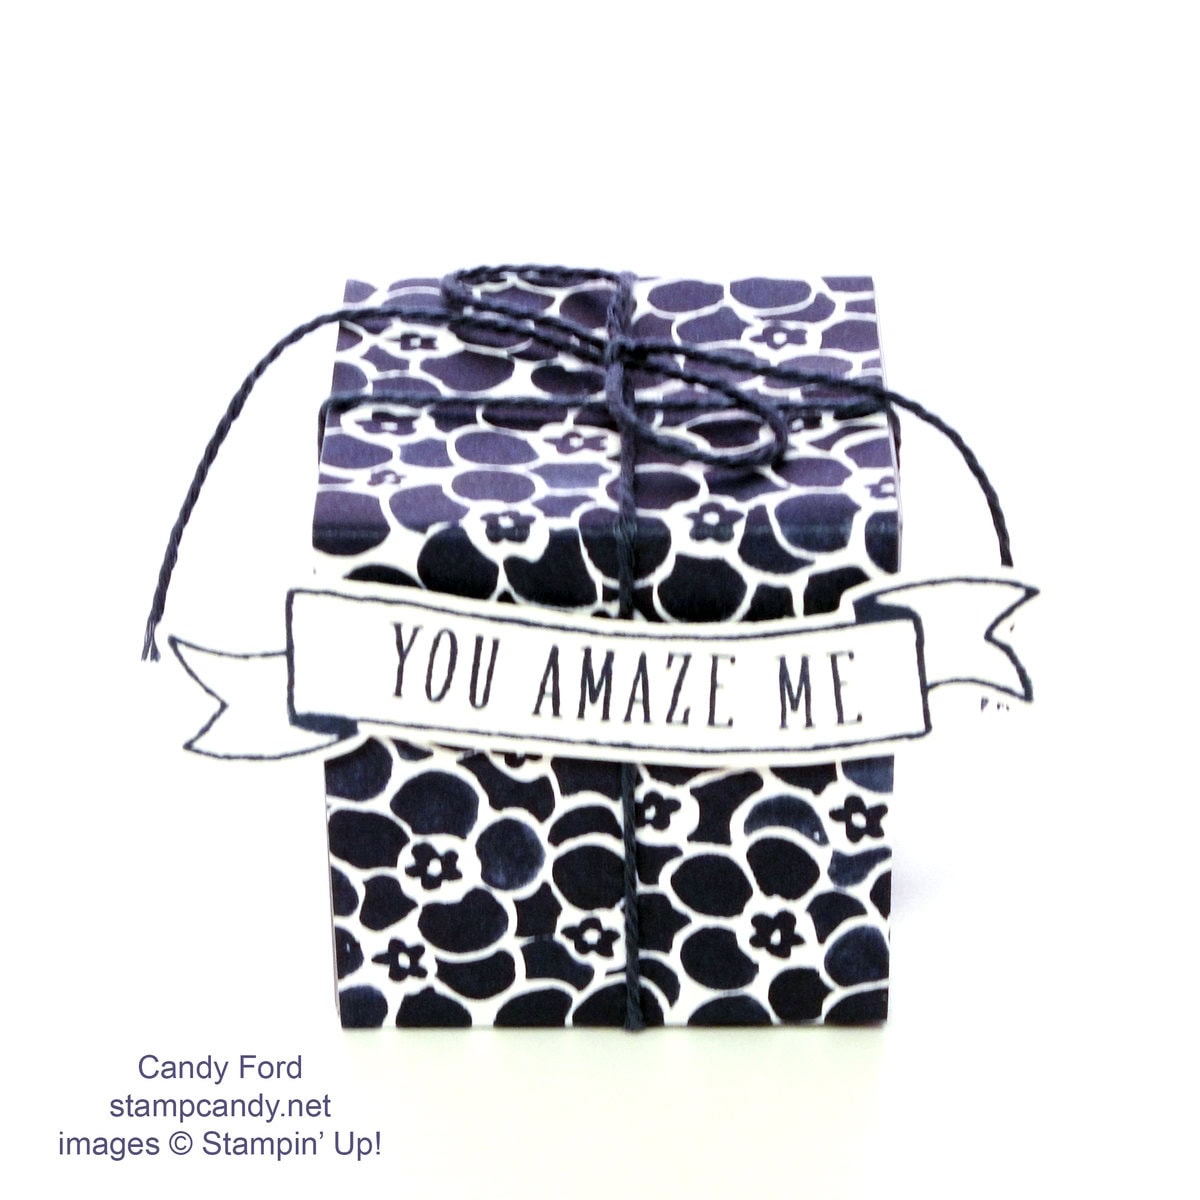
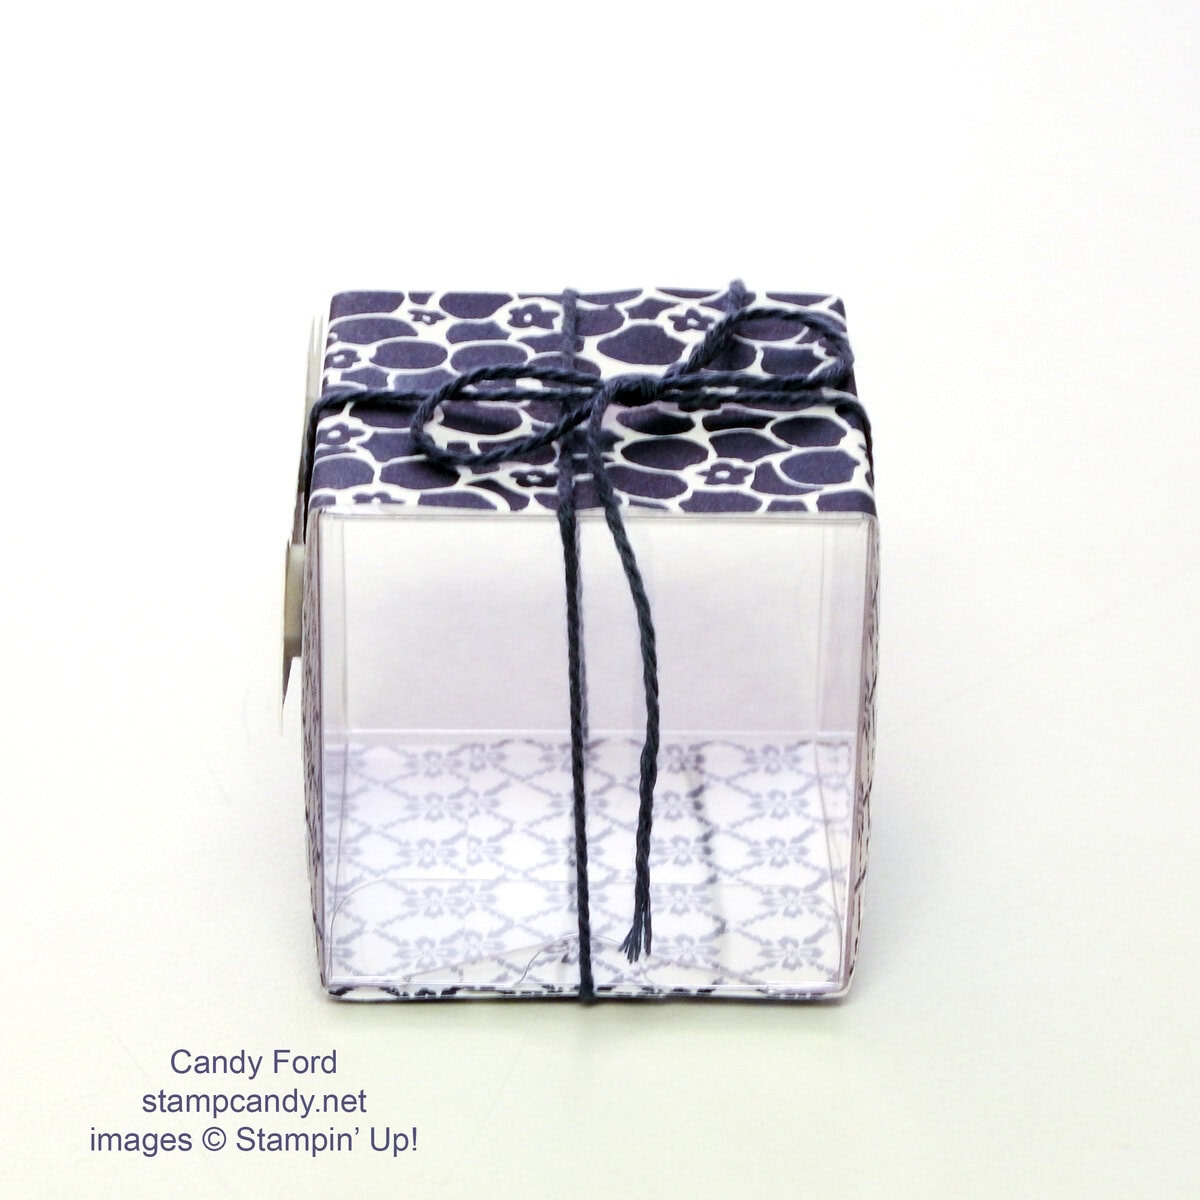
Today’s project is another from July’s Stamp Club. (You can see the first two here and here.) This one is so quick and easy, you won’t believe it!
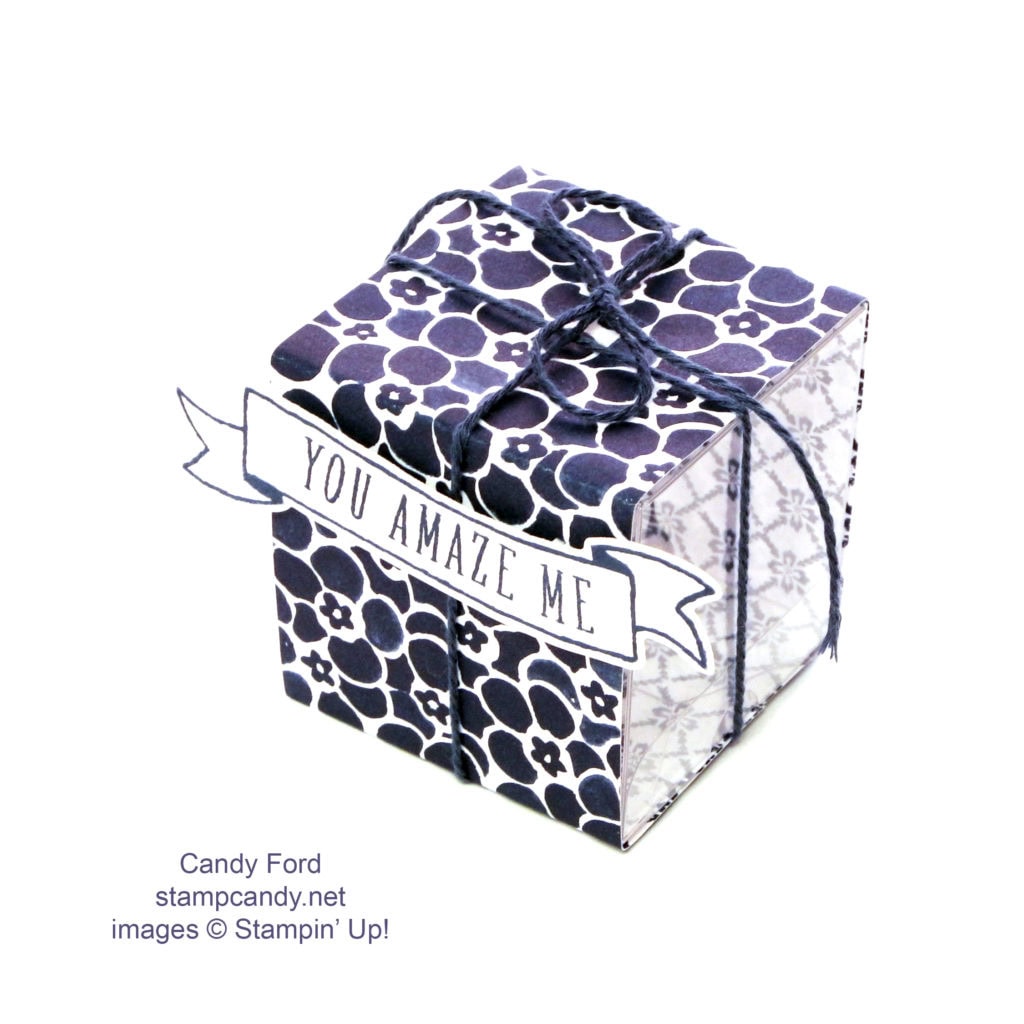
Assemble a Clear Tiny Treat Box.
Cut a piece of Floral Boutique Designer Series Paper to 2″ x 9″. Wrap it around the box and glue the ends together. Do not glue it to the box because it needs to be able to slide on and off.
Tie a piece of Night of Navy Solid Baker’s Twine around the box and tie in a bow on top.
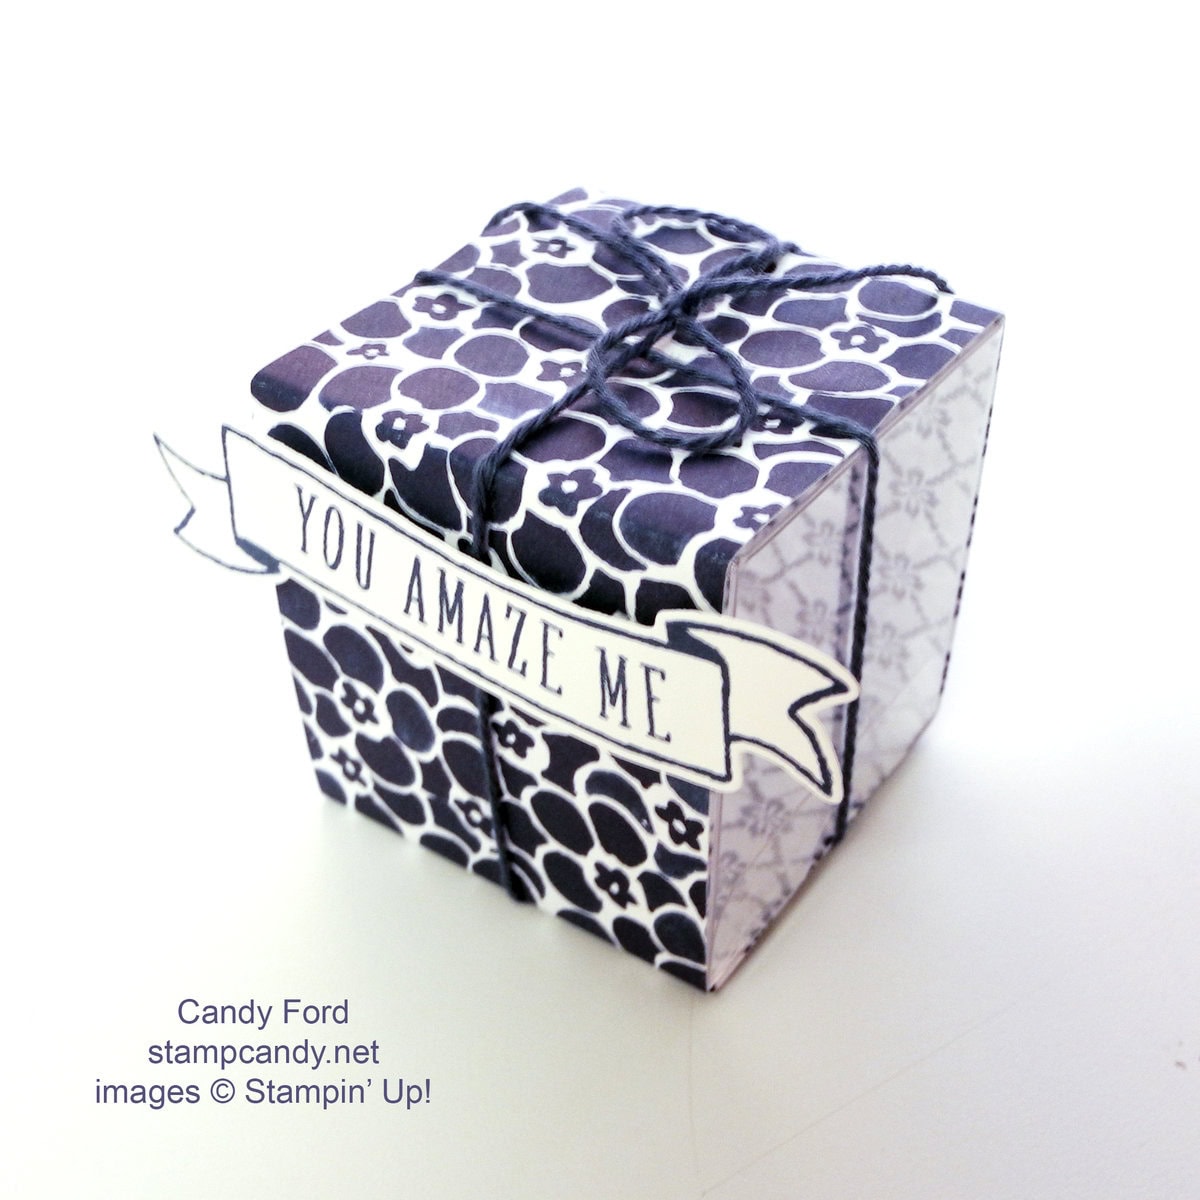
Stamp the banner and sentiment from the Banners for You stamp set in Night of Navy ink onto Whisper White card stock, then cut out with the coordinating die from the Bunch of Banners Framelits dies. Attach it to the DSP with Stampin’ Dimensionsals. Do not put one in the center of the banner, so the twine can slide through easily.
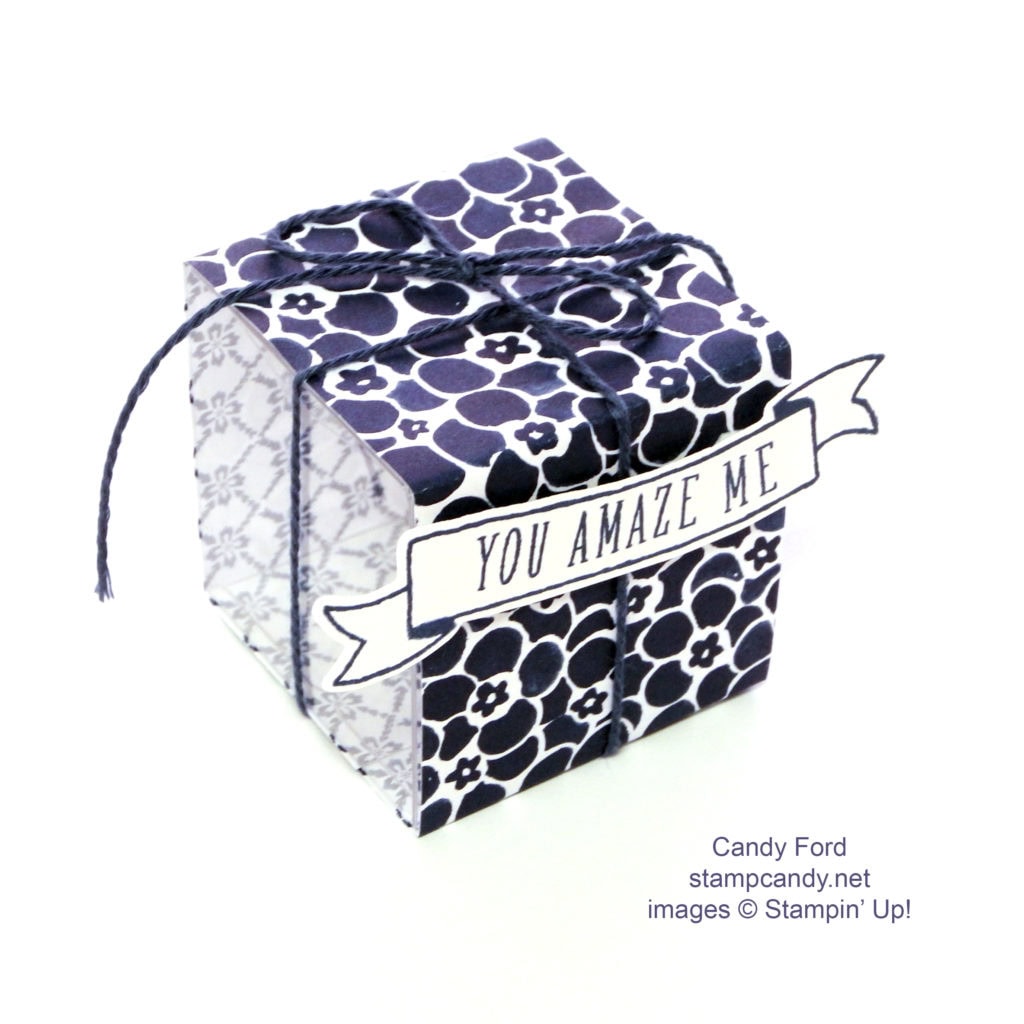
You can fill this with all sorts of little goodies. You can use your Fringe Scissors to cut strips of paper then crinkle it with your hands for filling. By the way, a Pandora Charm box fits perfectly inside this little box. Just sayin’.

Here’s what we used:
Thanks for stopping by today, and Sweet Stamping!


