Welcome to InKing Royalty’s October Blog Hop! This year’s Blog Hop themes are inspired by popular songs – this month’s song is “Monster Mash.” You can watch a video of the song at the bottom of this blog post. As you can guess, our Blog Hop today is filled with fun projects that are inspired by the spookiest night of the year – Halloween. We are excited to share our creations with you today! After you read my post, I hope you’ll hop over to the next person on the list at the base of this post.
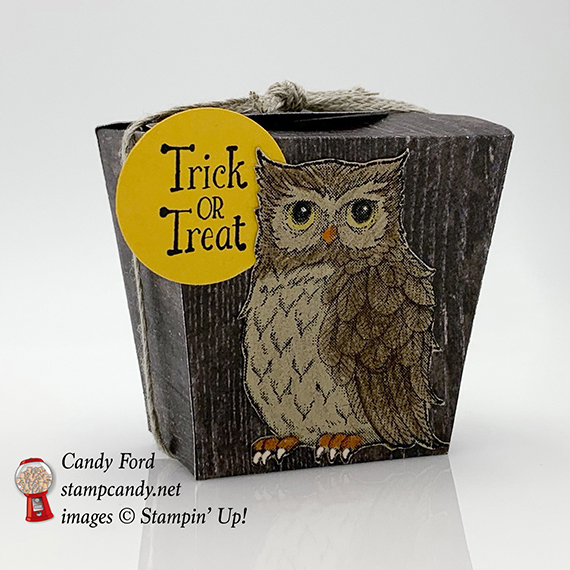
Here’s what I made:
Here’s what I did:
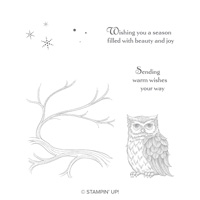
Stamped with the Still Night stamp set:
owl in Stazon black ink onto a scrap of Crumb Cake card stock (CS)
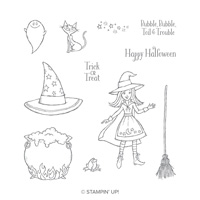
Stamped with the Cauldron Bubble stamp set:
sentiment in black ink onto a scrap of Crushed Curry CS
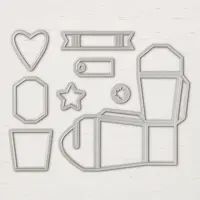
Die cut using the Takeout Thinlits:
two box pieces from Wood Textures Designer Series Paper (DSP)
Cut using the 1″ Circle Punch:
sentiment
Colored using Watercolor Pencils:
owl in Early Espresso, Basic Gray, Basic Black, Daffodil Delight, Pumpkin Pie, and Whisper White
Cut using Paper Snips:
fussy cut the owl (Seriously, Stampin’ Up!’s Paper Snips are the best scissors for fussy cutting paper!)
Assembled the card:
folded and burnished the score lines in the box pieces with a Bone Folder
the bottoms of the two box pieces glued to each other
flaps adhered to the inside of the adjacent sides of the box with Tear & Tape
sentiment “moon” and owl glued onto the front of the box
treats put inside, the closed the box
Braided Linen Trim tied around the box and tied in a knot
Here’s the Monster Mash hop:
Thank you for hopping along with us today. I hope you’ll hop to the next stop, Robin Myren at Songbird Designs by Robin. There’s a lot of inspiration to be found in this group, and you don’t want to miss any of it! If you get stuck during the Blog Hop, please use this line-up as a guide:
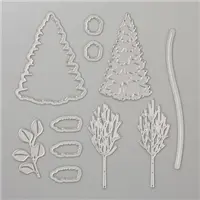
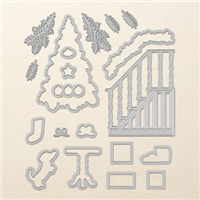
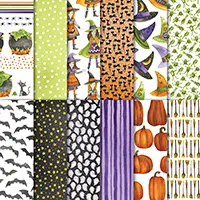
It’s time for the One Stamp at a Time blog hop for October. We’re featuring Halloweeny projects this month. I used the In the Woods Framelits Dies and the Christmas Staircase Thinlits Dies to create the card, which happens to be the invitation to our Halloween party this year. The front of the card is a homey Christmas scene, and the inside is the same scene in the dark, when the frightful creatures come out to play. I used the In the Woods dies along with the Toil & Trouble Designer Series Paper to create the treat bag.
I used only one stamp on this invitation, the one for the garland, mainly because I didn’t have sentiment stamps that said exactly what I wanted it to say in the size I needed. So I printed the sentiments onto card stock (Whisper White and Smoky Slate) and cut them using the Layering Squares Framelits Dies. I used two stamps on the treat bag, from two different stamp sets.
My husband and I have a big Halloween party each year with lots of decorations, yummy food, and even a costume contest. As a matter of fact, right now our house is full of boxes of Halloween decorations, as well as Christmas decorations, because the theme of this year’s Halloween party is Christmas.
Most years, after the Halloween party, we just don’t have the energy to put up a Christmas tree. I was determined to have a tree this year, so that’s why the unusual Halloween theme. It’s been very interesting combining Christmas and Halloween. All the rats and bats will have red bows around their necks, or tiny Santa hats. And I was amazed to find so many Halloween ornaments, and even black trees!
If there are any days in October when I have no blog post, it’s because the Halloween party prep has taken its toll. I will attempt to post every day, but I know from past experience that sometimes I’m just too tired from hanging cobwebs and bats and such to concentrate on creating a post, or even a project to blog about. So please forgive any gaps in my posting in the next few weeks. Thank you!
Here’s what I made:
This is a close up of the shiny red eyes peeking out from the tree.
I forgot to take more photos during the assembly line process, but here are a few. I made 100 invitations!
100 Whisper White staircases:
With 200 hundred little stars to adhere with Mini Glue Dots (1 on the front and 1 on the inside of each card) I found it easier and quicker to attach the stars to the strip of Glue Dots, then pull them off one by one as I needed them.
Ready to go in the envelopes:
Here’s what I did:
Cut and scored with my Stampin’ Trimmer:
Real Red card stock (CS) cut to 5-1/2″ x 8-1/2″, then scored in half at 4-1/4″
Crumb Cake CS cut to 5-1/4″ x 4″
Basic Gray CS cut to 5-1/4″ x 4″
Toil & Trouble Designer Series Paper (DSP) cut to 8-1/4″ x 6″, then scored at 4″ and 8″, also scored 1/2″ from the top and bottom
Stamped with the Ready for Christmas stamp set:
garland in Garden Green ink onto Garden Green CS
Stamped with the Cauldron Bubble stamp set:
“Halloween” in Real Red ink onto a scrap of Whisper White CS *
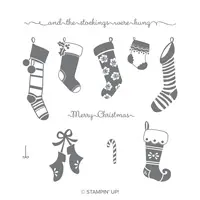
Stamped with the Hung with Care stamp set:
“Merry” in Real Red ink above “Halloween” *
* NOTE: I inked up only the part of the stamp I needed. I used a Real Red ink pad, but you can also use a Real Red Stampin’ Write Marker.
Cut using Circle Punches:
Merry Halloween sentiment using the 1-1/4″ punch
hole above the sentiment using the 1/8″ punch
hole in the top of the Whisper White CS tree, 1 larger and 1 smaller Garden Green trees using the 1/8″ punch
Die cut using the In the Woods Framelits:
larger Christmas tree shape from Garden Green CS (2 pieces), Whisper White, and Basic Black CS
smaller Christmas tree shape from Garden Green CS (2 pieces) and Basic Black CS
Die cut using the Christmas Staircase Thinlits:
staircase from Whisper White CS and Basic Black CS
garland from Garden Green CS and Basic Black CS
ornaments from Real Red CS and Basic Gray CS
star from Gold Foil Sheet and Black Foil Sheet
Die cut using the Layering Squares Framelits:
printed sentiments for card
frames from Soft Suede CS and Basic Black CS
Assembled the card:
burnished the fold in the card base with a Bone Folder
Crumb Cake CS layer glued onto the front of the card base
Whisper White staircase, larger Garden Green tree, gold star, Whisper White sentiment, and Soft Suede frame glued onto the Crumb Cake CS layer
Garden Green garland adhered over the staircase using Mini Stampin’ Dimensionals
smaller Garden Green tree adhered over larger tree using Mini Stampin’ Dimensionals
Real Red ornaments glued onto the smaller Garden Green tree
Basic Gray CS layer glued onto the inside of the card base
Basic Black staircase, larger Basic Black tree, black star, Smoky Slate sentiment, and Basic Black frame glued onto the Basic Gray CS layer
the Basic Black garland adhered over the staircase using Mini Stampin’ Dimensionals
smaller Basic Black tree glued onto the larger tree
Basic Gray ornaments glued onto the smaller Garden Green tree
2 Red Rhinestones applied to the tree, for the scary eyes peeking out from under a bough
All the information about the party (where, when, etc.) was printed on a separate piece of paper and enclosed in the envelope.
Assembled the treat bag
burnished the folds in the DSP with a Bone Folder
cut away one of the tiny corner sections and the adjacent 1/2″ section using Paper Snips
put Tear & Tape along both of the tabs, one at the side and one at the bottom, and folded over to create the bag
put treat in the bag
folded over the top along the score lines and secured with a Galvanized Clip
Whisper White CS tree glued to the back of the larger Garden Green tree – this is where you can write the recipient’s name
smaller Garden Green tree adhered to the larger Garden Green tree using Mini Stampin’ Dimensionals
2 Red Rhinestones applied to the smaller Garden Green tree, for the scary eyes peeking out from under a bough
Basic Black twine run through the hole in the Merry Halloween tag and tied in a knot just above it, then run through the holes in the tree
the twine is held on to the bag using the Galvanized Clip
Here’s the OSAT Ghouls, Goblins, and Gourds Blog Hop:
Here are today’s colors:
You can click on each one to see all the products that come in that color!
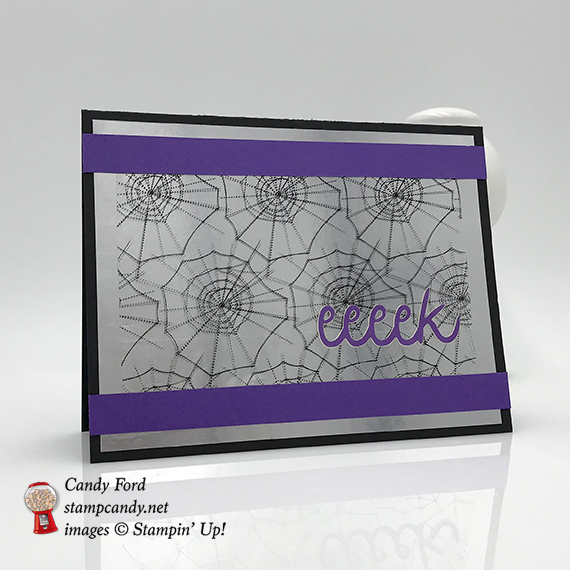
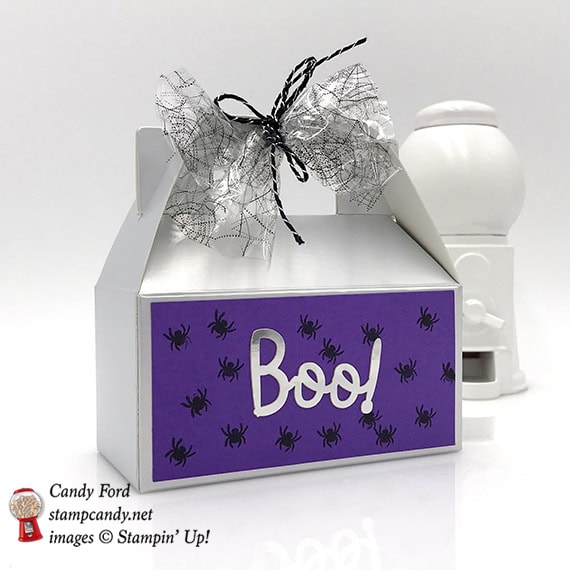
It’s time for the Paper Pumpkin Pop-Up Blog Hop! Yes, this is my second Paper Pumpkin themed blog hop using the September Frights & Delights Paper Pumpkin kit. The alternate project I made for today’s hop coordinates with the projects I made for the other hop, which you can see here.The kit makes 24 adorable Halloween treat bags, but I used some of the pieces to make this shiny card. I like the way the spider webs on the clear bag reflect in the Silver Foil layer.
Here’s what I made:
Here’s what I did:
Cut and scored with my Stampin’ Trimmer:
Basic Black card stock (CS) cut to 5-1/2″ x 8-1/2″, then scored in half at 4-1/4″
Silver Foil Sheet cut to 5-1/4″ x 4″
Gorgeous Grape CS cut to 5-1/2″ x 1/2″ (2 pieces)
a treat bag cut open and cut to 4-5/8″ x 3″
Whisper White CS cut to 5-1/2″ x 1/2″ for the inside of the card
Assembled the card:
burnished the fold in the card base with a Bone Folder
Silver Foil layer adhered onto the front of the card base using Tear & Tape
bag piece laid on the Silver Foil layer
Gorgeous Grape CS strips adhered onto the card front, overlapping the top and bottom edges of the bag, using Tear & Tape (This is what holds the bag onto the card.)
Gorgeous Grape self stick word applied onto the Bag.
Whisper White CS glued onto the inside of the card base.
Here’s the Paper Pumpkin Pop-Up Blog Hop:
Click on the pumpkin below to hop to the next stop, Debbie Green.
Here are today’s colors:
You can click on each one to see all the products that come in that color!
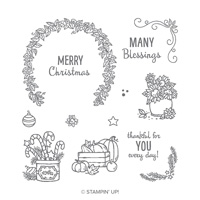
It’s time for the ICS Blog Hop for October. The theme this month is “Fall for All.” For today’s project, I used the Many Blessings stamp set, Layering Circles Framelits Dies, and several Autumnal colors. Three Blackberry Bliss Faceted Dots add the last little touch.
Here’s what I made:
Here’s what I did:
Cut and scored with my Stampin’ Trimmer:
Blackberry Bliss card stock (CS) cut to 8-1/2″ x 5-1/2″, then scored in half at 4-1/4″
Very Vanilla CS cut to 4″ x 5-1/4″ (two pieces)
Stamped with the Many Blessings stamp set:
sentiment in Blackberry Bliss in onto a scrap of Very Vanilla CS
floral image in Early Espresso ink onto a scrap of Very Vanilla CS
flourish in Blackberry Bliss ink onto two corners of the Very Vanilla CS layer
Colored using Stampin’ Blends Markers:
floral image in Daffodil Delight, Cajun Craze, Old Olive, and Bronze
Die cut using the Layering Circles Framelits:
sentiment
floral image
plain circle from scraps of CS in Cajun Craze, Crushed Curry, Mossy Meadow, and Early Espresso
Assembled the card:
burnished the fold in the card base with a Bone Folder
Very Vanilla CS layer glued onto the front of the card base
plain circles glued onto the Very Vanilla CS layer, overlapping each other
floral image and sentiment glued onto the layered plain circles
Blackberry Bliss FAceted Dots applied to the card front
remaining Very Vanilla CS glued onto the inside of the card base
Here’s the Fall for All ICS Blog Hop:
Click the button to hop to the next stop, Cheryl Hamilton of Create With Cheryl:
Here are today’s main colors:
You can click on each one to see all the products that come in that color!
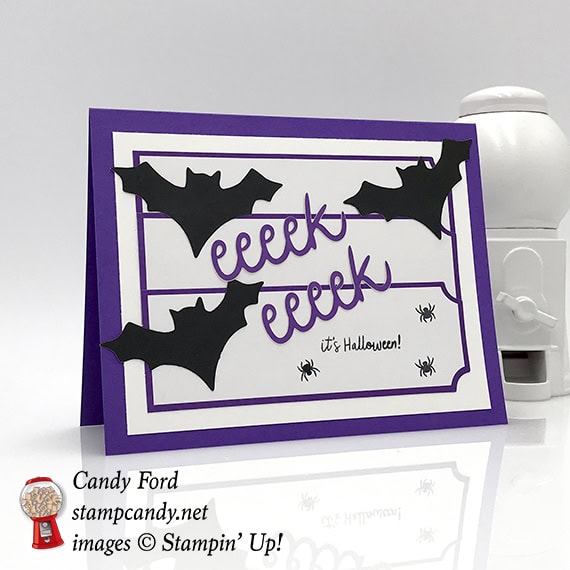
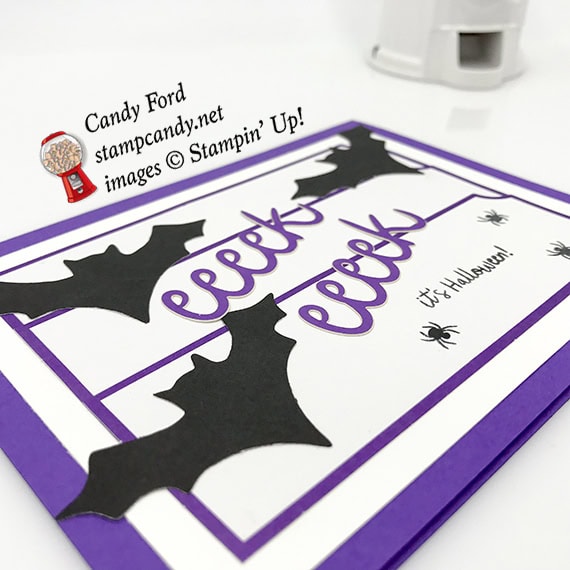
It’s time for the A Paper Pumpkin Thing Blog Hop for September! This month’s kit is called Frights & Delight and it’s adorable! Using the directions in the kit, you can make 24 sweet little treat bags. We are featuring some alternative projects you can make using the pieces in the kit.
Here’s what I made:
Here’s what I did:
Cut and scored with my Stampin’ Trimmer:
Gorgeous Grape card stock (CS) cut to 5-1/2″ x 8-1/2″, then scored in half at 4-1/4″
Whisper White CS layer cut to 5″ x 3-3/4″
Whisper White CS cut to 5-1/4″ x 4″ for the inside of the card
Gorgeous Grape CS cut to 3-3/4″ x 1-2/4″
Stamped with the Frights & Delights stamp set:
tiny spiders in Memento black ink onto the 3-3/4″ x 1-2/4″ Gorgeous Grape CS
sentiment and spiders in Memento black ink onto one of the tags
Cut using Paper Snips:
bottom off one of the bags
Assembled the card:
burnished the fold in the card base with a Bone Folder
5″ x 3-3/4″ Whisper White CS layer glued onto the front of the card base
three tags glued onto the Whisper White CS layer, including the stamped one
3 black bats glued onto the tags
2 Gorgeous Grape word stickers applied onto the tags
5-1/4″ x 4″ Whisper White CS glued onto the inside of the card base
Assembled the card:
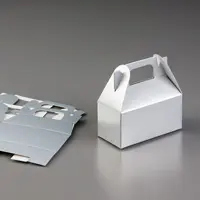
burnished the score lines in the box, and assembled it
3-3/4″ x 1-2/4″ stamped Gorgeous Grape CS glued onto the front of the box
silver word sticker applied onto the Gorgeous Grape CS
put treats inside the box
treat bag with bottom cut away gathered (with top and bottom at the sides) gathered and tied in the middle using the twine from the kit, and tied onto the top of the box
Here’s the Frights & Delights APPT Blog Hop:
Here are today’s colors:
You can click on each one to see all the products that come in that color!
Here’s the Dashing Along September special from Stampin’ Up:
Only 3 days left!!!
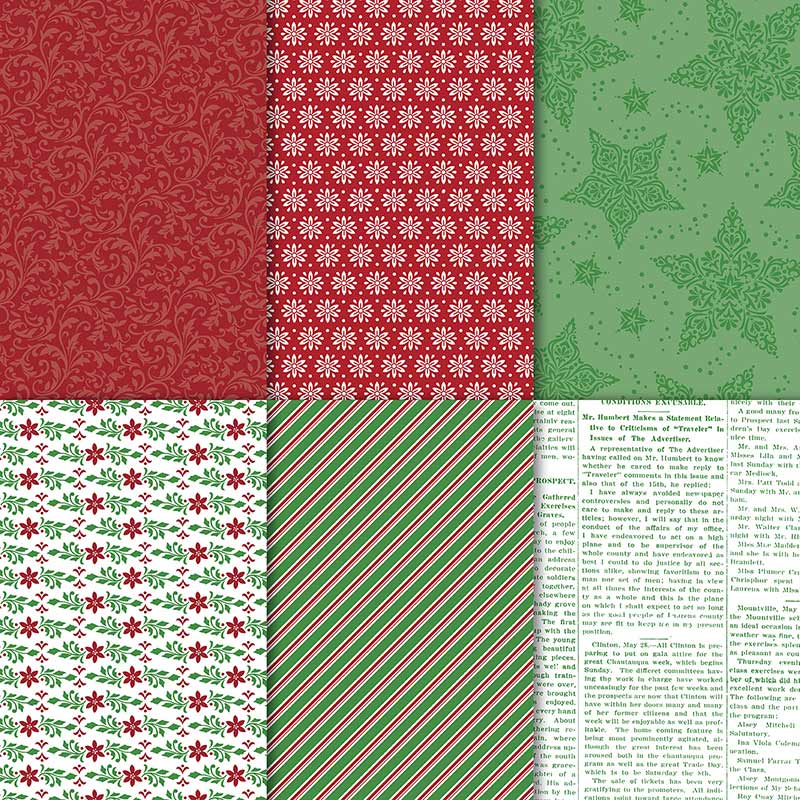
Receive one pack of Dashing Along Designer Series Paper with any $250 order in September!
Perfect for layering, this beautiful, traditional Christmas paper includes a mix of old favorites and new patterns to create a festive, eclectic feel.
Item number 149903
12 sheets: 3 double-sided sheets (6 total designs); 4 sheets of each design – perfect for making lots of Christmas cards!
12″ x 12″
Promotion period: September 1–30
Dashing Along Designer Series Paper is exclusive to this promotion and will not be available after September 30.
In order to qualify, the event merchandise total must reach $250 (before shipping and handling).
One package of Designer Series Paper may be redeemed per qualifying order, with no limit on how many packages of Designer Series Paper can be earned.
Demonstrator, Customer, Workshop, and online orders qualify.
Dashing Along Designer Series Paper may not be redeemed using Stampin’ Rewards. You will receive this FREE gift with a qualifying order in addition to any Stampin’ Rewards you may earn.
Dashing Along Designer Series Paper may not be exchanged for other paper.
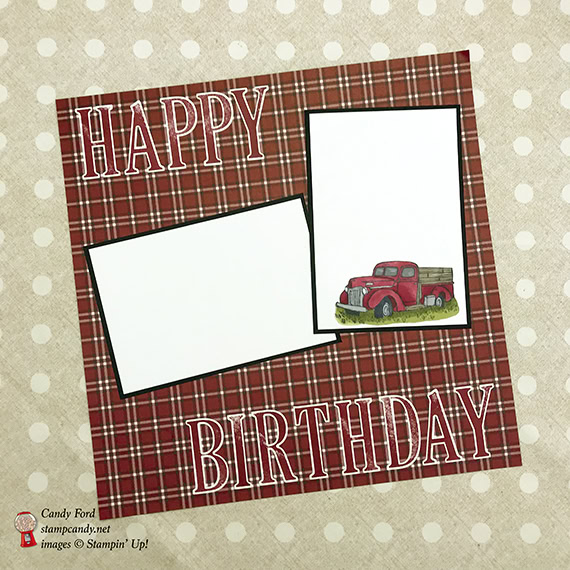
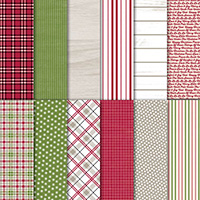
I’m excited to join the Scrapbooking Global Blog Hop for September! This month’s theme is Masculine pages. I thought, what’s more masculine than a plaid flannel shirt and an old pickup truck? The plaid background paper (I’m pretending it’s flannel) is from the new Festive Farmhouse Designer Series Paper, and the truck is from the Country Livin’ stamp set. I don’t have photos on the page because the birthday for which I made this page hasn’t happened yet. But I have the photo mats ready, so all I have to do is adhere the photos: one 6″ x 4″ and one 4″ square (above the truck.) For now it’s safe and sound in a pocket page in my scrapbook.
Here’s what I made:
The parts of this page that look white in the photo are actually Very Vanilla. The only Whisper White on the page is on the truck’s headlights.
Here’s what I did:
Cut and scored with my Stampin’ Trimmer:
Very Vanilla card stock (CS) cut to 4-1/4″ x 6-1/4″ (two pieces)
Basic Black CS cut to 4-1/2″ x 6-1/2″ (two pieces)
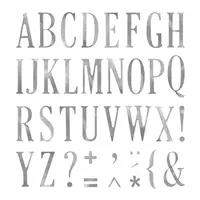
Stamped with the Letters for You stamp set:
HAPPY BIRTHDAY in Cherry Cobbler ink onto a scrap of Very Vanilla CS
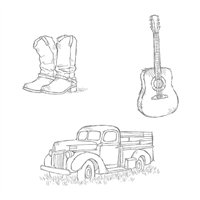
Stamped with the Country Livin’ stamp set:
truck in black Memento ink onto one of the Very Vanilla CS mats
Colored the truck image:
truck using Cherry Cobbler, Basic Black, Smoky Slate, and Crumb Cake Stampin’ Blends Markers
grass using Old Olive Stampin’ Blends Markers
headlights using a Whisper White Watercolor Pencil
Cut using Paper Snips:
truck image
Assembled the scrapbook page:
HAPPY glued onto the top left of the page
BIRTHDAY glued onto the bottom right of the page
Very Vanilla CS pieces glued onto the Basic Black CS pieces, to create mats for 4″ x 6″ photos
Basic Black CS pieces glued onto the page
truck glued onto one of the Very Vanilla CS pieces
Here’s the Scrapbooking Global Blog Hop:
Click the next button to go to the next stop on the hop, or use the line up below to navigate the hop.
Here are today’s colors:
You can click on each one to see all the products that come in that color!
Here’s the Dashing Along September special from Stampin’ Up:
There are only 10 days left to take advantage of this great offer!
Receive one pack of Dashing Along Designer Series Paper with any $250 order in September!
Perfect for layering, this beautiful, traditional Christmas paper includes a mix of old favorites and new patterns to create a festive, eclectic feel.
Item number 149903
12 sheets: 3 double-sided sheets (6 total designs); 4 sheets of each design – perfect for making lots of Christmas cards!
12″ x 12″
Promotion period: September 1–30
Dashing Along Designer Series Paper is exclusive to this promotion and will not be available after September 30.
In order to qualify, the event merchandise total must reach $250 (before shipping and handling).
One package of Designer Series Paper may be redeemed per qualifying order, with no limit on how many packages of Designer Series Paper can be earned.
Demonstrator, Customer, Workshop, and online orders qualify.
Dashing Along Designer Series Paper may not be redeemed using Stampin’ Rewards. You will receive this FREE gift with a qualifying order in addition to any Stampin’ Rewards you may earn.
Dashing Along Designer Series Paper may not be exchanged for other paper.