May 26, 2017 | Boxes, Gallery, Gifts, New Products |
Swatch Books & Paper Shares
for the brand new 2017-2018 Annual CatalogDesigner Series Papers are available to order!
I’ll order the papers on June 1, and will begin shipping as soon as I receive them and get them cut.
Click here for more details and to order!
And now for today’s project. I put this treat together in no time. I made it using the new Wood Textures Suite on pages 158-159 in the new 2017-2018 Annual Catalog: Wood Textures Designer Series Paper, Wood Crate Framelits, Wood Words stamp set, Copper Trim, and 3″ x 6″ Gusseted Cellophane Bags.
Here’s what I made:


Here’s what I did:
Die cut using the Wood Crate Framelits:
- 2 of the crate pieces from Wood Textures Designer Series Paper
Stamped with the Wood Words stamp set:
- “Hello Friend” in Whisper White Craft ink onto one of the crate’s slats
- “Farmers Market” in Whisper White Craft ink onto both ends of the crate
- NOTE: I used my Heat Tool to dry the ink.
Assembled the crate:
- tabs on each die cut piece glued onto the other die cut piece, to create the crate
- goldfish crackers (Parmesan is my favorite flavor) put in a 3″ x 6″ Gusseted bag, then tied it closed with a piece of Copper Trim, tying it in a bow
- Copper Trim pulled along its length to widen it
- NOTE: the Copper Trim is a thin mesh tube that you can use as is, or you can pull on the sides to make it wider, which consequently makes it shorter in length. You can also put things inside the tube. Keep checking back to see examples.
- bag of goldfish put into the crate – Voila!
Here’s what I used:
Click on the images for more details and to purchase. The new products will be available to purchase beginning June 1, 2017.
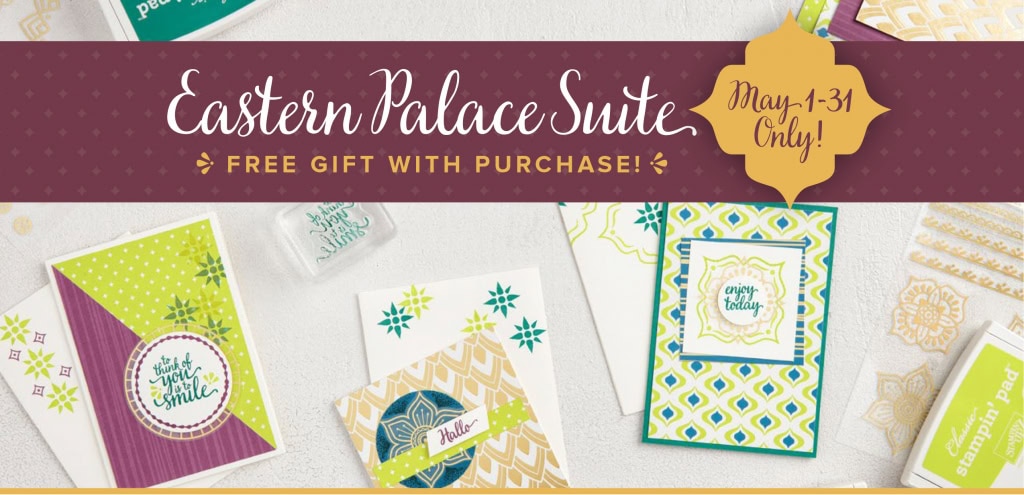
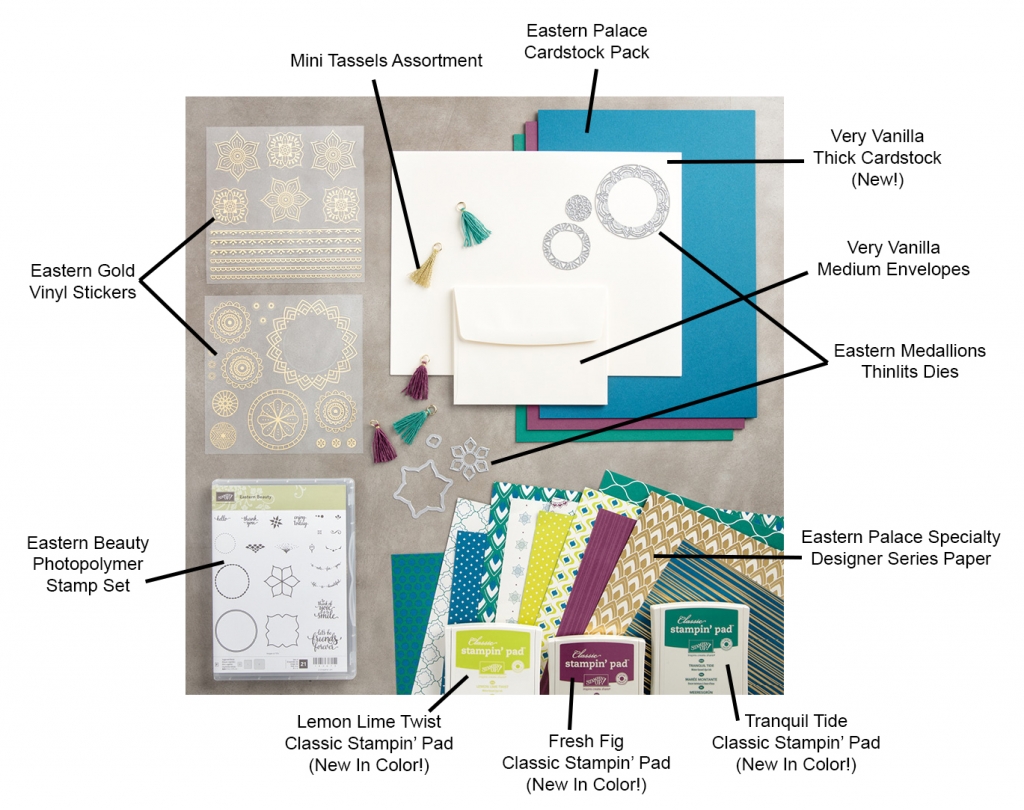
The 2017-2018 Annual Catalog goes live June 1, but you can order the brand new Eastern Palace Bundles now! Through May 31, you can order these exclusive bundles, and get a head start on making beautiful projects with these amazing new products. Included in this early release are three of the new In Colors: Fresh Fig, Lemon Lime Twist, and Tranquil Tide.
These products will still be available after May 31, but this amazing deal, including free products, will not be!
Get them now by clicking on the images below:


May Host Code
TPR2ZNKB
Use the Host Code on online orders less than $15o. See how to use a Host Code here.
Online orders of $75-149.99 placed with the Host Code will receive the FREE gift of the month!
Online orders of $150 or more will automatically receive the FREE gift of the month! Do not use the Host Code.
May’s FREE gift is a pack of Metallic Enamel Shapes. Each pack contains:
- 100 enamel shapes, 50 each in gold and silver foil.
- 1 sheet per color: gold and silver
- Each sheet has 15 mini circles, 10 small circles, 10 hearts, and 15 stars.

Metallic Enamel Shapes © Stampin’ Up!
(I can ship within US only.)


Gum Ball Rewards
 You always earn a Gum Ball for every $50 you spend on an order with me. Earn 10 Gum Balls and I’ll send you a free stamp set of your choice! See the Gum Ball Rewards page for details.
Click here to shop my online store!
Thanks for stopping by today, and Sweet Stamping!

Apr 29, 2017 | Boxes, Gallery |
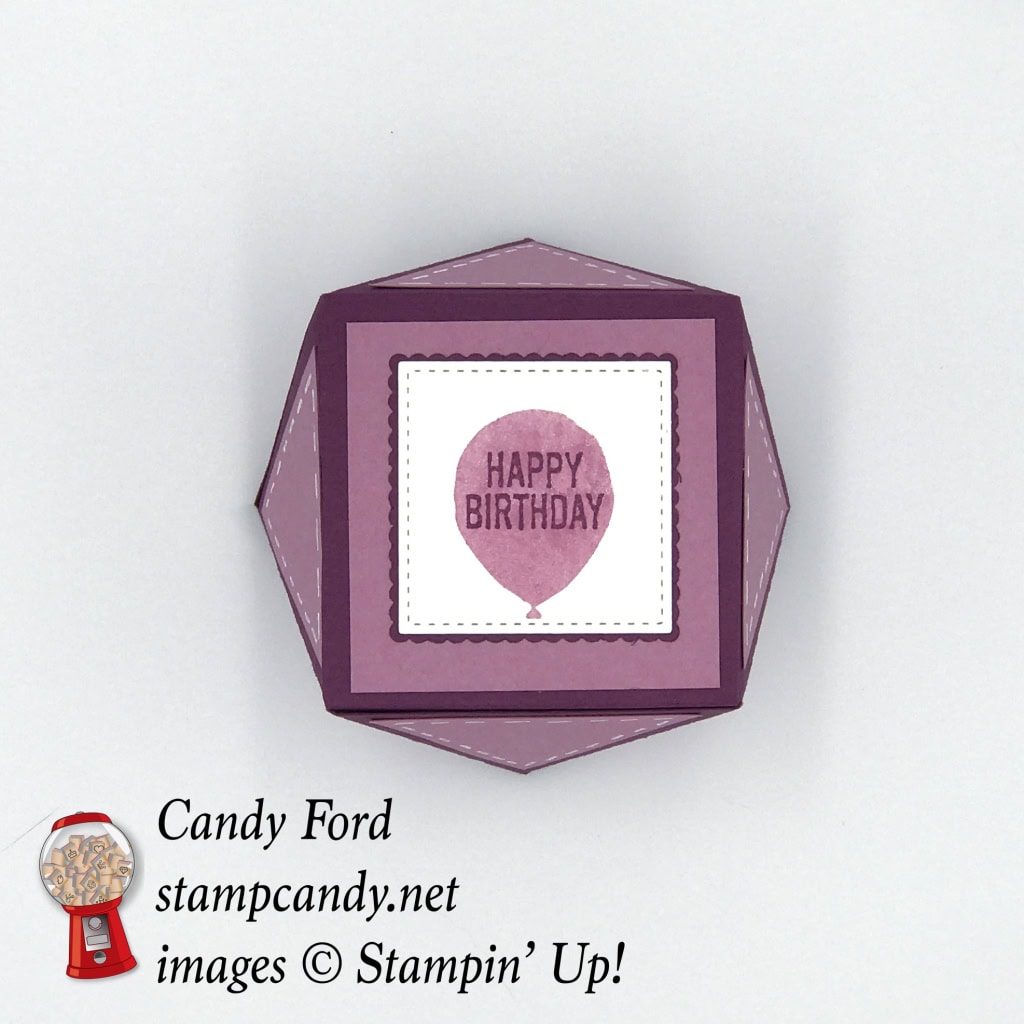
Here’s another faceted gift box (see the first one I made here.) For this one I used the Balloon Celebration and the Thoughtful Banners stamp sets, as well as the Stitched Shapes Thinlits and the Layering Squares Framelits. These boxes are are so easy to make, but they’re a real show stopper.
Here’s what I made:

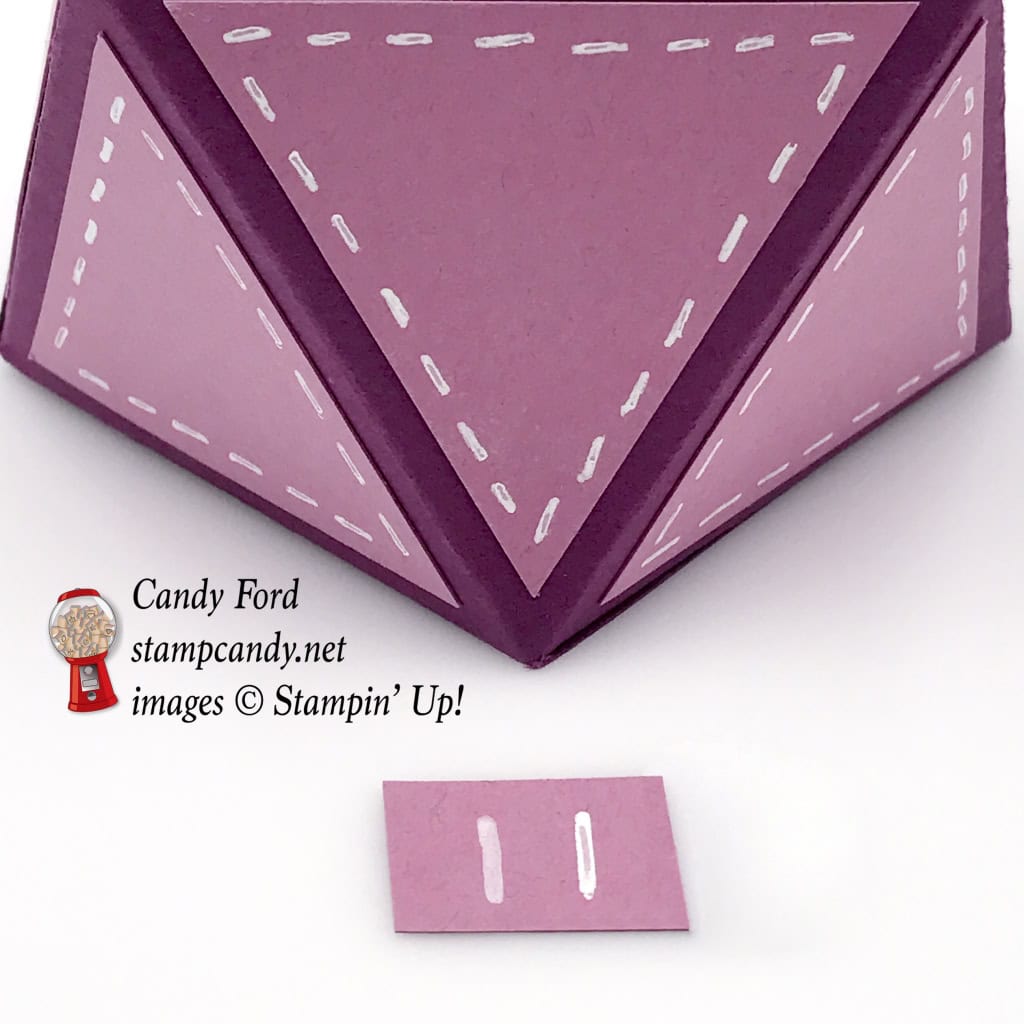
I used a White Cigno Gel Pen to draw the stitch lines, forgetting that it was a retired item. You can certainly use the White Chalk Marker that is still available. The scrap of paper below has the White Chalk Marker on the left and the Gel Pen on the right.
Here’s what I did:
Cut and scored with my Stampin’ Trimmer:
- Rich Razzleberry card stock (CS) cut to 7-7/8″ x 11-1/2″
- measuring along the short side, scored at 2-1/2″, 4-5/8″, 7-1/8″
- rotated 90° counterclockwise, so the skinniest section was at the top, then scored only down to the second score line (crossed one score line and stopped at the second) at 2-1/2″, 5″, 7-1/2″, 10″
- rotated 180° and scored only down to the first score line at 1/4″, 2-3/4″, 5-1/4″, 7-3/4″, 10-1/4″
Scored using Stylus and a ruler:
- diagonal lines as shown in the first diagram
All lines in this 1st diagram were scored, then the solid lines were cut and the dotted lines were left intact.

Cut with my Paper Snips (see diagram below):
- all grey areas cut away
- cut through all solid score lines, and left dotted score lines intact
- folded all score lines and burnished with a Bone Folder
This 2nd diagram shows where to cut, and where to adhere sides of box together.

Made triangles for sides:
- traced around one of the triangular box sides to create a template
- trimmed 1/8″ off each side of the new triangle template
- used template to cut 8 triangles from Sweet Sugarplum CS
Use White Chalk Marker:
- to draw stitched lines around the 8 Sweet Sugarplum CS triangles
Stamped using the Balloon Celebration stamp set:
- balloon in Sweet Sugarplum ink onto Whisper White CS
Stamped using the Thoughtful Banners stamp set:
- sentiment in Rich Razzleberry ink over the stamped balloon
Die cut using the Stitched Shapes Framelits:
Die cut using the Layering Squares Framelits:
- Rich Razzleberry CS to go under the sentiment
Assembled the faceted box:
- 8 Sweet Sugarplum triangles glued to the triangular sides of the box
- stamped square glued to Rich Razzleberry square
- Rich Razzleberry square glued to box top
- applied adhesive to the triangle in yellow and stuck it to the inside of the green area (see diagram above)
- folded in all four bottom flaps of the box and glued them together
- folded in the 3 top pieces of the box, tucking in the tab.
- Note 1: the two side flaps were trimmed down just a bit, to help it close, but left long enough to overlap each other.
- Note 2: I snipped the small tab at an angle on each side ever so slightly so it would tuck into the angled box
Here’s what I used:
Click on the images for more details and to purchase.
Stamp Camp!!!
Saturday, June 3, 2017, 9am-5pm
Candy’s Stampin’ Studio in Atlanta, GA
You’ll have 8 hours with no kids, no pets, no job, no worries – just stamping and shopping with friends!
Register here by May 20. Prepayment is necessary to make sure I have enough of everything on hand. Space is limited so register soon. Also, the earlier you register, the more prize drawing tickets you will receive at the door!
Click here for all the details.
Swatch Books & Paper Shares
for the brand new
2017-2018 Annual Catalog
Designer Series Papers
will be available beginning June 1!
Stay tuned!
Gum Ball Rewards
You always earn a Gum Ball for every $50 you spend on an order with me. Earn 10 Gum Balls and I’ll send you a free stamp set of your choice! See the Gum Ball Rewards page for details.
Click here to shop my online store!
April Host Code
HV6MJT2X
Use the Host Code on online orders less than $15o. See how to use a Host Code here.
Online orders of $75-149.99 placed with the Host Code will receive the gift of the month!
Online orders of $150 or more will automatically receive the gift of the month! Do not use the Host Code.
April’s gift is a pack of Urban Underground Embellishments! Each pack contains 24 brushed silver embellishments – 8 each of 3 designs. (I can ship within US only.)
Urban Underground Embellishments © Stampin’ Up!
Thanks for stopping by today, and Sweet Stamping!

Apr 28, 2017 | Boxes, Classes, Events, Gallery, New Products |
I do have a project to share with you today, a cute little outhouse (yep, that’s what I said) but first I want to tell you about my upcoming Stamp Camp. I’m very excited about it. You’ll have 8 hours with no kids, no pets, no job, no worries – just stamping and shopping with friends!
Stamp Camp
Saturday, June 3, 2017, 9am-5pm
Candy’s Stampin’ Studio in Atlanta, GA
Register here by May 20. Prepayment is necessary to make sure I have enough of everything on hand. Space is limited so register soon. Also, the earlier you register, the more prize drawing tickets you will receive at the door!
Click here for all the details.
And now, todays project. I made a bunch of products for the OnStage display board using the new Wood Textures Suite. When I saw the crescent moon shaped die, I knew I had to make an outhouse. I mean, isn’t that the first thing that came to your mind? No? Just me? Well anyway, check it out. I thinks it’s cute as can be.
Here’s what I made:
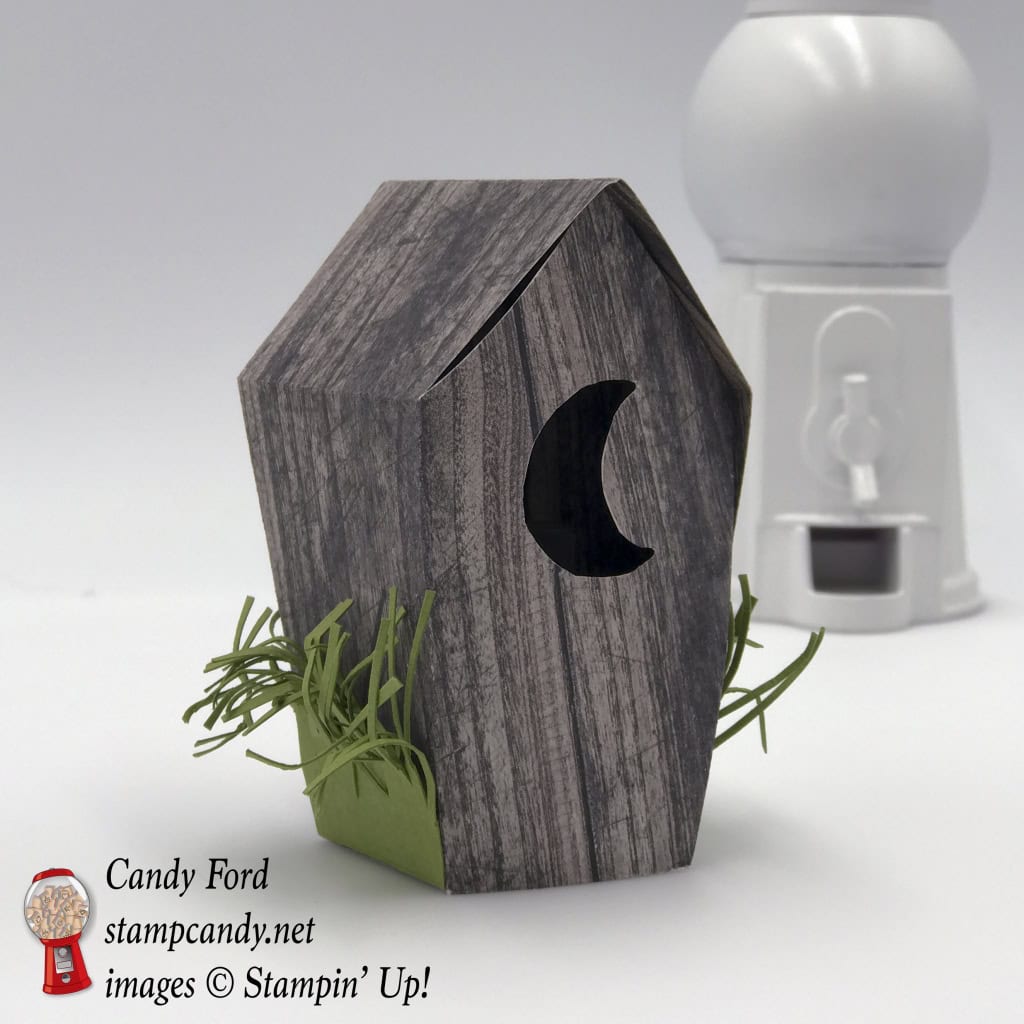


Die cut using the Home Sweet Home Thinlits:
- 2 pieces of Wood Textures Designer Series Paper (DSP) with the house die
- 1 piece of scrap card stock (CS) with the house die
Die cut using the Wood Crate Framelits:
Created a template for the inside:
- cut the door off of the CS piece, then cut off the top half of the door
- traced around the bottom part of the door on another piece of scrap CS
- measured and used a ruler to draw the rest of the template: sides, top, and bottom
- cut another piece of the DSP with my Paper Snips, using the template
- cut the hole for the “seat” with the 3/4″ Circle Punch

Made the grass for around the outhouse:
- cut pieces of Old Olive CS to fit around the bottom of the house
- used Paper Snips to cut cut cut all the grass blades, being sure not to cut all the way through to the other edge
- crumpled the blades with my fingers
Made the toilet paper:
- I used a scrap of Whisper White CS (approximately 1/2″ x 8″)
- used a Smoky Slate Stampin’ Write Marker to draw tiny “perforations” along about 1-1/2″ or so of one end
- put a tiny bead of glue down the side without perforations, leaving about 3/4″ at the end without glue
- roll up with your fingers (you might find it helpful to wrap it around a wooden skewer to get it started) leaving the “perforated” end free
Assembled the outhouse:
- two DSP die cuts glued together to make the house, leaving open the side that has the moon
- insert folded into shape and glued inside the house
- toilet paper roll glued to the seat
- grass pieces glued to the sides of the house
Here’s what I used:
Click on the images for more details and to purchase.
These items will be available to purchase on June 1, 2017:
- Wood Textures DSP, Item #144177
- Wood Crate Framelits, Item # 143730 (also available in a bundle with the Wood Words stamp set to save you 10%!)
Swatch Books & Paper Shares
for the brand new
2017-2018 Annual Catalog
Designer Series Papers
will be available beginning June 1!
Stay tuned!
Gum Ball Rewards
You always earn a Gum Ball for every $50 you spend on an order with me. Earn 10 Gum Balls and I’ll send you a free stamp set of your choice! See the Gum Ball Rewards page for details.
Click here to shop my online store!
April Host Code
HV6MJT2X
Use the Host Code on online orders less than $15o. See how to use a Host Code here.
Online orders of $75-149.99 placed with the Host Code will receive the gift of the month!
Online orders of $150 or more will automatically receive the gift of the month! Do not use the Host Code.
April’s gift is a pack of Urban Underground Embellishments! Each pack contains 24 brushed silver embellishments – 8 each of 3 designs. (I can ship within US only.)
Urban Underground Embellishments © Stampin’ Up!
Thanks for stopping by today, and Sweet Stamping!
Apr 18, 2017 | Blog Hop, Boxes, Catalogs, Gallery, Gift Wrap, New Products
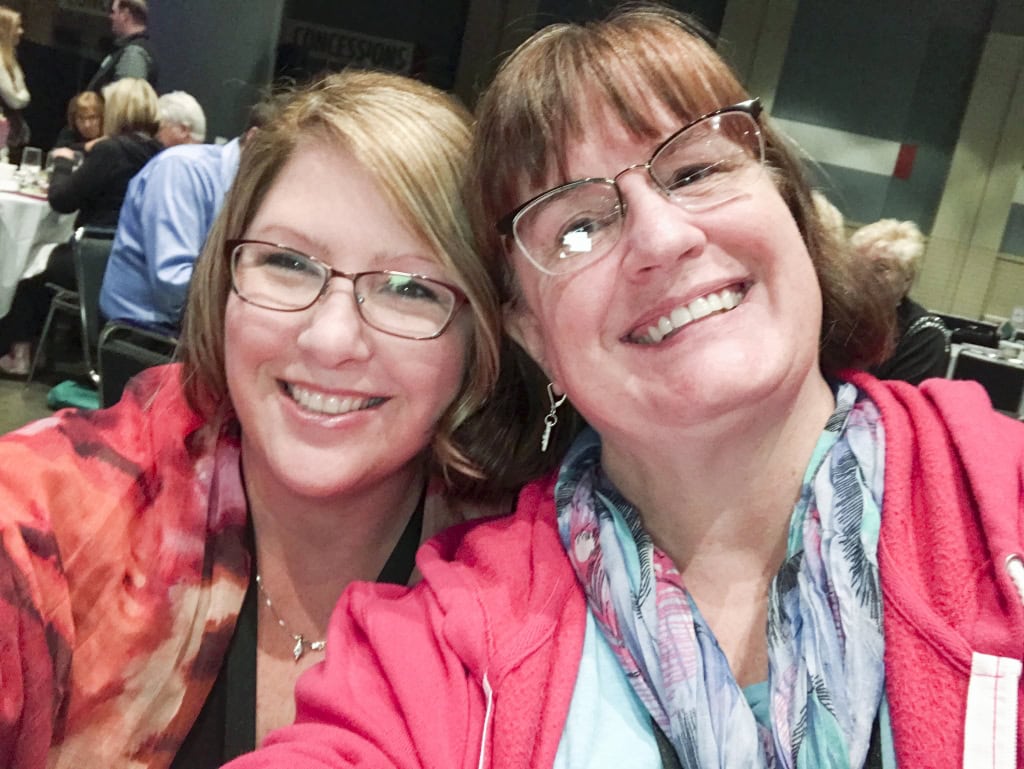
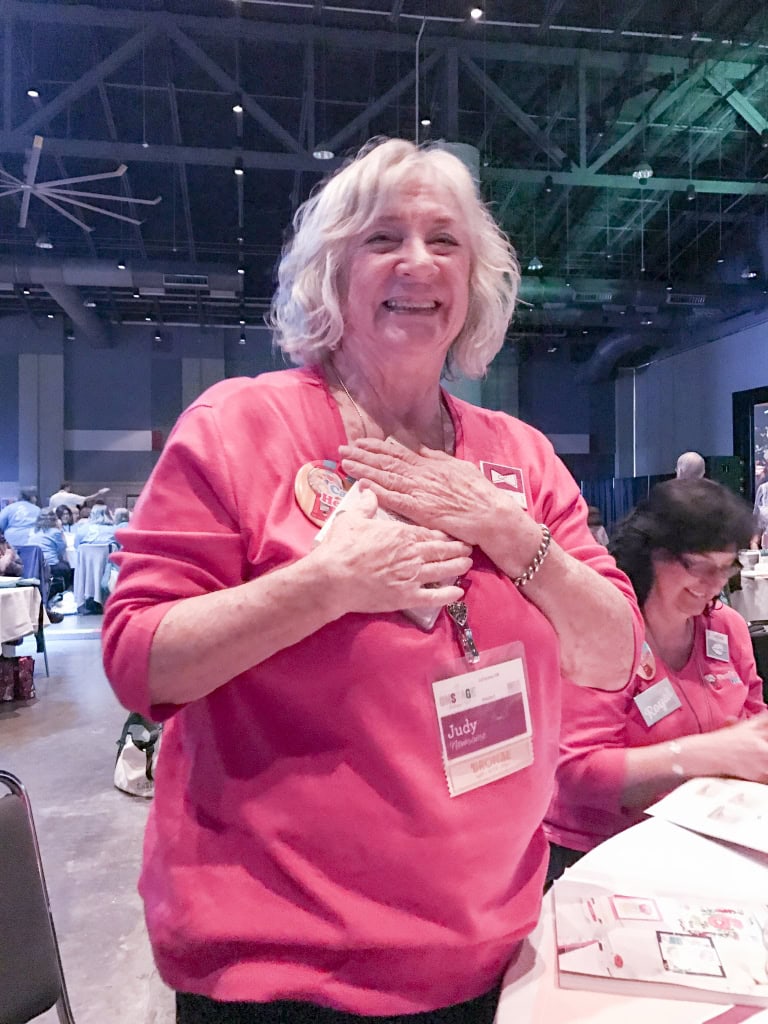
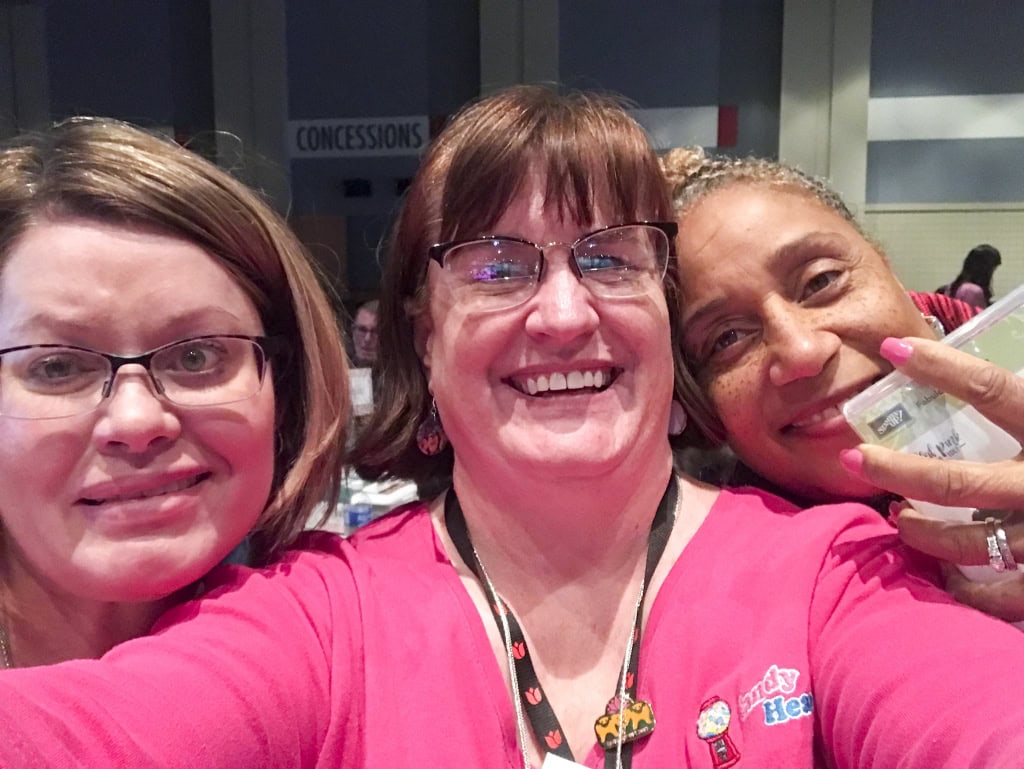
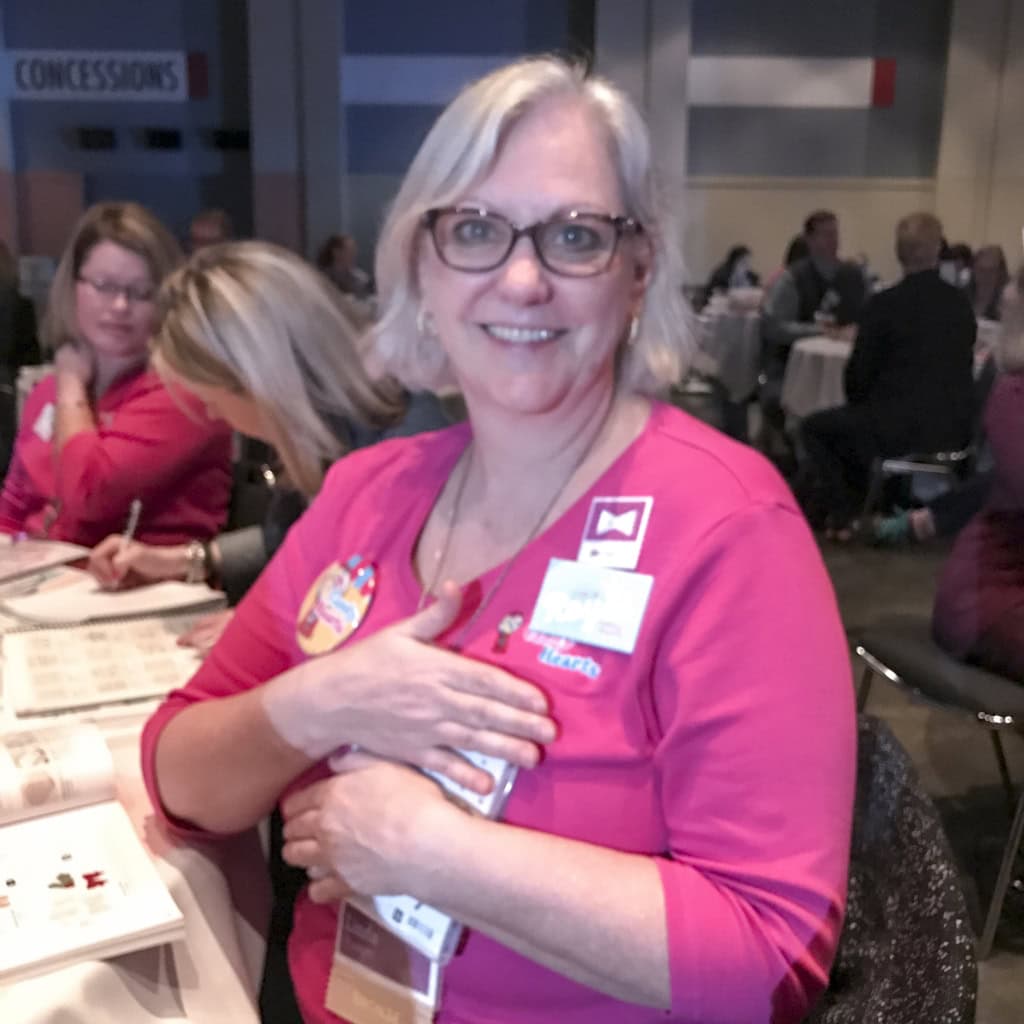
Welcome to the Thailand Incentive Trip Achievers Blog Hop for April 2017. This month our theme is “Onstage April 2017”.

Onstage is an event held for Stampin’ Up!® Demonstrators only, where we get to see, feel, and play with brand-new soon-to-be-released products. This event was based on the brand new 2017-2018 Annual Catalog.

We want to show you some of the highlights of this event and hope that you can join us and other Stampin’ Up!® Demonstrators in the future. Just one more reason to join my team!
Eight members of my team attended along with me, and we had a blast. We even had matching shirts, cups, and earrings!

Judy Newsome, Debbie Catlett, Caitlin Jones, Candy Ford, Linda Krueger, Missy Wiedeman, Donica Williams, Tamara Burton, and Kimberly Laidley.
My favorite thing about OnStage is seeing the demonstrators I only get to see at events like this. Well, and making new demonstrator friends. Oh, and the presentations. And the project ideas. And participating in swaps. And getting the newest catalog before anyone else. And getting some of the brand new products FREE before anyone else has even seen them. And pre-ordering new products before anyone else. So yeah, basically all of it.
Here are some shots from OnStage:

We weren’t yet allowed to show the new products, so that’s why we are hiding the stamp sets we won during Prize Patrols. 

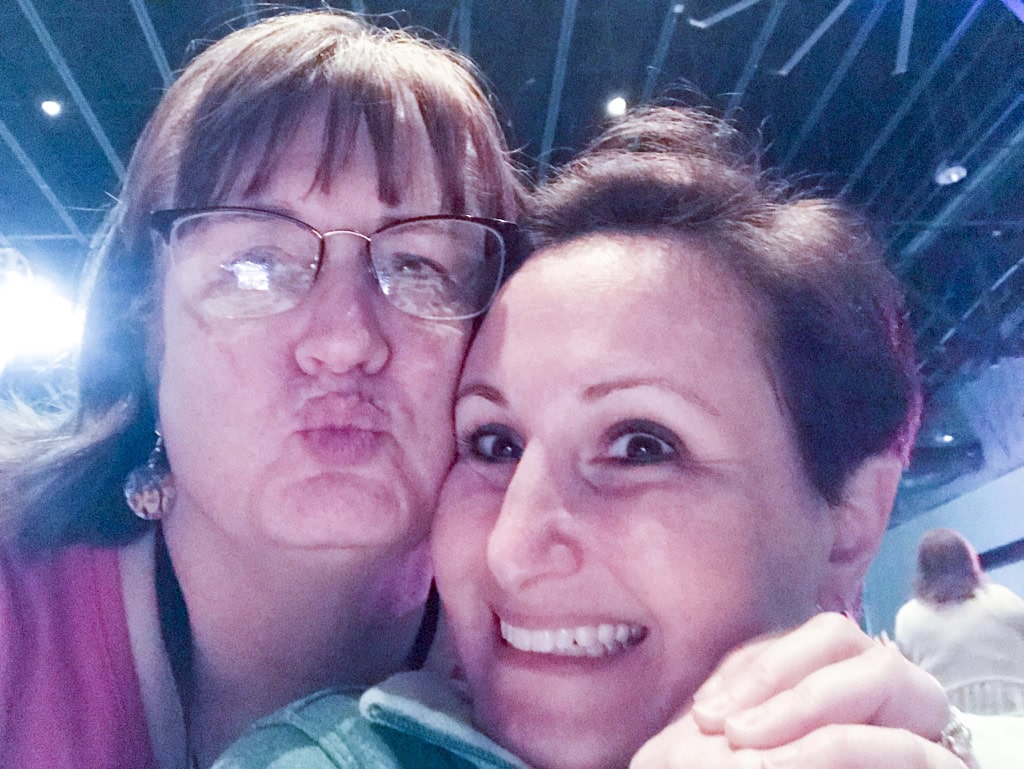

That evening, after OnStage was over and everyone had some dinner, Brian King’s team gathered in his suite for a Pajama Jam. We had snacks and went through the new catalog page by page. Of course, the Candy Hearts had matching pjs for the event (though not everyone has on their pj bottoms yet in this photo.)

I’m not sure what happened between these two shots, but Brian definitely had something to do with it. The camera caught him before he could get away. You can check out Brian’s blog post today for more photos of the Pajama Party.

Here’s what I made:
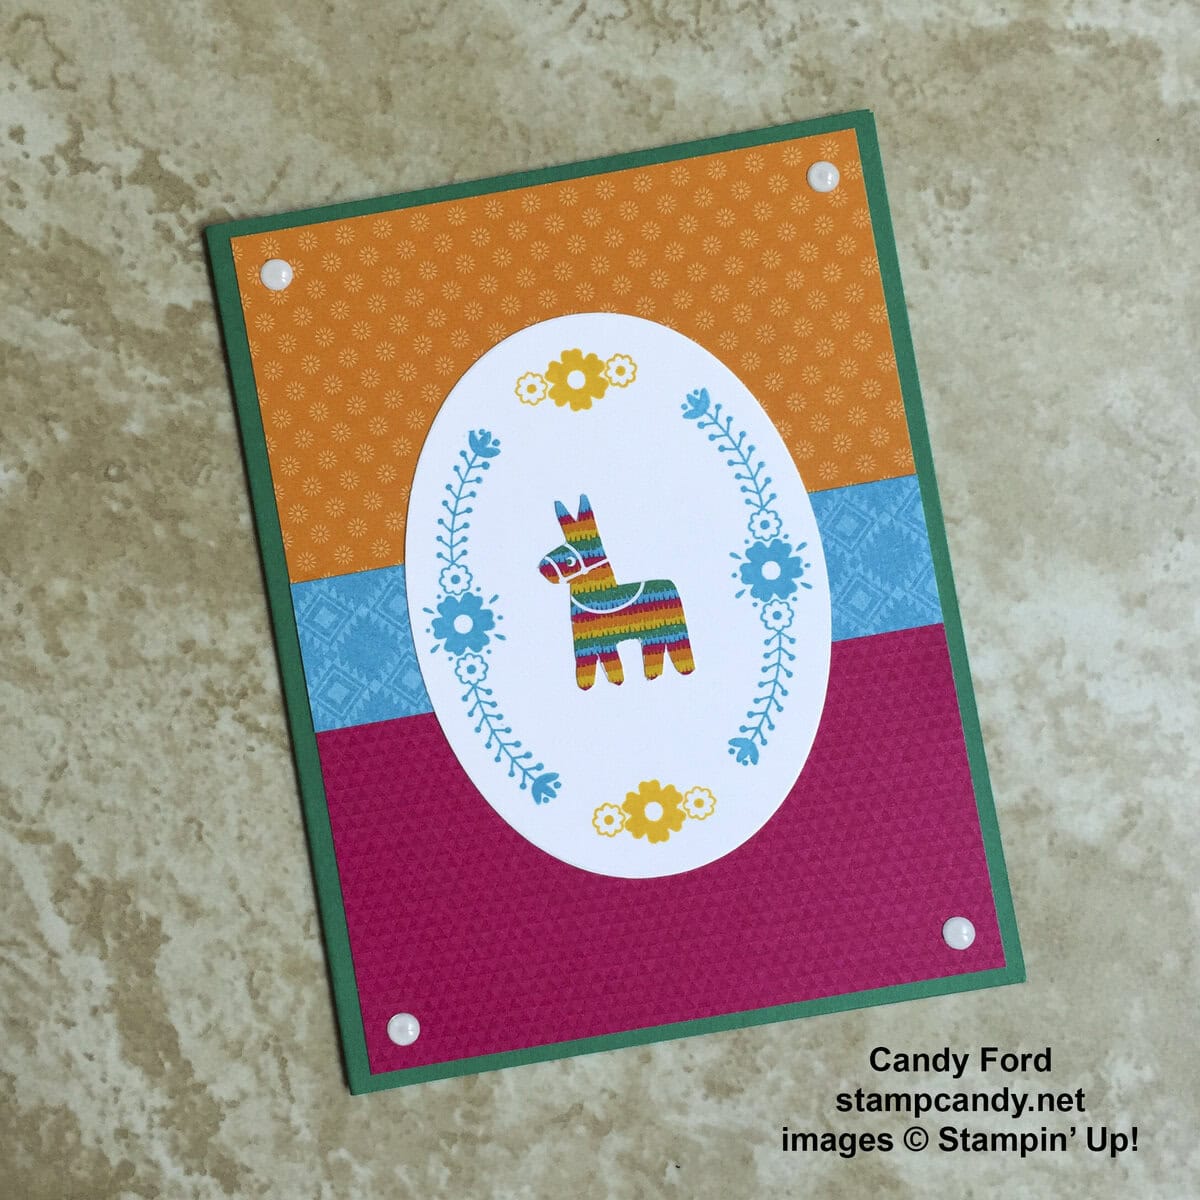
I was honored to present the new Wood Textures Suite of products at OnStage Savannah, and to create a display board of projects made with them. Today I’m sharing one of those projects. At first I filled the crate with a bag of Easter color Peanut M&Ms tied with a piece of the brand new Pool Party Solid Baker’s Twine.

Then I realized the M&Ms might be too heavy. The crate would be attached to a display board with velcro, and I was afraid the weight could cause the crate to warp or even tear. I found some small, lightweight Easter egg ornaments at Target, so I used those instead. (Most of my other display crates had miniature marshmallows in them for the same reason.)

The “grass” in the crate is some shredded gift bag filler I had on hand.
Here’s what I did:
Die cut using the Wood Crate Framelits:
- Wood Textures Designer Series Paper (DSP) using the crate die (2 pieces)
Stamped with the Wood Words stamp set:
- floral image in Pool Party ink onto one slatted side of the crate
Stamped with the Teeny Tiny wishes stamp set:
- sentiment in Pool Party ink onto a scrap of Whisper White card stock (CS)
Stamped with the Falling Flowers stamp set:
- small flower in Pink Pirouette ink over sentiment
Die cut using the Stitched Shapes Framelits:
Assembled the crate:
- two crate bottoms glued together, then tabs glued to sides to form crate
- sentiment adhered to front of crate with Stampin’ Dimensionals
Here’s the hop:
Thanks for taking part in our blog hop, there are so many amazing ideas and inspiration you don’t want to miss. Remember that currently you are at my blog (Candy Ford at stampcandy.net) so check the blog hop line up list to see who is next in the list. You don’t want to miss any of these!
Here’s what I used:
These are the new products I used, that will be available to purchase June 1, 2017:
- Wood Words Bundle (wood mount stamp set and Framelits) Item # 145315, $54.00
- Wood Words Bundle (clear mount stamp set and Framelits) Item # 145316, $46.75
- Wood Words wood mount stamp set, Item # 143925, $30.00
- Wood Words clear mount stamp set, Item # 143928, $22.00
- Wood Crate Framelits Dies, Item # 143730, $30.00
- Wood Textures Designer Series Paper, Item # 144177, $10.00
These are the current products I used. Click on the images for more details and to purchase.
Retiring Products
Click here to get them before they’re gone for good!
Gum Ball Rewards
You always earn a Gum Ball for every $50 you spend on an order with me. Earn 10 Gum Balls and I’ll send you a free stamp set of your choice! See the Gum Ball Rewards page for details.
Click here to shop my online store!
April Host Code
HV6MJT2X
Use the Host Code on online orders less than $15o. See how to use a Host Code here.
Online orders of $75-149.99 placed with the Host Code will receive the gift of the month!
Online orders of $150 or more will automatically receive the gift of the month! Do not use the Host Code.
April’s gift is a pack of Urban Underground Embellishments! Each pack contains 24 brushed silver embellishments – 8 each of 3 designs. (I can ship within US only.)
Urban Underground Embellishments © Stampin’ Up!
Thanks for stopping by today, and Sweet Stamping!
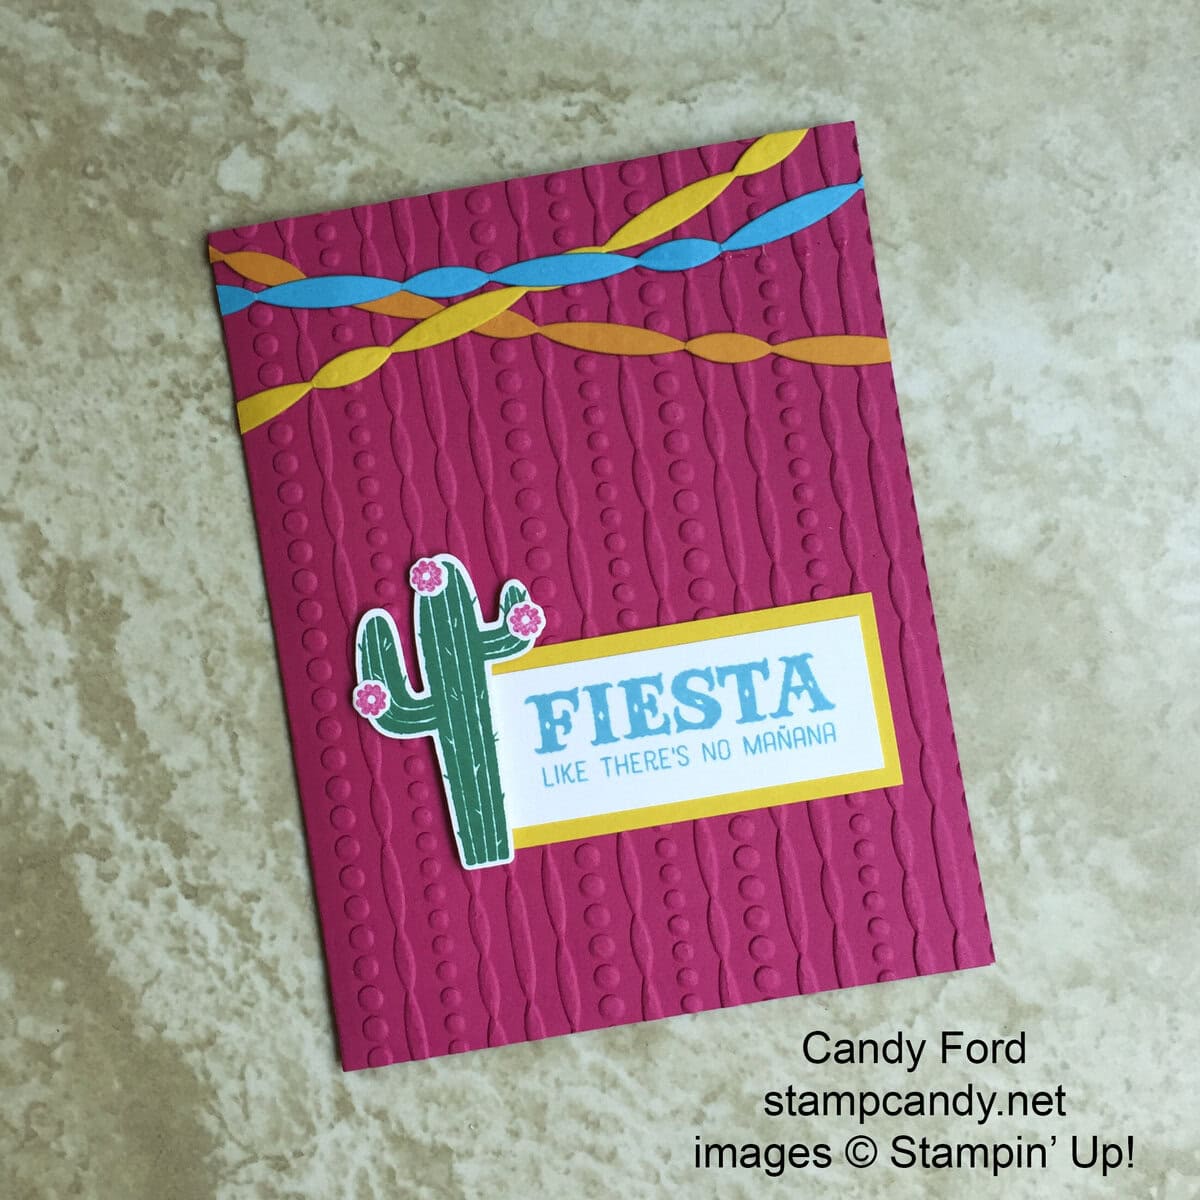
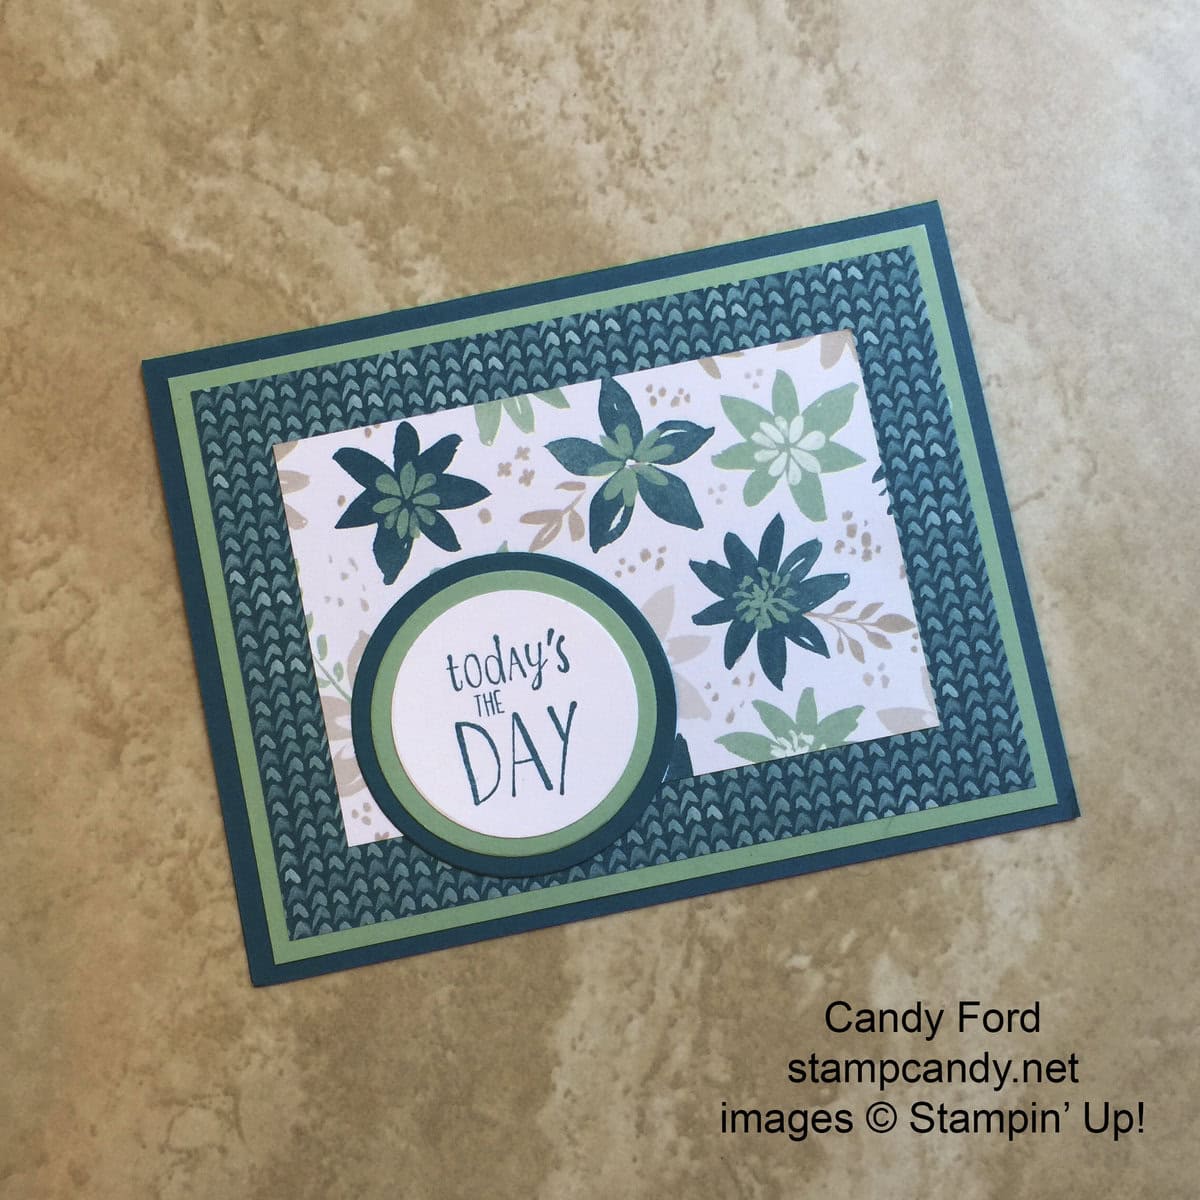
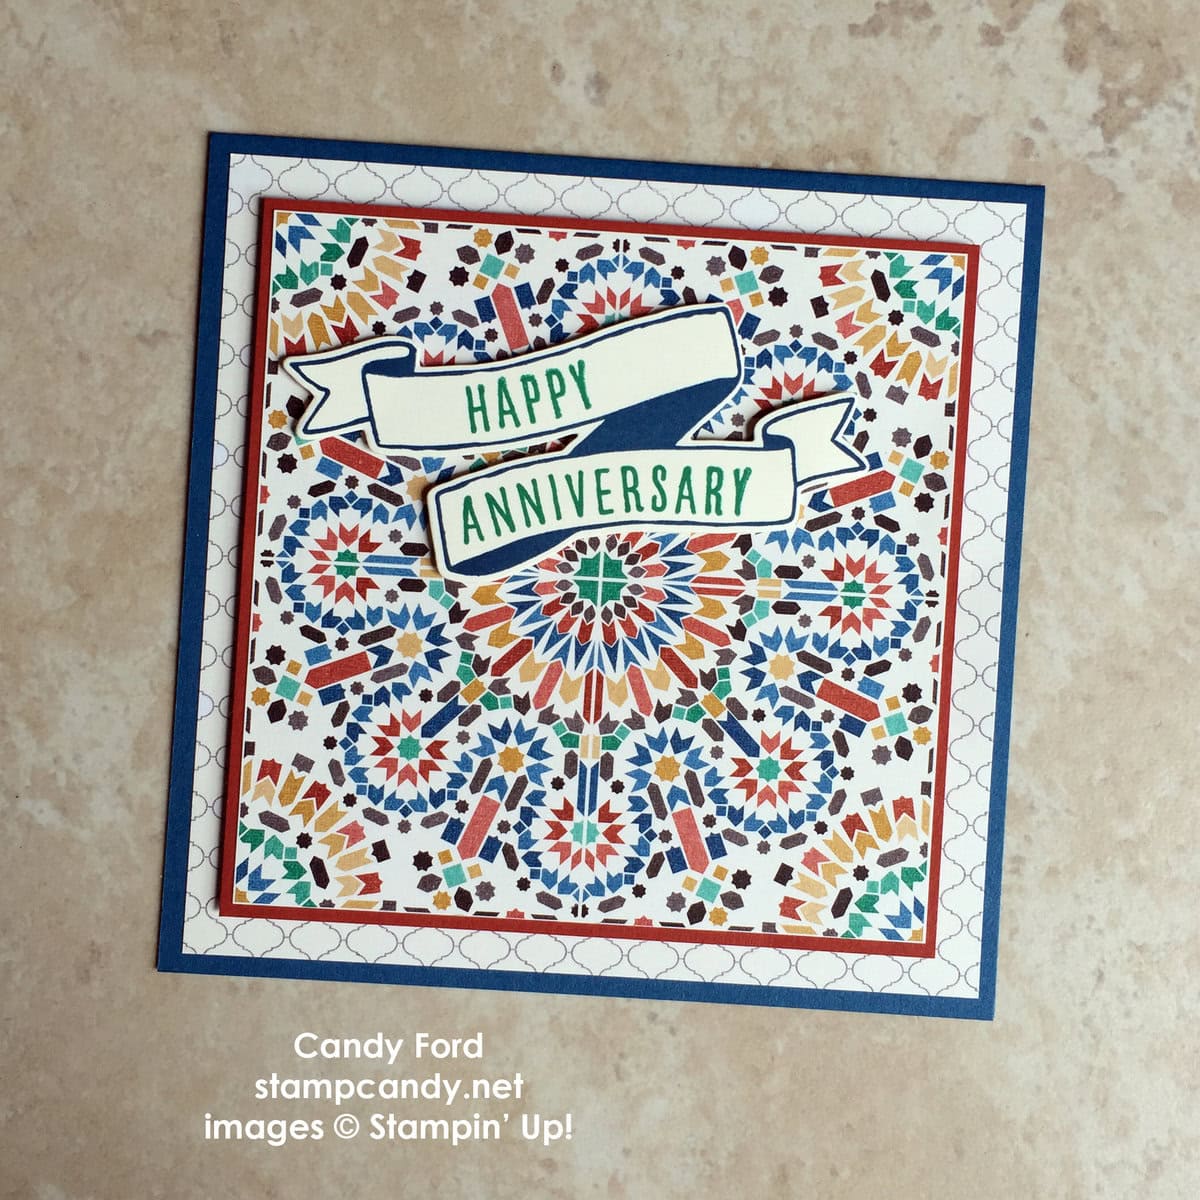
Apr 15, 2017 | Boxes, Cards, Retiring Products |
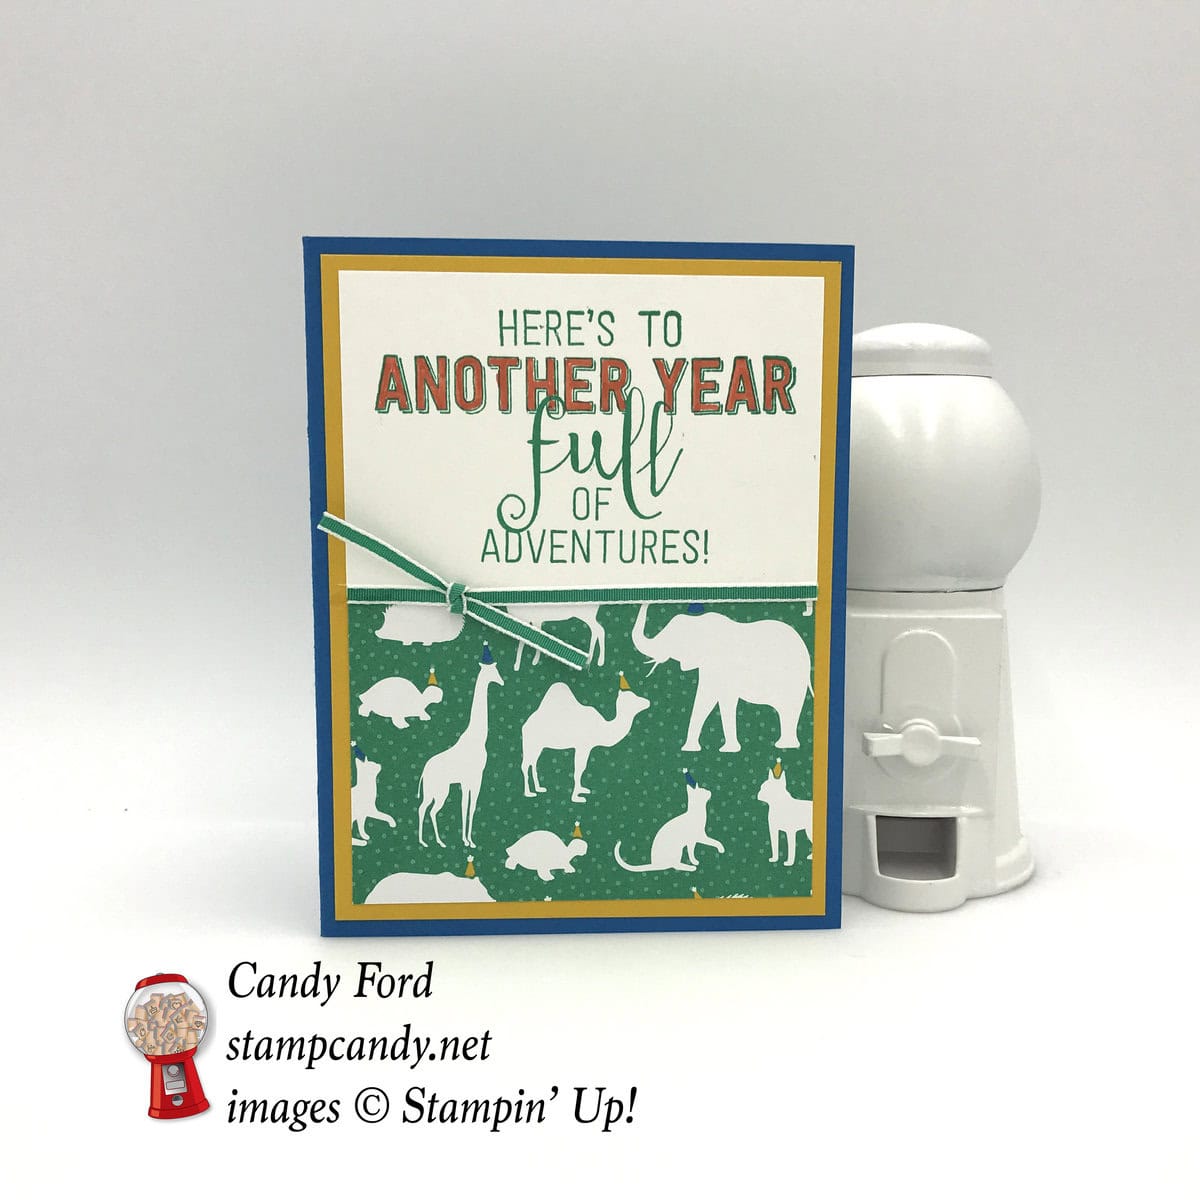
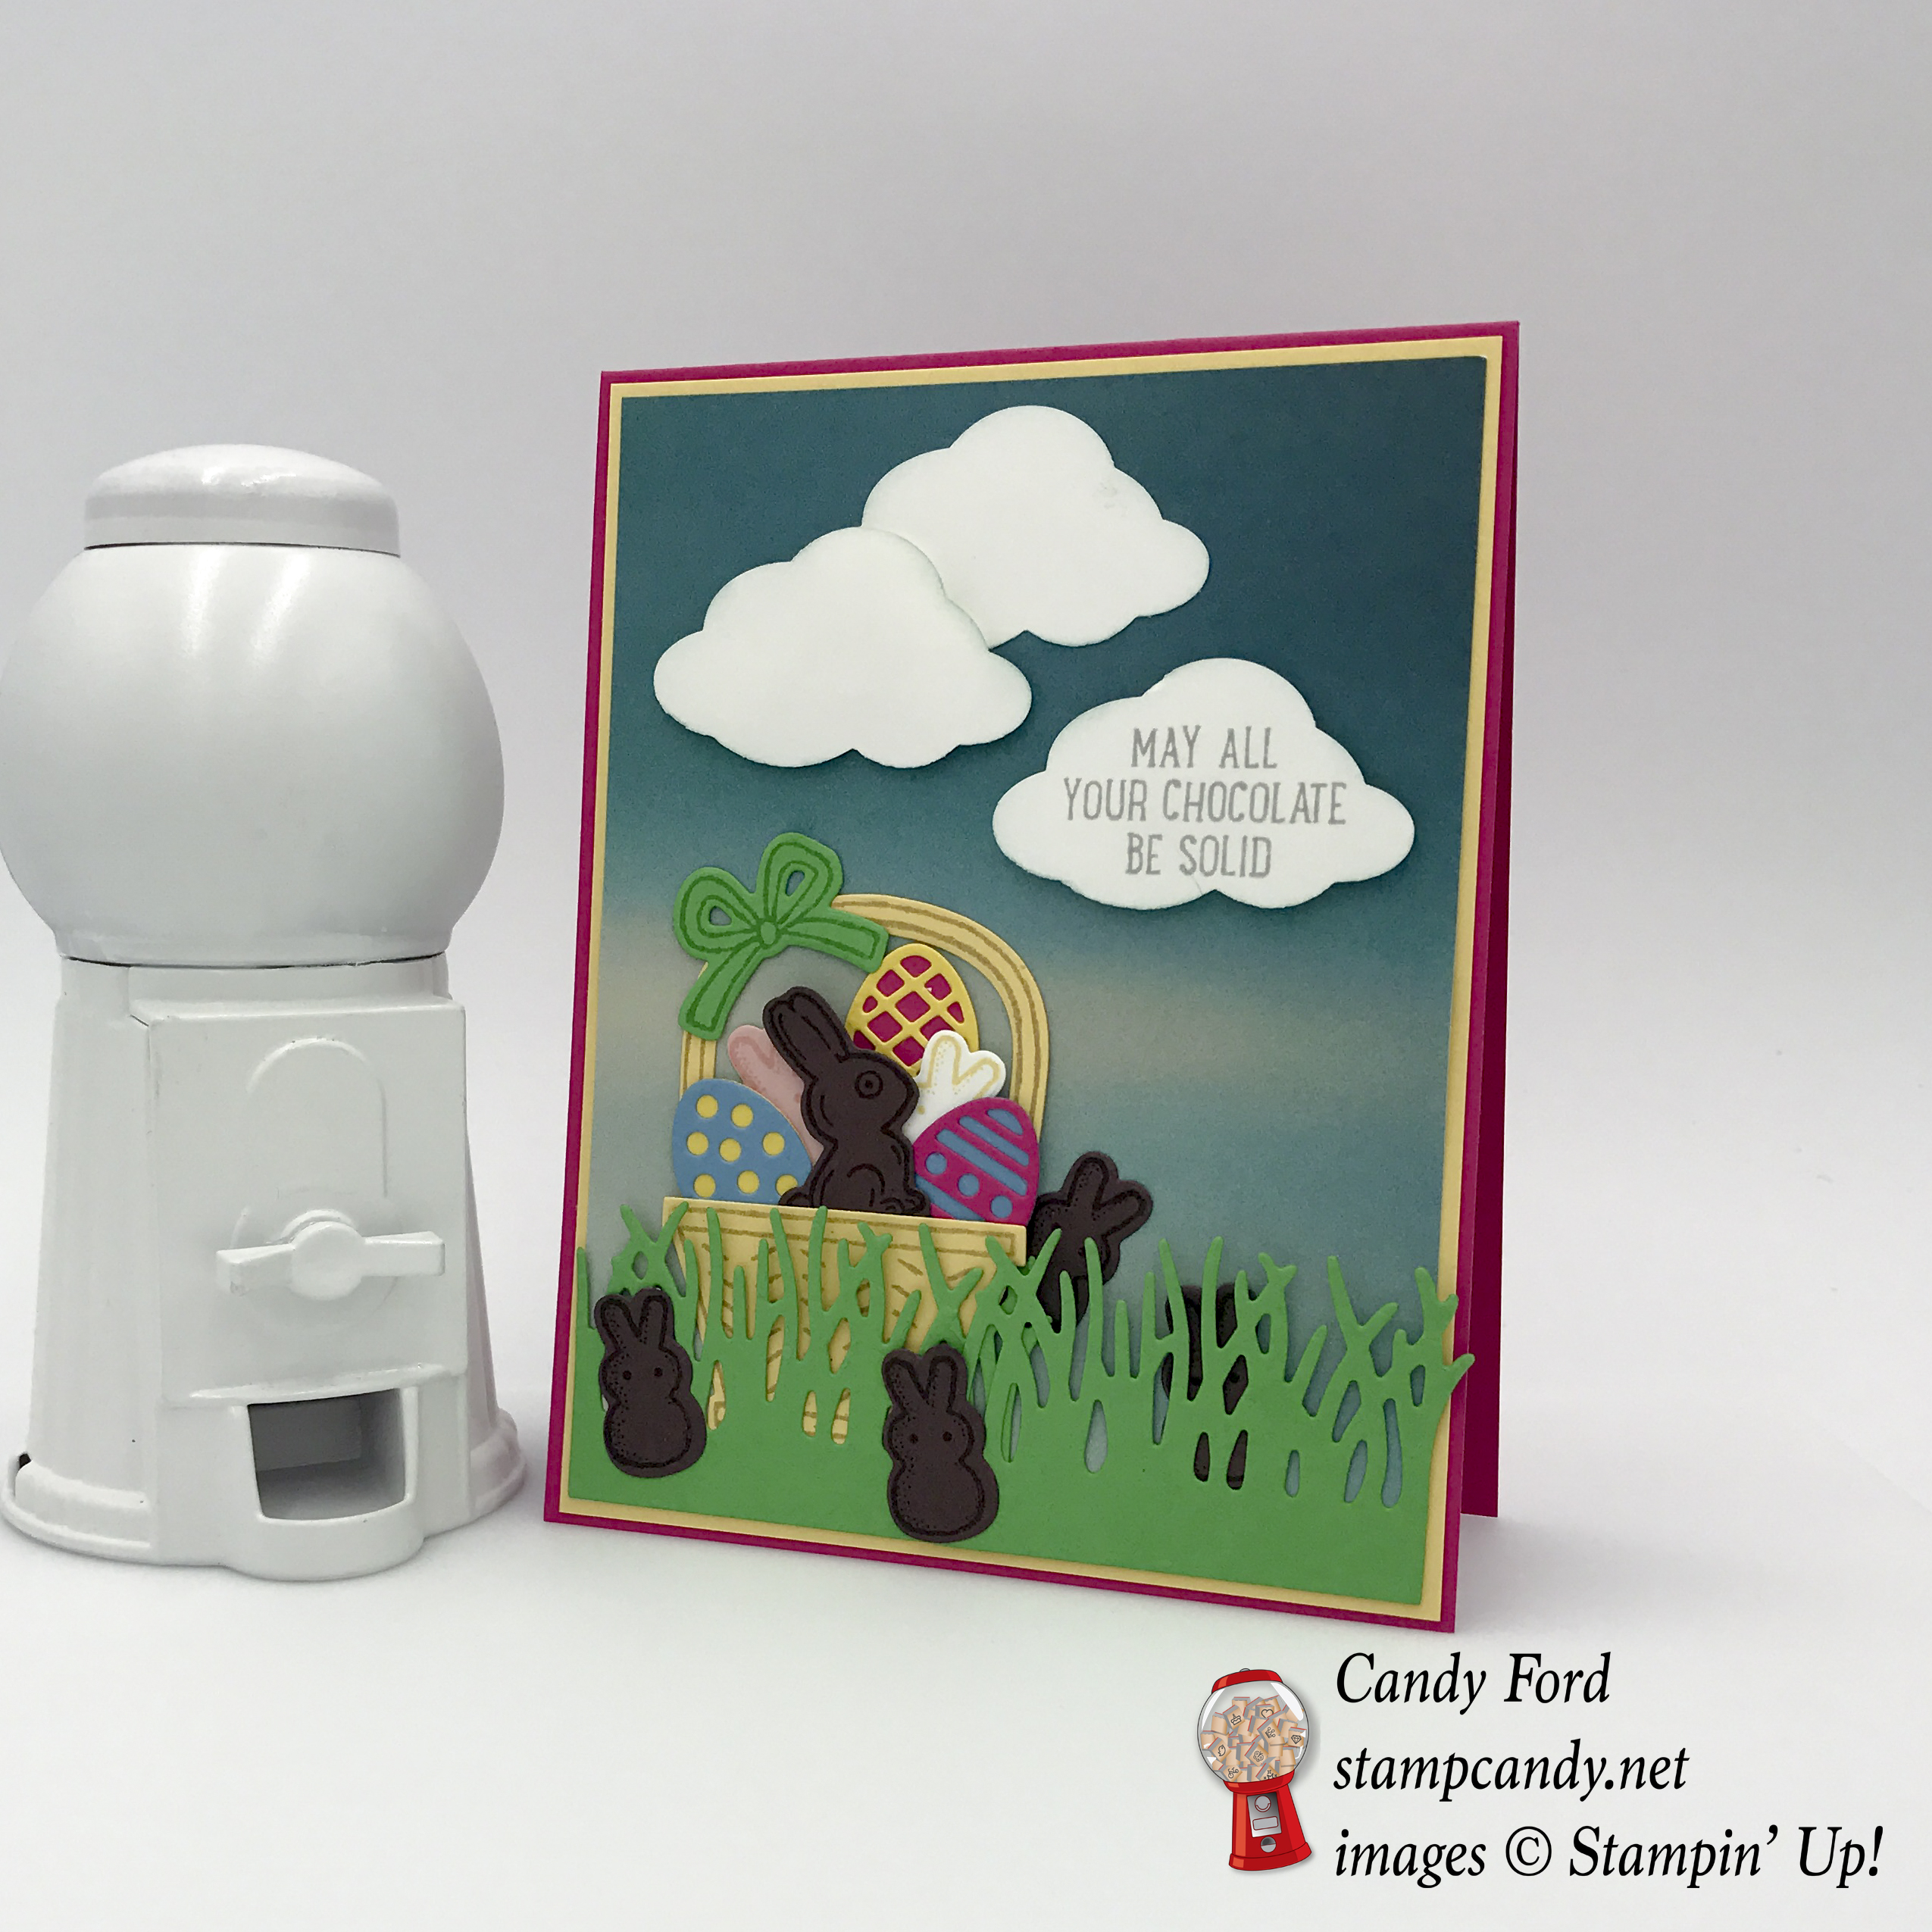
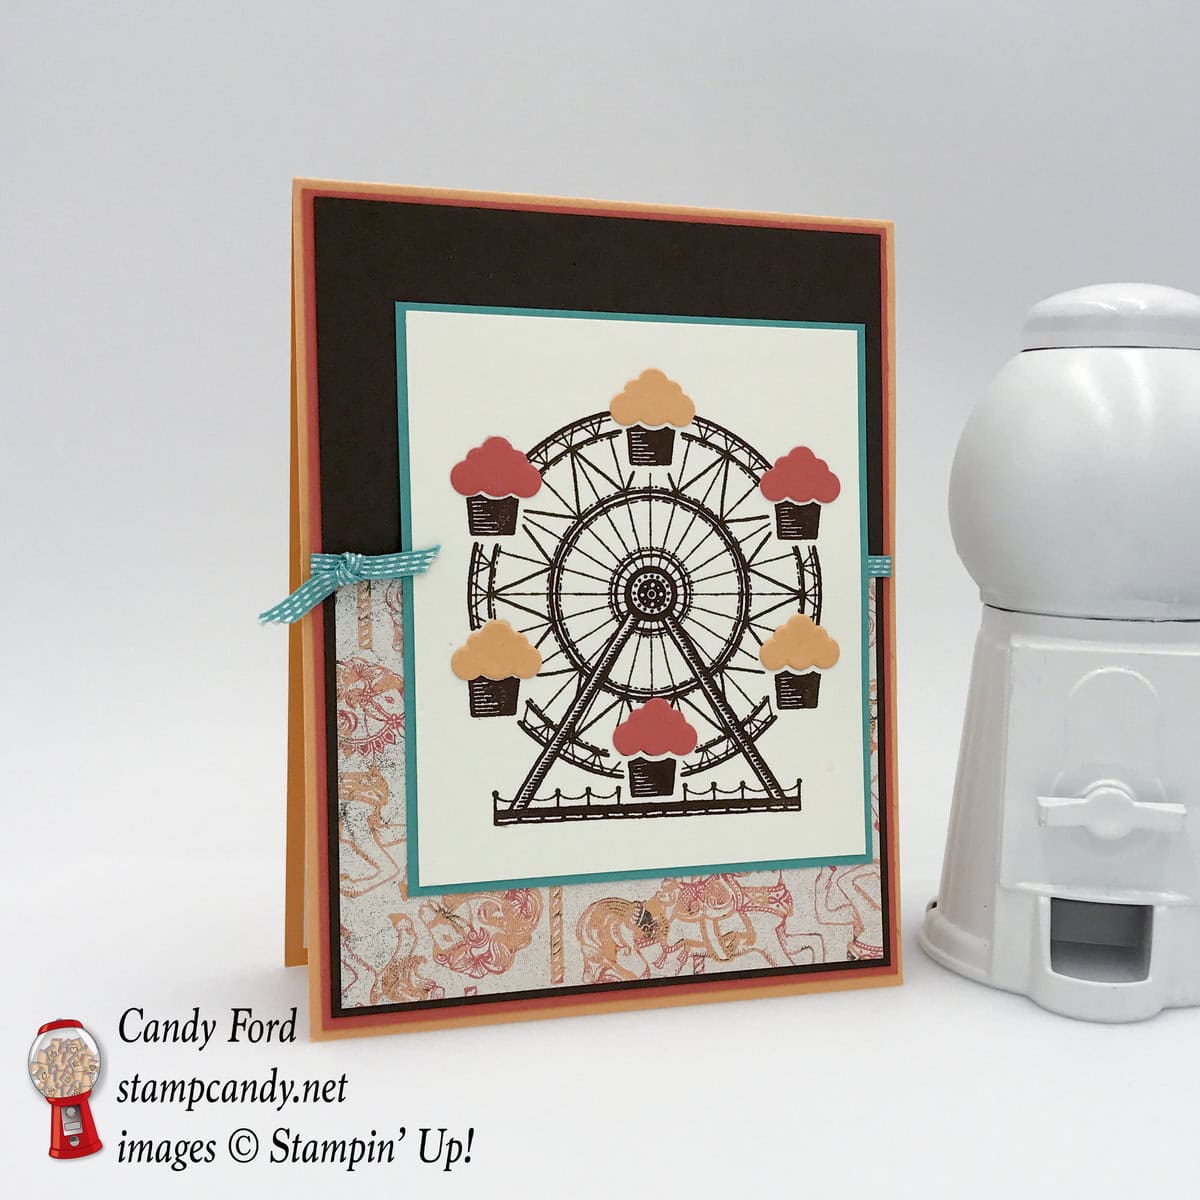
I had a wonderful time in Savannah last weekend at Stampin’ Up!’s OnStage event, but evidently I contracted the plague while I was there. Okay, it’s just the flu, but it still really stinks. Since I have no energy to get in my studio and create, I thought I’d share some cards from the past that I made using products that are retiring. Sort of a last hurrah, so to speak. Each of these projects uses at least one retiring item. It could be the paper, a retiring In Color, or stamp set. Or it could be that, in my flu medicine induced stupor, I accidentally included something that I shouldn’t have. So, you know, just enjoy looking at it anyway.
Hopefully, I’ll get some energy soon so I can start playing with the new goodies I was able to pre-pre-order. It is excruciating to see the boxes of new stuff just sitting here. Until then, please enjoy these blasts from the past.


Thanks for stopping by today, and Sweet Stamping!
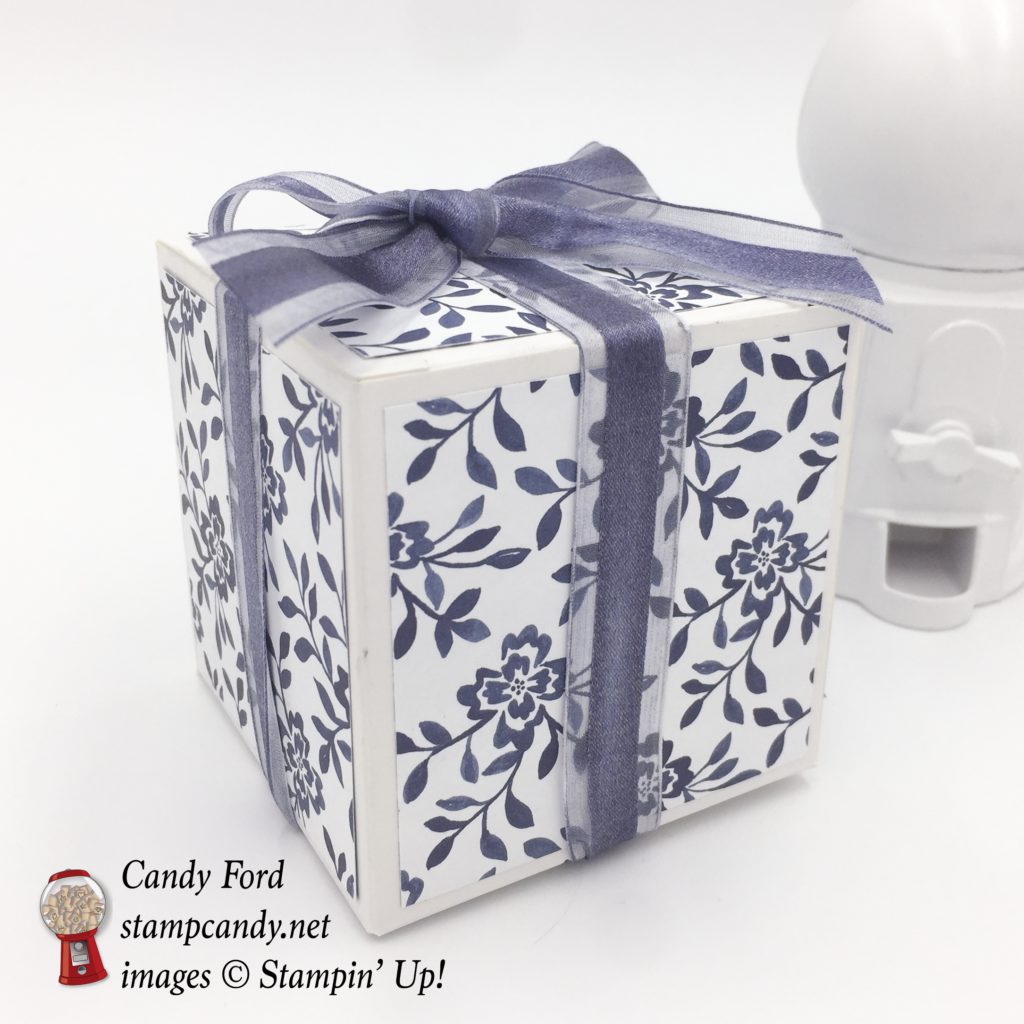
Apr 13, 2017 | Boxes, Events, Gallery, Gift Wrap, Gifts, Occasions |
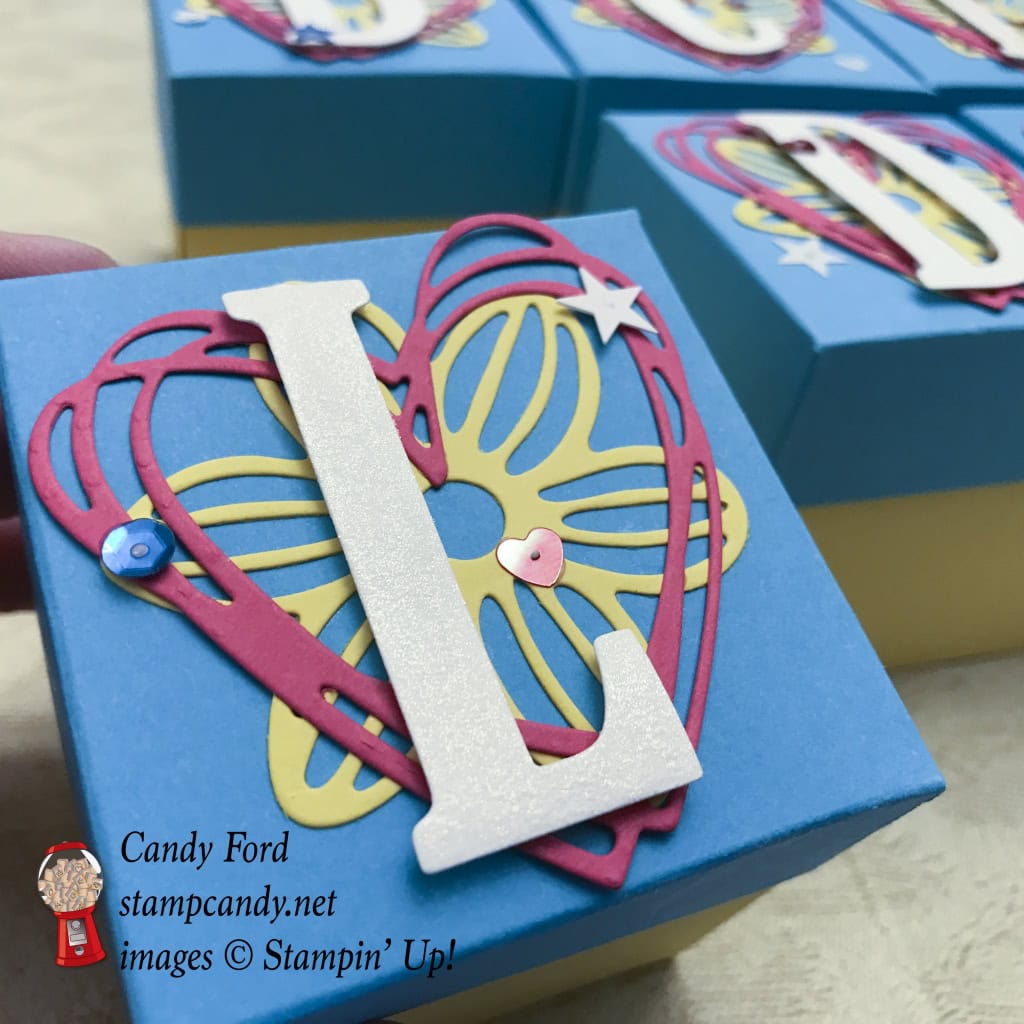
These are by far the fastest and easiest gift boxes I know how to make, and I make them all the time in various sizes. I made these for members of my team, the Candy Hearts, who attended OnStage (Stampin’ Up!’s semiannual convention type event) last weekend. In each box I put a pair of earrings with photos of candy conversation hearts on them. I didn’t use a single stamp on these boxes. Instead I used dies from the May Flowers Framelits, Sunshine Wishes Thinlits, and Large Letters Framelits.
Here’s what I made:
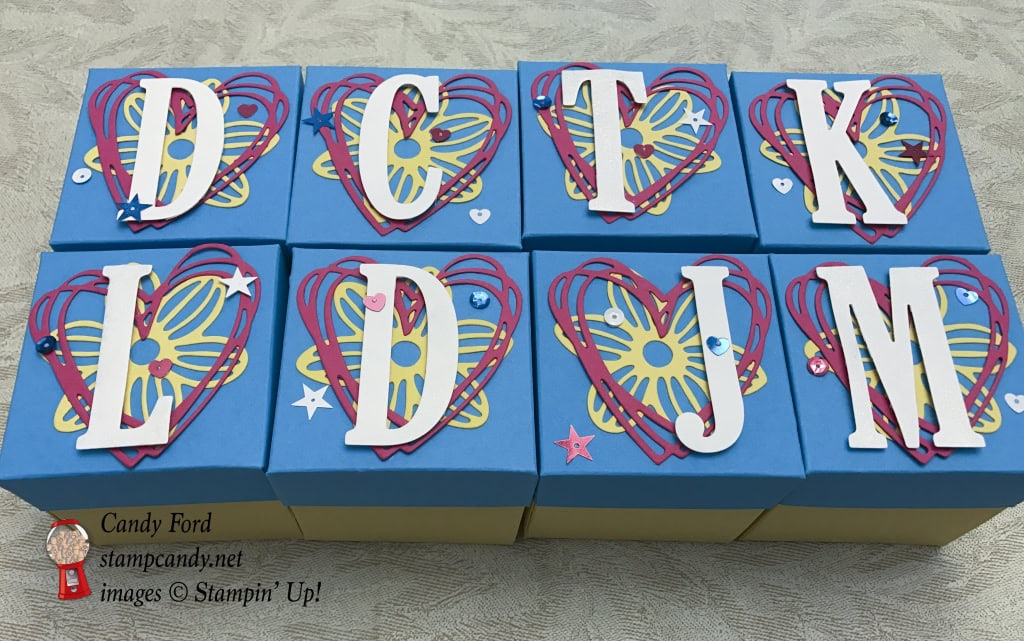
Here’s what I did:
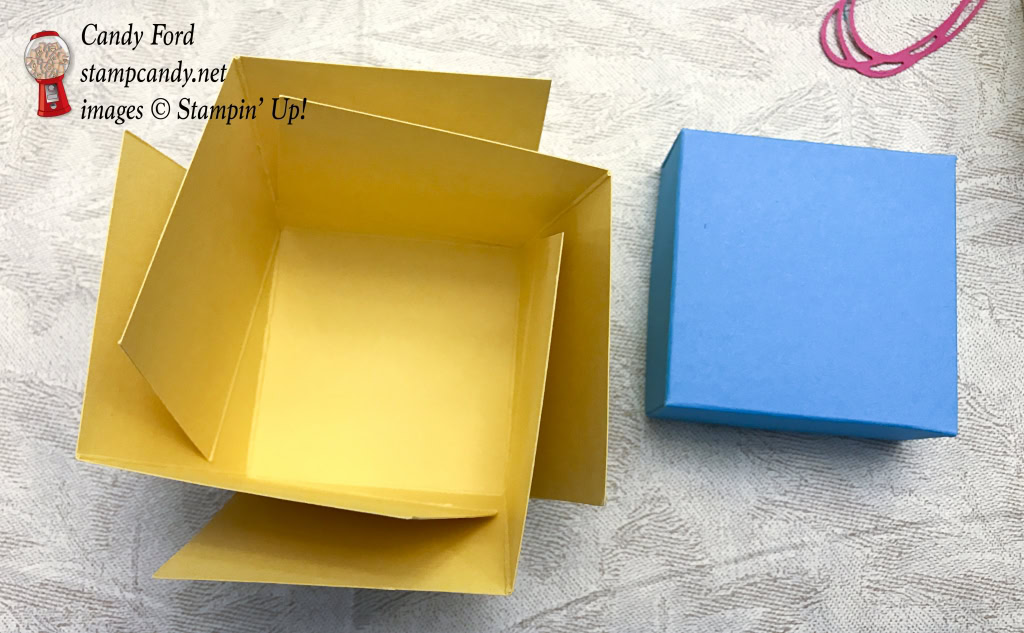
First I determined the size of the box, which was 3″ wide (side to side) x 3″ deep (front to back ) x 3″ high (top to bottom.)
Cut and scored with my Stampin’ Trimmer:
- Daffodil Delight card stock (CS) to 9″ x 9″, then scored 3″ from each side
- Tempting Turquoise CS to 5-1/16″ x 5-1/16″, then scored 1″ from each side
- See diagram below
Die cut using the May Flowers Framelits:
- flowers from Daffodil Delight CS scraps
Die cut using the Sunshine Wishes Thinlits:
- hearts from Melon Mambo CS scraps
Die cut using the Large Letters Framelits:
- each person’s first initial from Whisper White CS scraps, then covered it with Clear Wink of Stella (WOS) – Actually I applied the WOS after the letter was adhered to the box lid, but I recommend doing it beforehand. No matter how careful I was, I still got some WOS on the CS pieces below it.
Cut with Paper Snips:
- along one score line on each side of the Daffodil Delight CS box, only to the the first score line
- along one score line on each side of the Tempting Turquoise CS lid, only to the the first score line
- See diagram below
Assembled the gift boxes:
- folded up sides of lid and glued in place, with small tabs inside
- folded up sides of box, inserted earrings, and put lid on top to hold the sides up – You can glue the sides of the box, but I prefer to let them open up when the lid is removed (see photo below)
- Daffodil Delight flower glued onto box lid
- Melon Mambo heart glued over flower
- Whisper White letter adhered over heart and flower with Stampin’ Dimensionals
- sequins glued to lid – I put 3 sequins on each lid, and tried to make the placement look random
Here are the diagrams:
Score along dotted lines. Cut along solid lines.

Box Template

Lid Template
Here’s what I used:
Click on the images for more details and to purchase.
Retiring items are available through May 31, 2017 OR while supplies last. Many items are marked down, up to 50% off. So get them now while you still can. Please go to my online store and use the Host Code below.
Click here for the pdf.
Click here for the sortable Excel spreadsheet.
Click here to see the Retiring List in my online store.
Email me with any questions: candy@stampcandy.net
April Host Code
HV6MJT2X
Use the Host Code on online orders less than $150. See how to use a Host Code here.
Online orders of $75-149.99 placed with the Host Code will receive the gift of the month!
Online orders of $150 or more will automatically receive the gift of the month! Do not use the Host Code.
April’s gift is a pack of Urban Underground Embellishments! Each pack contains 24 brushed silver embellishments – 8 each of 3 designs. (I can ship within US only.)
Urban Underground Embellishments © Stampin’ Up!
Click here to shop my online store!
Gum Ball Rewards
You always earn a Gum Ball for every $50 you spend on an order with me. Earn 10 Gum Balls and I’ll send you a free stamp set of your choice! See the Gum Ball Rewards page for details.
Click here to shop my online store!
Thanks for stopping by today, and Sweet Stamping!
