Dec 1, 2016 | Boxes, Christmas, Gallery, Gift Wrap, Holiday, Tags |
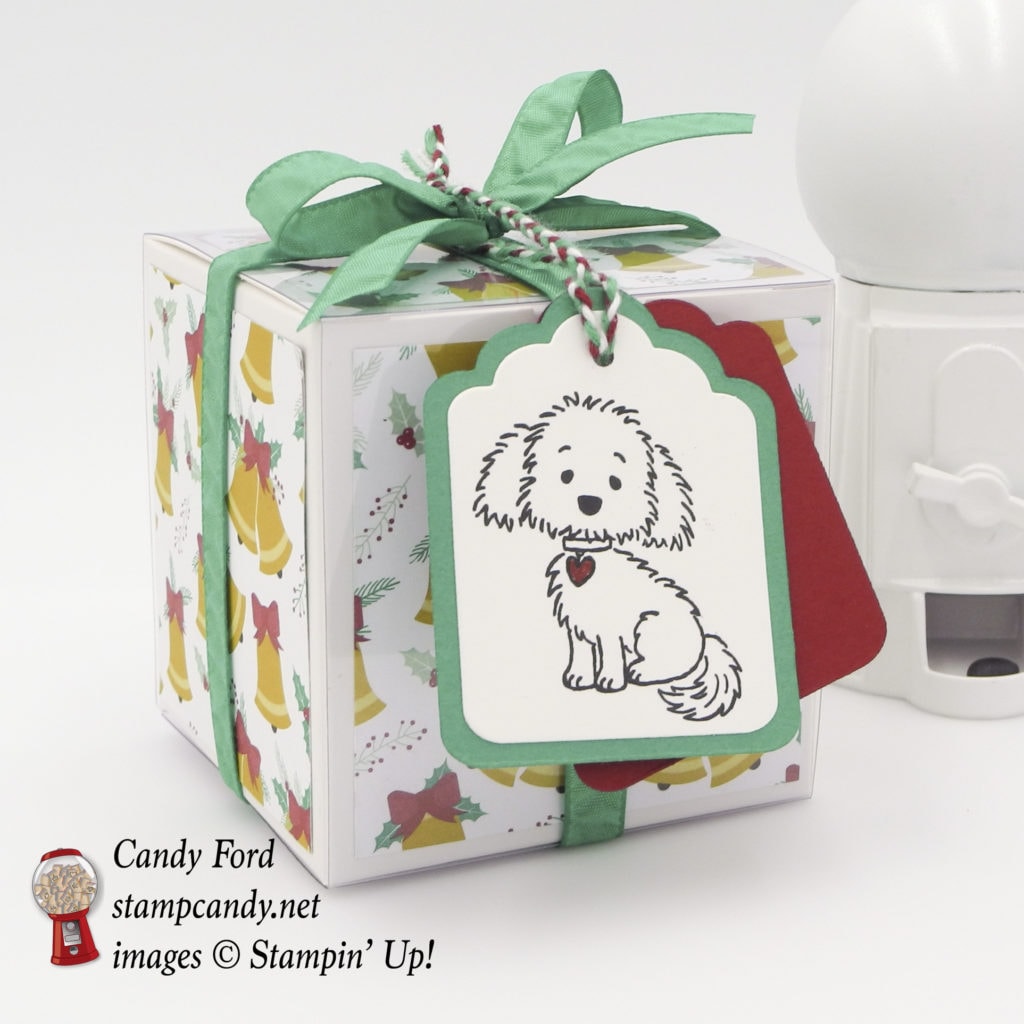
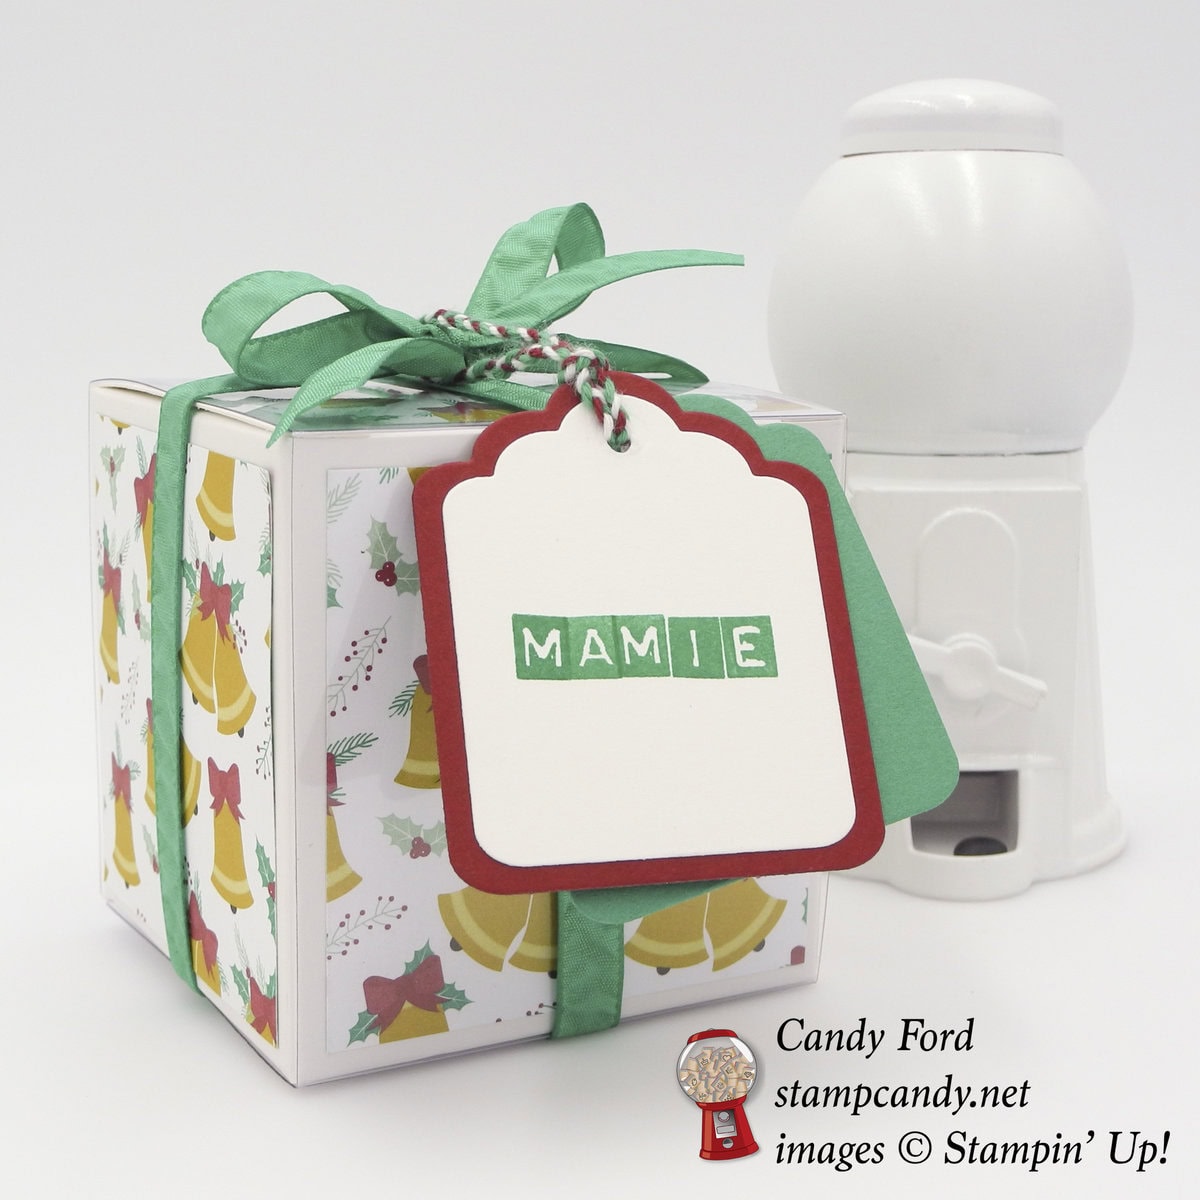
Our former neighbors have a little dog named Mamie. I get her a cute outfit each Christmas. This year I didn’t find anything I liked, except a little knit hat. I can’t wait to get a photo of her wearing it! Of course, the hat needed just the right gift wrap.
Here’s what I made:
 Here’s how I did it:
For the box:
The White Gift Boxes from this year’s Holiday Catalog are the perfect size for a small gift like this. They are 3″ x 3″ x 3″ and come with clear acetate sleeves. I cut 5 pieces ofPresents & Pinecones Designer Series Paper to 2-3/4″ x 2-3/4″. I used the 1″ circle punch to cut small piece from the top of the front piece to accommodate the cut out in the box. I glued the DSP pieces to the four sides and the top of the box. I slipped the clear sleeve over the box, then tied a piece of Emerald Envy Ruched Ribbon around it.
For the tag:
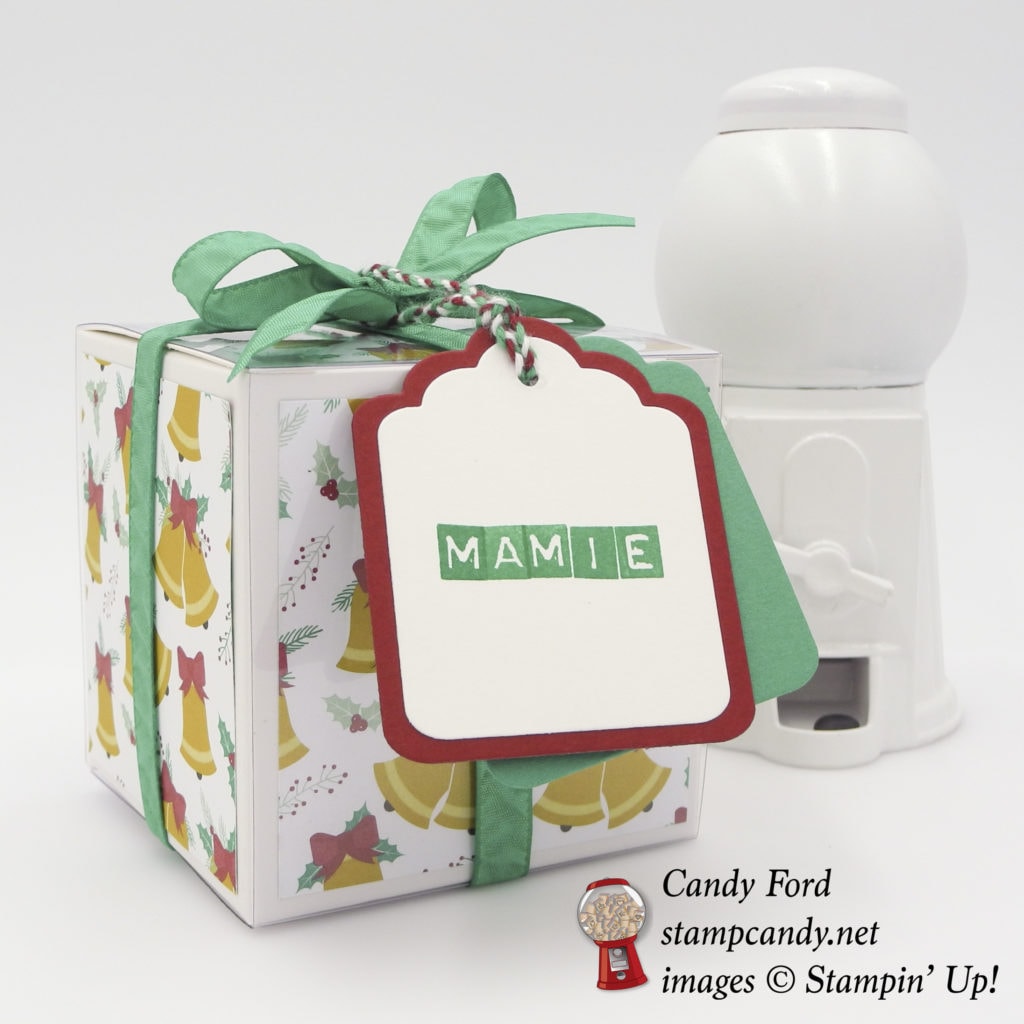
I stamped the dog from the Bella & Friends stamp set in Basic Black ink onto Thick Whisper White card stock. I used a Cherry Cobbler Stampin’ Write Marker to color in the heart. Then I cut it out with the Tags & Labels Framelits. Using the Labeler Alphabet stamp set, I stamped MAMIE in Emerald Envy ink onto Thick Whisper White CS, then cut it out with the same tag Framelit.
I used a larger Framelit from the same set to cut a piece of Cherry Cobbler CS and a piece of Emerald Envy CS. I glued the white pieces onto the colored pieces, then punched holes in the tops with the 1/8″ Circle Punch.
I braided pieces of Emerald Envy, Cherry Cobbler, and Whisper White Baker’s Twine and used it to tie the tag onto the gift’s bow.
Here’s what I used:
Thanks for stopping by today, and Sweet Stamping!

Aug 3, 2016 | Boxes, Events, Gallery, Gift Wrap, Gifts, Techniques |
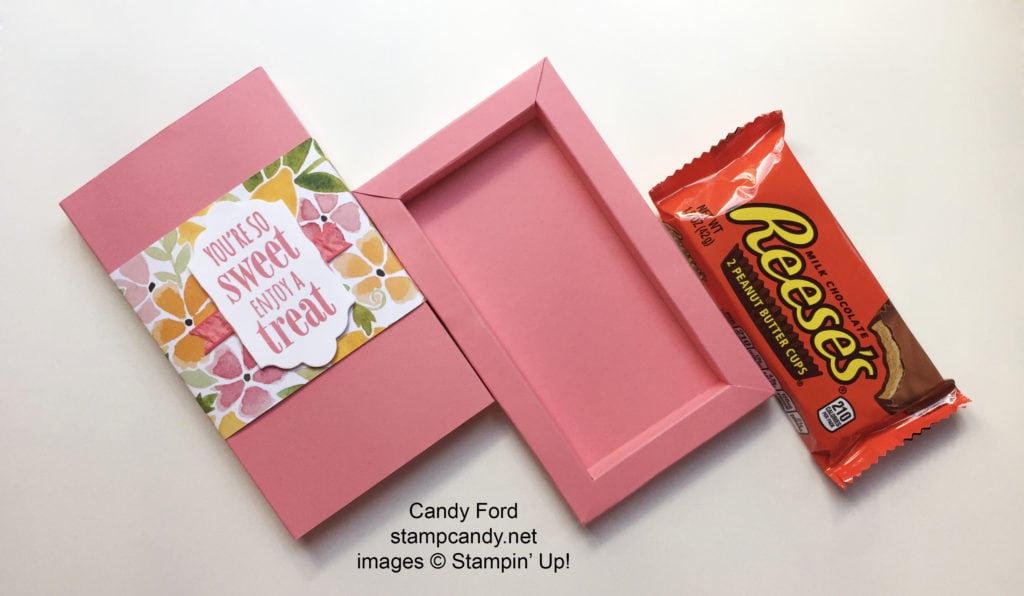
Today’s project was one of the Make & Takes in our July Candy Hearts Team Meeting. It’s a cute little treat box with a sliding tray.
I designed this one to fit a pack of 2 large Reese Cups.
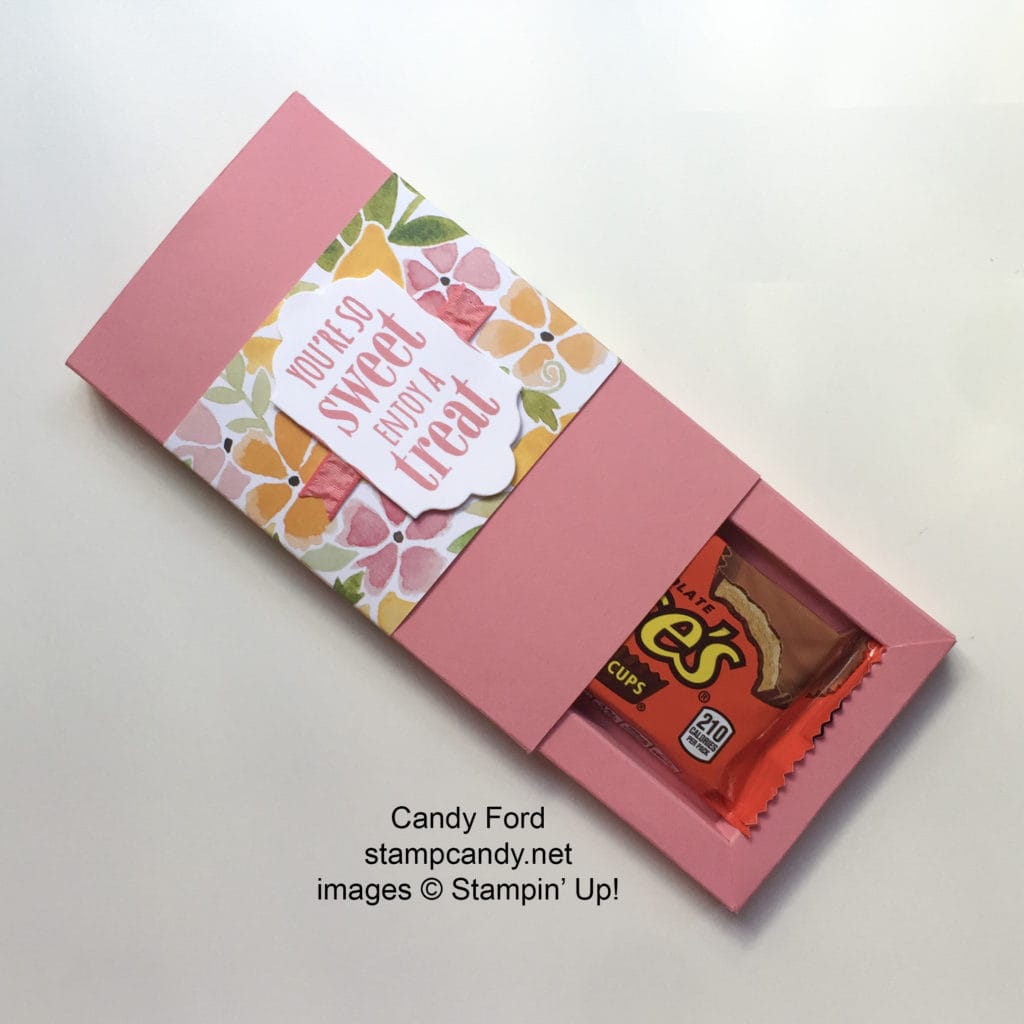
There are two parts to the box: the cover and the tray.
Here’s how I did it:
First determine the dimensions of your box. I measured a Reese’s cup package and determined I needed a box 2-1/2” wide x 5” long x 1/2” deep.
Create the tray:
Add the box depth x 10 to the width and to the length. So for the Reese cup box, the box depth is 1/2” and 1/2” x 10 = 5”. I added 5” to the width and to the length, so I cut my card stock to 7-1/2” x 10”.
Score 4 times from the edge of all four sides, the depth of the box each time. So I scored every 1/2” (the depth of my box.) I scored at 1/2”, 1”, 1-1/2”, and 2” on all four sides.
On the short sides, score one more time, 1/2” in from the last scores, but only down to the second score line. It should look something like this:
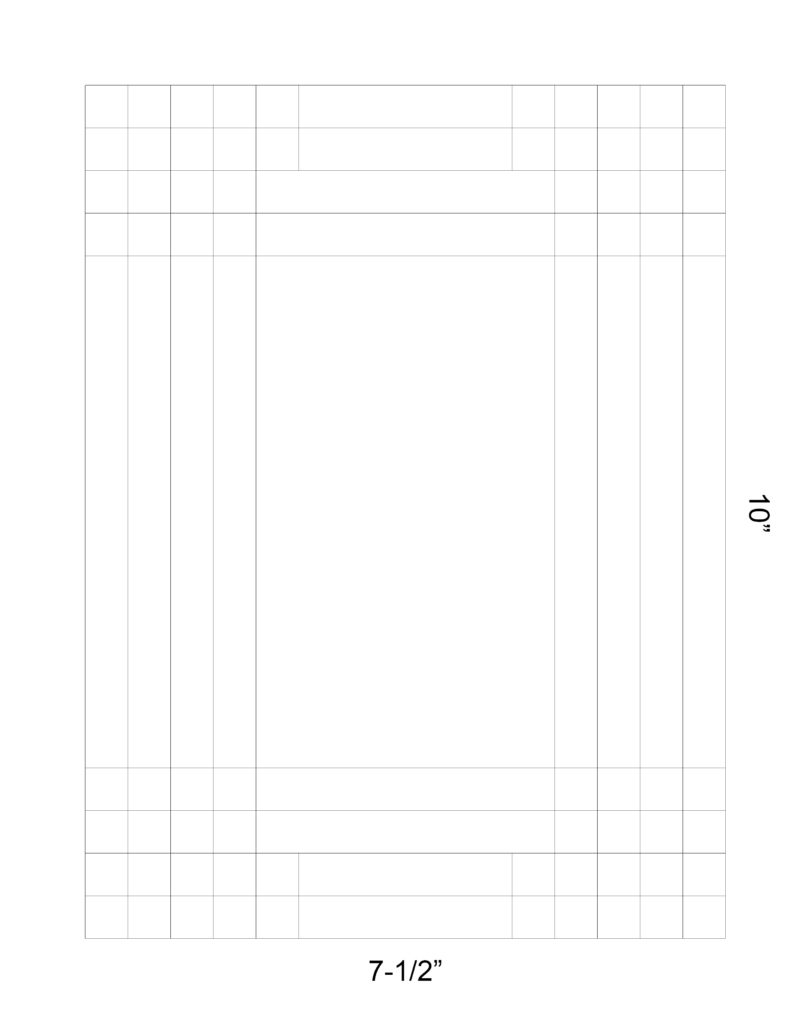
Cut the 16 (4 x 4) small squares made by the scored lines from each of the four corners (yellow areas.)
On the short sides cut down the two short scored lines, then cut diagonally down to the next corner (green areas.)

Discard all the pieces you have cut away.
Fold all score lines with a bone folder.
Now you’re ready to make the two long sides of the box. Turn up the scored side and put adhesive on the outermost strip. Roll toward the inside of the box, adhering that strip to the box bottom. Do the same thing on the other side.
Now make the two short sides of the box. Put adhesive on the outermost strip, just like before, and roll so that strip adheres to the box bottom. The skinnier center part will go between the two long sides, and the diagonal cut will lie on top of tip of the long side to create a mitered corner look. Do that on the other short side.
Create the cover:
Cut a piece of card stock the size you need to wrap around your tray and overlap by an inch or so. I cut mine to 6-1/8” wide (the length of my box plus 1/8”) by 10” long.
Wrap it around the tray, making sure it isn’t too snug, because it needs to slide on and off. Pinch where the bends need to be. Score and fold along the pinched areas. Wrap it around the tray and adhere the ends.
Now decorate:
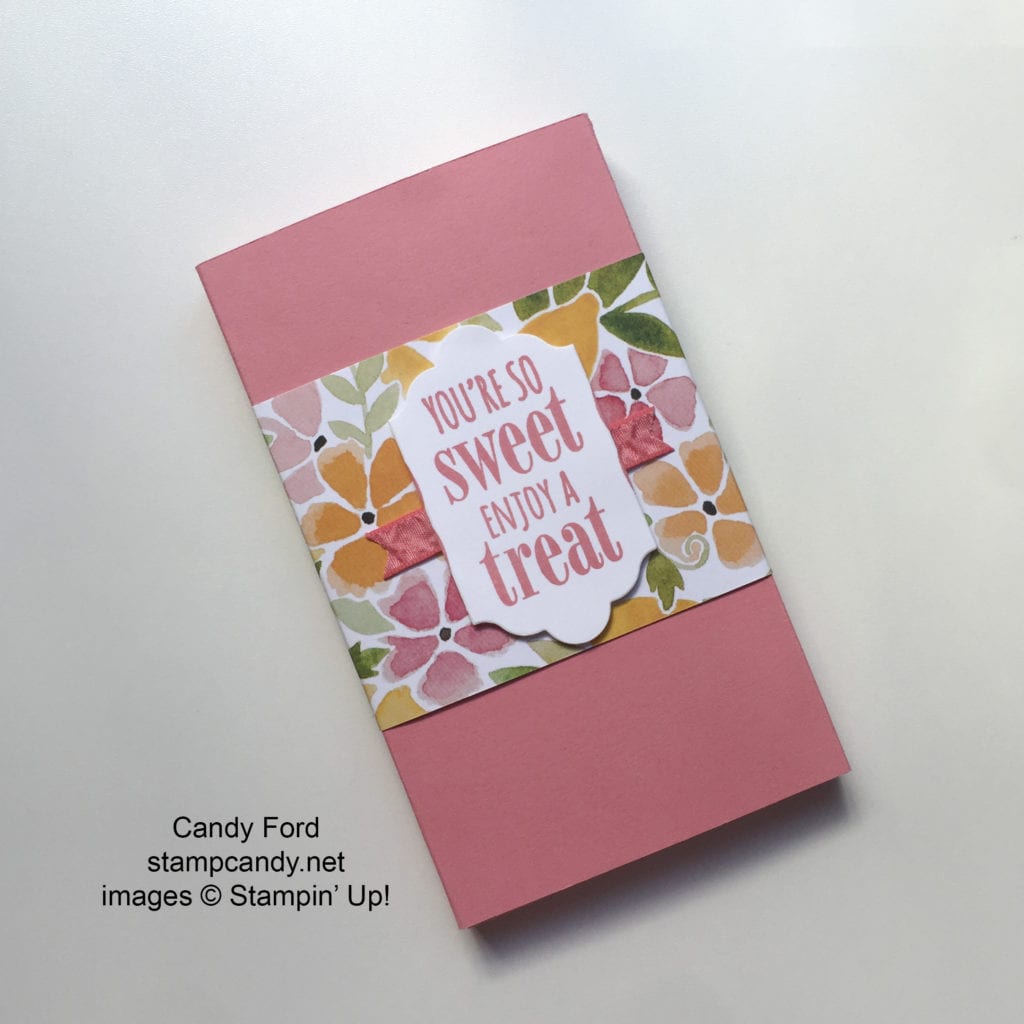
I cut a piece of Fruit Stand Designer Series Paper to 3″ x 10″ and wrapped it around the cover, gluing it in place.
I stamped the sentiment from the You’re So Sweet stamp set in Flirty Flamingo ink onto Whisper White card stock, then cut it with a die from the Lots of Labels Framelits. I adhered a piece of Flirty Flamingo Ruched Ribbon to the cover with Fast Fuse, then adhered the sentiment over than with Stampin’ Dimensionals.
I realize these directions can seem a bit confusing. It’s much easier to show how to make this than to write it. Please contact me if you have any questions at all!
Here’s what I used:

AUGUST HOSTESS CODE
PMTWBJMQ
If you are placing an order for less than $150, please use this Hostess Code.
Click here for details on how to use the Hostess Code.
If you are placing an order of $150 or more, you will receive Stampin’ Rewards on your order, so do not use the Hostess Code.
Thanks for stopping by today, and Sweet Stamping!
Jul 17, 2016 | Boxes, Club, Gallery, Gift Wrap, New Products |
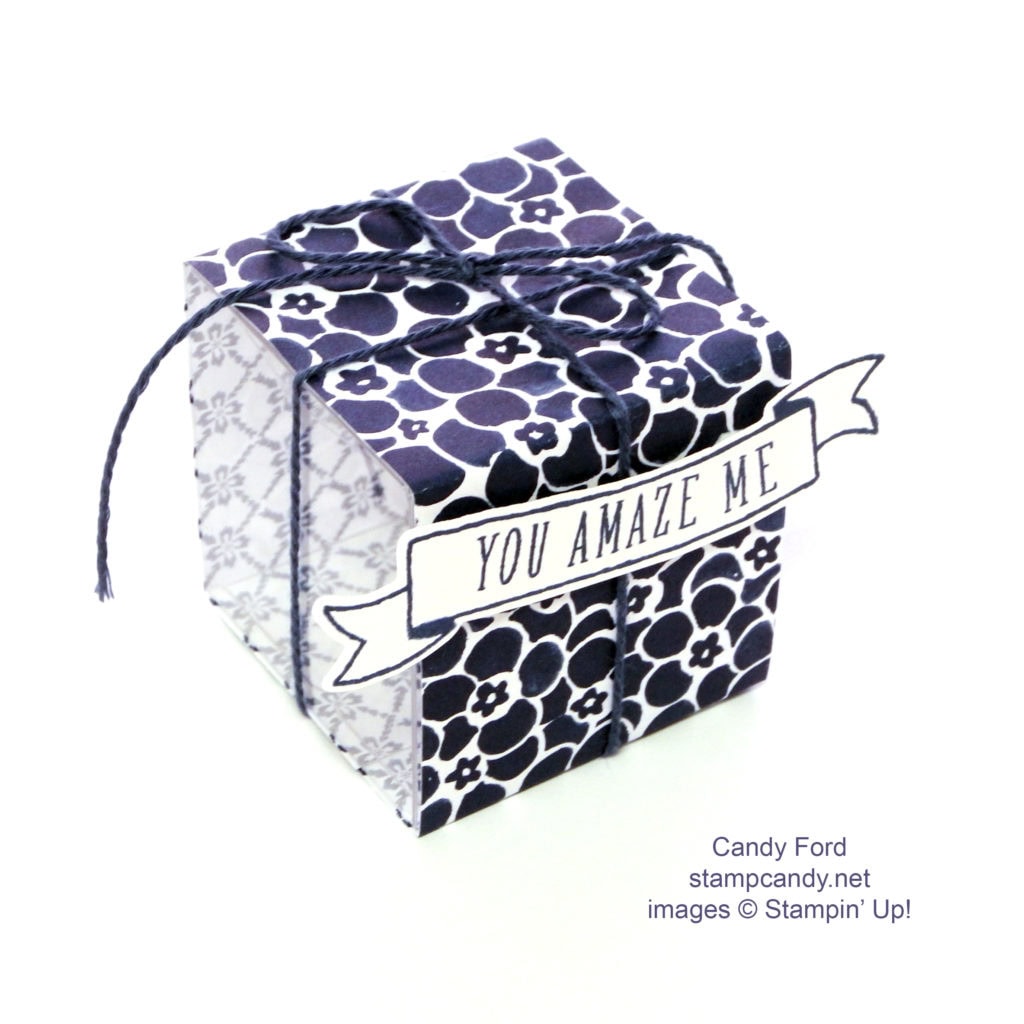
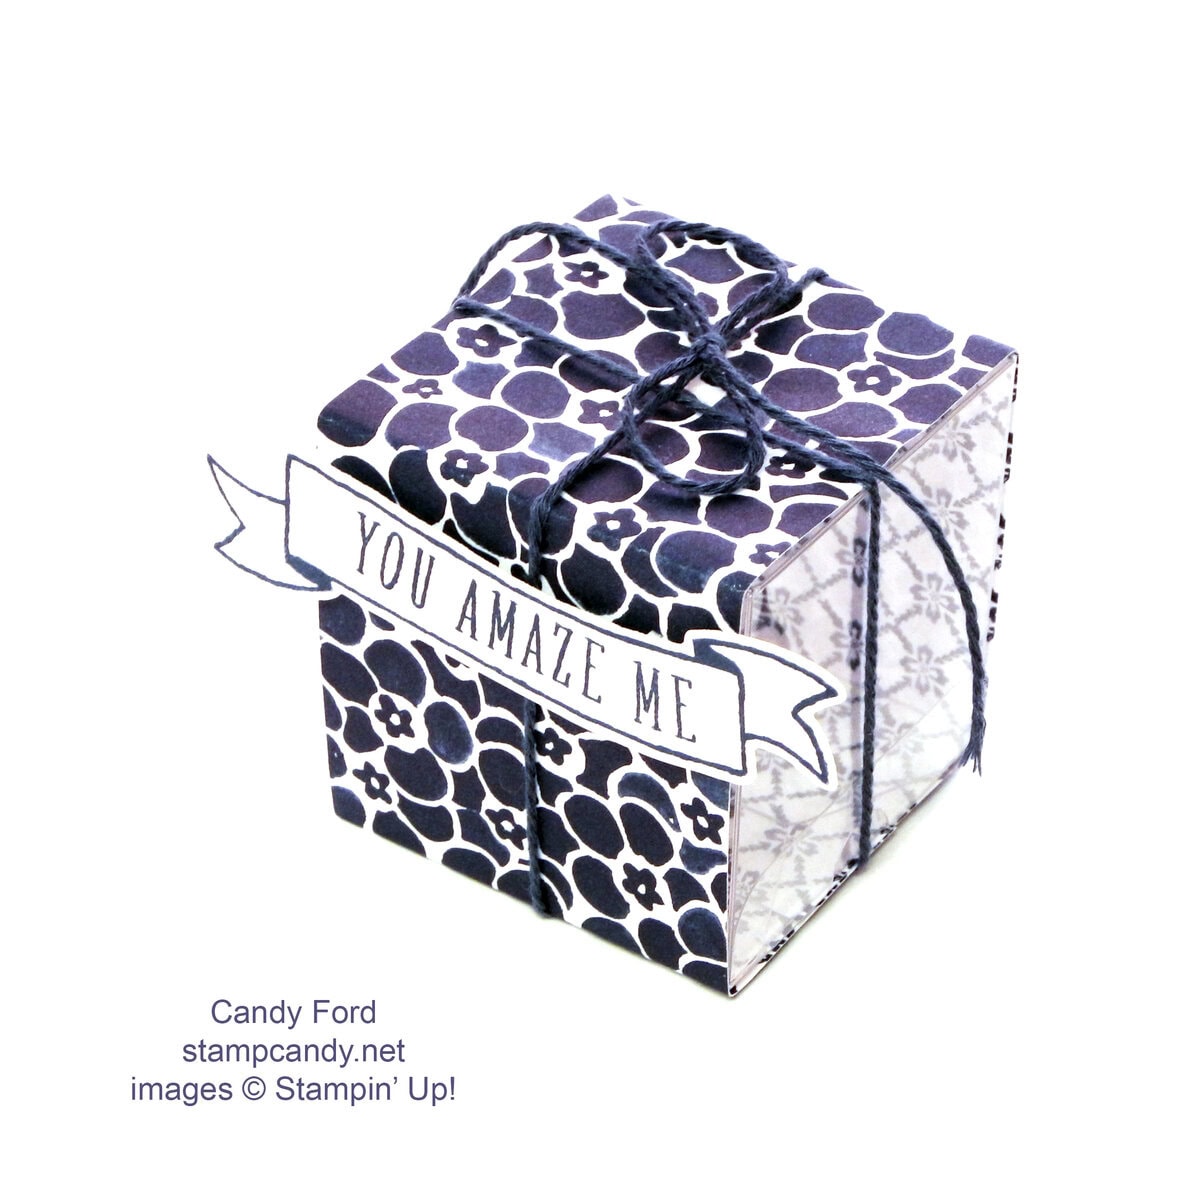
Today’s project is another from July’s Stamp Club. (You can see the first two here and here.) This one is so quick and easy, you won’t believe it!
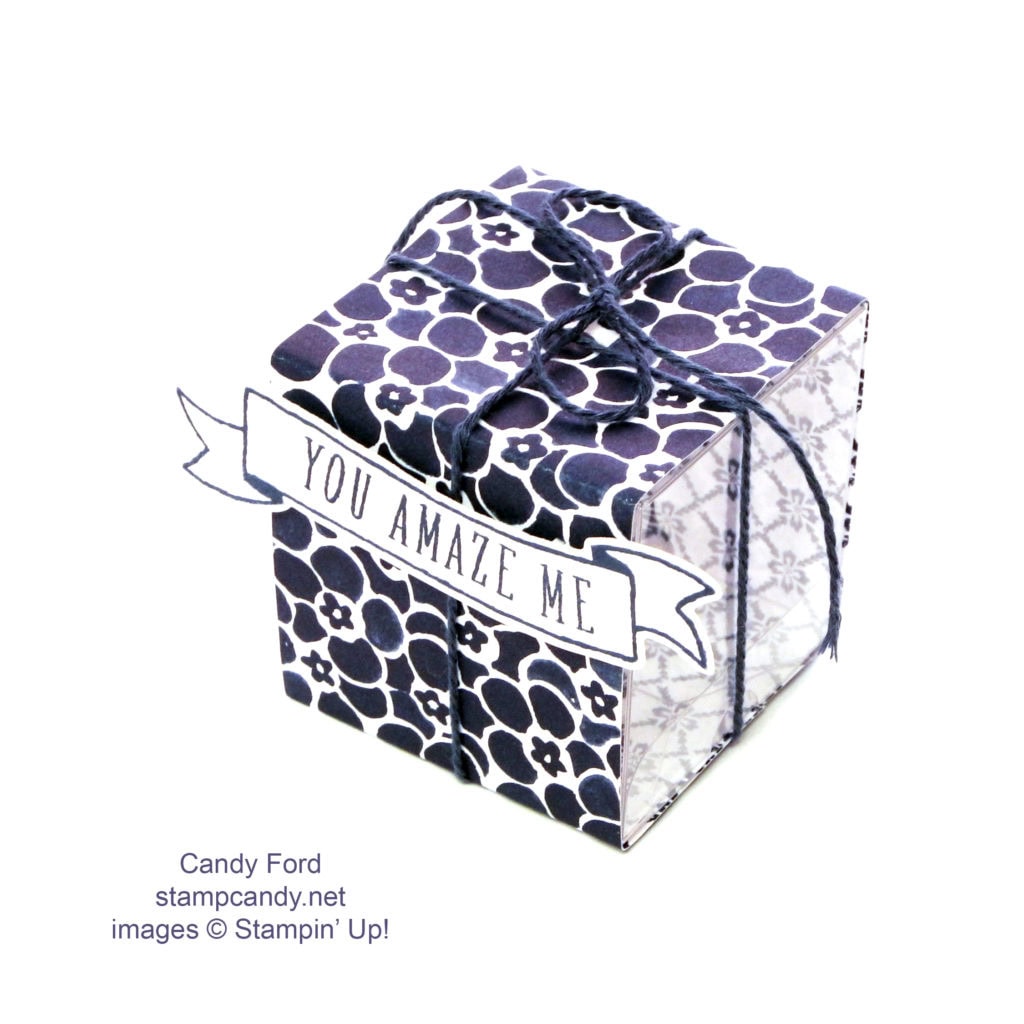
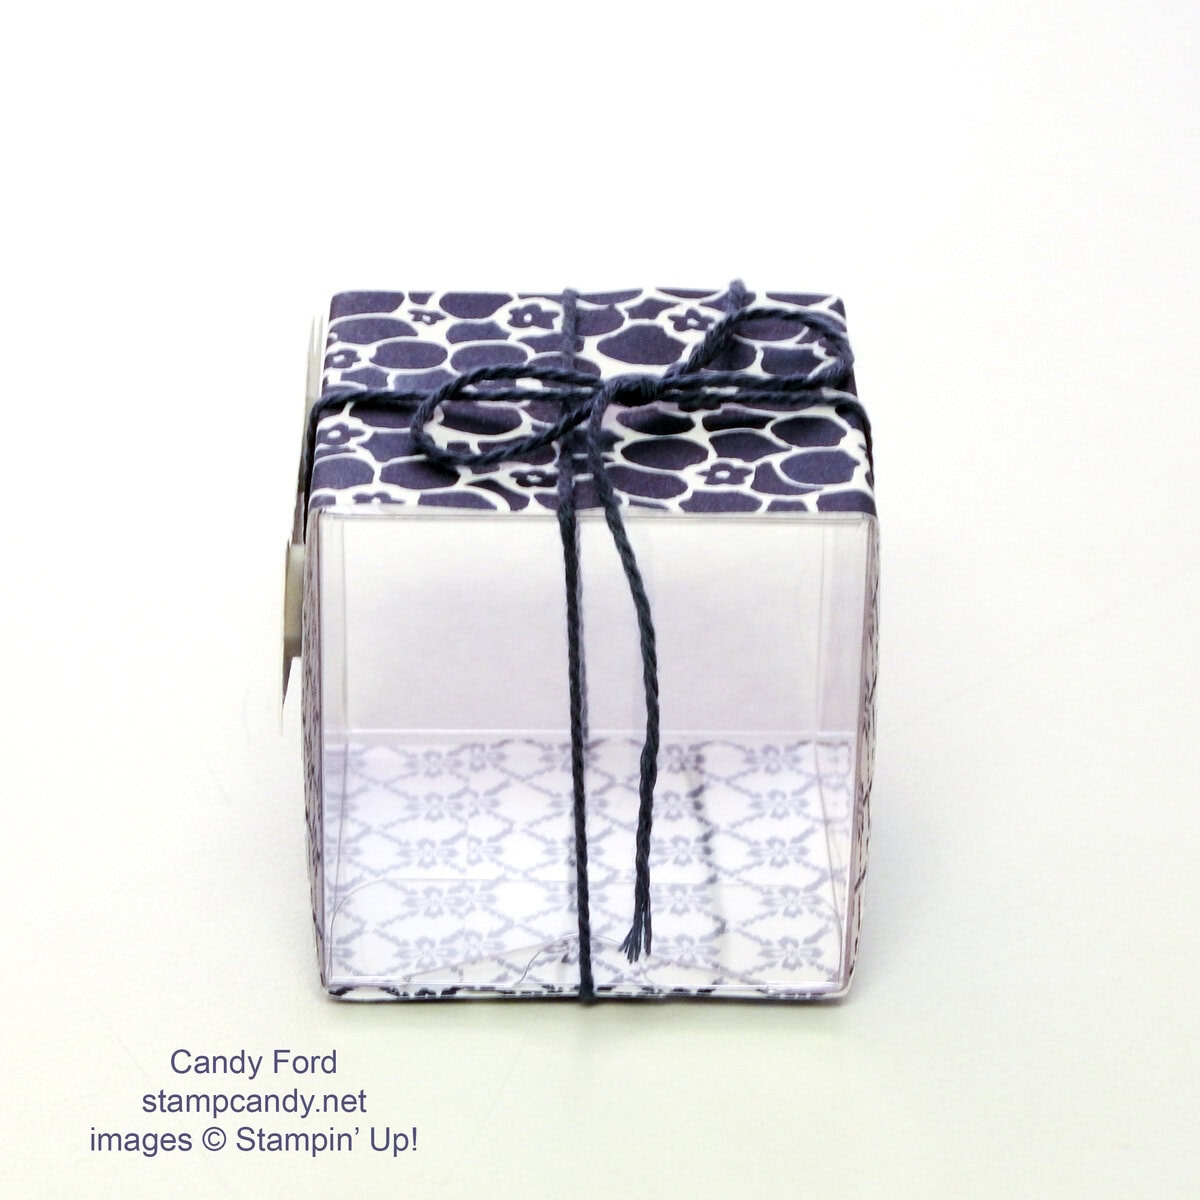
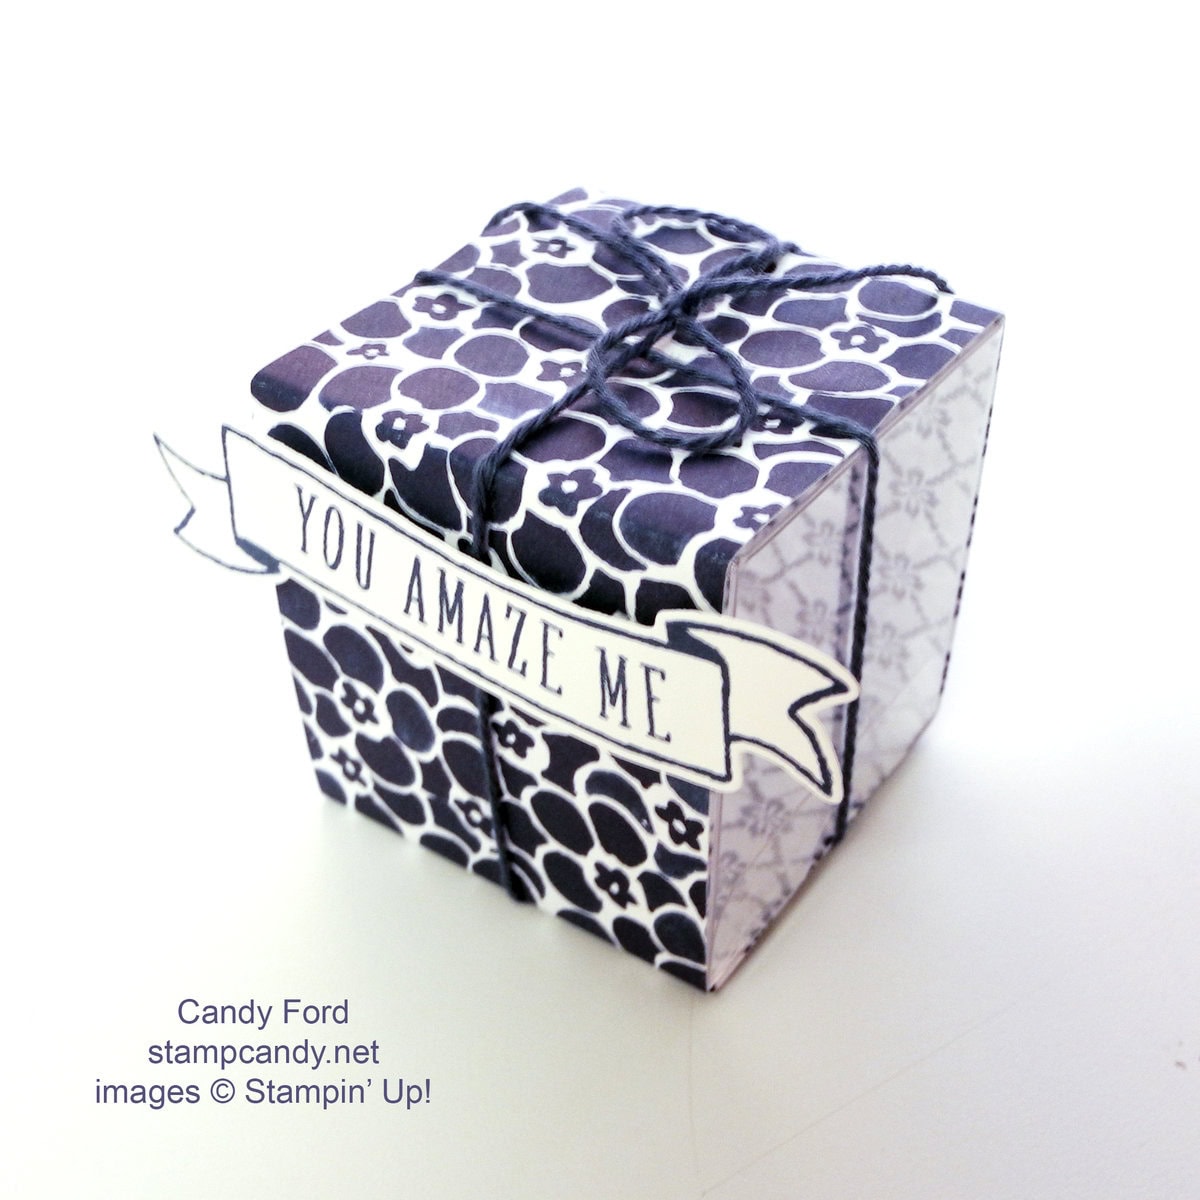
Assemble a Clear Tiny Treat Box.
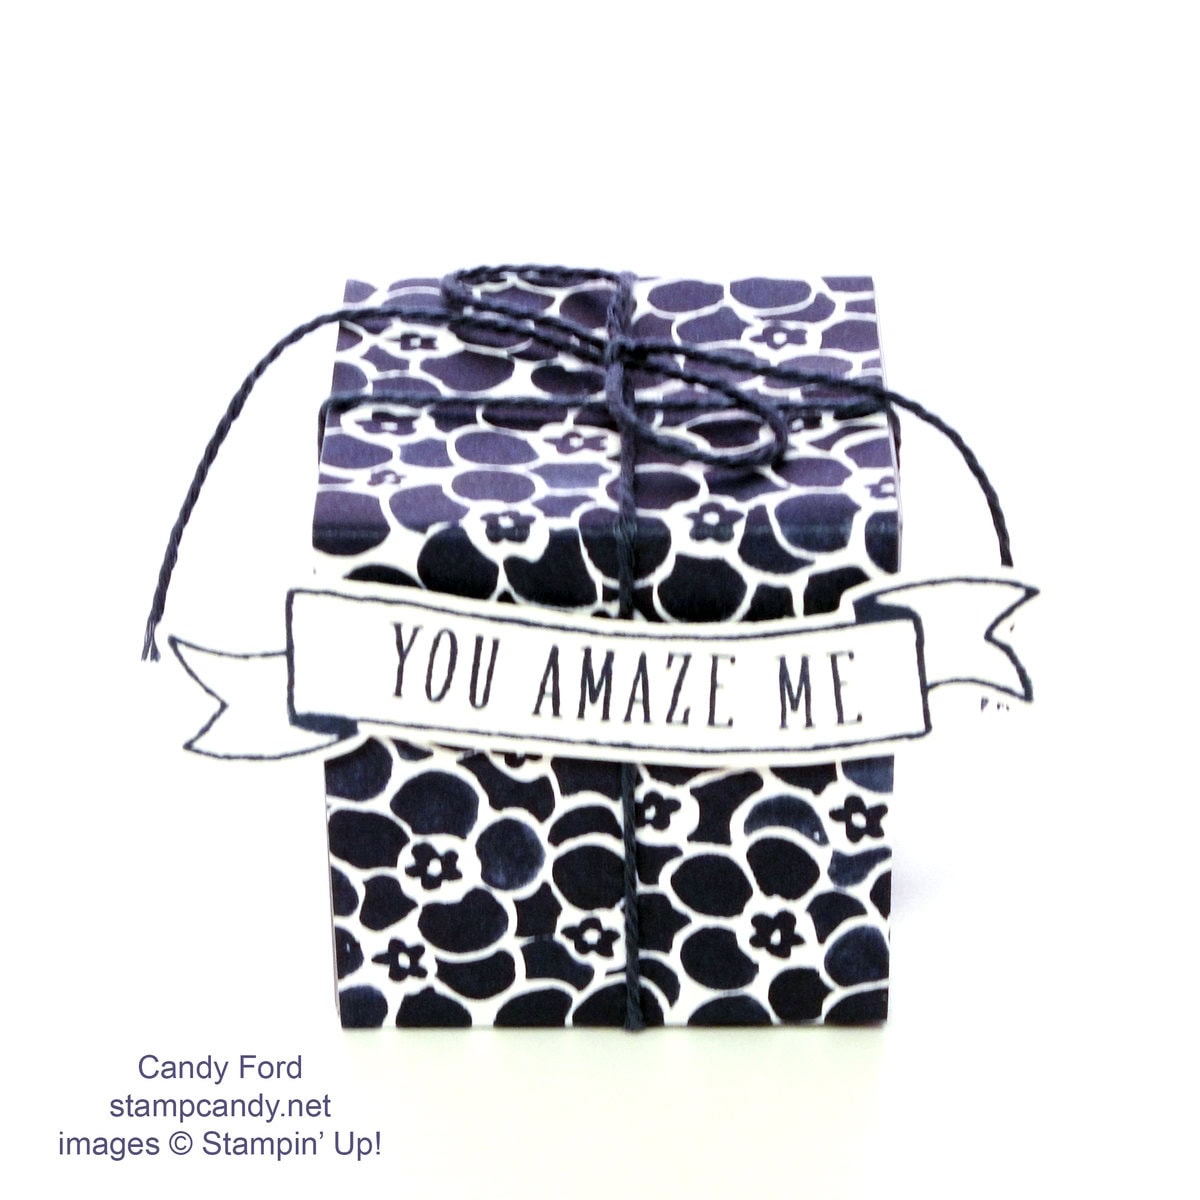
Cut a piece of Floral Boutique Designer Series Paper to 2″ x 9″. Wrap it around the box and glue the ends together. Do not glue it to the box because it needs to be able to slide on and off.
Tie a piece of Night of Navy Solid Baker’s Twine around the box and tie in a bow on top.
Stamp the banner and sentiment from the Banners for You stamp set in Night of Navy ink onto Whisper White card stock, then cut out with the coordinating die from the Bunch of Banners Framelits dies. Attach it to the DSP with Stampin’ Dimensionsals. Do not put one in the center of the banner, so the twine can slide through easily.
You can fill this with all sorts of little goodies. You can use your Fringe Scissors to cut strips of paper then crinkle it with your hands for filling. By the way, a Pandora Charm box fits perfectly inside this little box. Just sayin’.

Here’s what we used:
Thanks for stopping by today, and Sweet Stamping!

May 24, 2016 | Boxes, Classes, Gallery |
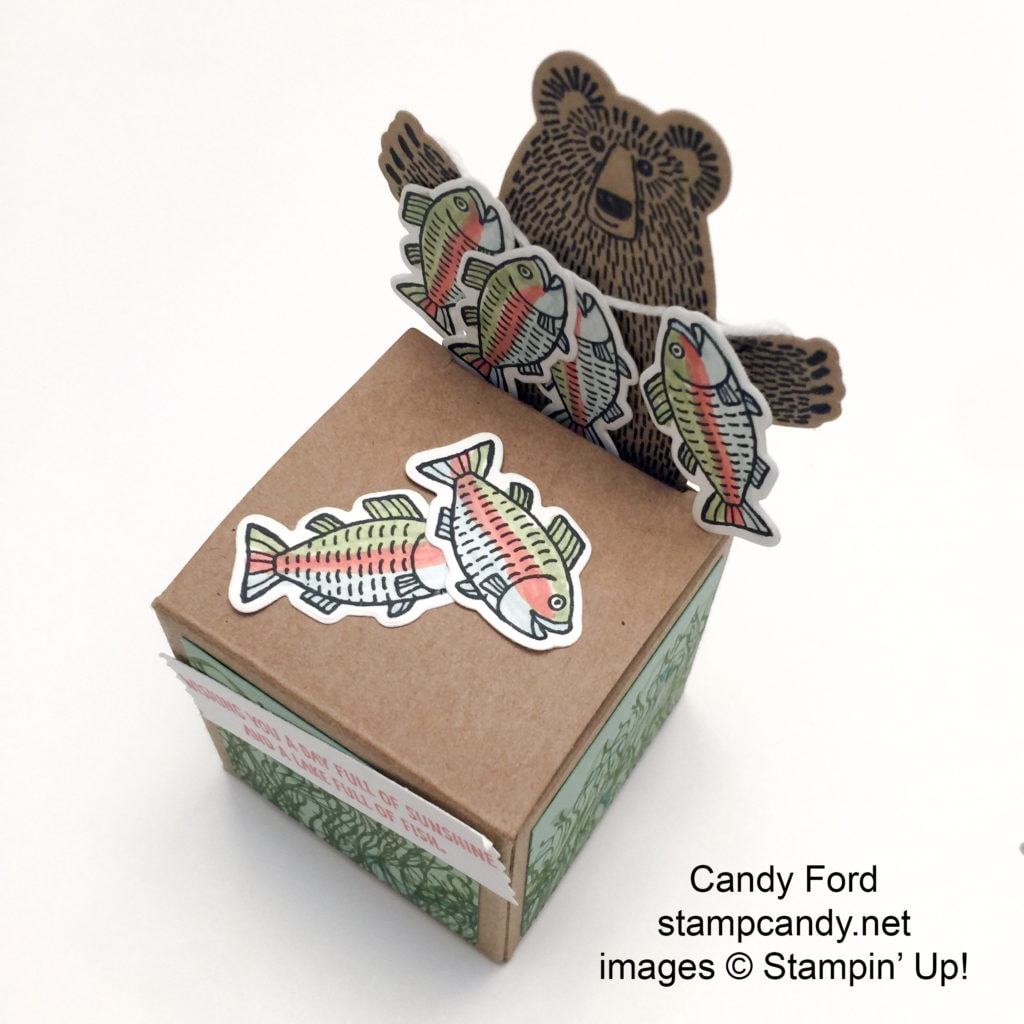
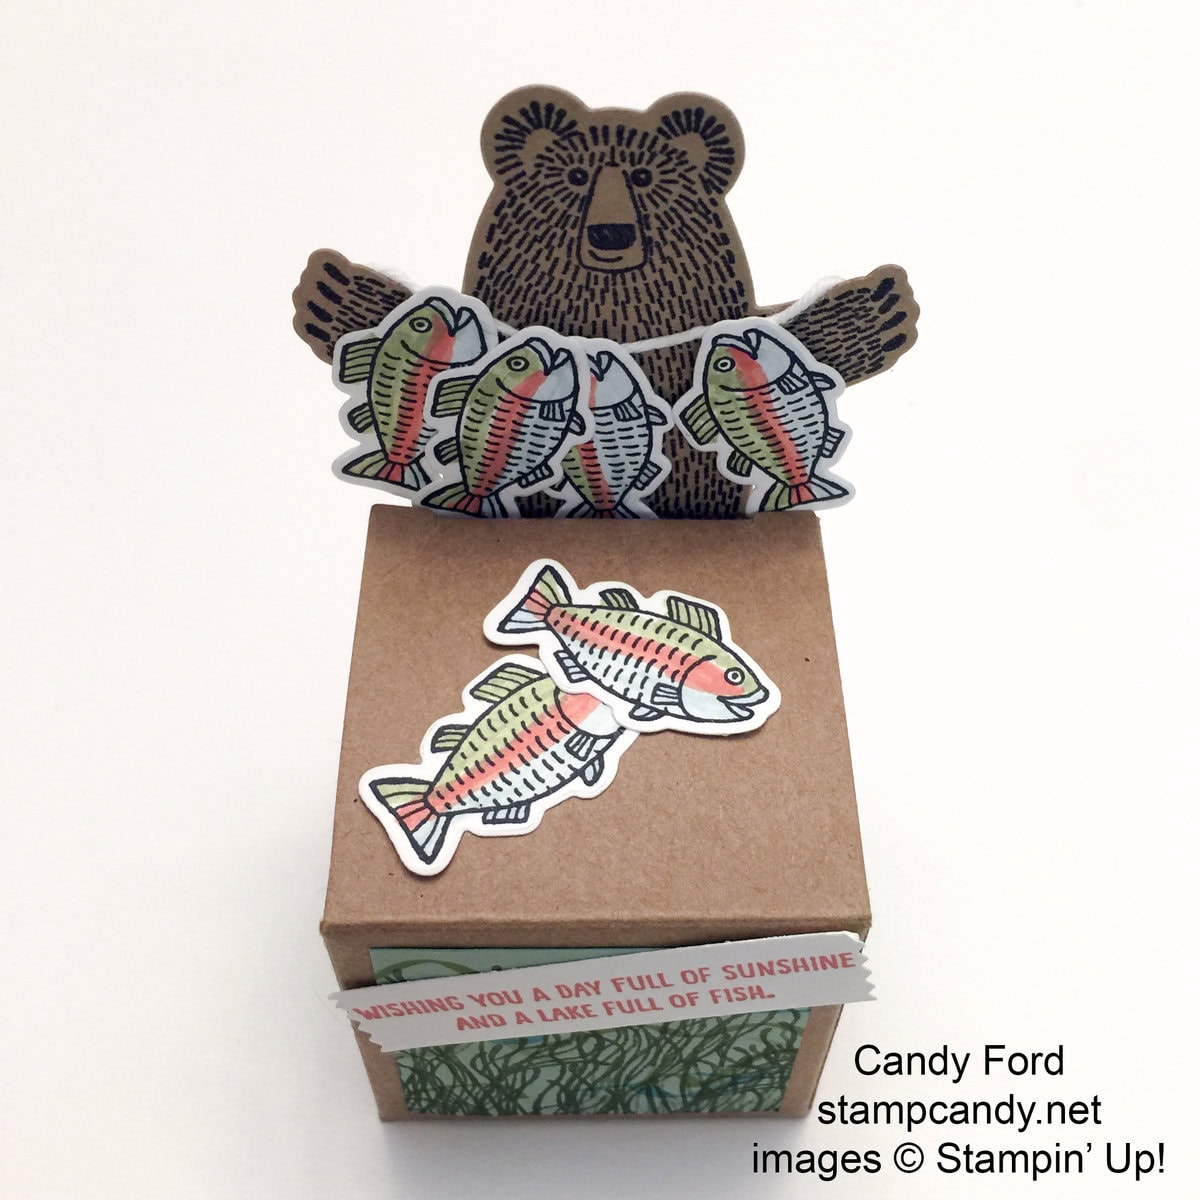
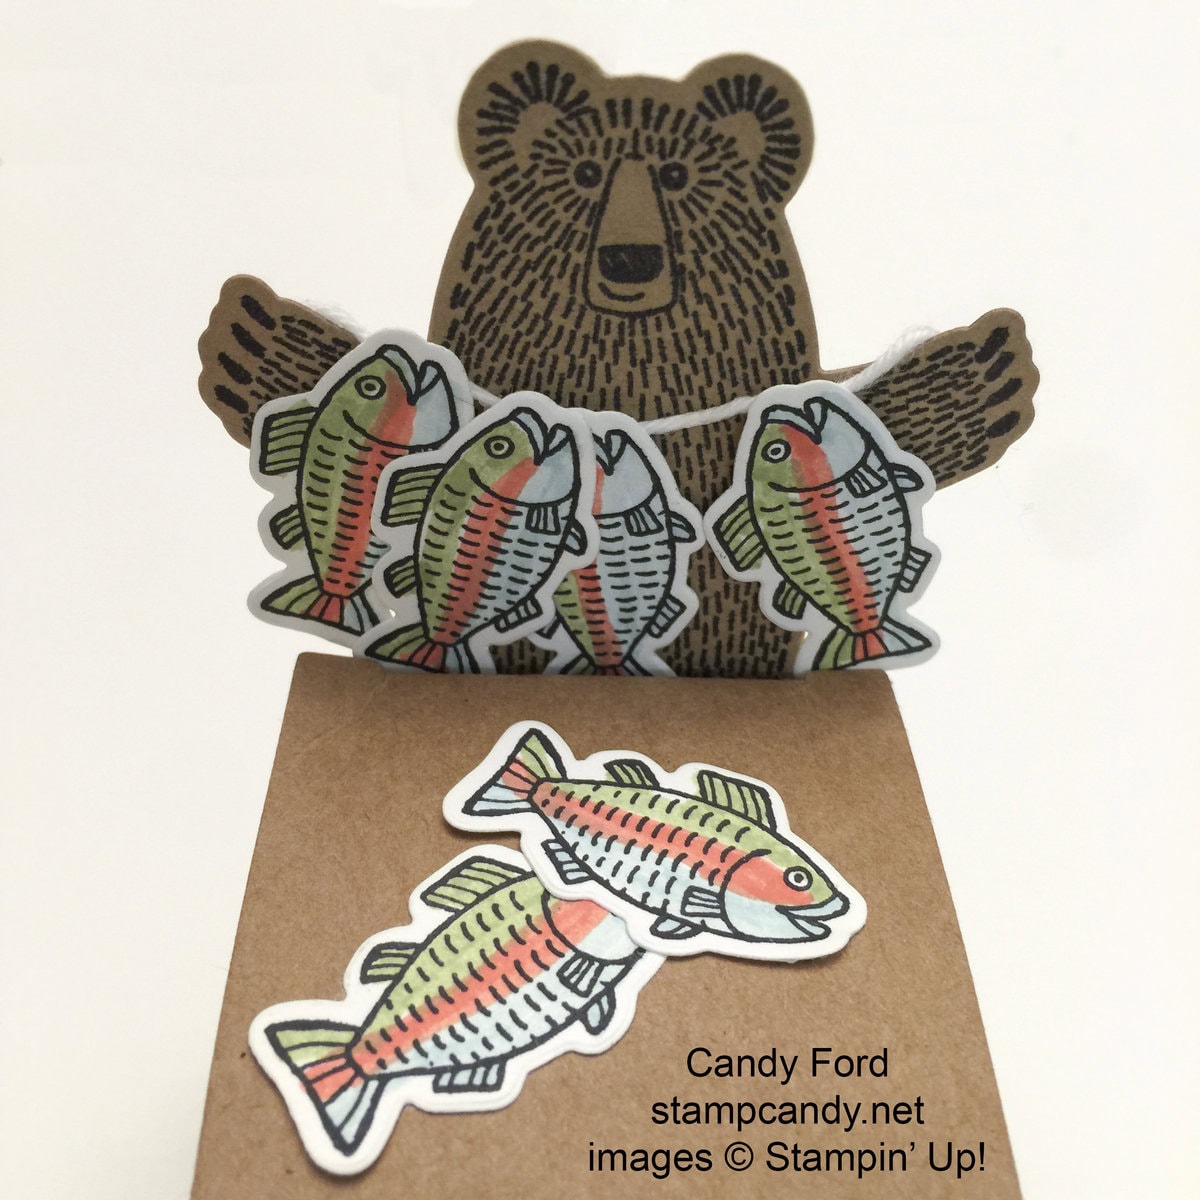
Today I’m sharing one of the projects we made in my recent Bear Hugs Bundle Class. It’s an adorable little box perfect for anyone who enjoys sunny days and fishing, or cute bears and fish!

We began by stamping the large bear in Basic Black Archival ink onto Crumb Cake card stock. We used the same black ink to stamp the fish onto Whisper White card stock. We colored the fish with Soft Sky, Calypso Coral, and Pear Pizzazz Stampin’ Write Markers. Then we cut out the images with the Bear Hugs Framelits Dies.
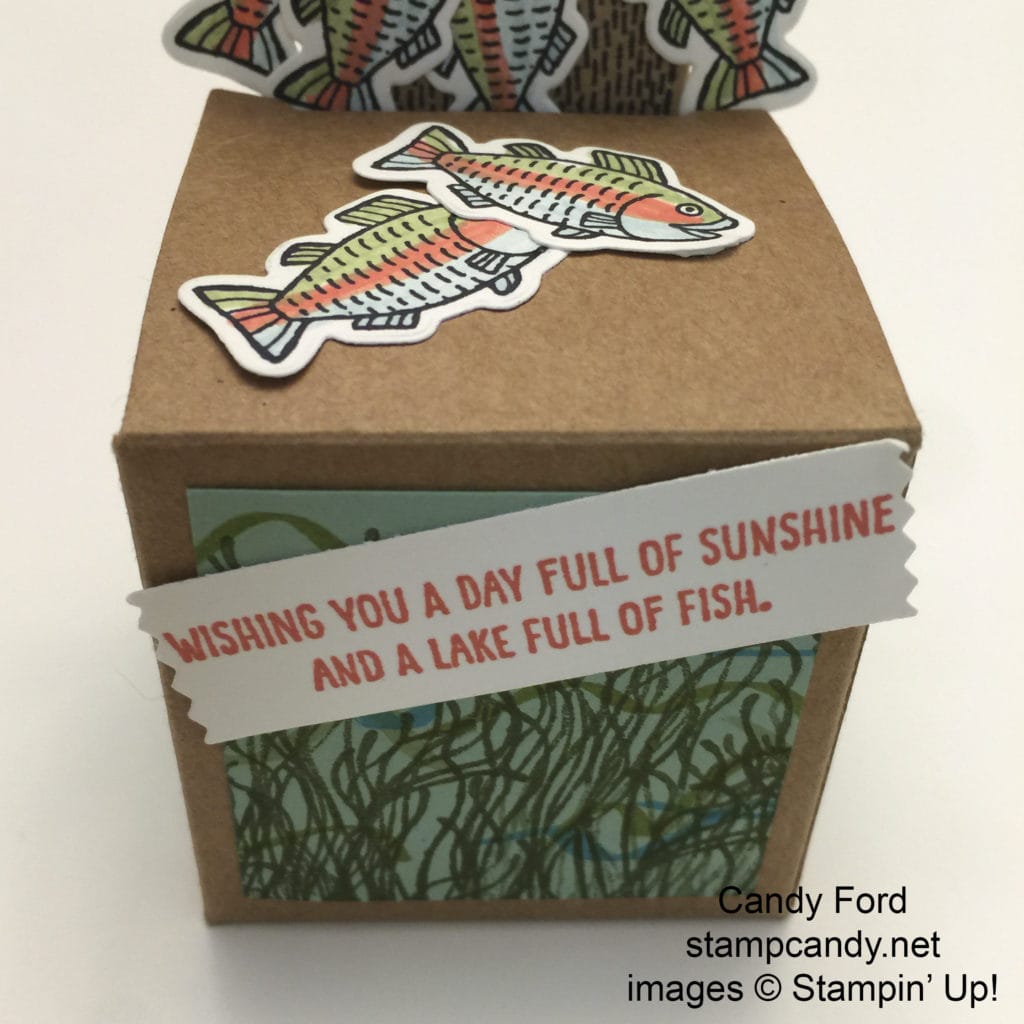
We stamped the sentiment in Calypso Coral onto Whisper White card stock and cut it out with the Washi Label Punch.
We cut a piece of Pool Party card stock to 1-3/4″ x about 7″ and drew squiggly lines with Old Olive and Tempting Turquoise Stampin’ Write Markers. Then we stamped in Mossy Meadow ink the “seaweed” (or whatever the stuff groing at the bottom of a lake is called) using the jellyfish from the From Land to Sea stamp set upside down – the tentacles made the perfect swaying plants. We then cut the strip into four 1-3/4″ squares. We used the 3/4″ Circle Punch to cut a notch in the top of one square to accommodate the round notch in the top of the box front. We glued the other squares to the other sides.
Back view:
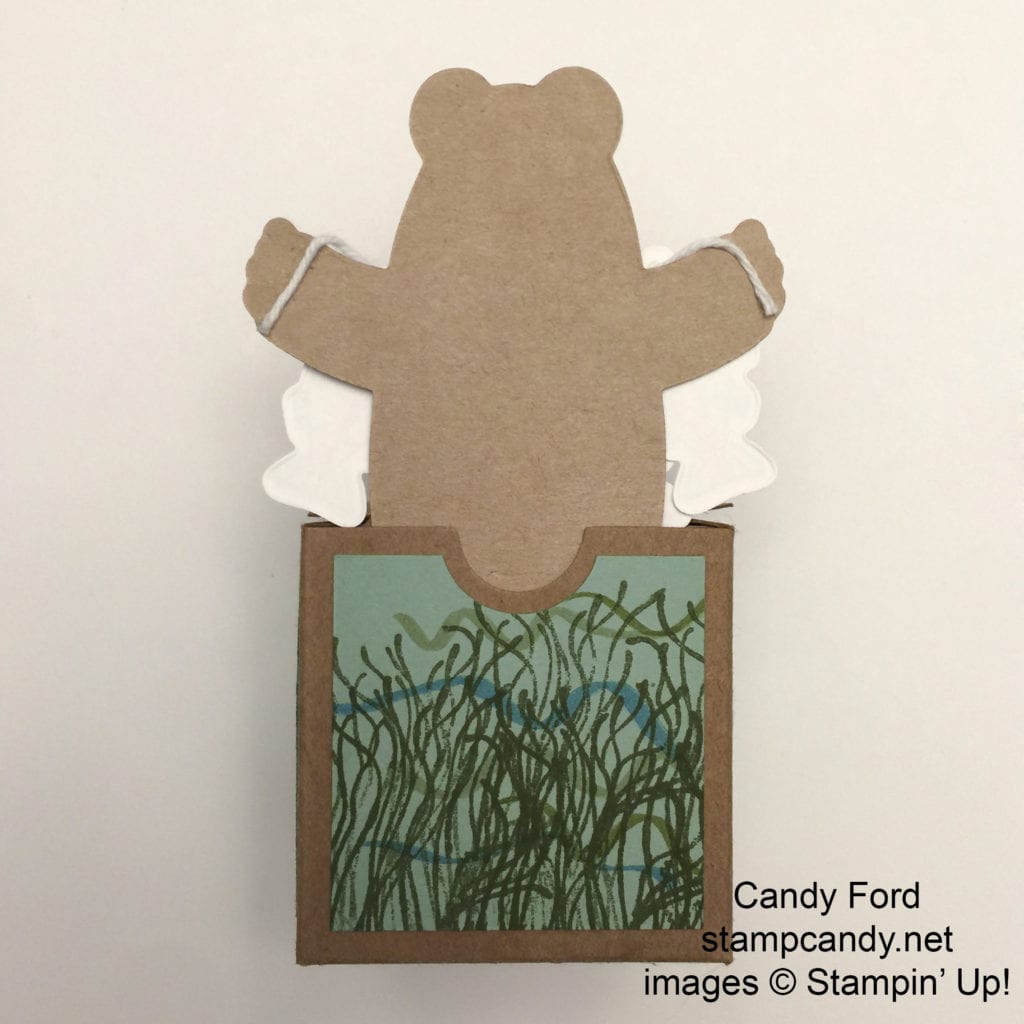
We glued the sentiment to the back of the box, which we’re using as the front.
We glued two fish to the top of the box.
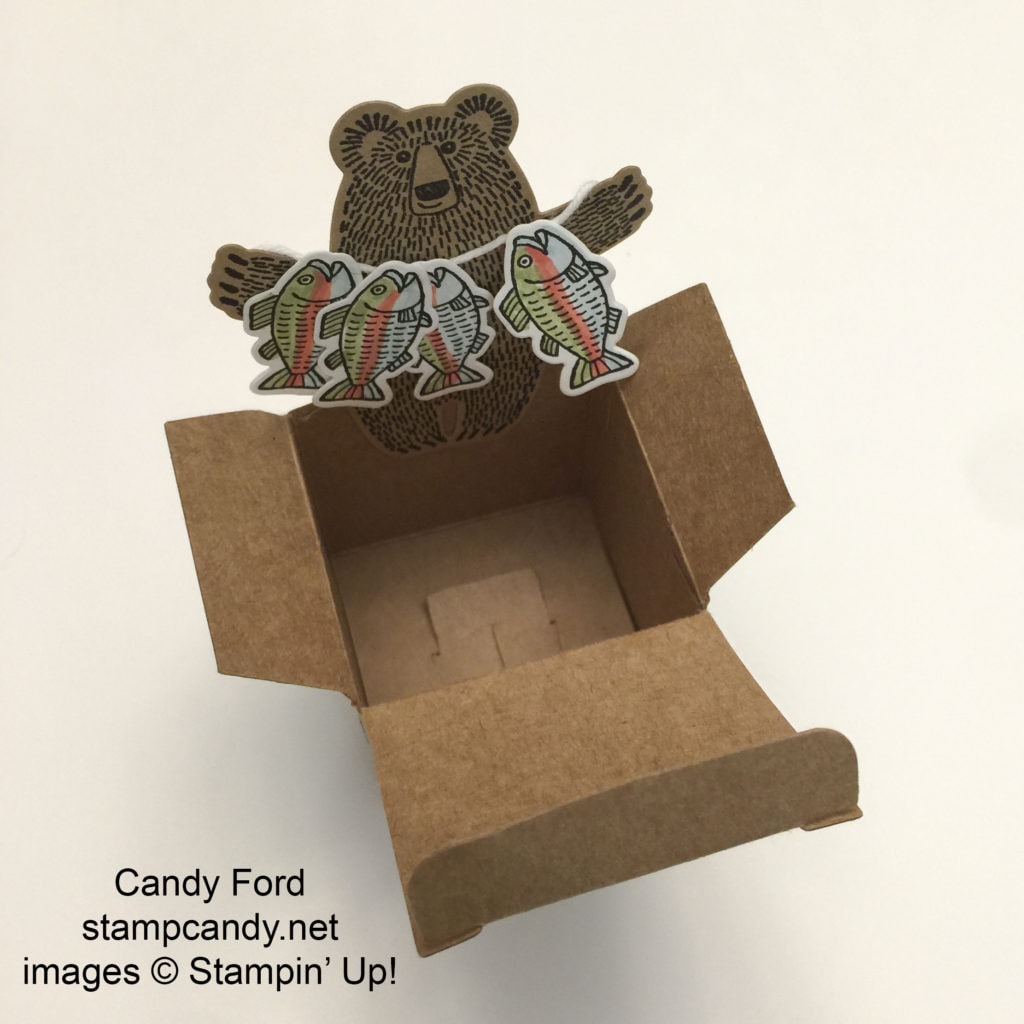
We glued some fish to a piece of Whisper White Baker’s Twine, then attached the ends of the twine to the bear’s hands. Kimberly cut between two of the bear’s fingers and slipped the twine between them. Brilliant! I wish I had thought of that! I glued mine to his hands.
We glued the back of the bear’s legs to the inside of the box on the front side. Now when you close the it, the bear is coming up from inside the box with his string of fish.
Here’s what we used:
 There are only 7 days left to shop from the 2015-2016 Annual Catalog’s Retiring List! Click here to see what is still available.
Thanks for stopping by today, and Sweet Stamping!

May 7, 2016 | Baby, Boxes, Cards, Club, Gifts |
Hello, Sweet Stampers! I’m sorry I haven’t posted in a few days. I’ve been having some computer issues. Hopefully they’re fixed now.
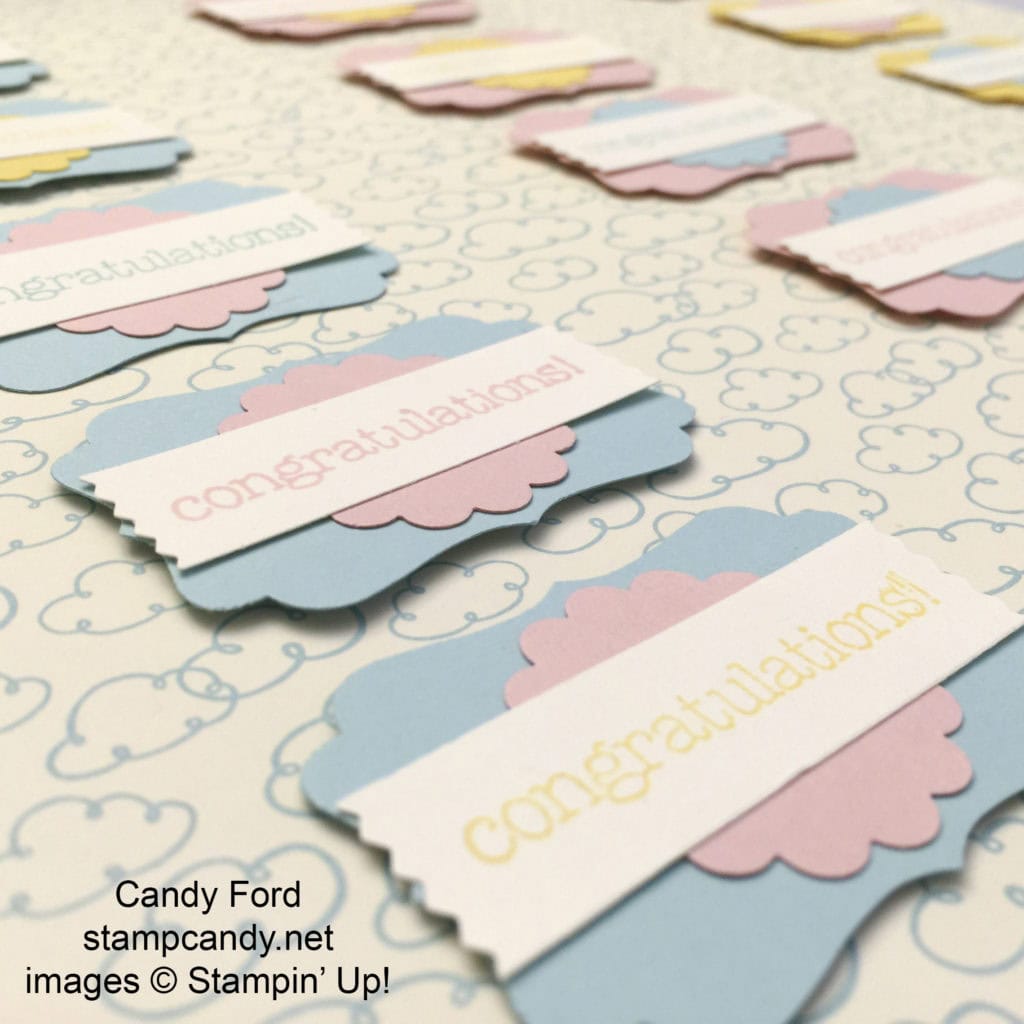
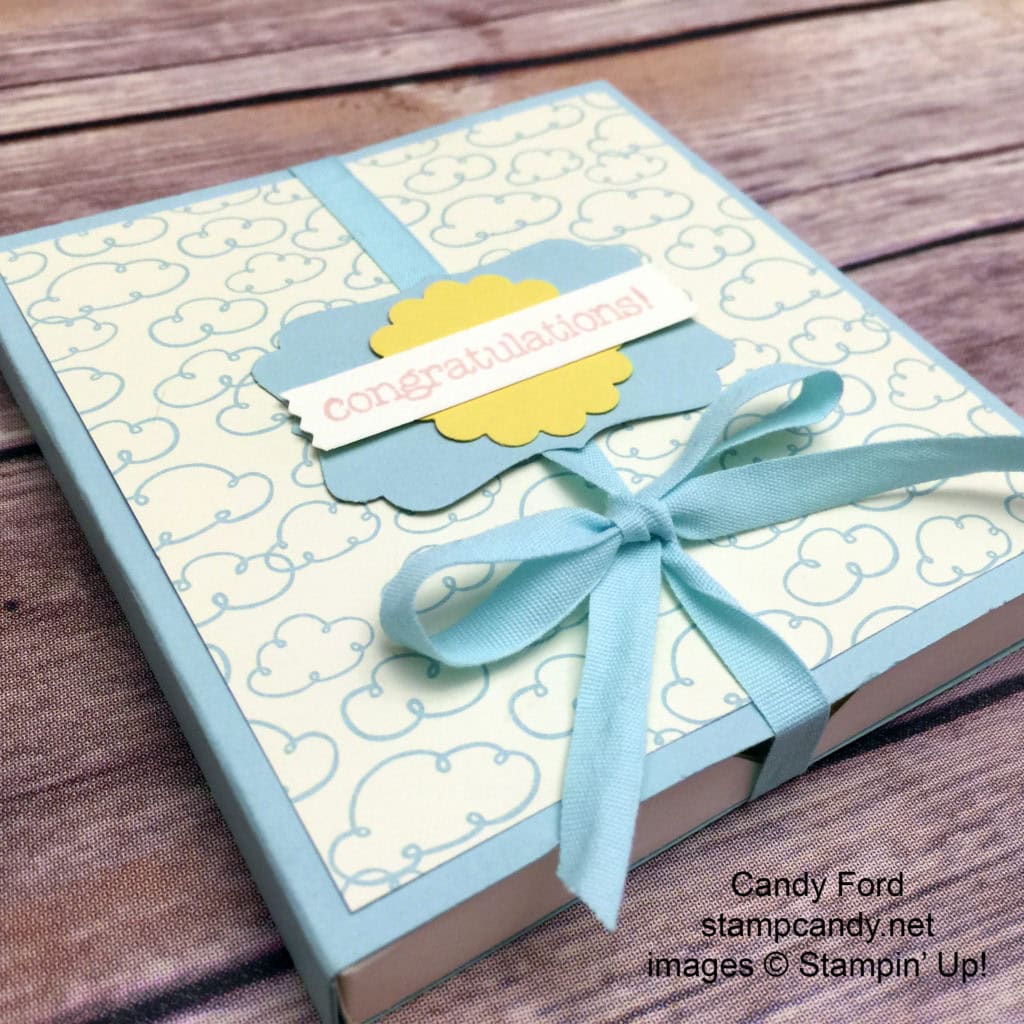
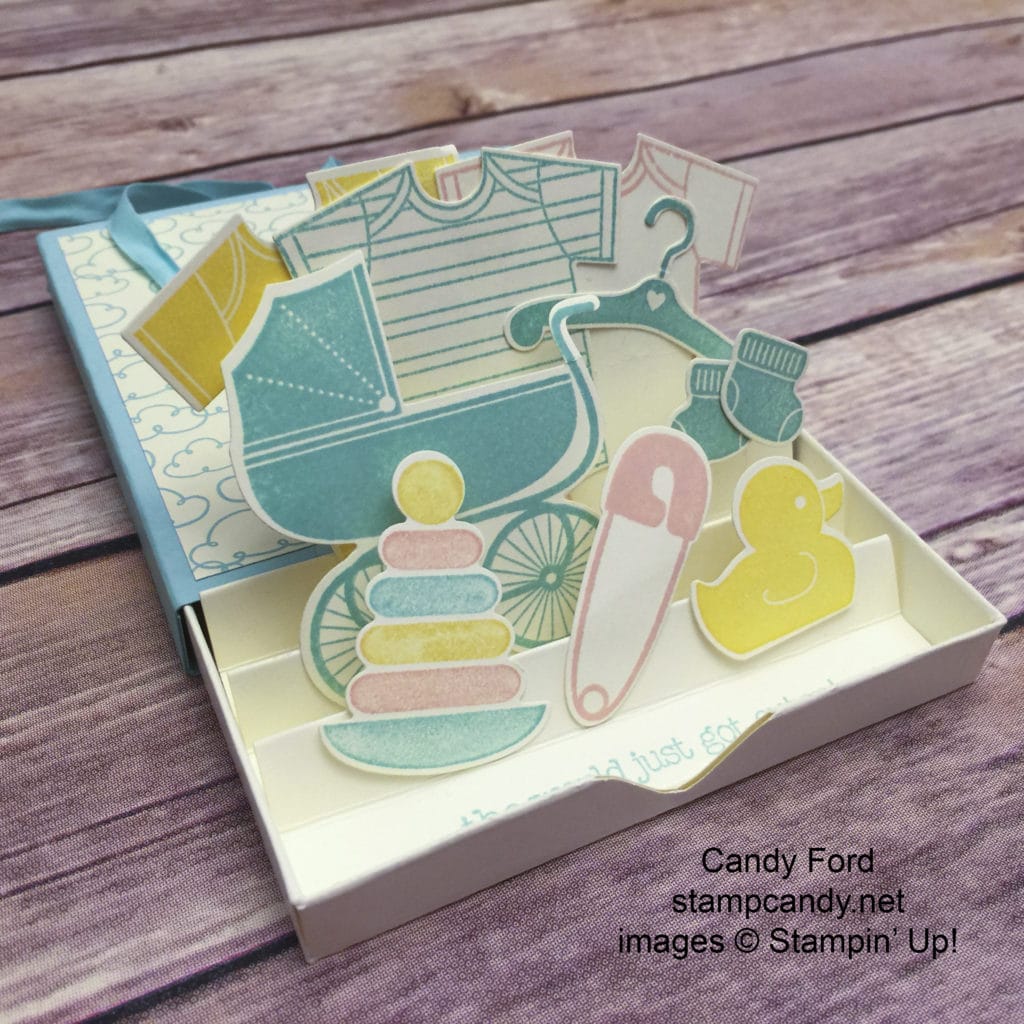
Today I’m excited to share another Stamp Club project with you. It’s a Baby Themed Pop Up Matchbox Card with space in the back for a gift card. Everyone got to choose which color cover and ribbon they wanted to use, which colors to stamp the items inside the box, and which colors to use for the box label – all combinations of Blushing Bride, Daffodil Delight, and Pool Party. My sample has more blue than pink and yellow.
At first you see the sweet little box tied up with ribbon.
Then when you untie the ribbon and begin to pull out the inner tray, you see the continuation of the sentiment from the cover peeking out.
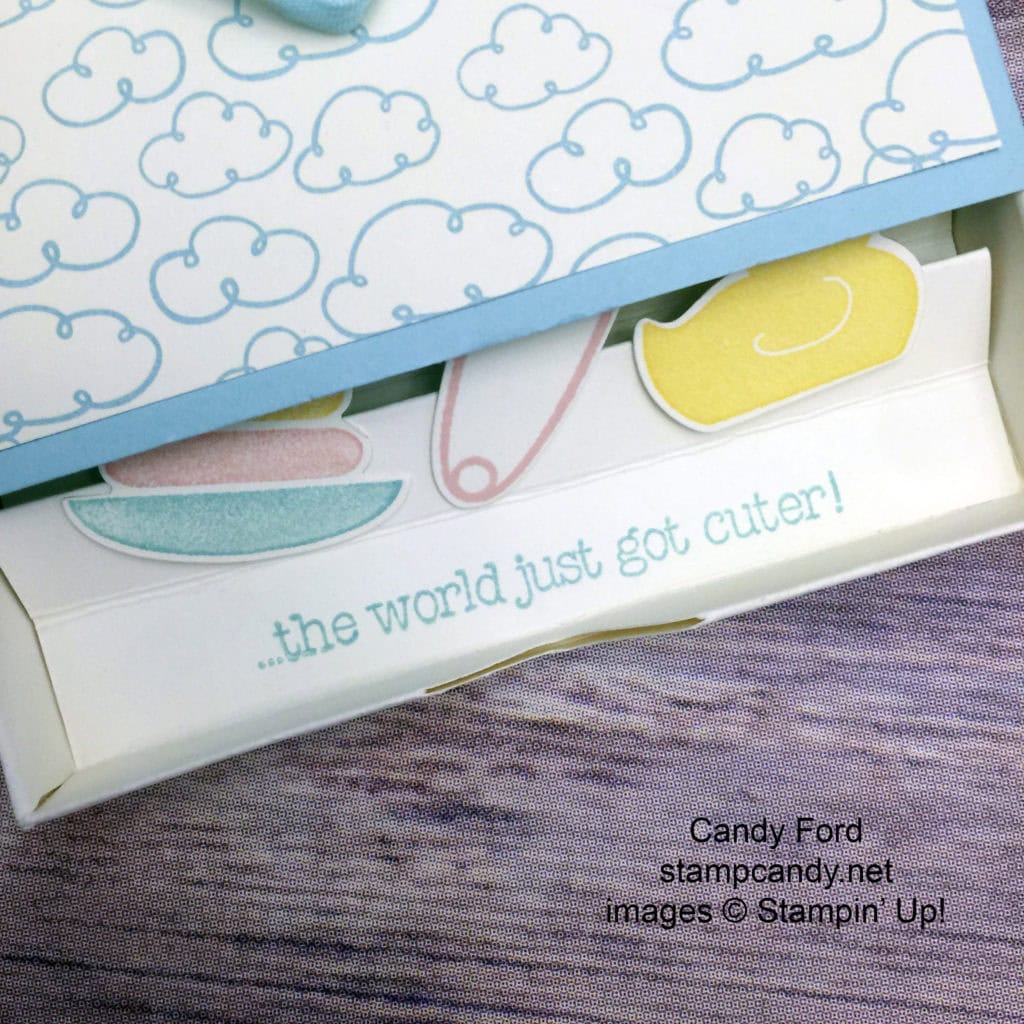
As you continue to pull, all the little goodies pop up! Window Sheets cut into strips and adhered to the backs of the images with Glue Dots help them pop.

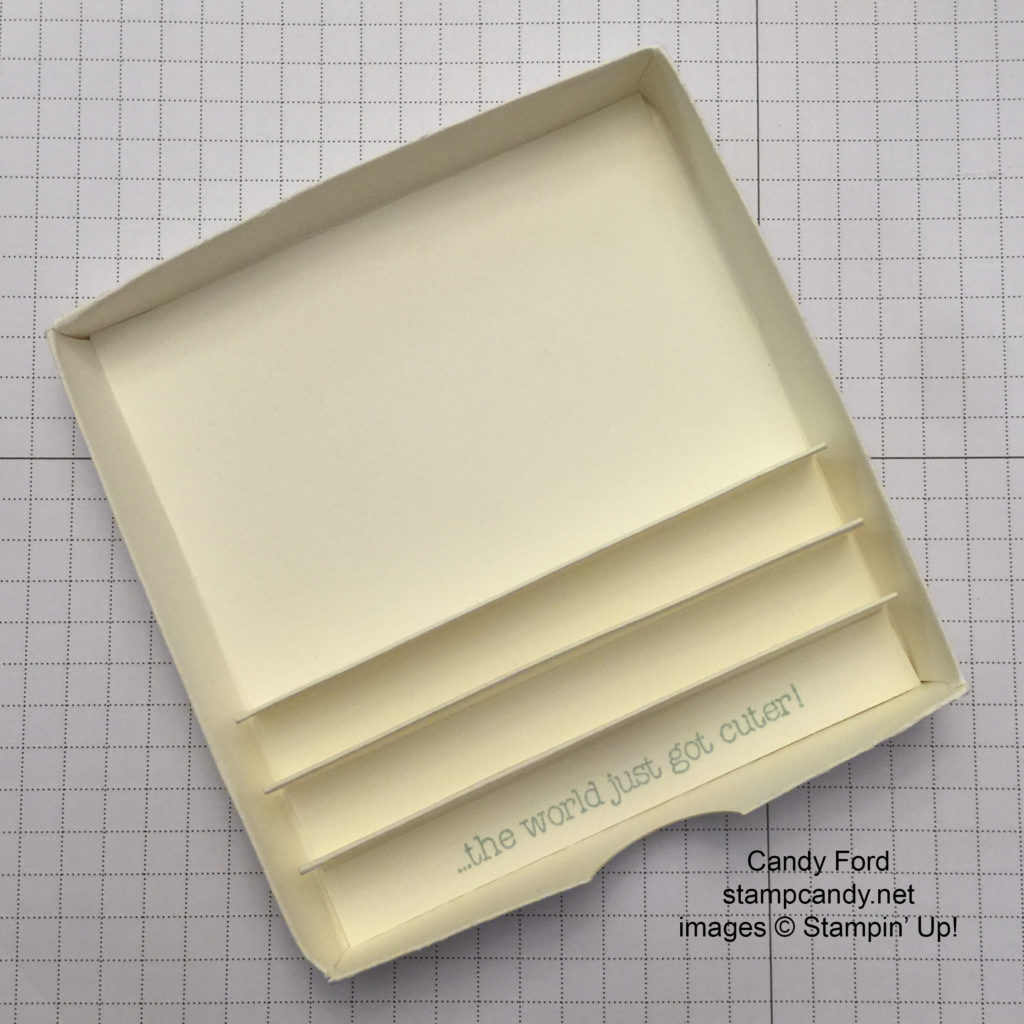
This is what the tray looks like before adding the goodies.There is space in the back for a gift card.
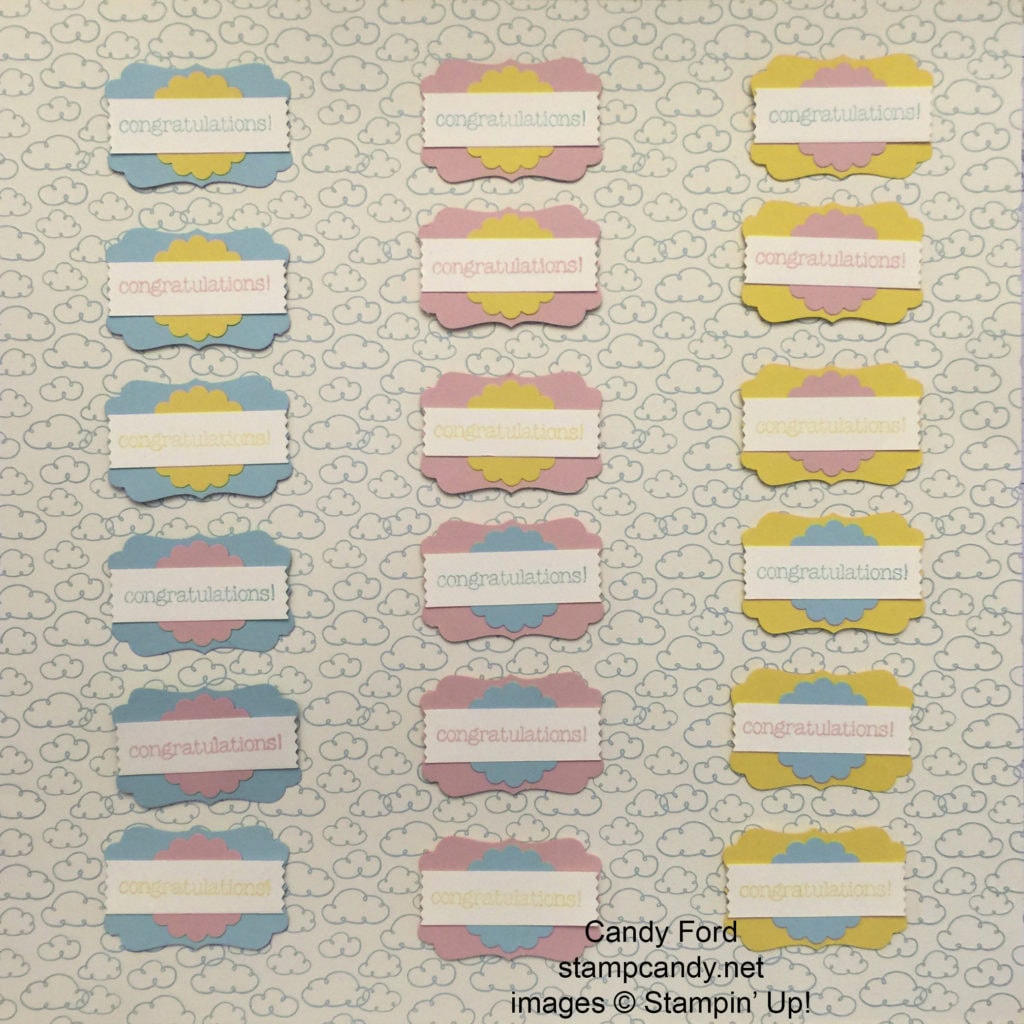
Here are 18 different color combinations of the box label, to help you decide which you like best:

Would you like the tutorial for this project? Click here to upload the pdf. Remember, you can always contact me with questions!
I hope you enjoy making your own Pop Up Matchbox Card!
Here’s what I used:
There are only 24 days left to order from the 2015-2016 Annual Catalog! Be sure to check out the remaining retiring items here.
Thanks for stopping by today, and Sweet Stamping!
May 2, 2016 | Boxes, Cards, Club, Events, Occasions |
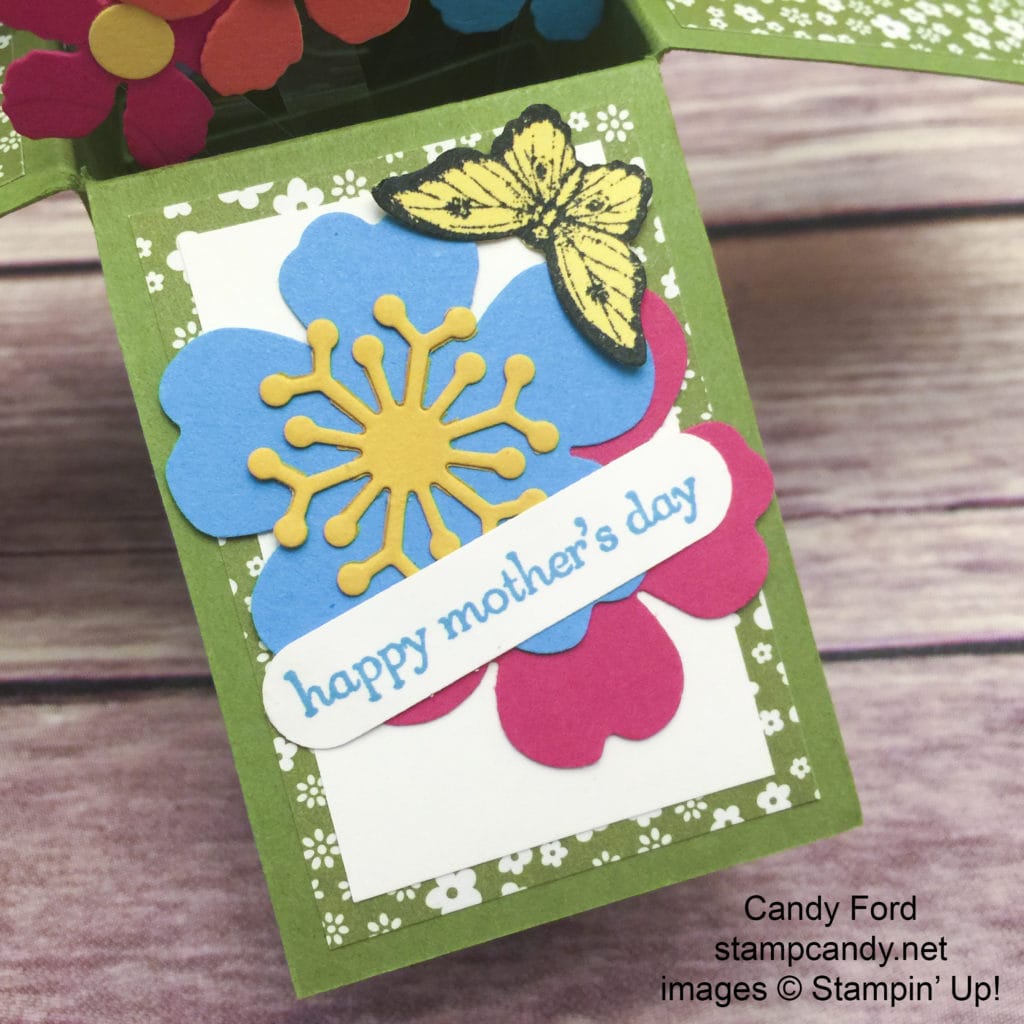
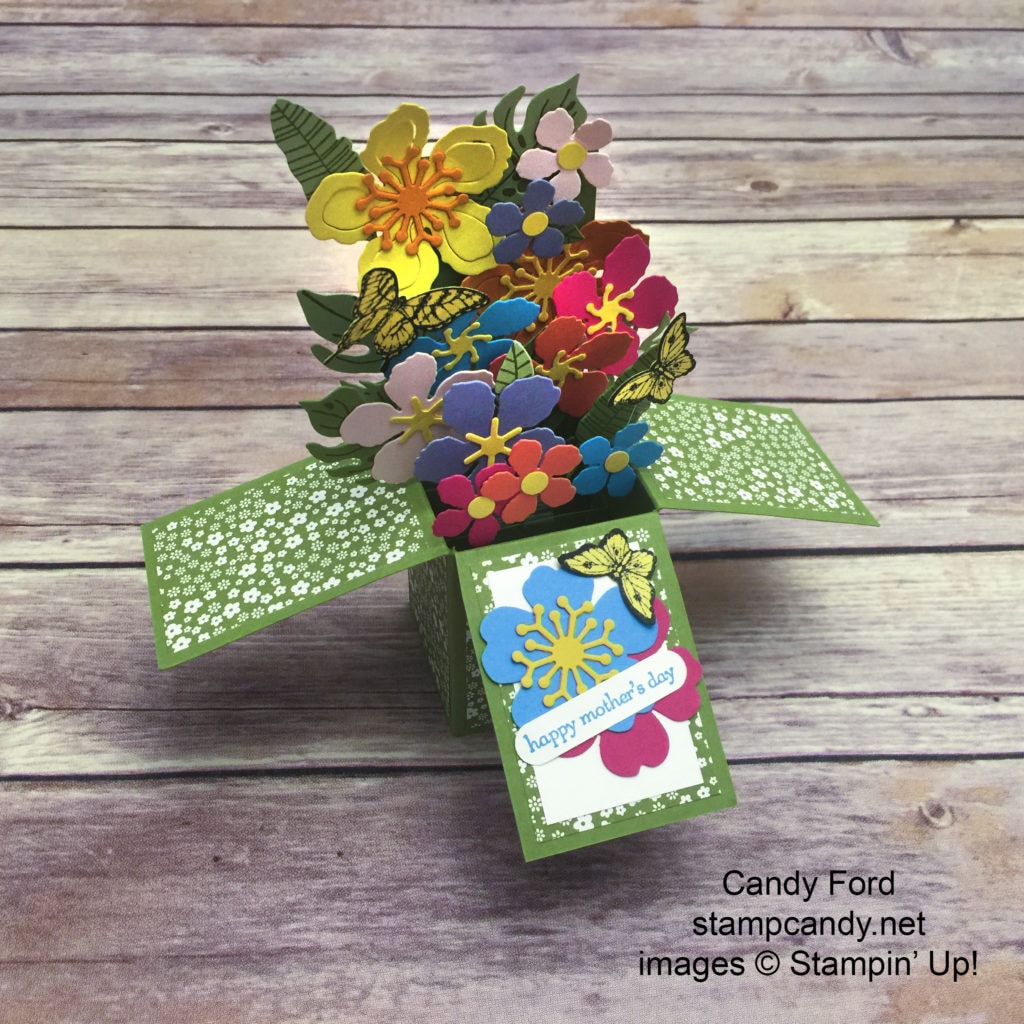
Today I’m sharing with you one of our April Stamp Club projects, a card in a box. This one is bursting with flowers and butterflies…
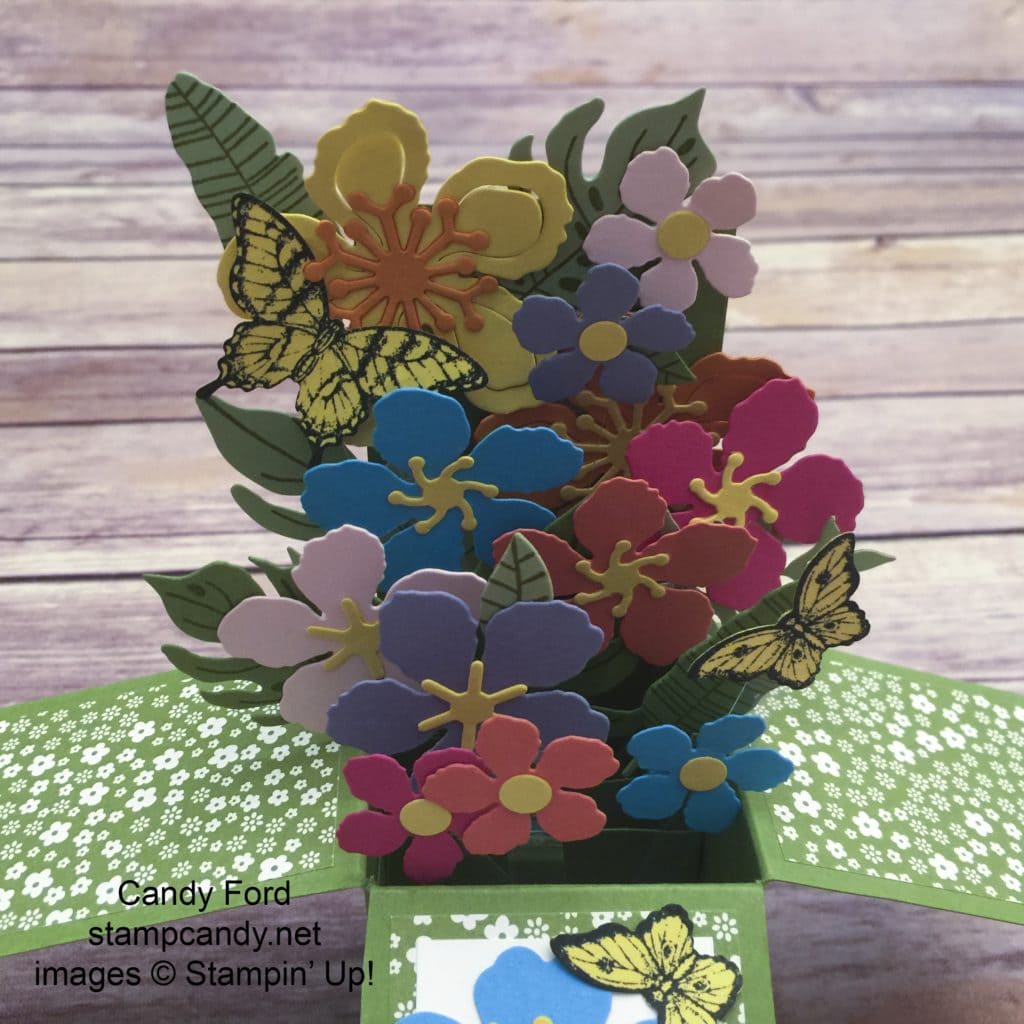
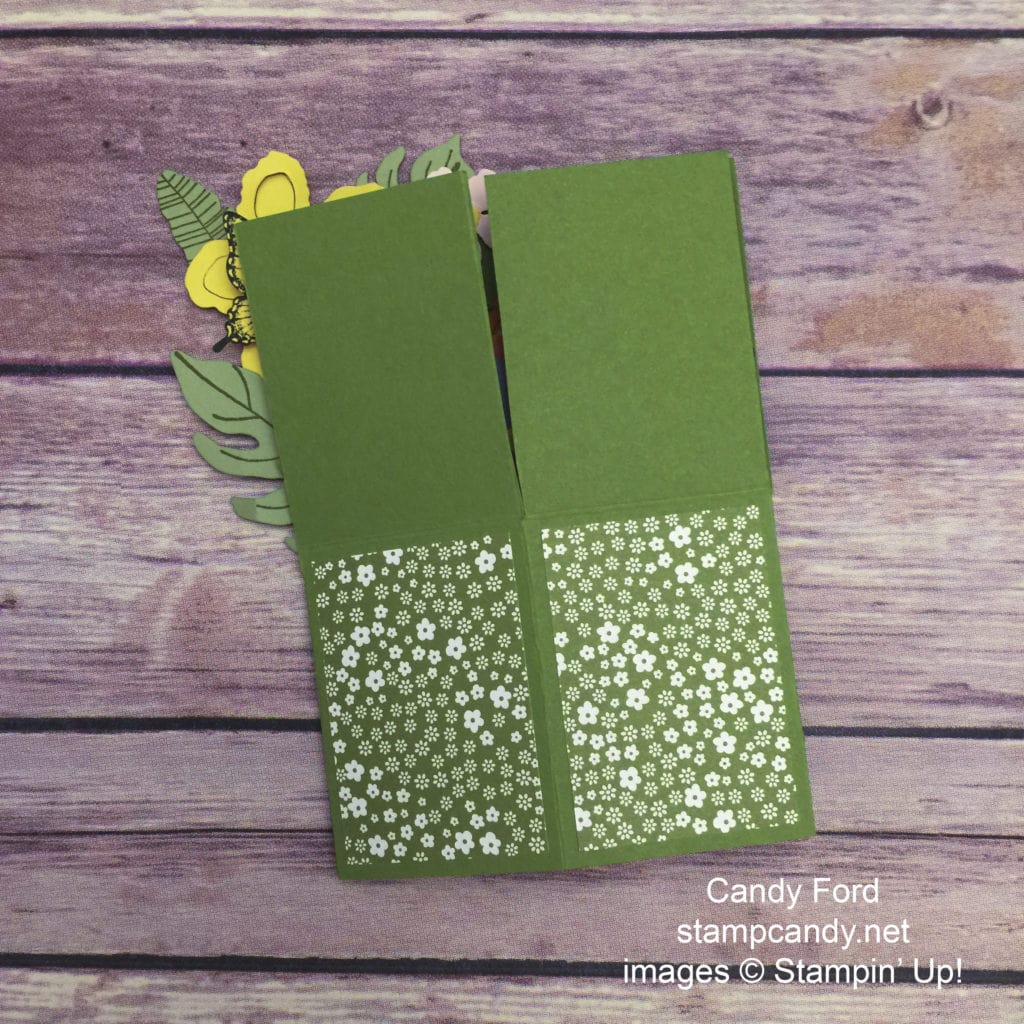
…then it folds flat to go into an envelope.
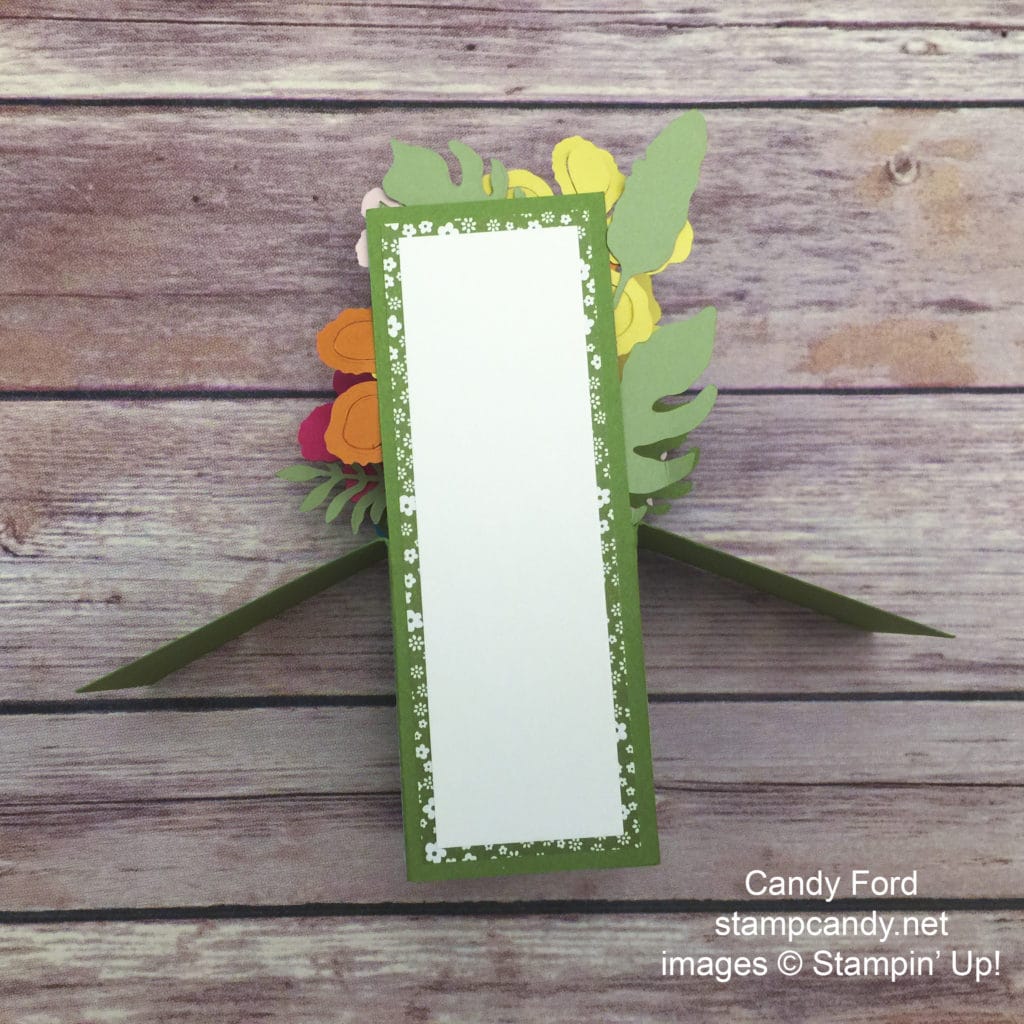
The back has a blank panel for a handwritten message. It’s easier to write on before gluing it onto the box.
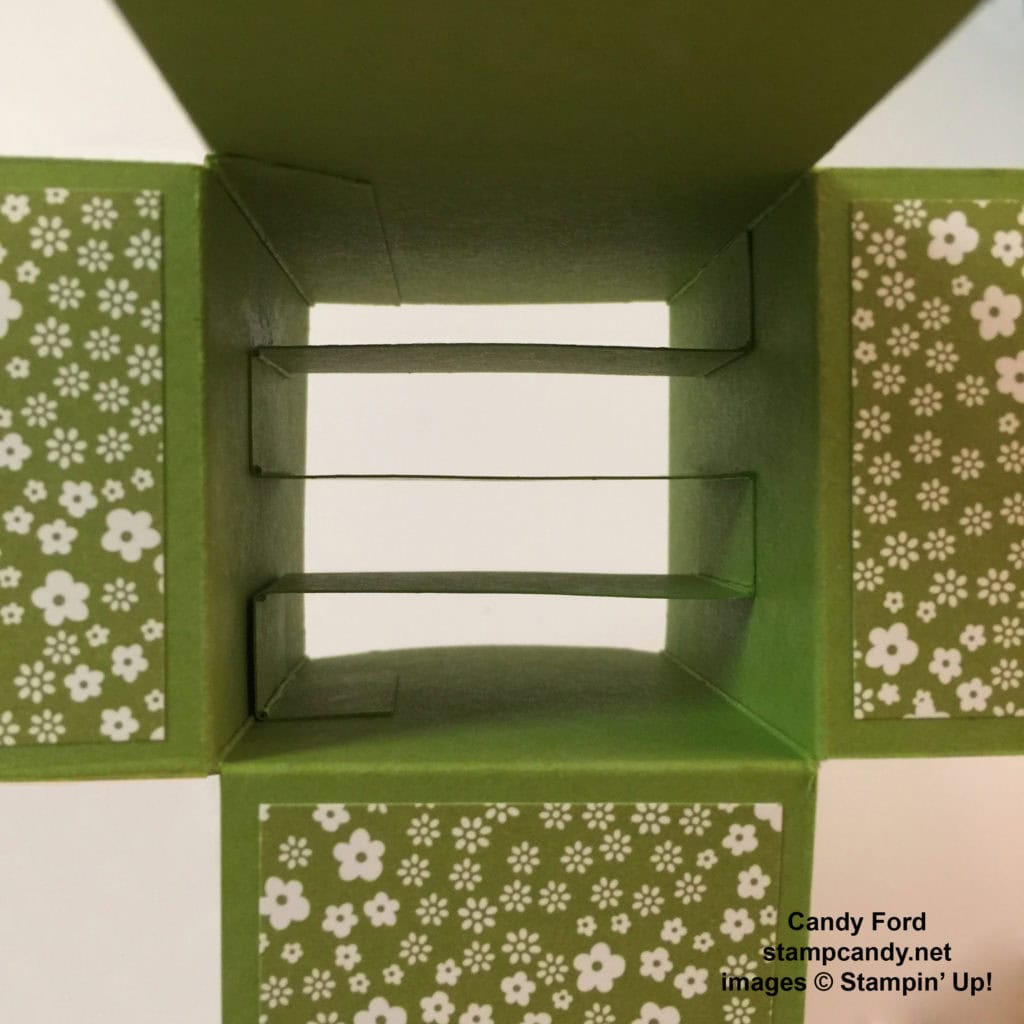
There is a strip of card stock zig-zagged on the inside of the box to attach the flowers & butterflies to. Be sure you attach it so that it runs side to side instead of front to back.
The front panel has the sentiment. I chose to make this a Mother’s Day card, but you could use almost any sentiment from the Teeny Tiny Wishes stamp set.
This card may seem a bit overwhelming at first, but it really isn’t difficult at all. I find the most difficult part is to get the zig-zagged strip glued inside the box. I recommend using liquid glue, so you can slide it into place more easily than if you use a dry adhesive.

Click here to download the free tutorial for this Floral Card in a Box!

Paper Pumpkin is a great way to spend 30-60 minutes each month relaxing, crafting, and hanging out with friends. Each month you receive a box full of goodies in the mail. It contains everything you need to complete that month’s project including ink pad(s) and an exclusive stamp set (you might need scissors and adhesive.) A clear acrylic block comes in your first kit to use with all your Paper Pumpkin stamps in the future.

When you subscribe month-to-month the kits are $19.95 per month, which includes shipping. When you buy a prepaid subscription of 6- or 12-months, you save money! See the options here.
When you subscribe to Paper Pumpkin in May or June 2016, and the kits ship to you for 6 months, I will send you a Paper Pumpkin shopping bag full of goodies!

Be sure to check out the retiring products here, many of which are discounted up to 50%. Most items are only available while current supplies last, and none of them will be available after May 31. Some things have already sold out, so don’t wait!
Thanks for stopping by today, and Sweet Stamping!


