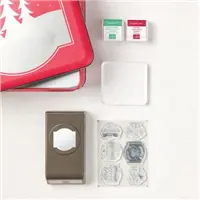
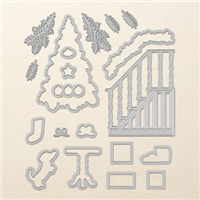
It’s time for the ICS Blog Hop! I can’t wait to see all the great projects made by the amazing stampers in this group! This month’s theme is Christmas Cards Galore. I opted to make a very peaceful Christmas card. I used the Christmas Staircase Thinlits Dies, the Christmas Traditions Punch Box, and Subtles Designer Series Paper. The white dots on the DSP looks like big fluffy snow, don’t they? I love how serene it is. And the best part? It’s very simple to make, but it looks complicated.
Here’s what I made:
Here’s what I did:
Cut and scored with my Stampin’ Trimmer:
Balmy Blue card stock (CS) cut to 4-1/4″ x 11″, then scored in half at 5-1/2″
Balmy Blue Designer Series Paper (DSP) cut to 4″ x 5-1/4″
Whisper White CS cut to 4″ x 5-1/4″ for the inside of the card base
Stamped with the Christmas Traditions stamp set:
image in Balmy Blue ink onto a scrap of Whisper White Thick CS
NOTE: I prefer to use the thick CS for certain cut pieces, especially if they are adhered with Stampin’ Dimensionals. You can use regular or thick white CS for everything on the card, if you only have one.
Cut using the Christmas Traditions Punch:
stamped image
Die cut using the Christmas Staircase Thinlits:
one tree shape
six boughs
Assembled the card:
burnished the fold in the card base with a Bone Folder
DSP layer glued onto the front of the card base
die cut tree glued onto the DSP layer
die cut coughs glued onto the tree: 3 at the bottom, 2 in the middle, then 1 at the top
stamped image adhered onto the tree using Stampin’ Dimensionals
Whisper White CS glued onto the inside of the card base
Here’s the hop:
Be sure to follow the hop all the way around. You don’t want to miss any of the terrific projects! Click the button below to hop along to the next stop, Janey Backer of Inspired Stamping.
Here are today’s colors:
You can click on each one to see all the products that come in that color!
The Year-End Closeout has officially begun! During this promotion, you will be able to save on a selection of retiring and surplus items—while supplies last. Definitely place your orders sooner rather than later, because supplies are limited and the Year-End Closeout ends on January 2. After that, some of your favorite retiring items may be gone for good!
CLICK HERE to see all the Year-End Closeout items.
Here’s how to shop 2019 Occasions/Sale-a-bration items now!
Become a Candy Heart!
Join my team and you can order the new products right now, instead of having to wait another month!
No selling required! I welcome Hobby Demos! (Hobby Demos join to get the discount for themselves.)
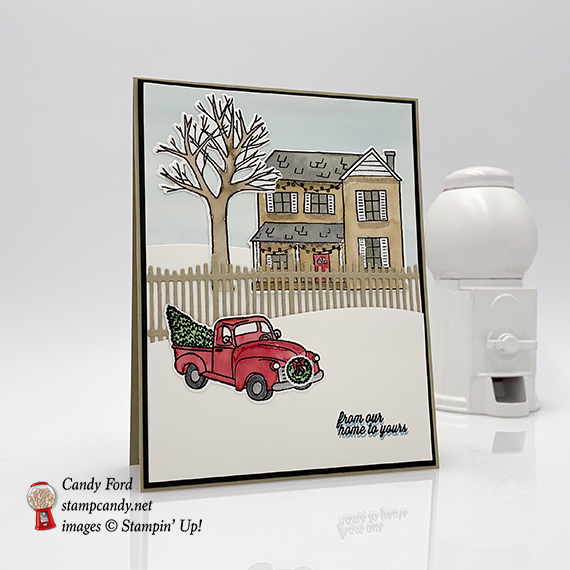
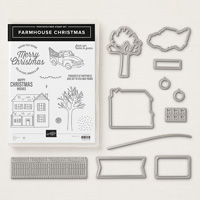
I made today’s card using the Farmhouse Christmas bundle (Farmhouse Christmas stamp set and Farmhouse Framelits Dies). I used several layers of Shimmery White card stock (CS) to create the snowy scene, and used an Aqua Painter to color the die cut pieces. I got the idea from a card on page 12 of the 2018 Holiday Catalog. They used the truck and the fence, and some Embossing Paste for snow.
Here’s the card I CASEd:
CASE = copy and share everything, or copy and selectively edit
Here’s what I made:
Here’s what I did:
Cut and scored with my Stampin’ Trimmer:
Crumb Cake card stock (CS) cut to 4-1/4″ x 11″, then scored in half at 5-1/2″
Basic Gray CS cut to 4-1/8″ x 5-3/8″
Shimmery White CS cut to 4″ x 5-1/4″ (4 pieces: 3 for the snow layers and 1 for the inside of the card base)
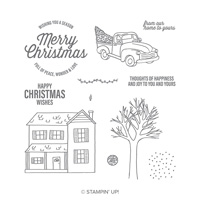
Stamped with the Farmhouse Christmas stamp set:
house with string lights, tree, truck, and wreath in black Stazon ink onto scraps of Shimmery White CS
sentiment in black Stazon ink onto the bottom right corner of the top layer
sentiment in Balmy Blue ink just offset from black sentiment
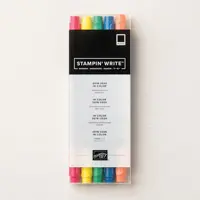
Colored using Stampin’ Write Markers:
shadows on house in Crumb Cake
string lights in Real Red, Call Me Clover, and Pacific Point
tires in Basic Gray
Colored using an Aqua Painter :
house in Crumb Cake; front door in Real Red; roof and windows in Basic Gray
tree in Soft Suede
truck in Real Red; tires and metal pieces in Basic Gray; tree in Garden Green
wreath in Garden Green; bow in Real Red
background (bottom Shimmery White CS layer) in Balmy Blue
NOTE: There are several ways you can get the ink onto the Aqua Painter: 1) squeeze an ink pad to get some ink onto the inside of the lid, and use that at your palette; 2) drop some ink from a refill onto a clear block or into a small bowl; 3) use a Stampin’ Write Marker to apply some ink onto a clear block. I used option 3, the markers, for this card.
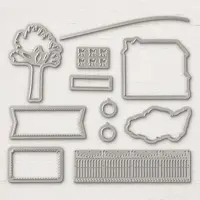
Die cut using the Farmhouse Framelits:
house, tree, truck, and wreath
fence from a scrap of Crumb Cake CS
curve across the top of the top and middle Shimmery White CS layers (I flipped over the top one so the curves didn’t match up.)
Assembled the card:
burnished the fold in the card base with a Bone Folder
middle Shimmery White CS (snow) layer glued onto the bottom (painted, full size) snow layer, lining up the two bottom corners
house and tree glued onto the middle/bottom snow layers
fence glued over the middle snow layer, house, and tree, and the excell trimmed off the sides using Paper Snips
top (shortest) snow layer glued over all, lining up the two bottom corners
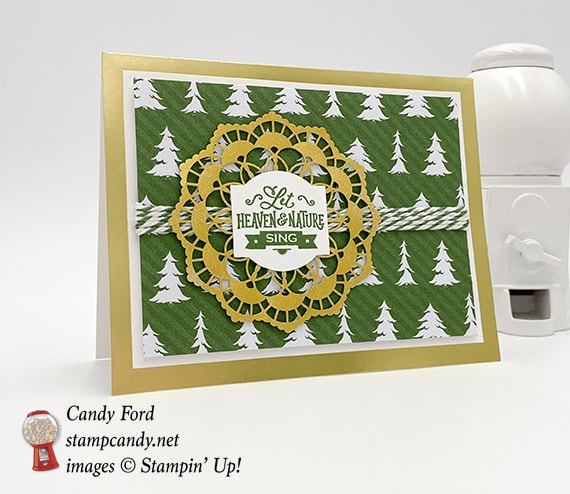
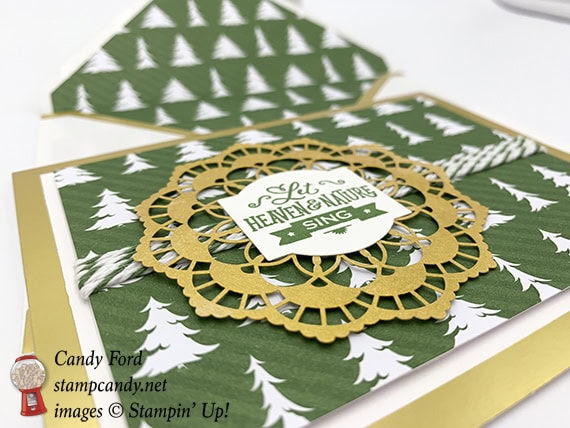
Let Heaven & Nature Sing is just one of the six sentiments in the Christmas Traditions Punch Box set. Today I’ve combined it with a doily colored with shimmer paint, baker’s twine, Santa’s Workshop Designer Series Paper, and a Gold Foil Edged Card & Envelope.
Here’s what I made:
Here’s what I did:
Cut and scored with my Stampin’ Trimmer:
Santa’s Specialty Designer Series Paper (DSP) cut to 4-3/4″ x 3-1/2″
envelope flap traced onto a piece of the DSP with a pencil, then cut along the lines
make the DSP about 1/2″ skinnier than the envelope, so it will fit inside
Stamped with the Christmas Traditions stamp set:
sentiment in Garden Green ink onto a scrap of Whisper White Thick card stock (CS)
NOTE: I used the thick CS because it is sturdier than the regular Whisper White CS, and fares better when held up with Stampin’ Dimensionals.
Punched using the Christmas Traditions Punch:
sentiment
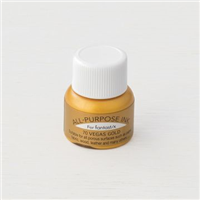
Colored using Shimmer Paint:
the back of a Colored Doily in Vegas Gold with a wedge of a Stampin’ Sponge
Assembled the card:
burnished the fold in the card base with a Bone Folder
Tear & Tape adhesive applied horizontally across the DSP layer and wrapped around to the back
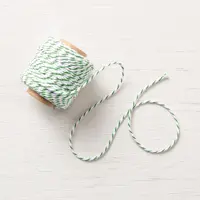
enough pieces (4 or 5) of Garden Green & White Baker’s Twine adhered onto the Tear & Tape to cover the adhesive, wrapping the ends around to the back of the DSP layer
punched sentiment glued onto the front of the painted doily
painted doily/sentiment adhered over the twine using Mini Stampin’ Dimensionals
DSP layer adhered to the card front using Stampin’ Dimensionals
Assembled the envelope:
inserted the DSP into the envelope and glued it to the inside, making sure to push the DSP down past the envelope adhesive, so you can still wet the adhesive to seal the envelope
Here are today’s colors:
You can click on each one to see all the products that come in that color!
Today I’m sharing one more card I made using the Snowflake Showcase products. I hope you were able to buy yours while they were available in November. I used the Snow is Glistening stamp set and the Snowfall Thinlits Dies. And I colored some pearls with a Blends Marker as the little tips of the snowflake.
Here’s what I made:
I made a few copies of this card. It wasn’t until I was already writing this blog post that I realized I took a photo of the one with a crooked snowflake in the center. Please just imagine it’s straight. Or squint – that helps.
Here’s what I did:
Cut and scored with my Stampin’ Trimmer:
Whisper White Thick card stock (CS) cut to 4-1/4″ x 11″, then scored in half at 5-1/2″
Coastal Cabana CS cut to 4″ x 5-1/4″
Whisper White CS cut to 3-3/4″ x 5″
Stamped with the Snow it Glistening stamp set:
sentiment in Coastal Cabana ink onto the Whisper White CS layer
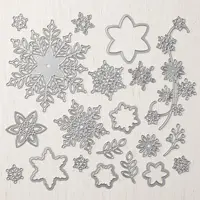
Die cut using the Snowfall Thinlits:
largest snowflake cut from a scrap of Whisper White Thick CS
middle size snowflake cut from a scrap of Coastal Cabana CS
smallest snowflake cut from a scrap of Whisper White CS
Colored using a Blends Marker:
6 Pearl Basic Jewels in Light Bermuda Bay
NOTE: It’s easiest to color the pearls while they are still on the sheet they come on. Also be careful when you color them so you don’t damage the brush tip of your Blends Marker.
Assembled the card:
burnished the fold in the card base with a Bone Folder
Coastal Cabana CS layer glued onto the front of the card base
whisper white CS layer glued onto the Coastal Cabana CS Layer
largest snowflake glued onto the Whisper White CS layer
Coastal Cabana snowflake glued onto the largest snowflake
smallest snowflake glued onto the Coastal Cabana snowflake
Coastal Cabana Glitter dot applied to the center of the smallest snowflake
Here are today’s colors:
You can click on each one to see all the products that come in that color!
Recently I saw a video for a die that cut out the parts for this ornament, but I thought I could do it myself. So I did! It looks much more complicated than it is. It’s just one piece of paper scored and folded, with a few pieces cut away. Add a piece of twine or ribbon and some glue and you’re done! I used the Dashing Along Designer Series Paper (DSP) and the Snowfall Thinlits Dies to decorate the ornament. By the way, the Dashing Along DSP was a limited time offer that expired, but it’s back while supplies last!!!
Today is the last day to order the Showflake Showcase products! Scroll down to the bottom of this post for details.
Here’s what I made:
Here’s what I did:
Cut and scored with my Stampin’ Trimmer:
Garden Green card stock (CS) cut to 8-1/4″ x 5″
the same Garden Green CS scored every 1″ in both directions
the same Garden Green CS scored diagonally in 8 squares as shown in diagram below
Whisper White CS cut to 3/4″ x 3/4″ (4 pieces)
Dashing Along Designer Series Paper (DSP) cut to 1/2″ x 1/2″ (4 pieces)
Die cut using the Snowfall Thinlits:
12 snowflakes from a scrap of Whisper White CS
Cut using Paper Snips:
remove the green shaded areas shown in the diagram
Cut using a 1/8″ Circle Punch:
a hole in the center of the four flaps that will form the top of the box
Assembled the faceted ornament:
burnished all the folds in the Garden Green CS
glued the tab to the inside of the opposite end
folded in the four tabs that form the bottom, pushing in the diagonally scored areas, and glued the tabs together
NOTE: I think it’s easiest to fold in two opposite flaps and glue together, because it’s easier to keep them square, then to glue the other two opposite flaps.
twine looped and tied a knot. then strung through the holes in the four top flaps, leaving the knot on the inside of the ornament, and pushing the flaps down to the knot. The flaps pulling outward against the twine holds them in place.
DSP pieces onto the Whisper White CS pieces
Whisper White CS pieces glued onto four of the panels – every other panel around the middle of the ornament
snowflakes glued onto the remaining 12 square panels of the ornament
You can put treats in the ornament. I recommend gluing the top flaps together, and leaving the bottom flaps open to insert the goodies. Then apply thin velcro pieces to the bottom flaps so the recipient can easily get to the goodies inside. I haven’t actually tried this yet but I have ordered some velcro to try it. I’ll let you know how it works. Theseare the ones I’ve ordered.
Here are today’s colors:
You can click on each one to see all the products that come in that color!
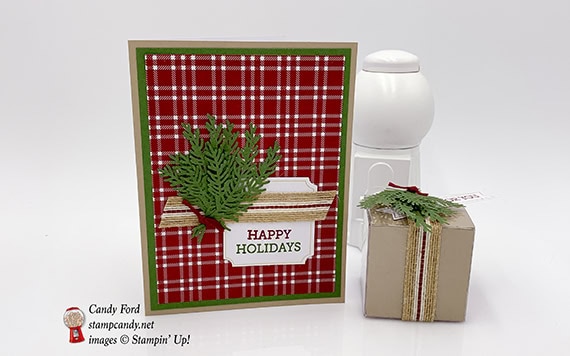
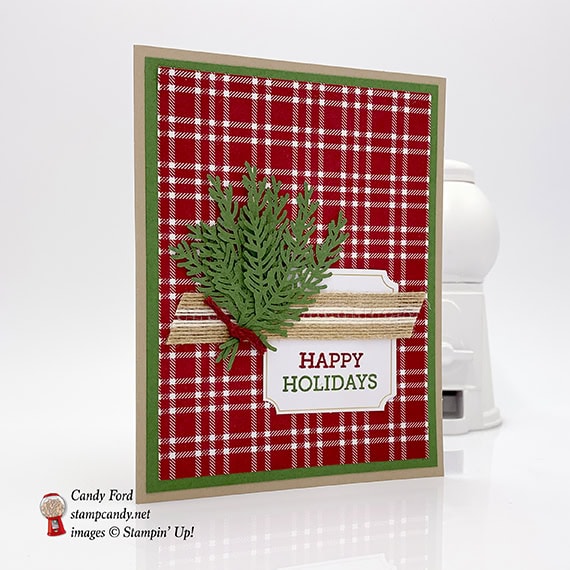
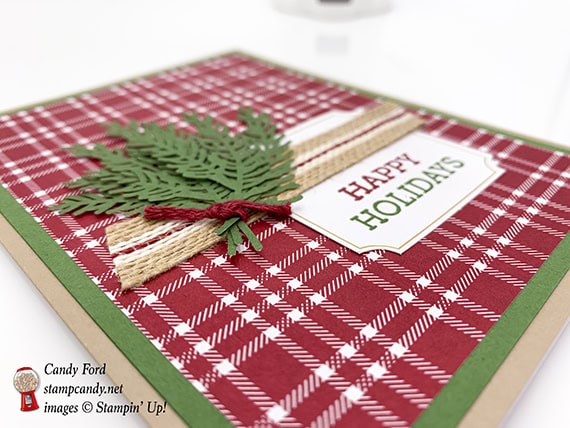
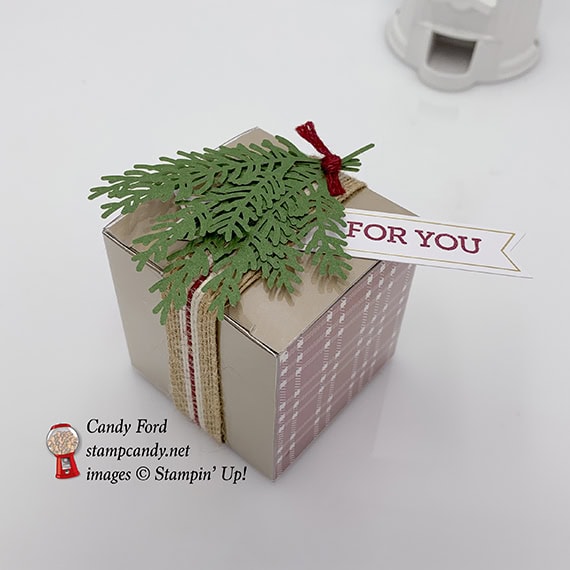
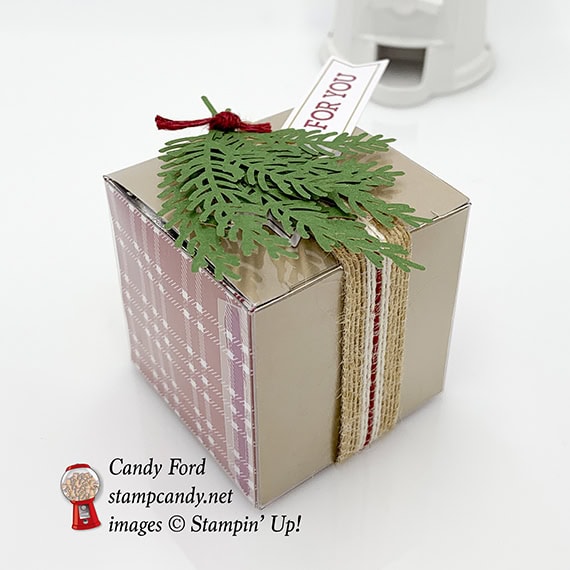
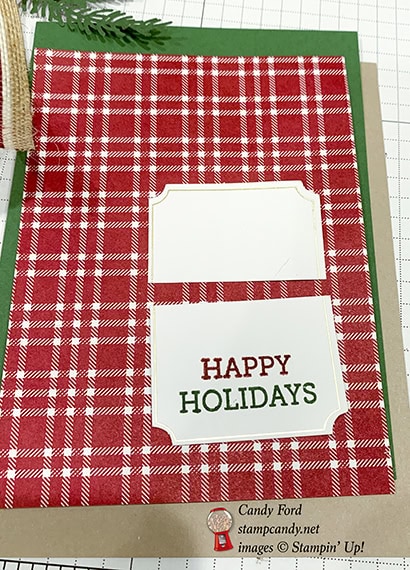
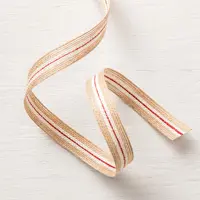
It’s time for the A Paper Pumpkin Thing (APPT) Blog Hop! This month’s kit is called To You and Yours, and it makes 10 awesome Christmas/holiday cards. I used it to make an alternate card and treat box. I only used items from the kit, except for the following: Garden Green ink pad, one Clear Tiny Treat Box, one piece of Garden Green card stock and two pieces of Striped Burlap Trim.
The kit comes with card layers in two different plaid designs. The envelopes are lined with a third plaid design, which is what I used on my projects today.
Here’s what I made:
Here’s what I did:
Cut and scored with my Stampin’ Trimmer:
Garden Green card stock (CS) cut to 4″ x 5-1/4″
plaid paper from the inside of an envelope cut to 3-3/4″ x 5″
plaid paper from the inside of an envelope cut to 2″ x 6″
card base cut to 2″ x 8″, making sure the original score line is at the 4″ mark, then scoring at 2″ and 6″
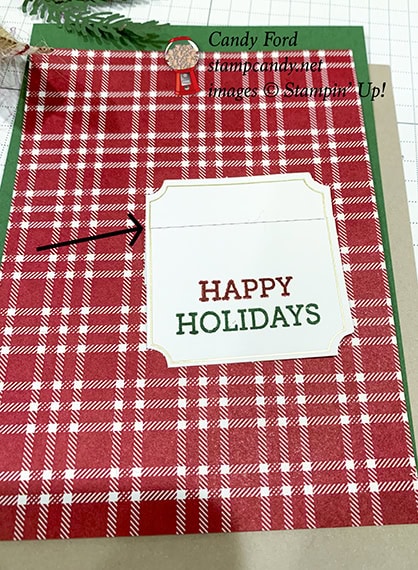
die cut label cut in half
Stamped with the kit’s stamp set:
“For You” in Cherry Cobbler ink onto the right end of a die cut banner
“Happy” in Cherry Cobbler ink and “Holidays” in Garden Green ink onto the bottom half of the die cut label
Cut with a 1/2″ Circle Punch:
a half moon shape from one end of the 2″ x 8″ piece, to match up with the finger notch of the treat box
Assembled the card:
burnished the fold in the card base with a Bone Folder
Garden Green CS layer glued onto the front of a card base
plaid paper layer glued onto the Garden Green CS layer
the stamped half of the die cut label layered over the other half, to shorten it, and glued onto the plaid layer
I had to draw a line so you could see where the two halves of the label overlap:
burlap trim adhered onto the plaid layer, hiding the seam in the label
5 die cut sprigs bundled and tied together using a piece of Cherry Cobbler trim, then adhered to the plaid layer and burlap trim
Assembled the box:
assembled the treat box
burnished the folds in the 2″ strip cut from plaid paper, and in the 2″ strip cut from a card base
plaid strip inserted into the treat box side to side
the other strip inserted into the treat box front to back, lining up the finger notch in the front
put the goodies in and closed the lid (I used Hershey’s Kisses. You can see from the photos I got it just a little too full. It’s bulging a little.)
10″ piece of burlap trim wrapped around the box and the ends adhered together, but not to the box, so it can slip on and off
5 die cut sprigs bundled and tied together using a piece of Cherry Cobbler trim, then adhered to the ribbon on top of the box
“For You” banner slipped under the ribbon
Here’s the To You and Yours Blog Hop:
Here are today’s colors:
You can click on each one to see all the products that come in that color!