Night of Navy Snowflake Showcase Card

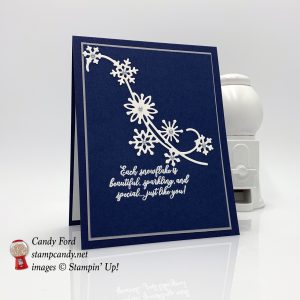
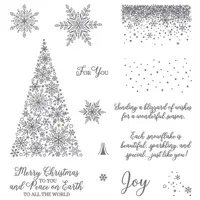
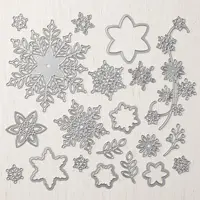
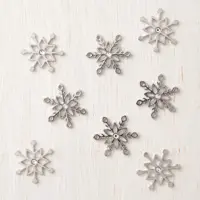
I have really been loving playing with the Snowflake Showcase collection of products. (You only have 3 more days to buy it, so don’t miss out on this amazing collection of products.) Today I’m sharing a card I made in Night of Navy and Whisper White using the Snow is Glistening stamp set and Snowfall Thinlits Dies. It uses one of my favorite sentiments from the collection.


Here’s what I made:

Snowflake Showcase winter or Christmas card, Stampin' Up! #stampcandy


Snowflake Showcase winter or Christmas card, Stampin' Up! #stampcandy

Here’s what I did:

Cut and scored with my Stampin’ Trimmer:

  • Night of Navy card stock (CS) cut to 4-1/4″ x 11″, then scored in half at 5-1/2″
  • Whisper White CS cut to 3-7/8″ x 5-1/8″
  • Night of Navy CS cut to 3-3/4″ x 5″
  • Whisper White Cs cut to 4″ x 5-1/4″

Stamped with the Snow is Glistening stamp set:

  • sentiment in Versamark ink onto the Night of Navy CS layer, then heat embossed in white

Die cut using the Snowfall Thinlits:

  • flourish from a scrap of Whisper White CS

Assembled the card:

  • burnished the fold in the card base with a Bone Folder
  • Whisper White CS layer glued onto the front of the card base
  • Night of Navy CS layer glued onto the Whisper White CS layer
  • die cut flourish glued onto the the Night of Navy CS layer
  • 7 Pearl Basic Jewels applied to the die cut
  • Whisper White CS glued onto the inside of the card base


Here are today’s colors:

You can click on each one to see all the products that come in that color!


Here’s what I used:

Click on these images for more details and to purchase.


Here’s the beautiful Snowflake Showcase!

It’s available only in November, so get yours before it’s gone!


The Happiness Surrounds stamp set can be used all year long!

Happiness Surrounds stamp set © Stampin’ Up!


And the Snow is Glistening stamp set can be used all winter long. 

Snow is Glistening stamp set © Stampin’ Up!


You get 20 dies in this set! 20!!! And they go with both stamp sets, so they can be used all year long.

Snowfall Thinlits © Stampin’ Up!


Look at these adorable embellishments! They’re flat so they’re great for cards. I even made a pair of earrings!

Snowflake Trinkets © Stampin’ Up!


Click on the images below to see more details and to purchase the Snowflake Showcase items:


The White Velveteen Paper mentioned in the video is sold out and no longer available. 


 Here’s even more cool stuff you should check out:

Thanks for stopping by today, and Sweet Stamping!


Farmhouse Christmas Card with Snowflake Showcase

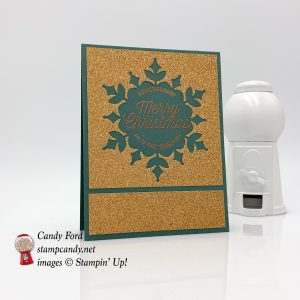
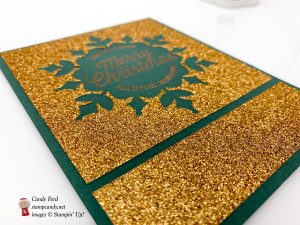
For today’s card I combined the Snowflake Showcase with the Farmhouse Christmas stamp set and Joyous Noel Glimmer Paper. I don’t think the photos really do this card justice. The glimmer paper and the heat embossed sentiment really give this card a lot of shine and sparkle.


Here’s what I made:

Snowflake Showcase Christmas card, Stampin' Up!, #stampcandy


Snowflake Showcase Christmas card, Stampin' Up!, #stampcandy

Here’s what I did:

Cut and scored with my Stampin’ Trimmer:

  • Tranquil Tide card stock (CS) cut to 4-1/4″ x 11″, then scored in half at 5-1/2″
  • copper glimmer paper cut to 4″ x 4″
  • copper glimmer paper cut to 4″ x 1-1/8″
  • Whisper White CS cut to 4″ x 5-1/4″ for the inside of the card base

Die cut using the Snowfall Thinlits:

  • largest snowflake from the center of the 4″ x 4″ copper glimmer paper
  • NOTE: Save the snowflake for another project!

Stamped with the Farmhouse Christmas stamp set:

  • sentiment in Versamark ink onto the front of the card base, then heat embossed in copper
  • NOTE: I laid the die cut glimmer paper on the card base and used a pencil to lightly mark the area where I could stamp. Then I stamped and embossed the sentiment before adhering the glimmer paper to the card. If you glue on the glimmer paper first, you are likely to get embossing powder on and around it.

Assembled the card:

  • burnished the fold in the card base with a Bone Folder
  • copper glimmer paper pieces glued onto the front of the card stock
  • Whisper White CS glued onto the inside of the card base


Here are today’s colors:

You can click on each one to see all the products that come in that color!


Here’s what I used:

Click on these images for more details and to purchase.


Here’s the beautiful Snowflake Showcase!

It’s available only in November, so get yours before it’s gone!


The Happiness Surrounds stamp set can be used all year long!

Happiness Surrounds stamp set © Stampin’ Up!


And the Snow is Glistening stamp set can be used all winter long. 

Snow is Glistening stamp set © Stampin’ Up!


You get 20 dies in this set! 20! And they go with both stamp sets, so they can be used all year long.

Snowfall Thinlits © Stampin’ Up!


Look at these adorable embellishments! They’re nice and flat so they’re great for cards. I even made a pair of earrings!

Snowflake Trinkets © Stampin’ Up!


Click on the images below to see more details and to purchase the Snowflake Showcase items:


The White Velveteen Paper mentioned in the video is sold out and no longer available. 


 Here’s even more cool stuff you should check out:

Thanks for stopping by today, and Sweet Stamping!


Each Snowflake is Just Like You with the Snowflake Showcase

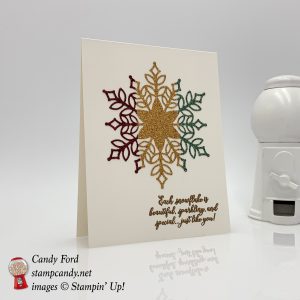
I love the sentiment on this card: Each snowflake is beautiful, sparkling, and special, just like you! I heat embossed in in copper. The big snowflake is cut using the Snowfall Thinlits Dies from three strips of Joyous Noel Glimmer Paper laid side by side. 

Scroll down to see more information on the Snowflake Showcase. It will only be available for 5 more days, or while supplies last, so don’t wait!


Here’s what I made:

Snowflake Snowcase Christmas card, Stampin' Up!, #stampcandy


Snowflake Snowcase Christmas card, Stampin' Up!, #stampcandy

Here’s what I did:

Cut and scored with my Stampin’ Trimmer:

  • 4-1/4″ x 11″ card stock (CS) cut to , then scored in half at 5-1/2″
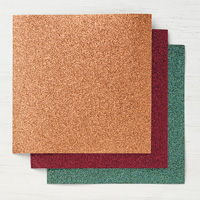
  • Merry Merlot glimmer paper cut to 1-1/4″ x 6″
  • Copper glimmer paper cut to 1-1/4″ x 6″
  • Tranquil Tide glimmer paper cut to 1-1/4″ x 6″

Stamped with the Snow is Glistening stamp set:

  • sentiment in Versamark ink onto the lower right of the front of the card base, then heat embossed in copper

Die cut using the Snowfall Thinlits:

  • three glimmer paper strips laid side by side and cut using the largest snowflake die
  • NOTE: Be careful to keep all the pieces of the snowflake.

Assembled the card:

  • burnished the fold in the card base with a Bone Folder
  • glimmer paper snowflake glued onto the front of the card base


Here are today’s colors:

You can click on each one to see all the products that come in that color!


Here’s what I used:

Click on these images for more details and to purchase.


Here’s the beautiful Snowflake Showcase!

It’s available only in November, so get yours before it’s gone!


The Happiness Surrounds stamp set can be used all year long!

Happiness Surrounds stamp set © Stampin’ Up!


And the Snow is Glistening stamp set can be used all winter long. 

Snow is Glistening stamp set © Stampin’ Up!


You get 20 dies in this set! 20!!! And they go with both stamp sets, so they can be used all year long.

Snowfall Thinlits © Stampin’ Up!


Look at these adorable embellishments! They’re flat so they’re great for cards. I even made a pair of earrings!

Snowflake Trinkets © Stampin’ Up!


Click on the images below to see more details and to purchase the Snowflake Showcase items:


The White Velveteen Paper mentioned in the video is sold out and no longer available. 


 Here’s even more cool stuff to check out:

Thanks for stopping by today, and Sweet Stamping!


Warm Hearted Merry Christmas Card

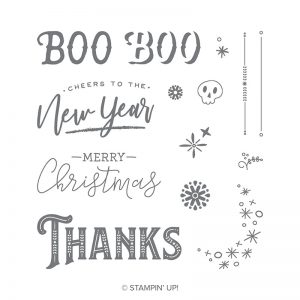
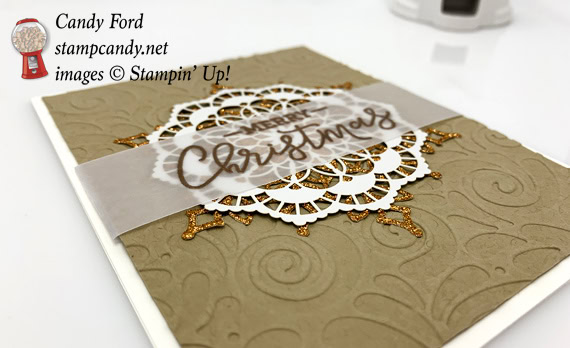
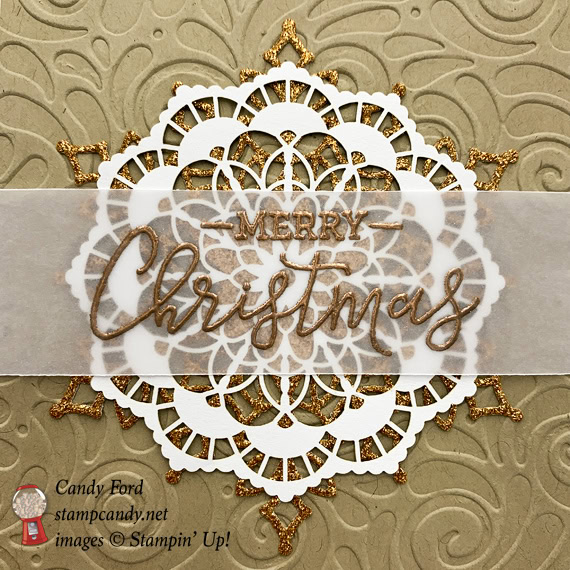
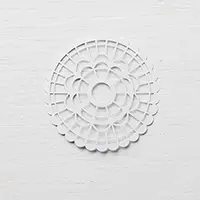
I made today’s card using the Warm Hearted stamp set, the Swirls & Curls embossing folder, and the Nowfall Thinlits Dies. The Dies are part of the Snowflake Showcase collection that is only available through the end of November, or while supplies last. The white doily is actually a Colored Doily flipped over. And did you know you can heat emboss on vellum? Yes, you can! You just need to be careful not to overheat it, as it can burn (or even bubble) before card stock.The Warm Hearted stamp set has large sentiments for all the Autumn and Winter holidays:

Warm Hearted Stamp Set © Stampin' Up! #stampcandy

Warm Hearted Stamp Set © Stampin’ Up!


Here’s what I made:

Stampin' Up! Warm Hearted Hostess stamp set handmade Christmas card by Candy Ford of Stamp Candy


Stampin' Up! Warm Hearted Hostess stamp set handmade Christmas card by Candy Ford of Stamp Candy


Stampin' Up! Warm Hearted Hostess stamp set handmade Christmas card by Candy Ford of Stamp Candy

Here’s what I did:

Cut and scored with my Stampin’ Trimmer:

  • Whisper White Thick card stock (CS) cut to 4-1/4″ x 11″ , then scored in half at 5-1/2″
  • Crumb Cake CS cut to 4″ x 5-1/4″
  • Vellum CS cut to 1-1/4″ x 6″

Stamped with the Warm Hearted stamp set:

  • sentiment in Versamark ink onto the Vellum strip, then heat embossed in copper
  • NOTE: When stamping onto a slick surface, like Vellum, using the Stamparatus keeps the stamp from slipping and smearing the ink.

Die cut using the Snowfall Thinlits:

  • large snowflake from a scrap of copper glimmer paper

Embossed using the Swirls & Curls embossing folder:

  • Crumb Cake CS layer

Assembled the card:

  • burnished the fold in the card base with a Bone Folder
  • copper snowflake glued onto the Crumb Cake CS layer
  • colored doily glued over the snowflake – I use glue because it gets down into the glitter to adhere.
  • ends of vellum strip wrapped around to the back of the Crumb Cake CS layer and adhered on the back using Snail or Tear & Tape
  • Crumb Cake CS layer glued onto the front of the card base


Here are today’s colors:

You can click on each one to see all the products that come in that color!


Here’s what I used:

Click on these images for more details and to purchase.

Price: $110.00


Here’s the beautiful Snowflake Showcase!

It’s available only in November, so get yours before it’s gone!


This stamp set can be used all year long!

And this stamp set can be used every winter. 


You get 20 dies in this set! 20!!! And they go with both stamp sets, so they can be used all year long.

Snowfall Thinlits © Stampin’ Up!

Look at these adorable embellishments! They’re flat so they’re great for cards. I even made a pair of earrings!

Snowflake Trinkets © Stampin’ Up!

Click on the images below to see more details and to purchase the Snowflake Showcase items:


The White Velveteen Paper mentioned in the video is sold out and no longer available. 


 Here’s even more cool stuff you should check out:

Thanks for stopping by today, and Sweet Stamping!


Jingle All The Way with the Christmas Traditions Punch Box

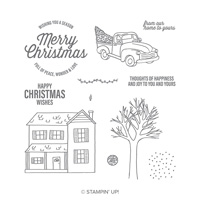
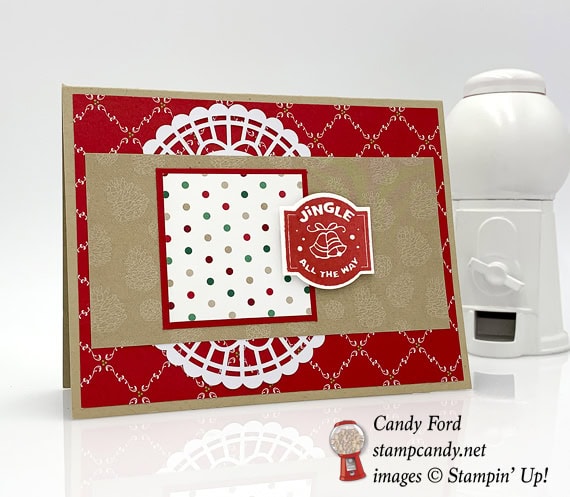
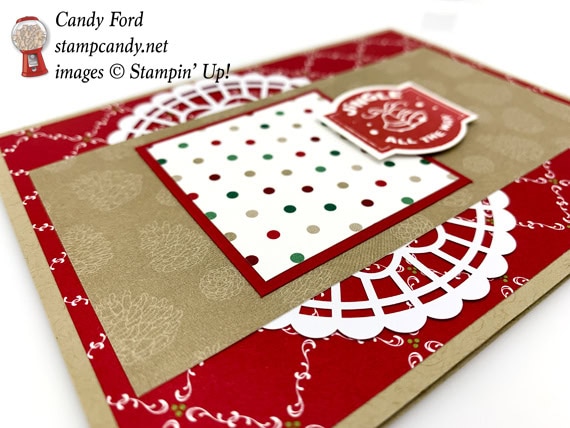
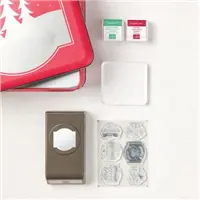
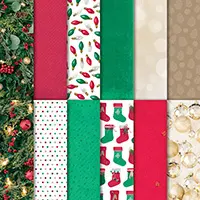
Today I’m sharing another card made using the Christmas Traditions Punch Box. I also used Under the Mistletoe and All is Bright Designer Series Papers and a Pearlized Doily

But first, I have to remind you that today is the first day of Stampin’ Up!’s Online Extravaganza! Today and tomorrow, Paper and Embellishments from the Annual Catalog are on sale! CLICK HERE to see all the sale items!

And be sure to check back because Nov. 25-26 stamps and kits will be on sale, and Nov. 27-28 tooks and ink will be on sale! Yep, Online Extravaganza lasts 6 days!

PLUS I’m giving double Gumball Rewards all six days! And you can combine orders placed Nov. 23-28 to earn Gumballs.

Online Extravaganza #stampcandy


Here’s what I made:

Stampin Up All Is Bright Under the Mistletoe DSP handmade Christmas card by Candy Ford of Stamp Candy


Stampin Up All Is Bright Under the Mistletoe DSP handmade Christmas card by Candy Ford of Stamp Candy


Here’s what I did:

Cut and scored with my Stampin’ Trimmer:

  • Crumb Cake card stock (CS) cut to 5-1/2″ x 8-1/2″, then scored in half at 4-1/4″
  • Under the Mistletoe Designer Series Paper (DSP) cut to 5-1/4″ x 4″ (red background)
  • All is Bright DSP cut to 5″ x 2-1/2″ (Crumb Cake pinecones)
  • Real Red CS cut to 2-1/4″ x 2-1/4″
  • All in Bright DSP cut to 2″ x 2″ (dots)
  • whisper White CS cut to 5-1/4″ x 4″ for the inside of the card base
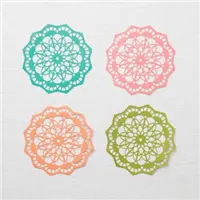
  • Pearlized Doily cut in half

Stamped with the Christmas Traditions stamp set:

  • sentiment in Real Red ink onto a scrap of Whisper White Thick CS

Cut using the Christmas Traditions Punch:

  • stamped sentiment

Assembled the card:

  • burnished the fold in the card base with a Bone Folder
  • large red DSP layer glued onto the front of the card base
  • doily halves glued onto the red DSP layer
  • pinecone DSP layer glued onto the red DSP layer
  • Real Red CS layer glued onto the pinecone DSP layer
  • dot DSP layer glued onto the Real Red CS layer
  • sentiment adhered using Stampin’ Dimensionals
  • Whisper White CS glued onto the inside of the card base


Here are today’s main colors:

You can click on each one to see all the products that come in that color!


Here’s what I used:

Click on these images for more details and to purchase.


Here’s the beautiful Snowflake Showcase!

It’s available only in November, so get yours before it’s gone!

The Happiness Surrounds stamp set can be used all year long!

Happiness Surrounds stamp set © Stampin’ Up!


And the Snow is Glistening stamp set can be used all winter long. 

Snow is Glistening stamp set © Stampin’ Up!

You get 20 dies in this set! 20!!! And they go with both stamp sets, so they can be used all year long.

Snowfall Thinlits © Stampin’ Up!


Look at these adorable embellishments! They’re flat so they’re great for cards. I even made a pair of earrings!

Snowflake Trinkets © Stampin’ Up!


Click on the images below to see more details and to purchase the Snowflake Showcase items:


The White Velveteen Paper mentioned in the video is sold out and no longer available. 


 Here’s even more cool stuff you should check out:

Thanks for stopping by today, and Sweet Stamping!


Super Simple Pillow Box Gift

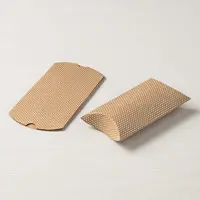
Happy Thanksgiving! Today I’m sharing with you a super duper quick and simple project. It has three pieces: a pillow box, a doily, and a piece of ribbon. That’s it! No stamping. No adhesive. The ribbon is the only thing you even need to cut. You can certainly dress it up all you want to, but when you need something in a hurry, this is the ticket. 

Here’s what I made:

Stampin' Up! Kraft Pillow box with Pearlized Doily and Poppy Parade textured ribbon by Candy Ford of Stamp Candy

Stampin' Up! Kraft Pillow box with Pearlized Doily and Poppy Parade textured ribbon by Candy Ford of Stamp Candy

Stampin' Up! Kraft Pillow box with Pearlized Doily and Poppy Parade textured ribbon by Candy Ford of Stamp Candy


Here’s what I did:

  • Fold in one end of a pillow box.
  • Fill it with treats or a small gift and fold in the other end.
  • Wrap a piece of ribbon around the box and tie it in a knot on the front.
  • Slip a Pearlized Doily over the ends of the ribbon and over the knot, which will hold it in place.
  • Done!


Here are today’s colors:

You can click on each one to see all the products that come in that color!

(The boxes are kraft, but Crumb Cake is pretty close.)


Here’s what I used:

Click on these images for more details and to purchase.


Here’s the beautiful Snowflake Showcase!

It’s available only in November, or while supplies last, so get yours before it’s gone!


This stamp set can be used all year long!

And this stamp set can be used every winter. 


You get 20 dies in this set! 20!!! And they go with both stamp sets, so they can be used all year long.

Snowfall Thinlits © Stampin’ Up!

Look at these adorable embellishments! They’re flat so they’re great for cards. I even made a pair of earrings!

Snowflake Trinkets © Stampin’ Up!

Click on the images below to see more details and to purchase the Snowflake Showcase items:


The White Velveteen Paper mentioned in the video is sold out and no longer available. 


 Here’s even more cool stuff you should check out:

Thanks for stopping by today, and Sweet Stamping!