Jul 31, 2016 | Cards, Christmas, Classes, Gallery, Holiday |

Today I’m sharing another project from my Christmas in July class. I used a design from the Serene Scenery Designer Series Paper Stack that you might not think of as Christmasy at first, but it’s all in how you use it. You can see a more summery card I made with this same designer paper here.
Here’s how I did it.
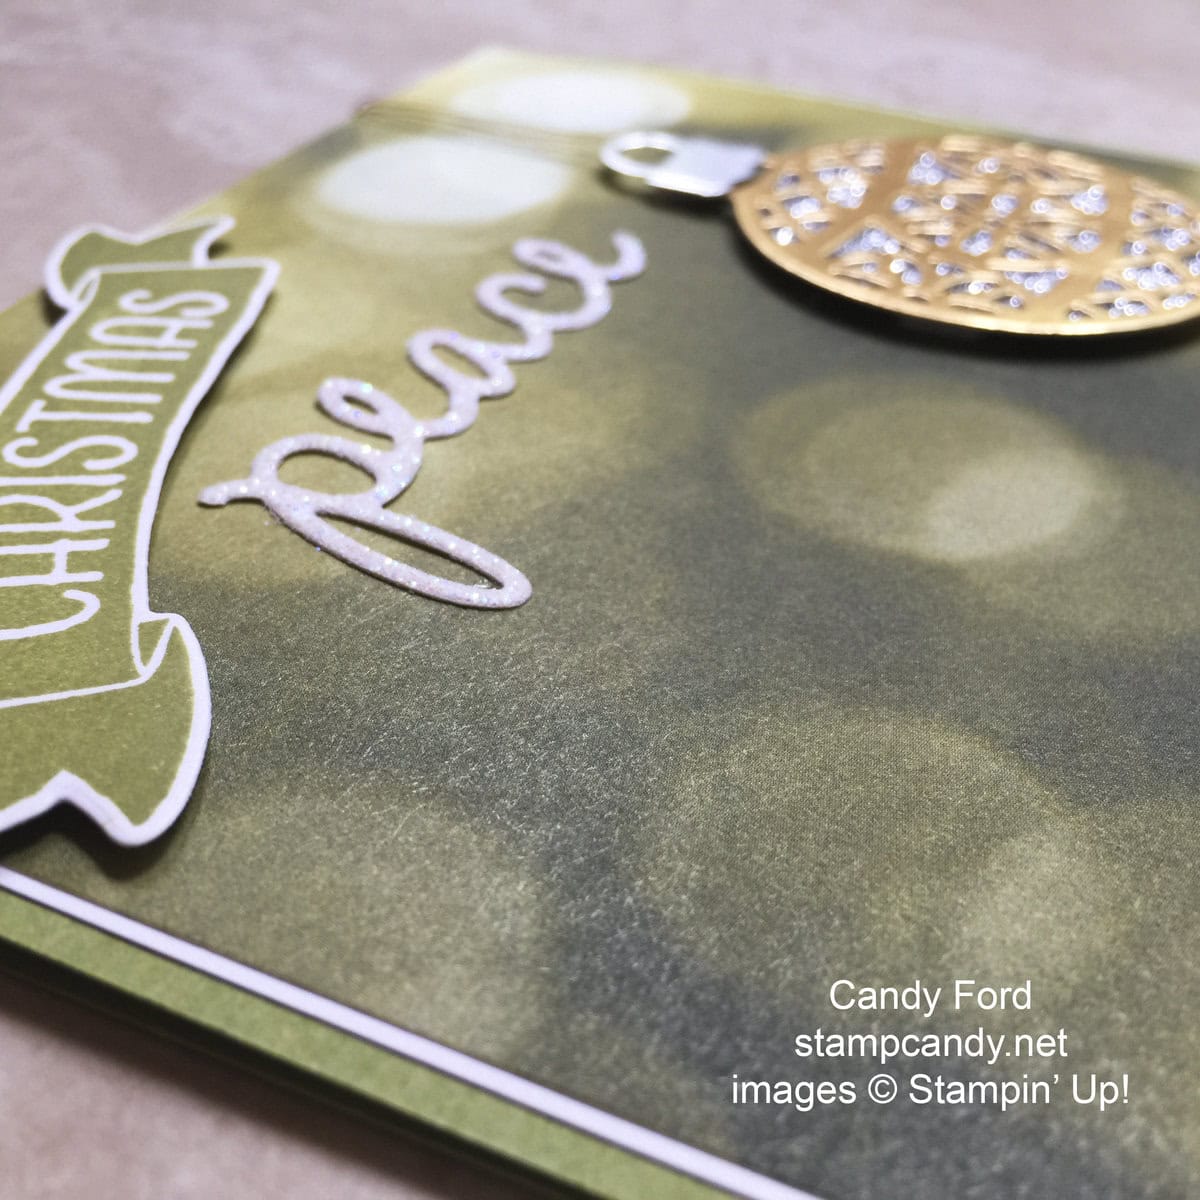
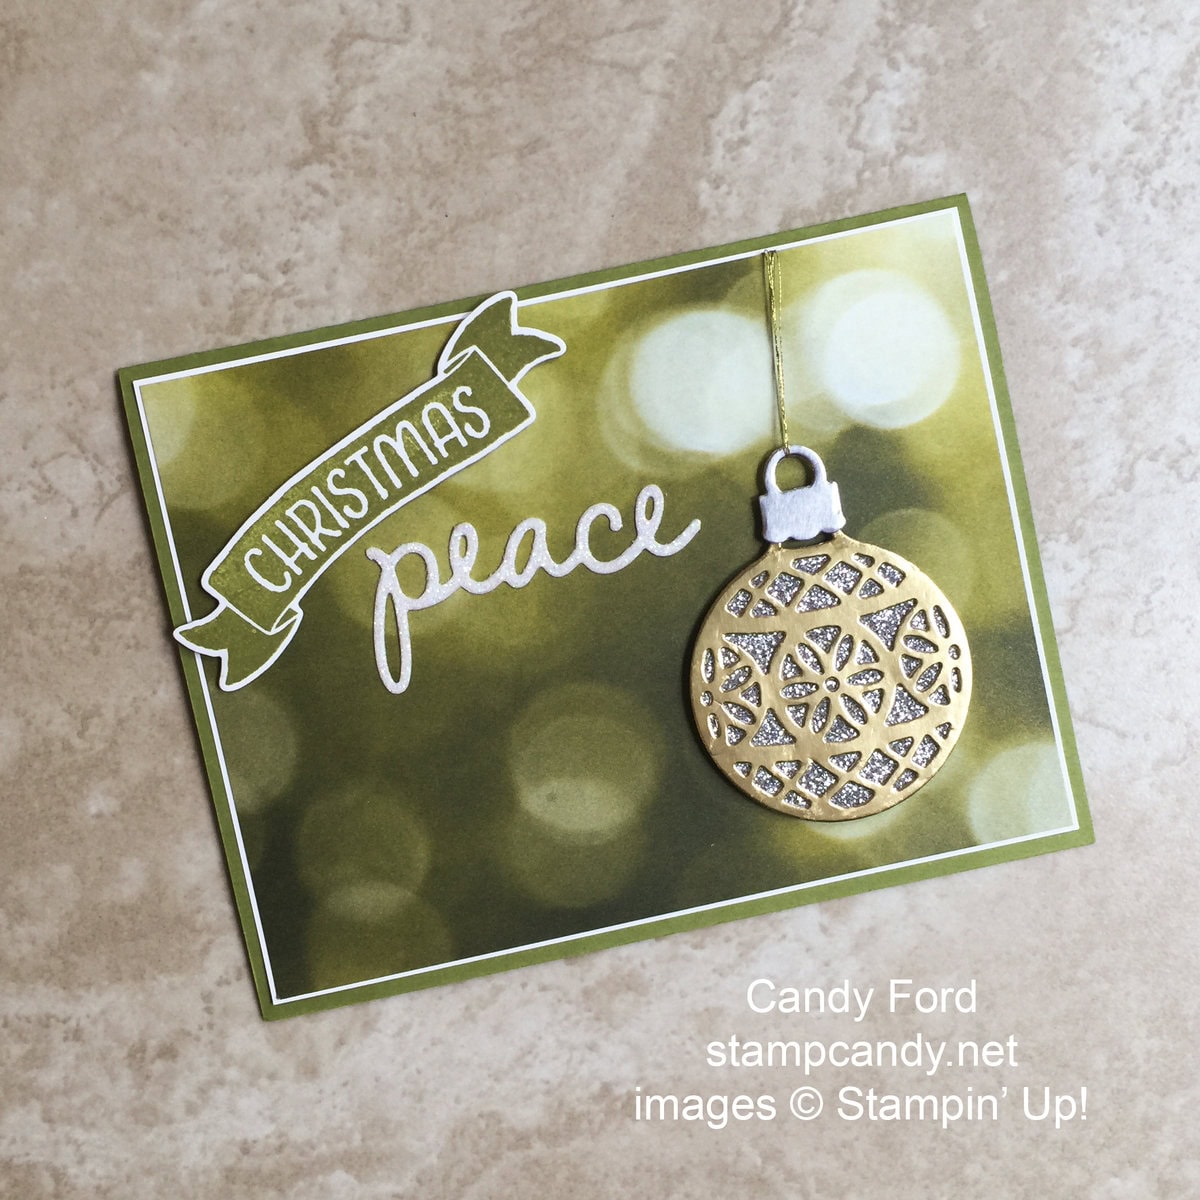
The card base is Old Olive card stock with a Whisper White card stock layer.
I stamped the first part of the sentiment, from the Time of Year stamp set, in Old Olive ink onto Whisper White card stock, then cut it out with the coordinating die from the Bunch of Banners Framelits. I adhered it to the DSP with Stampin’ Dimensionals.
I cut the second part of the sentiment from Dazzling Diamonds Glimmer Paper with a die from the Christmas Greeting Thinlits. I glued it to the DSP layer.
I used the Delicate Ornaments Thinlits to cut the lacy ball from a Gold Foil Sheet and the ornament top from a Silver Foil Sheet. I used the 1-3/4″ Circle Punch to cut a piece of Silver Glimmer Paper, and glued the gold piece to the front of it. I used Fast Fuse to adhere the silver top to the ornament. I attached it to the DSP layer with Stampin’ Dimensionals.
I ran a double piece of Gold Metallic Thread through the ornament top and over the top of the DSP, then taped it to the back of the DSP with Fast Fuse.
I then glued the DSP layer to the card.

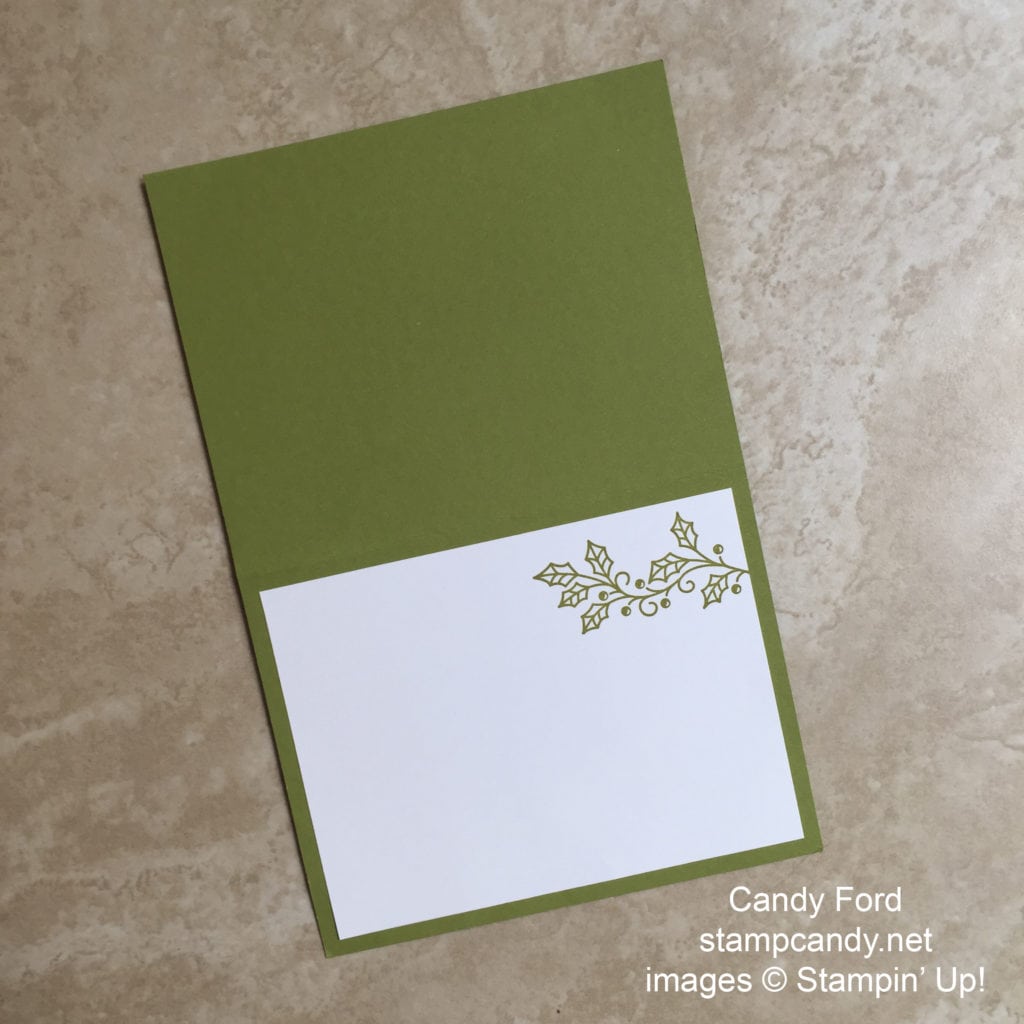
For the card’s interior, I stamped an image from the Embellished Ornaments stamp set in Old Olive ink onto a piece of Whisper White card stock, then glued it to the card.
Here’s what I used:

TODAY IS THE LAST DAY TO TAKE ADVANTAGE OF THIS PROMOTION!
Click on image to shop now!

Thanks for stopping by today, and Sweet Stamping!

Jul 30, 2016 | Cards, Christmas, Classes, Gallery, Holiday |
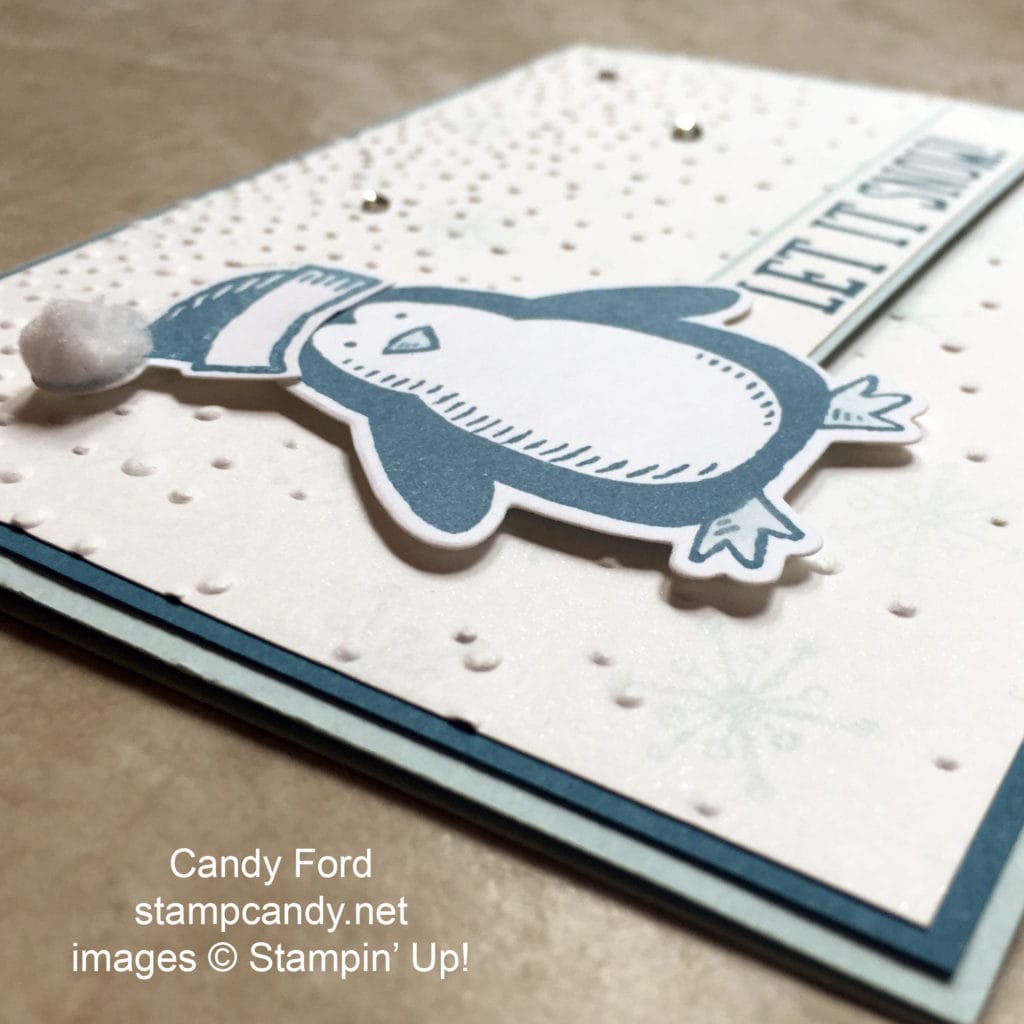
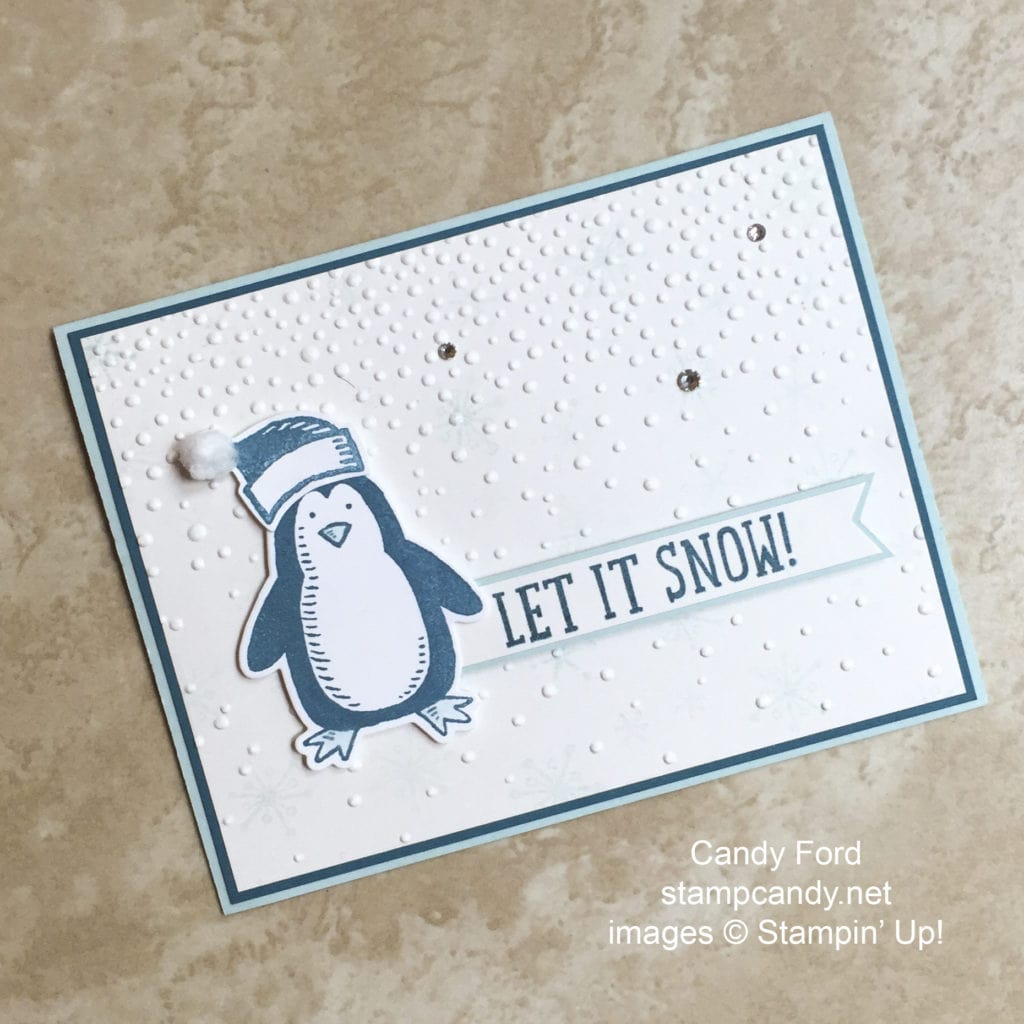
Today I’m sharing a project from my Christmas in July class. This cute little guy is so cold he’s blue. But I think he likes it that way. It’s a cute card that actually could be used for any winter occasion.
Here’s how I did it.
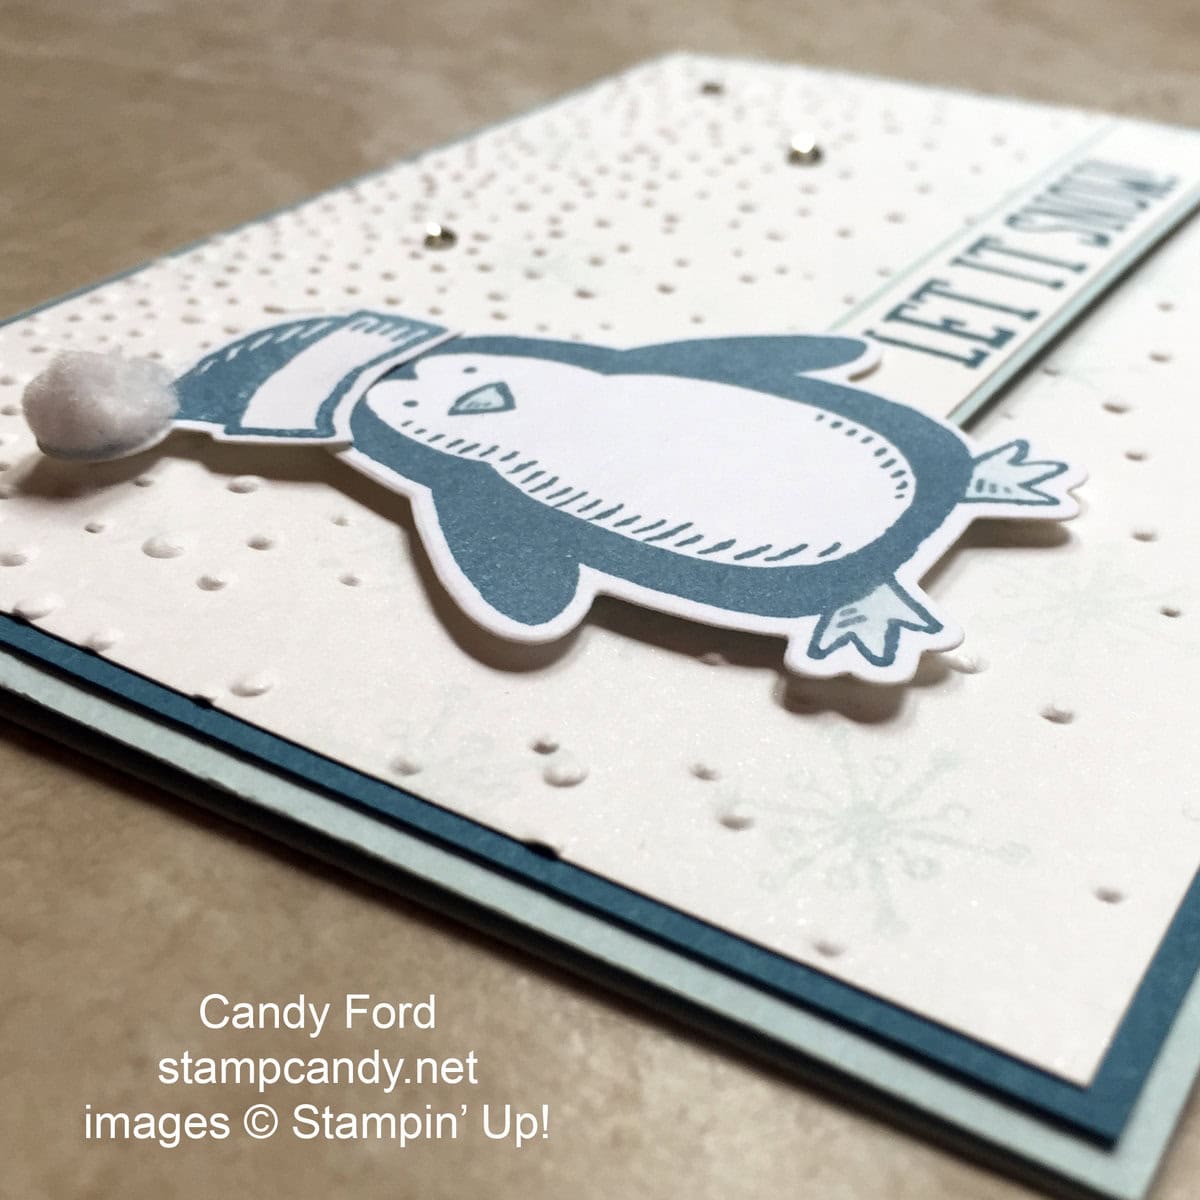
The card base is Soft Sky card stock with an Island Indigo layer on top. All the stamped images are from the Snow Place stamp set.
I stamped the Whisper White layer with snowflakes in Soft Sky. They’re subtle and don’t show well in this photo, I’m afraid. I ran it through the Big Shot using the Softly Falling embossing folder, then glued it to the card front.
I stamped the penguin and hat in Island Indigo ink onto another piece of Whisper White card stock, and cut them out with the coordinating dies from the Snow Friends Framelits. I used a Blender Pen to spread the ink of his beak and feet – it’s a very subtle way to color them in.
I stamped the sentiment in Island Indigo onto a strip of Whisper White card stock, and notched the right end – you can do this with the Banner Triple Punch or with Paper Snips. I matted the sentiment on a slightly wider strip of Soft Sky card stock and cut the end to match the white piece. I attached this to the card front with Stampin’ Dimensionals.
I glued a pompom from the Whisper White Mini Pompom Trim to the hat as shown, then glued the hat to the penguin’s head. I attached this whole piece to the card with Stampin’ Dimensionals, covering the left end of the sentiment.
The final touch is three Rhinestone Basic Jewels, 2 small and 1 medium size, on the snowy background.
Here’s what I used:
TOMORROW IS THE LAST DAY TO TAKE ADVANTAGE OF THIS PROMOTION!
Click on image to shop now!
Thanks for stopping by today, and Sweet Stamping!
Jul 20, 2016 | Blog Hop, Cards, Christmas, Gallery, Holiday, New Products |

Welcome to InKing Royalty’s July Blog Hop! Can you believe we are half-way to Christmas? It might seem a bit early to start looking at wintry scenes and holiday goodies, but there are so many great products in Stampin’ Up!’s 2016 Annual Catalog that we want to share before the Holiday Catalog is revealed next month. Today’s Blog Hop is filled with inspiring projects that feature each artist’s take on Christmas in July. After you read my post, I hope you’ll hop over to the next person on the list at the base of this post.
When tasked with making a Christmas card for this blog hop, I found it very difficult. Not because I couldn’t get into the Christmas spirit due to the sweltering summer heat, but because there were so many options, I had a hard time deciding what to do. I went to my online store, did a search for “Christmas,” and got 52 results!
After much deliberation, I decided to use the Festive Flower Builder Punch along with the new This Christmas Specialty Designer Series Paper to create a card in Garden Green, Cherry Cobbler, and Very Vanilla.

Here’s what I came up with:
(The background of this photo is Very Vanilla, not Whisper White in bad lighting.)

Here’s how I did it:
The card base is Garden Green card stock. There’s a layer of the DSP glued to the base, and a smaller layer of the DSP glued to that.
For the poinsettia, I stamped the three sizes of leaf/petal veins from the Reason for the Season stamp set in Cherry Cobbler ink onto Cherry Cobbler card stock – 8 of the largest, 8 of the middle size, and 3 of the small doubles. Then I stamped three of the largest ones in Garden Green ink onto Garden Green card stock. I used the Festive Flower Builder Punch to cut out all the stamped pieces, plus 3 flower centers from Crushed Curry card stock.
I used my Bone Folder to curl all the punched pieces (except the Crushed Curry centers) so the ends curved down. I punched a 1″ circle of Cherry Cobbler card stock and started gluing the inner tips of the pieces onto it, beginning with the largest petals and building up to the smallest on top. I glued the 3 leaves to the bottom of the flower and the 3 centers to the top.
I attached Stampin’ Dimensionals to the underside of the petals to keep them from getting flattened in the envelope. Then I put Fast Fuse on the 1″ circle on the bottom of the flower, and stuck it to a large gold doily from the Metallic Foil Doilies. I used Fast Fuse to attach the whole thing to the card front.
On the card’s interior, I glued a piece of Very Vanilla card stock for a handwritten note. You can also add a stamped greeting, such as one of the three in the Reason for the Season stamp set – I would recommend using Cherry Cobbler ink.
I used another piece of the DSP to create a custom envelope using the Envelope Punch Board.
I hope you’ll hop along to the next stop on the blog hop, Linda Heller at Where the Rubber Hits the Road…. There’s lots of inspiration to be found in this group – and you don’t want to miss it!
If you get stuck during the Blog Hop, please use this line-up as a guide:
- Brian King at Stamp with Brian
- Candy Ford at Stamp Candy
- Linda Heller at Where the Rubber Hits the Road…
- Shawn de Oliveira at ShawnStamps
- Karen Browning at StampWithMeKZB
- Lory Robinson at The Robin’s Nest Designs
- Imogene Thomas at MomoMakes.com
- Lynn Kolcun at Avery’s Owlery
- Jennifer Spiller at Westside Paper Creations
- Becky Volpp at InkBlossom with Becky
- Natalie Bradley at NatalieBradley.com
Here’s what I used today:
Thanks for hopping along with us today, and Sweet Stamping!
Jan 2, 2016 | Blog Candy, Challenges, Christmas, CYCI |

A couple weeks ago, CanYouCaseIt.com posted our 100th challenge! To celebrate, and to thank all of you for following along, the design team had a Blog Hop with Blog Candy on each of our blogs. It was a two week challenge. To see my post, click here.
Here is what I offered as my Blog Candy: Versatile Christmas stamp set, Winter Wonderland Designer Vellum Stack, Metallic Silver Baker’s Twine, Home For Christmas Enamel Dots, and Season of Cheer Washi Tape. That’s a $45 value! Most of these items will retire in two days, so if you don’t win today, click on the images at the bottom of this post to get yours while you can!

The lucky winner of this Blog Candy, and belated Christmas gift, is Julie “Jules2Jems” Curtis !!! Julie’s comment: “This is a great card for a guy!”
Congratulations, Julie! Please email your mailing address to me at candy@stampcandy.net, and I’ll get these goodies right out to you!
Here’s where everyone can get these products:
Check back tomorrow for the first CYCI challenge of 2016!
If you’re in the Atlanta area tomorrow, be sure to stop by my Open House! Details are in yesterday’s post here.
Thanks for stopping by today, and Sweet Stamping!

Dec 27, 2015 | Cards, Christmas, Gifts, Holiday, Paper Pumpkin |
Prepaid Paper Pumpkin subscriptions make fantastic gifts. I got several of my family members subscriptions last year, and I gave them their first kit all wrapped up. This year I gave them subscription renewals, so I made these cards to let them know to expect more kits in the coming months.
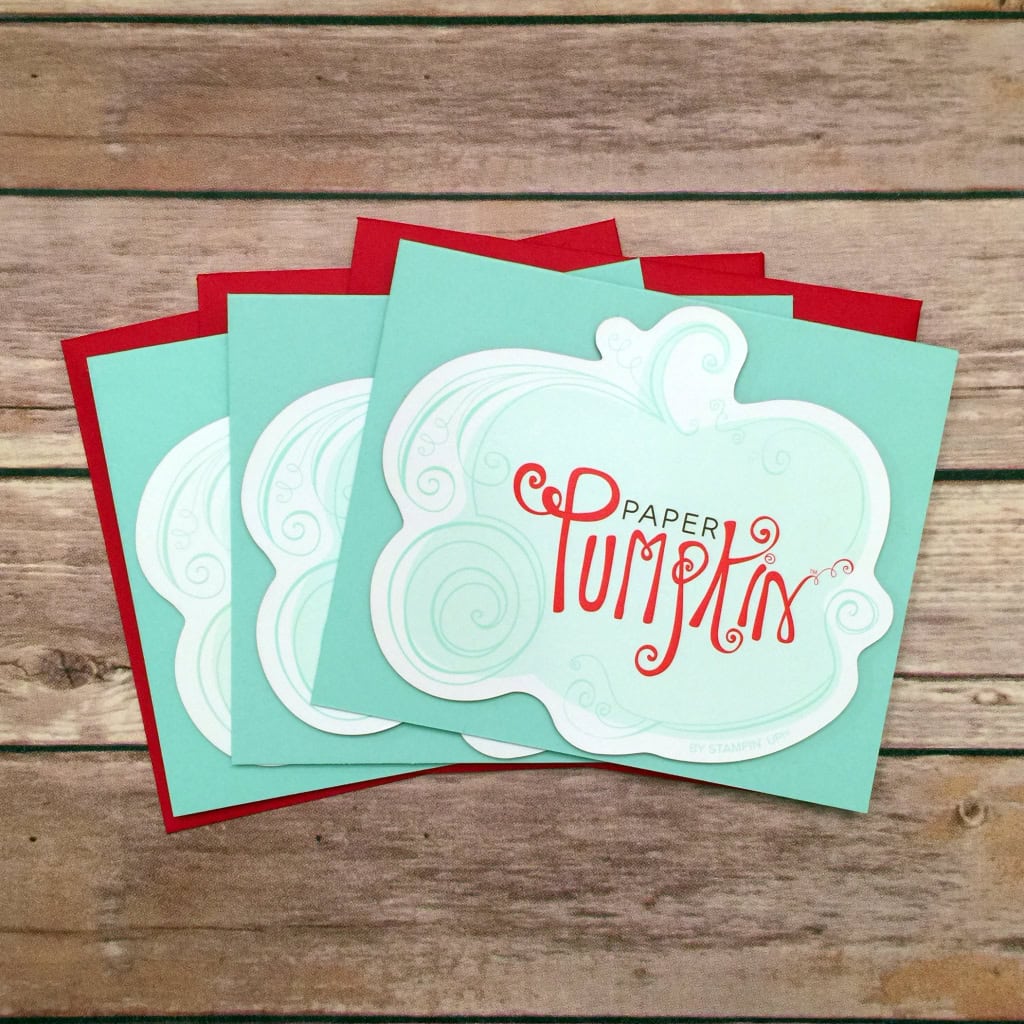
I’ve been saving the pumpkin cards that come in each of my kits. I used Stampin’ Dimensionals to attach them to the fronts of 5″ x 6″ Pool Party card stock card bases. I wrote a personal note inside each one with my Real Red Stampin’ Write Marker.
I used my Envelope Punch Board to make the perfect size envelopes out of Real Red Envelope Paper.
I gave each card in a gift bag with some new stamping tools.
I love sharing my love of stamping, and Paper Pumpkin is such an easy way to do that. Consider giving subscriptions to your family and friends for birthdays, Christmas, or any other occasion.
Here’s what I used:
To see my most pinned project this month, click here.
Thanks or stopping by today, and Sweet Stamping!

Dec 26, 2015 | Bags, Christmas, Club, Food, Gifts, Holiday |

Who doesn’t love a cup of hot cocoa when the weather’s cold? Today’s project is a quick gift idea for anyone who needs warming up. It was also one of our December Stamp Club projects.
We began by randomly stamping the cups from the Cup of Cheer stamp set in Crumb Cake on a Kraft Tag a Bag Gift Bag. We then stamped the snowflakes from the Project Life Hello December 2015 stamp set in Real Red between the cups. This is one of my favorite snowflake stamps. It’s so delicate.
We stamped the same cup image in Chocolate Chip and the same snowflakes in Real Red on a 2″ strip of Very Vanilla card stock. Then we used the Banner Trip Punch to notch the end. We cut a 1″ strip of Chocolate Chip card stock and notched the end of it as well. We glued the two banners together, overlapping.
After putting a packet of hot cocoa mix inside the bag, we folded over the top, tucked in the tops of the banners, and stapled it shut. You can also adhere the banners to the bag, if you’d like to have more than just the staple holding them on.
We tied a length of Real Red 1/8″ Striped Ribbon around the bag and tied on a candy cane. I found these hot cocoa flavored candy canes at Target.

Here’s what we used:
Thanks for stopping by today, and Sweet Stamping!