Dec 25, 2015 | Cards, Christmas, Holiday, New Products, Occasions, Tags |

Today I’m sharing two projects.
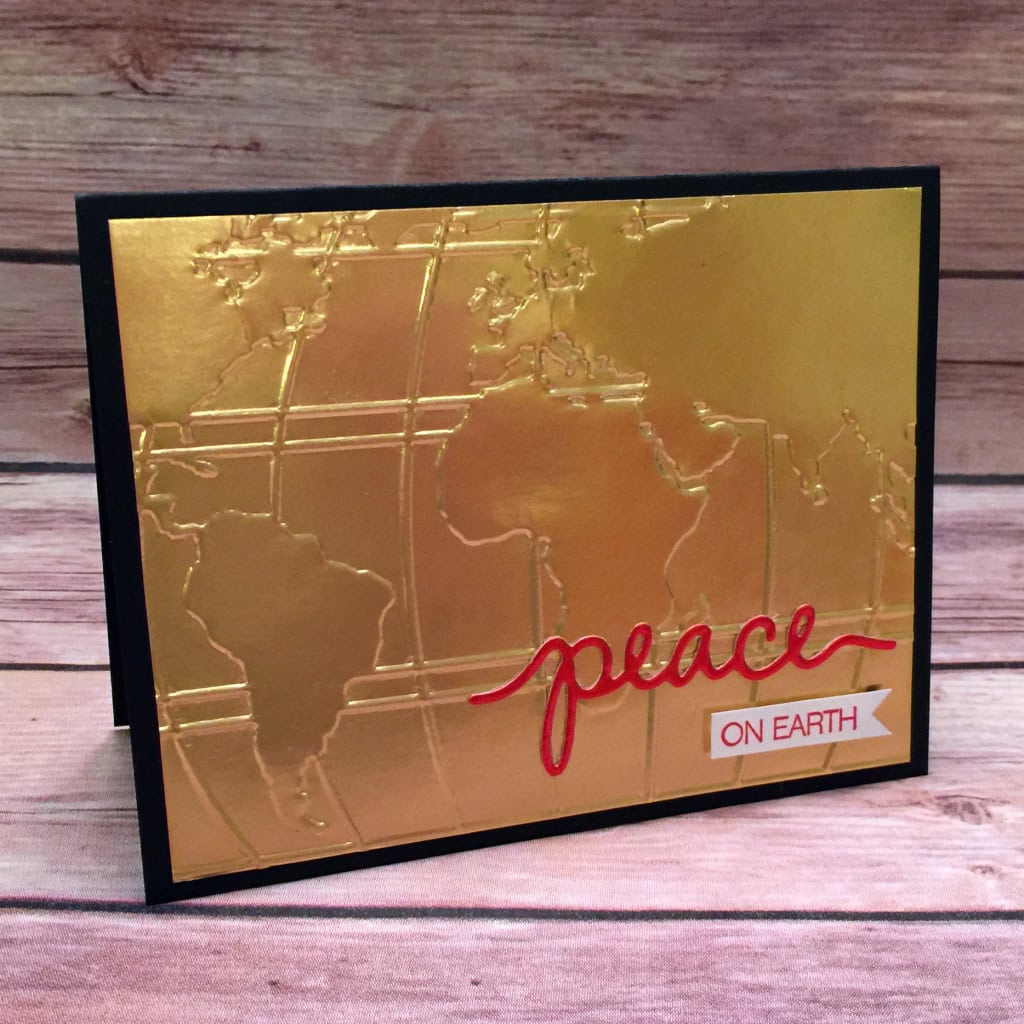
The first is a card made with current items and one new Occasions item sneak peek. This was one of our Make & Takes for the December Candy Hearts team meeting.
The card base is Basic Black card stock. For the inside, you can add a Whisper White card stock panel, or you can write directly on the black with a White Signo Gel Pen.
We embossed a piece of Gold Foil Sheet with the new World Traveler Textured Impressions Embossing Folder for the card front.
We cut peace from a Red Foil Sheet with the Christmas Greetings Thinlits Dies and glued it onto the card front.
We stamped ON EARTH from the Holly Jolly Greetings stamps set in Real Red on Whisper White. We cut it into a strip with scissors and used the 1″ Square Punch to notch the end. Then we attached it to the card front with Stampin’ Dimentionals.
 Here’s what we used for the card:
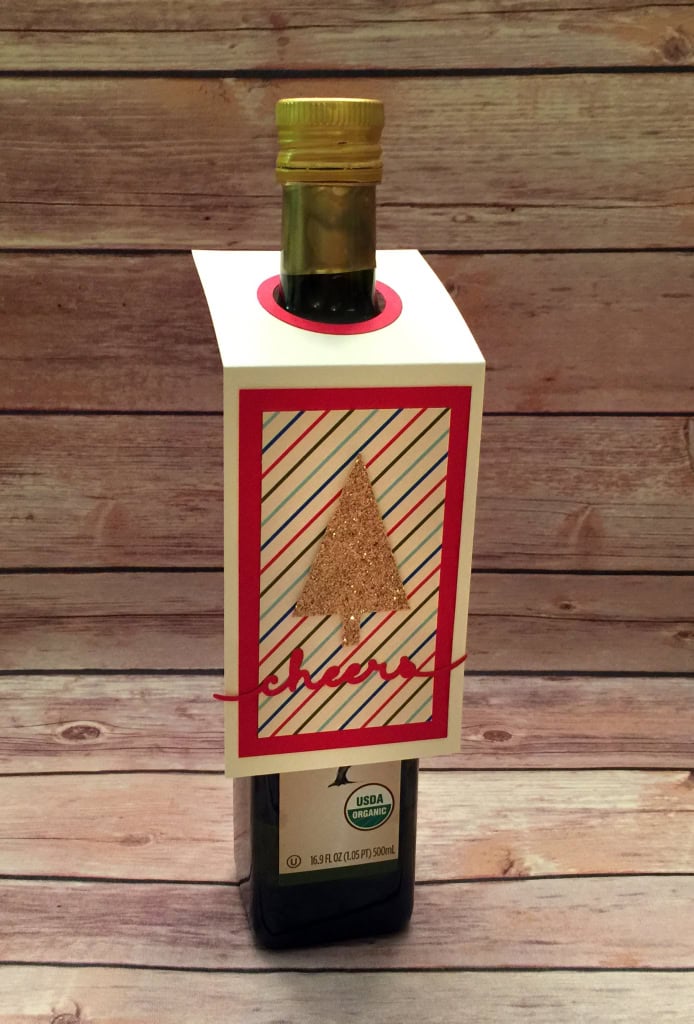
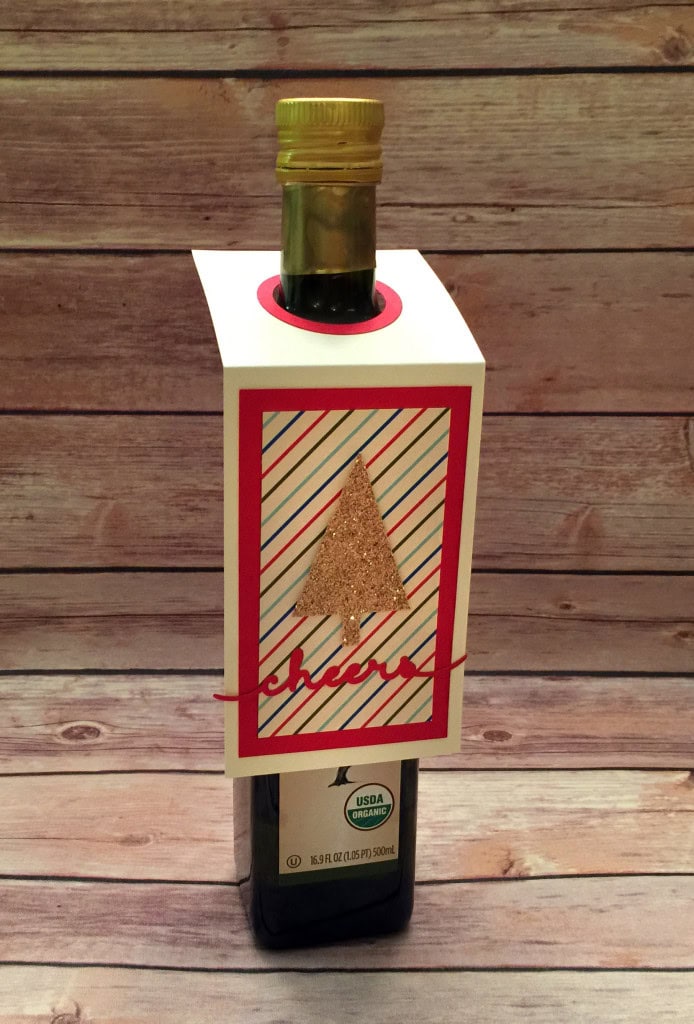
The second project is another last minute gift idea. A tag is a quick way to dress up a bottle of anything. This one is on a nice bottle of Olive Oil. I made it as one of the Make & Takes at the team meeting at Subway earlier this month.
The tag base is a piece of Whisper White card stock. Real Red card stock surrounds the hole and mats the piece of Home For Christmas Designer Series Paper. The word Cheers is also cut from Real Red card stock, with the Greetings Thinlits Dies.
The tree is a piece of Gold Glimmer Paper cut with the Tree Punch.
Super quick and easy!
Here’s what I used for the tag:
Thanks for stopping by today, and Merry Christmas!

Dec 24, 2015 | Cards, Christmas, Holiday, Swaps |
Happy Christmas Eve! Hubby and I are spending it with family. The ladies will go together for our annual Christmas pedicures, a tradition we started a few years ago. We’ll have a lovely home cooked dinner and spend some time together, then wake up tomorrow to see what Santa brought.
Here in Georgia, it’s usually too warm for snow. The forecast is for rain. But hey, I can watch movies of snowy Christmases and pretend, even though the snowflakes on today’s project may be the closest I get to the real stuff this year.
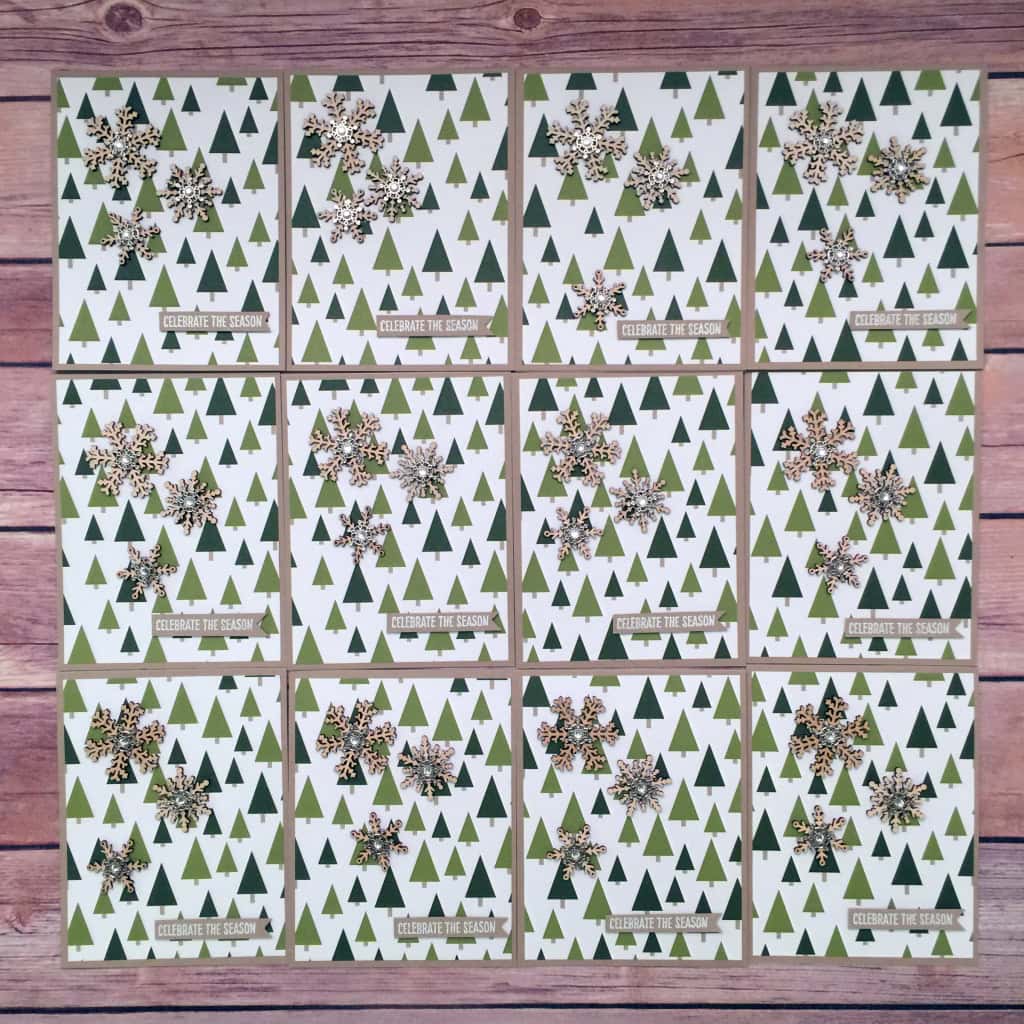
Today I’m sharing a card I designed for a card swap. I made twelve of these and mailed them to everyone in the swap. While I’m sending it during the Christmas season, you could use it anytime during the winter. Just change the sentiment.

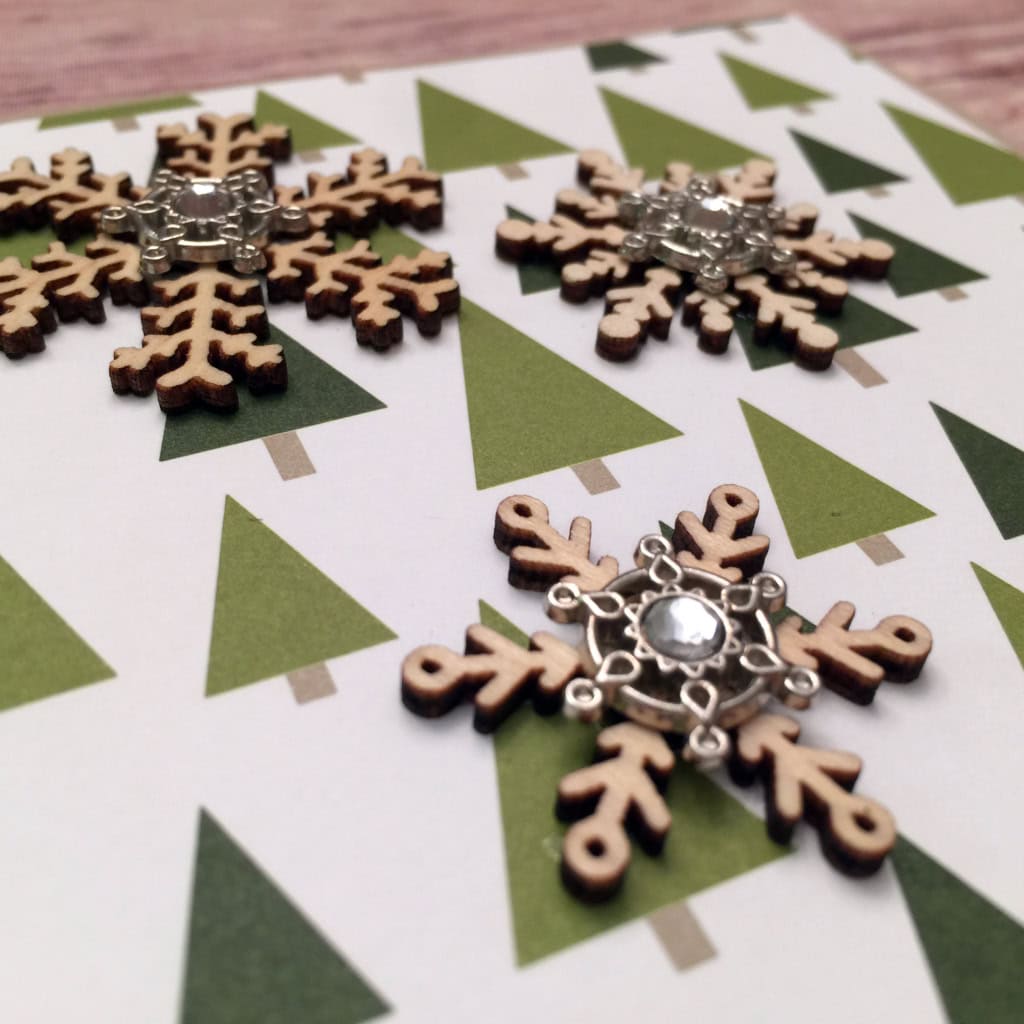
I glued a layer of Merry Moments Designer Series Paper on the Crumb Cake card base, then I glued on three Snowflake Elements and topped them with Snowflake Embellishments using Glue Dots.
I stamped the sentiment from the Happy Scenes stamp set in Craft White Ink on Crumb Cake card stock, then heat embossed it with White Stampin’ Emboss Powder. I cut it into a strip with my Craft Scissors and notched the end with he 1″ Square Punch. I attached it with Stampin’ Dimensionals.
Tip: To protect the embellishments, cut a 4-1/4″ x 5-1/2″ piece of card stock to insert in the envelope over the front of the card.
Here’s what I used:
Thanks for stopping by today, and Sweet Stamping!
Dec 23, 2015 | Bags, Christmas, Club, Gift Wrap, Holiday |

I loooooove the Mini Treat Bag Framelits Dies. These little bags are so versatile. You can put so many different things in them: cards, cookies, candies, small toys and gifts,… And since you can use any Designer Series Paper, they are perfect for any occasion.
This was one of the Make & Takes at our December Stamp Club meeting.
We started by using the Mini Treat Bag Framelits to cut the bag from Merry Moments DSP and assembling it with glue. We cut the bow from Real Red card stock using the bow die included in the set.
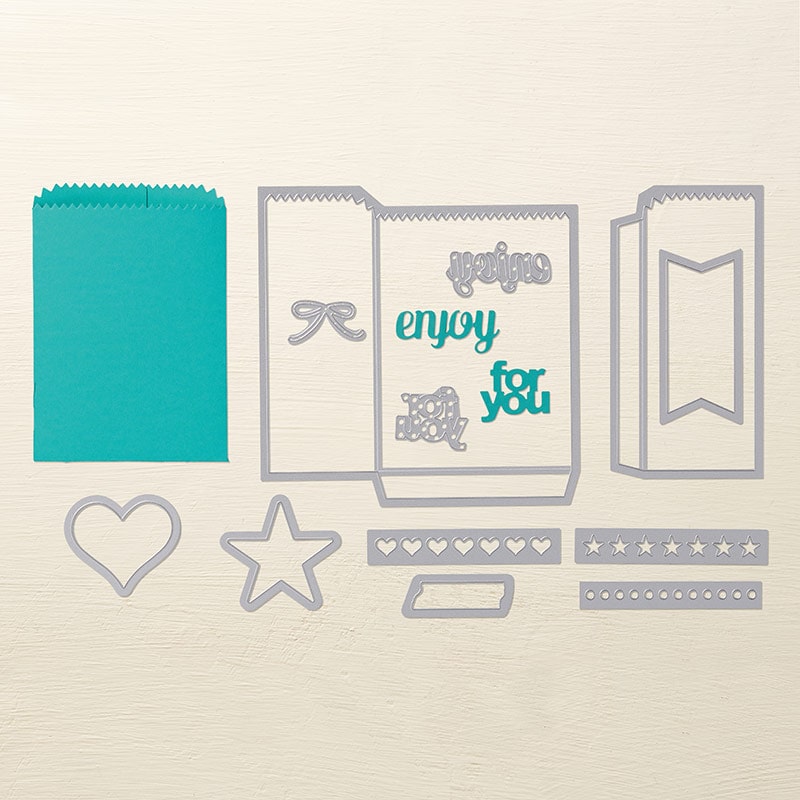
We used Stampin’ Write Markers in Real Red, Crumb Cake, and Mossy Meadow to color the stamp from the Cup of Cheer stamp set. We huffed to reactivate the ink, then stamped on Whisper White card stock. We cut it with the 2-1/2″ Circle Punch and adhered it to the bag.
We cut two leaves with the Leaflets Framelits Dies, then used the 1″ Circle Punch to cut around the edges so they would look like holly leaves. We drew veins on the leaves with the Mossy Meadow marker.
To make your own bag, click on these images to buy the products:
Thanks for stopping by today, and Sweet Stamping!
Dec 22, 2015 | Christmas, Gift Wrap, Gifts, Holiday |
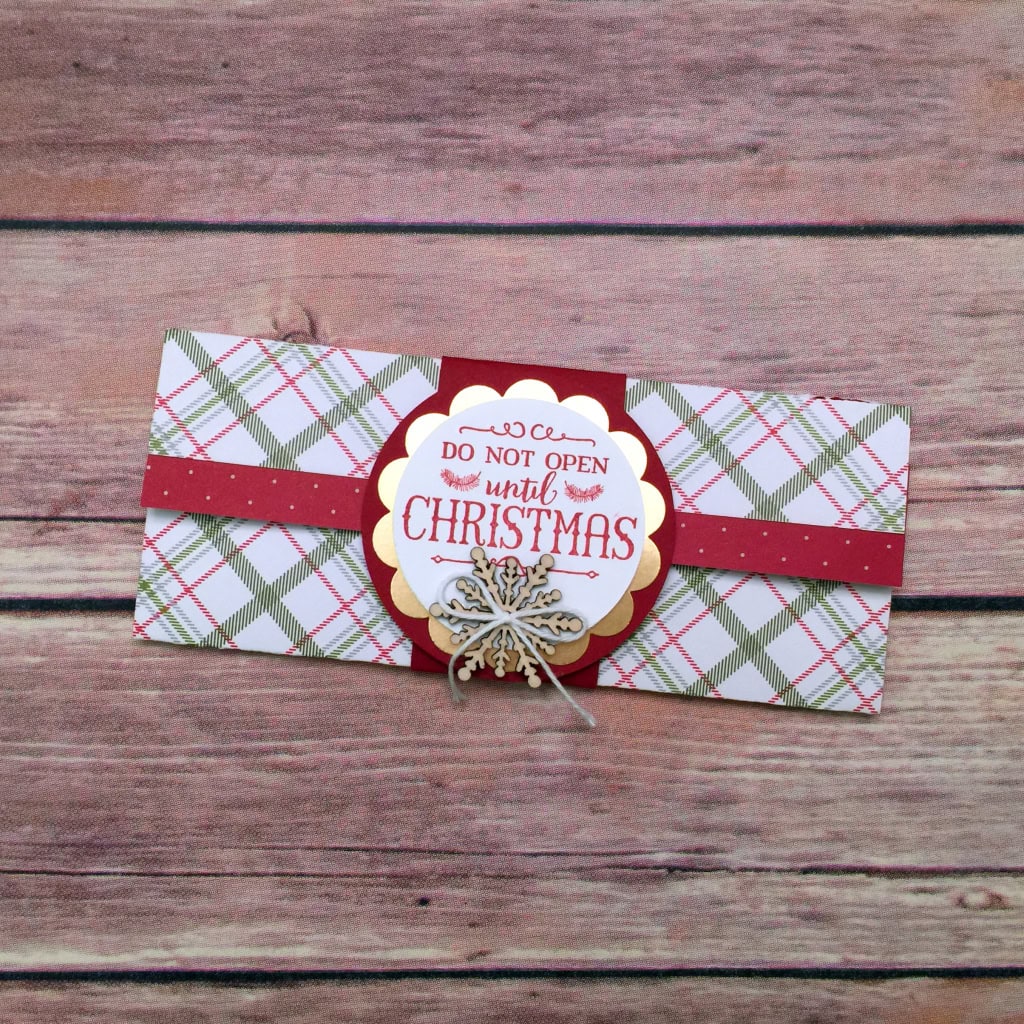
Gift cards are very popular gifts for any time of year, but we give even more during the holidays. Here is an easy gift card holder that anyone would appreciate receiving.
I started with a 6″ x 6″ piece of Merry Moments Designer Series Paper. I scored it at 1″ and at 3-1/2″. I folded it along the score lines, and adhered the sides to make an envelope.
I cut a another piece of the same paper 1″ x 6″ and adhered it to the underside of the flap, with about 1/2″ showing. Using a 1-1/4″ Circle Punch, I cut a finger notch in the inner flap.

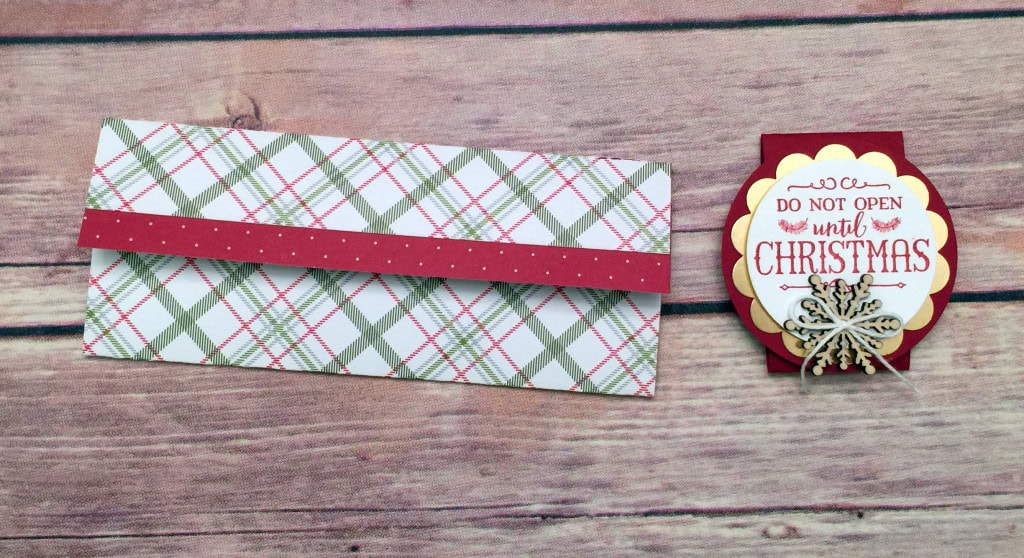
For the belly band, I cut a 1-1/2″ x 8-1/2″ strip of Cherry Cobbler card stock, wrapped it around the envelope, and glued the ends together. I made sure it wasn’t so tight that it’s difficult to slide on and off.
I stamped the sentiment from the Oh, What Fun stamp set on Whisper White card stock in Cherry Cobbler, then cut it out with the 2″ Circle Punch, with the wording toward the top of the circle.
I’ve used this stamp set a lot this holiday season. It coordinates with the Oh, What Fun Tag Project Kit, but is great by itself.
I cut a piece of Gold foil Sheet with he 2-3/8″ Scallop Circle Punch, and a piece of Cherry Cobbler card stock with the 2-1/2″ Circle Punch. I glued the gold piece to the Cherry Cobbler piece, then adhered the sentiment with Stampin’ Dimensionals. I glued the snowflake on then adhered the twine bow with a Glue Dot. I glued this whole piece to the belly band, covering the seam where the two ends overlap.
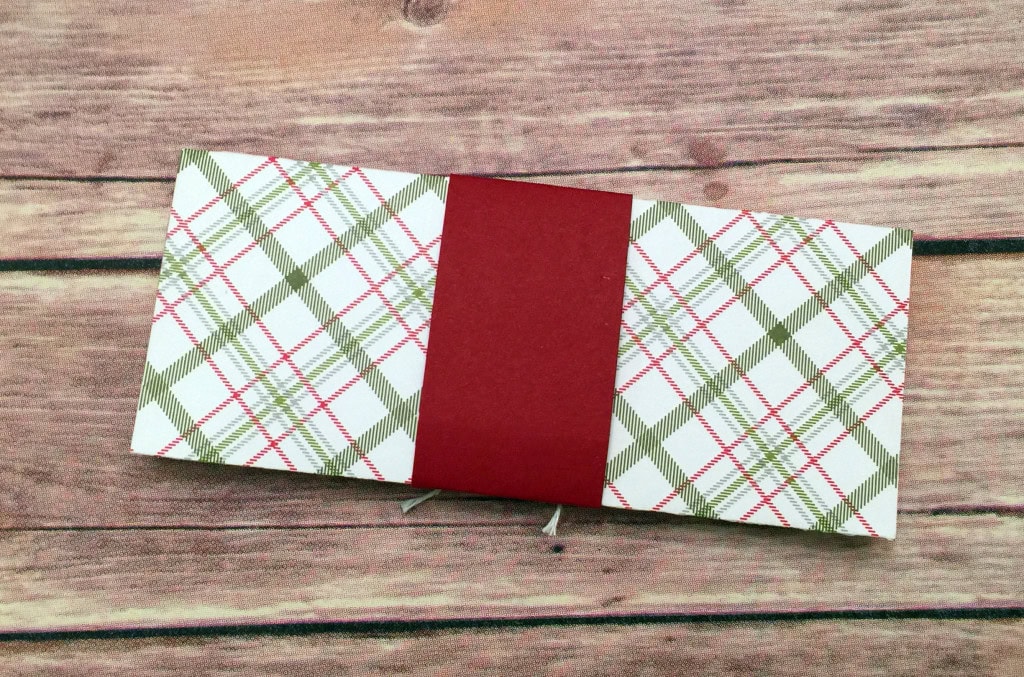
Here it is from the back.
Here’s what I used:
Thanks for stopping by today, and Sweet Stamping!
Dec 21, 2015 | Christmas, Gift Wrap, Holiday, New Year, Tags |
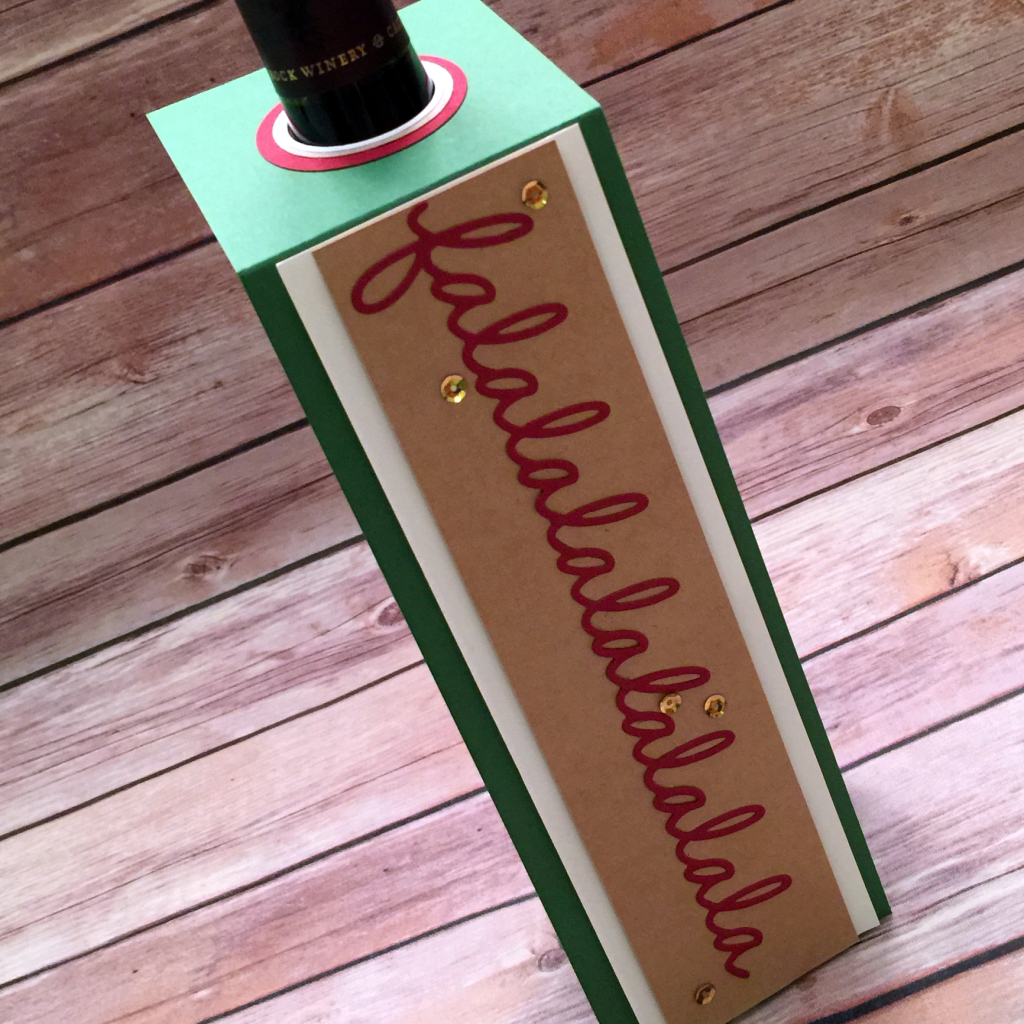
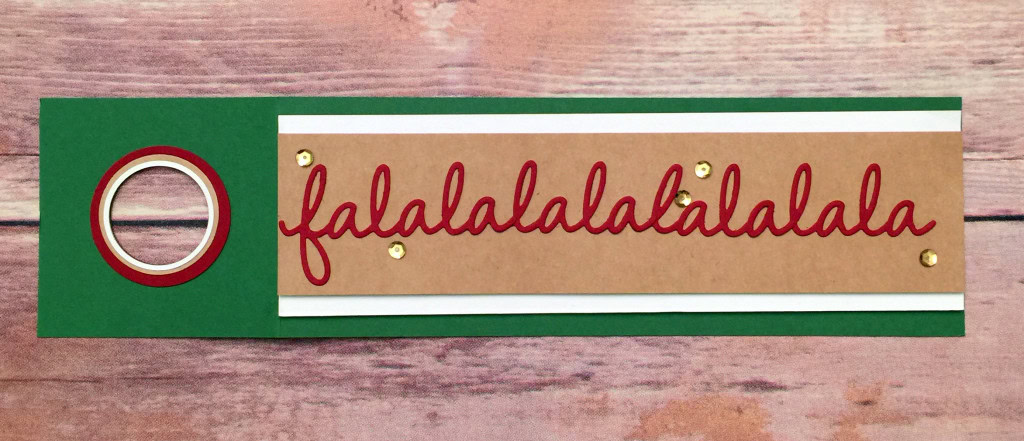
Do you need to decorate a bottle of wine, fancy olive oil, or bath product for a holiday gift? Bottle tags are a quick and easy way to do just that.

This one is made of Garden Green, Cherry Cobbler, Whisper White, and Kraft card stock.
I cut three rings with various sizes of Circle Punches for the top.
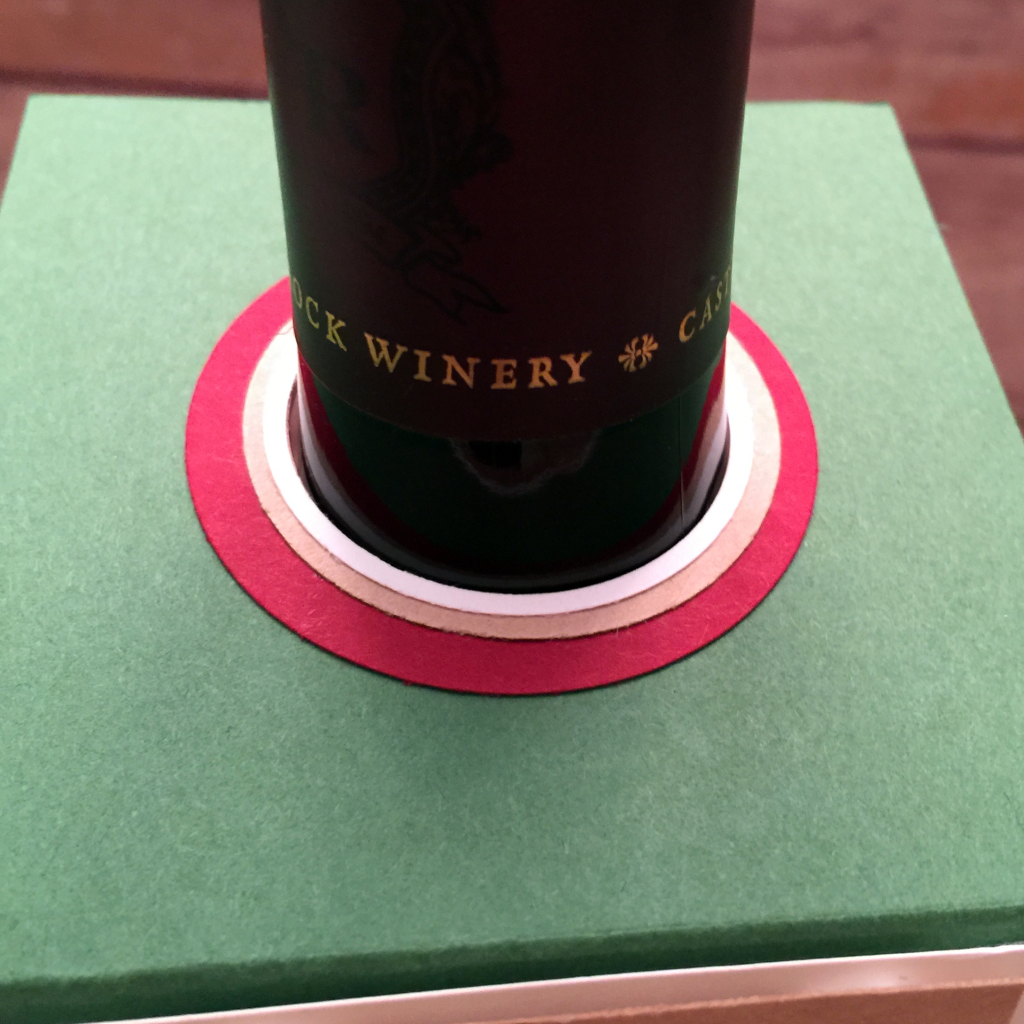
Be sure to cut the inner circle first, then cut the outer circle.

I used the Seasonal Frame Framelits Dies to cut out falala four times, then cut fa off of three of them. I then glued them together, overlapping the ends.

A few gold sequins added some sparkle.
Here’s what I used:
Thanks for stopping by today, and Sweet Stamping!
Dec 19, 2015 | Cards, Christmas, Holiday |

In October I went on a week long Caribbean crafting cruise with three friends, and we had a marvelous time. This is one of the cards I made on that cruise.

The card base is Whisper White Thick card stock, with a Pear Pizzazz layer, and a Rose Red layer embossed with the Stylish Stripes embossing folder.
I stamped the twig in Pear Pizzazz on Soft Sky card stock, then colored it with an Aqua Painter in Pear Pizzazz and Rose Red, then cut it with the Lots of Labels Framelits Dies. I poked a hole along the stem with the Paper Piercing tool.
For the ornament, I stamped the sentiment from the Happy Scenes stamp set on Whisper White card stock in Pear Pizzazz and Soft Sky, then I cut it with the 1″ Circle Punch. I poked a hole at the top with the Paper Piercing Tool.
I pulled apart a piece of Metallic Gold Baker’s Twine and used just the gold piece to hang the ornament.
Everything is glued together except the ornament which is raised with Stampin’ Dimentionals.
Here’s what I used:
Thanks for stopping by today, and Sweet Stamping!