Apr 28, 2017 | Boxes, Classes, Events, Gallery, New Products |
I do have a project to share with you today, a cute little outhouse (yep, that’s what I said) but first I want to tell you about my upcoming Stamp Camp. I’m very excited about it. You’ll have 8 hours with no kids, no pets, no job, no worries – just stamping and shopping with friends!
Stamp Camp
Saturday, June 3, 2017, 9am-5pm
Candy’s Stampin’ Studio in Atlanta, GA
Register here by May 20. Prepayment is necessary to make sure I have enough of everything on hand. Space is limited so register soon. Also, the earlier you register, the more prize drawing tickets you will receive at the door!
Click here for all the details.
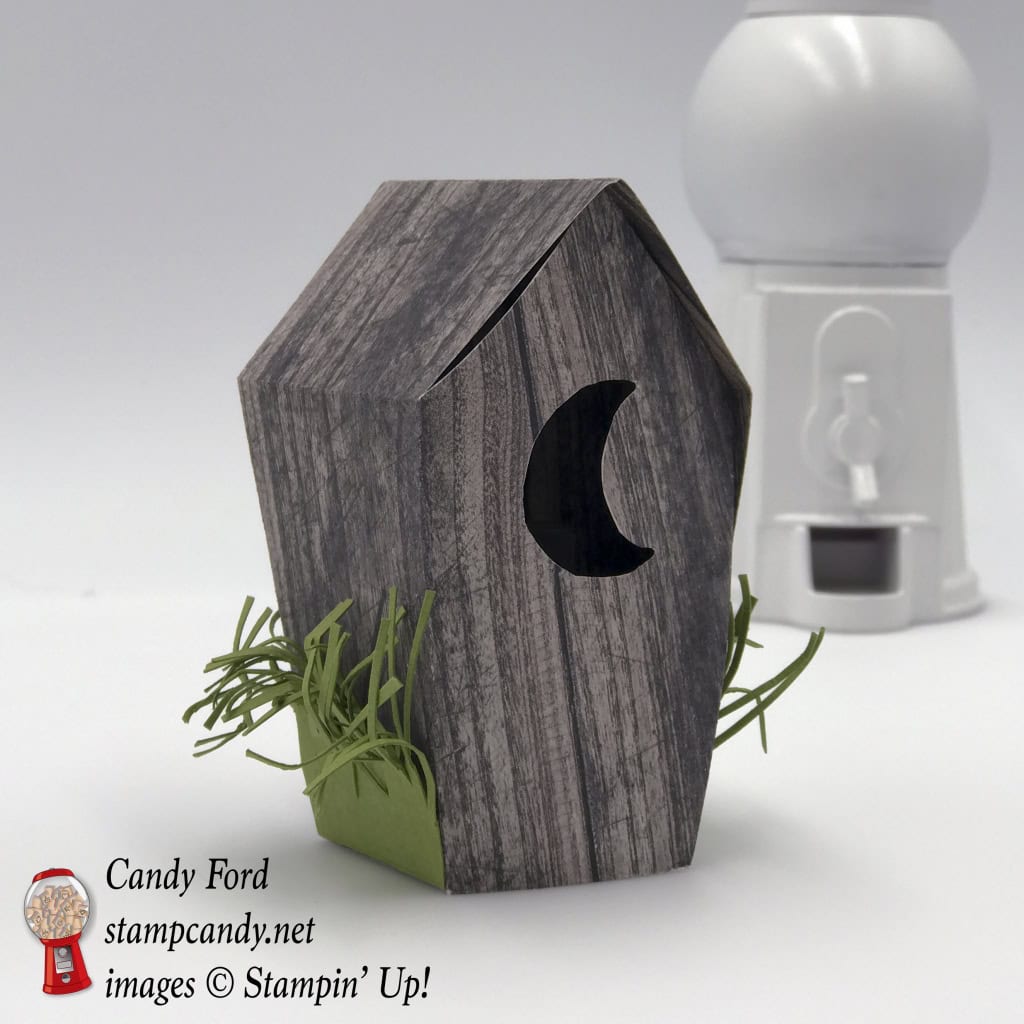
 And now, todays project. I made a bunch of products for the OnStage display board using the new Wood Textures Suite. When I saw the crescent moon shaped die, I knew I had to make an outhouse. I mean, isn’t that the first thing that came to your mind? No? Just me? Well anyway, check it out. I thinks it’s cute as can be.
Here’s what I made:


Die cut using the Home Sweet Home Thinlits:
- 2 pieces of Wood Textures Designer Series Paper (DSP) with the house die
- 1 piece of scrap card stock (CS) with the house die
Die cut using the Wood Crate Framelits:
Created a template for the inside:
- cut the door off of the CS piece, then cut off the top half of the door
- traced around the bottom part of the door on another piece of scrap CS
- measured and used a ruler to draw the rest of the template: sides, top, and bottom
- cut another piece of the DSP with my Paper Snips, using the template
- cut the hole for the “seat” with the 3/4″ Circle Punch

Made the grass for around the outhouse:
- cut pieces of Old Olive CS to fit around the bottom of the house
- used Paper Snips to cut cut cut all the grass blades, being sure not to cut all the way through to the other edge
- crumpled the blades with my fingers
Made the toilet paper:
- I used a scrap of Whisper White CS (approximately 1/2″ x 8″)
- used a Smoky Slate Stampin’ Write Marker to draw tiny “perforations” along about 1-1/2″ or so of one end
- put a tiny bead of glue down the side without perforations, leaving about 3/4″ at the end without glue
- roll up with your fingers (you might find it helpful to wrap it around a wooden skewer to get it started) leaving the “perforated” end free
Assembled the outhouse:
- two DSP die cuts glued together to make the house, leaving open the side that has the moon
- insert folded into shape and glued inside the house
- toilet paper roll glued to the seat
- grass pieces glued to the sides of the house
Here’s what I used:
Click on the images for more details and to purchase.
These items will be available to purchase on June 1, 2017:
- Wood Textures DSP, Item #144177
- Wood Crate Framelits, Item # 143730 (also available in a bundle with the Wood Words stamp set to save you 10%!)

Swatch Books & Paper Shares
for the brand new
2017-2018 Annual Catalog
Designer Series Papers
will be available beginning June 1!
Stay tuned!
Gum Ball Rewards
 You always earn a Gum Ball for every $50 you spend on an order with me. Earn 10 Gum Balls and I’ll send you a free stamp set of your choice! See the Gum Ball Rewards page for details.
Click here to shop my online store!
April Host Code
HV6MJT2X
Use the Host Code on online orders less than $15o. See how to use a Host Code here.
Online orders of $75-149.99 placed with the Host Code will receive the gift of the month!
Online orders of $150 or more will automatically receive the gift of the month! Do not use the Host Code.
April’s gift is a pack of Urban Underground Embellishments! Each pack contains 24 brushed silver embellishments – 8 each of 3 designs. (I can ship within US only.)
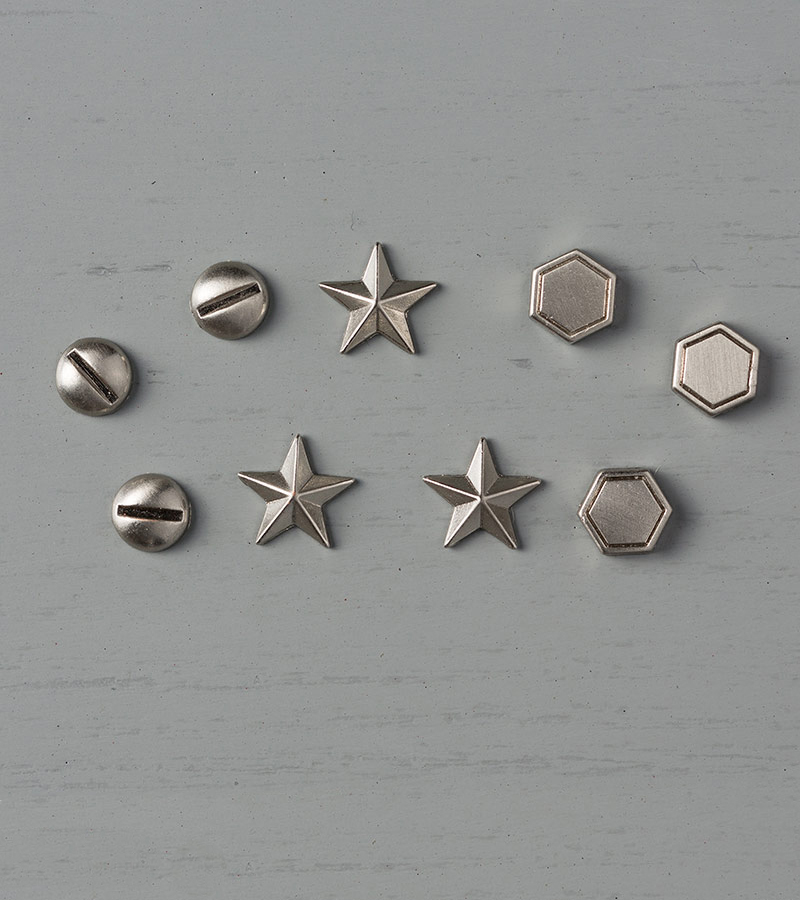
Urban Underground Embellishments © Stampin’ Up!
Thanks for stopping by today, and Sweet Stamping!

Apr 16, 2017 | Cards, Events, Gallery, Retiring Products, Swaps, Techniques |
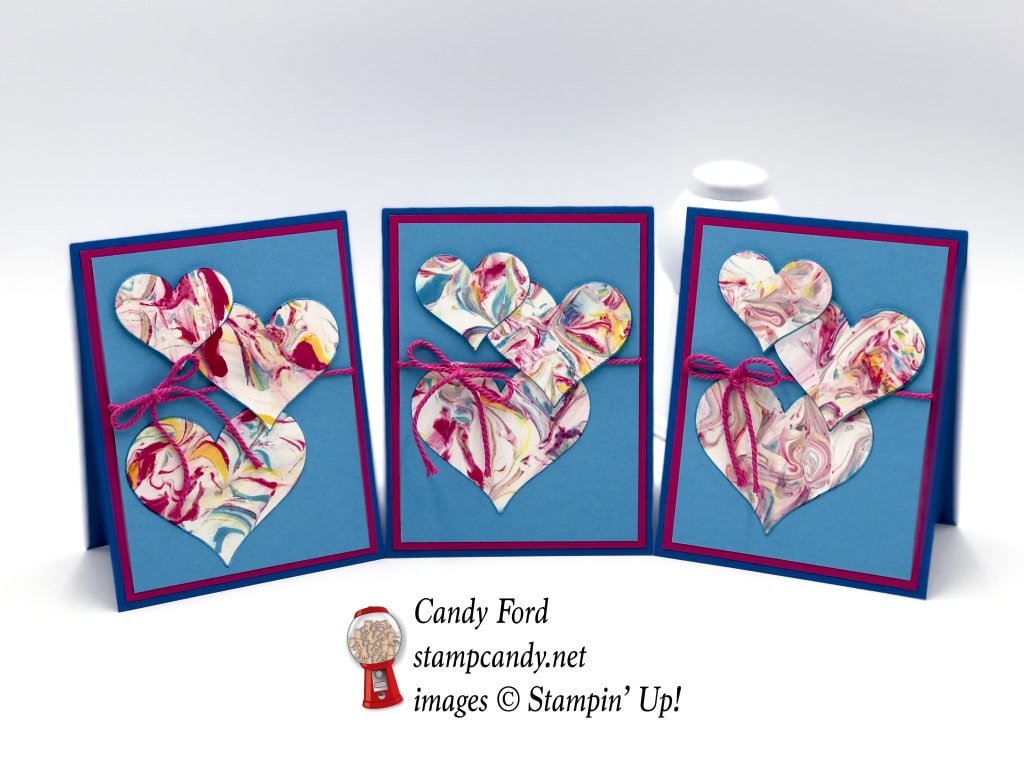
Today I’m sharing another project, technically three, that I made using the shaving cream marbling technique. To see the first card I made, and a video on the technique, click here. I used the three pieces of marbled paper that I made before, and used the Sweet & Sassy Framelits Dies to cut out the marbled hearts.

Here’s what I made:

Here’s what I did:
Cut and scored with my Stampin’ Trimmer:
- Pacific Point card stock (CS) to 4-1/4″ x 11″, then scored in half at 5-1/2″
- Melon Mambo CS to 4″ x 5-1/4″
- Tempting Turquoise CS to 3-3/4″ x 5″
- Whisper White CS to 3-3/4″ x 5″ for the inside
Die cut using the Sweet & Sassy Framelits:
- one small, one medium, and one large heart from each piece of marbled paper
Assembled the card:
- Melon Mambo Thick Baker’s Twine wrapped around front of Tempting Turquoise CS and adhered to back with Fast Fuse
- a second piece of Melon Mambo Thick Baker’s Twine tied around the first piece, and tied in a bow
- used the brush end of a Tempting Turquoise Stampin’ Write Marker to color just the very edges of all the marbled hearts
- largest marbled heart glued to Tempting Turquoise CS
- medium and small hearts adhered to Tempting Turquoise CS with Stampin’ Dimensionals
- Tempting Turquoise CS glued onto Melon Mambo CS
- Melon Mambo CS glued onto Pacific Point card base
- Whisper White CS for inside of card – you can glue it to the inside of the card base, or you can write your personal note on it and leave it loose inside, so the recipient can reuse the card
Here’s what I used:
Click on the images for more details and to purchase.
Retiring Products
Click here to get them before they’re gone for good!
Gum Ball Rewards
You always earn a Gum Ball for every $50 you spend on an order with me. Earn 10 Gum Balls and I’ll send you a free stamp set of your choice! See the Gum Ball Rewards page for details.
Click here to shop my online store!
April Host Code
HV6MJT2X
Use the Host Code on online orders less than $15o. See how to use a Host Code here.
Online orders of $75-149.99 placed with the Host Code will receive the gift of the month!
Online orders of $150 or more will automatically receive the gift of the month! Do not use the Host Code.
April’s gift is a pack of Urban Underground Embellishments! Each pack contains 24 brushed silver embellishments – 8 each of 3 designs. (I can ship within US only.)
Urban Underground Embellishments © Stampin’ Up!
Thanks for stopping by today, and Sweet Stamping!
Apr 13, 2017 | Boxes, Events, Gallery, Gift Wrap, Gifts, Occasions |
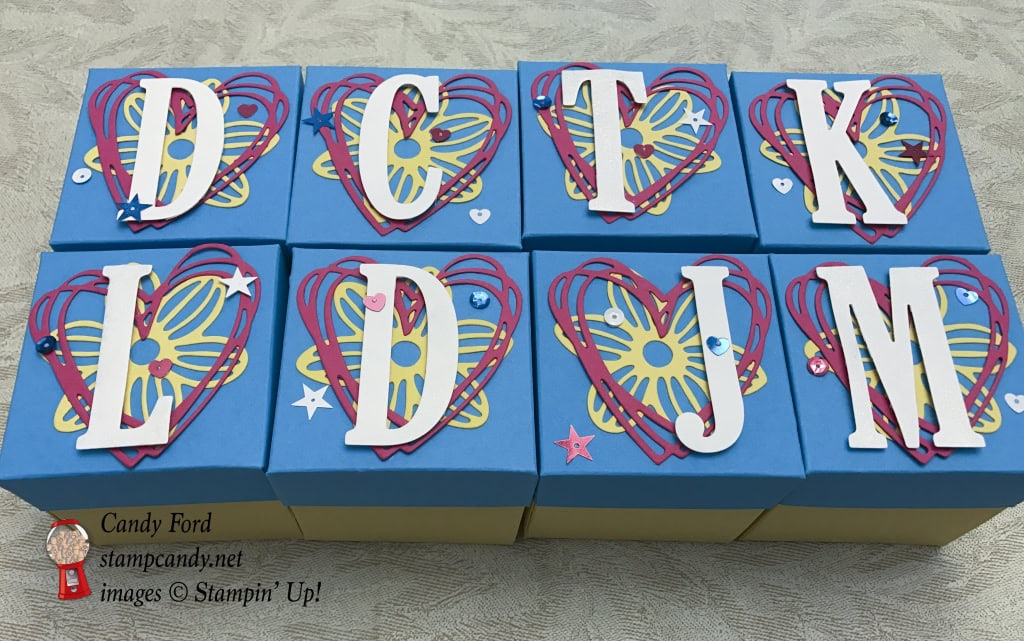
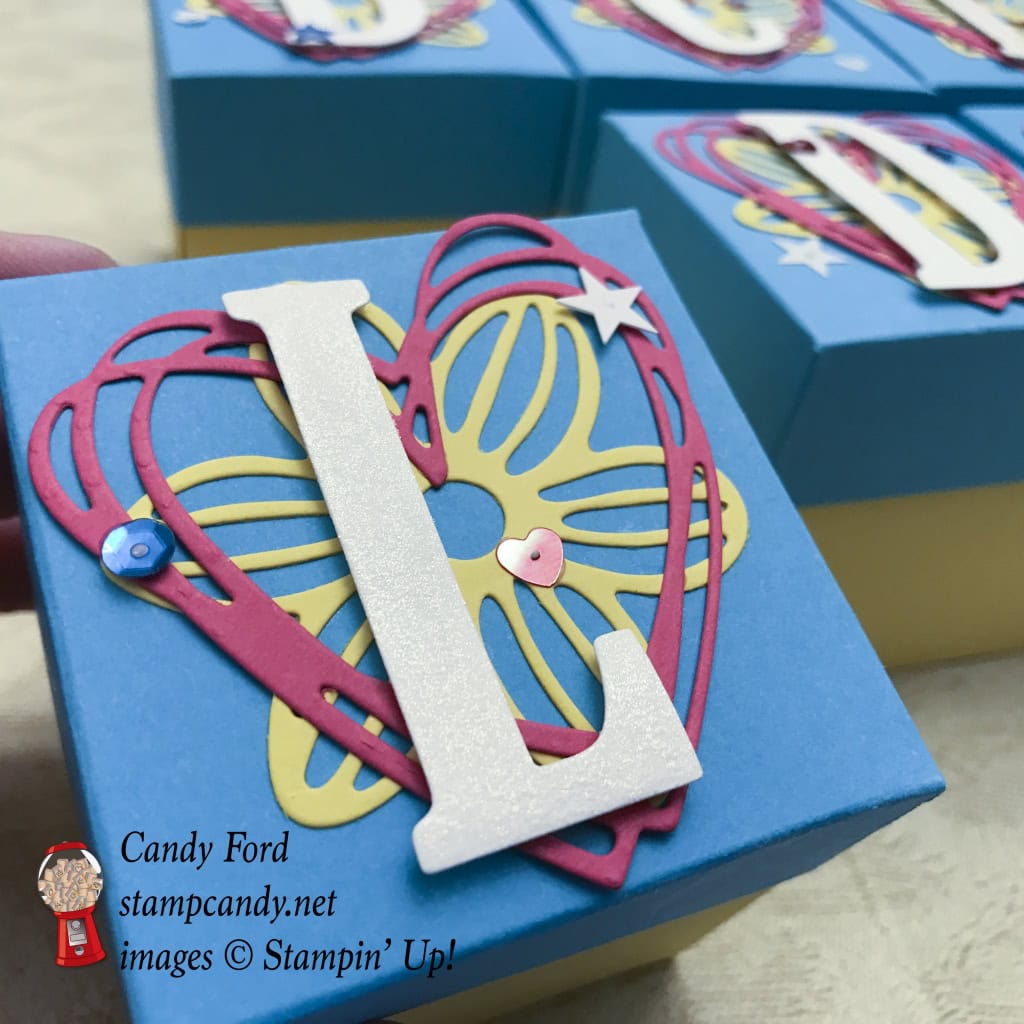
These are by far the fastest and easiest gift boxes I know how to make, and I make them all the time in various sizes. I made these for members of my team, the Candy Hearts, who attended OnStage (Stampin’ Up!’s semiannual convention type event) last weekend. In each box I put a pair of earrings with photos of candy conversation hearts on them. I didn’t use a single stamp on these boxes. Instead I used dies from the May Flowers Framelits, Sunshine Wishes Thinlits, and Large Letters Framelits.
Here’s what I made:
Here’s what I did:
First I determined the size of the box, which was 3″ wide (side to side) x 3″ deep (front to back ) x 3″ high (top to bottom.)
Cut and scored with my Stampin’ Trimmer:
- Daffodil Delight card stock (CS) to 9″ x 9″, then scored 3″ from each side
- Tempting Turquoise CS to 5-1/16″ x 5-1/16″, then scored 1″ from each side
- See diagram below
Die cut using the May Flowers Framelits:
- flowers from Daffodil Delight CS scraps
Die cut using the Sunshine Wishes Thinlits:
- hearts from Melon Mambo CS scraps
Die cut using the Large Letters Framelits:
- each person’s first initial from Whisper White CS scraps, then covered it with Clear Wink of Stella (WOS) – Actually I applied the WOS after the letter was adhered to the box lid, but I recommend doing it beforehand. No matter how careful I was, I still got some WOS on the CS pieces below it.
Cut with Paper Snips:
- along one score line on each side of the Daffodil Delight CS box, only to the the first score line
- along one score line on each side of the Tempting Turquoise CS lid, only to the the first score line
- See diagram below
Assembled the gift boxes:
- folded up sides of lid and glued in place, with small tabs inside
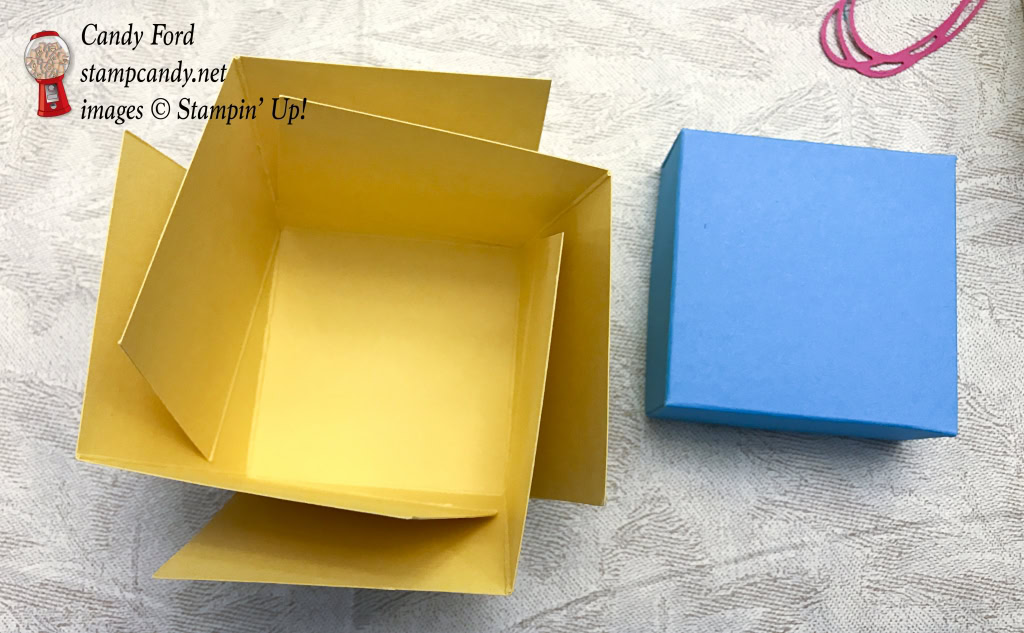
- folded up sides of box, inserted earrings, and put lid on top to hold the sides up – You can glue the sides of the box, but I prefer to let them open up when the lid is removed (see photo below)
- Daffodil Delight flower glued onto box lid
- Melon Mambo heart glued over flower
- Whisper White letter adhered over heart and flower with Stampin’ Dimensionals
- sequins glued to lid – I put 3 sequins on each lid, and tried to make the placement look random
Here are the diagrams:
Score along dotted lines. Cut along solid lines.

Box Template

Lid Template
Here’s what I used:
Click on the images for more details and to purchase.
Retiring items are available through May 31, 2017 OR while supplies last. Many items are marked down, up to 50% off. So get them now while you still can. Please go to my online store and use the Host Code below.
Click here for the pdf.
Click here for the sortable Excel spreadsheet.
Click here to see the Retiring List in my online store.
Email me with any questions: candy@stampcandy.net
April Host Code
HV6MJT2X
Use the Host Code on online orders less than $150. See how to use a Host Code here.
Online orders of $75-149.99 placed with the Host Code will receive the gift of the month!
Online orders of $150 or more will automatically receive the gift of the month! Do not use the Host Code.
April’s gift is a pack of Urban Underground Embellishments! Each pack contains 24 brushed silver embellishments – 8 each of 3 designs. (I can ship within US only.)
Urban Underground Embellishments © Stampin’ Up!
Click here to shop my online store!
Gum Ball Rewards
You always earn a Gum Ball for every $50 you spend on an order with me. Earn 10 Gum Balls and I’ll send you a free stamp set of your choice! See the Gum Ball Rewards page for details.
Click here to shop my online store!
Thanks for stopping by today, and Sweet Stamping!
Mar 27, 2017 | Boxes, Deals, Decor, Events, Food, Gallery, Gift Wrap, Gifts, Holiday, Occasions, Parties, Sale-A-Bration, Sketches |
I made these little Easter Baskets as favors for each place setting at the March Candy Hearts team meeting. You can read about the gathering here. I used Cupcakes & Carousels Designer Series Paper and the blue bows from the coordinating Embellishment Kit. These go together super fast.
Here’s what I made:


Here’s what I did:
Cut and scored with my Stampin’ Trimmer:
- Cupcakes & Carousels Designer Series Paper (DSP) to 3-3/4″ x 3-3/4″, then scored at 1-1/4″ and 2-1/2″ on one side, then rotated it 90 and scored again at 1-1/4″ and 2-1/2″
- DSP to 3/4″ x 4″ strip
Cut with Paper Snips:
- two score lines on each of two opposite sides
- Diagram: solid lines = cut, and dotted lines = fold

Assembled the basket:
- folded up the three sections along one of the cut sides
- angled in the two outer pieces and glued to the center piece
- repeated on the other side
- glued handle to inside of basket on each side
- adhered a bow to the basket with Mini Glue Dots
- filled with crinkly gift bag filler and Easter candies by Cadbury and Lindt
Here’s what I used:
Click on the images for more details and to purchase.
MORE SALE-A-BRATION ITEMS!
ONLY UNTIL MARCH 31!!!

Now through March 31, you will earn a FREE item from the Sale-a-bration catalog for each $50 you spend on an order. Sale-a-bration items are now available only while supplies last. So don’t wait if there’s anything you still want!
Here are the Sale-a-bration items still available:
Paper Pumpkin 3 month prepaid subscription is only $55, but only through March 31! It’s the easiest way to earn a FREE Sale-a-bration item! Get it here.
Take it to the next level with a 12-month prepaid subscription. Save over $2 per month with the everyday awesome price, earn Stampin’ Rewards, and instantly qualify for 4 FREE Sale-A-Bration items! Get it here.
RETIRING IN COLORS
DID YOU KNOW the 2015-2017 In Colors will retire at the end of May? But don’t wait until then to order them. At some point they will become available only while supplies last. So get what you need now.
SPEAKING OF RETIRING PRODUCTS
The Designer Series Papers always retire, too. None of us will know for sure until the retiring list comes out, but here are the DSPs and related products that I believe will be retiring at the end of May:
You always earn a Gum Ball for every $50 you spend on an order with me. Earn 10 Gum Balls and I’ll send you a free stamp set of your choice! See the Gum Ball Rewards page for details.
Click here to shop my online store!
March Host Code
BDF43VHE
Use the Host Code on online orders less than $15o. See how to use a Host Code here.
Online orders of $75-149.99 placed with the Host Code will receive the gift of the month!
Online orders of $150 or more will automatically receive the gift of the month! Do not use the Host Code.
March’s gift is a pack of Metallic Foil Doilies! Each pack contains 24 doilies: 6 each of 2 sizes in 2 colors.

Metallic Foil Doilies © Stampin’ Up!
Click here to shop my online store!
April’s gift is a pack of Urban Underground Embellishments! Each pack contains 24 brushed silver embellishments – 8 each of 3 designs.

Urban Underground Embellishments © Stampin’ Up!
Click here to shop my online store!
Thanks for stopping by today, and Sweet Stamping!
Mar 25, 2017 | Boxes, Events, Gallery, Gift Wrap, Gifts, Retiring Products, Sale-A-Bration, Swaps |
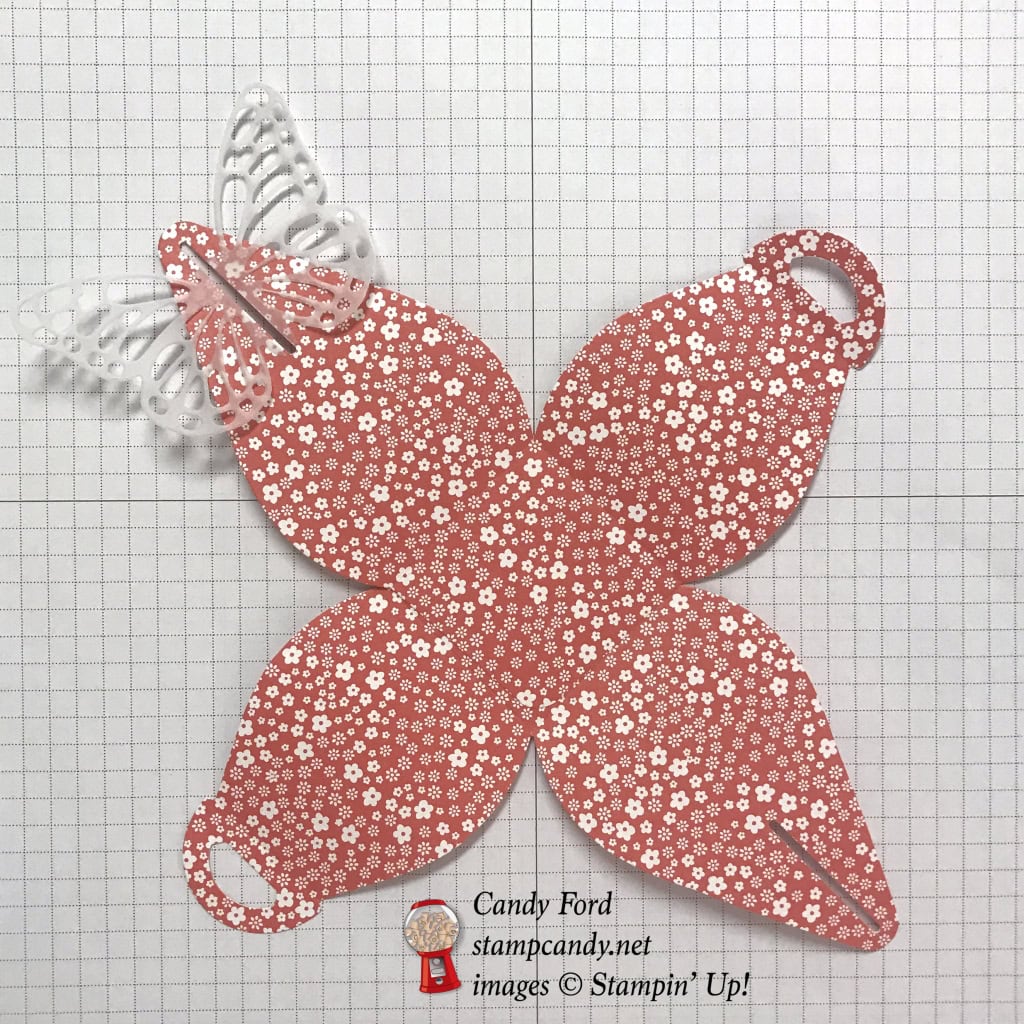
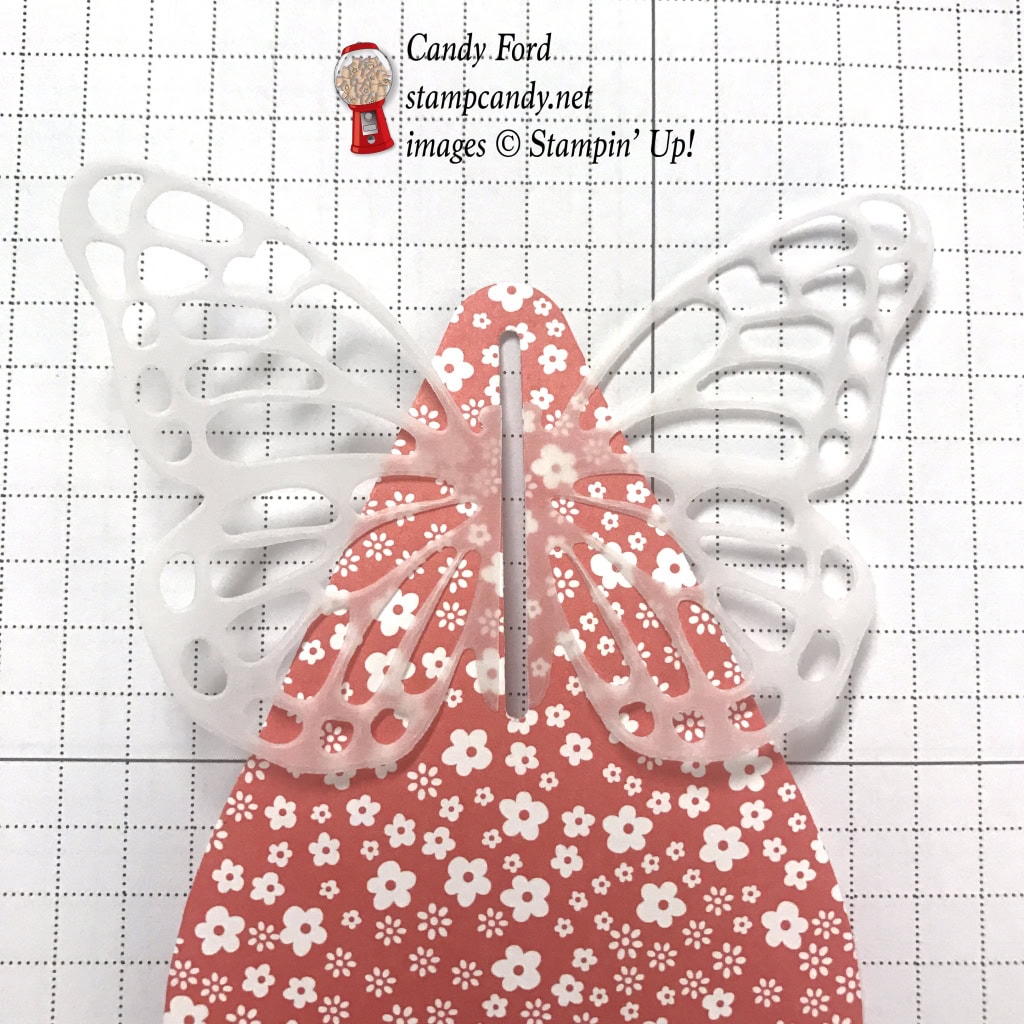
Today I’m sharing my 3D Swap from our March Candy Hearts team meeting, which you can read about here. It’s really super simple. I used the Curvy Keepsake Box Framelits to make the box, and added a vellum butterfly. That’s it! Well, other than filling them with chocolates. Aren’t they pretty? They look like the butterflies are about to fly away with them.
Here’s what I made:

Here’s what I did:
Cut and scored with my Stampin’ Trimmer:
- 2015-2017 In Color Designer Series Paper (DSP) to 6″ x 12″
- Vellum card stock (CS) to 3-1/2″ wide strips
- cut each die-cut butterfly in half, up through the body*
Die cut using the Curvy Keepsake Box Framelits:
- DSP cut with the box die (2 per box)
Die cut using the Butterflies Thinlits:
- *butterflies from Vellum – one per box
Assembled the box:
- two box pieces glued together at the bottom
- glued a butterfly half on each side of the slot, as shown – make sure this part gets closed last
- close three sides of the box, fill with goodies, then close the fourth part with the butterfly


Here’s what I used:
Click on the images for more details and to purchase.
MORE SALE-A-BRATION ITEMS!
ONLY UNTIL MARCH 31!!!
Now through March 31, you will earn a FREE item from the Sale-a-bration catalog for each $50 you spend on an order. Sale-a-bration items are now available only while supplies last. So don’t wait if there’s anything you still want!
Here are the Sale-a-bration items still available:
CORRECTION: the Seaside and the Sparkle Textured Impressions Embossing Folders are no longer available as free SAB items.
Paper Pumpkin 3 month prepaid subscription is only $55, but only through March 31! It’s the easiest way to earn a FREE Sale-a-bration item! Get it here.
Take it to the next level with a 12-month prepaid subscription. Save over $2 per month with the everyday awesome price, earn Stampin’ Rewards, and instantly qualify for 4 FREE Sale-A-Bration items! Get it here.
RETIRING IN COLORS
DID YOU KNOW the 2015-2017 In Colors will retire at the end of May? But don’t wait until then to order them. At some point they will become available only while supplies last. So get what you need now.
SPEAKING OF RETIRING PRODUCTS
The Designer Series Papers always retire, too. None of us will know for sure until the retiring list comes out, but here are the DSPs and related products that I believe will be retiring at the end of May:
You always earn a Gum Ball for every $50 you spend on an order with me. Earn 10 Gum Balls and I’ll send you a free stamp set of your choice! See the Gum Ball Rewards page for details.
Click here to shop my online store!
March Host Code
BDF43VHE
Use the Host Code on online orders less than $15o. See how to use a Host Code here.
Online orders of $75-149.99 placed with the Host Code will receive the gift of the month!
Online orders of $150 or more will automatically receive the gift of the month! Do not use the Host Code.
March’s gift is a pack of Metallic Foil Doilies! Each pack contains 24 doilies: 6 each of 2 sizes in 2 colors.
Metallic Foil Doilies © Stampin’ Up!
Click here to shop my online store!
Thanks for stopping by today, and Sweet Stamping!
Feb 8, 2017 | Cards, Events, Gallery, Holiday, Occasions |
As a Stampin’ Up! demonstrator, I get to attend wonderful events where I get new catalogs, see and play with new products, and order them, all before anyone else. Back in November, I attended such an event and got to make some lovely projects. Today I’m sharing one of those with you.
Here’s what I made:
Here’s what I did:
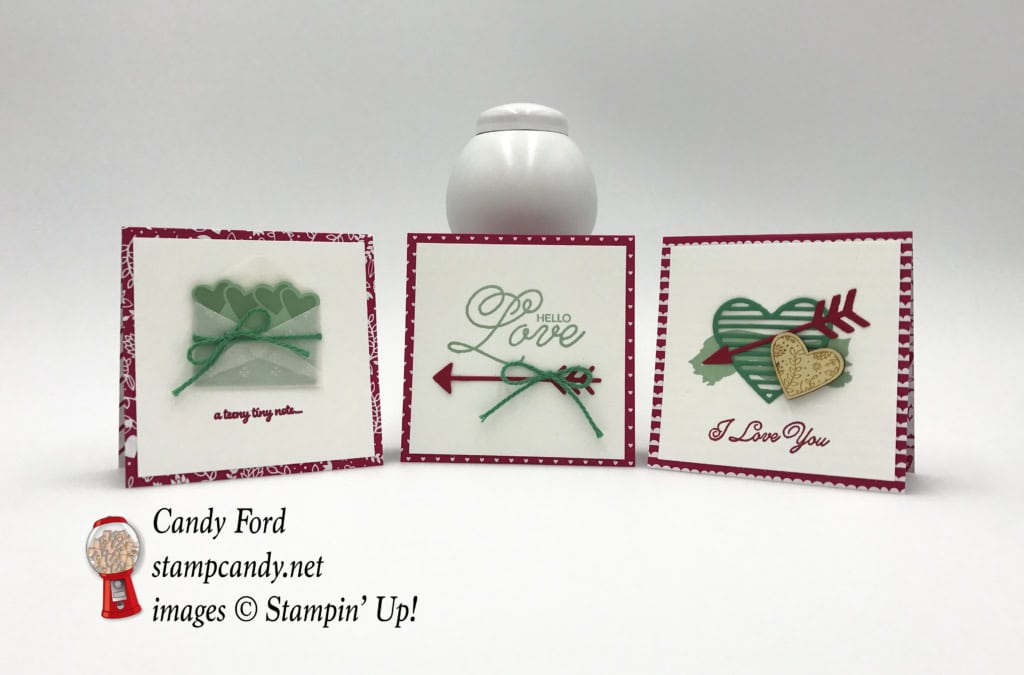
Each card is half a piece of Sending Love DSP, folded in half to make a 3″ x 3″ card.
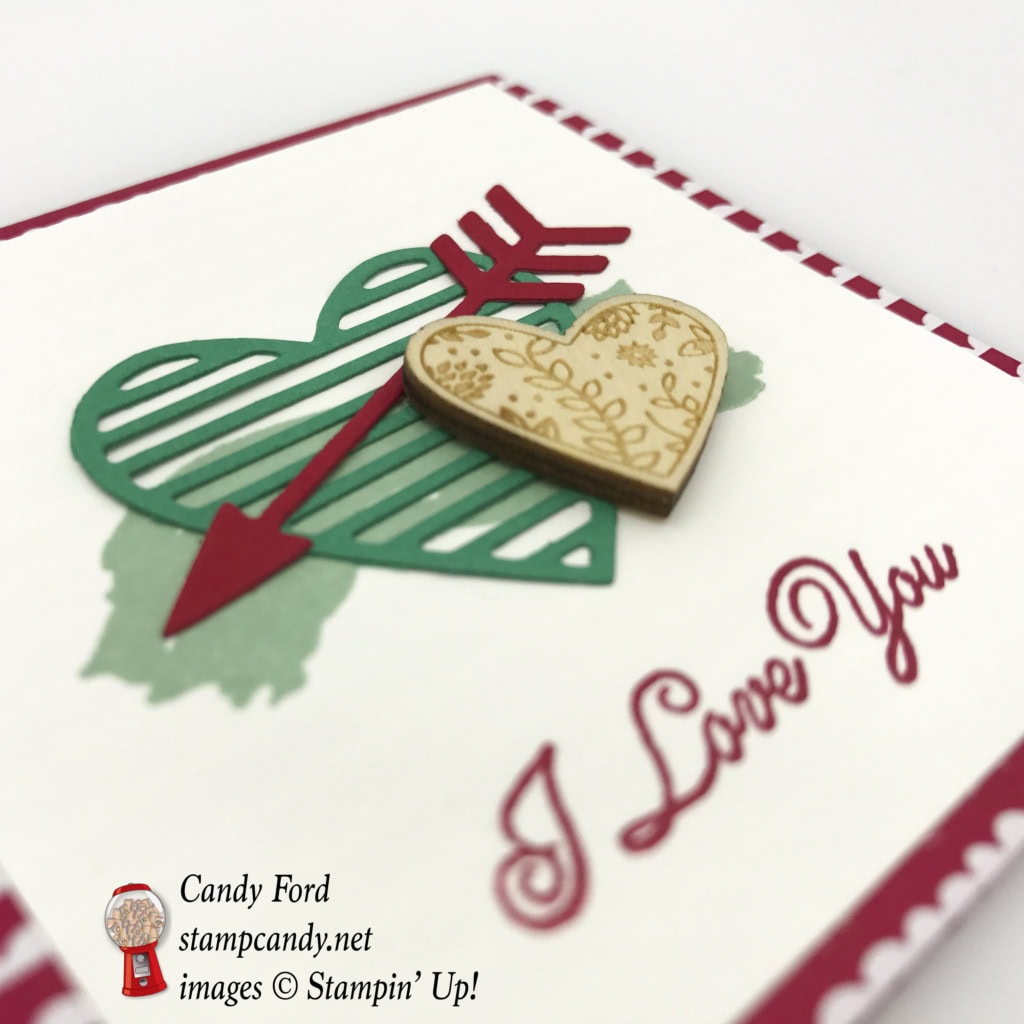
There is a 2-3/4″ square piece of Whisper White card stock glued onto the front of each one. Each piece is decorated differently, but with the same Sealed With Love bundle.
There is another 2-3/4″ square piece of Whisper White card stock glued to the inside for a handwritten note.
Here’s what I used:
Thanks for stopping by today, and Sweet Stamping!


