Dec 5, 2016 | Christmas, Food, Gallery, Gift Wrap, Gifts, Holiday |
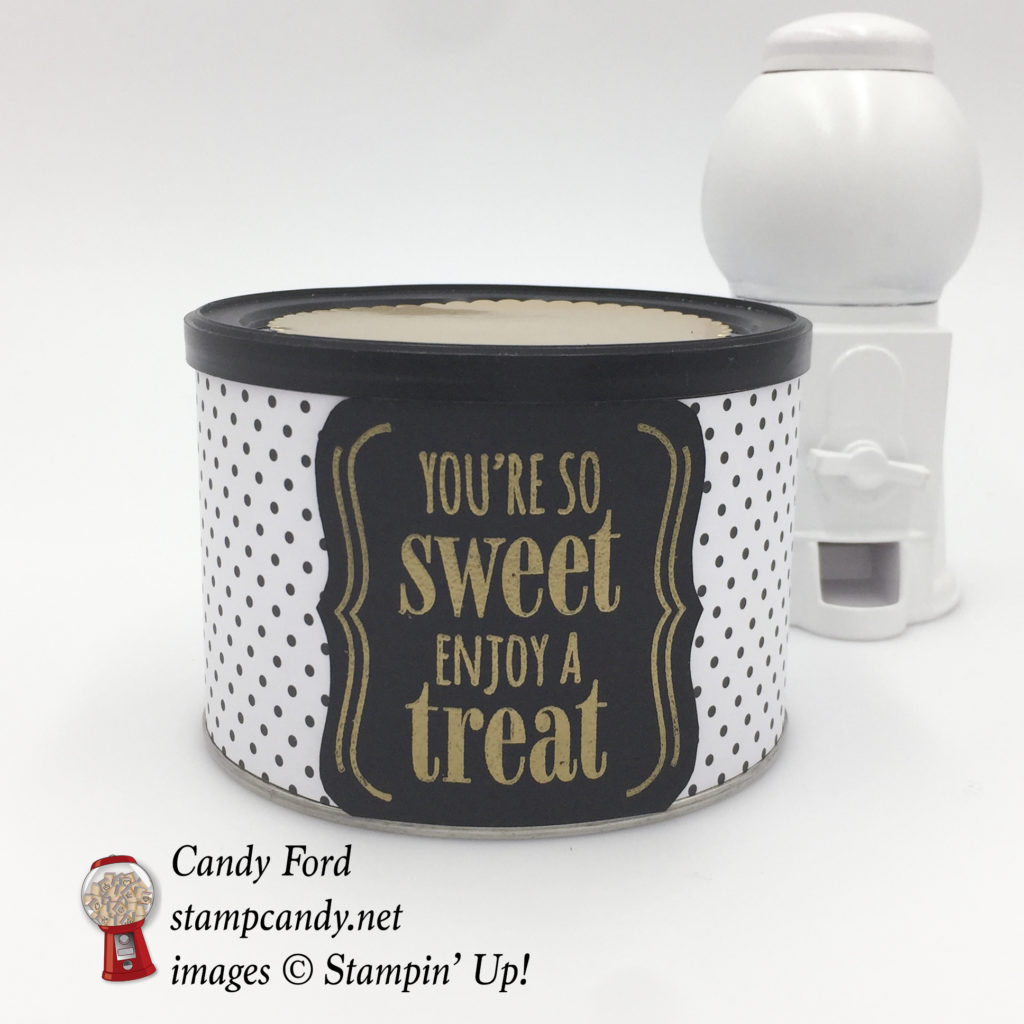
Recently I’ve been sharing projects that are great for small gifts – perfect for people you want to give just a little something to. The projects are inexpensive items dressed up with papercrafting products. This one is a can of honey roasted cashews. Or you could eat the cashews and use the empty container for another small gift – cookies maybe?
Here’s what I made:
Here’s how I did it:
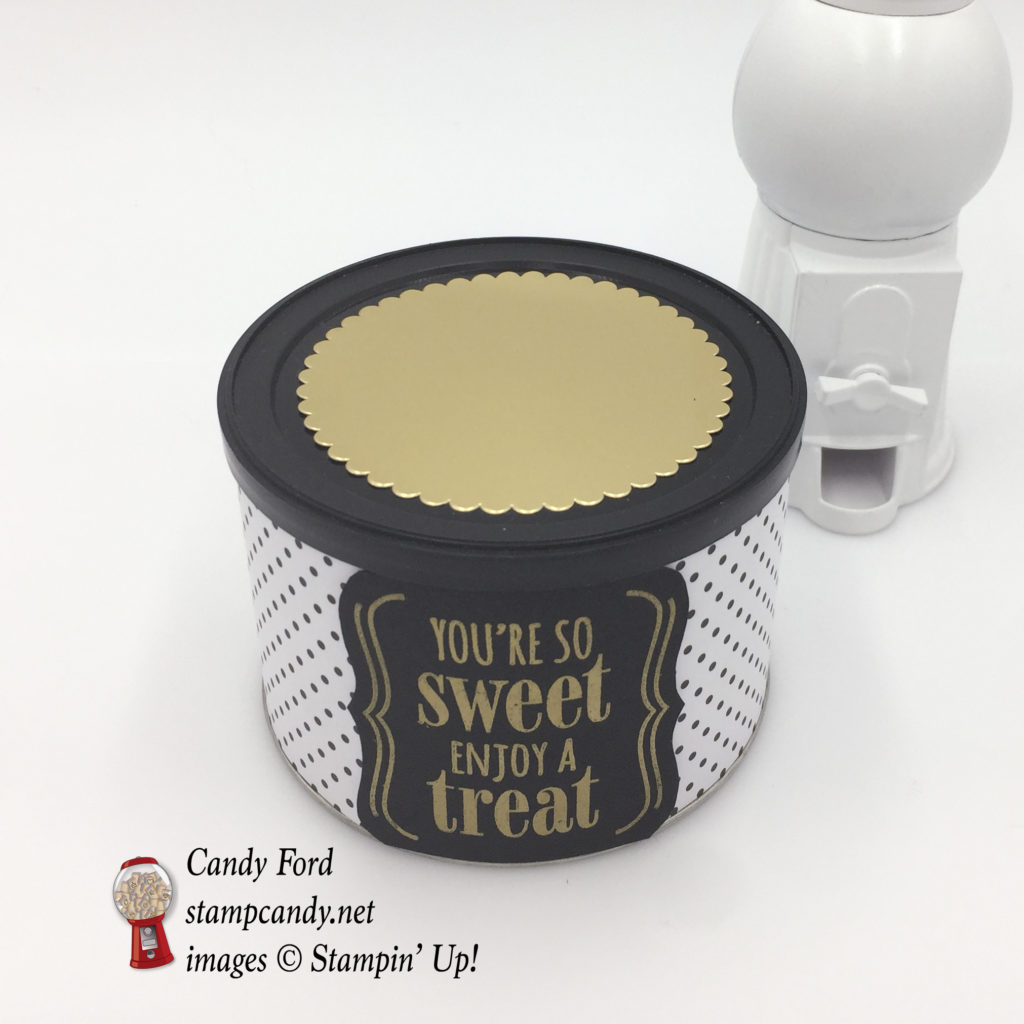
The can came with a black lid, which prompted my choice of colors. I cut a piece of Pop of Pink Designer Series paper (white with black dots) to fit around the can and adhered it with Fast Fuse.
On a piece of Basic Black card stock, I heat embossed in gold a sentiment from the You’re So Sweet stamp set. I cut it out with Paper Snips and glued it to the DSP. I wrapped a couple of rubber bands around it until the glue dried.
For the final touch, I cut a piece of Gold Foil Sheet with the Layering Circles Framelits and adhered it to the lid with Fast Fuse.
Here’s what I used:
Thanks for stopping by today, and Sweet Stamping!

Dec 2, 2016 | Boxes, Food, Gallery, Gift Wrap, Gifts |
Recently I had the honor of presenting at an event for Stampin’ Up! Demonstrators. Today I’m sharing one of the small gift ideas I showed. (I didn’t photograph the items until after the event, so some of them are a bit worn looking. Lots of people handled and looked at them.)
Here’s what I made:
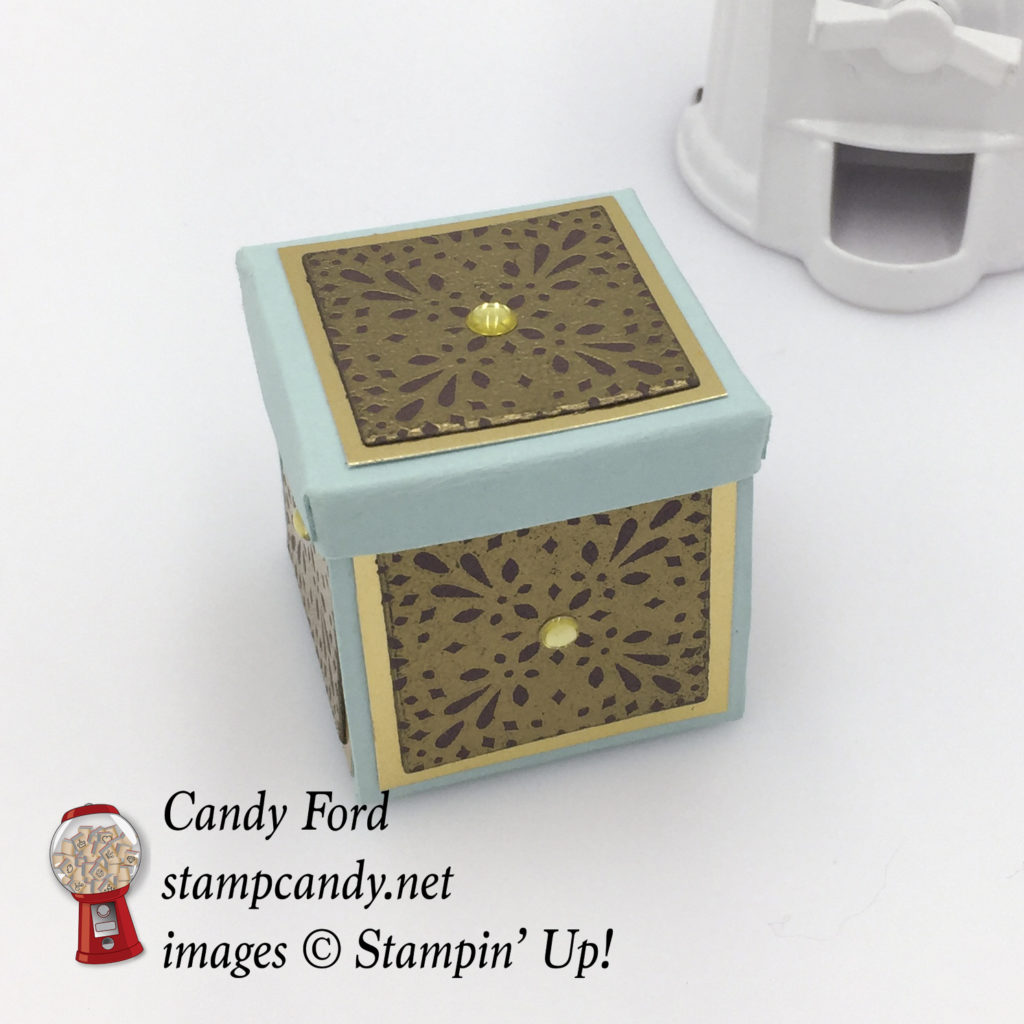
It’s just a tiny blue box (1-1/2″ x 1-1/2″ x 1-1/2″) with brown and gold on all sides.
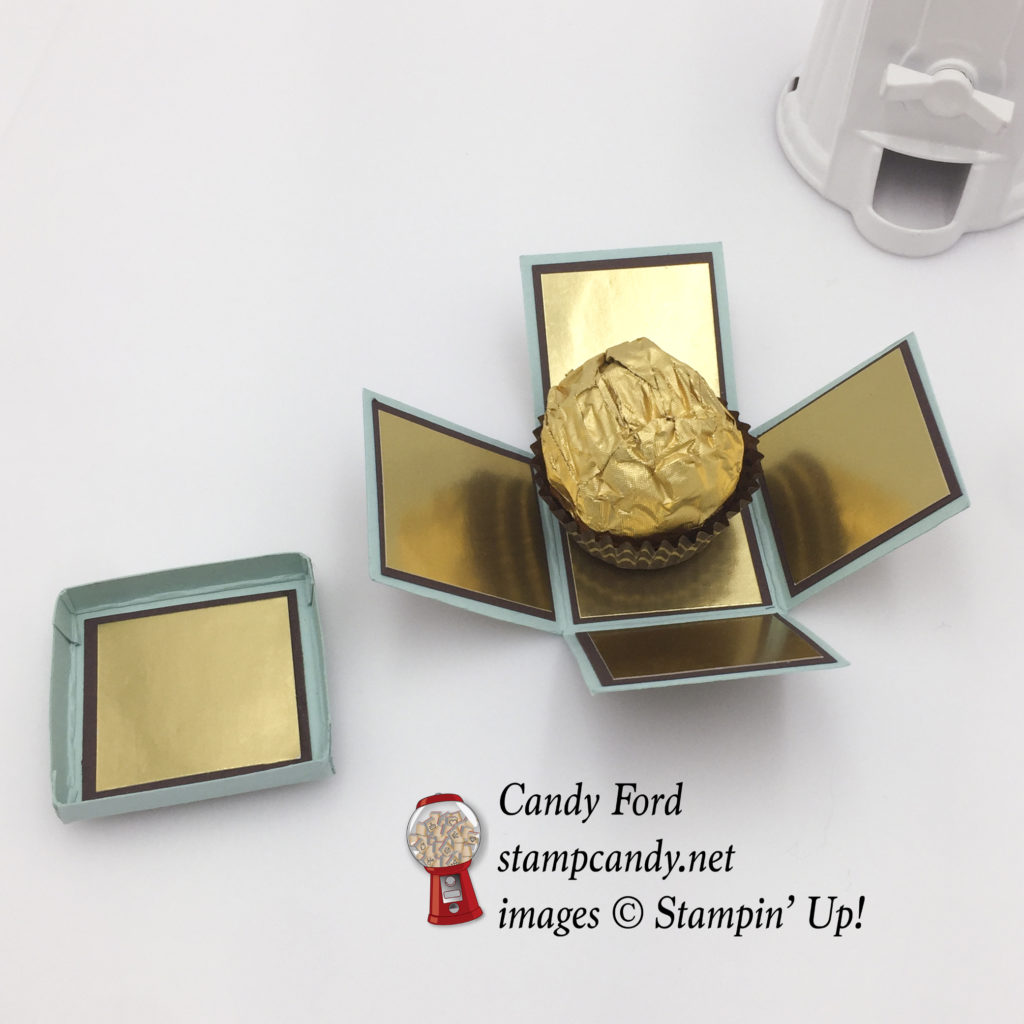
When you lift the top off, the sides fall away to expose one delicious Ferrero Rocher candy. It’s an elegant way to dress up a very small gift.
Here’s how I did it:
For the box:
I cut a piece of Soft Sky card stock to 4-1/2″ x 4-1/2″. I scored it 1-1/2″ and 3″, then turned it a quarter turn and scored at1-1/2″ and 3″. I cut away the corner areas, then folded on all score lines.
For the interior, I cut 6 pieces Chocolate Chip CS to 1-3/8″ x 1-3/8″, and I cut 6 pieces of Gold Foil Sheet to 1-1/4″ x 1-1/4″. I glued 5 of the Chocolate Chip pieces to the interior squares, and 5 of the gold pieces on top of those. I saved the other 2 pieces for the lid’s interior.
For the exterior, I stamped and heat embossed the smaller medallion image from the Frosted Medallions stamp set in gold onto Chocolate Chip CS 5 times. I used the Layered Squares Framelits to cut each image. I cut 5 pieces of Gold Foil Sheet to 1-3/8″ x 1-3/8″. I glued the gold pieces onto the 4 sides of the box, and the embossed pieces on top of those. I put a gold embellishment from the Metallic Enamel Shapes on the center of each embossed piece. I saved the other 2 pieces for the top of the lid.
For the lid:
I cut a piece of Soft Sky CS to 2-1/16″ x 2-1/16″. I scored it 1/4″ in from each of the four sides. I cut one score line at each corner, and folded all score lines. I glued the small pieces at the corners to the inside of the adjacent side, forming the lid.
I glued the leftover pieces from above to the lid’s interior and exterior, to match the box.
Note: I almost always use glue for this kind of project, but I prefer to use Fast Fuse when adhering something to a slick surface, like the gold side of the Gold Foil Sheet.
TIP: When making this type of box, I find it helpful to make it just big enough to hold the contents without any extra room. In this instance, the candy helps to hold up the sides of the box when the lid is on. If there is too much empty space inside, the sides can lean in and your box won’t look, well, like a very good box.
Here’s what I used:


YEAR-END CLOSEOUT DEALS HAVE BEGUN!
Stampin’ Up! has been doing a little year-end cleaning, and we’ve got some great deals to offer you and your customers! Our Year-End Closeouts will include holiday retiring products, clearance rack items, and current high-inventory catalog products. Read below for promotion rules and information.
Details
• Promotion period: December 1, 2016 – January 3, 2017
• All products (and discounts, if any) can be found in the Year-End Closeouts category of the online store beginning December 1.
• Year-end closeout items may be added to all order types: demonstrator, workshop, customer, and online.
• Clearance Rack items are only available while supplies last.
• Following the Year-End Closeouts promotion, some products may remain on the Clearance Rack; other items may be removed from the Clearance Rack to be added at another undetermined time.
• High-inventory items will only be discounted through January 3; beginning January 4, they will still be available, but at regular price.
• Retiring item availability will follow standard retiring item rules:
• Retiring stamp sets are guaranteed available until December 21, after which they will be only available while supplies last.
• Retiring accessories will only be available while supplies last.
• Retiring items will only be available while supplies last. All retiring items will be discontinued after January 3.
Other Year-End Closeouts products and applicable discounts can be found in the online store.
• No minimum purchase is required to participate in Year-End Closeouts.
• Year-End Closeouts are eligible for Stampin’ Rewards with qualifying orders.
• New demonstrators may add Year-End Closeouts items to their Starter Kit! Click on Be a Candy Heart at the top of the page!
Thanks for stopping by today, and Sweet Stamping!
Aug 16, 2016 | Christmas, Classes, Events, Food, Gallery, Holiday, New Products |

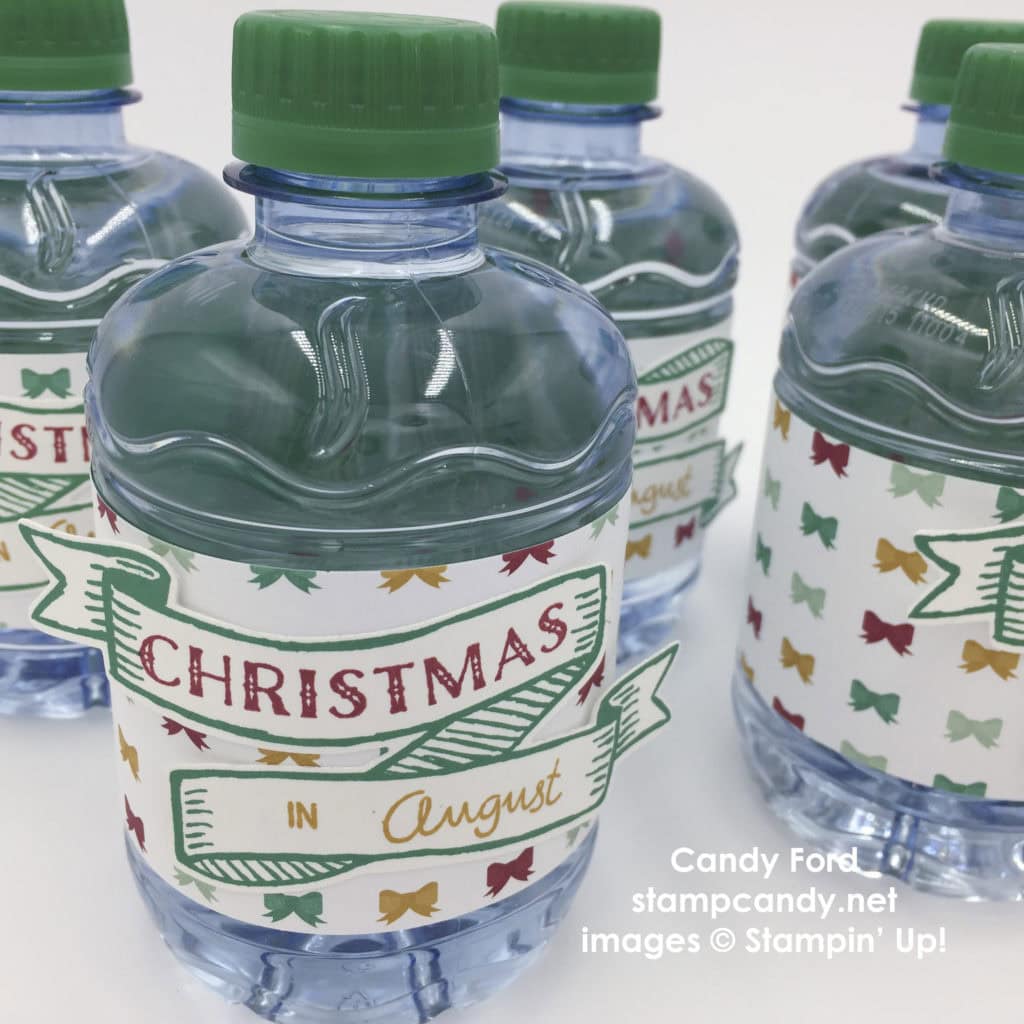
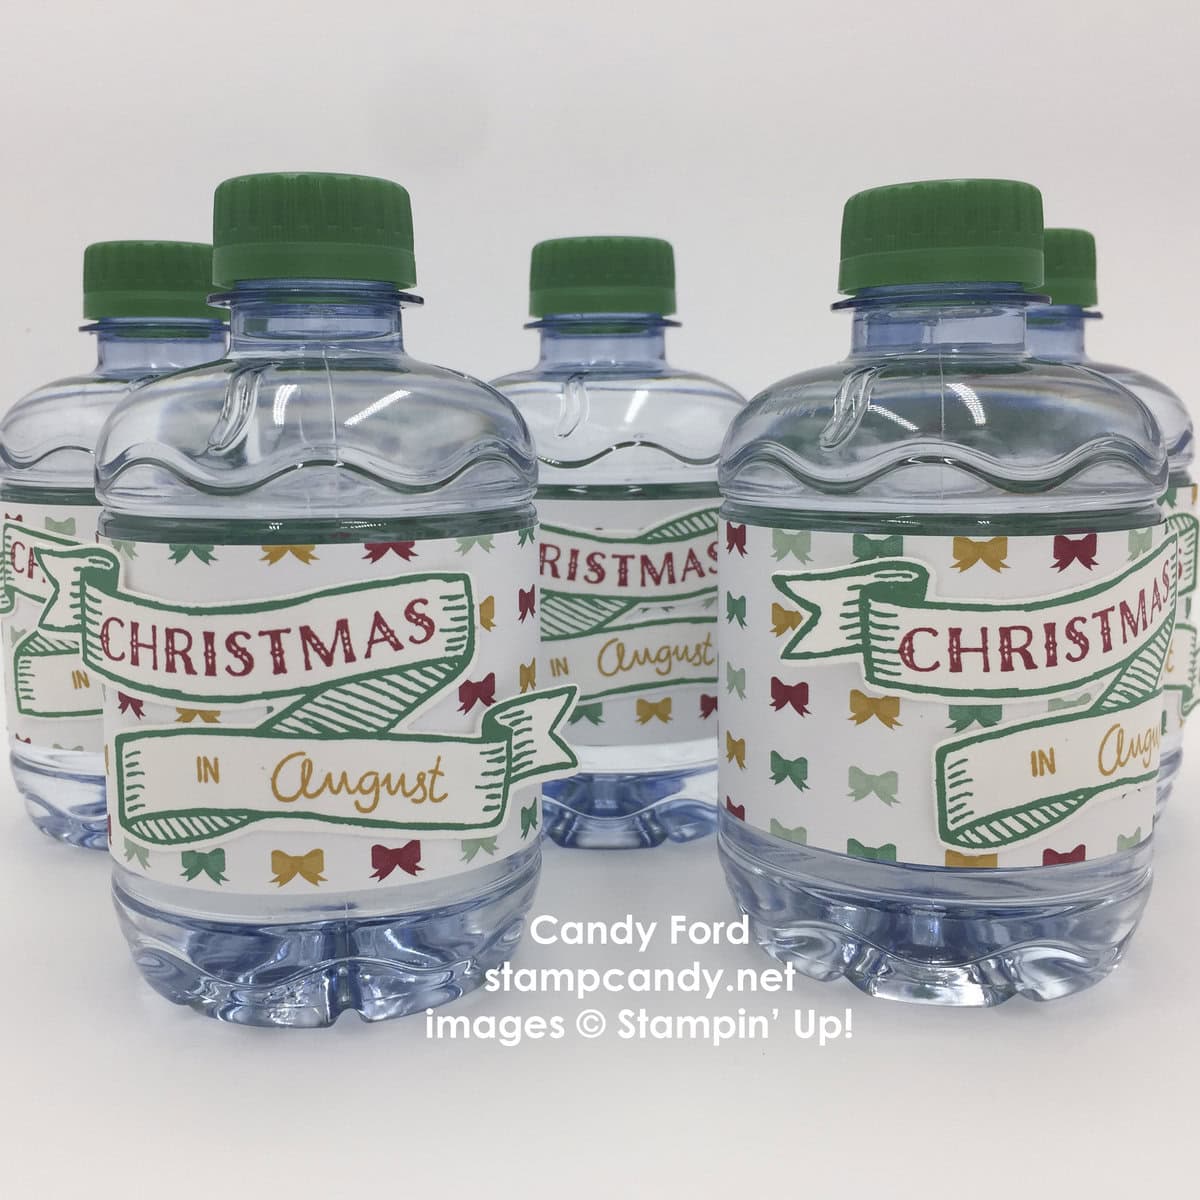
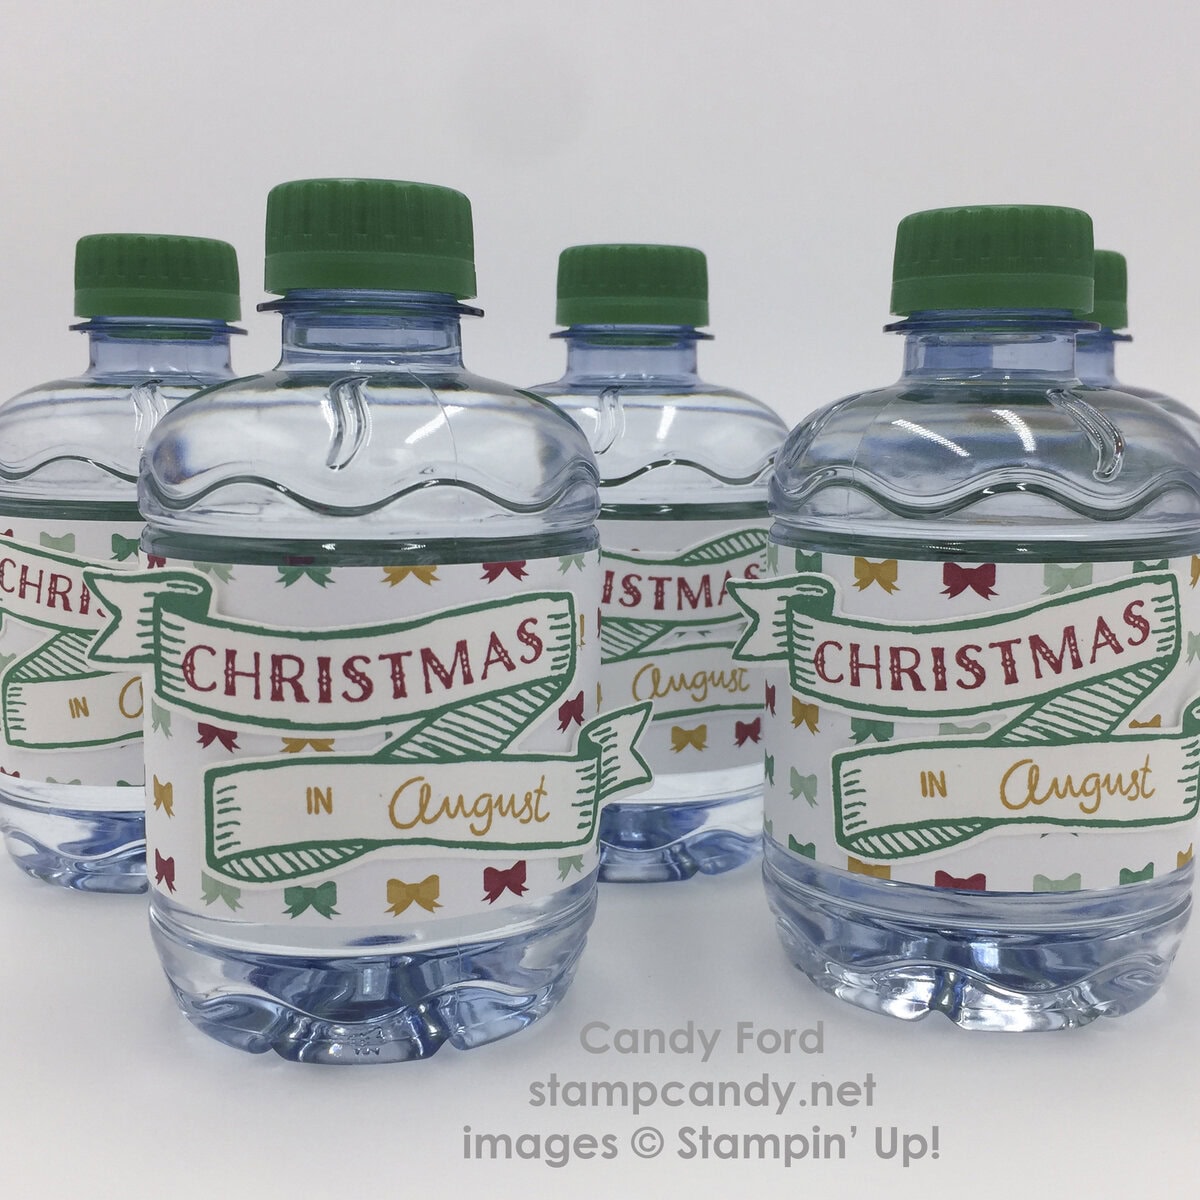
I always decorate bottles of water for my classes, not only because attendees need to stay hydrated, but mostly to let them know how special I think they are, and how much I appreciate them. My Christmas in August card class was this Sunday, and I thought I would share those bottles with you today.
I used to buy larger bottles, but too much was wasted. These smaller ones are just right. The brand doesn’t matter. Remove the original label and measure it. Cut your paper to that measurement, or maybe just a little longer.
Here’s how I did it:
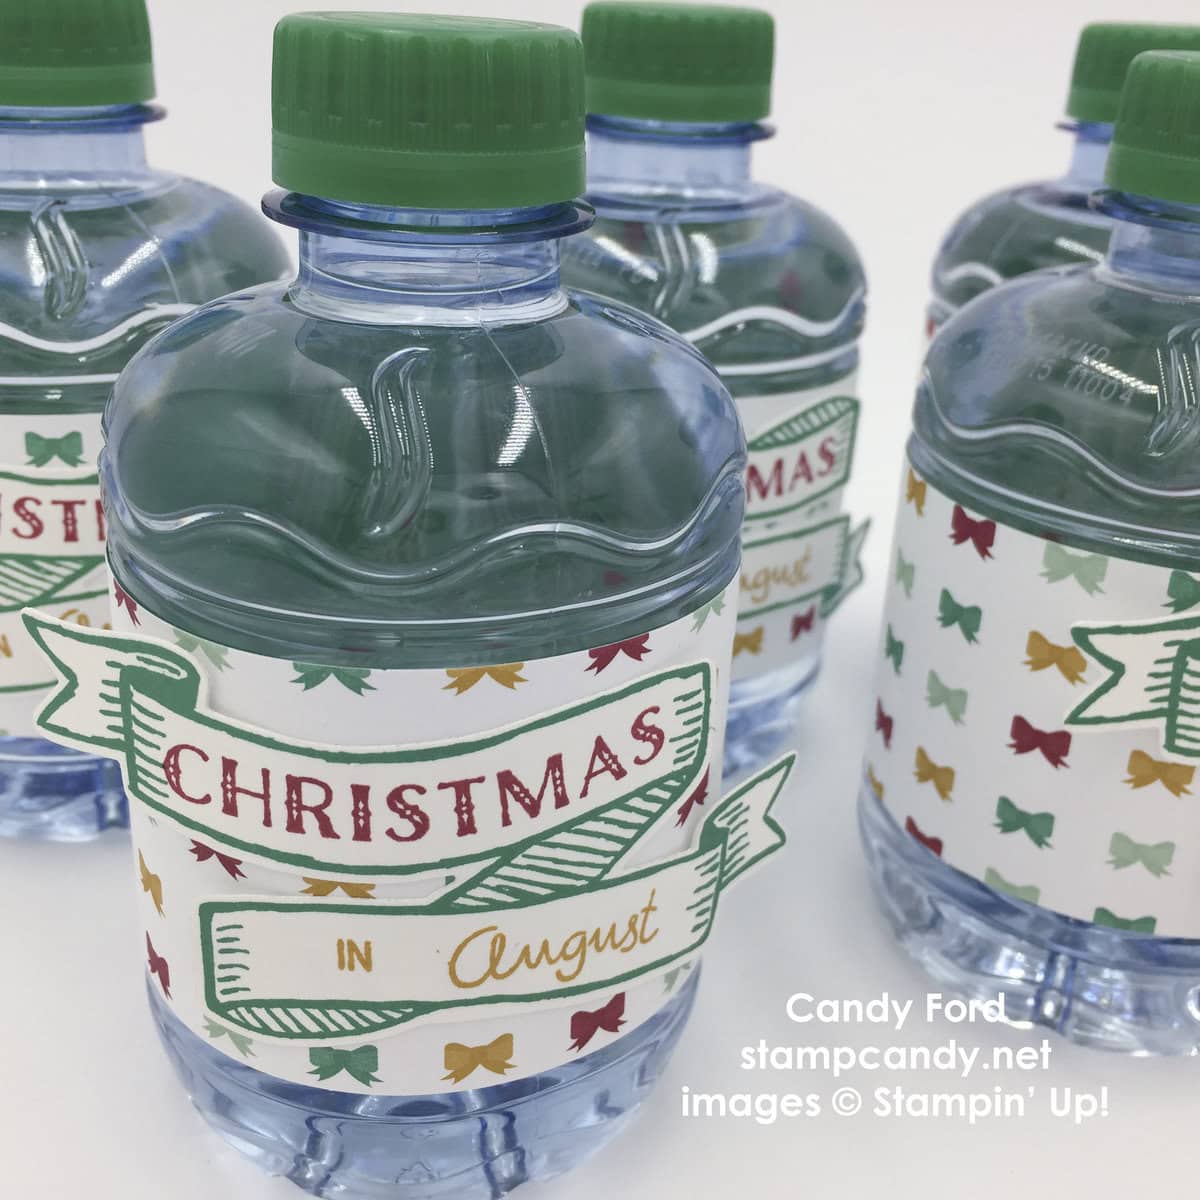
These particular bottles are Dasani 10.1 fl.oz. I cut the 9″ x 2″ belly band from the new Presents & Pinecones Designer Series Paper. I put some Fast Fuse adhesive at each end, and wrapped it around the bottle.
I stamped the banner from the new Banners for Christmas stamp set in Emerald Envy ink onto Whisper White card stock. I then stamped “Christmas” from the same stamp set in Cherry Cobbler ink, and “in August” from the Project Life Date It stamp set in Delightful Dijon ink, inside the banner. Then I cut it out with the coordinating die from the Bunch of Banners Framelits. I attached the banner to the bottle with Fast Fuse, leaving just the two ends loose.
I recommend adding any ornamentation to the belly band after it’s on the bottle. If you add it before, it might pop off or stretch oddly when you curve the band around the bottle.
I hope this inspires you to do little things like this for your own events. Even just turning a boring old bottle of water into something that will make your guests feel special, since you went to the time and trouble (almost none of either, actually!) to create this for them.
Here’s what I used:
The first 2 items will be available when the new Holiday catalog goes live on September 1. Everything else is available now!
AUGUST HOSTESS CODE
PMTWBJMQ
If you are placing an order for less than $150, please use this Hostess Code. Click here for details on how to use the Hostess Code.If you are placing an order of $150 or more, you will receive Stampin’ Rewards on your order, so do not use the Hostess Code.
Thanks for stopping by today, and Sweet Stamping!
Apr 29, 2016 | Bags, Boxes, Cards, Food, Gifts, Occasions, Swaps |
Today I’m sharing with you more of the items I received in the 3D Treat Swap. You can see my other posts about it here and here.
made by Julie Davidse
made by Deb Reeder
made by Teresa Granary
made by Fran Kennedy
made by Karen Oster
made by Rae Ann
made by Cindy Schuster
Thanks for stopping by today, and Sweet Stamping!

Apr 28, 2016 | Bags, Boxes, Food, Gifts, Swaps |
Yesterday I shared with you my project for the 3D Dinner & Swap in Salt Lake City. You can see that post here. Today I’m excited to show you some of the amazing projects I received in the swap.
Karen Oster made this sweet little bag containing a bag of Hershey Kisses.


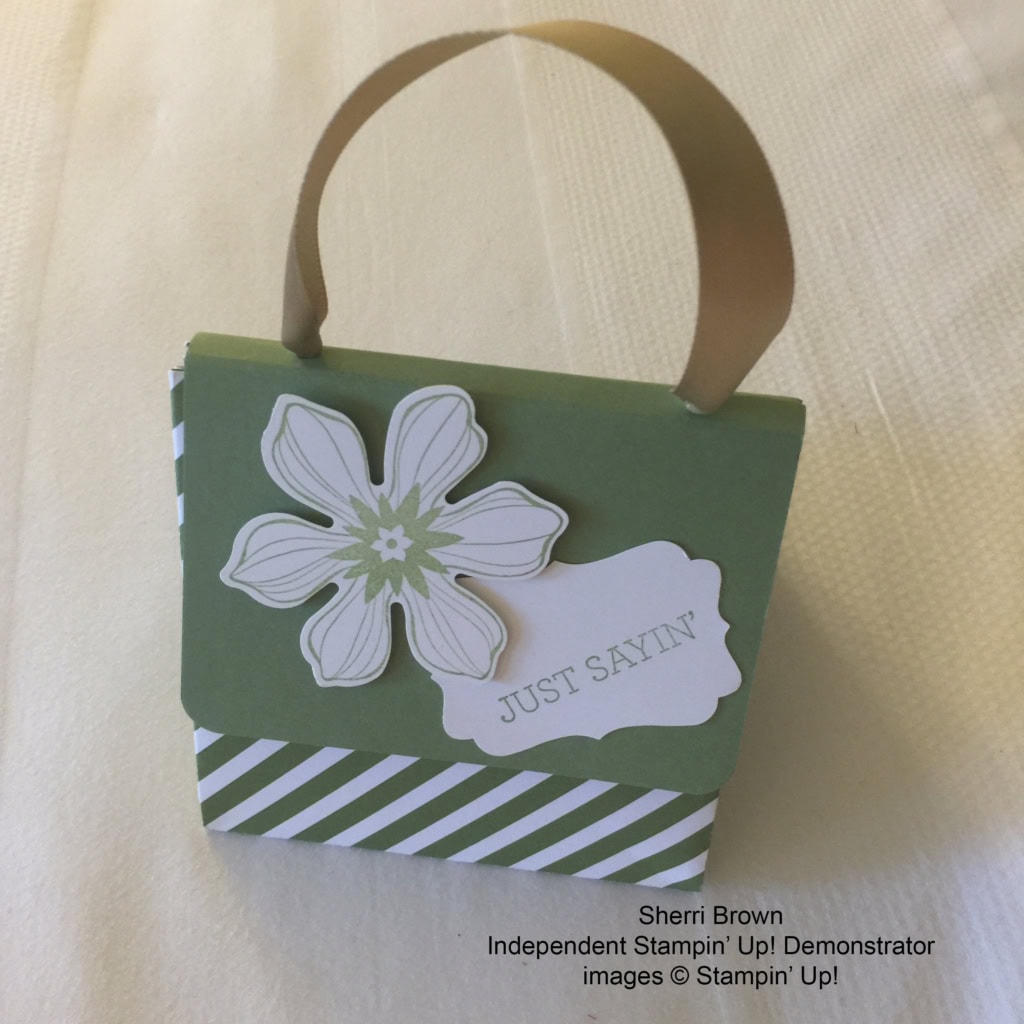
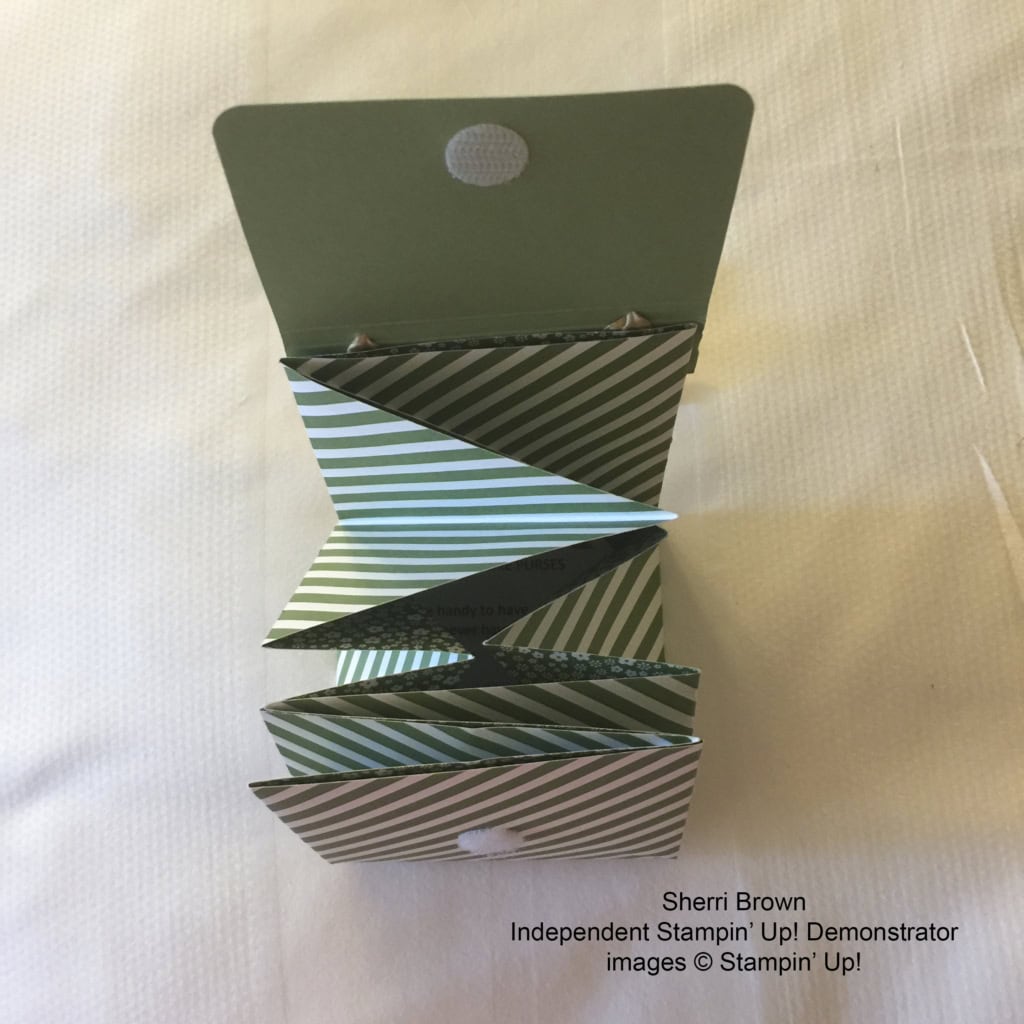
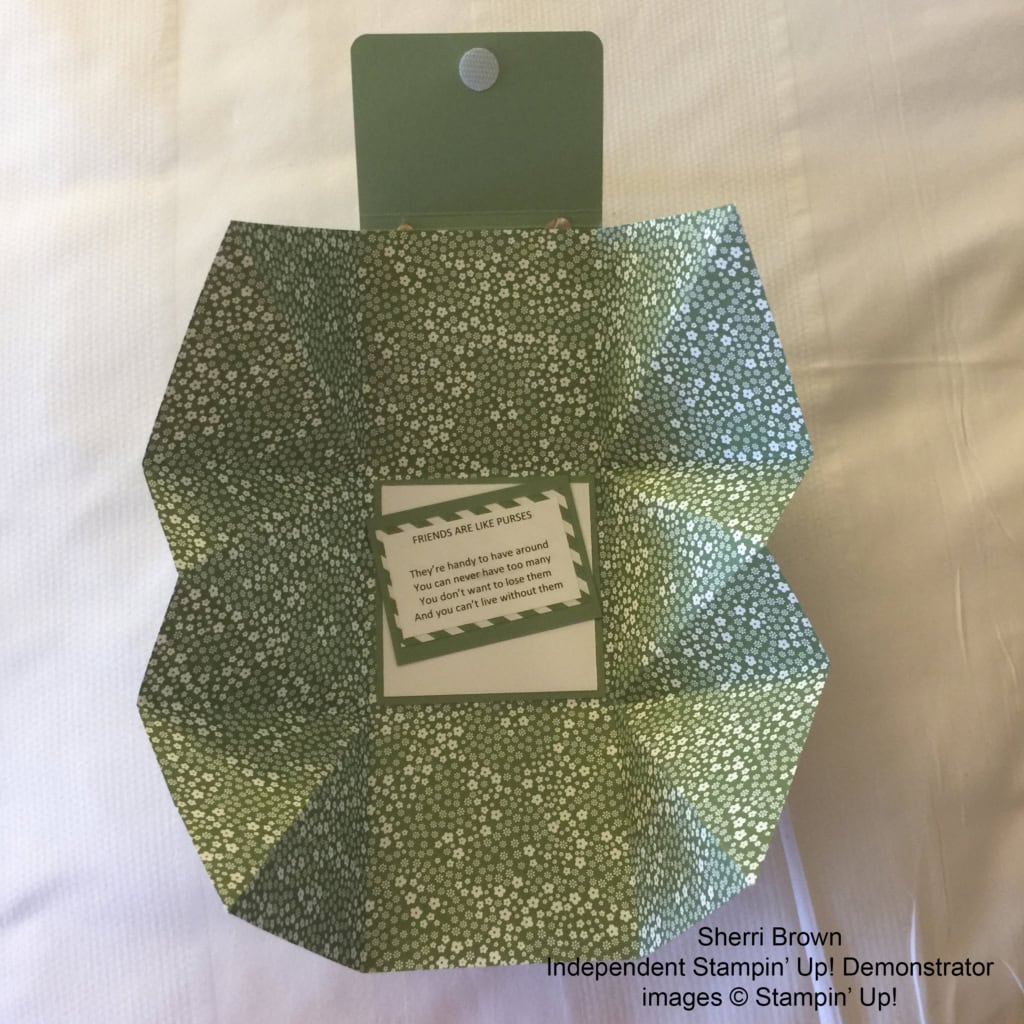
This adorable purse made by Sherri Brown opens up completely. It’s a 12″ x 12″ sheet of Designer Series Paper, scored and folded. She added a Velcro dot to keep it closed.
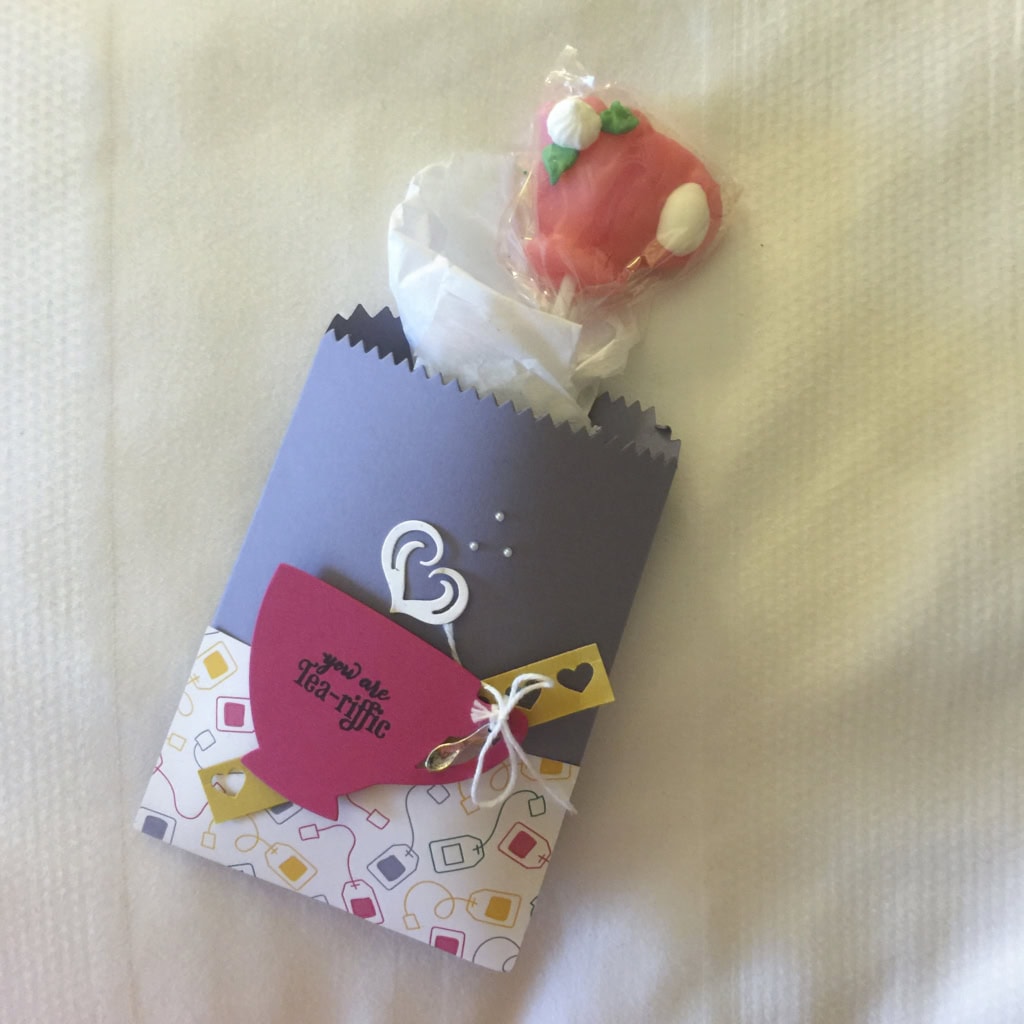
This sweet Mini Treat Bag made by Brenda Bierens contained a teapot shaped lollipop and some little candies with teapots on the wrappers.

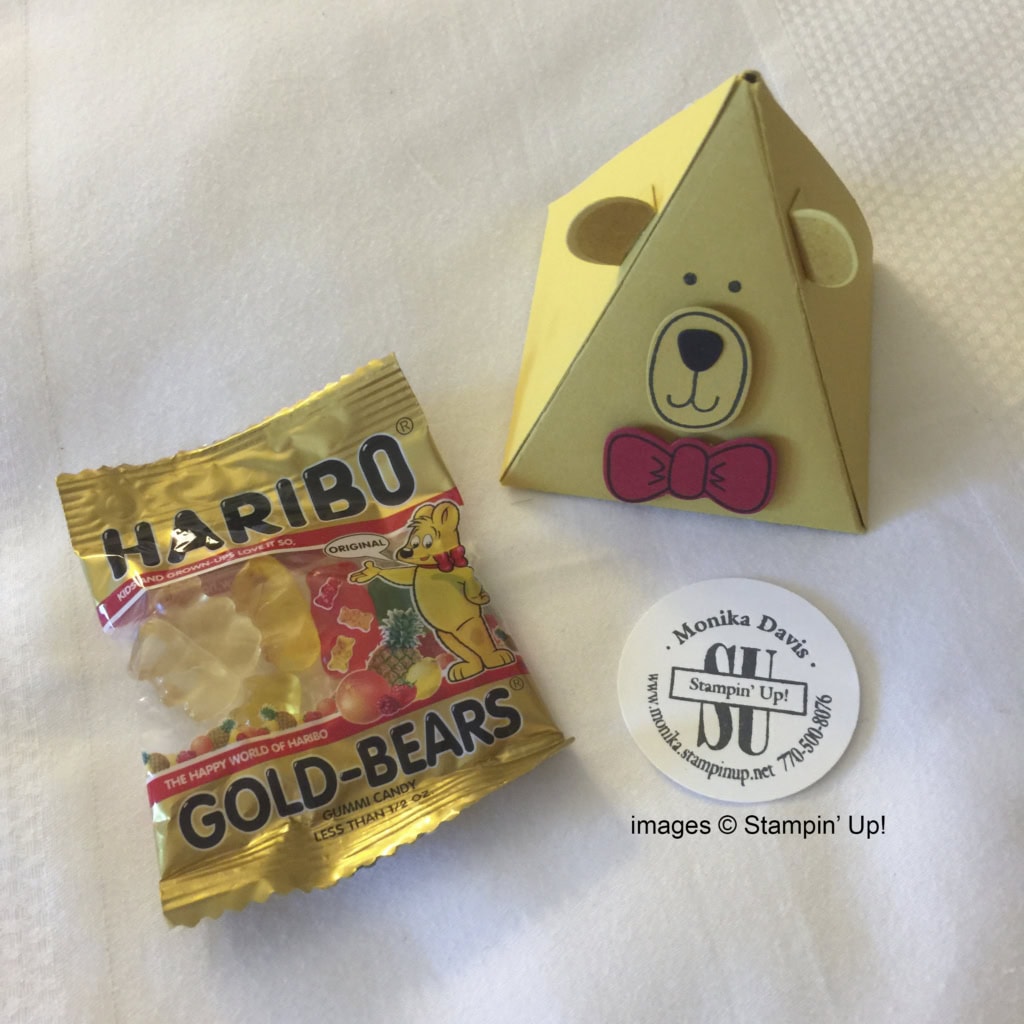
Monika Davis’ little bear box contained a bag of tiny gummy bears. Isn’t it adorable?


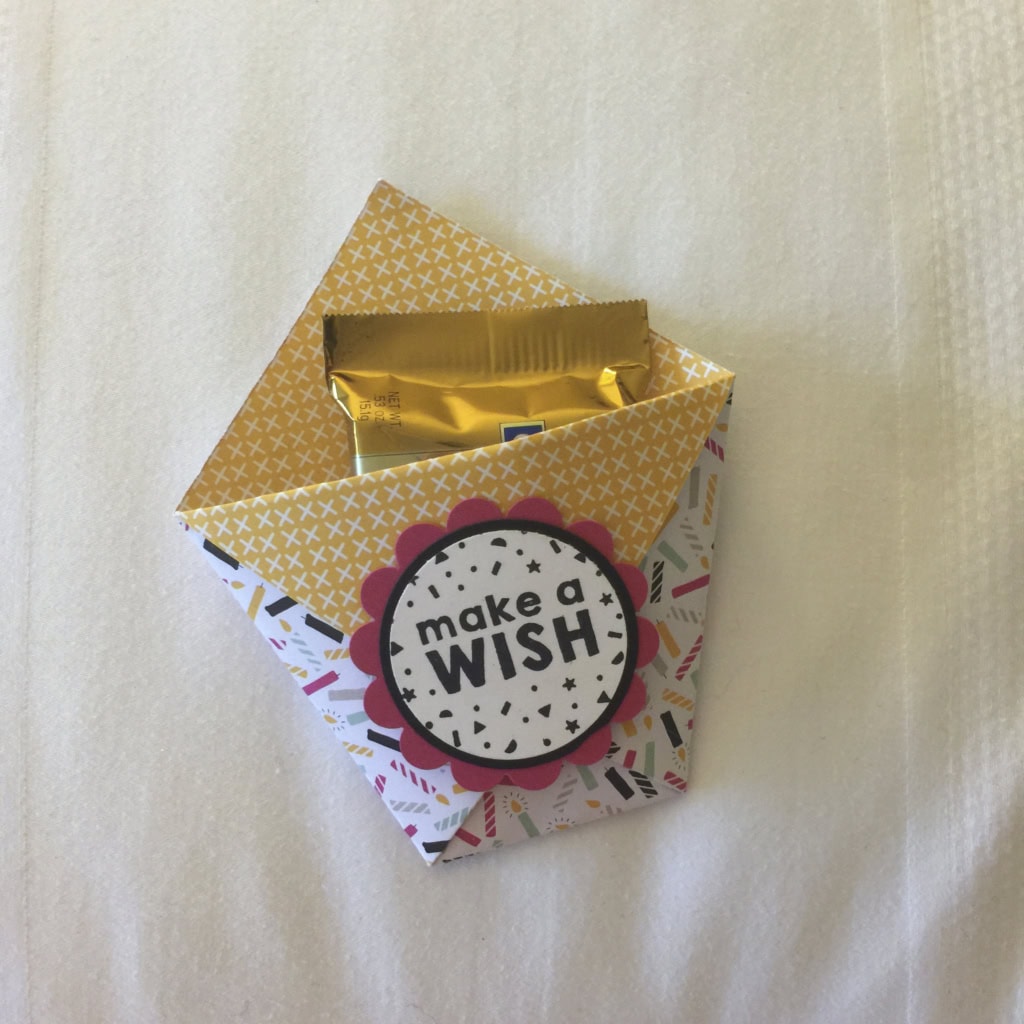
Debbie Callon’s cellophane bag is adhered to the inside of the folded card stock.


Diane Squires made this Kraft Tag a Bag folded in half to make an extra pocket. There were chocolates in the back pocket and a card in the front.


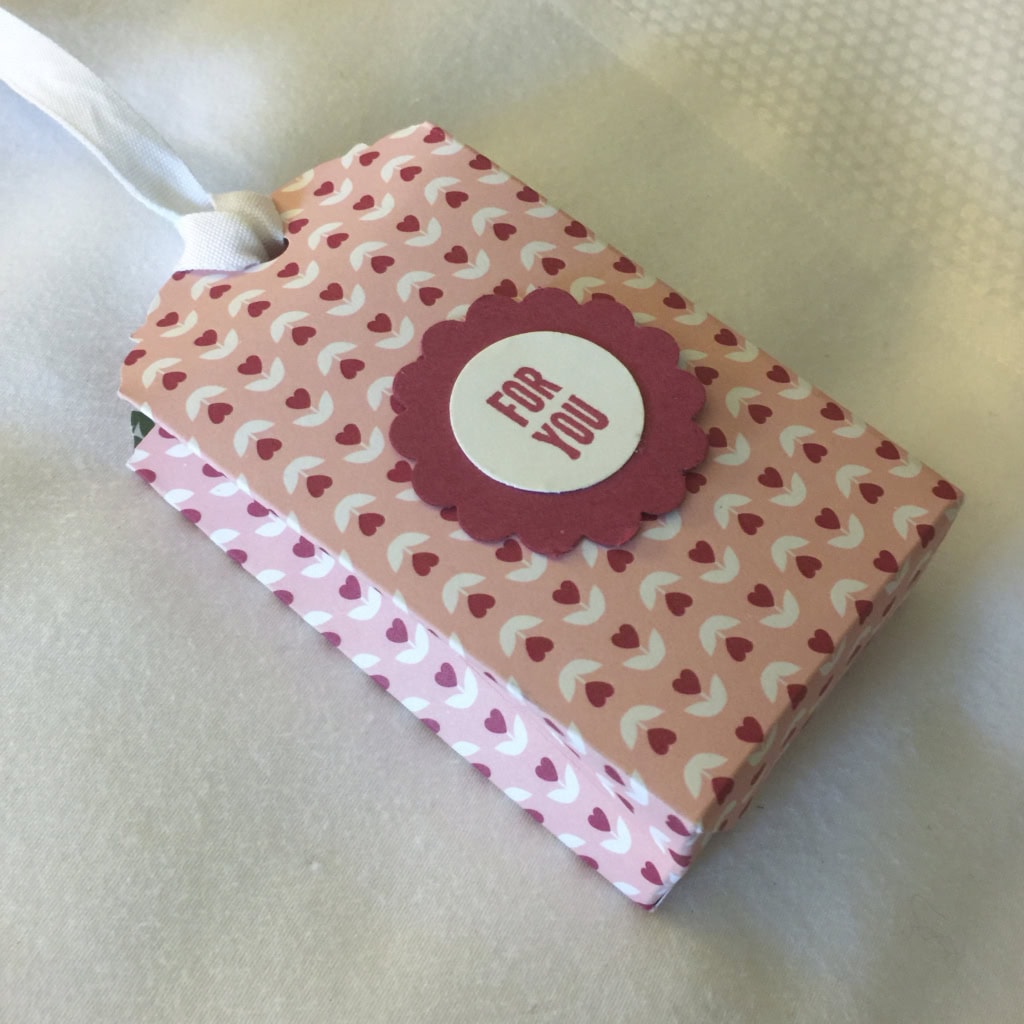
Penny Nelson’s little bag contains a tag that is folded on the end so it will pull out a gift card.


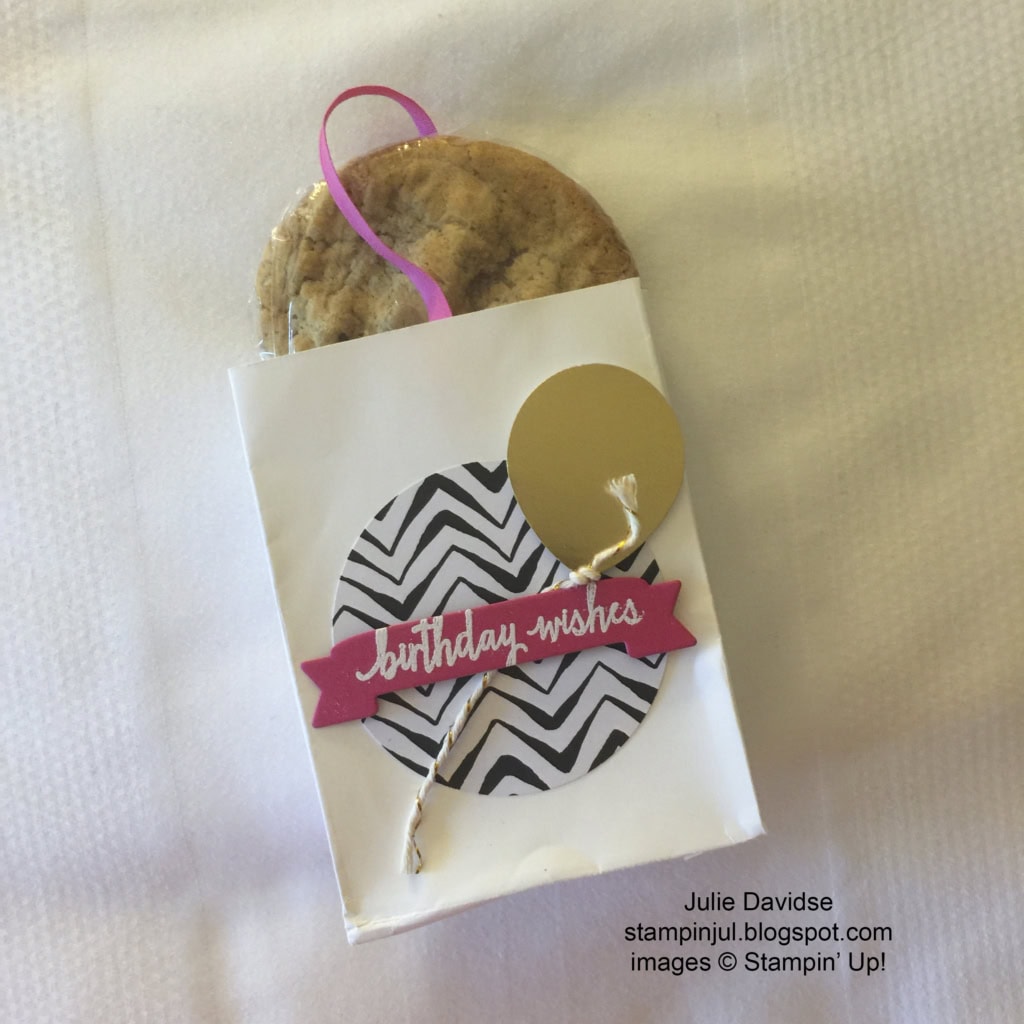
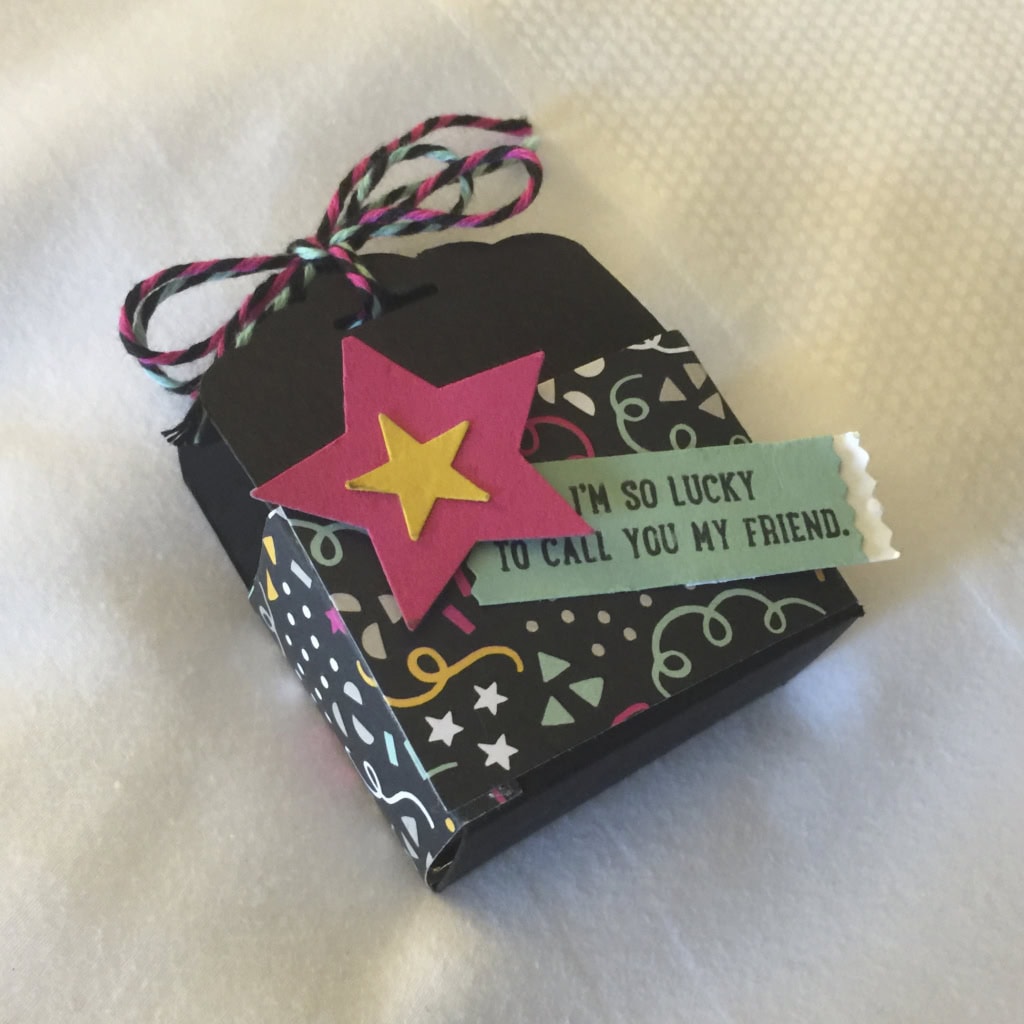
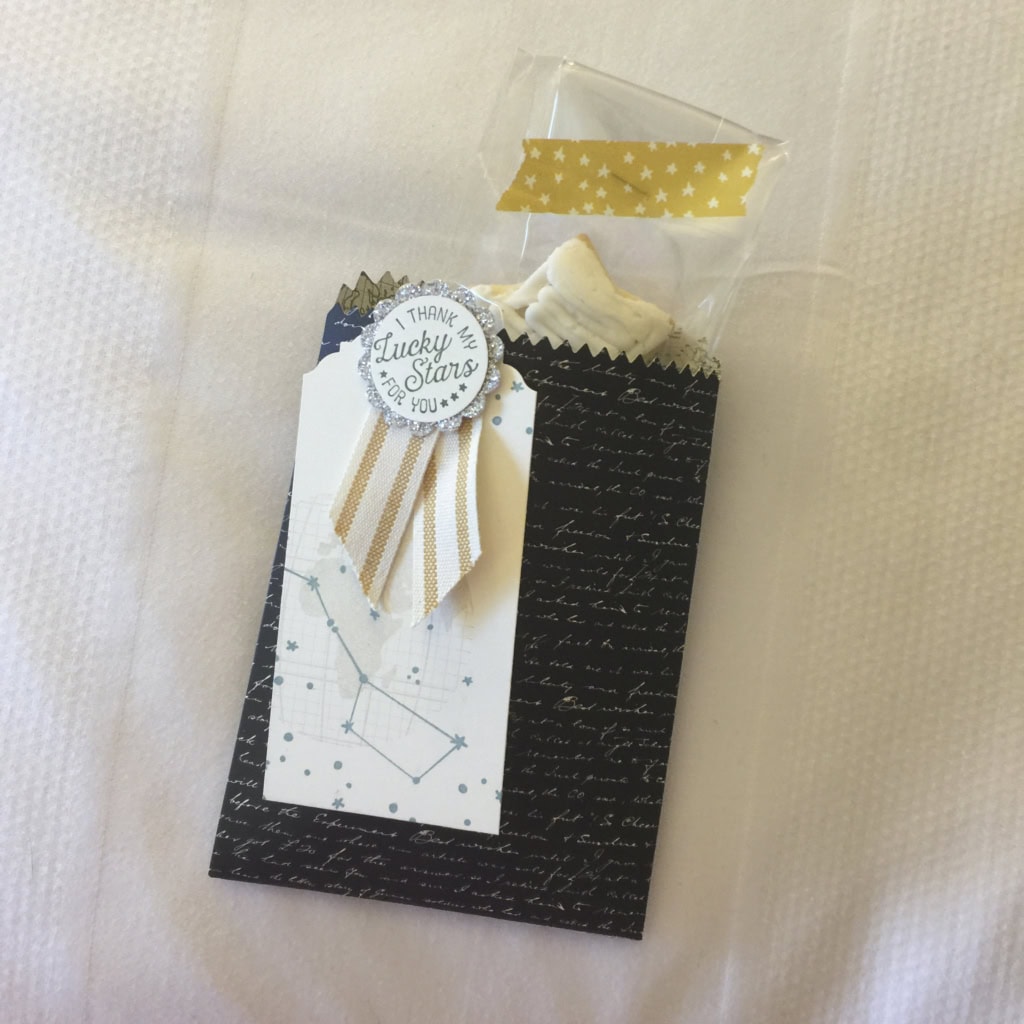
Jeanna Kay made this cute little bag and tag using the Going Places suite of products. The star-shaped cookies are the perfect accompaniment.

I wanted to be sure you saw all four sides of Elaine Laycock’s Curvy Keepsake Box, since they’re all decorated differently.


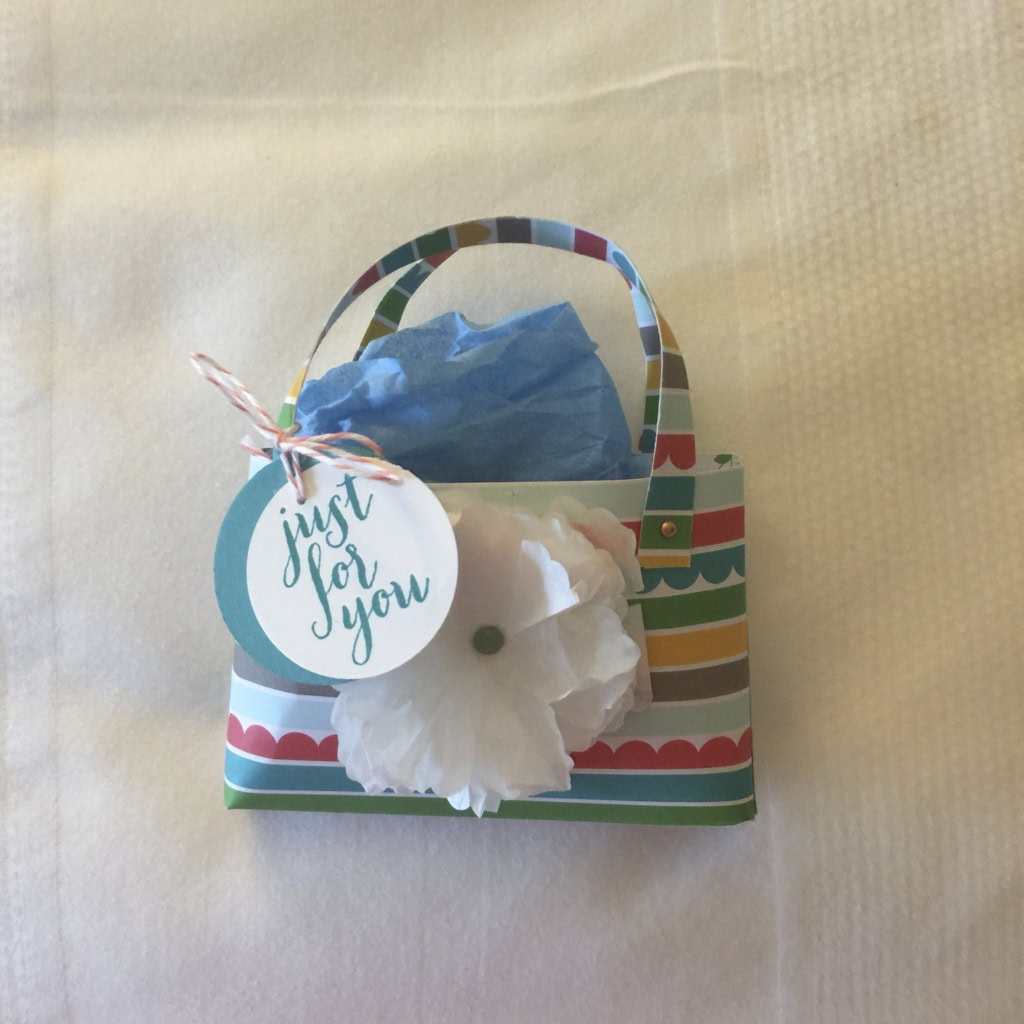
This sweet little shopping bag made by Yvonne Sutton contained earrings made with the Botanical Garden Jewels.


Check back to see more swap items I received!
Thanks for stopping by today, and Sweet Stamping!
Mar 7, 2016 | Bags, Club, Food, Gifts, Occasions, Tags |
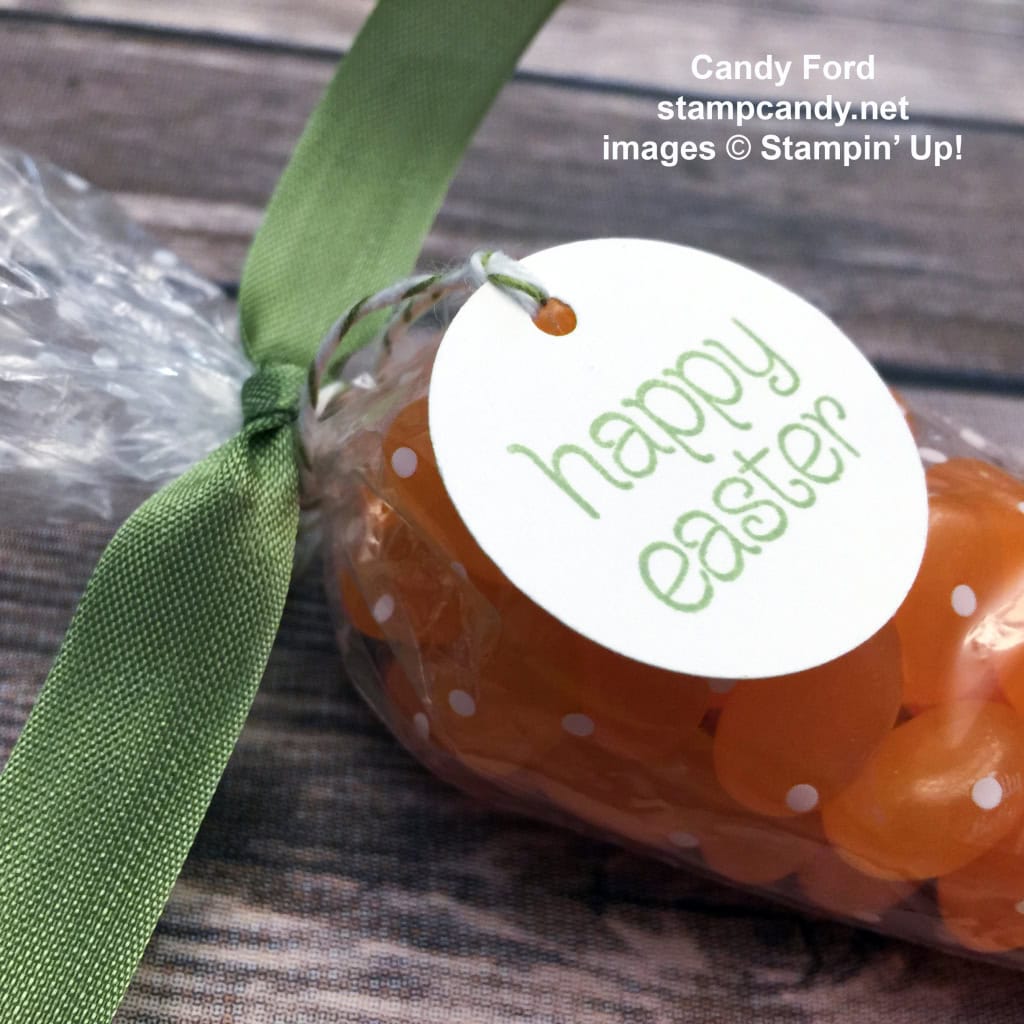
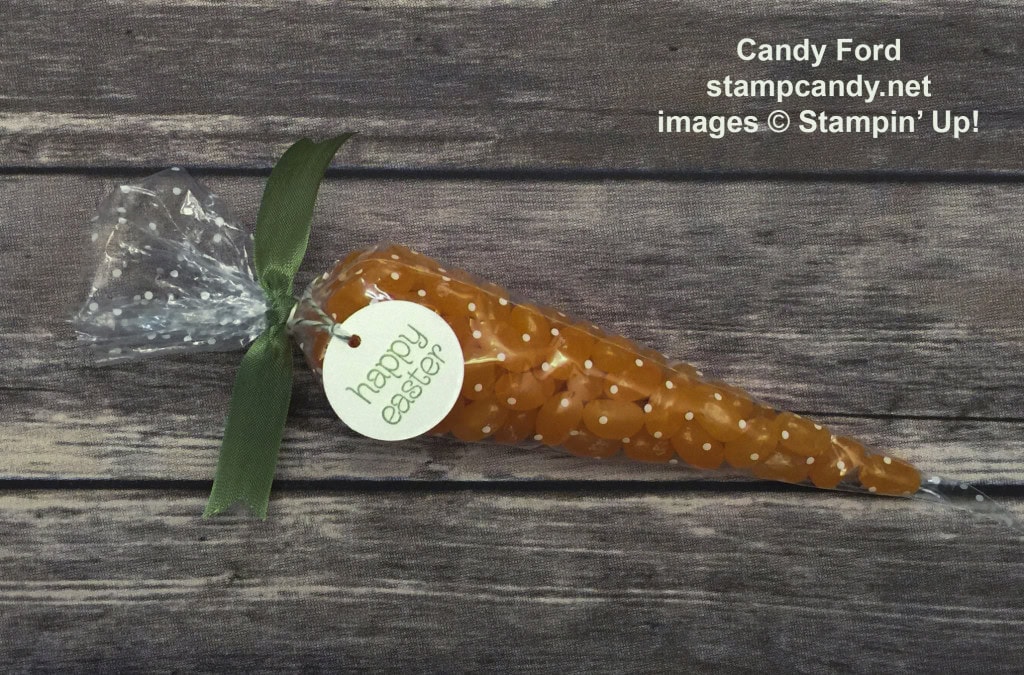
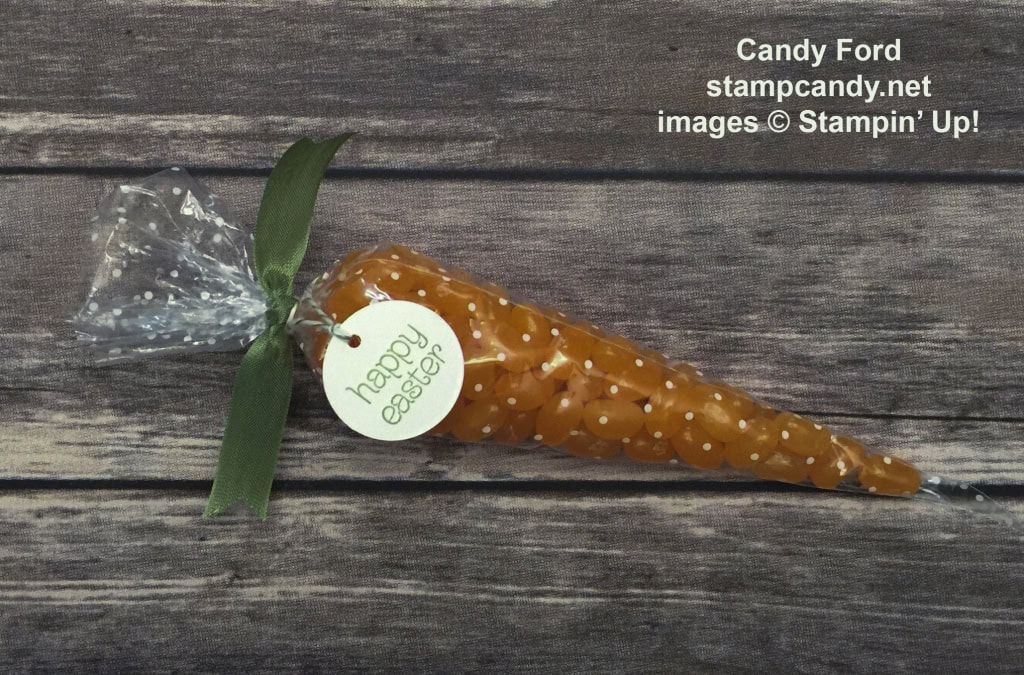
No, it isn’t an exotic dish you’d see on one of those cooking challenge shows. It’s much simpler. It’s a Polka Dot Cone Bag filled with Tangerine flavored jelly beans, and tied with Wild Wasabi Seam Binding and Old Olive Baker’s Twine, to look like a carrot.
This is the third and final Easter project from the March Stamp Club gathering. To see the previous two, click here and here.
This is just about as quick and easy as they come. Put a level 1/3 cup of jelly beans, or other small treats, into the bag. Twist the top to close, and tie with a piece of Wild Wasabi Seam Binding Ribbon.
Stamp the sentiment (we used this one from the Circle of Spring stamp set) on a piece of Whisper White card stock and cut it with the 1-1/4″ Circle Punch. Punch a small hole with the 1/8″ Circle Punch to make a tag. Use Old Olive Baker’s Twine to tie the tag onto the bag.
And that’s it! These provide a lot of bang for the buck. They’re super quick and easy, and make wonderful favors.
Here’s what we used:
Thanks for stopping by today, and Sweet Stamping!


