Nov 16, 2020 | Cards, Christmas, Gallery, Holiday |
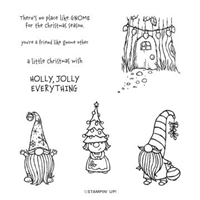
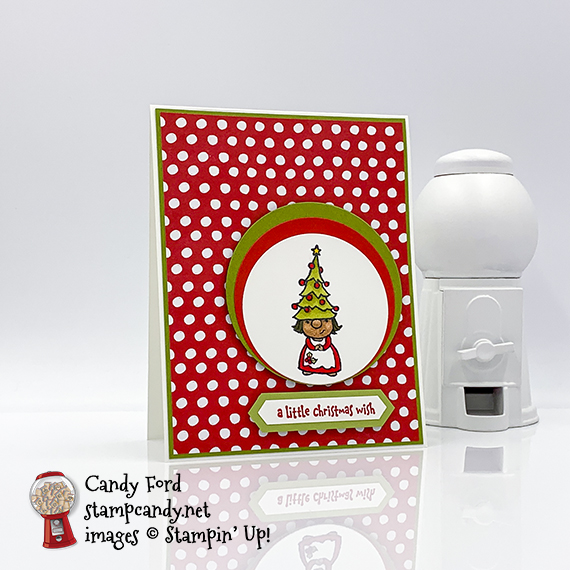
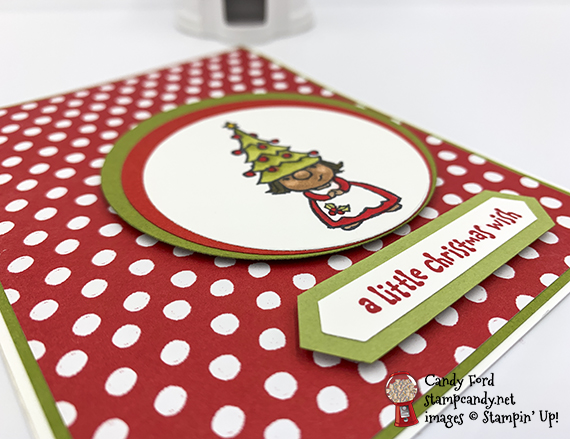
I used the Gnome for the Holidays stamp set, Layering Circle Dies, Classic Label Punch, and Trimming the Town Designer Series Paper to make today’s fun Christmas card. I have really fallen in love with this stamp set. The gnomes are just so adorable. And how fun is that polka dot background?
If you are reading this in email, some photos may appear blurry, or may not appear at all. Please click here to see the post on my blog.
S Gnome for the Holidays Gnome for the Holidays Gnome for the Holidays Gnome for the Holidays
Here’s what I made:
S
Here’s what I did:
Cut and scored with my paper trimmer:
- Whisper White Thick card stock (CS) cut to 4-1/4″ x 11″, then scored in half at 5-1/2″
- Old Olive CS layer cut to 4-1/8″ x 5-3/8″
- Trimming the Town Designer Series Paper (DSP) layer cut to 4″ x 5-1/4″
- Old Olive CS strip cut to 4″ x 5/8″
Stamped with the Gnome for the Holidays stamp set:
- gnome in Memento Tuxedo Black ink onto a scrap of Whisper White CS
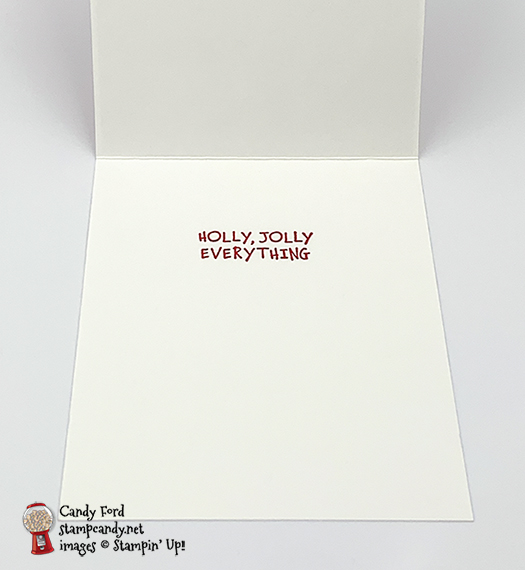
- outer sentiment in Real Red ink onto a scrap of Whisper White CS
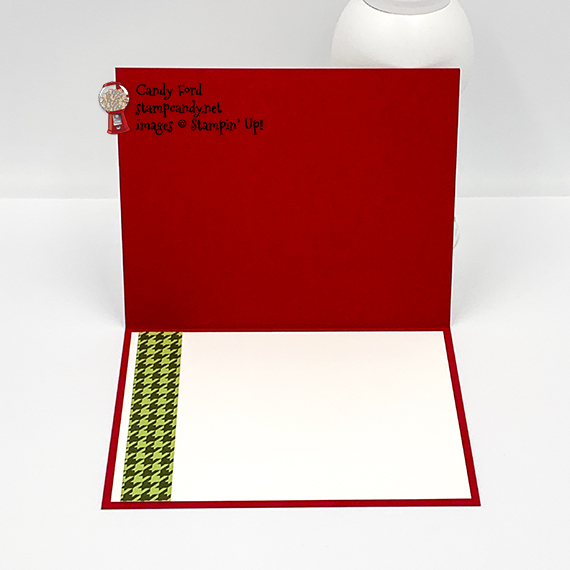
- inner sentiment in Real Red ink onto the inside of the card base
Cut using the Layering Circles Dies:
- gnome
- 2 larger circles from scraps of Real Red and Old Olive CS
Cut using the Classic Label Punch:
Colored using Stampin’ Blends Markers:
- gnome in Old Olive, Real Red, Bronze, Ivory, and Soft Suede
Cut using Paper Snips:
- both ends of the Old Olive CS strip, to match the outer sentiment
Assembled the card:
- burnished the fold in the card base with a Bone Folder
- Old Olive CS layer glued onto the front of the card base
- DSP layer glued onto the Old Olive CS layer
- gnome and two other circles lined up at the bottom and glued together, then adhered onto the DSP layer using Stampin’ Dimensionals
- outer sentiment glued onto the Old Olive CS strip, then adhered onto the DSP layer using Stampin’ Dimensionals
S
Here are today’s main colors:
You can click on each one to see all the products that come in that color!
S
Here’s what I used:
Click on these images for more details and to purchase. If you are reading this post in email, the product images may not show up. Please click here to see the post on my blog.
Supply List. <— Click for a clickable and printable list of the products!
S
S
Here’s the new Curvy Celebrations offering:
Click the image to see it in my online store.

S
Here are some helpful links:
S
Thanks for stopping by today, and Sweet Stamping!
Nov 13, 2020 | Cards, Christmas, Gallery, Holiday |
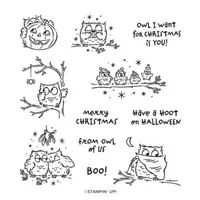
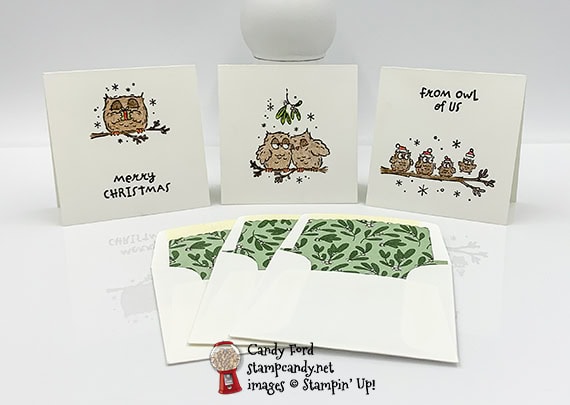
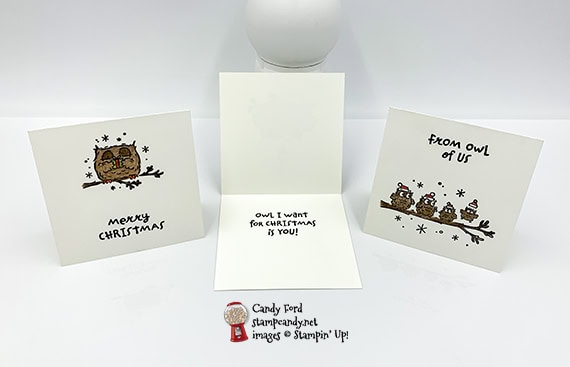
I used the Have a Hoot stamp set and Watercolor Pencils to make these cute little 3″ x 3″ cards, and I used the Envelopes Dies and ‘Tis the Season Designer Series Paper to line the 3″ x 3″ Envelopes. Aren’t these little owls adorable? One is holding a gift, a couple are snuggled up under mistletoe, and a group is celebrating together.
If you are reading this in email, some photos may appear blurry, or may not appear at all. Please click here to see the post on my blog.
S Hoot Hoot Hoot Hoot
Here’s what I made:
 S
S
Here’s what I did:
Cut and scored with my paper trimmer:
- Whisper White Thick card stock (CS) cut to 3″ x 6″”, then scored in half at 3″ (3 pieces)
Stamped with the Have A Hoot stamp set:
- images and sentiment in Jet Black Stazon ink onto the cards, as shown
Colored using Watercolor Pencils and a Blender Pen:
- images in Early Espresso, Pumpkin Pie, Cherry Cobbler, and Old Olive
Cut using the Envelopes Dies:
- 3 pieces of ‘Tis the Season Designer Series paper (DSP) to line the envelopes
Assembled the cards & envelopes:
- burnished the folds in the card bases with a Bone Folder
- die cut DSP pieces glued onto the inside of three 3×3 Whisper White Envelopes, being careful not to cover the adhesive that comes on the envelope flaps
S
Here are today’s colors:
You can click on each one to see all the products that come in that color!
S
Here’s what I used:
Click on these images for more details and to purchase. If you are reading this post in email, the product images may not show up. Please click here to see the post on my blog.
Supply List. <— Click for a clickable and printable list of the products!
S
S
Here’s the new Curvy Celebrations offering:
Click the image to see it in my online store.
S
Here are some helpful links:
S
Thanks for stopping by today, and Sweet Stamping!
Nov 12, 2020 | Blog Hop, Boxes, Cards, Christmas, Gallery, Gift Wrap, Gifts, Holiday |

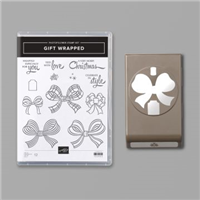
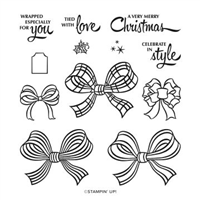
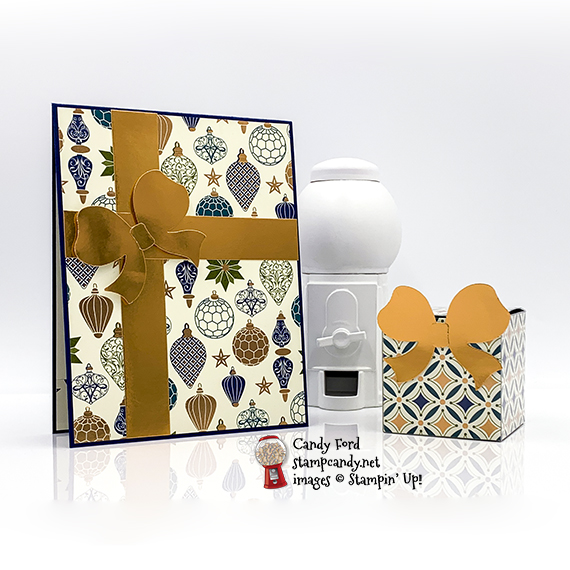
Welcome to the November 2020 OSAT Blog Hop! This month’s theme is Glad Tidings We Bring, so we’re featuring Christmas projects. I used the Gift Wrapped Bundle (Gift Wrapped stamp set ad Gift Bow Builder Punch) and Brightly Gleaming Designer Series Paper to create a Christmas card and Tiny Treat/Gift Box.
Be sure to hop all the way around to all the stops to see all the wonderful Christmas projects this team has created for you today!
If you are reading this in email, some photos may appear blurry, or may not appear at all. Please click here to see the post on my blog.
S November 2020 OSAT November 2020 OSAT November 2020 OSAT
Here’s what I made:

S
Here’s what I did:
Cut and scored with my paper trimmer:
- Night of Navy card stock (CS) cut to 4-1/4″ x 11″, then scored in half at 5-1/2″
- Brightly Gleaming Designer Series Paper (DSP) layer cut to 4-1/8″ x 5-3/8″
- DSP cut to 8-1/2″ x 2″, then scored at 2″, 4″, 6″, and 8″
- DSP cut to 2″ x 6″, then scored at 2″ and 4″
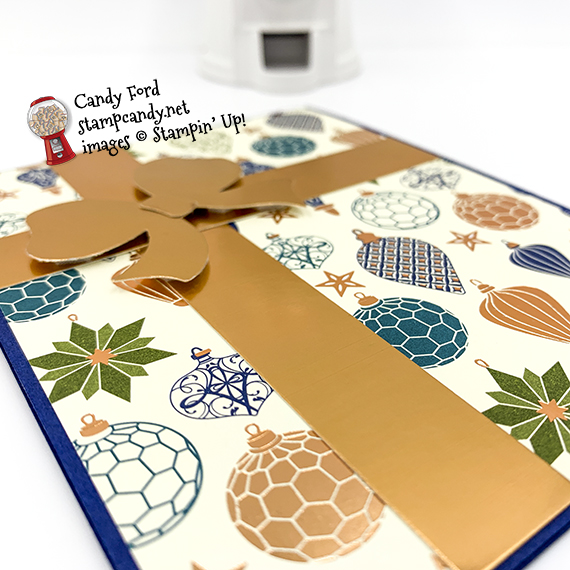
- Copper Foil strips cut to 3/4″ x 4-1/8″ and 3/4″ x 5-3/8″
- Very Vanilla CS cut to 4-1/8″ x 5-3/8″ for the inside of the card base
- DSP strip cut to 4-1/8″ x 3/4″
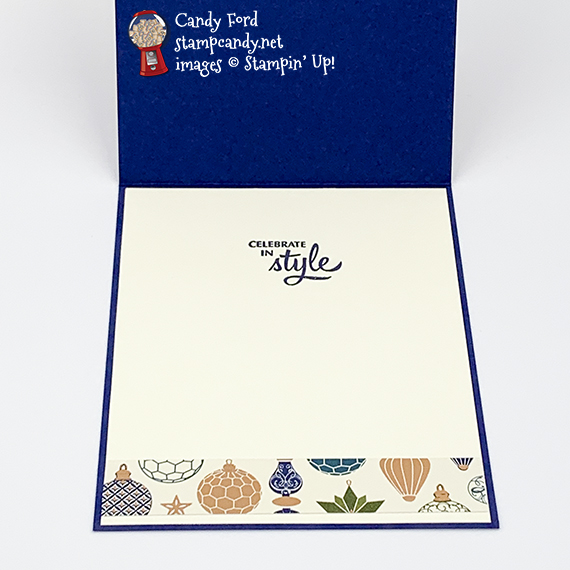
Stamped with the Gift Wrapped stamp set:
- sentiment in Night of Navy ink onto the Very Vanilla CS for the inside
Cut using the Gift Bow Builder Punch:
- 2 bows and “knots” from a scrap of Copper Foil Sheet
Assembled the card:
- burnished the fold in the card base with a Bone Folder
- DSP layer glued onto the front of the card base
- 2 Copper Foil strips adhered onto the DSP layer using Stampin’ Seal+
- a punched knot adhered onto a punched bow using Stampin’ Seal+
- punched bow adhered over the intersection of the foil strips using Stampin’ Dimensionals
- Very Vanilla CS glued onto the inside of the card base
- 3/4″ DSP strip glued onto the Very Vanilla CS, near the bottom
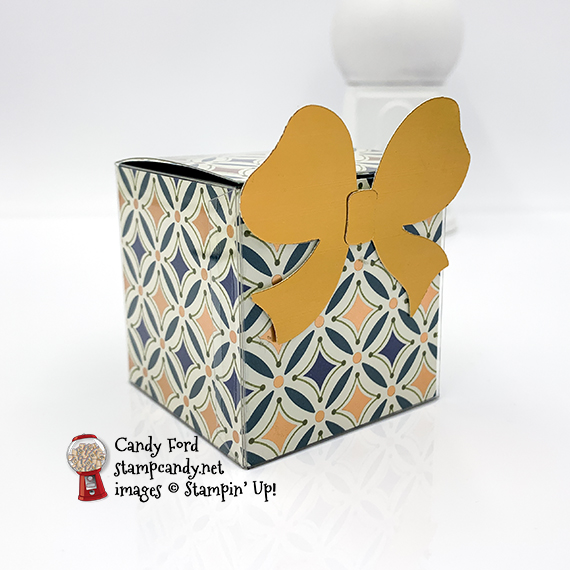
Assembled the box:
- burnished the folds in a Clear Tiny Treat Box with a Bone Folder, and folded to assemble
- burnished the folds in the two 2″ DSP strips
- longer DSP put into the box to line all four sides
- shorter DSP put into the box to line the bottom, back side, and top
- gift or treats put into the box and closed the lid
- second knot adhered onto the second punched bow using Stampin’ Seal+
- bow adhered onto the front of the box using Stampin’ Seal+
S
Here’s the November 2020 OSAT Blog Hop:
S
Here are today’s main colors:
You can click on each one to see all the products that come in that color!
S
Here’s what I used:
Click on these images for more details and to purchase. If you are reading this post in email, the product images may not show up. Please click here to see the post on my blog.
Supply List. <— Click for a clickable and printable list of the products!
S
Here’s the new Curvy Celebrations offering:
Click the image below to see it in my online store
S
Here are some helpful links:
S
Thanks for stopping by today, and Sweet Stamping!
Nov 10, 2020 | Blog Hop, Cards, Christmas, Gallery, Holiday |

Welcome t the November 2020 ICS Blog Hop! This month’s theme is Christmas is coming, so we’re featuring Christmas cards. I used the Gift Wrapped Bundle (Gift Wrapped stamp set and Gift Bow Builder Bunch) and Snowflake Splendor Designer Series Paper to create a Slimline card. This is one of the projects we made at my November Stamp Club gathering.
Be sure to hop around to all the stops to see all the great Christmas cards this team have made for you today!
If you are reading this in email, some photos may appear blurry, or may not appear at all. Please click here to see the post on my blog.
S November 2020 ICS November 2020 ICS November 2020 ICS November 2020 ICS. https://stampcandy.net/cards/November-2020-ICSBH-Christmas/ https://bit.ly/37WSEbl
Here’s what I made:


S
Here’s what I did:
Cut and scored with my paper trimmer:
- Balmy Blue card stock (CS) cut to 8-1/2″ x 7″, then scored in half at 3-1/2″
- Snowflake Splendor Designer Series Paper (DSP) layer cut to 8-1/4″ x 3-1/4″
- Whisper White CS cut to 8-1/4″ x 3-1/4″ for the inside of the card base
Stamped with the Gift Wrapped stamp set:
- 3 bows in Balmy Blue ink and 2 bows in Pool Party ink onto a scrap of Whisper White Thick CS
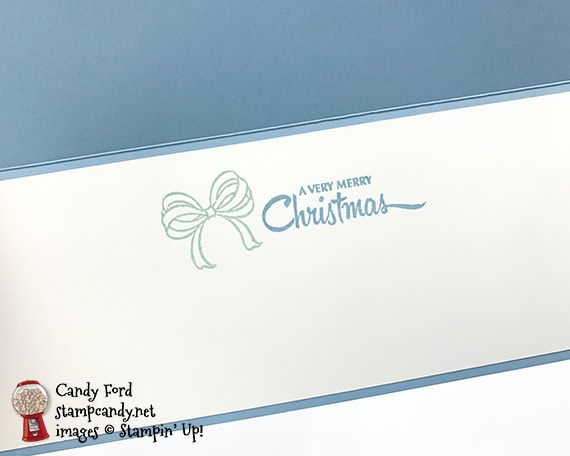
- sentiment in Balmy Blue ink onto the Whisper White CS for the inside
- small bow in Pool Party ink next to the sentiment
Cut using the Gift Bow Builder Punch:
Assembled the card:
- burnished the fold in the card base with a Bone Folder
- DSP layer glued onto the front of the card base
- 5 punched bows glued onto the DSP layer
- Adhesive Backed Snowflakes applied onto the DSP layer, on the visible centers of the snowflakes, using a Take Your Pick tool (they don’t show in the photos)
- Whisper White CS glued onto the inside of the card base
S
Here’s the November 2020 ICS Blog Hop:
Click the Next button to hop to Tricia Butts of Tricia’s Stamping Creations.
 S
S
Here are today’s colors:
You can click on each one to see all the products that come in that color!
S
Here’s what I used:
Click on these images for more details and to purchase. If you are reading this post in email, the product images may not show up. Please click here to see the post on my blog.
Supply List <— Click for a clickable and printable list of the products!
S
S
Here are some helpful links:
S
Thanks for stopping by today, and Sweet Stamping!
Nov 10, 2020 | Cards, Christmas, Gallery, Gift Card Holder, Gifts, Holiday |
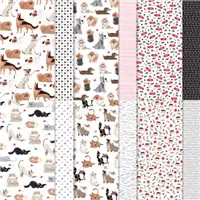
I used the Gift Wrapped Bundle (Gift Wrapped stamp set and Gift Bow Builder Punch) to make today’s project. It’s a Christmas card with a surprise pop-up gift card holder inside. I also used the Label My Fancy punch, Plush Poinsettia Specialty Paper, and Playful Pets Designer Series Paper to create the wrapped gift on the front of the card. This is one of the cards we made in my November Stamp Club gathering. We used the Gift Wrapped bundle to make 3 cards, and I will share the other two here on my blog this week.
If you are reading this in email, some photos may appear blurry, or may not appear at all. Please click here to see the post on my blog.
S gift wrapped gift wrapped gift wrapped gift wrapped
Here’s what I made:
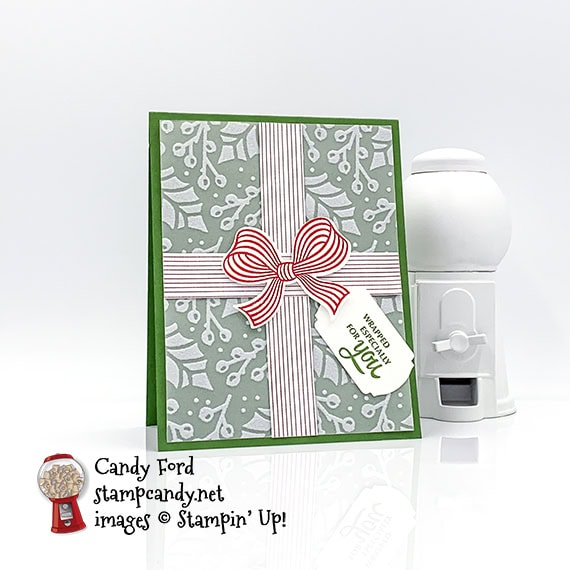
I didn’t have a gift card to use for the photo, so I used an old hotel key card, just to show how it fits in the holder.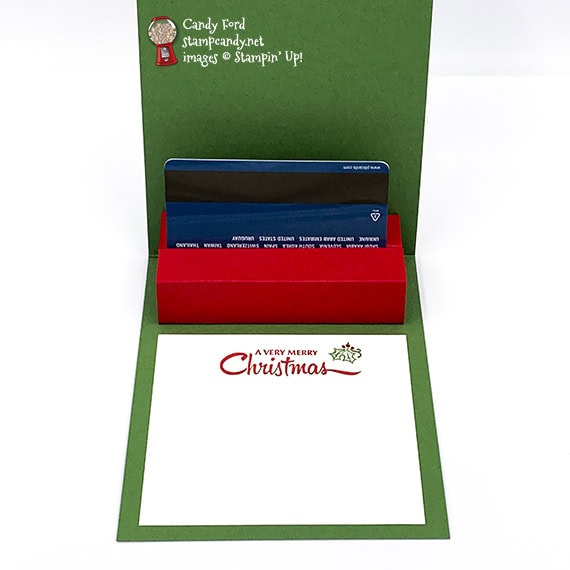


S
Here’s what I did:
Cut and scored with my paper trimmer:
- Garden Green card stock (CS) cut to 4-1/4″ x 11″, then scored in half at 5-1/2″
- Plush Poinsettia Specialty Paper (SP) layer cut to 4″ x 5-1/4″
- Playful Pets Designer Series Paper (DSP) strips cut to 3/4″ x 4″ and 3/4″ x 5-1/4″
- 2 pieces of Real Red CS cut to 3-3/4″ x 3-1/4″, and scored along the shorter side at 3/4″, 1-1/2″. 2-1/4″, and 3″
- Whisper White CS cut to 3-3/4″ x 3-1/2″ for the inside of the card base
Stamped with the Gift Wrapped stamp set:
- outer sentiment in Garden Green ink onto a scrap of Whisper White Thick CS
- bow in Real Red ink onto a scrap of Whisper White Thick CS
- inner sentiment in Real Red ink onto the Whisper White CS for the inside
- holly in Garden Green & Real Red beside the inner sentiment – I used Stampin’ Write Markers to color the holly stamp, then huffed on it to reactivate the ink before stamping
Cut using the Gift Bow Builder Punch:
Cut using the Label Me Fancy Punch:
- the outer sentiment, so that it was toward the right end of the label
Assembled the card:
- burnished the fold in the card base, and all the folds in the Real Red CS pieces, with a Bone Folder
- DSP strips adhered onto the SP layer using Stampin’ Seal
- SP layer adhered onto the front of the card base using Stampin’ Seal applied behind the DSP strips so they don’t show through the SP
- bow adhered onto the intersection of the DSP strips using Stampin’ Dimensionals
- outer sentiment adhered below the bow using Stampin’ Seal
- the 1/4″ section of each Real Red CS piece glued onto the inside of the opposite side, to form two skinny open-ended boxes
- one of the Real Red boxes glued into the corner of the inside of the card base, putting glue along the back and bottom sides of the box
- second Real Red box glued in front of the first one, putting glue along the bottom side of the box
- the two boxes glued together only at the very ends, leaving space between them for the gift card to be tucked down into
- Whisper White CS with inner sentiment glued onto the inside of the card base, in front of the Real Red boxes
S
Here are today’s colors:
You can click on each one to see all the products that come in that color!
S
Here’s what I used:
Click on these images for more details and to purchase. If you are reading this post in email, the product images may not show up. Please click here to see the post on my blog.
Supply List. <— Click for a clickable and printable list of the products!
S
S
Here are some helpful links:
S
Thanks for stopping by today, and Sweet Stamping!
Nov 9, 2020 | Blog Hop, Cards, Christmas, Gallery, Holiday |

Welcome to the November 2020 Candy Hearts Blog Hop! Today we are sharing Christmas themed projects. After reading my post, I hope you will hop to the next person on the list below. Be sure to hop around to see ALL the great projects the Candy Hearts have created for you!
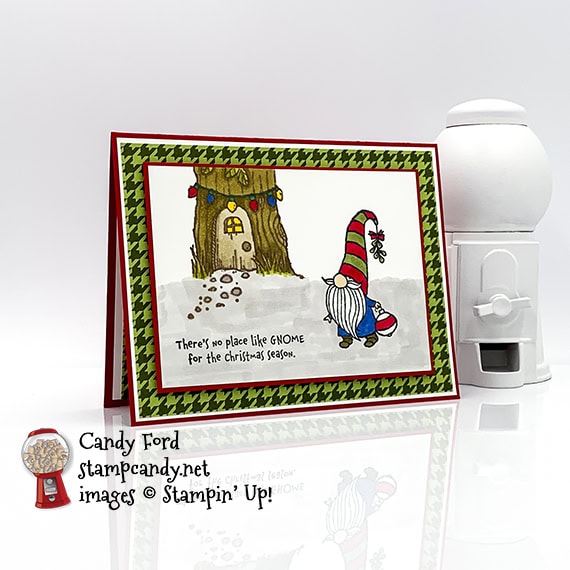
I used the Gnome for the Holidays stamp set and Stampin’ Blends Markers to create a holiday scene on my card for today. I just love this little gnome with the ornament, and his hat with mistletoe dangling from the tip. Don’t you?
If you are reading this in email, some photos may appear blurry, or may not appear at all. Please click here to see the post on my blog.
S November 2020 Candy Hearts November 2020 Candy Hearts November 2020 Candy Hearts November 2020 Candy Hearts
Here’s what I made:

S
Here’s what I did:
Cut and scored with my paper trimmer:
- Real Red card stock (CS) cut to 5-1/2″ x 8-1/2″, then scored in half at 4-1/4″
- Whisper White CS layer cut to 5-3/8″ x 4-1/8″
- Heartwarming Hugs Designer Series Paper (DSP) layer cut to 5-1/4″ x 4″
- Real Red CS layer cut to 4-5/8″ x 3-3/8″
- Whisper White CS layer cut to 4-1/2″ x 3-1/4″
- DSP strip cut to 3/4″ x 4″
- Whisper White CS cut to 5-1/4″ x 4″ for the inside of the card base
Stamped with the Gnome for the Holidays stamp set:
- tree house in Early Espresso ink at the top of the smaller Whisper White CS layer
- gnome and sentiment in Tuxedo Black Memento ink onto the same Whisper White CS layer
Colored using Stampin’ Blends Markers:
- gnome in Old Olive, Real Red, Night of Navy, Soft Suede, and Ivory
- tree in Soft Suede, Old Olive, Crumb Cake, Real Red, Night of Navy, and Daffodil Delight
- ground and rocks in Gray Granite
Assembled the card:
- burnished the fold in the card base with a Bone Folder
- larger Whisper White CS layer glued onto the front of the card base
- DSP layer glued onto the Whisper White CS layer
- Real Red CS layer adhered onto the DSP layer using strips cut from a Foam Adhesive Sheet
- stamped layer glued onto the Real Red CS layer
- DSP strip glued onto the Whisper White CS for the inside
- Whisper White CS glued onto the inside of the card base
S
Here’s the November 2020 Candy Hearts Blog Hop:
Thank you for hopping with the Hearts today! Be sure to hop around to all the stops. You do not want to miss any of the creativity in this talented group of stampers!
S
Here are today’s main colors:
You can click on each one to see all the products that come in that color!
S
Here’s what I used:
Click on these images for more details and to purchase. If you are reading this post in email, the product images may not show up. Please click here to see the post on my blog.
Supply List. <— Click for a clickable and printable list of the products!
S
S
Here are some helpful links:
S
Thanks for stopping by today, and Sweet Stamping!