Oct 14, 2021 | Autumn, Blog Hop, Boxes, Cards, Gallery, Gift Wrap, Gifts, Halloween, Holiday, Treat Holders |

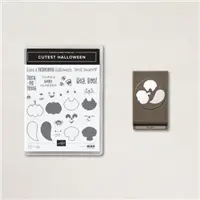
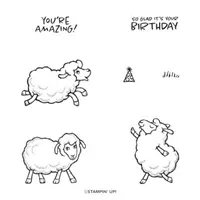
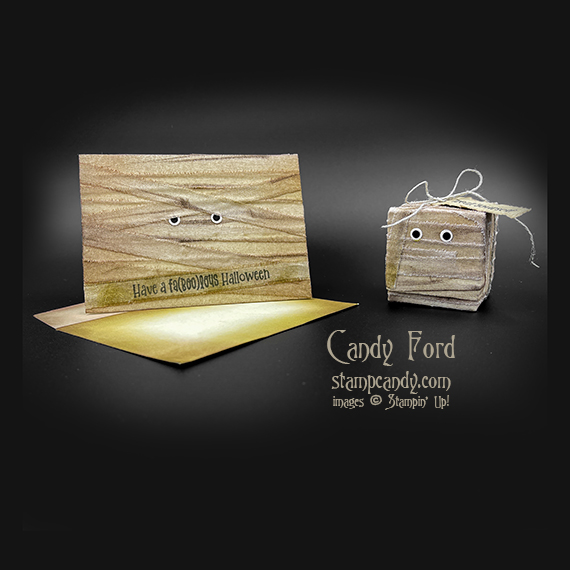
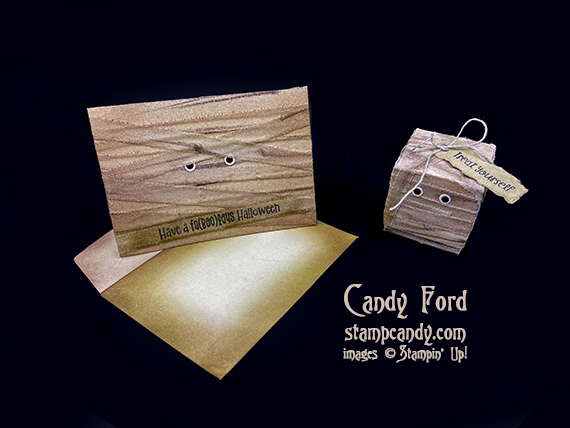
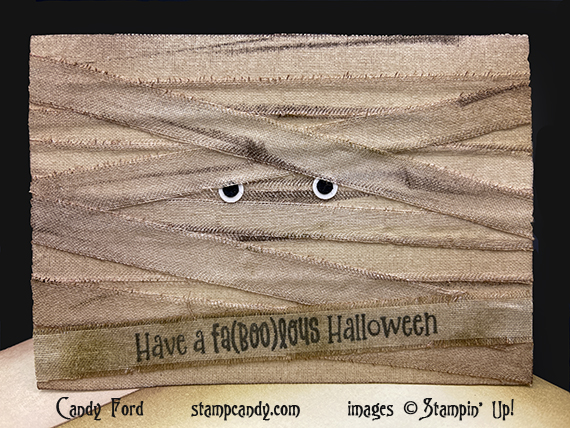
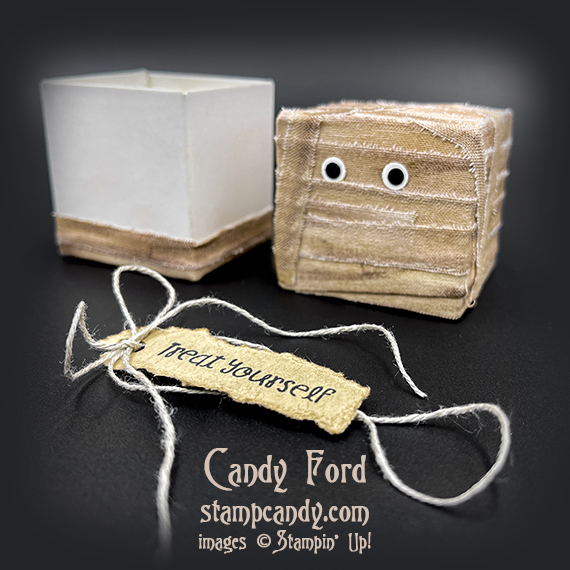
Welcome to the October 2021 OSAT Blog Hop! This month’s theme is A Ghoul’s Night Out, so we’re sharing Halloween projects with you today. The theme suggests fun, and I wanted my projects to be fun, but also spooky. I used Linen Paper and the Cutest Halloween Stamp Set to create a mummy card and treat box. The Cutest Halloween stamp set can be bundled with the Halloween punch to save 10%. The bundle is also a part of the Cute Halloween Suite Collection.
Be sure to hop all the way around to all the blogs to see all the great projects this group has created for you!
If you are reading this in email, some photos may appear blurry, or may not appear at all. Please click here to see the post on my blog.
S October 2021 OSAT Blog Hop October 2021 OSAT Blog Hop October 2021 OSAT Blog Hop October 2021 OSAT Blog Hop
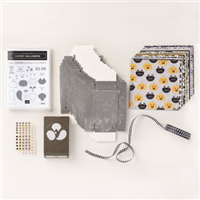
Here’s what I made:

S
Here’s what I did:
Linen Paper:
- cut Linen paper to 6″ x 6″ (2 pieces)
- used a Blending Brush and ink pads in Crumb Cake, Soft Suede, and Early Espresso to color the Linen paper
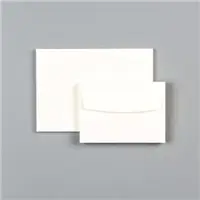
- colored the edges and flap of a Very Vanilla Note Card envelope using the same Blending Brush and ink pads
- added more color to the Linen paper with the edges of the ink pads
- used Paper Snips to cut little snips along one edge of the Linen Paper, just to get it started so I could tear it into strips
- tore the Linen paper into strips averaging about 3/8″ wide
- Note: the backing tended to curl up or come off entirely as I tore.
Stamped with the Cutest Halloween stamp set:
- card sentiment in Jet Black Memento ink onto one of the linen strips (I used my Stamparatus to stamp a few times so it would be nice and dark.)
- box sentiment in Jet Black Memento ink onto a scrap of Crumb Cake cardstock (CS)
Envelope:
- colored the edges and flap of a Very Vanilla Note Card envelope using the same Blending Brush and ink pads
Eyes:
- cut 4 circles from Basic Black CS using the Turtle Builder Punch
- cut 4 circles from Basic White Thick CS using a standard hand-held 1/4″ hole punch (available anywhere you buy office or school supplies)
Tag:
- tore the Crumb Cake CS around the box sentiment, leaving a little extra space at one end for the hole
- cut a hole in the end using the Turtle Builder Punch
- used the same Blending Brush and Soft Suede ink pad to “dirty up” the tag a little bit
Assembled the card:
- burnished the fold in a Very Vanilla Note Card with a Bone Folder
- applied torn strips of Linen paper onto the card front, then trimmed the excess from the ends using Paper Snips
- Note: I used the strips from the cut edges of the Linen paper along the top and bottom of the card front.
- applied the strip with sentiment over the other strips
- ran blending brush over strips for a little more dirt
- glued 2 eyes onto the strips
Assembled the box:
- burnished the folds in the box and lid with a Bone Folder, and folded to assemble
- applied linen strips onto the top of the lid, covering up the little ribbon handle
- wrapped linen strips around the sides of the lid to cover the whole thing
- Note: I used the strips from the cut edges of the Linen paper along the top and bottom of the lid.
- wrapped strips around just the bottom of the box (Only cover the part of the box that shows when the lid is on, about 1/4″ to 3/8″. I sent a little above that and the strips tend to curl down in a few places when the lid goes on the box.)
- wrapped any extra strips in a haphazard way over the lid
- ran blending brush over strips for a little more dirt
- glued 2 eyes onto one side of the lid
- wrapped linen thread around the box and tied it in a bow, also tying on the tag
S
Here’s the October 2021 OSAT Blog Hop:
s
Here are today’s colors:
You can click on each one to see all the products that come in that color!
S
Here’s what I used:
Click on these images for more details and to purchase. If you are reading this post in email, the product images may not show up. Please click here to see the post on my blog.
Supply List. <— Click for a clickable and printable list of the products!
Here are some helpful links:
S
Thanks for stopping by today, and Sweet Stamping!
Oct 12, 2021 | Blog Hop, Boxes, Gallery, Gift Wrap, Gifts, Halloween, Holiday, Treat Holders |

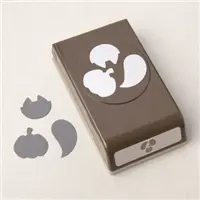
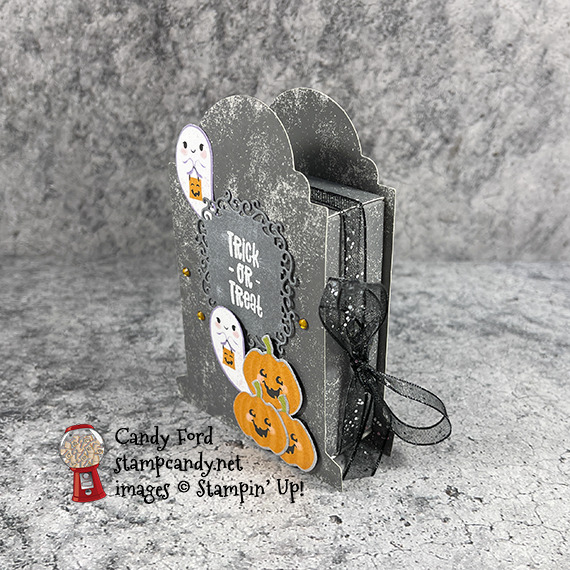
Welcome to the October 2021 ICS Blog Hop! This month we are featuring our favorite punches. Of course, it’s impossible for me to choose one punch as my favorite. I like them all! But I finally decided to use the Halloween Punch because, you know, it’s October and all. The punch can be purchased alone or in a bundle with the Cutest Halloween stamp set (save 10% when you buy the bundle!)

If you are reading this in email, some photos may appear blurry, or may not appear at all. Please click here to see the post on my blog.
S October 2021 ICS October 2021 ICS October 2021 ICS October 2021 ICS
Here’s what I made:

S
Here’s what I did:
Stamped with the Cutest Halloween stamp set:
- sentiment in Versamark ink onto a scrap of Basic Gray cardstock (CS), then heat embossed it in white
Cut using the Ornate Frames Dies:
Cut using the Halloween Punch:
- 3 pumpkins and 2 ghosts from the Cute Halloween Designer Series Paper (DSP)
Inked using a Sponge Dauber:
- sentiment die cut in White Craft Ink, then dried the ink using the lower setting of my Heat Tool
Assembled the project:
- burnished the folds in the box and lid with a Bone Folder, then assembled the box
- sentiment and one ghost glued onto the lid of the box (Note: the ghost extends past the top of the box, I was careful only to to apply glue where it would be adhered onto the box.)
- 3 pumpkins glued together in a cluster, then adhered onto the box lid using Black Stampin’ Dimensionals
- second ghost adhered onto the box lid, as if coming out from behind the pumpkins, using Black Stampin’ Dimensionals
- 3 Pumpkin Pie rhinestones applied onto the box lid using my Take Your Pick Tool
- ribbon wrapped around the lid, adhering in onto the top, bottom, and left side with Tear & Tape, then tied in a bow on the right side

redS
Here’s the October 2021 ICS Blog Hop:
Click the Next button to hop to the next blog:

Here are today’s main colors:
You can click on each one to see all the products that come in that color!
S
Here’s what I used:
Click on these images for more details and to purchase. If you are reading this post in email, the product images may not show up. Please click here to see the post on my blog.
Supply List. <— Click for a clickable and printable list of the products!
Here are some helpful links:
S
Thanks for stopping by today, and Sweet Stamping!
Sep 15, 2021 | Blog Hop, Boxes, Gallery, Gift Wrap, Gifts, Halloween, Holiday, Treat Holders |

Welcome to the September 2021 InKing Royalty Blog Hop! This month’s projects feature candy and treats, so prepare your sweet tooth for some wonderful inspiration. We are excited to share our creations with you today! After you read my post, I hope you’ll hop over to the next person on the list at the base of this post.
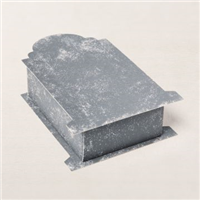
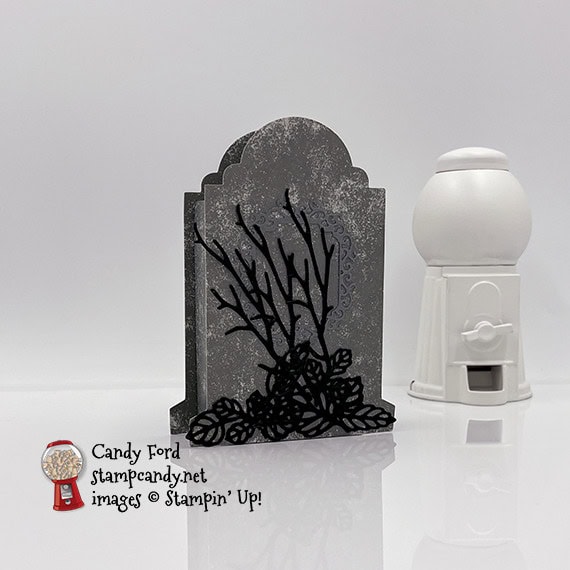
Okay, so what do you do when you’ve spent days packing for a long weekend stamping retreat, and only remember you committed to do a blog hop the night before it goes live? Oops! Well, I didn’t want to undo all that packing, so first I checked to see what I could get to easily. Stamps and inks no, but dies yes. I was able to maneuver a Mini Stampin’ Cut & Emboss Machine out of its box. And I got to a Tombstone Treat Box. Okay, that would have to do. Of course, the project had to be quick and easy so I could get my post done in time. What I came up with is a spooky tombstone with twigs and fallen leaves, that you can put goodies in.
If you are reading this in email, some photos may appear blurry, or may not appear at all. Please click here to see the post on my blog.
S September 2021 InKing September 2021 InKing September 2021 InKing September 2021 InKing https://stampcandy.net/blog-hop/september-2021-irbh-candy-treats
Here’s what I made:
S
Here’s what I did:
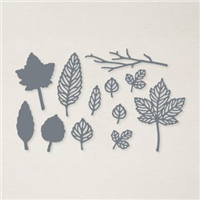
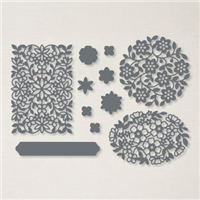
Cut using the Intricate Leaves Dies:
- several of the small leaves and 3 branches from scraps of Basic Black card stock (CS)
Cut using the Ornate Frames Dies:
- frame from a scrap of Basic Grey CS
Put it all together:
- burnished the folds in the box base and lid with a Bone Folder, then folded them to assemble (The box comes with peel off adhesive already attached!)
- frame glued onto the front of the tombstone (top of the lid)
- leaves glued along the bottom of the front
- That’s it! Easy Peasy, Toil & Trouble! Or is it Bubble Bubble, Lemon Squeezy?
S
Here’s the September 2021 Candy Hearts Blog Hop:
Thank you for hopping along with us. If you get stuck during the Blog Hop, please use this line-up as a guide:
- Brian King at Stamp with Brian
- Sheryl Sharp at Sharp Notes by Sheryl
- Candy Ford at Stamp Candy <—– YOU ARE HERE!
- Jackie Beers at Blue Line Stamping
- Lynn Kolcun at Avery’s Owlery
- Renae Novak at Blessed by Cards
- Jan Dufour at Stamp Me Silly
- Sue Jackson at Just Peachy Stamping
- Pam Morris at Tap Tap Stamp
s
Here are today’s colors:
You can click on each one to see all the products that come in that color!
S
Here’s what I used:
Click on these images for more details and to purchase. If you are reading this post in email, the product images may not show up. Please click here to see the post on my blog.
Supply List. <— Click for a clickable and printable list of the products!
S
Only 15 More Days of Sale-a-bration!
Don’t miss out on these amazing free products!
Choose one of these free items for every $50 on an order:
s
Choose one of these free items for every $100 on an order:
Any order of $300 or more automatically qualifies you to receive the amazing In Your Words stamp set for free!
How would you like to get a discount on all your Stampin’ Up! purchases? Join my team of Candy Hearts (we have a lot of fun!) and you get to choose $125 in products and pay only $99 and get Free Shipping! During Sale-a-bration you also get to choose a free bundle on top of all that! Here are the bundles you can choose from:
S
Here are some helpful links:
S
Thanks for stopping by today, and Sweet Stamping!

Aug 16, 2021 | Blog Hop, Boxes, Christmas, Gallery, Gift Wrap, Gifts, Holiday, Tags, Treat Holders |

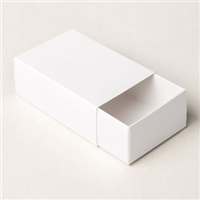
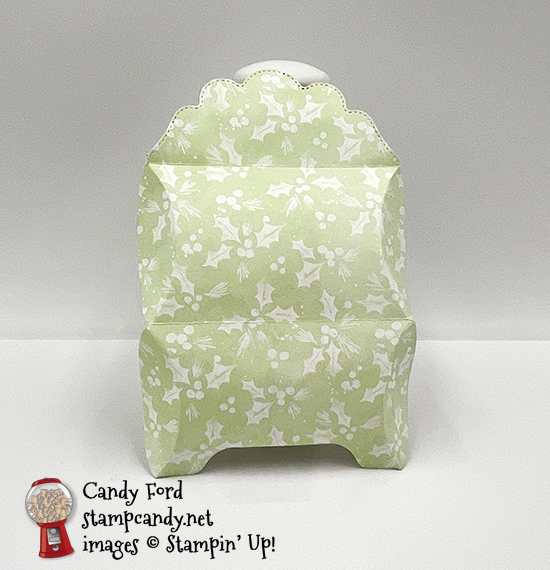
Welcome to the August 2021 CHBH! This month we are featuring 3D projects. I’m sharing a treat box I made using some new holiday products from the July-December 2021 Mini Catalog: the Pretty Pillowbox Dies and Painted Christmas Designer Series Paper.
After reading my post, be sure to hop around to all the stops to see the wonderful 3D projects this creative group has in store for you.
If you are reading this in email, some photos may appear blurry, or may not appear at all. Please click here to see the post on my blog.
S August 2021 CHBH August 2021 CHBH August 2021 CHBH August 2021 CHBH
Here’s what I made:
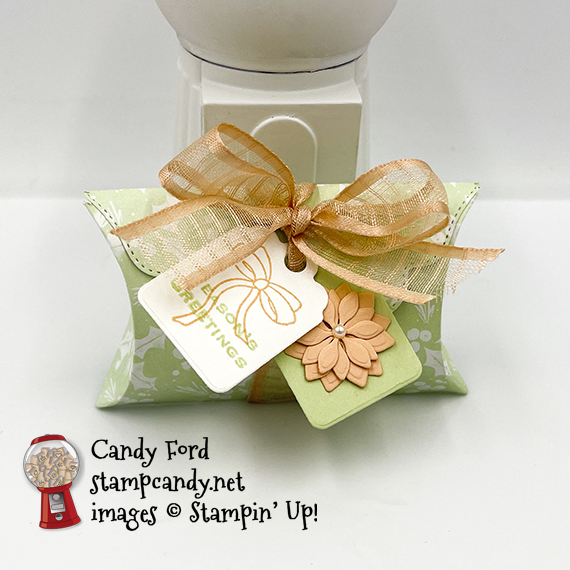
You can fold in the ends as I’ve done here, or you can glue the ends shut, since it opens at the flap.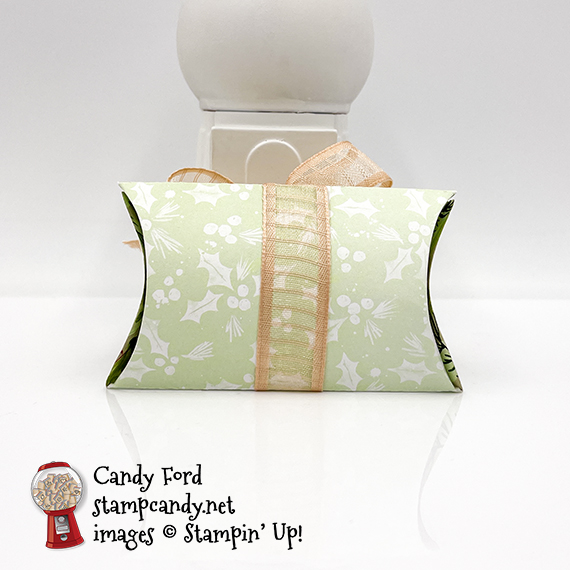
A couple of Burt’s Bees lip balms fit inside for a small and functional gift.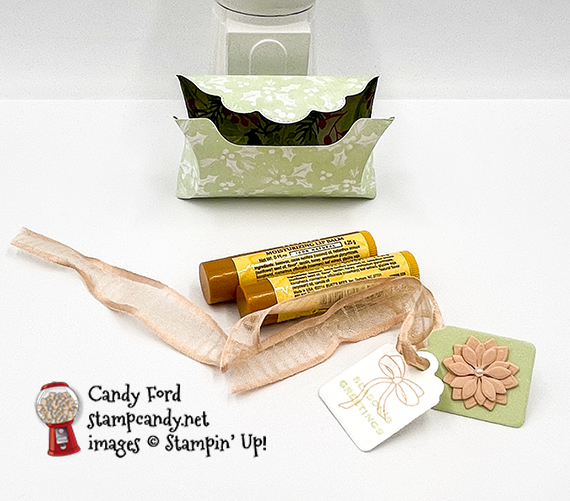


S
Here’s what I did:
Cut using the Pretty Pillowbox Dies:
- box from a 4-1/2″ x 6″ piece of Painted Christmas DSP
- 2 large and 2 small flower pieces from a scrap of Petal Pink CS
- tags from scraps of Soft Sea Foam and Basic White Thick CS
Stamped with the Tidings & Trimmings stamp set:
- bow in Petal Pink ink onto the Basic White Thick CS tag
- sentiment in Soft Sea Foam ink over the bow
Assembled the box:
- burnished the folds in the box with a Bone Folder
- 4 flower pieces stacked and glued together, then glued onto the Soft Sea Foam CS tag
- pearl applied onto the center of the flower using a Take Your Pick tool
- box folded closed, and 2 lip balms put inside
- tags strung onto ribbon, then the ribbon tied around the box and tied in a bow
S
Here’s the August 2021 CHBH:
Thank you for hopping with the Hearts today! Be sure to hop around to all the stops. You do not want to miss any of the creativity in this talented group of stampers! If you get lost, use the list below.
s
Here are today’s colors:
You can click on each one to see all the products that come in that color!
S
Here’s what I used:
Click on these images for more details and to purchase. If you are reading this post in email, the product images may not show up. Please click here to see the post on my blog.
Supply List. <— Click for a clickable and printable list of the products!
S
It’s Sale-a-bration time…AGAIN!
Stampin’ Up! is having the second Sale-a-bration of this year! Through 30 September 2021, you can choose a free Level 1 Sale-a-bration item for every $50 on an order, and a free Level 2 item for every $100 on an order (before tax & shipping.)
When you join my Candy Hearts team of stampers during Sale-a-bration, you get to choose $125 in product and FREE shipping and pay only $99 (plus tax) PLUS you get to choose one of a dozen new bundles! for free! You can click on each bundle below to see all the details in my online store.
S
Here are some helpful links:
S
Thanks for stopping by today, and Sweet Stamping!
Feb 8, 2021 | Blog Hop, Gallery, Gift Wrap, Gifts, Love, Treat Holders |
Welcome to the February 2021 Candy Hearts Blog Hop! This month’s theme is Love. Be sure to hop around to all the stops on the hop. You don’t want to miss any of the projects the Candy Hearts have made for you today.
If you are reading this in email, some photos may appear blurry, or may not appear at all. Please click here to see the post on my blog.
S February 2021 Candy February 2021 Candy February 2021 Candy February 2021 Candy
Here’s what I made:
 A dozen chocolate kisses fit perfectly in the box, in three neat rows. Of course, you can add many more if you pack them in.


S
Here’s what I did:
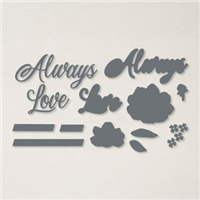
Cut using the Always Dies:
- sentiment from a scrap of Seaside Spray card stock (CS)
- sentiment background from a scrap of Misty Moonlight CS
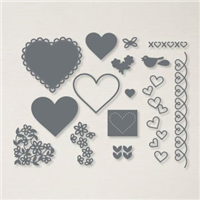
Cut using the Many Hearts Dies:
- heart from a scrap of Melon Mambo CS
Cut using the Flowering Vine Dies:
- background from a scrap of Blushing Bride CS
Assembled the box:
- burnished the folds in the box and the wrap-around lid with a Bone Folder
- folded the box to assemble it
- Blushing Bride CS die cut glued onto the lid of the box
- Melon Mambo heart die cut glued over the Blushing Bride CS die cut
- Seaside Mist CS sentiment glued onto the Misty Moonlight CS background
- Misty Moonlight CS background glued over the heart
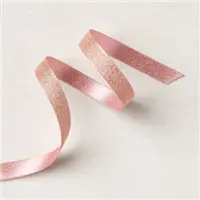
- ribbon adhered onto the bottom of the box using Tear & Tape, so it wraps around the box, and tied it in a bow at one end
- slid the box into the lid
S
Here’s the February 2021 Candy Hearts Blog Hop:
Thank you for hopping with the Hearts today! Be sure to hop around to all the stops. You do not want to miss any of the creativity in this talented group of stampers! If you get lost, use the list below.
Here are today’s colors:
You can click on each one to see all the products that come in that color!
S
Here’s what I used:
Click on these images for more details and to purchase. If you are reading this post in email, the product images may not show up. Please click here to see the post on my blog.
Supply List. <— Click for a clickable and printable list of the products!
S
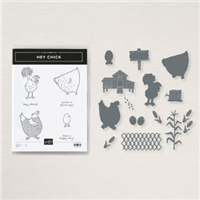
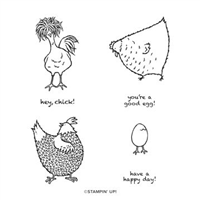
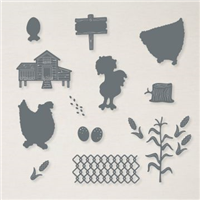
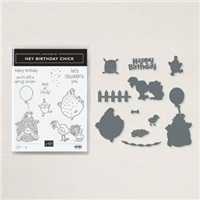
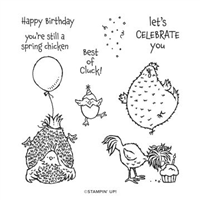
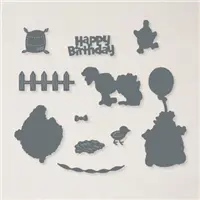
Hey Chick is here!
The Hey Chick stamp set from 2017 Sale-a-bration was so popular, Stampin’ Up! has brought it back. But that’s not all! Now there are coordinating dies. AND there’s a second stamp set, Hey Birthday Chick, that also has coordinating dies. CLICK HERE to see them all. One thing though – they’re available for a limited time, so get them while you can!
S
Basic White products:
The facility that manufactures Whisper White paper is closed due to COVID-19. But don’t fret. The new Basic White products are here!
S
Here are some helpful links:
S
Thanks for stopping by today, and Sweet Stamping!
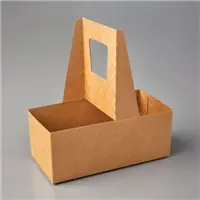
Nov 17, 2020 | Christmas, Food, Gallery, Gift Wrap, Gifts, Holiday |
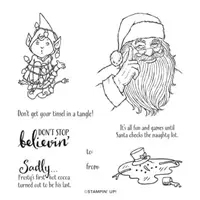
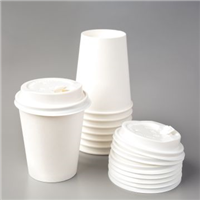
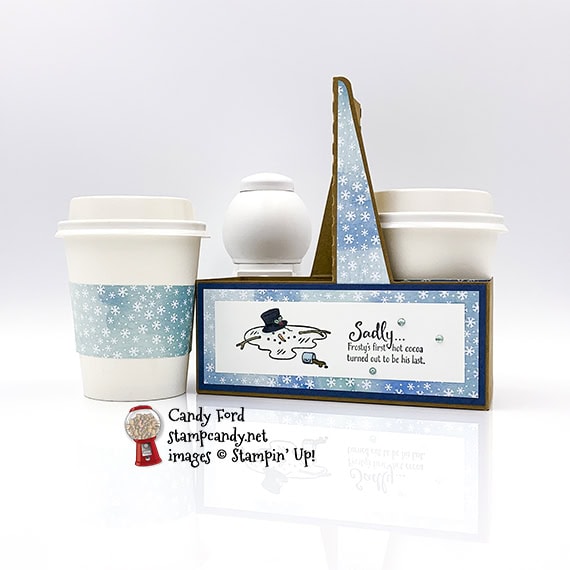
I used the Don’t Stop Believin’ stamp set, Snowflake Splendor Designer Series Paper, and Warm Wraps Dies to decorate these Mini Coffee Cups and Holder. Poor Frosty thought some hot cocoa sounded so tasty, but no one warmed him of the danger. This is a perfect way to give someone some hot cocoa mix. or maybe some K-cups.
If you are reading this in email, some photos may appear blurry, or may not appear at all. Please click here to see the post on my blog.
S Don’t Stop Believin Don’t Stop Believin Don’t Stop Believin Don’t Stop Believin
Here’s what I made:
S
Here’s what I did:
Cut and scored with my paper trimmer:
- Night of Navy card stock (CS) cut to 5-3/4″ x 2-1/4″ (2 pieces)
- Snowflake Splendor Designer Series Paper (DSP) cut to 5-1/2″ x 2″ (2 pieces)
- Night of Navy CS cut to 2-3/4″ x 2-1/4″ (2 pieces)
- DSP cut to 2-1/2″ x 2″ (2 pieces)
- DSP cut to 1-1/4″ x 4-1/2″ (2 pieces)
- Whisper White CS cut to 5″ x 1-1/2″
Stamped with the Don’t Stop Believin’ stamp set:
- image and sentiment in Memento Tuxedo Black ink onto the Whisper White CS
Cut using the Warm Wraps Dies:
- DSP for the cups (4 pieces)
Cut using Paper Snips:
- laid the coffee holder on its side and traced around the handle onto the back of the DSP strips
- cut around the traced shapes using Paper Snips, then cut about 1/8″ off the long straight side with my Paper Trimmer
- You could lay the holder over the strip so that the straight side of the handle extends 1/8″ past the edge of the DSP strip. That will keep you from having to trim off the 1/8″ afterward.
Colored using Stampin’ Blends Markers:
- stamped image in Basic Black, Just Jade, Real Red, Pumpkin Pie, Soft Suede, Pool Party, and Seaside Sprayx
Assembled the project:
- burnished the folds in the holder with a Bone Folder, then popped up to open
- fussy cut strips glued onto the sides of the holder handles
- stamped layer glued onto one of the longer DSP layers
- DSP layers glued onto the corresponding Night of Navy CS layers
- Night of Navy CS layer glued onto the sides of the holder
- 3 Coastal Cabana rhinestones applied onto the stamped layer using a Take Your Pick tool
- die cut DSP glued together at the ends to make 2 cup wraps, then the wraps slipped onto the cups
S
Here are today’s main colors:
You can click on each one to see all the products that come in that color!
S
Here’s what I used:
Click on these images for more details and to purchase. If you are reading this post in email, the product images may not show up. Please click here to see the post on my blog.
Supply List. <— Click for a clickable and printable list of the products!
S
Here’s the new Curvy Celebrations offering:
Click the image to see the products in my online store. Available through 4 January 2021.

S
Here are some helpful links:
S
Thanks for stopping by today, and Sweet Stamping!