Dec 26, 2015 | Bags, Christmas, Club, Food, Gifts, Holiday |

Who doesn’t love a cup of hot cocoa when the weather’s cold? Today’s project is a quick gift idea for anyone who needs warming up. It was also one of our December Stamp Club projects.
We began by randomly stamping the cups from the Cup of Cheer stamp set in Crumb Cake on a Kraft Tag a Bag Gift Bag. We then stamped the snowflakes from the Project Life Hello December 2015 stamp set in Real Red between the cups. This is one of my favorite snowflake stamps. It’s so delicate.
We stamped the same cup image in Chocolate Chip and the same snowflakes in Real Red on a 2″ strip of Very Vanilla card stock. Then we used the Banner Trip Punch to notch the end. We cut a 1″ strip of Chocolate Chip card stock and notched the end of it as well. We glued the two banners together, overlapping.
After putting a packet of hot cocoa mix inside the bag, we folded over the top, tucked in the tops of the banners, and stapled it shut. You can also adhere the banners to the bag, if you’d like to have more than just the staple holding them on.
We tied a length of Real Red 1/8″ Striped Ribbon around the bag and tied on a candy cane. I found these hot cocoa flavored candy canes at Target.

Here’s what we used:
Thanks for stopping by today, and Sweet Stamping!

Dec 22, 2015 | Christmas, Gift Wrap, Gifts, Holiday |
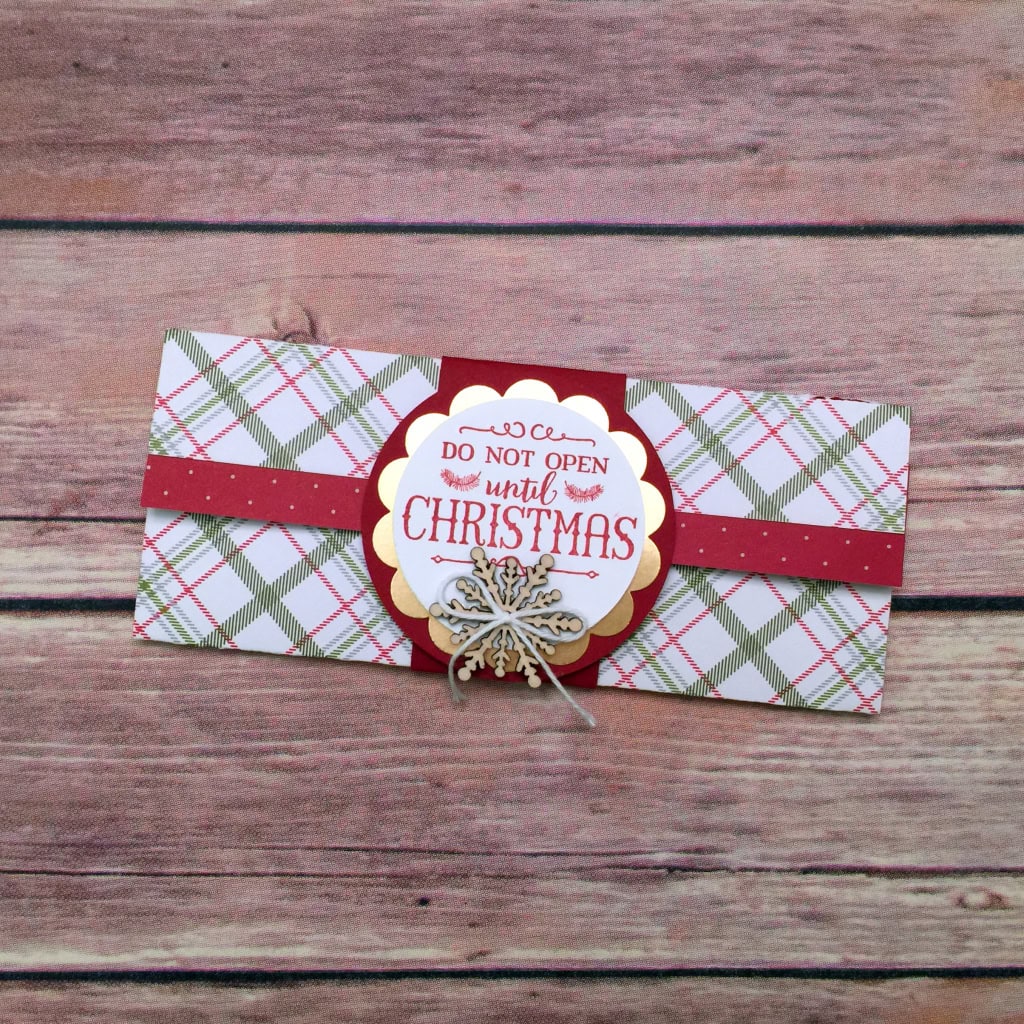
Gift cards are very popular gifts for any time of year, but we give even more during the holidays. Here is an easy gift card holder that anyone would appreciate receiving.
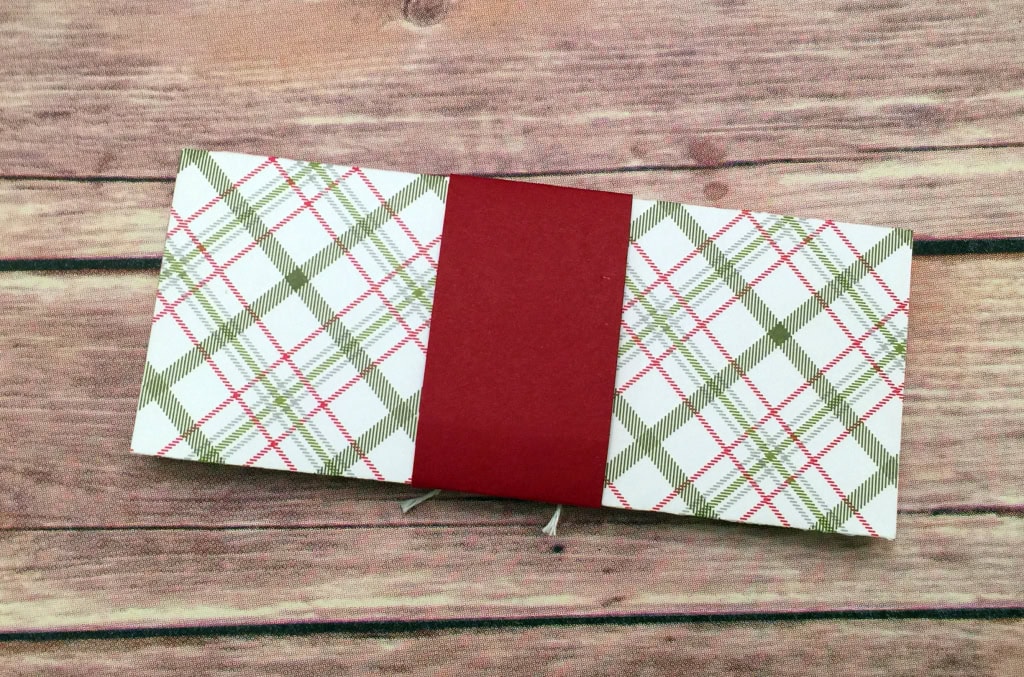
I started with a 6″ x 6″ piece of Merry Moments Designer Series Paper. I scored it at 1″ and at 3-1/2″. I folded it along the score lines, and adhered the sides to make an envelope.
I cut a another piece of the same paper 1″ x 6″ and adhered it to the underside of the flap, with about 1/2″ showing. Using a 1-1/4″ Circle Punch, I cut a finger notch in the inner flap.

For the belly band, I cut a 1-1/2″ x 8-1/2″ strip of Cherry Cobbler card stock, wrapped it around the envelope, and glued the ends together. I made sure it wasn’t so tight that it’s difficult to slide on and off.
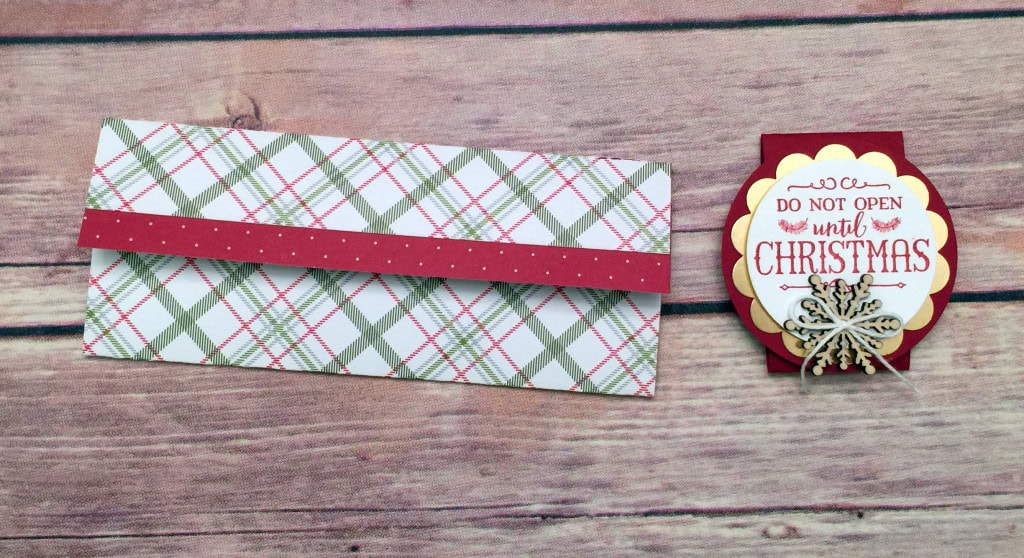
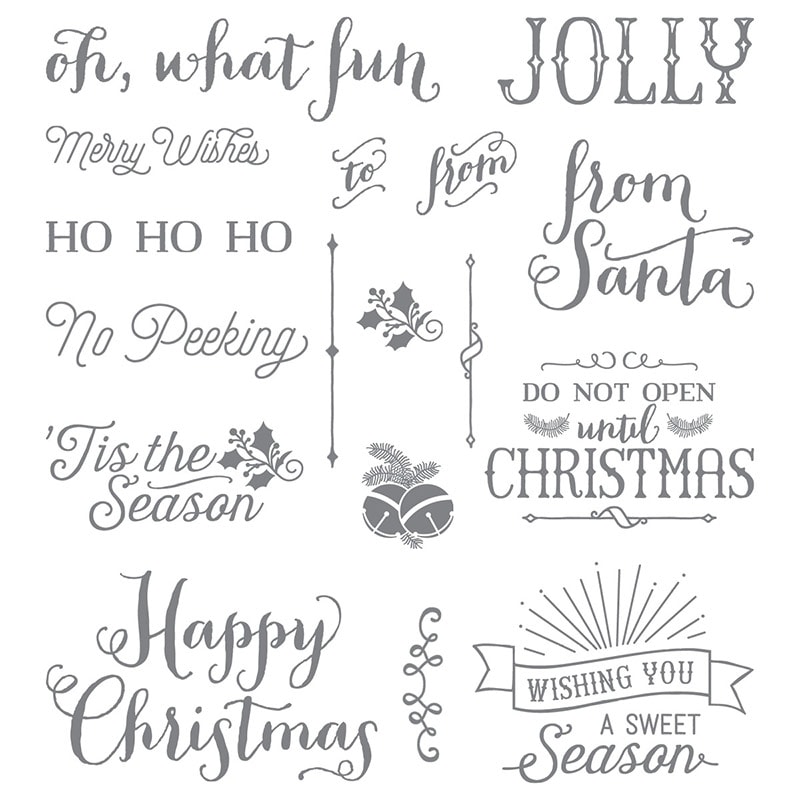
I stamped the sentiment from the Oh, What Fun stamp set on Whisper White card stock in Cherry Cobbler, then cut it out with the 2″ Circle Punch, with the wording toward the top of the circle.
I’ve used this stamp set a lot this holiday season. It coordinates with the Oh, What Fun Tag Project Kit, but is great by itself.
I cut a piece of Gold foil Sheet with he 2-3/8″ Scallop Circle Punch, and a piece of Cherry Cobbler card stock with the 2-1/2″ Circle Punch. I glued the gold piece to the Cherry Cobbler piece, then adhered the sentiment with Stampin’ Dimensionals. I glued the snowflake on then adhered the twine bow with a Glue Dot. I glued this whole piece to the belly band, covering the seam where the two ends overlap.
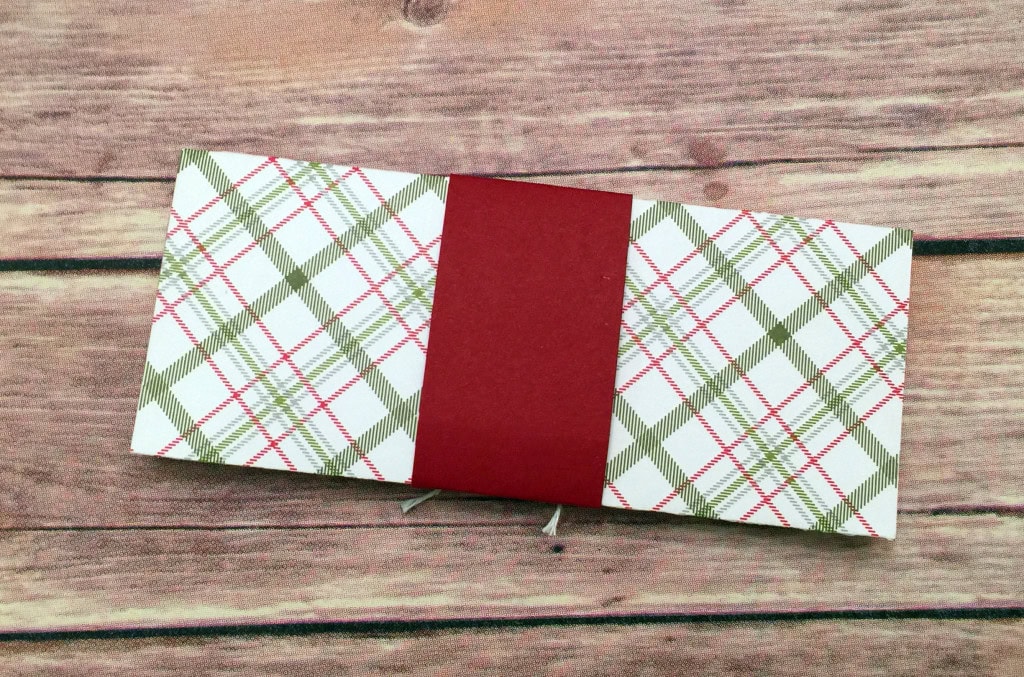
Here it is from the back.
Here’s what I used:
Thanks for stopping by today, and Sweet Stamping!
Sep 27, 2015 | Boxes, Challenges, Christmas, CYCI, Gift Wrap, Gifts, Holiday, Techniques |
With this week’s CanYouCaseIt.com Designer’s Choice challenge, you can make whatever you want!
Be sure to check out all the great projects here. Here’s mine.
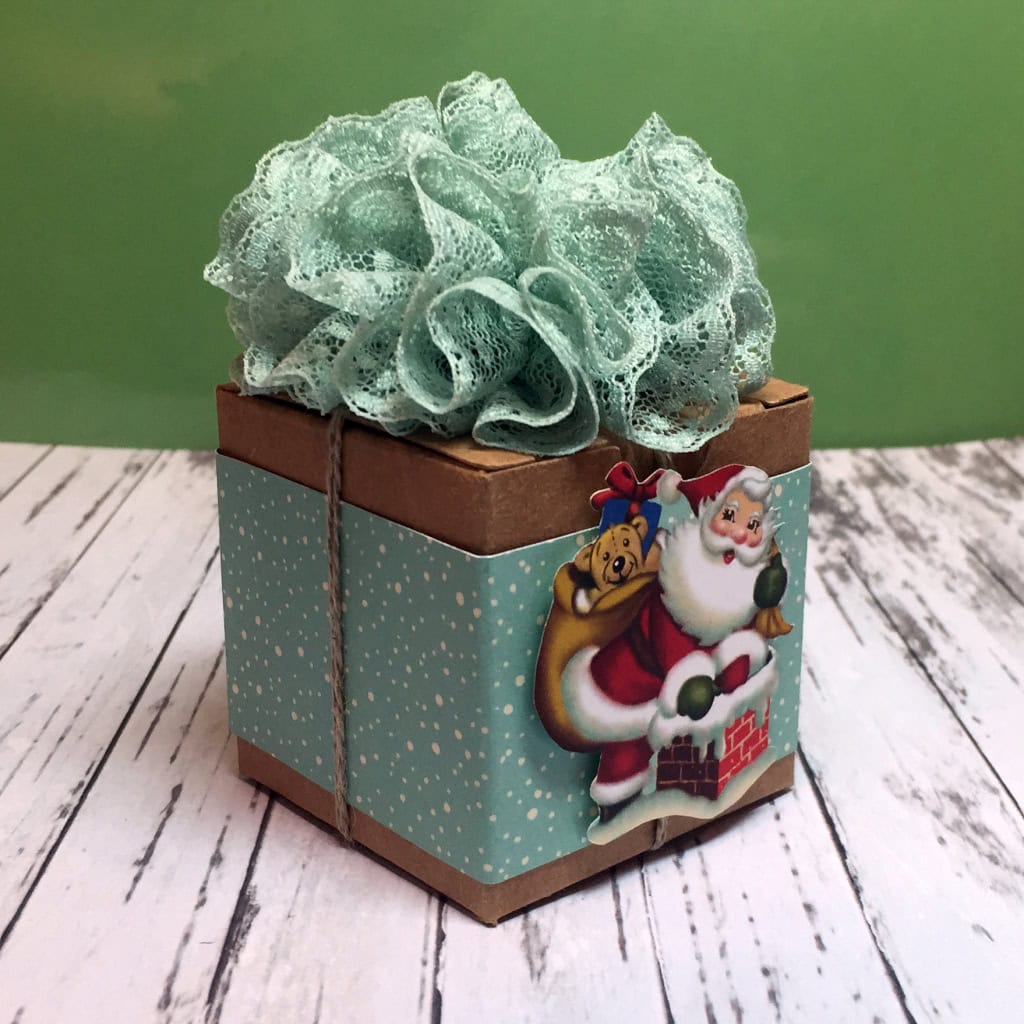
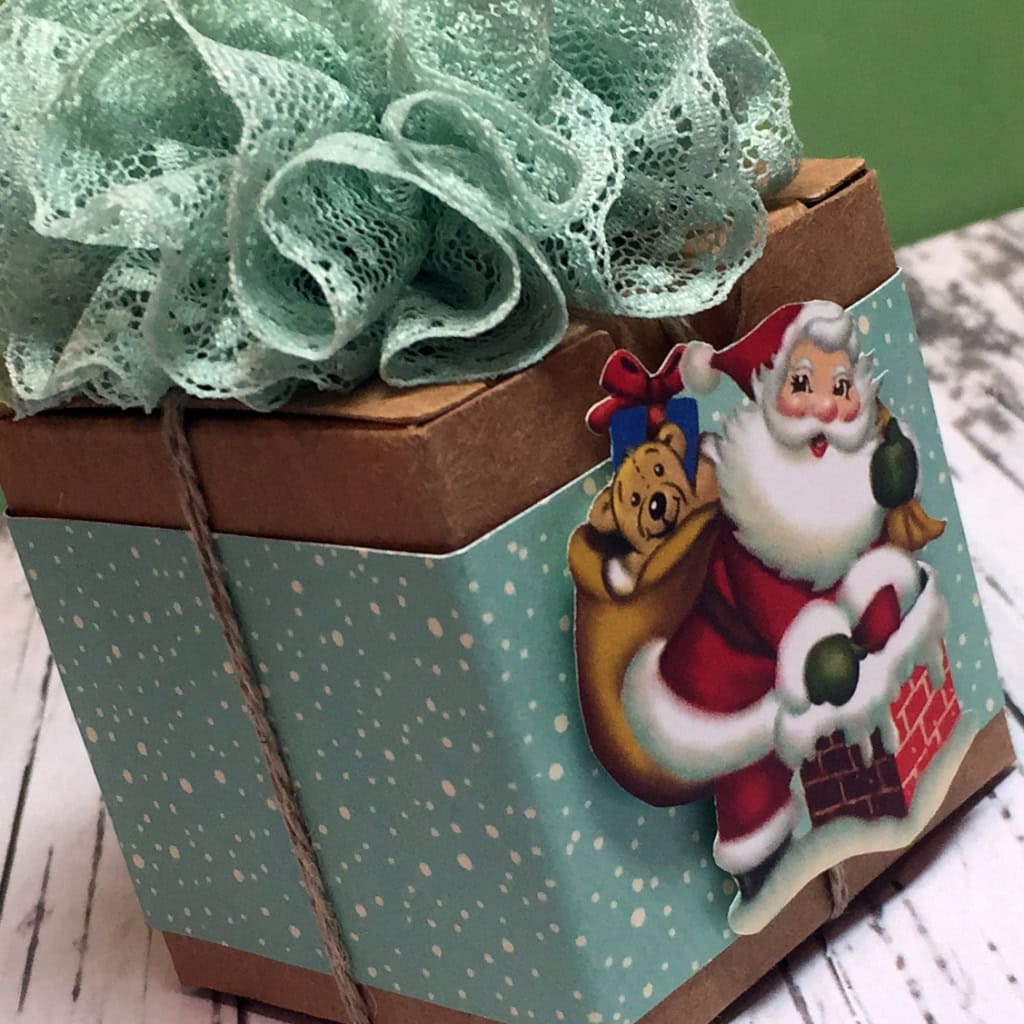
I just love these Tiny Treat Boxes. They’re so versatile. They are a great size for little treats and small gifts. (A Pandora charm box fits in perfectly.) You can use them individually, or stack them together to make an Advent calendar, for instance.
Today I’ve wrapped one with a belly band made from Home for Christmas Designer Series Paper. I used my Paper Snips to fussy cut a Santa from the same DSP, then attached it with Stampin’ Dimensionals.
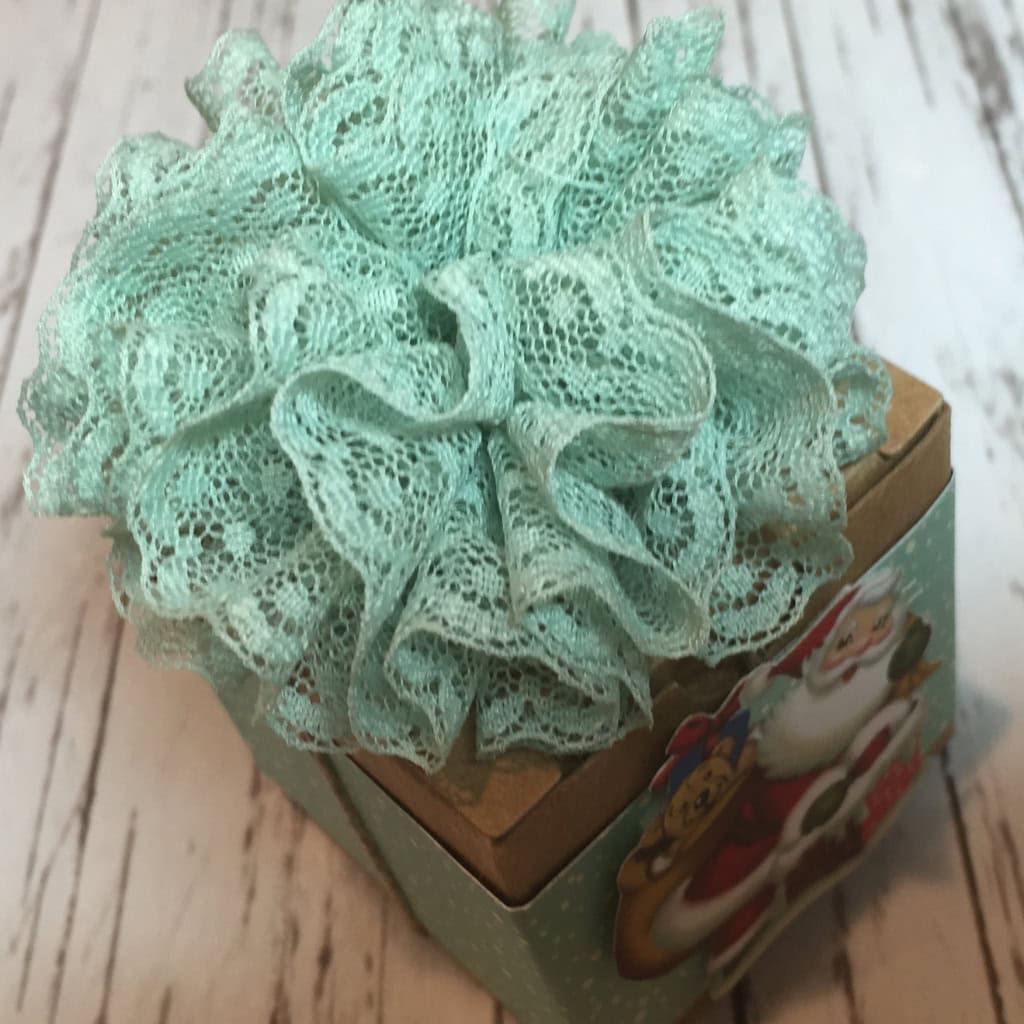
I tied up the box with Linen Thread and topped it with a pompom made of Mint Macaron 1″ Dotted Lace Trim.
TECHNIQUE: The pompom is easy to make. Cut a length of the Dotted Lace Trim (I used about 6 feet) and use a needle and thread to gather it along the straight edge. I used Linen Thread and a floss threader, because I had it at hand. Just gather it up and tie it off, then tie onto the box.
Here’s what I used:
I love hearing from you! Please leave your comments and questions below.
Thanks for stopping by today, and Sweet Stamping!
Sep 22, 2015 | Bags, Christmas, Classes, Gift Wrap, Gifts, Holiday, Kits, New Products, Workshops |

Need a gift bag super fast? No problem! Just grab your Gift Bag Punch Board and a piece of paper, and a minute later you’ll have one.
Now, need a tag for that bag? Get the Oh What Fun Tag Project Kit. I love having these tags on hand to put on those last minute gifts. The kit makes 30 tags, 3 each of 10 different designs, and they are so fun!
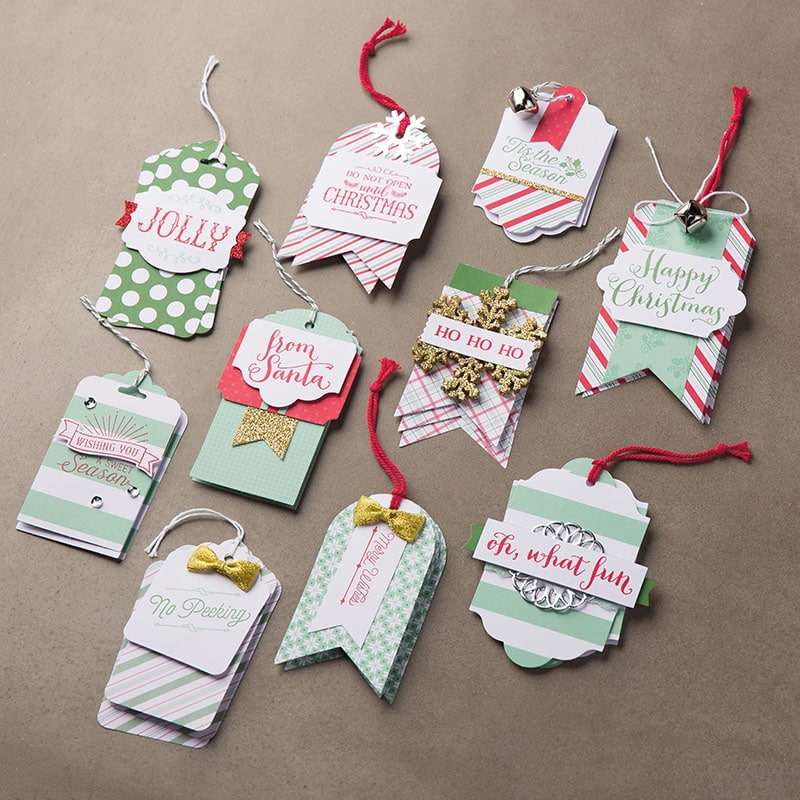
Here are just some of the items that come in the kit.
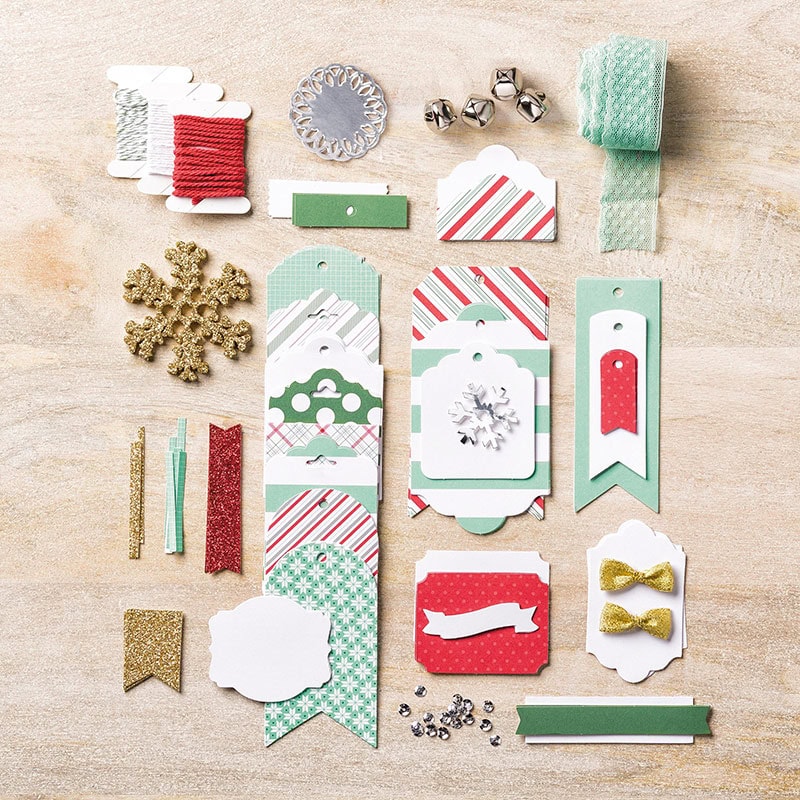
The Oh What Fun stamp set coordinates beautifully with the kit.

Spend a relaxing hour or two with this kit and stamp set, and you’ll have these great tags on hand whenever you need them.
Or better yet, invite some friends over, and if you’re in the Atlanta area, I’ll bring my stamps and inks, so you can each make 30 tags while enjoying time with friends and family. Email me (candy@stampcandy.net) so we can find a date that works for you! You can even earn Stampin’ Rewards as host!
If you aren’t local, have each person order their own kit, and split the cost of the stamp set and any other supplies you need. Ask me how to use a Hostess Code for your gathering so you can get free products!
The tag I used today has a jingle bell. How festive is that? I tied it onto a Mint Macaron gift bag that I made with, you guessed it, the Gift Bag Punch Board.

Here’s what I used:
Thanks for stopping by today, and Sweet Stamping!
Sep 13, 2015 | Cards, Challenges, Gifts, Sketches |
I love seeing all the different directions people take from the same idea. That’s why I enjoy challenges so much. Every week CYCI issues a different challenge – a sketch, a color palette, a theme, or something else. I hope you’ll play along by entering your own projects. Go to canyoucaseit.com for more details.
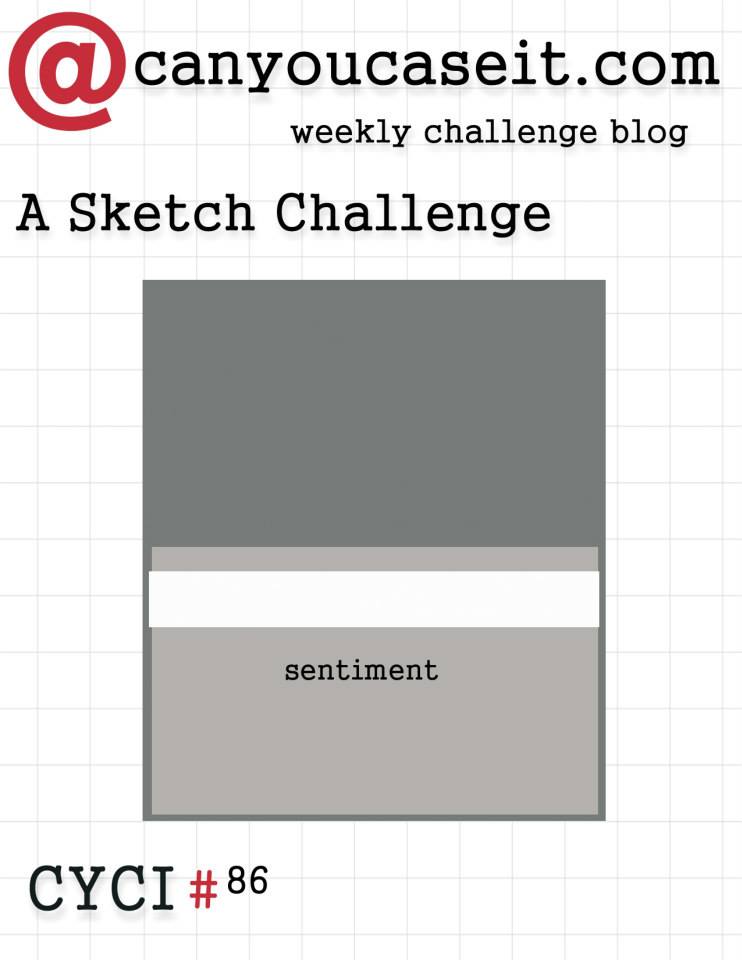
Here is this week’s sketch challenge:
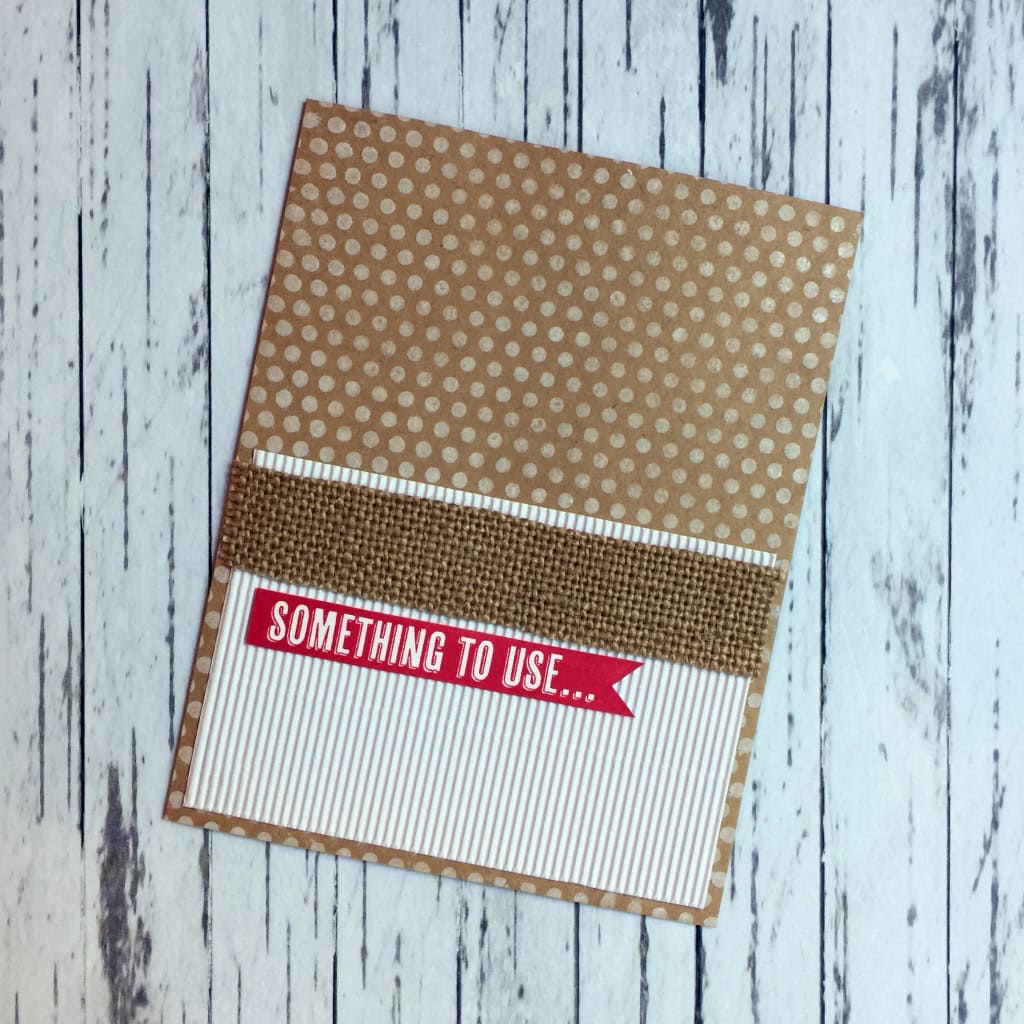
And here’s my card:
I love this clean and simple sketch. I think the most elegant cards are CAS. Not that I don’t like cards with lots of pretty doodahs – I do! But there is something to be said for understated designs.
I haven’t used this color combo in a while, and it’s one of my faves, so here it is:

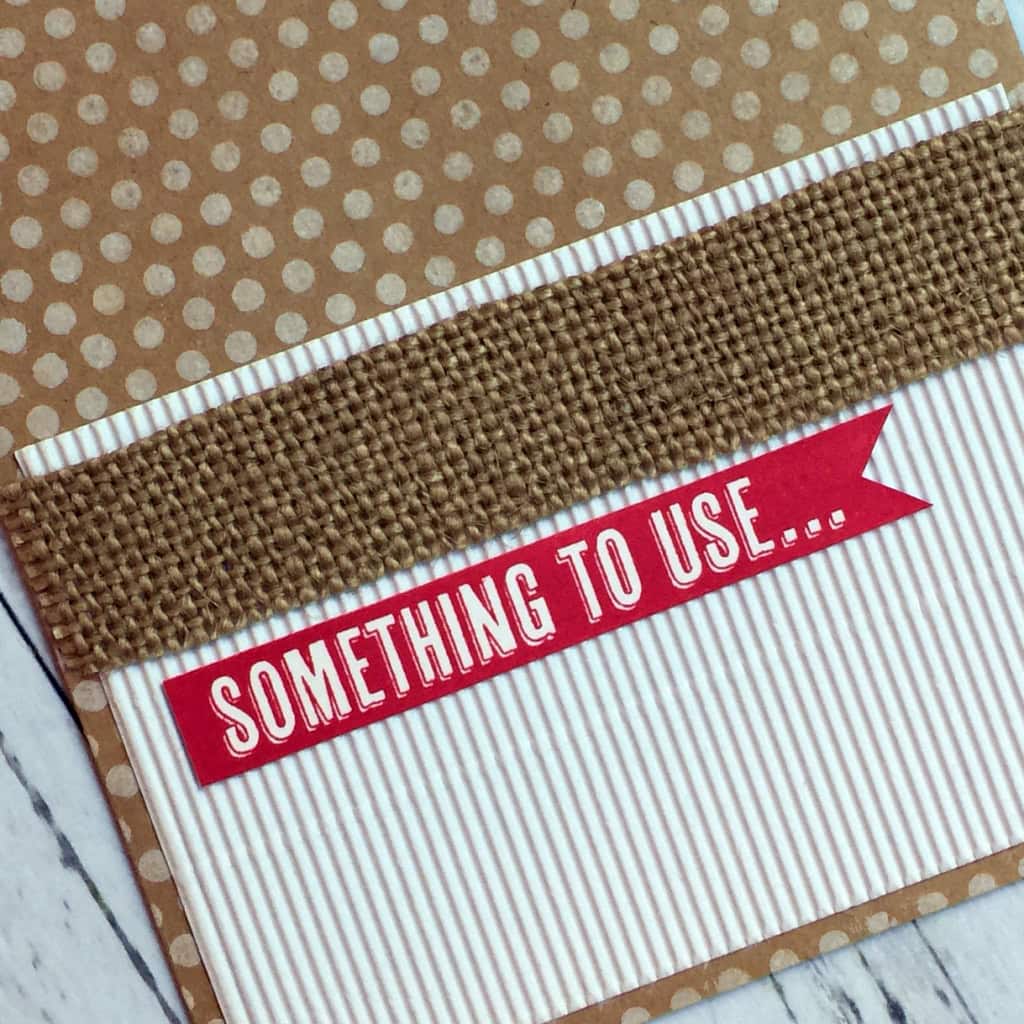
The card base is Kraft card stock. The white panel is White Corrugated Paper. The ribbon is Burlap – I trimmed down both edges with Craft Scissors to remove the stitching and to make it thinner. And the sentiment, from the B.Y.O.P. stamp set, is stamped in Real Red on Whisper White CS, then cut with Craft Scissors, except for the notch at the end, which I cut with Paper Snips.
Tip: I keep two pairs of Craft Scissors: one for ribbon only and one for paper. I also use Paper Snips for paper. The Snips are great for detail work, and the larger Scissors are nice when cutting long smooth lines.
At this point I liked the card, but the large expanse of plain Kraft CS at the top did bother me a little. I thought it needed just a little something, but not too much. That’s when I decided to stamp it in Whisper White Craft Ink with the large Dots for Days background stamp. Now it’s like a piece of DSP in the background. The evenly spaced and aligned dots almost count as a solid – certainly as a neutral.
The sentiment continues on a piece of Whisper White CS glued to the card’s interior:

Here’s what I used:
Be sure to check out the other Can You Case It projects here.
I love hearing from you and welcome your questions and comments!
Thanks for stopping by today, and Sweet Stamping!
Jun 25, 2015 | Boxes, Gift Wrap, Gifts, New Products |

Look what I got! This adorable box with its great big bow is from my darling sister, Judy. She filled it with little sweets for me. Yum!
It’s so easy for you to make your own! One piece of Bohemian DSP, the Bigz L Gift Bow die, the Curvy Keepsake Box Thinlits die set, and a Clothespin – add a little adhesive and it’s done in no time. It looks like it took a lot more time and effort. I love projects that give you a “big bang for the buck.”

Here’s what she used:
Thanks for stopping by today, and Sweet Stamping!